


Automation is everywhere nowadays in IT. From virtual machine provisioning to web site deployment, automation is key especially when you need to deal with multiple items. Even file management between Azure storage and your local machine can be automated using a utility program called AzCopy.
Not a reader? Watch this related video tutorial!AzCopy is a standalone utility that allows the management of Azure storage. With AzCopy, several operations can be performed. In this article, we’re going to focus on:
- Creating storage containers
- Copying local files to containers
- Copying files between containers
Let’s begin!
If you learn better via video, you can also check out a TechSnips video closely related to what you’ll be learning in this article.
Prerequisites
This article will a walkthrough demonstrating various tasks. If you’d like to follow along, be sure you have the below list of requirements met before starting.
- An Azure subscription. If you do not have this yet, you can request for a trial subscription.
- Azure Storage Account. Please refer to Create a storage account to learn more.
- AzCopy downloaded and authenticated (check out the article How to Download and Install the AZCopy Tool to learn how to set this up)
Creating New Storage Containers
First up, let’s use AzCopy to create new storage containers in an existing storage account. In the example you’ll be using, you’ll create two new containers named container1 and container2.
Note: Before creating a new container, you must know the container’s endpoint URL. The endpoint URL adheres to the format: https://[storageaccountname].blob.core.windows.net/[container_name].
First, define the endpoint URL. In this example, the containers will be created in a storage account called storageaccount1207 creating two endpoint URLs:
- https://storageaccount1207.blob.core.windows.net/container1
- https://storageaccount1207.blob.core.windows.net/container2
Now that you know the endpoint URLs, use the azcopy make command passing each endpoint URL as a parameter as shown below.
> azcopy make https://storageaccount1207.blob.core.windows.net/container1
> azcopy make https://storageaccount1207.blob.core.windows.net/container2
Copying Files to/from Azure Containers
Once you have a storage container created, you’re probably asking “How do I upload to Azure Blob Storage?”. You can make it happen with AzCopy using the azcopy copy command. You can use AzCopy to copy PSTs, VHDs, and more.
Using OAuth Authentication
When using AzCopy to copy files to blobs, you have a couple of options for authentication. Since it is presumed you’ve already authenticated to Azure Storage (since it was in the prerequisites), you can simply run azcopy copy specifying a local file path followed by a container endpoint URL as shown below.
By not specifying any other parameter, you are using the OAuth authentication.
> azcopy copy c:\myDir\file1.txt https://storageaccount1207.blob.core.windows.net/container1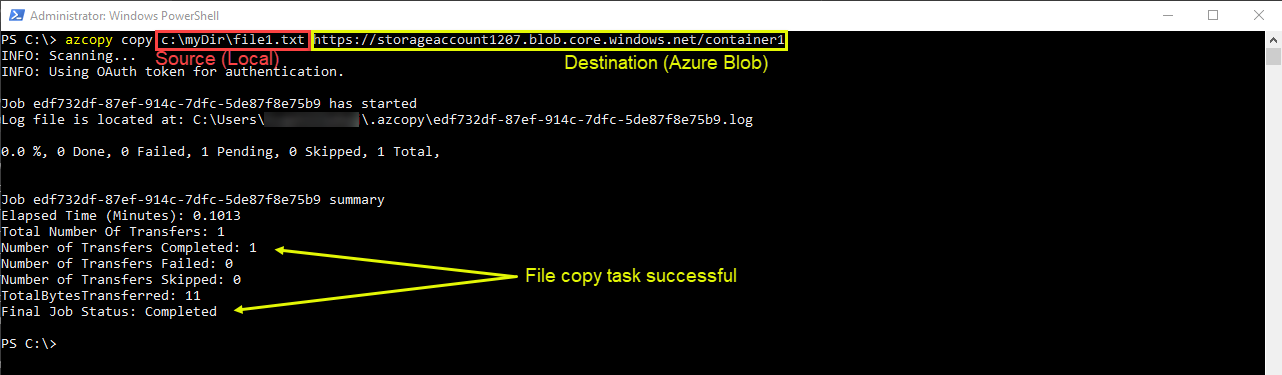
How do you know to confirm the file is copied to the Azure blob container? You can use the azcopy list [container url] command. See the example below showing that the file1.txt file exists.
> azcopy list https://storageaccount1207.blob.core.windows.net/container1
To download a file from the Azure blob to the local directory, you only need to switch the places of the source and destination arguments. See the example below.
> azcopy copy https://storageaccount1207.blob.core.windows.net/container1/file1.txt>c:\myDir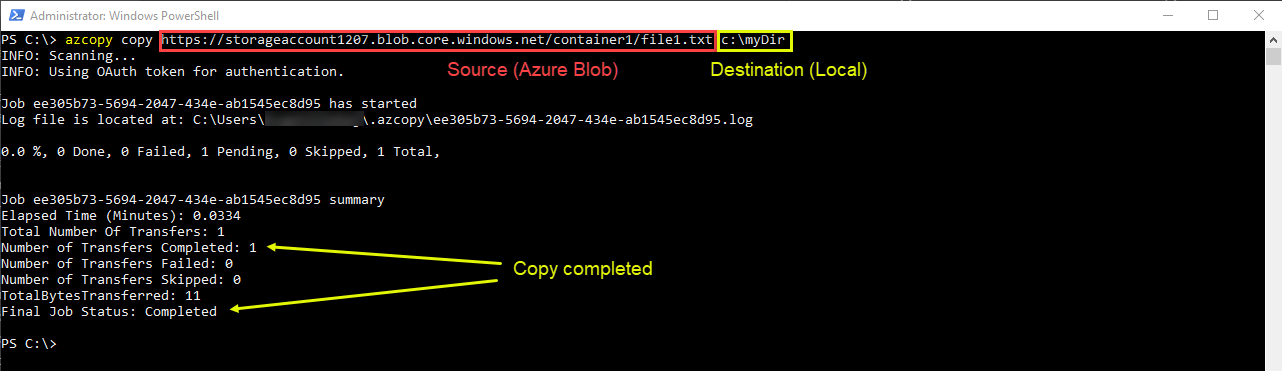
Using a Shared Access Signature (SAS) Token
To use a SAS token, you must first generate one. If you don’t know how to generate a SAS token, check out the How to Generate an Azure SAS Token to Access Storage Accounts article.
Once you have a SAS token available, you can append the token to the destination container’s URL as an HTTP parameter as shown below.
> azcopy copy c:\myDir\file1.txt 'https://storageaccount1207.blob.core.windows.net/container1?sv=2019-02-02&sr=c&sig=LgFsqIRHZovsSjpAVNAyyyy4tnDJ%2BxNh%2B1Cq3rY4Gbk%3D&se=2019-12-09T06%3A34%3A30Z&sp=rw'If you are using PowerShell and stored the token to a variable (eg. $token), you can pass that variable as instead of the full token string like the command below.
> azcopy copy c:\myDir\file1.txt "https://storageaccount1207.blob.core.windows.net/container1?$token"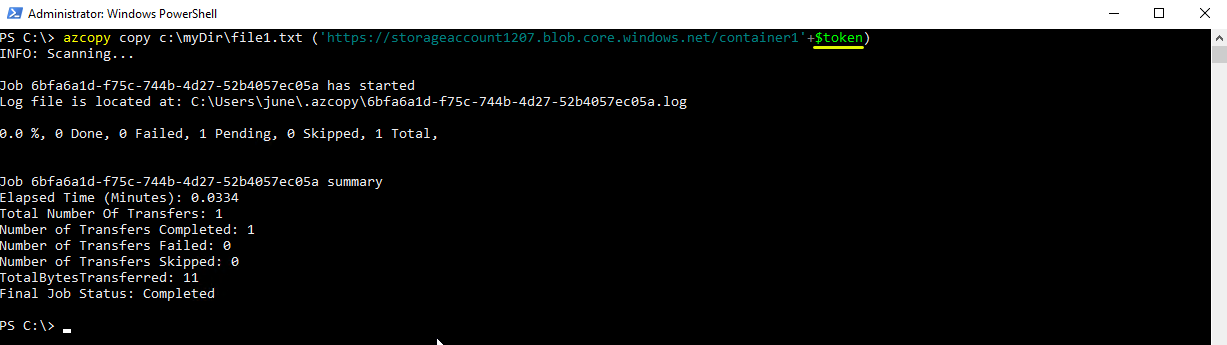
Using the same token (assuming it is still within its validity period), you can also download files from the Azure storage to the local storage. The example below copies the file1.txt file from the Azure storage with a SAS token.
In the code below, you can see that this time instead of appending the token after the container name, the name of the file is added first. This instructs AzCopy to copy a specific file using the SAS authentication.
> azcopy copy ('https://storageaccount1207.blob.core.windows.net/container1/file1.txt'+$token) C:\MyDir\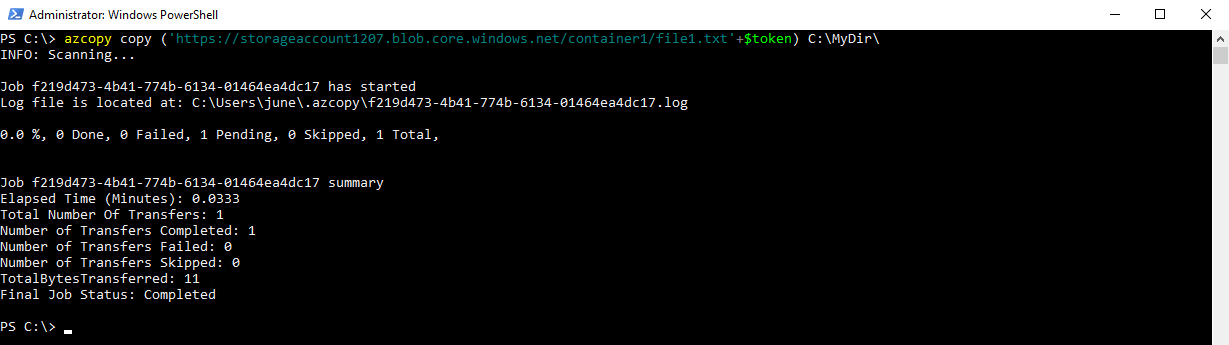
Copying a Directory to/from Azure Storage
If you have many files to transfer or download from Azure, you can also copy entire directories at once using azcopy copy. The command to do so is not that different from what you use to copy single files.
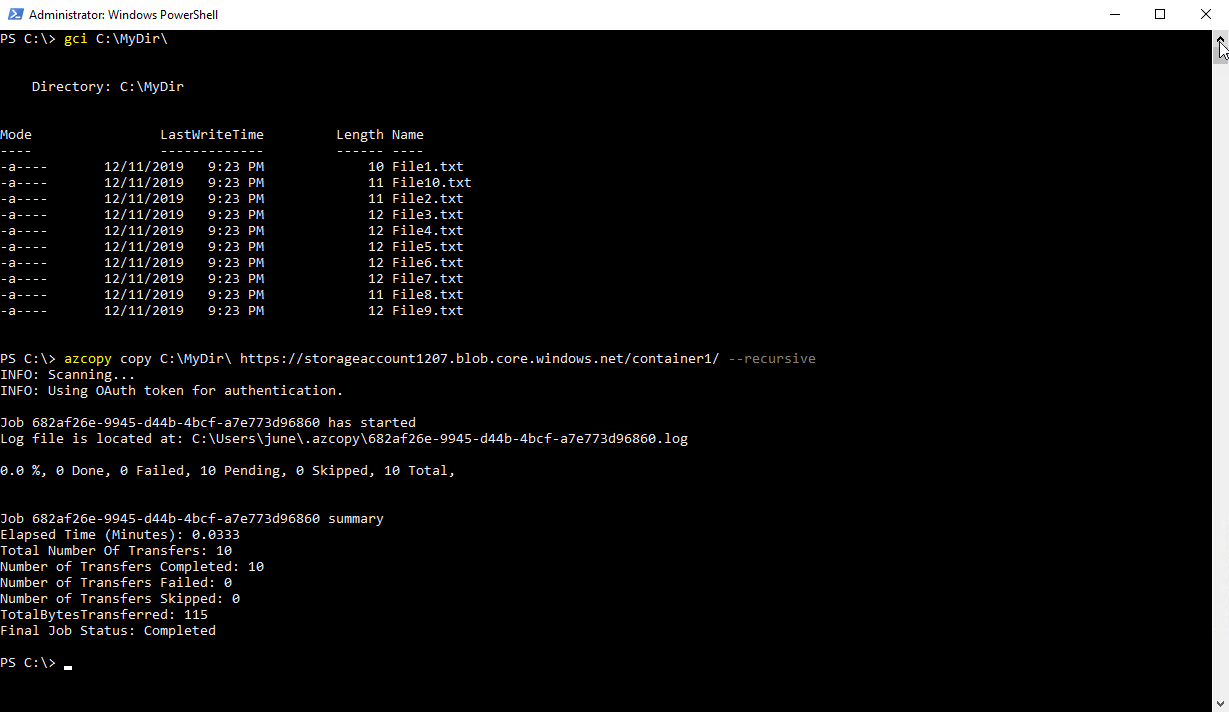
Below you can see a command that copies the C:\\MyDir recursively to the blob container container1. The --recursive parameter is the key here. The —recursive flag at the end of the command indicates that all contents from the parent directory and sub-directories that may exist will be copied.
> azcopy copy C:\MyDir\ https://storageaccount1207.blob.core.windows.net/container1/ --recursiveYou can see below ten files inside of C:\MyDir folder were all copied successfully based on the job summary.
Copying Files Between Azure Storage Containers
Throughout this article, you’ve been using the azcopy copy command quite a bit. There’s no need to stop now! Not only can you copy directories and files to/from on-prem, you can also copy blobs across storage containers.
Rather than using a local file path, you’d change up the parameters to use one blob container URL as the source and another blob container URL as the destination.
You’ve already created two storage containers called container1 and container2. In this section, let’s copy files, directories and even the entire blob container from container1 to container2.
To copy files from one container to another, first, generate a new SAS token. Since the two containers belong to the same storage account, the same token can be used for both the source and destination.
Assuming you’ve saved the token string to a variable called $token (if running azcopy with PowerShell), you can easily copy all data from one storage container to the other as shown below.
Reminder: Take a look at the How to Generate an Azure SAS Token to Access Storage Accounts article if you don’t know how to generate a SAS token.
> azcopy copy ('https://storageaccount1207.blob.core.windows.net/container1'+$token) ('https://storageaccount1207.blob.core.windows.net/container2'+$token) --recursive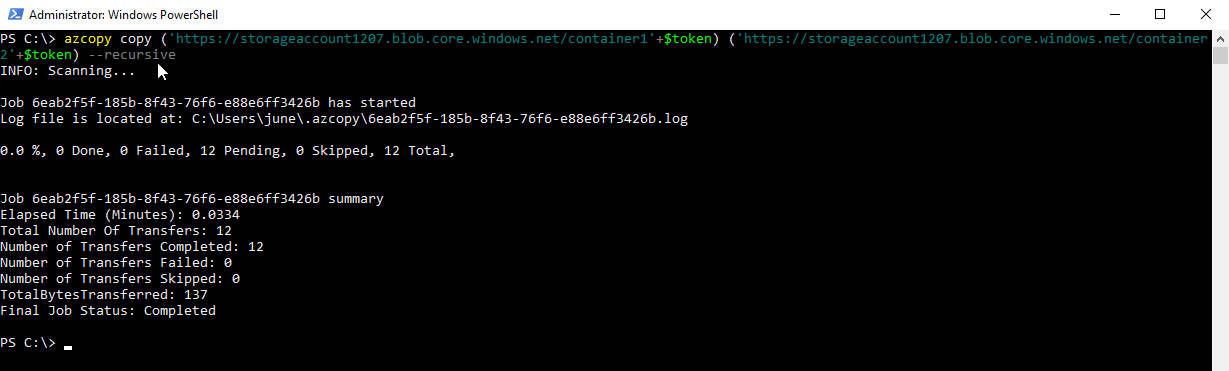
Other Useful AzCopy Operations
Aside from copying files and folders, there are other copy operations you can perform with AzCopy. Some of these are:
- Copying specific files (filtered).
- Copying a directory into another directory in the blob container.
- Copying from Amazon AWS to Azure Storage.
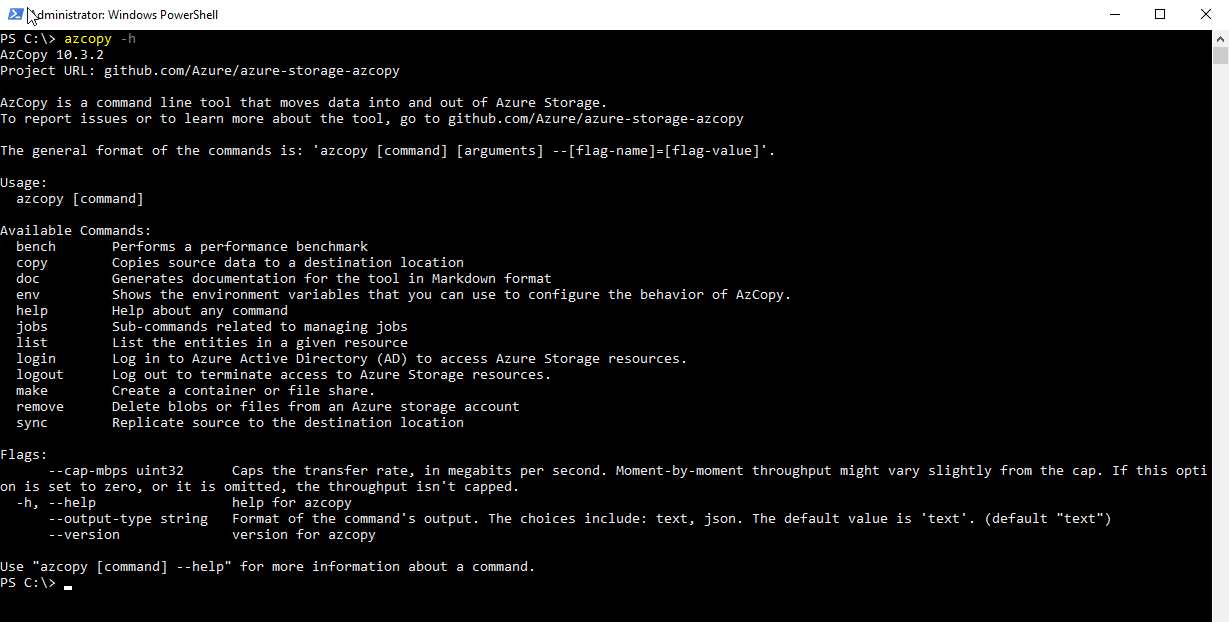
If you’d like to learn about everything AzCopy can do, check out the help content by running azcopy -h. You’ll find many other useful commands aside from the copy command you’ve focused solely on in this article. You can see a screenshot of these commands below.
To learn more, visit the AzCopy Copy page. Then you can try these on your own using the techniques you learned in this article.
Summary
In this article, you learned how to use AzCopy to transfer files between the local and Azure storage. You also learned how to perform these tasks while using OAuth and Shared Access Signature Token for authentication. You’ve seen what other AzCopy commands are available and how to find them.
I hope this article has helped you get started with AzCopy and sparked your interest in using it more as part of your administration or development tasks. Thank you!


