


In today’s world, enterprise offerings like DropBox, SharePoint Oline, OneDrive for Business and others are common.
Not a reader? Watch this related video tutorial!Many businesses still rely on good ol’ Server Message Block (SMB) or Network File System (NFS) to work with files across a network. If so, and your organization is in the cloud, it’s time to learn about how to set up Azure Files and Azure File Sync.
With Azure File Sync, you can cache remotely-stored files in Azure Files shares locally or perhaps on an Azure VM. This service allows you not to pull large files across a slow Internet connection perhaps or keep highly-accessed files local for better performance.
Prerequisites
This article will be a hands-on tutorial. If you’d like to follow along, please be sure you have the following items in your environment before starting.
- An Azure subscription. If you don’t have one yet, you can create an account for free
- A Window Server 2019 machine. There are no strict requirements for this tutorial but the tutorial will be using an Azure VM with 1 vCPU, 8GB of RAM, and two mounted storage volumes; one for the operating system and one to store the synced data.
Note: Linux and macOS are only supported as SMB or NFS clients and cannot be configured as File Sync servers. You can only register a Windows Server 2012 R2 and later OS.
Creating an Azure File Share
The Azure Files service consists of Azure File shares. These are like the ol’ SMB shares you’re used to referencing them via a UNC path like \\SRV1\sharename.
To set up the Azure File Sync service, you must first create an Azure file share that will store data on an Azure storage account.
This tutorial will be using a file share name of ata-smb.
To create an Azure file share, you must first have a place to store the data the file share will expose via SMB. An Azure file share doesn’t require too many specific configuration items for the storage account so running through this tutorial will get a storage account set up for you.
This tutorial will be using an Azure storage account name of ataazfilesyncstorage001.
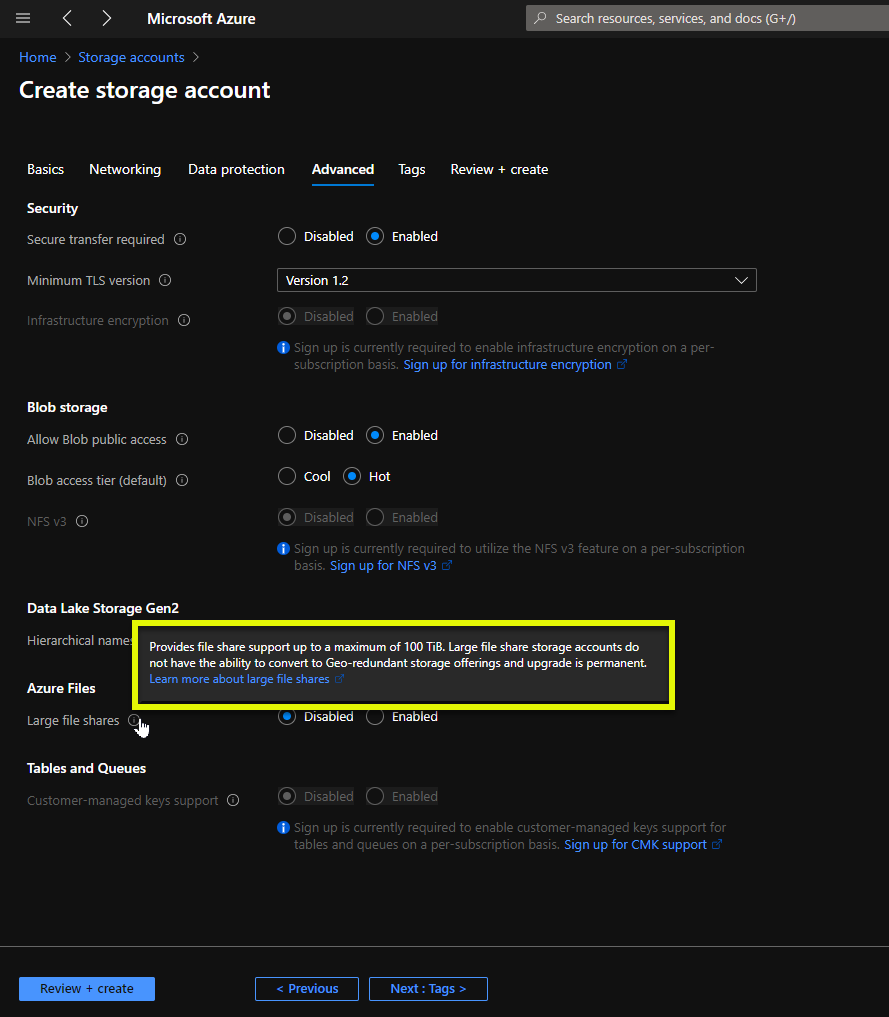
When setting up the storage account, be sure you set these items specifically for storing Azure file share data. Under the Advanced tab in the Azure portal:
- Ensure Secure Transfer required is set to Enabled.
- Ensure Allow Blob public access is set to Enabled.
- Set Large file shares support for Azure Files to Disabled.
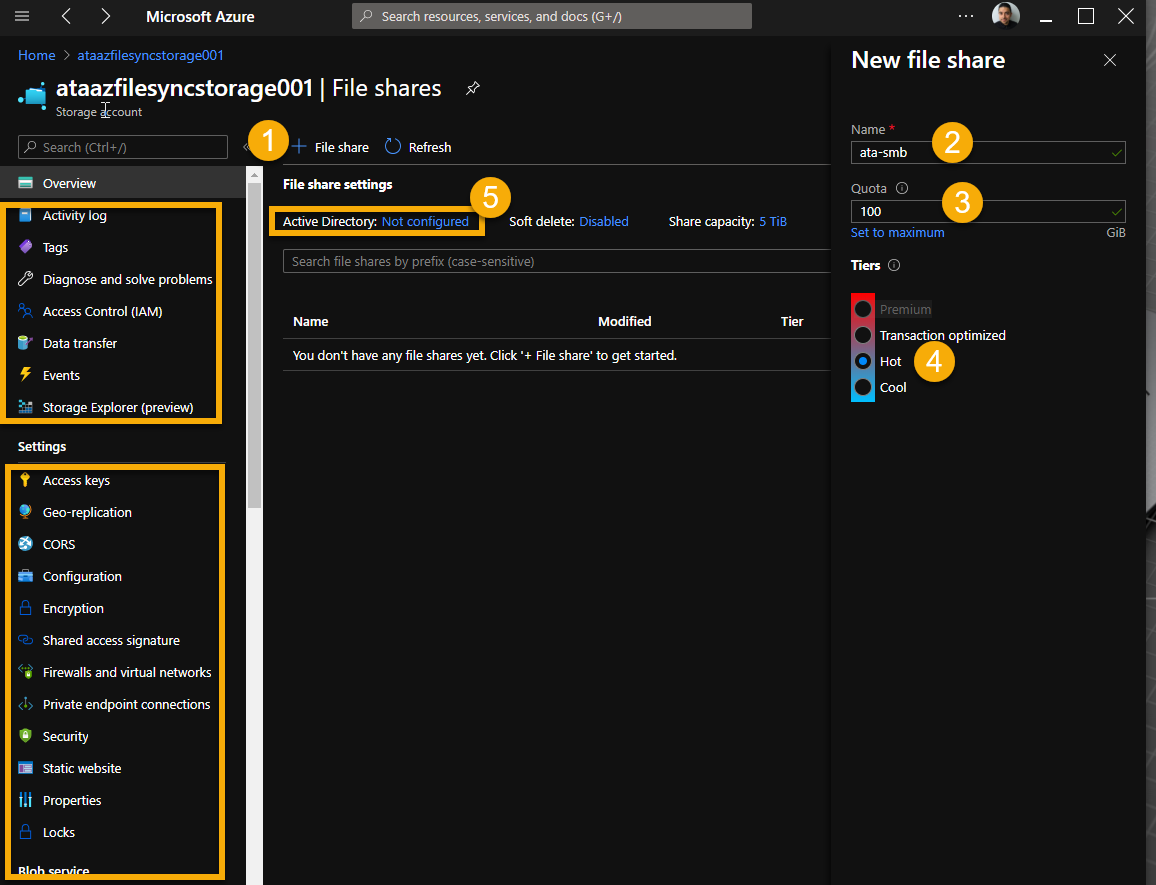
4. Once the Storage account resource is created, go to the storage account you just created. On the Overview page, click on the File shares box as shown below.

5. Once inside the File share page, click the + File share button and fill out the blade with a name for the share, the quota, and select a tier. As shown below, this tutorial opted for 100GB of storage and selected the Hot Tier. You may select whatever Quota and Tier you would like.
The warmer the tier, the faster the syncing process is but the more expensive.
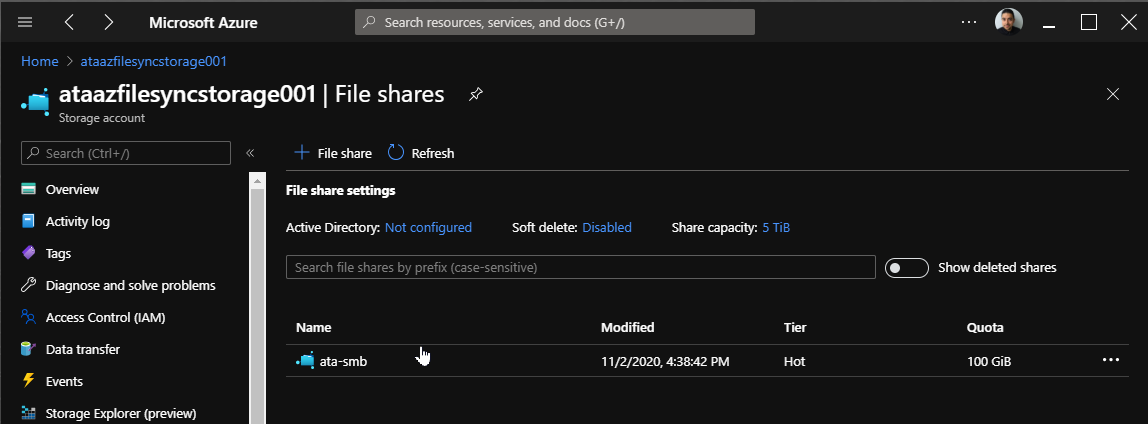
Once the Azure file share has been created, you should see your file share show up under your storage account like below.
Create a File Share Directory
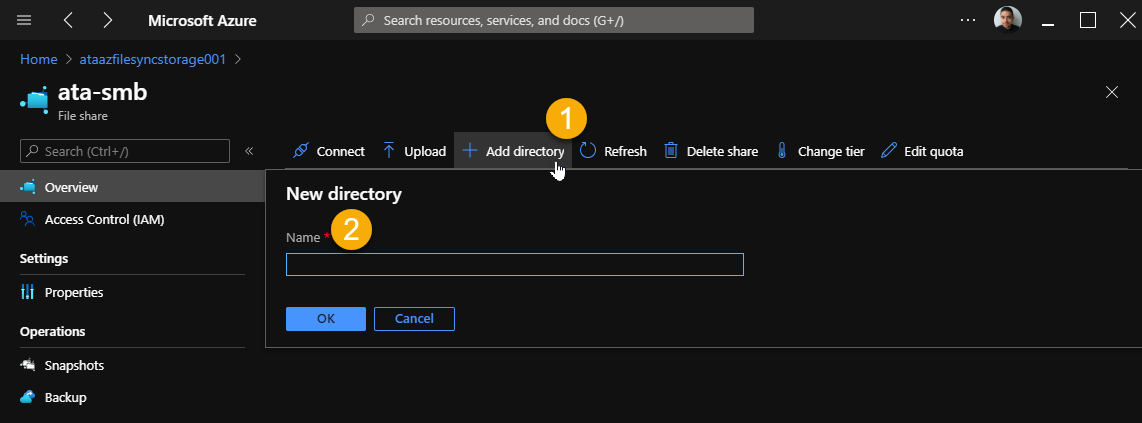
Now that the file share is created, it’s time to add some directories to it. To do that:
Click on your newly-created file share, click Add Directory and give the share a name. This tutorial will create three directories called Azure 101, Blogs, and White Papers.
Configure Azure File Sync
Multiple components make up the Azure File Sync Service. These components include the Storage Sync Service, the Sync Group, the Azure File Sync agent, and the Registered server. We’re going to configure each of these in this article.
Note the name of the Azure resource for Azure File Sync service is called storage sync service resource. We will continue with this nomenclature as we proceed.
Creating the Storage Sync Service
Let’s start with the storage sync service. The storage sync service is a required component of Azure Files that contains sync groups and the server endpoints.
- In the Azure portal, search for Azure File Sync. You should find it located under the Azure Marketplace as shown below.
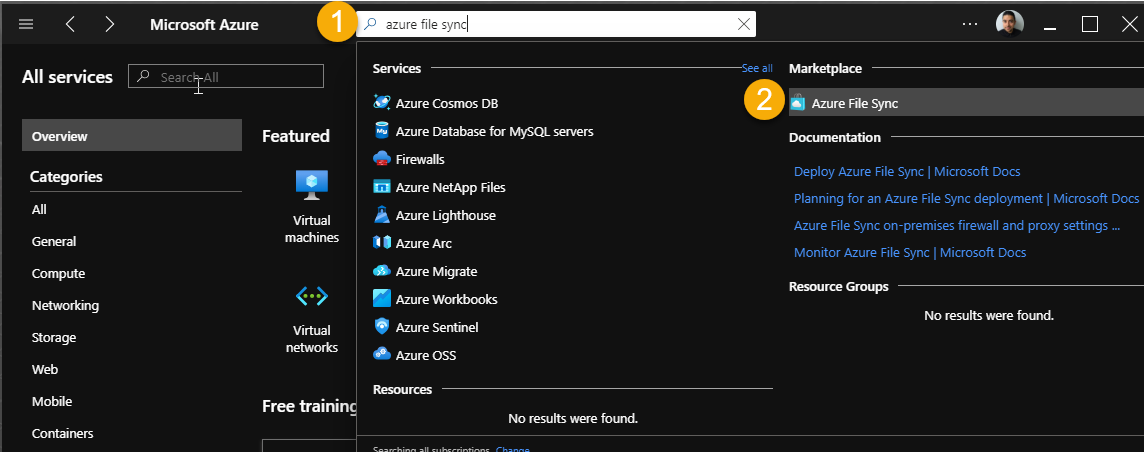
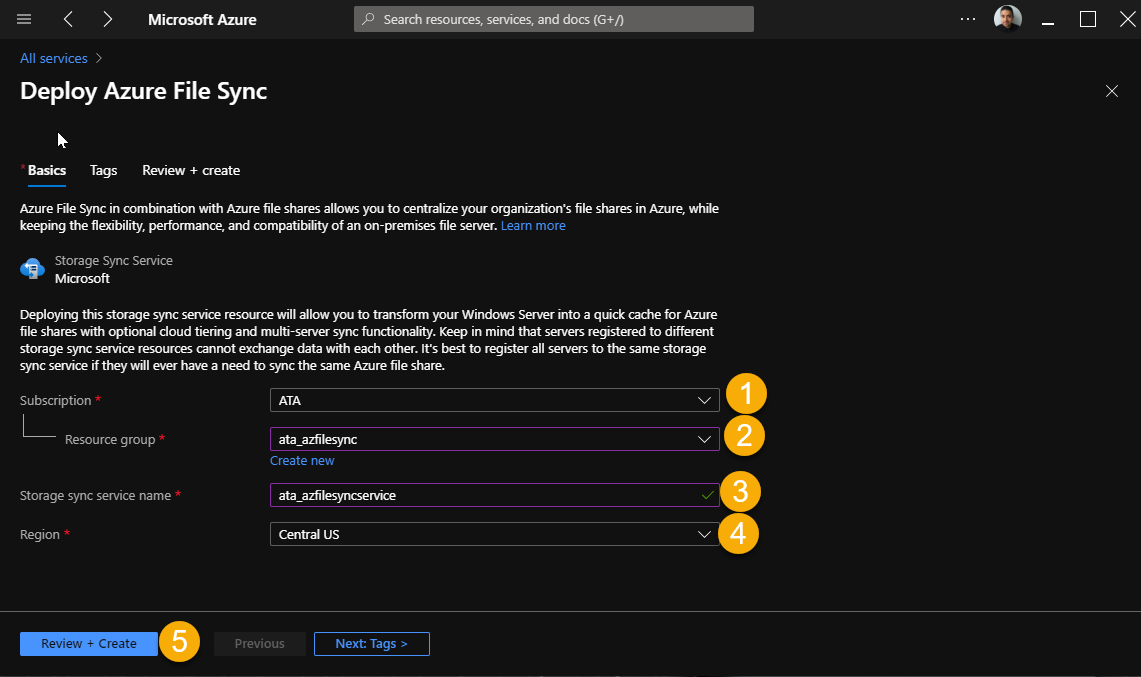
2. Click on Azure File Sync and provide the necessary details:
- Subscription (Your Azure subscription)
- Region (The datacenter location to create the service in. This should be the same region the storage account and Azure Files service is in.)
- Resource Group (A resource group you’d like to put this service in)
- Storage sync service name (A name of your choosing)
IMPORTANT: The Azure file share must be in the same region as the Azure File Sync Service for sync to function.
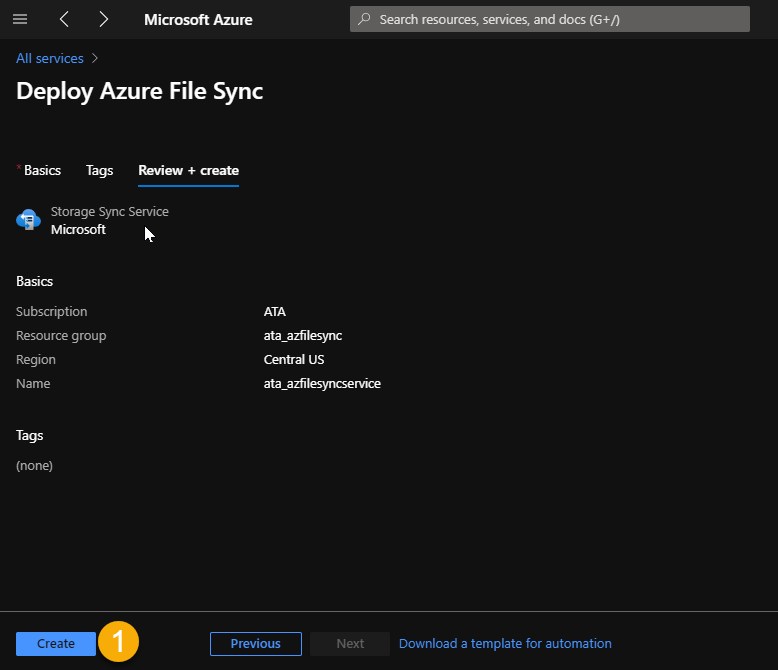
3. Select Review + create and then on Create to begin creation as shown below.
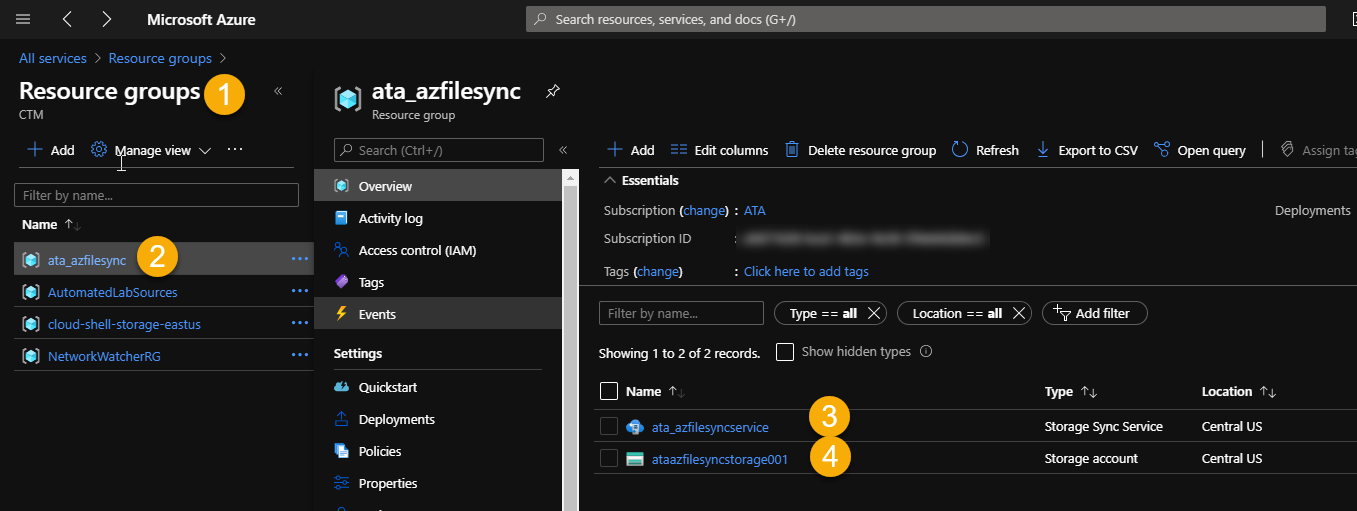
4. Now validate the deployment by going to the newly deployed Storage sync resource. You should find the Storage Sync Service and Storage account are located in the same Resource group and same Region.
Create a Sync Group
Now that we have a Storage sync service Resource, move on to configure a sync group. A sync group will contain the server endpoints (your file servers) and points to the storage account and file share you created earlier.
- While on your Azure Files services in the Azure portal, click on Sync groups.
- Provide the necessary details to create the sync group.
- Sync group name – The tutorial will use ata_azurefilesync_group001.
- Azure File Share – This is the file share you created earlier.
- 1st Cloud endpoint Subscription – The tutorial will use ATA.
- Storage account – This is the storage account you created earlier.
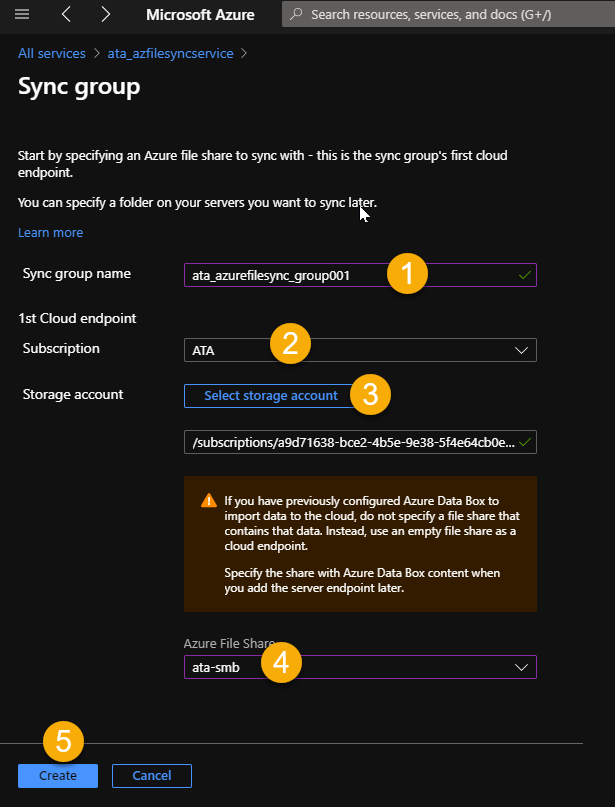
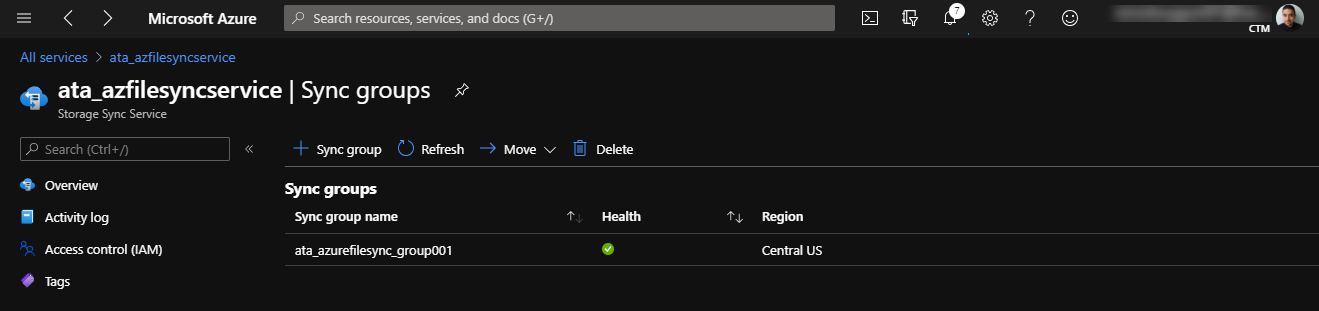
3. When the deployment is complete, click into the sync group as shown below.
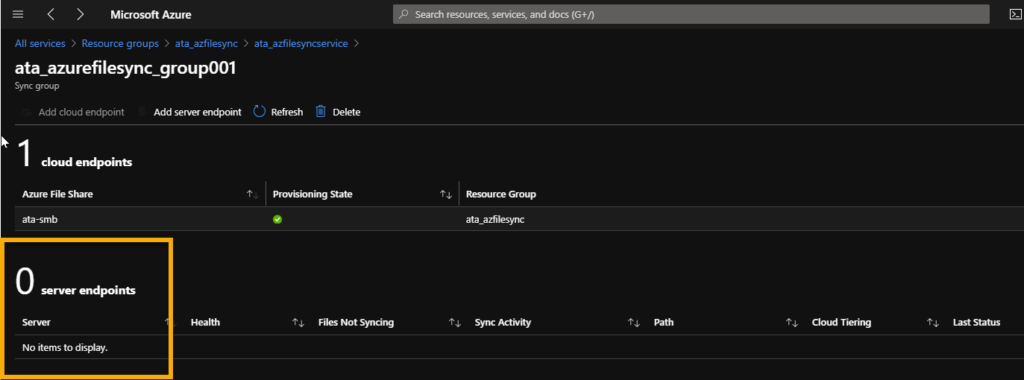
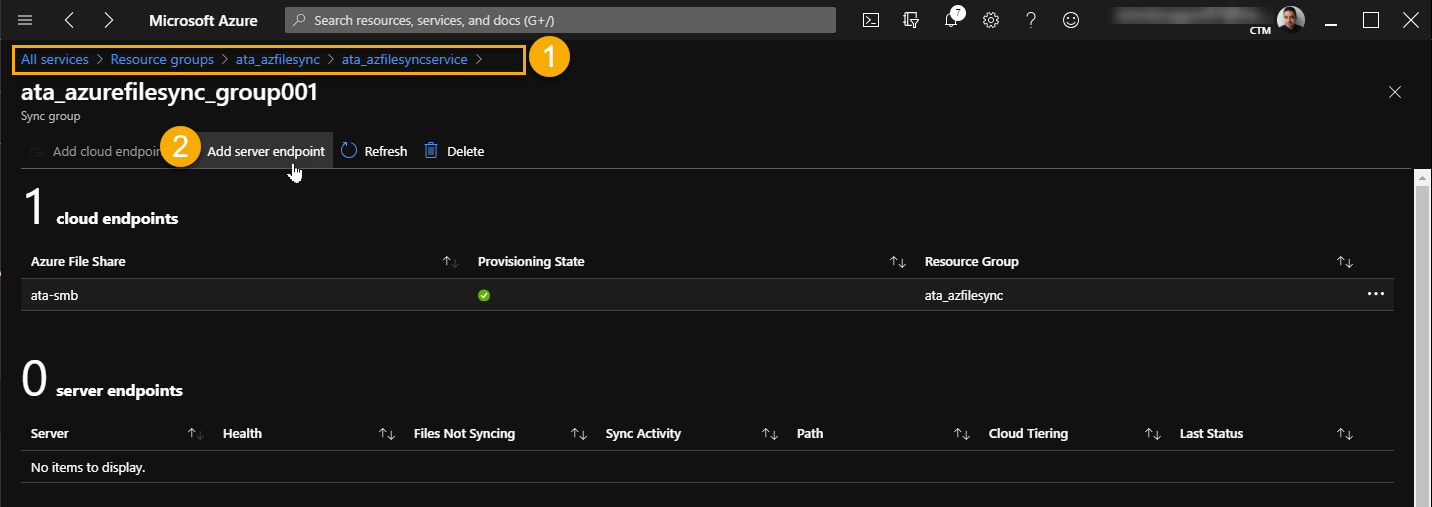
4. The sync group page displays the number of cloud and server endpoints currently configured. Notice there are no server endpoints listed. That’s the next task on your to-do list!
Installing the Azure File Sync Agent
By now, you’re all set up in Azure. It’s time to go on-prem (or an Azure VM) and install the Azure File Sync agent. The agent is what will communicate with the Azure file share.
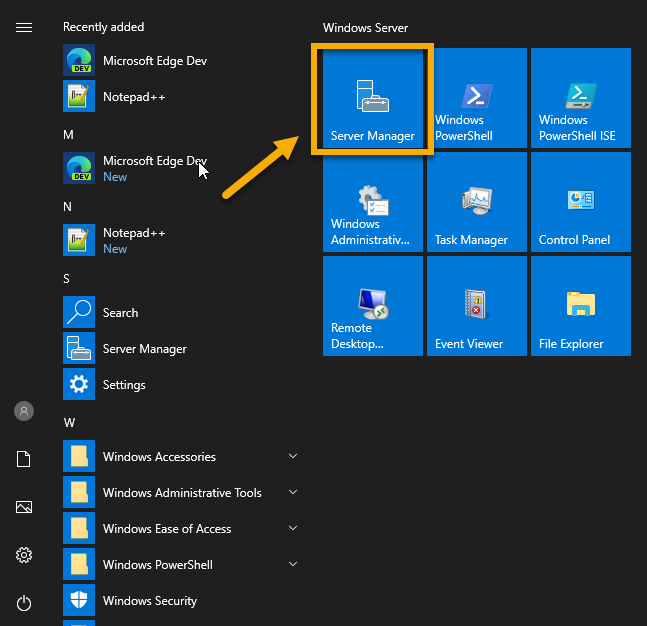
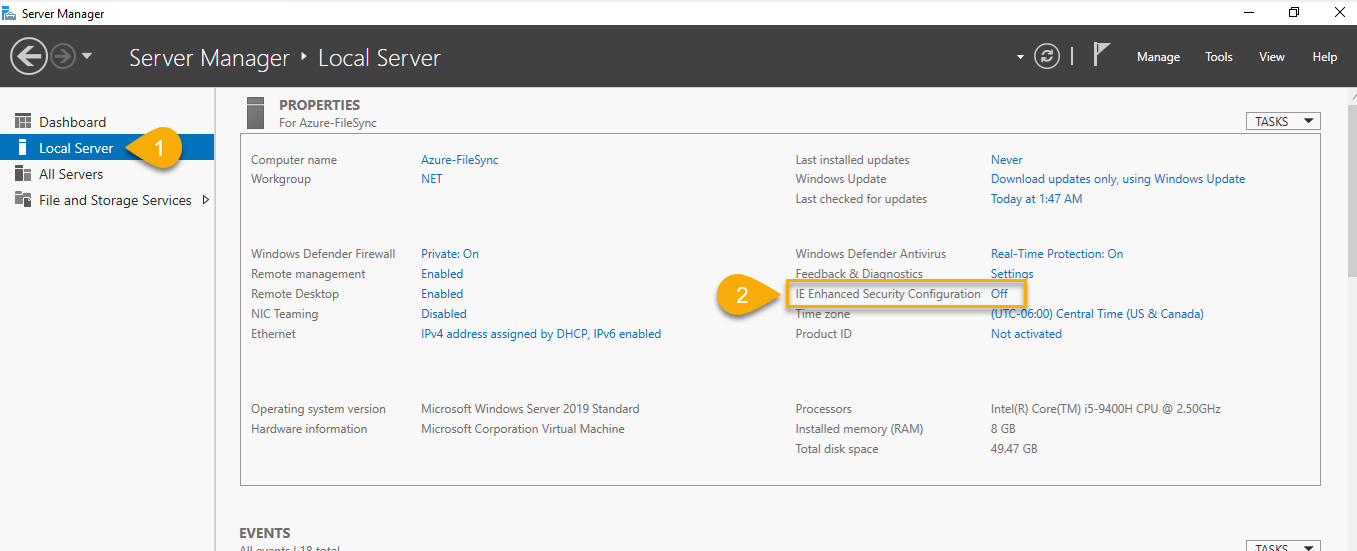
- Login to your Windows Server 2019 instances and open server manager.
2. Disable the Internet Explorer (IE) Security Configuration to avoid web-related connection issues with the installation of the Azure File Sync agent.
3. Next, download the Azure File Sync agent called StorageSyncAgent_WS2019.msi.
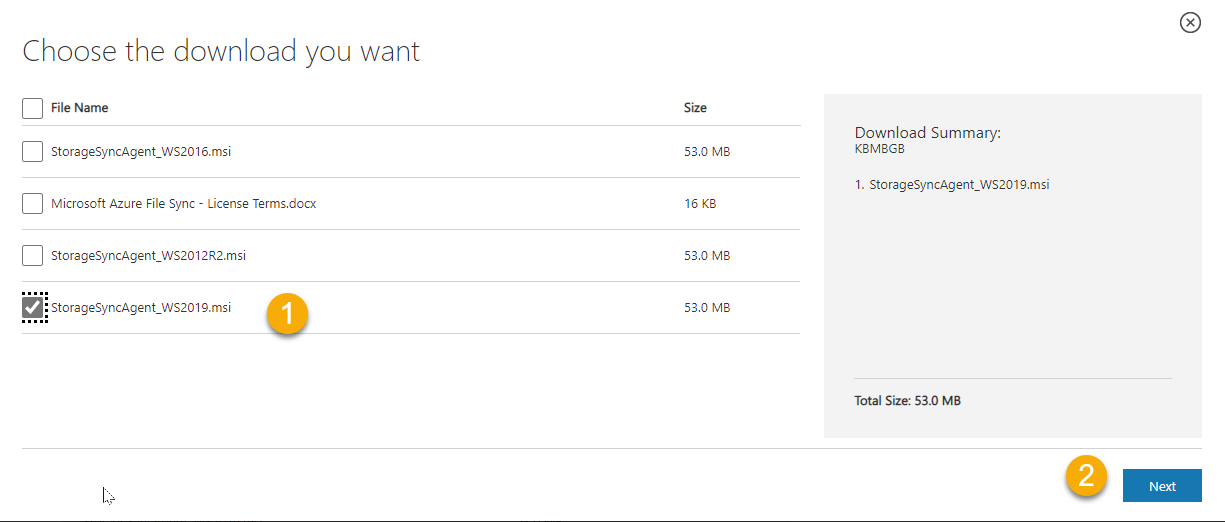
You can also download the Azure File Sync agent from the Registered server section within the Azure File sync service.
4. Once the download is complete, launch the Setup wizard. You can safely accept all defaults.
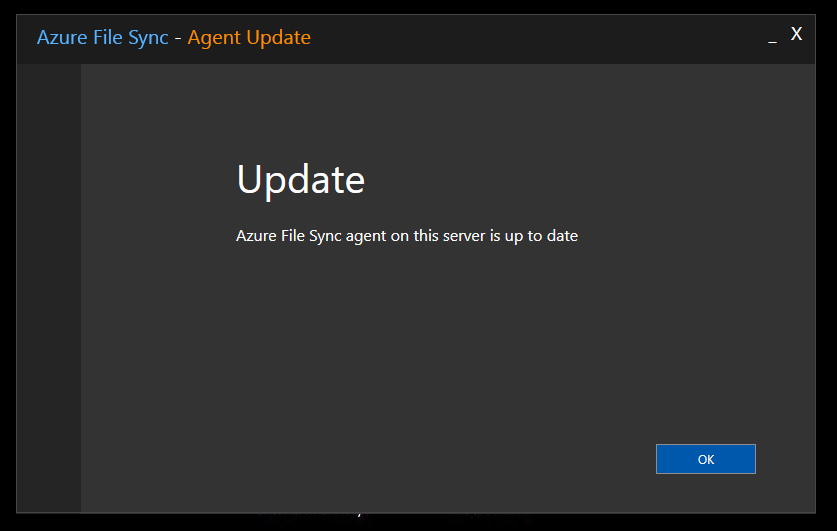
5. Once the installer wizard finishes, the installer will bring up another setup wizard. This time the setup wizard registers the server to the Azure File Sync service establishing a trust relationship between your server and the Storage Sync Service.
Right after the agent installation has completed, the agent immediately checks for an update or new release. You can move on by clicking OK.
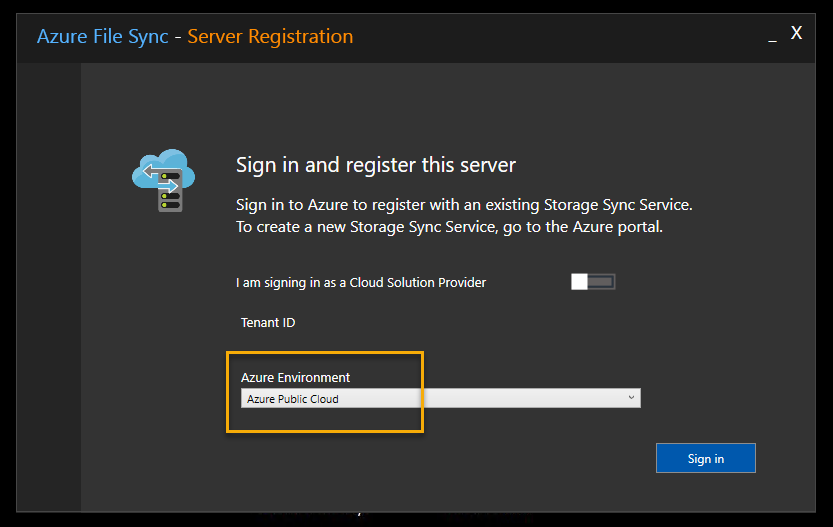
6. Next, sign in to your Azure tenant to perform the registration with the Azure File Sync service. To begin, select Azure Public Cloud as the Azure Environment assuming your Azure subscription is in the public cloud.
7. You are now prompted for your tenant credentials. Provide your username and password ensuring you use an account with global administrator permissions.
8. Next, provide all of the details the storage sync service such as your Azure subscription, the resource group to create the storage sync service, and the storage sync service name.
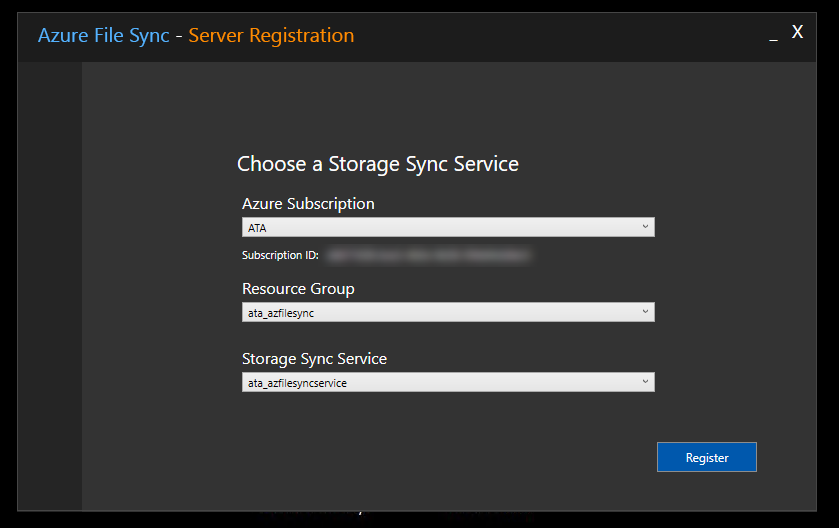
Note that each server can only be registered to one Sync Service at a time.
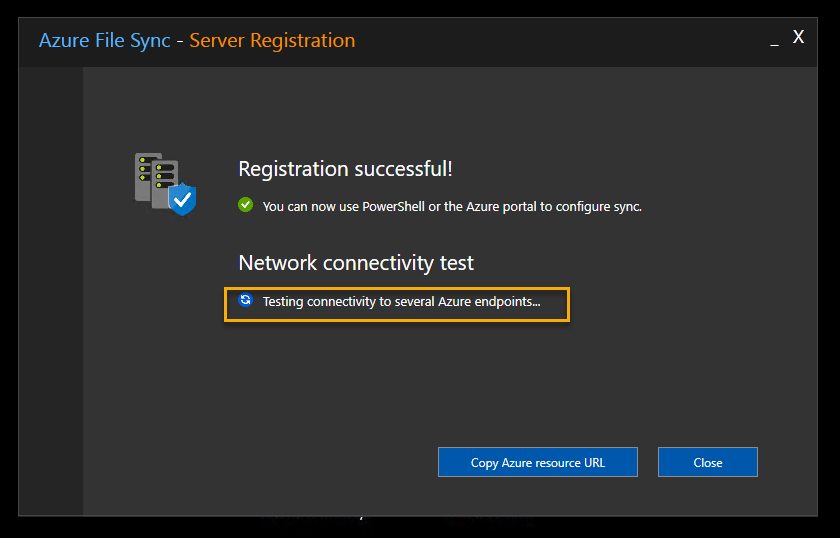
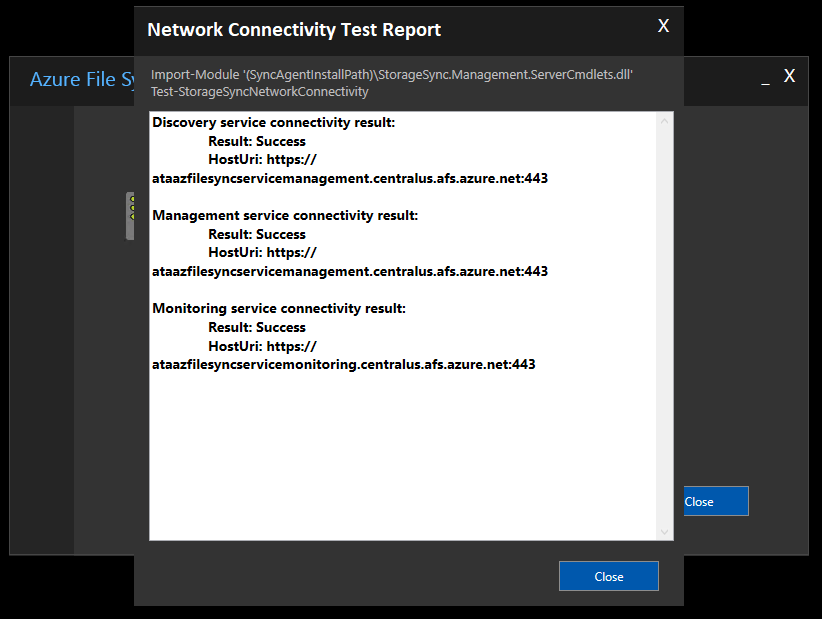
9. Once the registration is complete you should receive confirmation of success or failure. Note the wizard also runs a connectivity test against a set of Azure endpoints in the background.

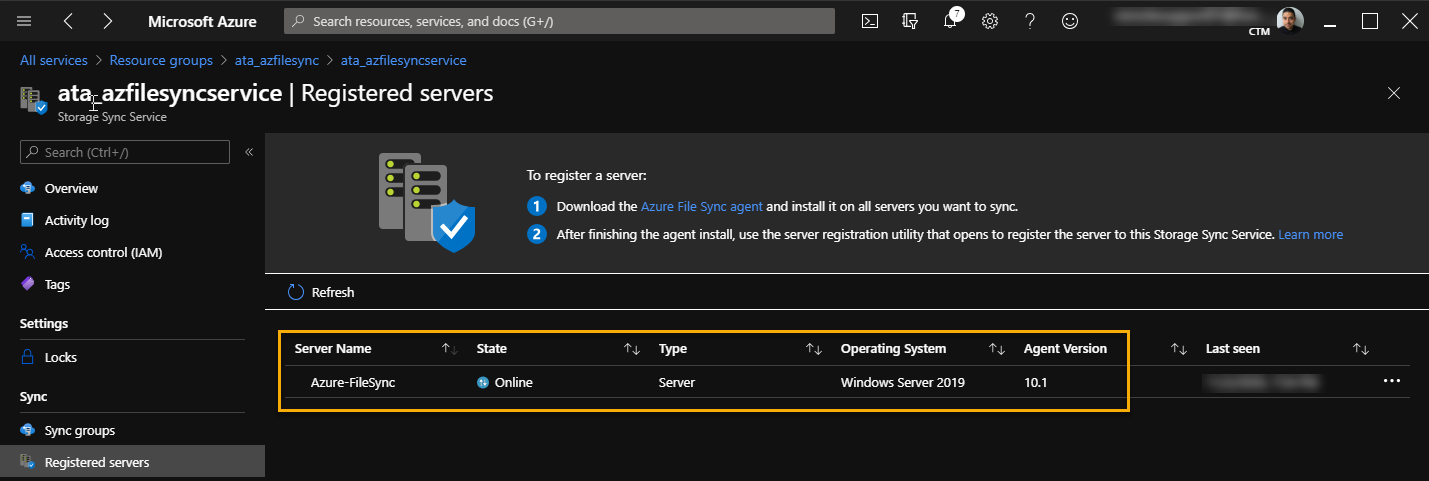
10. Head over to the Azure Portal and confirm the Windows Server instance is now a Registered server.
Setting up the Server Endpoint
Your server is now registered with the Azure File Sync service. You must now configure the registered server as a server endpoint.
- Navigate to the Azure Portal and go to your Azure File Sync service again. Click on the sync group you should have created already.
- Click on Add server endpoint as shown below.
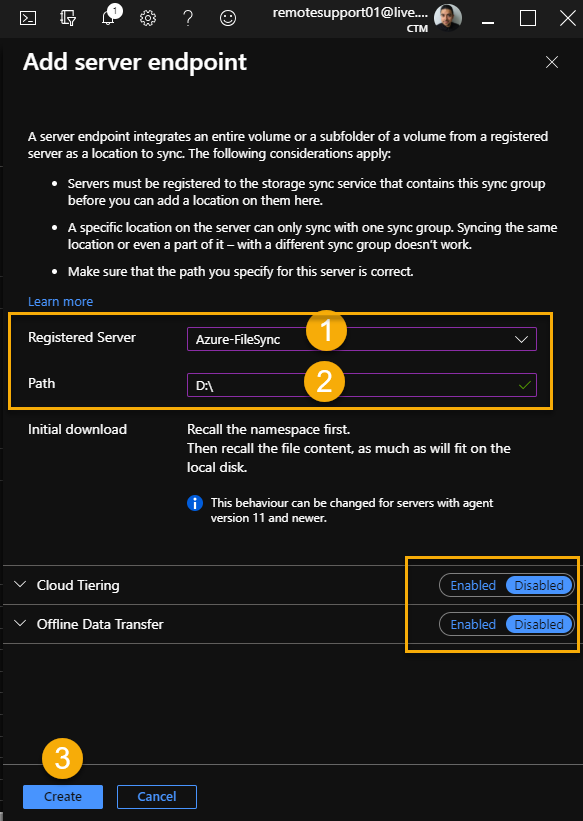
3. You should see a registered server comes up as an option. If you’ve been following along with this tutorial, it will be called Azure-FileSync.
4. For the path to store synced files to, provide a location you prefer the Azure File shares to be downloaded to on the Windows Server instance. For this tutorial, that location is D:\.
5. Keep the Cloud Tiering option disabled as the setting goes beyond the scope of this article.
6. Keep Offline Data Transfer disabled as this is related to Azure Data Box which is outside of the scope for this tutorial.
The process might take a couple of minutes to complete. You will notice the endpoint is now displayed and the health status is set to pending.
7. While the starts, click on the server (shown below as Azure-FileSync). You’ll notice more granular details about the process in the Server Endpoint Properties blade.
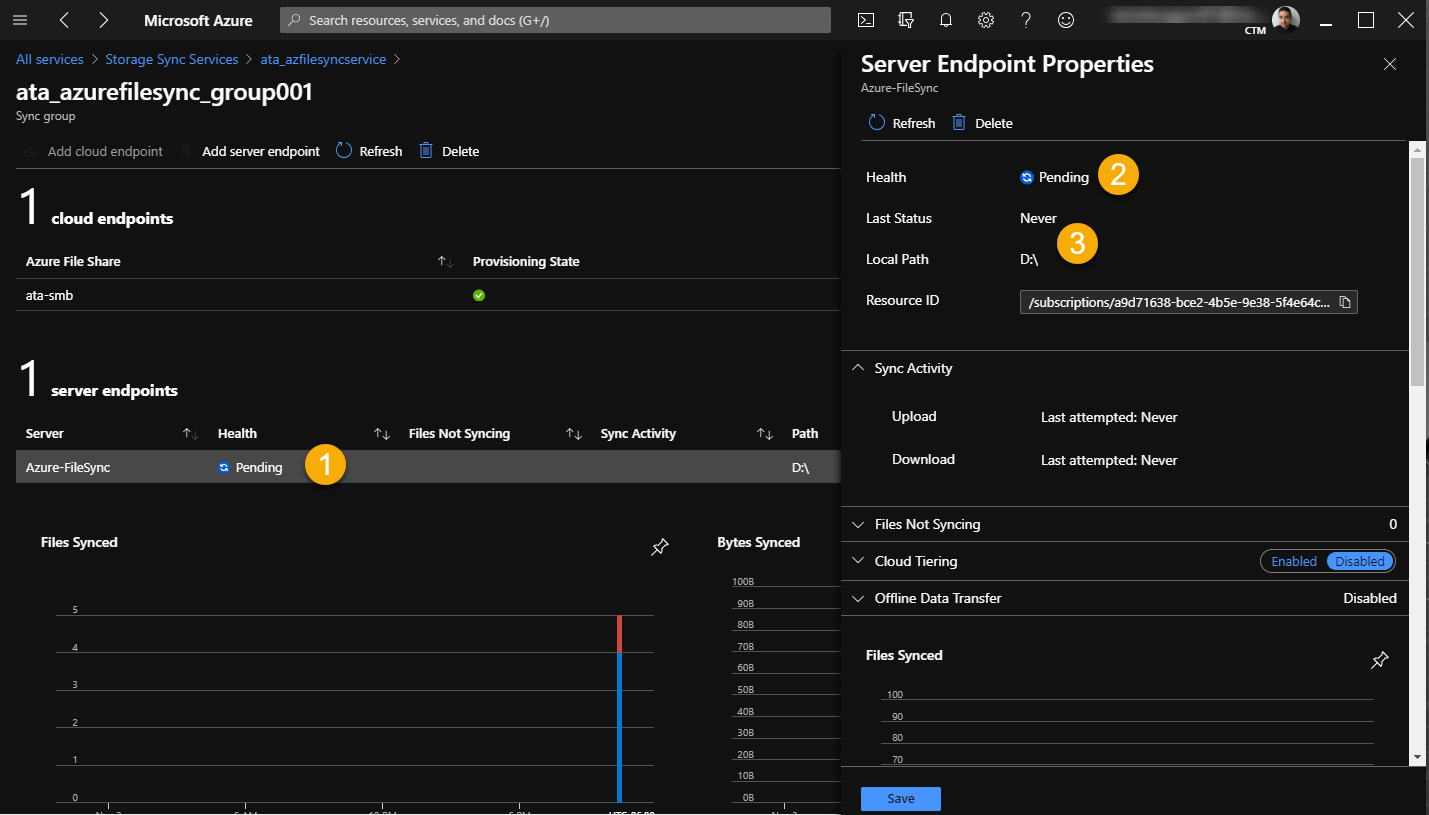
The cloud endpoint runs a detection job every 24 hours, which means it might take up to 24 hours before files begin to sync.
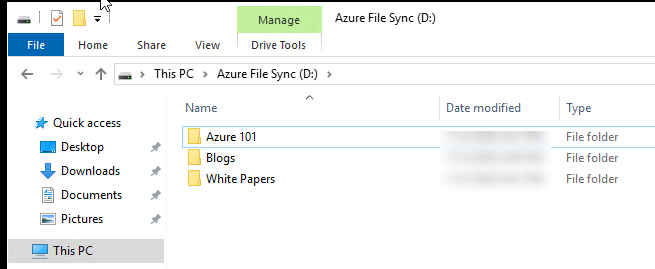
8. Head over to your Windows Server again and open the File Explorer. You’ll notice all of the directories you created in the Azure portal are created as directories on the Windows Server file system.
At this point, any files you add to any of these directories will be automatically synchronized to the Azure Files storage account. The same sync will also be performed on all files stored in the Azure Files storage account.
Syncing files down from Azure to your server will take some time. Changes made to the Azure file share by using the Azure portal or SMB are not immediately detected and replicated like changes to the server endpoint.
Azure Files does not yet have change notifications or journaling, so there’s no way to automatically initiate a sync session when files are changed. On Windows Server, Azure File Sync uses Windows USN journaling to automatically initiate a sync session when files change.
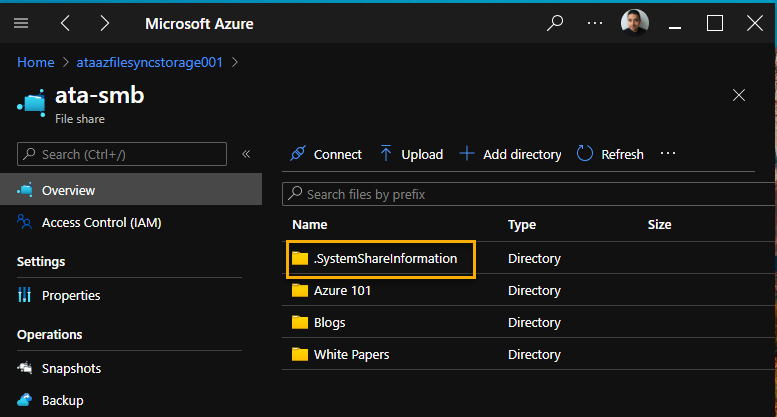
You’ll see a directory in the Azure file share called .SystemShareInformation. Do NOT modify or delete this folder as it’s critical to Azure File Sync functionality!
Validating Azure File Sync
Now that you finally reached your goal of setting up a Windows Server with Azure File Sync, it’s time to put the service through its paces. Create a few files in any of the directories you’ve configured to sync and notice the sync in action.
You’ll see below an example of the file sync in action.
Next Steps
This article walked you through setting up Azure File Sync from cloud to on-premises. To deploy Azure File Sync was quite the exercise. There were lots of moving parts to configure; however, It wasn’t difficult to accomplish.
You can learn more about Azure File Sync pricing and features such as Cloud Tiering, Backups and Snapshots, Security, Encryption, Authentication and more by visiting these links:


