


Correlated failure can be a major headache for any cloud computing environment. But fortunately, AWS Placement Groups allow you to control the placement of resources in your cloud environment. Your resources become more fault-tolerant and can better handle correlated failure.
In this tutorial, you will learn the ins and outs of AWS Placement Groups, what they are and how to create one.
Read on to say goodbye to downtime and hello to peace of mind!
Prerequisites
This tutorial comprises hands-on demonstrations. To follow along, ensure you have the following:
- An AWS account with active billing setup – A free-tier AWS account is sufficient.
- An operating system with AWS CLI installed and configured – This tutorial uses Windows 10.
Creating AWS Placement Groups
When you create a new instance on Amazon Elastic Compute Cloud (EC2), the service automatically tries to place the instance. This behavior minimizes the risk of correlated failures by distributing it across various underlying hardware.
You can use AWS placement groups to further customize the placement of a group of interdependent instances based on your workload requirements.
But before you can use placement groups, you need to create one with the steps below:
💡 Remember to carefully consider your needs before creating a placement group. When you create a placement group, the instances in the group are placed on underlying hardware in a way that is optimized for the chosen strategy.
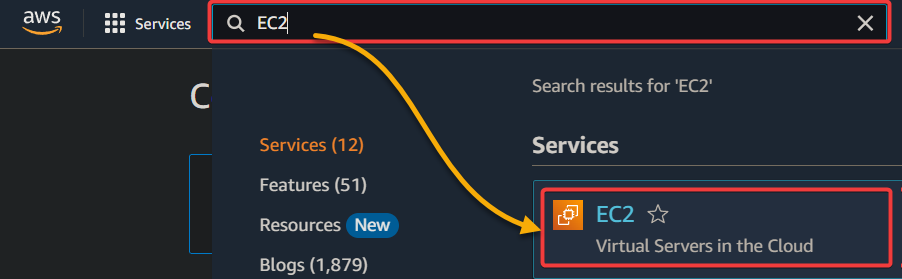
1. Open your favorite web browser, and log into your AWS Manage Console.
2. Next, search for and select EC2 in the search result, redirecting your browser to the EC2 Dashboard.
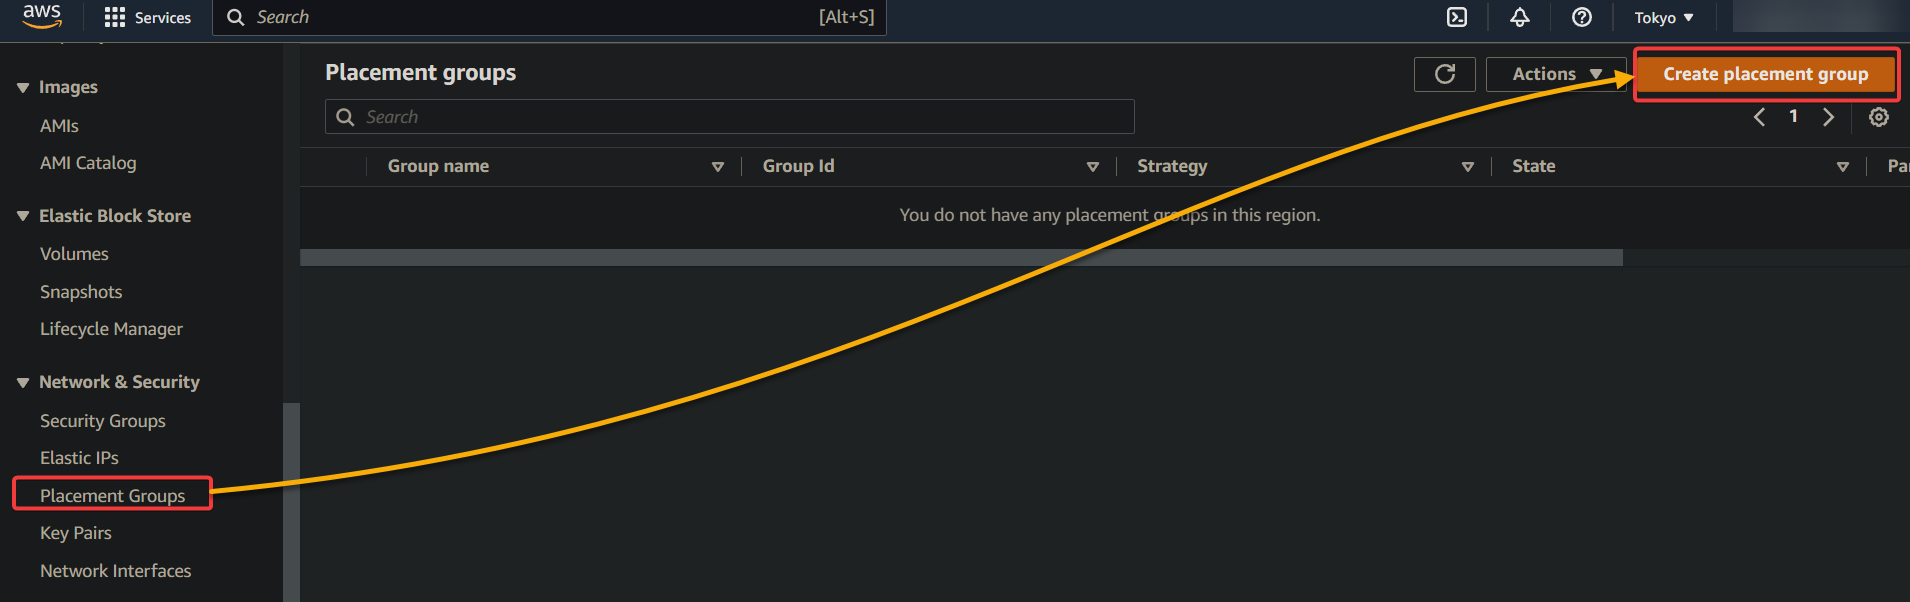
3. On the EC2 Dashboard, click Placement Groups (left pane) → Create Placement Group to initiate creating a placement group.
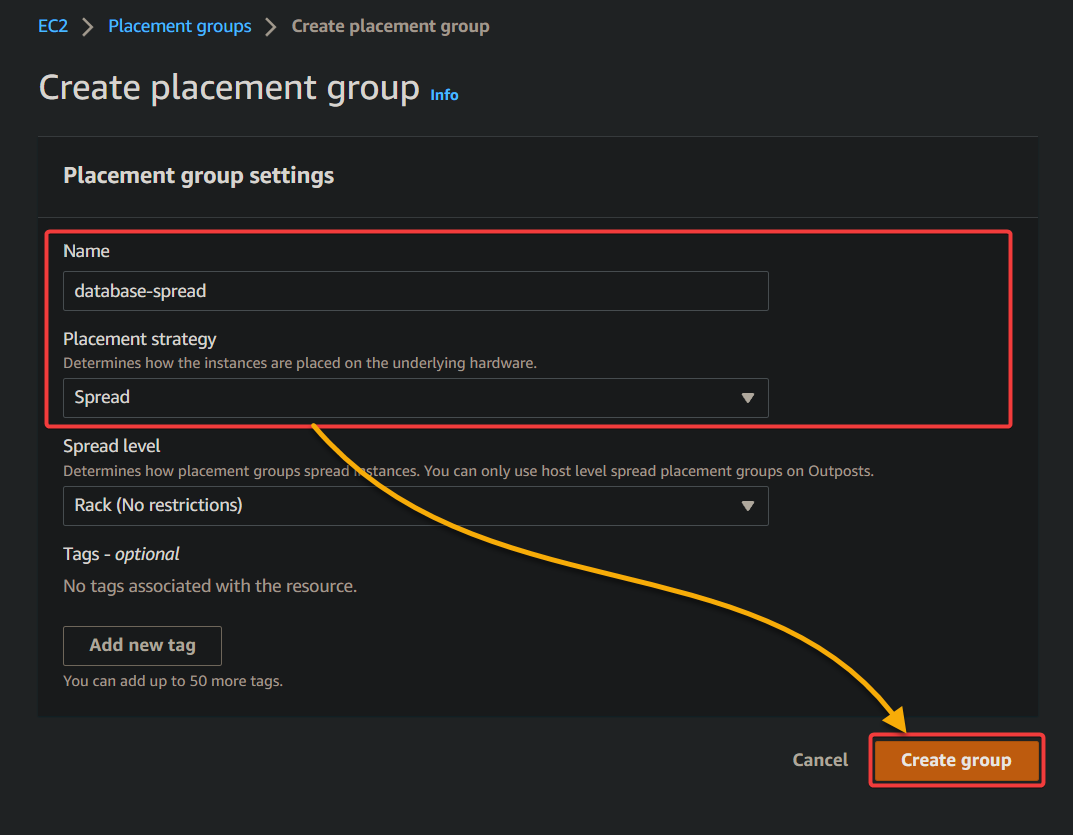
4. Now, configure the placement group settings as follows:
- Name – Provide a placement group name (unique within your AWS account and region) with a maximum of 255 characters long. This tutorial uses database-spread for a spread placement group containing database instances.
- Placement strategy – Choose any strategies below to distribute resources in your placement group. This tutorial uses the Spread strategy.
Note that you can not change the chosen strategy or merge it with another placement group after placement group creation. The performance of the placement group could be negatively impacted.
| Strategy | Description |
| Cluster | Involves grouping instances closely together within the same Availability Zone for efficient communication between nodes. This strategy is useful for high-performance computing (HPC) applications that rely on tight node-to-node coupling. |
| Partition | Involves dividing resources into separate sections or partitions within the group. This strategy helps large, distributed workloads (e.g., Hadoop, Cassandra, and Kafka) as it allows greater isolation between groups of instances. |
| Spread | Involves carefully distributing small group of instances across distinct underlying hardware to minimize the risk of correlated failures. This strategy is ideal for applications that require a uniform distribution of resources. |
- Keep other settings as default and click Create group to finalize creating the placement group.
Wait for the placement group to be created, and you will see a green notification at the top, as shown below.
You are now ready to use the AWS placement groups for your EC2 instances. Since the instances are placed on the underlying hardware, you will not see them in the console.

Launching EC2 Instances Into a Placement Group
Now that you have created a placement group suitable for your workflow, you can launch AWS EC2 instances into your Spread-level placement group. Doing so reduces the risk of potential simultaneous failures when your instances share the same equipment.
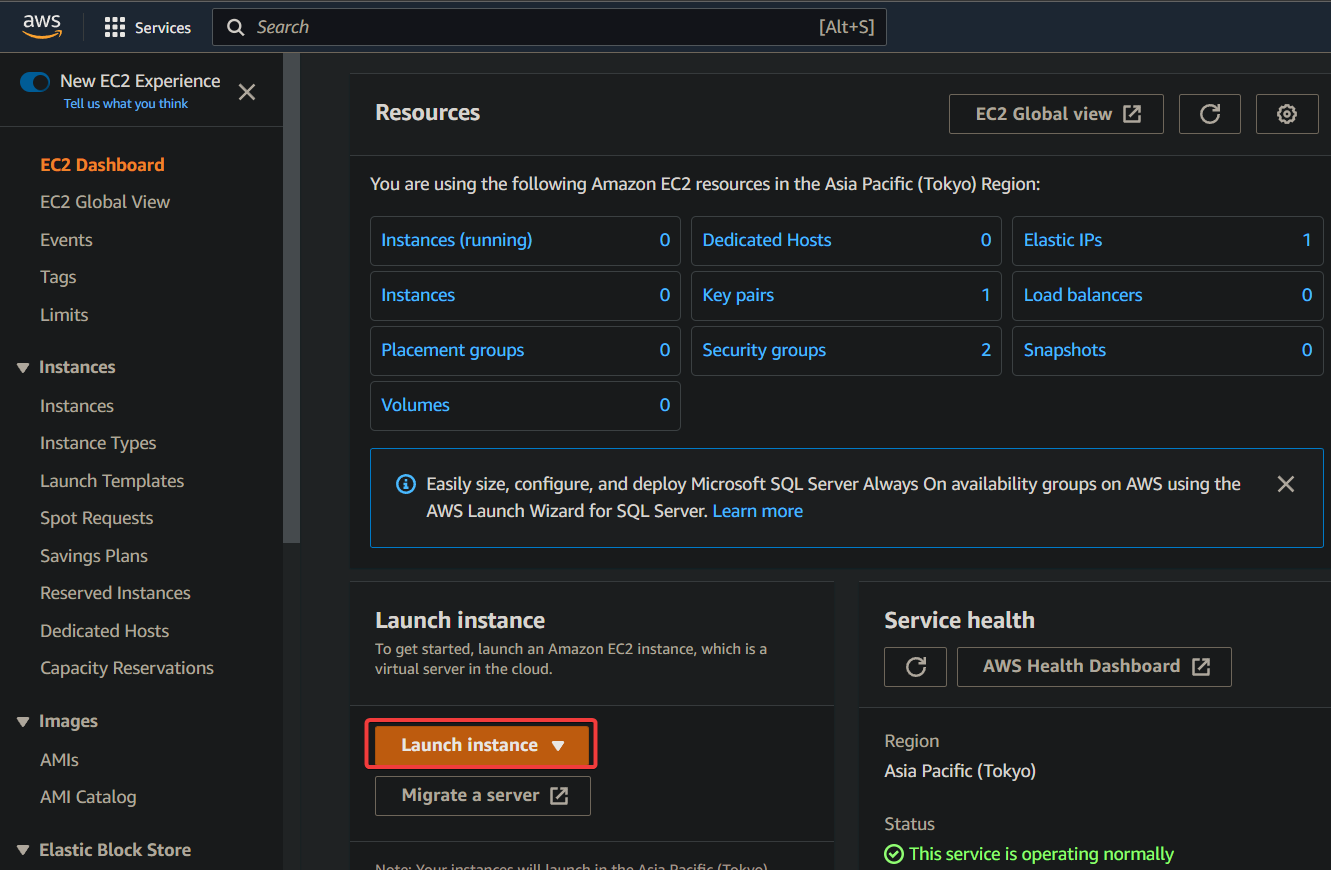
1. Navigate to the EC2 console and click on Launch Instance, as shown below, to initiate launching an instance.
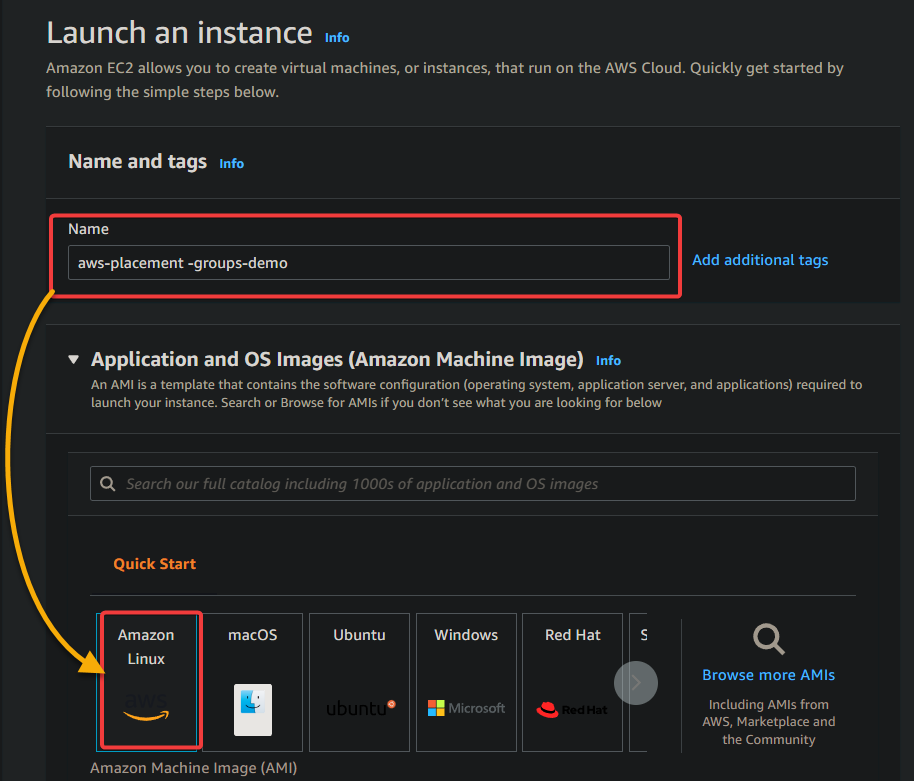
2. Next, configure the following for your instance:
- Name – Provide a name of your EC2 instance (e.g., aws-placement -groups-demo).Application and OS Images – Select an Amazon Machine Image (AMI) suitable for your needs. These are the images you can use for your EC2 instance. But this tutorial uses the Amazon Linux AMI.
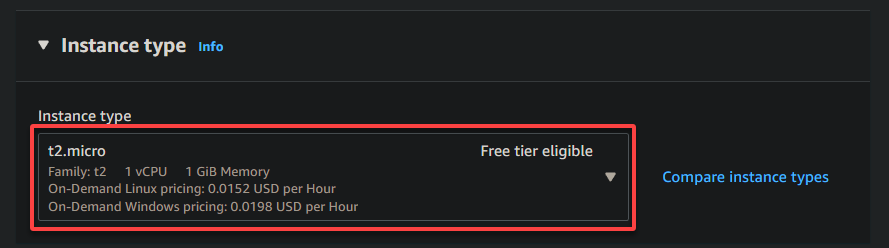
3. Choose the free-tier t2.micro as the Instance type since it is free. You can choose a different instance type, but note that you will be charged for it.
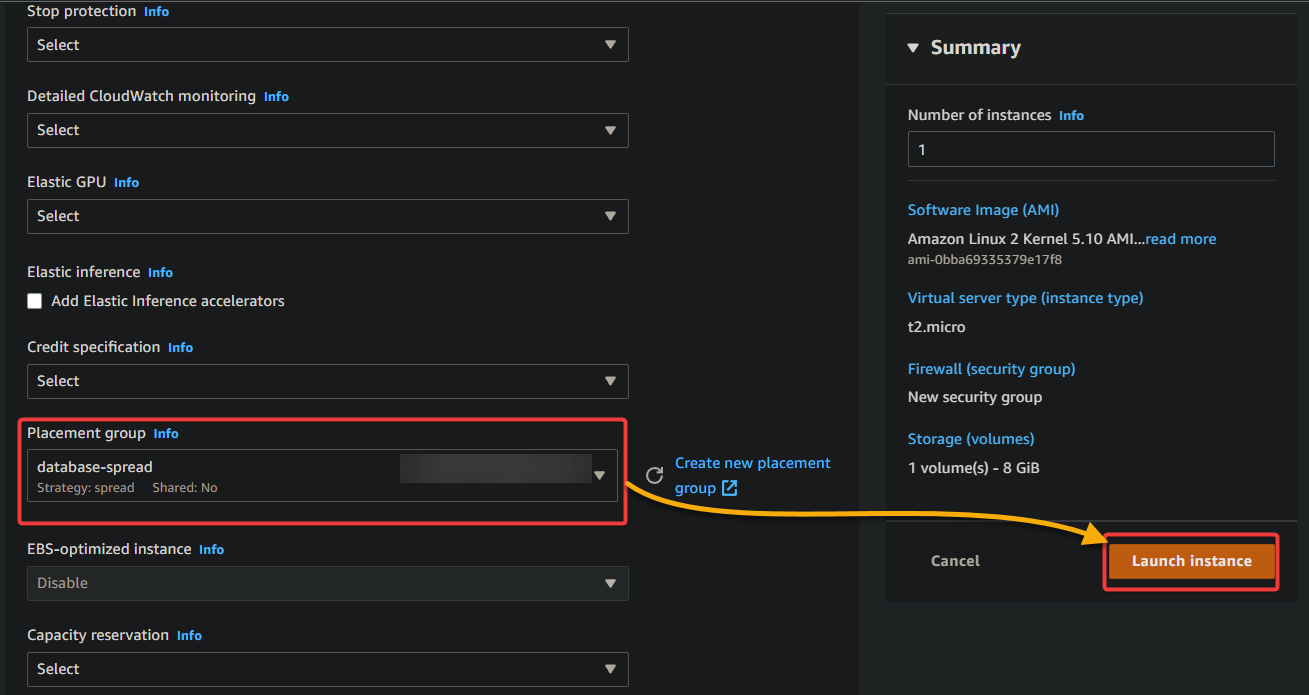
4. Now, scroll down, and select the name of your newly-created Placement group from the dropdown menu.
Keep other settings as default, and click Launch instance to launch your instance.
💡 Note that the request to start or launch an instance in the Spread-level placement group only works when there is sufficient unique hardware to fulfill the request.
5. Wait for the instance to be created, and click on it to open its details page.

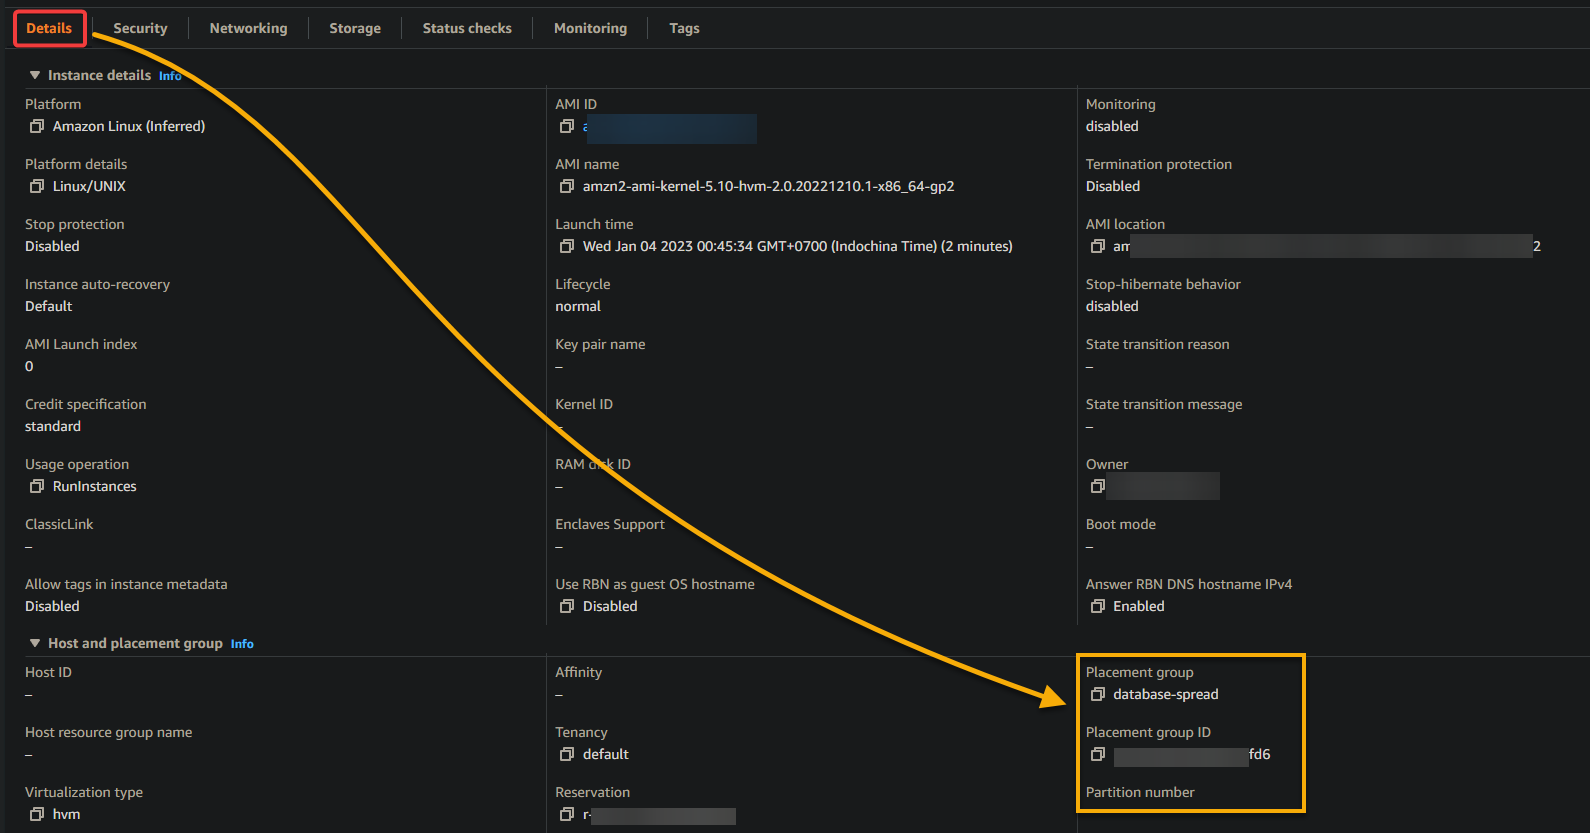
6. Lastly, click the Details tab to view the instance’s details, including the placement group (database-spread) assigned to the instance.
At this point, the EC2 instance will be placed on underlying hardware optimized for the group’s chosen strategy, in this case, the Spread strategy.
Moving Existing Instances In/Out of AWS Placement Groups
After launching instances to your placement group, you may need to scale your workload up or down. How? You can add or remove instances from your placement group by moving them in or out as needed.
💡 Take caution when moving instances, as the implications can affect the performance and availability of your workload. For example, moving instances requires stopping and restarting the instances. Doing so can result in downtime for your workload, as the instances temporarily become unavailable during the movement.
To move existing instances in or out of your placement groups:
1. Open command prompt, and run the below aws command to verify AWS CLI --version installed.
aws --versionBelow, you can verify AWS CLI 2.0.30 is installed.

2. Next, navigate to your instance’s overview page, and copy the instance’s ID to move. You will need the instance ID to move the instance in or out of the placement group.

3. Run the below aws ec2 command to stop the instance (stop-instances).
💡 From this point, throughout this section, be sure to replace
{instance-id}with the instance ID you copied in step two.
When an instance is stopped, all of its data is preserved, preventing any data loss.
aws ec2 stop-instances --instance-ids {instance-id}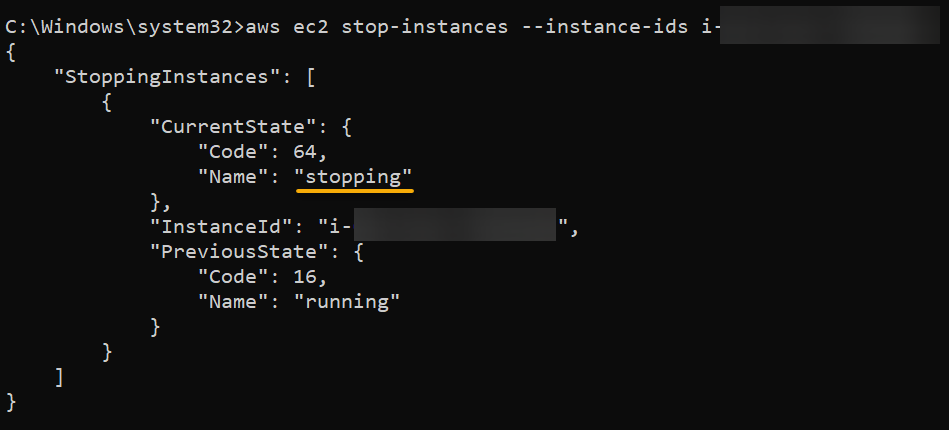
4. Now, run the following command to remove your instance ({instance-id}) from a placement group.
The --group-name option determines whether the instance should be moved in or out of a placement group. In this case, the empty string ("") signifies that the instance should be removed from its current placement group.
💡 Note: Removing instances from a placement group helps when you need to troubleshoot an issue with your instances.
aws ec2 modify-instance-placement --instance-id {instance-id} --group-name ""The “Return”: true output value shown below indicates that the operation was successful.

5. After the instance removal, run the below start-instances command to start the instance again.
aws ec2 start-instances --instance-ids {instance-id}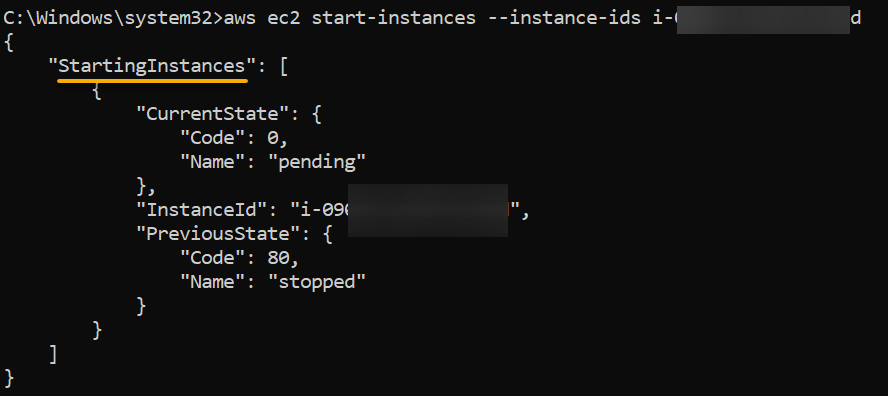
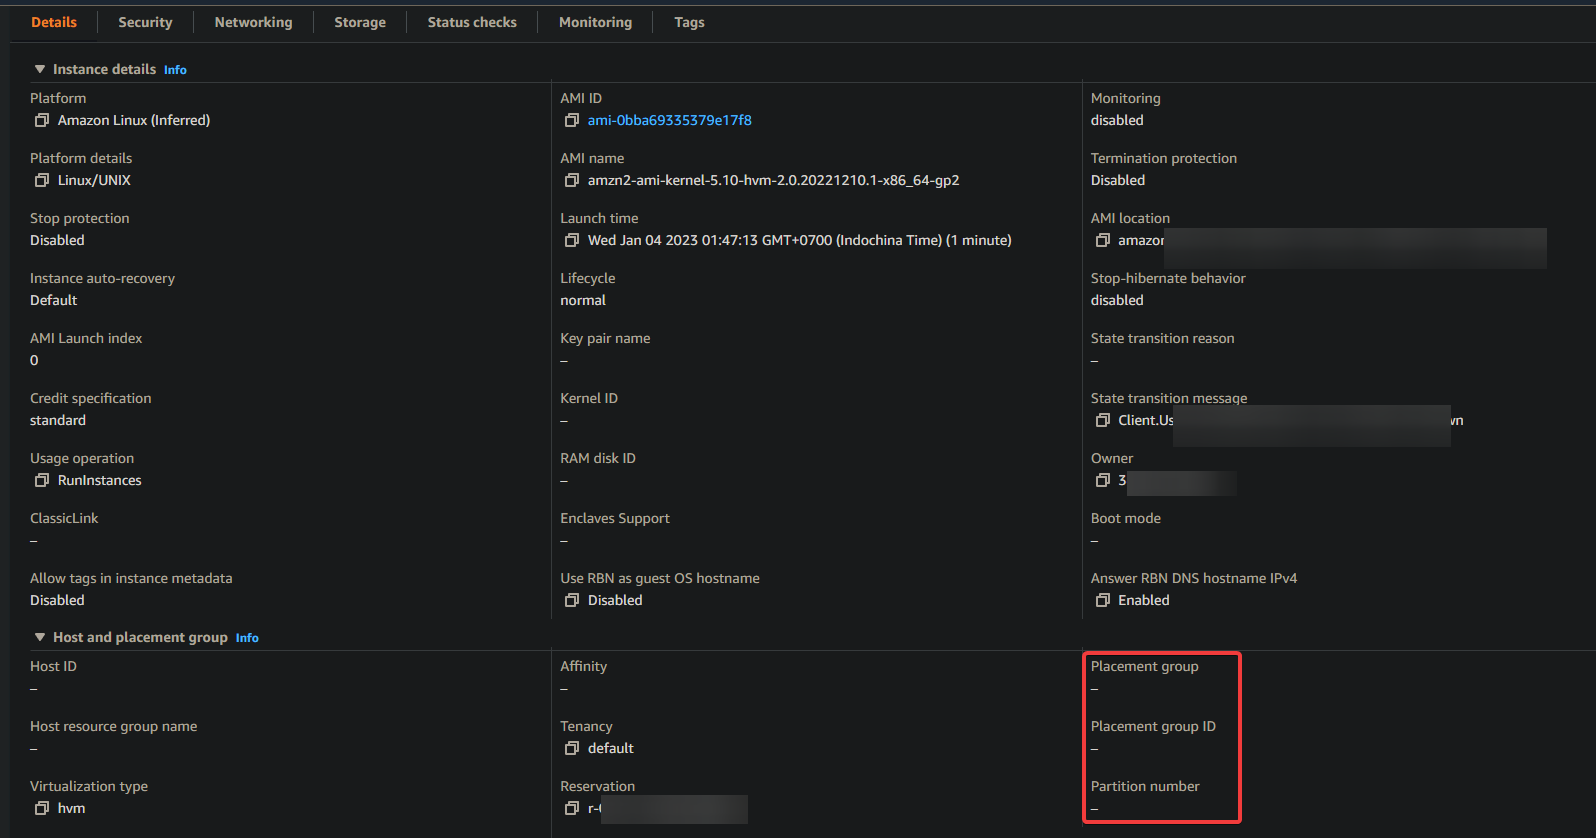
6. After starting the instance, navigate to the instance’s details page to verify that the placement group was removed.
The placement group field is empty, as shown below, indicating the instance was successfully removed from the placement group.
7. Now, run each command below to stop a particular instance (stop-instances), and move it into a specific placement group.
aws ec2 stop-instances --instance-ids {instance-id}
aws ec2 modify-instance-placement --instance-id {instance-id} --group-name "database-spread"
8. Lastly, refresh the instance’s details page, and you will see the instance moved back to the placement group (database-spread), as shown below.

Deleting AWS Placement Groups
Keeping placement groups you no longer need is only a waste of resources. Why not delete them to free up resources? Moreover, since the placement strategy is unchangeable, deleting a placement group and creating a new one will do the trick.
Run the below delete-placement-group command, which does not produce output, but deletes a specified placement group (database-spread).
aws ec2 delete-placement-group --group-name database-spreadNow, rerun the command to try deleting the same placement group. Doing so lets you verify if the placement group has been removed.
aws ec2 delete-placement-group --group-name database-spreadBelow, you can see an error since the placement group does not exist.

Conclusion
AWS placement groups are a powerful tool for optimizing the performance of your workload. And in this tutorial, you have learned to group instances together within a placement group. As a result, you can now take advantage of low network latency and high network throughput. Doing so is especially beneficial for workloads that require high levels of performance.
Placement groups can be invaluable if you are working with an HPC workload or a distributed application or simply want to ensure your instances are running as efficiently as possible.
With the knowledge you gained in this tutorial, why not consider implementing partition placement groups for your large distributed and replicated workloads in Amazon EC2?


