

Do you have an extensive infrastructure to manage in AWS public cloud? If so, inspecting and monitoring your environments and infrastructures for vulnerabilities is crucial. And the good news is that AWS has its own most widely-used service, AWS Inspector.
Amazon Inspector is a vulnerability management service that continuously scans your AWS compute resources and automatically detects the affected resources. And in this tutorial, you’ll learn what an AWS inspector is and how to execute an inspector in the AWS cloud to find vulnerabilities.
Read on and start patching up security holes with AWS Inspector!
Prerequisites
This tutorial comprises step-by-step instructions. If you’d like to follow along, be sure you have the following in place:
- An AWS account with an AWS EC2 instance.
- An AWS IAM user, an access key ID, and a secret key set up on your local machine. The AWS IAM user must have permission to create and manage EC2 instances on AWS Cloud.
Enabling Amazon Inspector in AWS Cloud
AWS Inspector is an AWS service that cares about vulnerabilities or issues that might block you from working with AWS compute resources. But before you inspect your AWS infrastructure, you’ll need to enable the AWS Inspector by subscribing to the service.
1. Open your favorite web browser, navigate the AWS Management Console, and log in with your AWS account.
You can centrally manage AWS inspector with multiple AWS accounts by using the AWS organization. Also, if you have more accounts in the future, you can easily enable the service.
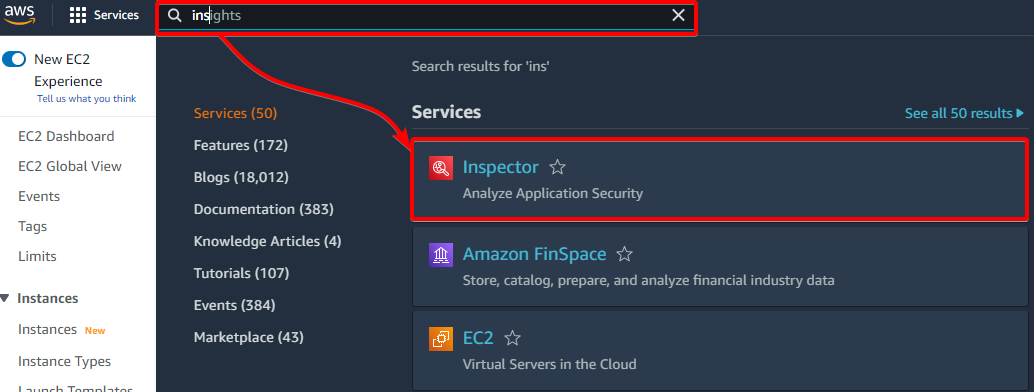
2. While in AWS Management Console, search for inspector in the search box at the top, click on and click on the Inspector menu item. Your browser redirects to a page where you’ll see details about AWS Inspector (step three).
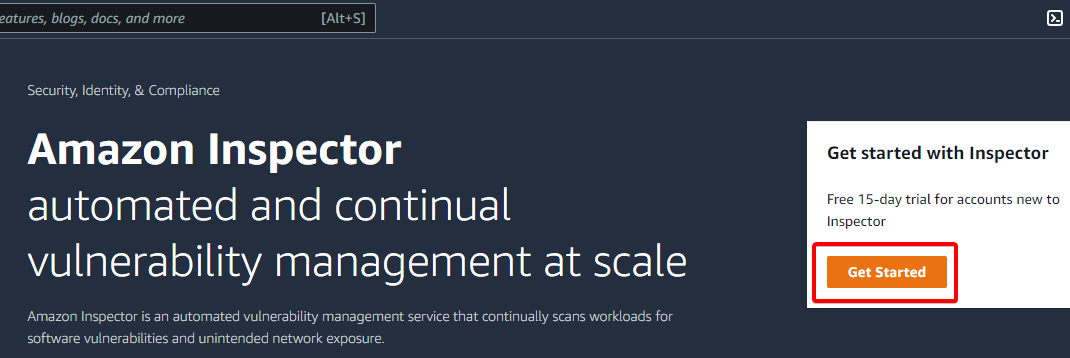
3. On the Amazon Inspector page, click on the Get Started button, as shown below, to initialize enabling AWS Inspector.
4. Finally, click on the Enable Inspector button (bottom-right) to enable the AWS Inspector. After enabling the Inspector, all scan types are enabled by default.

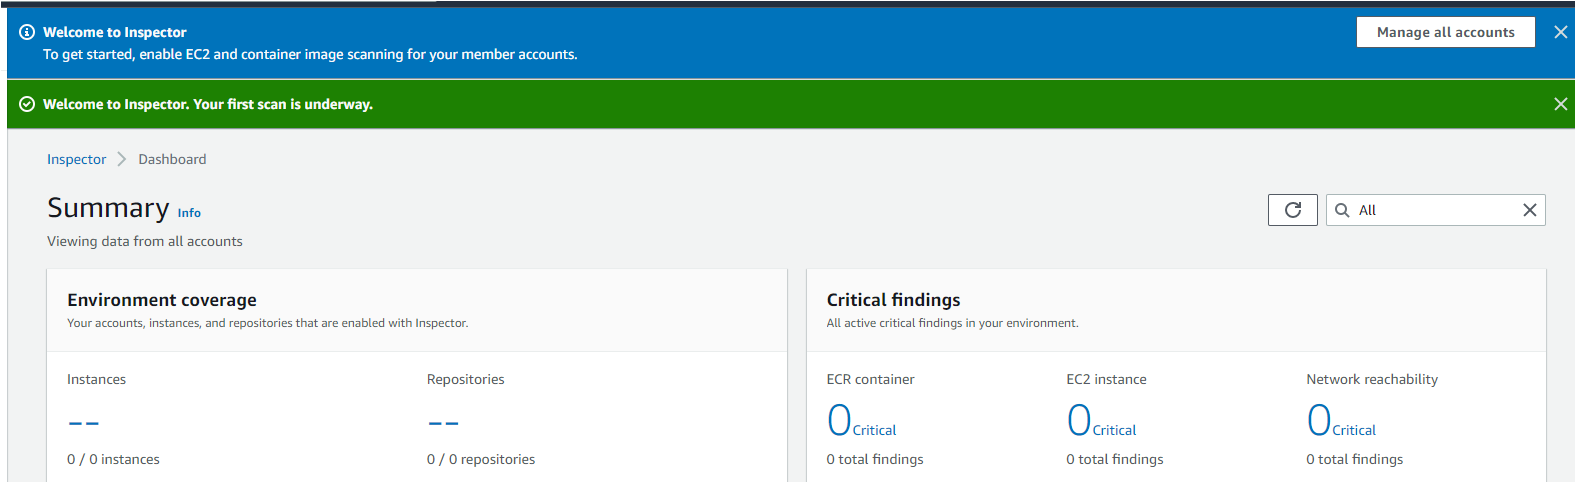
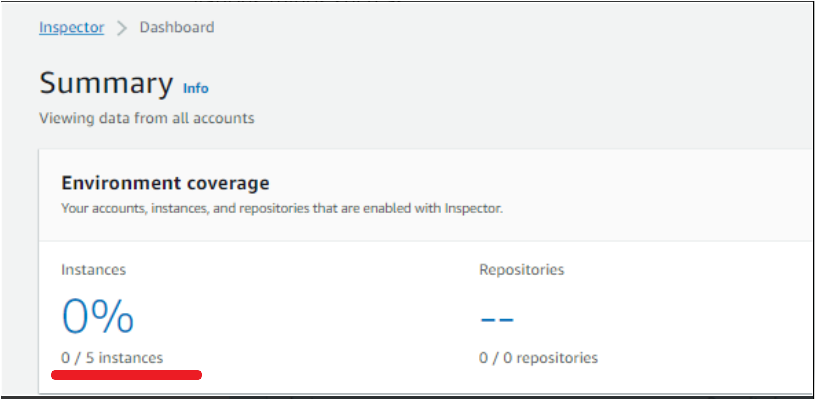
Once the AWS Inspector is enabled, your browser redirects to the AWS Inspector Dashboard page with a welcome message at the top, as shown below.
As of now, you will see 0 instances and repositories in the Environment coverage. AWS Inspector initially takes a few minutes to scan your infrastructure after getting enabled,
Running Scans on AWS EC2 Instances in AWS Cloud
You’ve just enabled AWS Inspector in AWS Cloud, and you’re now ready to scan AWS EC2 instances in AWS Cloud. AWS Inspector inspects all installed software and networking components in the AWS EC2 instance.
1. Log in to your Ubuntu machine using your favorite SSH client.
2. Next, run the below systemctl command to check the status of the SSM Agent. SSM agent collects information about the software application inventory of your EC2 instances.
The SSM agent is installed on all AWS EC2 instances by default, but verifying the agent’s status is essential.
sudo systemctl status snap.amazon-ssm-agent.amazon-ssm-agent.service
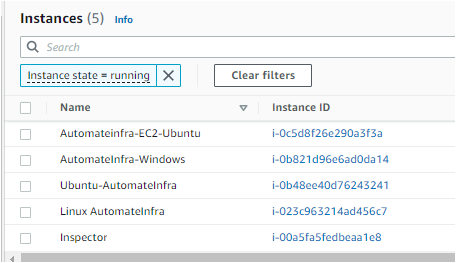
3. Navigate to your Amazon EC2 dashboard and count the number of EC2 instances in your AWS account.
As you can see below, there are five instances currently running in the AWS account in the us-east-01 region.
4. Now, navigate to the AWS Inspector Dashboard, where you’ll notice the Environment coverage section. Environment coverage provides the count of total resources scanned by the Amazon Inspector, such as several AWS accounts, AWS EC2 instances, and ECR repositories.
You can continuously scan your environment or AWS resources, and later AWS inspector publishes the findings of all issues and vulnerabilities to Amazon EventBridge.
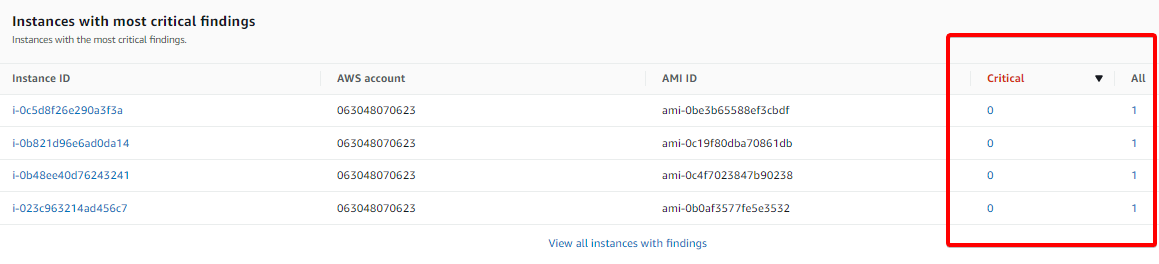
In the screenshot below, you can see five instances that the AWS Inspector scanned.
You can also see the Critical findings, which provide the essential vulnerabilities in your environment and a total count of all findings in your environment.
AWS inspector provides a well-structured Dashboard that provides a high level of findings across environments.
Below, the critical findings on each instance are zero (0), but the AWS Inspector showed one (1) in the All column, which signifies a High-Priority finding.
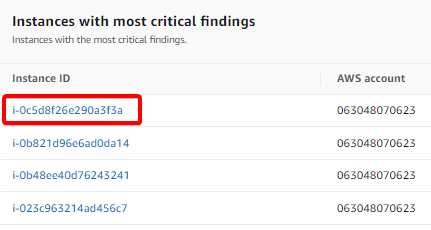
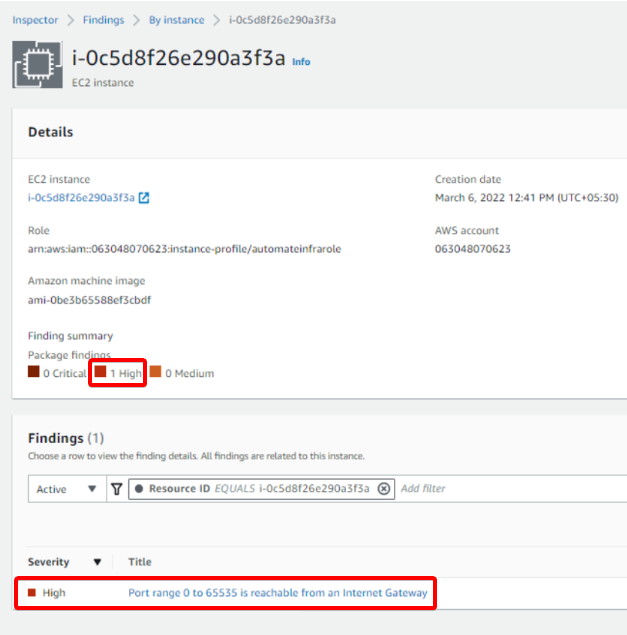
5. Click on any of the instances to access its critical findings.
Below, you can see 1 High priority finding. This high priority finding shows the title saying Port range 0 to 65535 is reachable from an Internet Gateway. This finding warns that it’s a risk for an infrastructure to open many ports.
6. Finally, click on High under the Severity table shown below to see more details on the findings, such as Network, which can cause vulnerabilities or attackers attacking the system.
As you can see below, the Open Network Paths suggest that the network causing security concerns is from Internet Gateway > Network ACL > Security Group > Network Interface > Instance in the AWS Cloud (red box).
You’ll also see that AWS Inspector provides remediation (green box) so that you can act upon it.

Running Scans on AWS ECR Repository
You previously scanned your AWS EC2 instances and went through critical findings based on priority. But this time, you’ll scan container images stored in Amazon Elastic Container Registry (ECR) for software vulnerabilities.
1. On the AWS Management Console, search for ecr, and select the Elastic Container Registry menu item shown below.

2. Next, click on the Get Started (top-right) button to create an ECR repository.

3. Specify the details of the new repository, such as Visibility settings and Repository name, and click on the Save button (bottom) to save the new repository. You can choose the repository name as you like, but this tutorial’s choice is ata-learning-ecr.
After saving the repository, your browser redirects to the Amazon Elastic Container Registry page (step four)

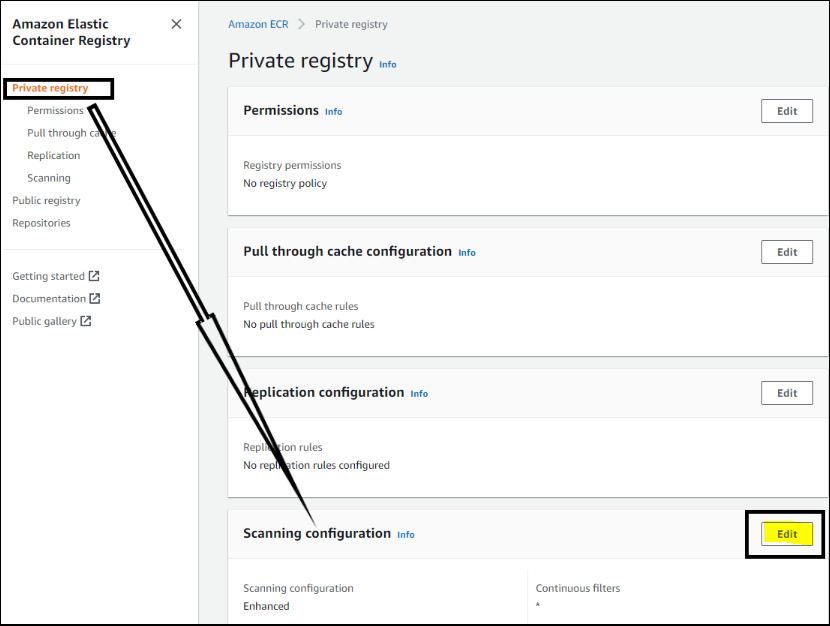
4. Now, navigate to the Private registry page (left panel), and click on Edit under the Scanning configuration section to edit the registry settings.
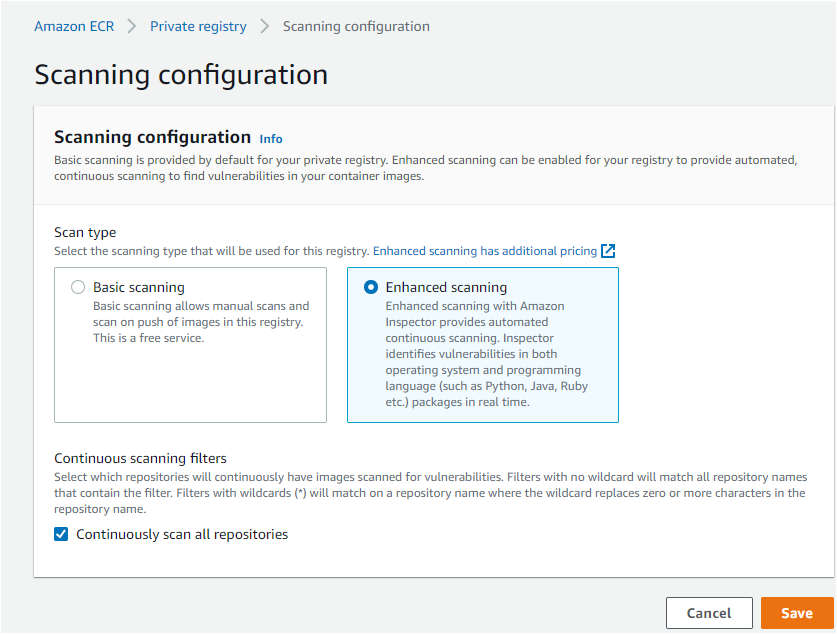
5. Edit the Scanning configuration with the following:
- Select the Enhanced scanning option. Enhanced scanning allows AWS Inspector to scan all the AWS ECR repositories automatically. This option gives you a choice between continuous scanning or on-push scanning at the repository level.
- Check the Continuously scan of all repositories box. Continuous scanning includes on-push scans and automated rescans.
- Click on the Save button to save the configuration.
On-push scanning scans only work when you push an image.
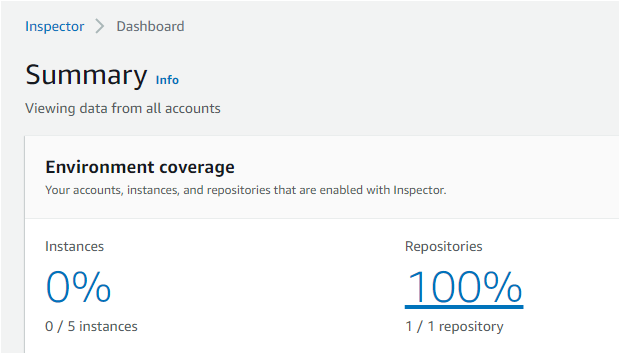
6. Navigate back to the AWS Inspector main page, and you’ll notice the Summary page shows one repository in the Environment coverage you just created. The below summary indicates that AWS Inspector detected/scanned the ECR repository.
Click on 100% under repositories, and your browser redirects to the Account management page, where you can view the scan details.
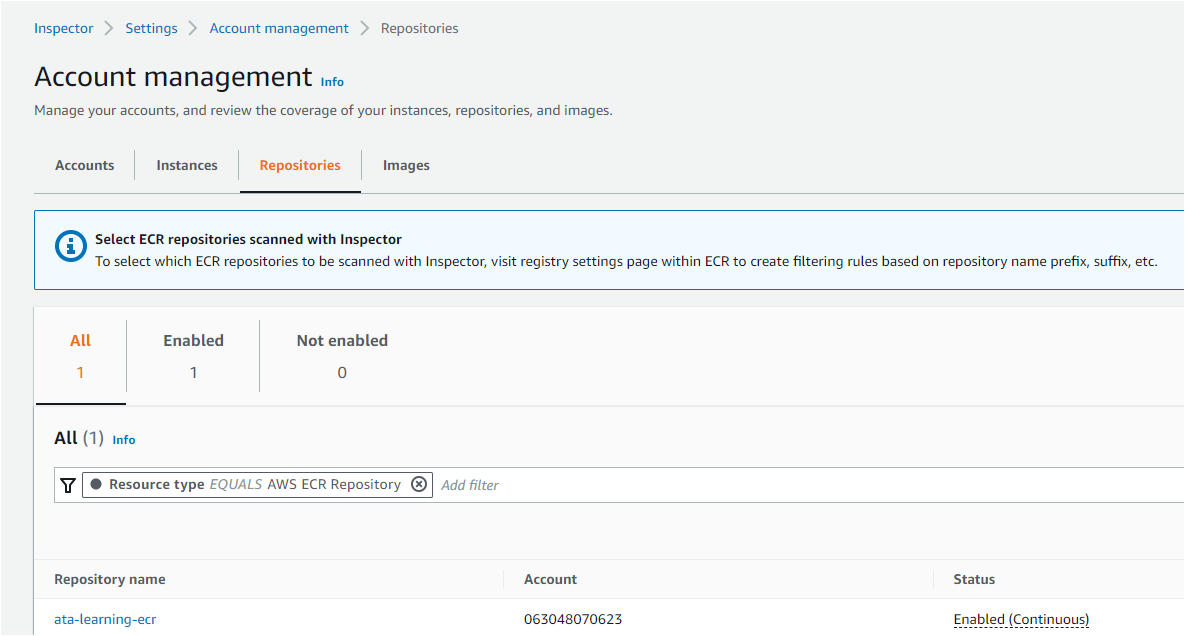
7. Finally, click on the Repositories tab on the Account management page details to view the scan details.
As you can see below, there are no issues or findings made so far for this repository by AWS Inspector, indicating there are no security risks in the ECR repository you created.
Conclusion
In this tutorial, you’ve learned how to discover security holes in your AWS EC2 instances and AWS ECR within AWS Cloud using AWS Inspector. Building a secure cloud infrastructure is crucial, and AWS Inspector is a service that one must use to scan for vulnerabilities.
At this point, you’re now ready to use this knowledge with other AWS services and secure your powerful services with Amazon Inspector.
AWS Inspector integrates with various AWS services such as AWS CloudWatch, and CloudTrail.


