


Have you been searching for a reliable and secure container image registry service to host your Docker images? If yes, then Amazon Elastic Container Registry (AWS ECR) is at your service.
AWS ECR is a fully managed registry service that supports private and public repositories. And in this tutorial, you will learn how to use the Amazon ECR to host Docker images via the AWS CLI and GitHub Actions.
Ready? Stay tuned and start deploying Docker images privately with AWS ECR!
Prerequisites
This tutorial will be a hands-on demonstration. To follow along, be sure you have the following:
- A Linux machine – This tutorial uses Ubuntu 20.04.3 LTS.
- Docker and AWS CLI are locally installed on your machine.
- An AWS account.
Creating and Configuring an AWS ECR Repository
Container images ideally are stored in repositories. Before deploying and hosting Docker images on AWS ECR, you’ll need first to create and configure a repository to store your Docker image.
1. Open your favorite web browser, navigate to AWS ECR, and log in with your AWS account.
2. Once logged in, click Get Started to initialize creating a repository.

3. Next, provide a unique repository name, but this tutorial uses a repository name called node-app.
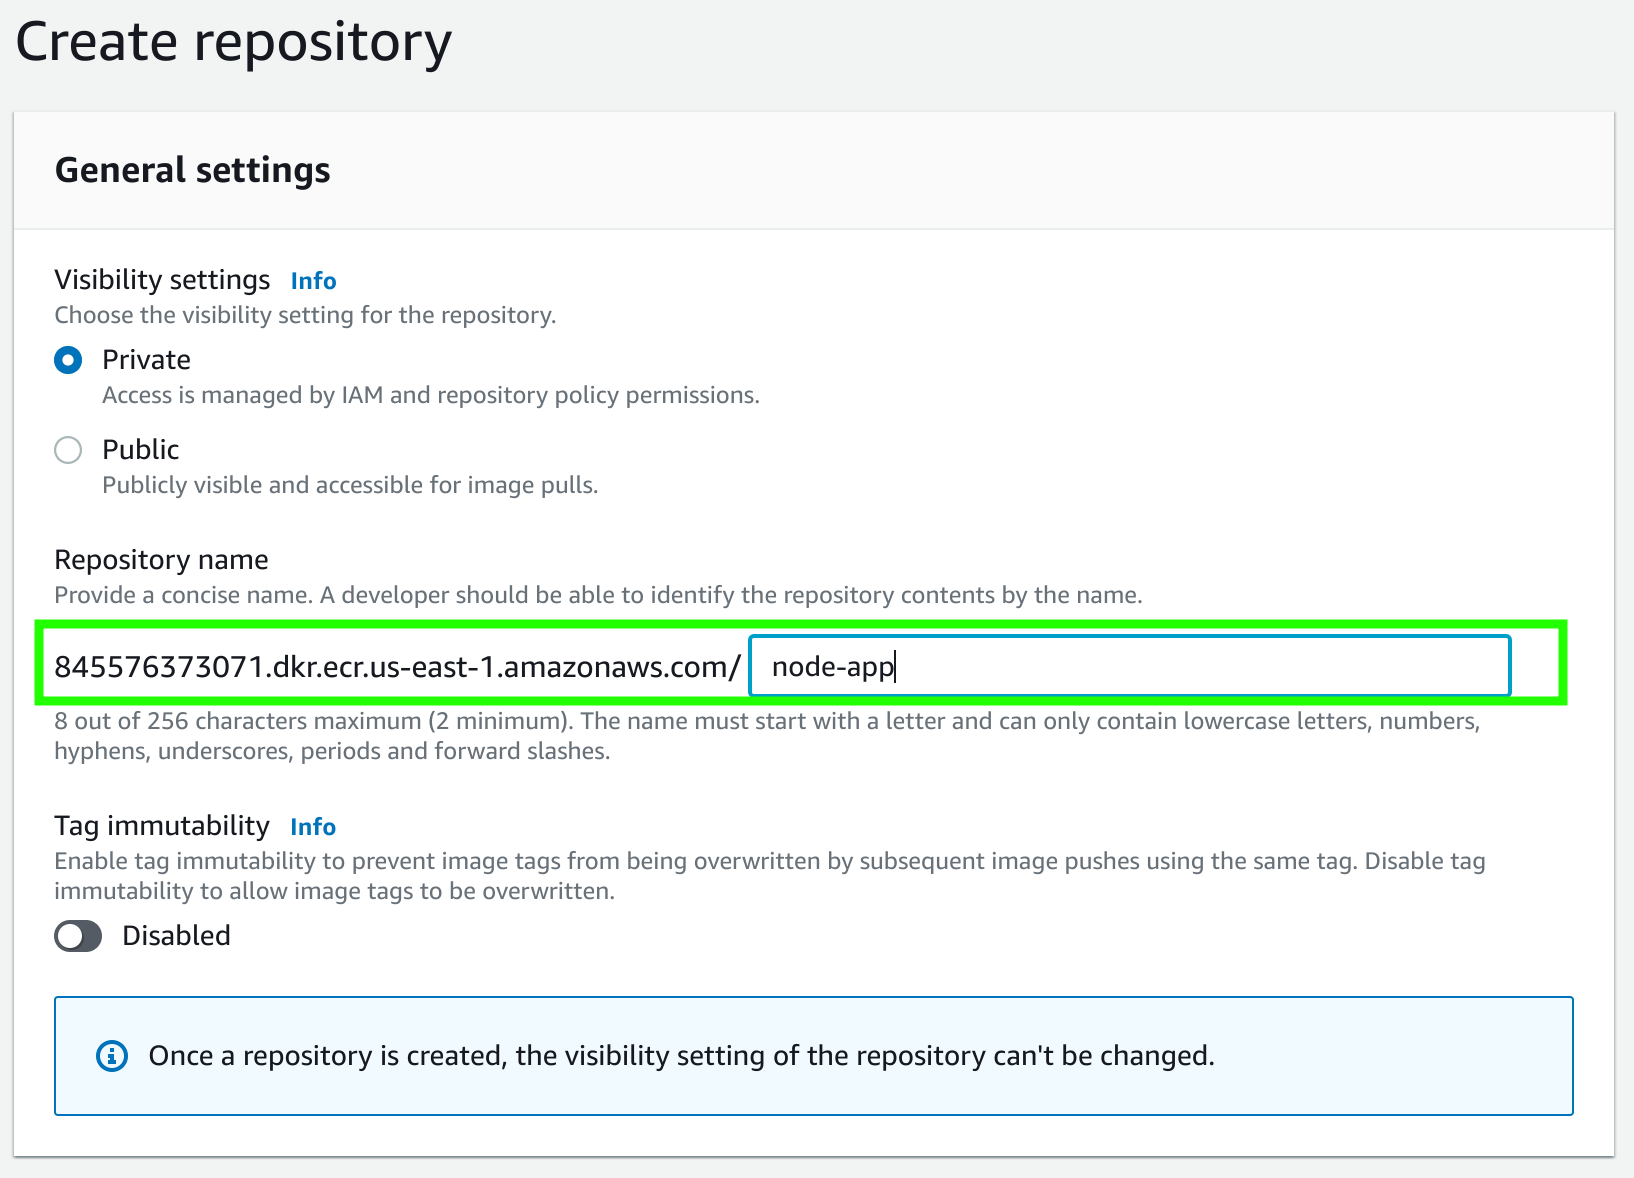
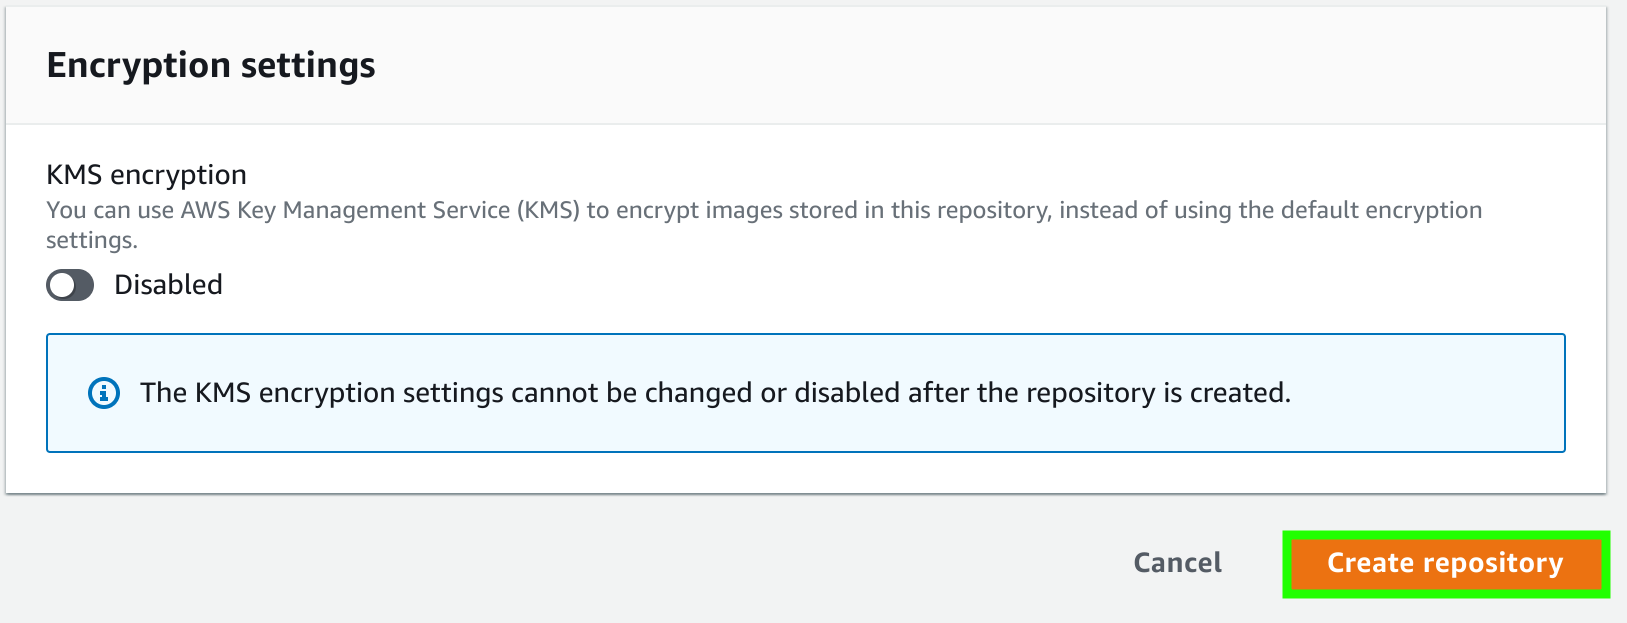
4. Leave other default settings, scroll down to the bottom, and click on the Create repository button to create this repository.
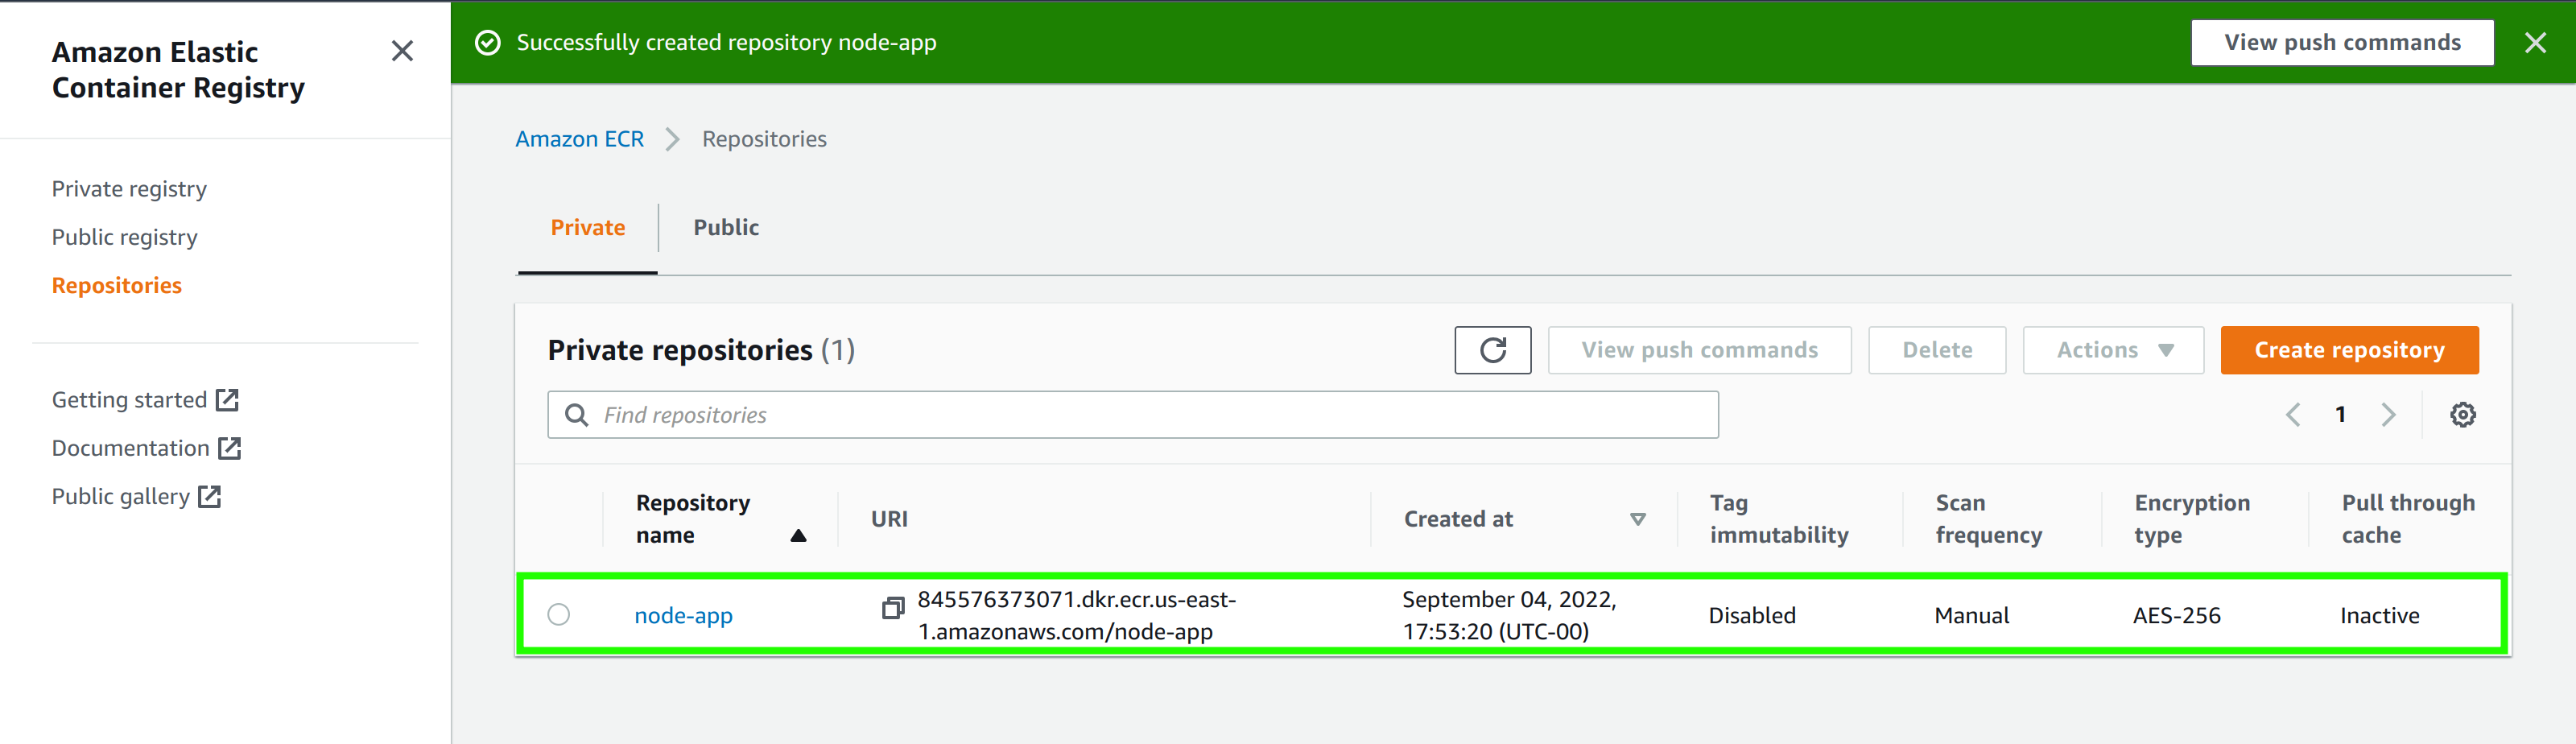
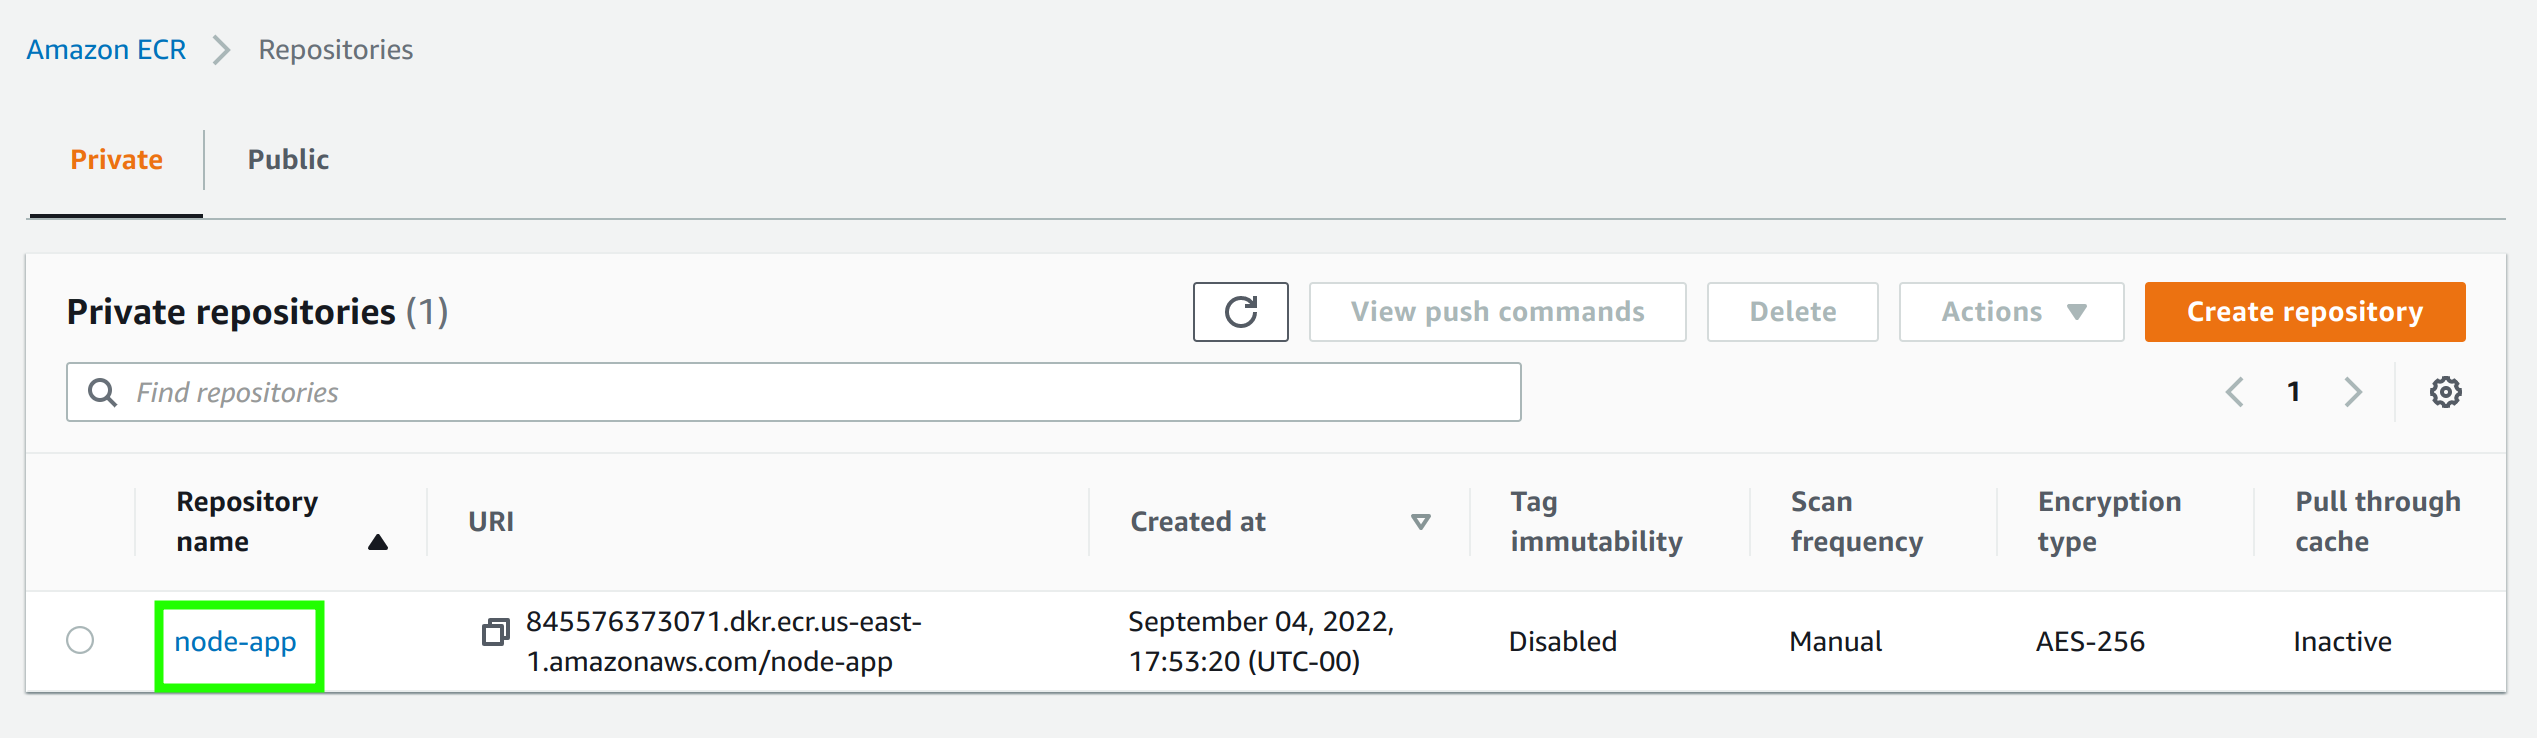
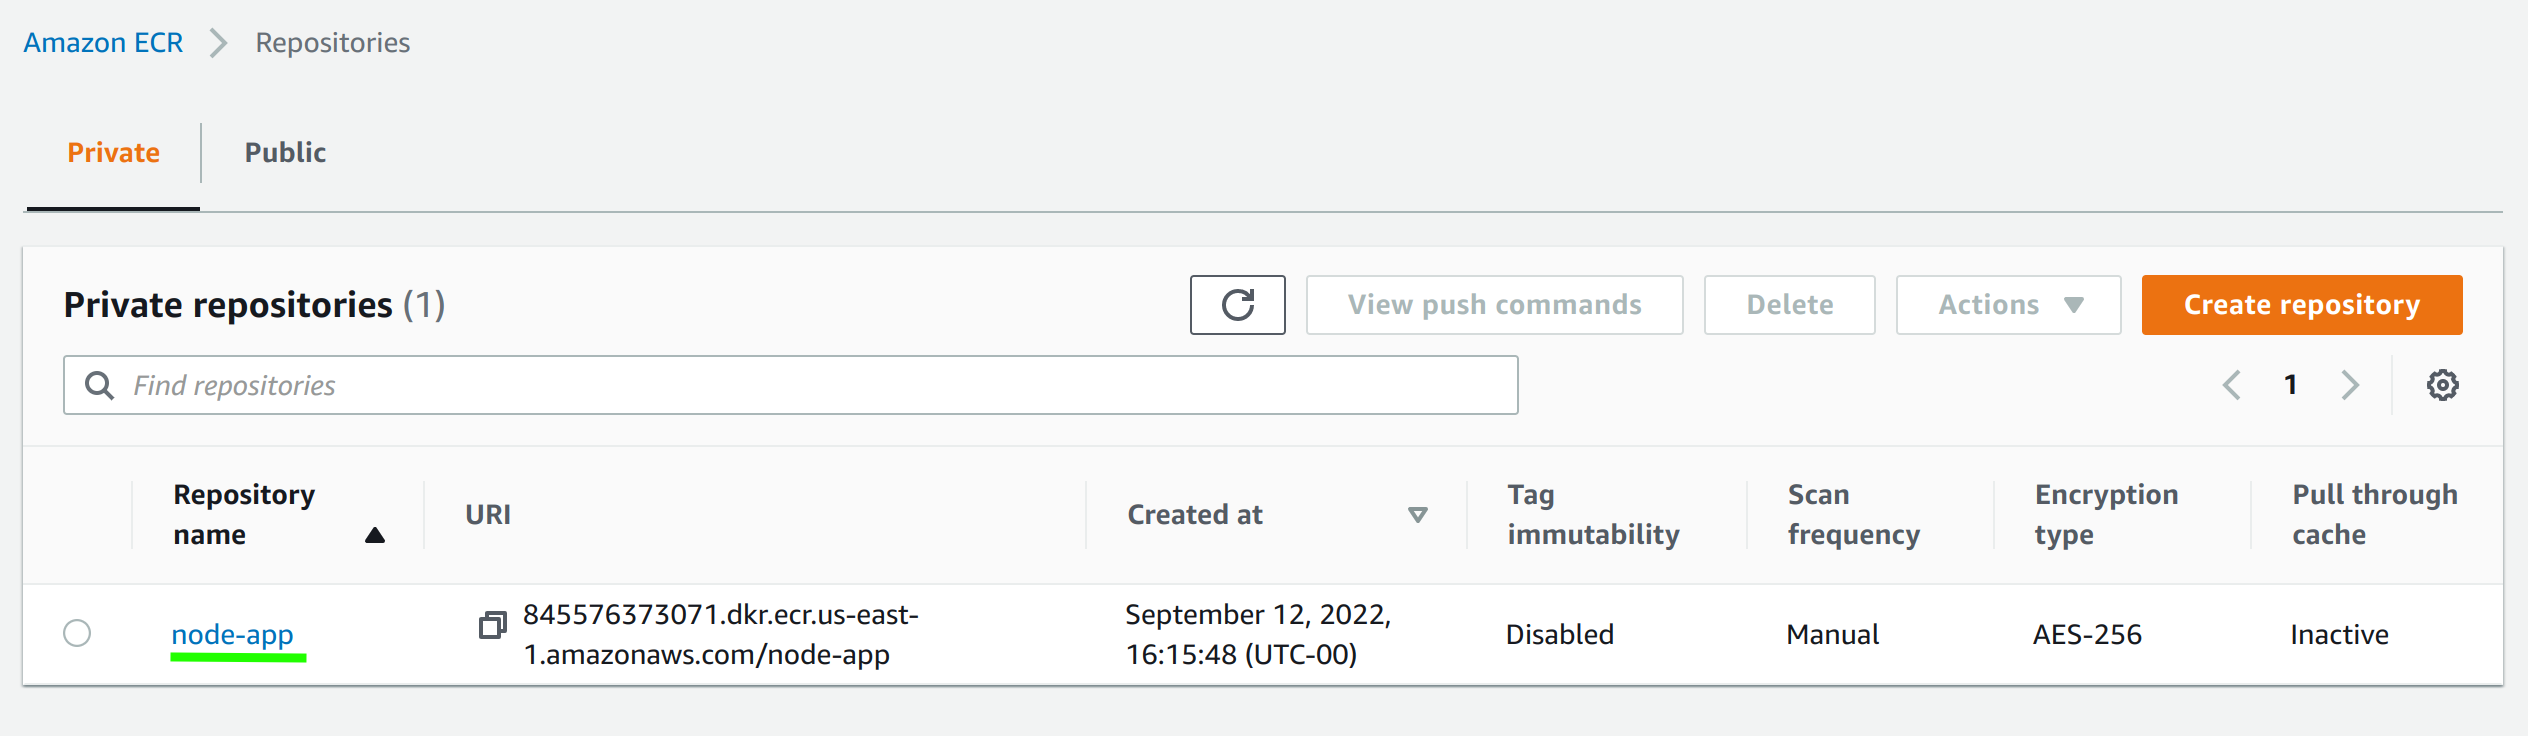
After creating the repository, you will see your newly created repository listed, as shown below.
Creating an IAM User and Granting Access to ECR
You have successfully created a repository on AWS ECR, but how do you manage your repository? You will need a dedicated IAM user granted with required access to perform tasks on your ECR repository.
To create an IAM user to interact with your ECR repository, follow these steps:
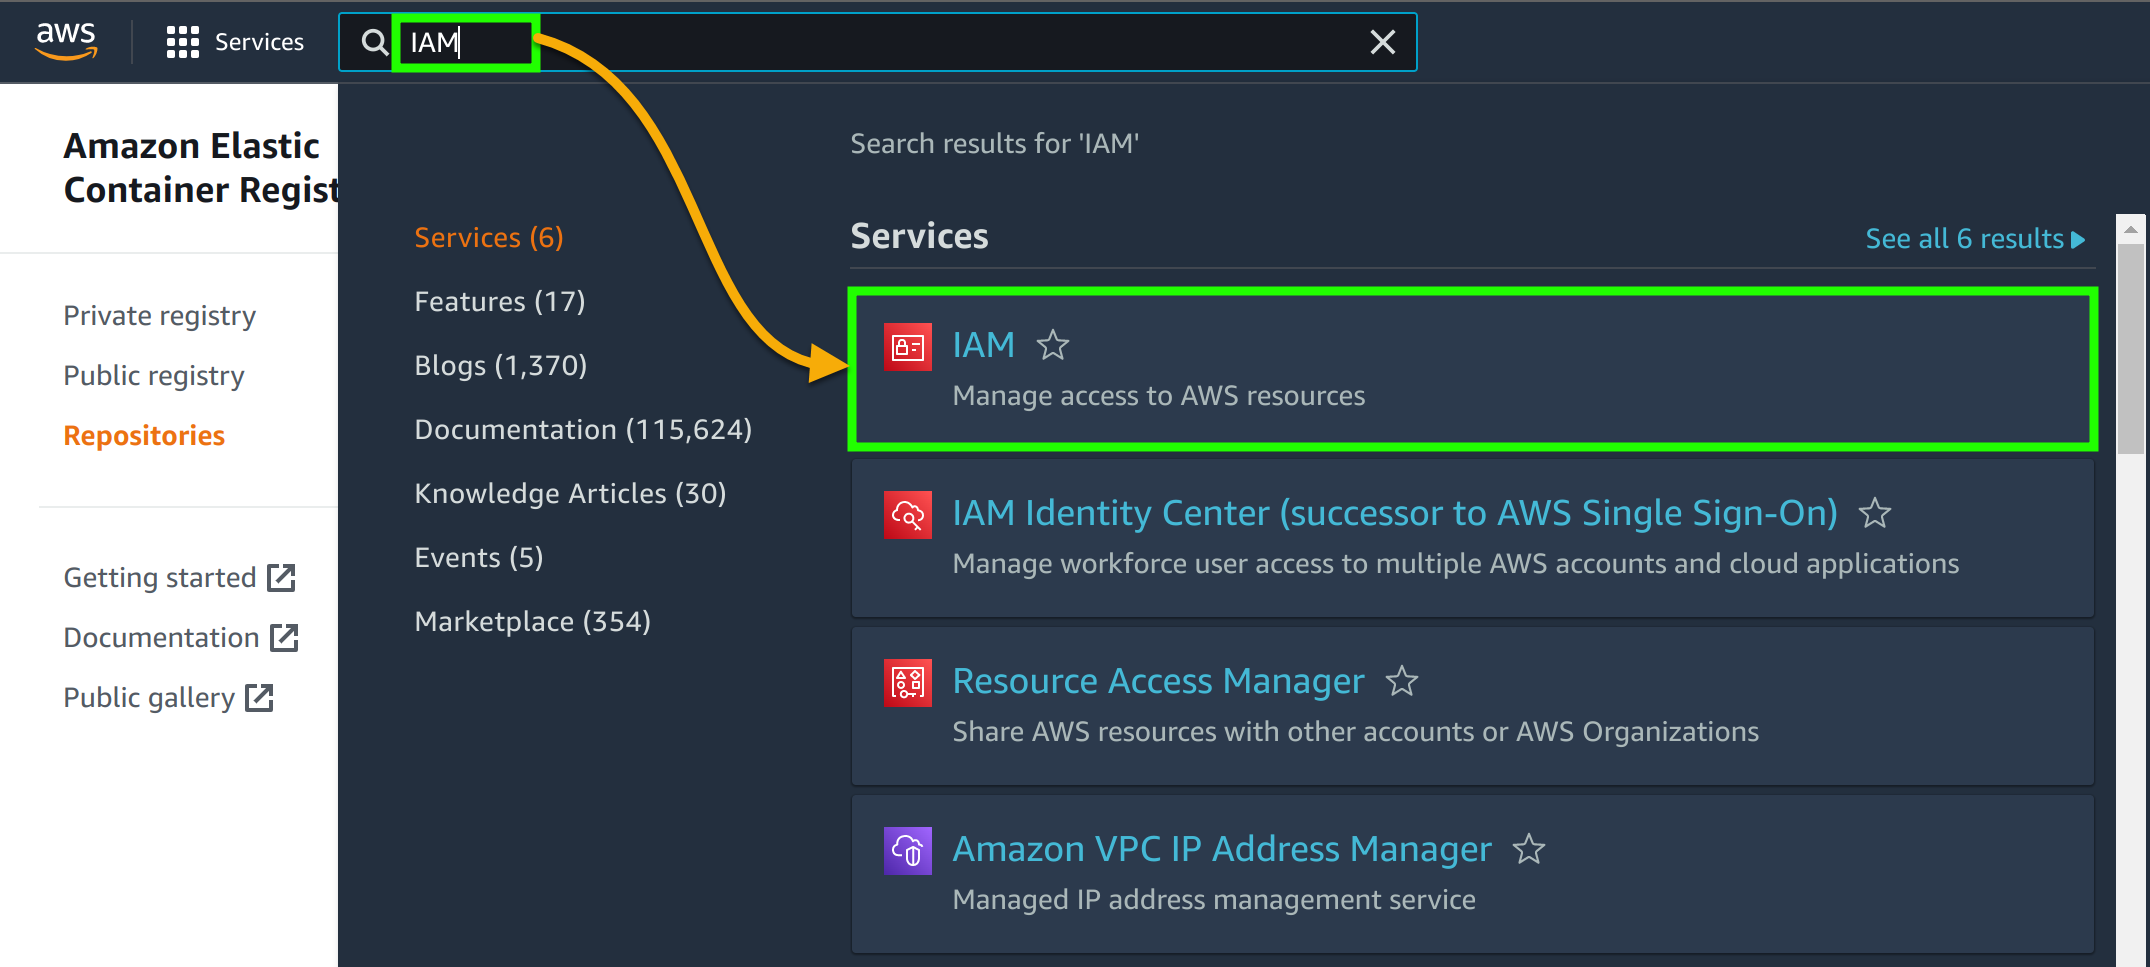
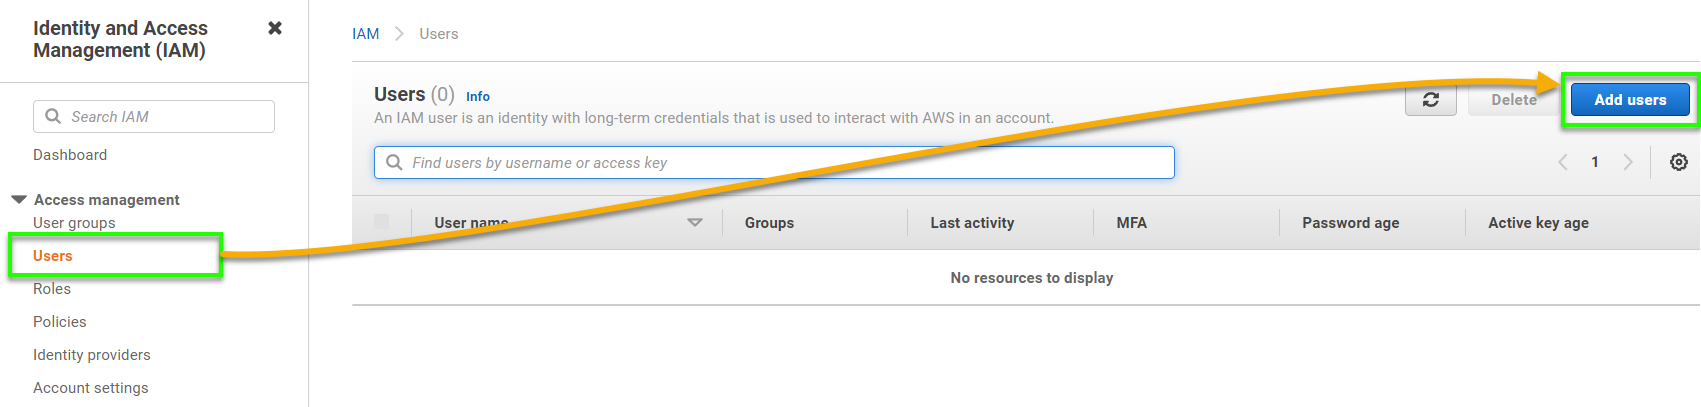
1. On the AWS Management Console, search for IAM, and select the first option, as shown below, to access the IAM dashboard.
2. Next, select Users (left panel) on your IAM dashboard, and click Add users (top-right) to initiate adding a new IAM user.
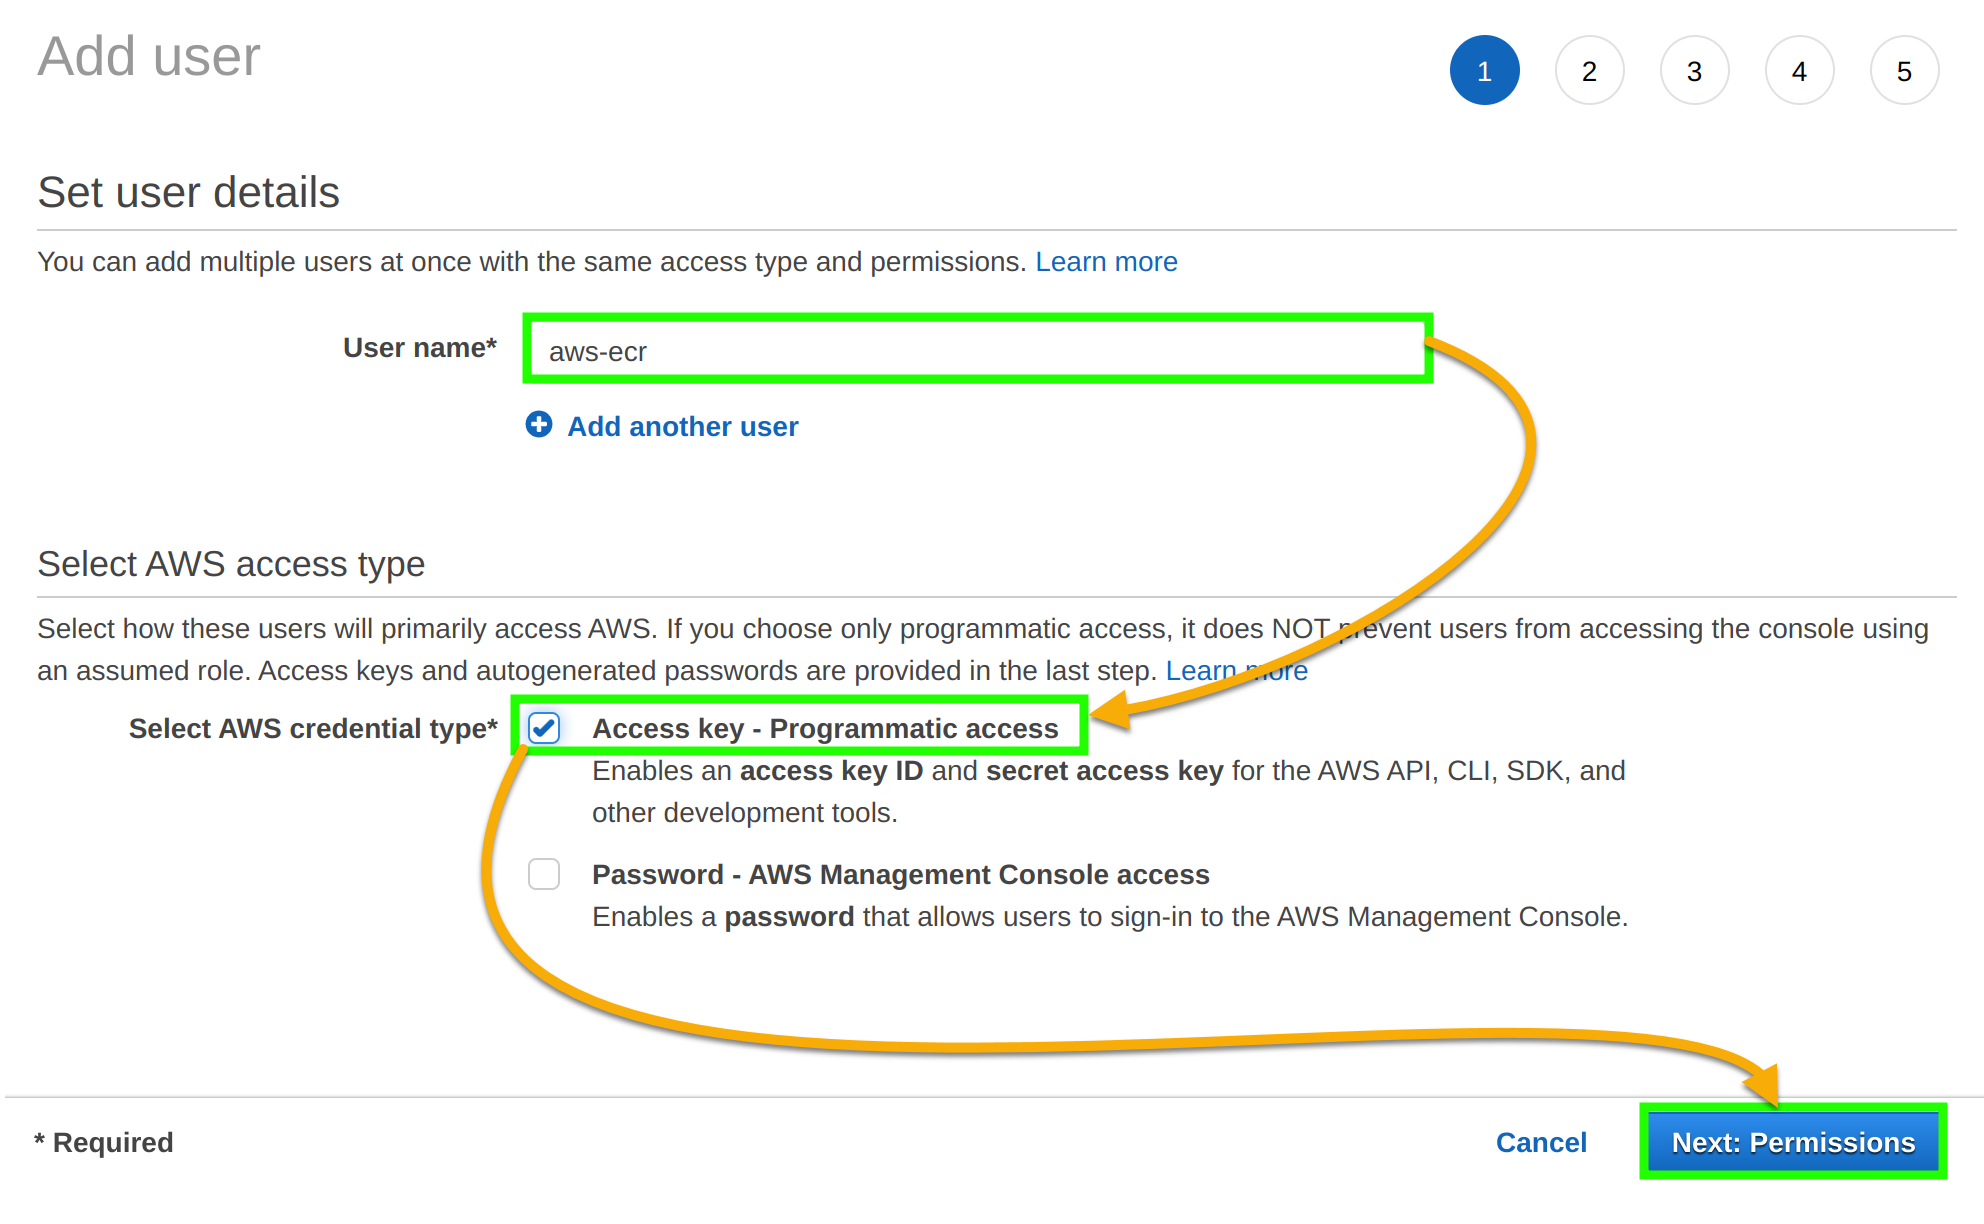
3. Set the user details and AWS access type with the following:
- Provide a unique User name, but this tutorial’s choice is aws-ecr.
- Choose the Access key – Programmatic access option, so you will only need an access key ID and a secret access key to access your AWS ECR repository via the AWS CLI.
- Click Next: Permissions to proceed setting permissions for the IAM user.
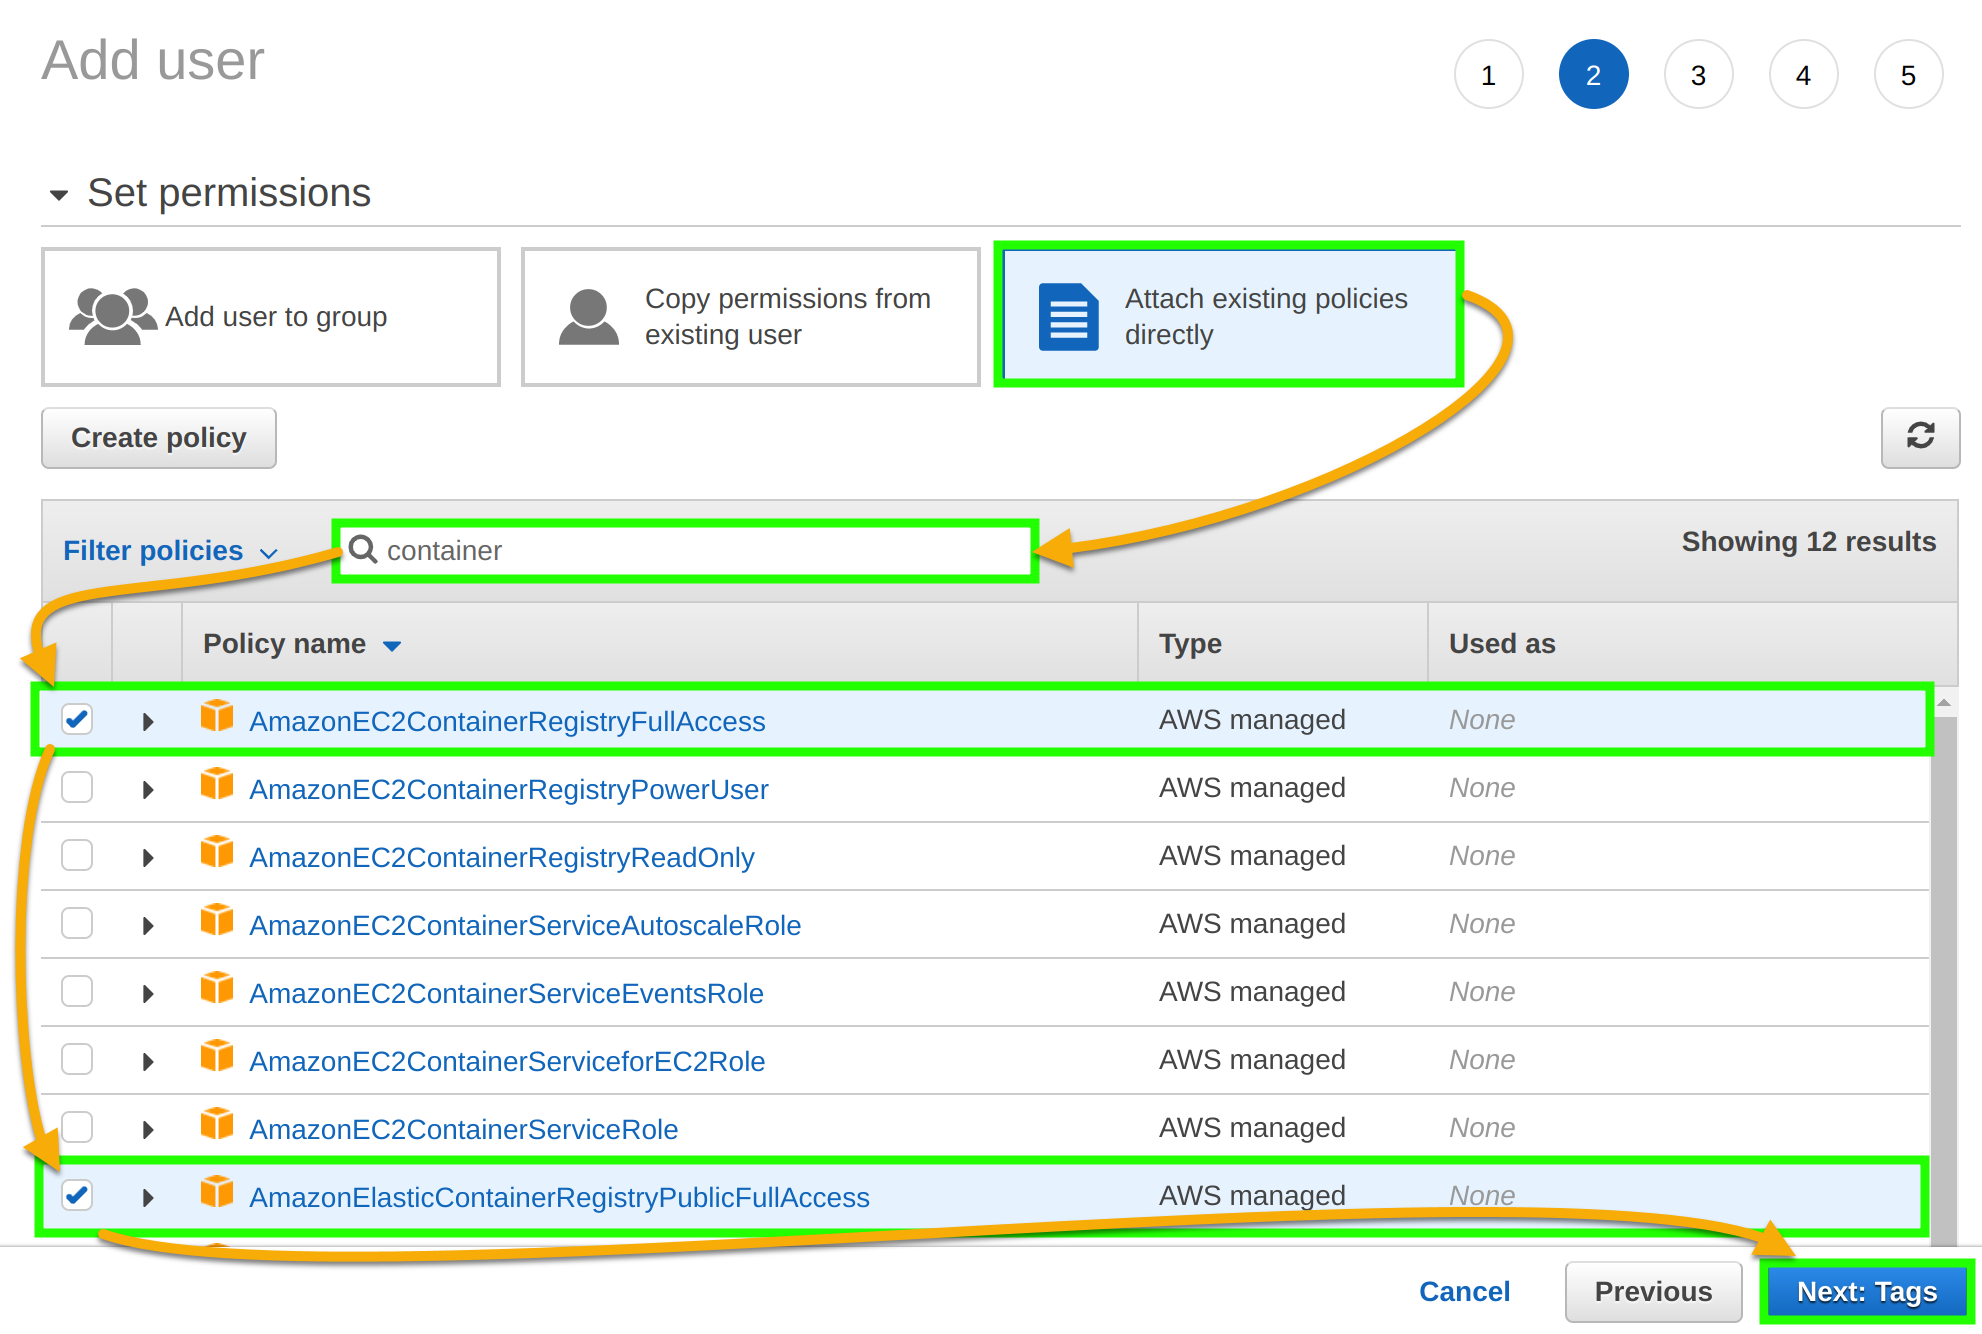
4. Now, add permission policies to the new IAM user with the following:
- Select the Attach existing policies directly **option to search for existing policies.
- Search container to filter policies, and select AmazonEC2ContainerRegistryFullAccess and AmazonElasticContainerRegistryPublicFullAccess policies.
These policies grant AWS ECR full access to the new IAM user since you will be working on AWS ECR.
- After selecting policies, click Next: Tags to continue.
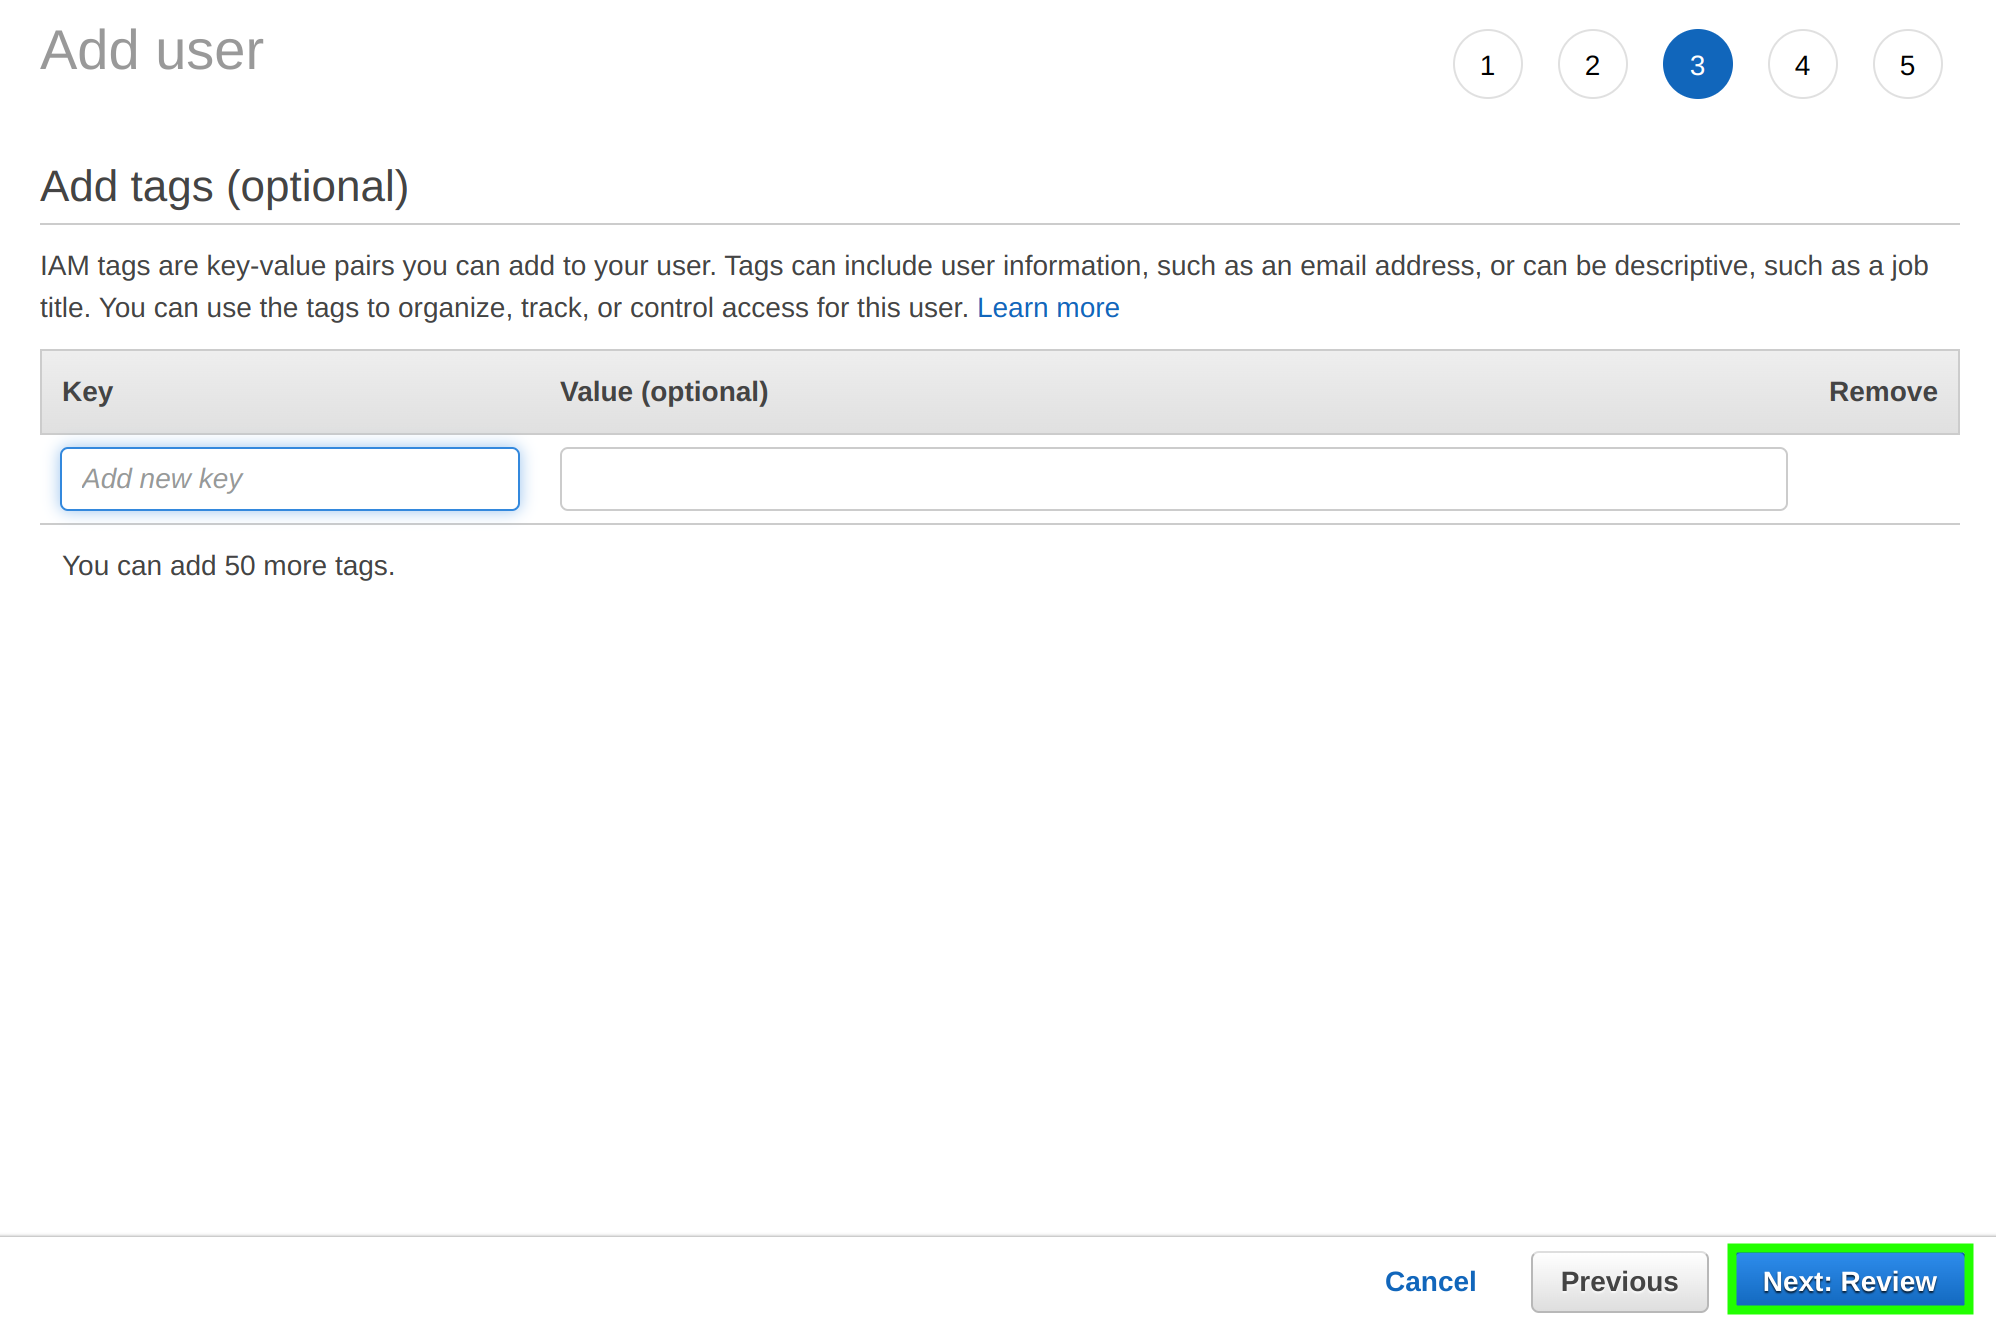
5. Skip adding tags, and click Next: Review to continue.
6. Next, review the current user details, and click Create user (bottom-right) to create the new IAM user.
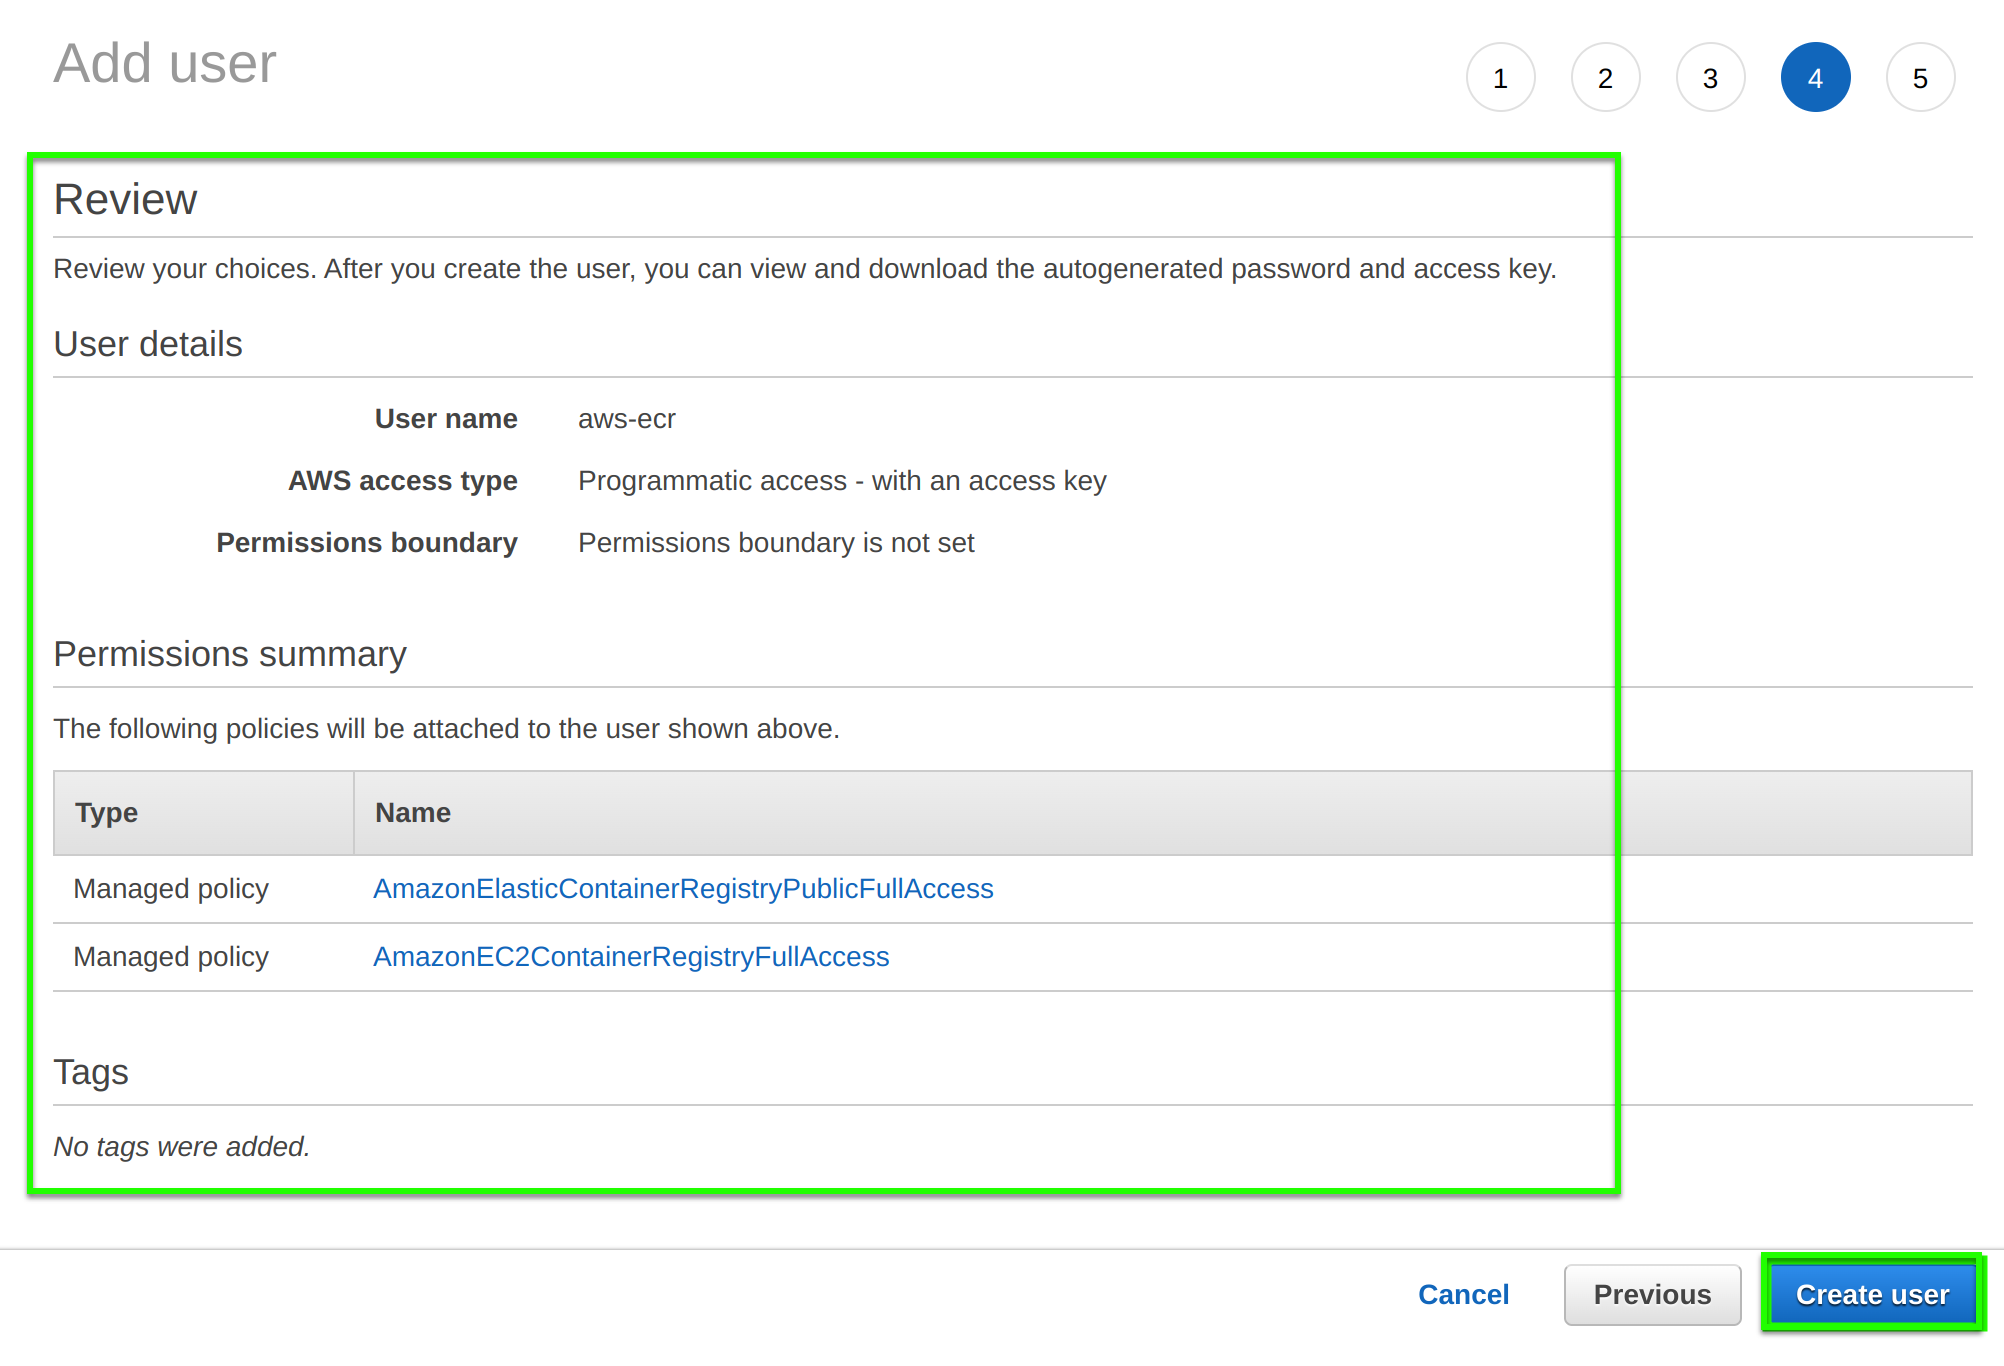
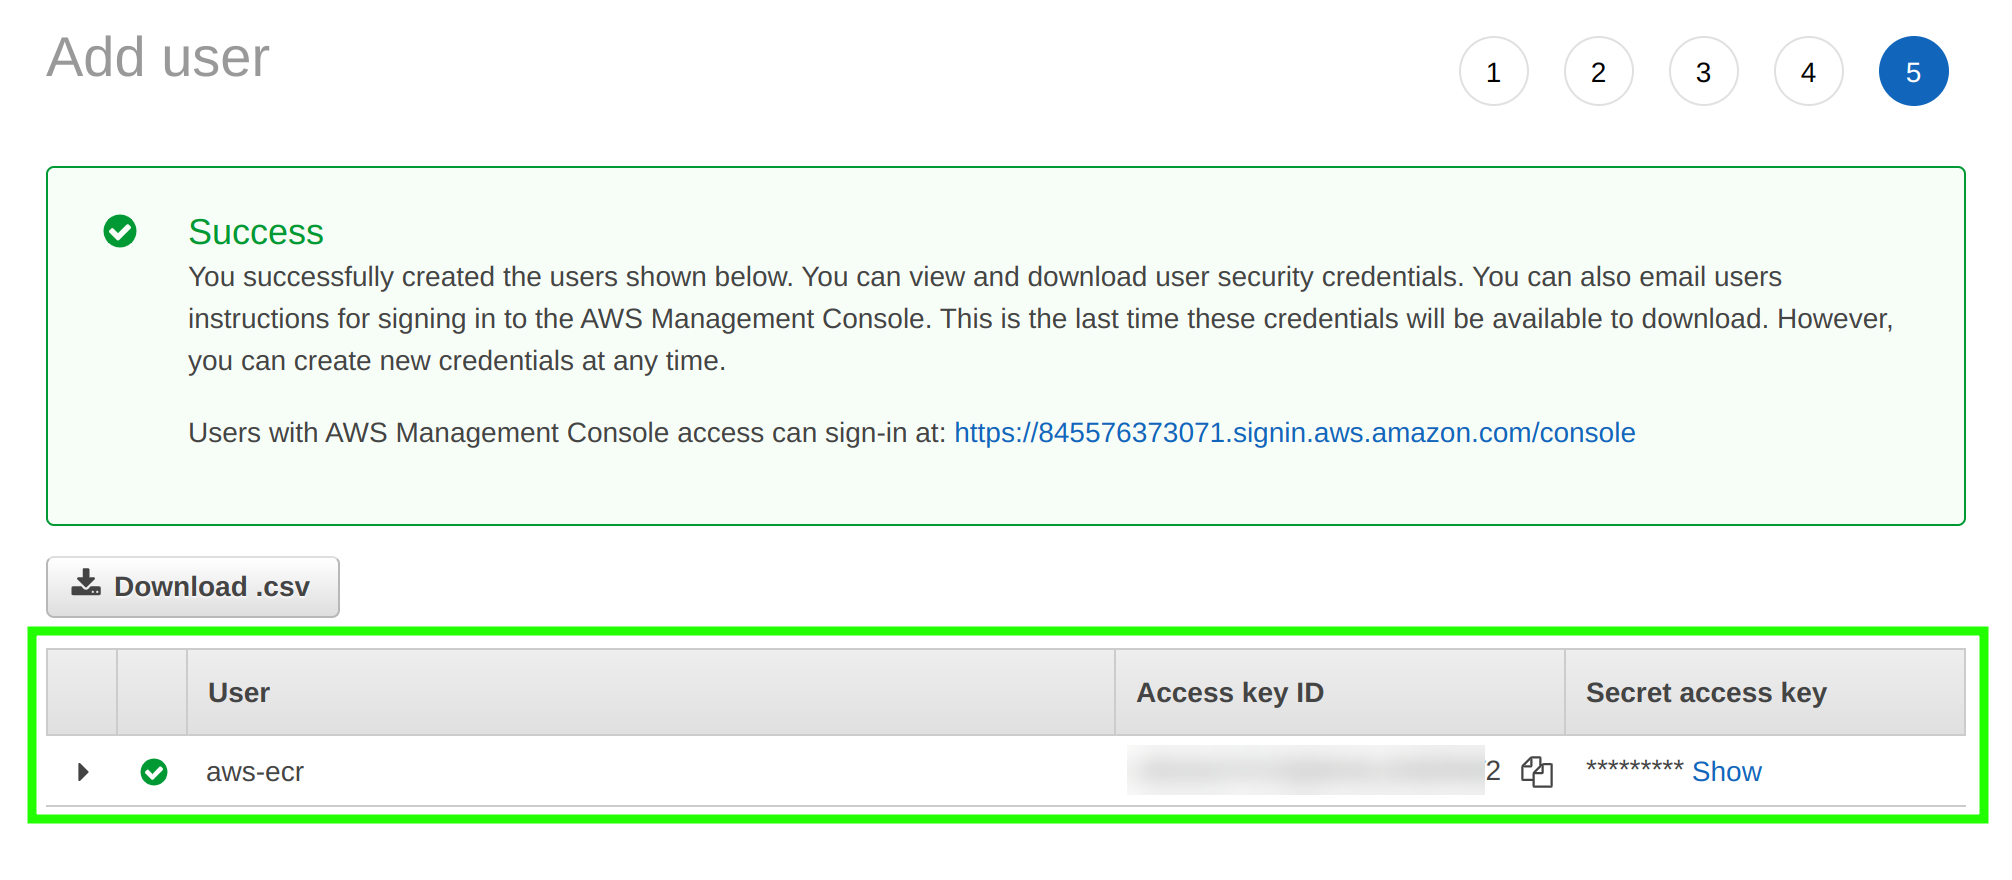
You will see the newly-created IAM user, as shown below if created successfully.
Note down the Access key ID, and Secret access key as these are the credentials you will need to interact with your ECR repository.
7. Finally, open your terminal, and run the aws configure command below to configure your AWS CLI to work with your IAM user.
aws configureConfigure AWS CLI with the following when prompted:
- Provide the AWS Access Key ID and AWS Secret Access Key you noted in step six.
- Set the Default region name – This tutorial uses us-east-1.
- Set the Default output format – This tutorial’s choice is json.
At this point, your dedicated IAM user can now connect and perform tasks on AWS ECR.

Pushing Docker Images to AWS ECR
After configuring your AWS CLI to work with your new IAM user, you are ready to perform tasks on your repository on AWS ECR. Specifically, pushing Docker images to your repository.
1. Navigate to the Repositories page on AWS ECR, and click on your repository’s name (node-app) to access your repository.
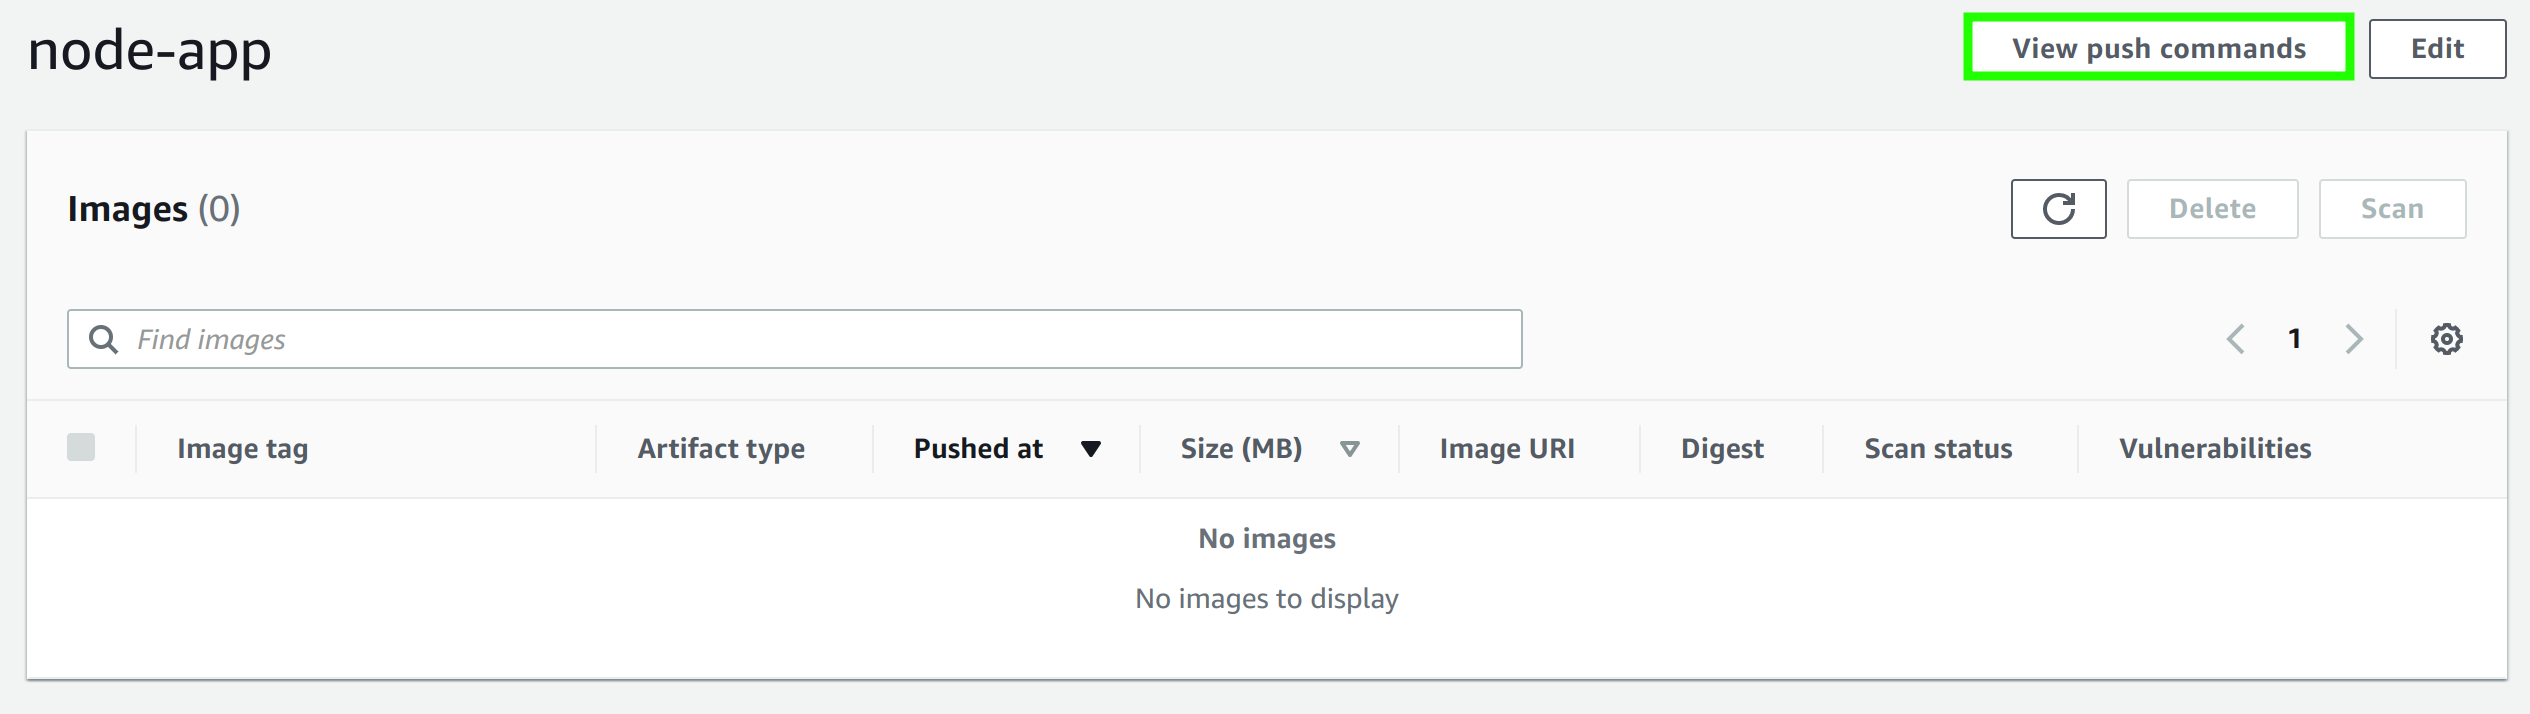
2. Next, click View push commands (top-right) to view the commands you will need to push your Docker image to your repository.
3. On the pop-up Push commands window, copy the first command (aws ecr get-login-password).
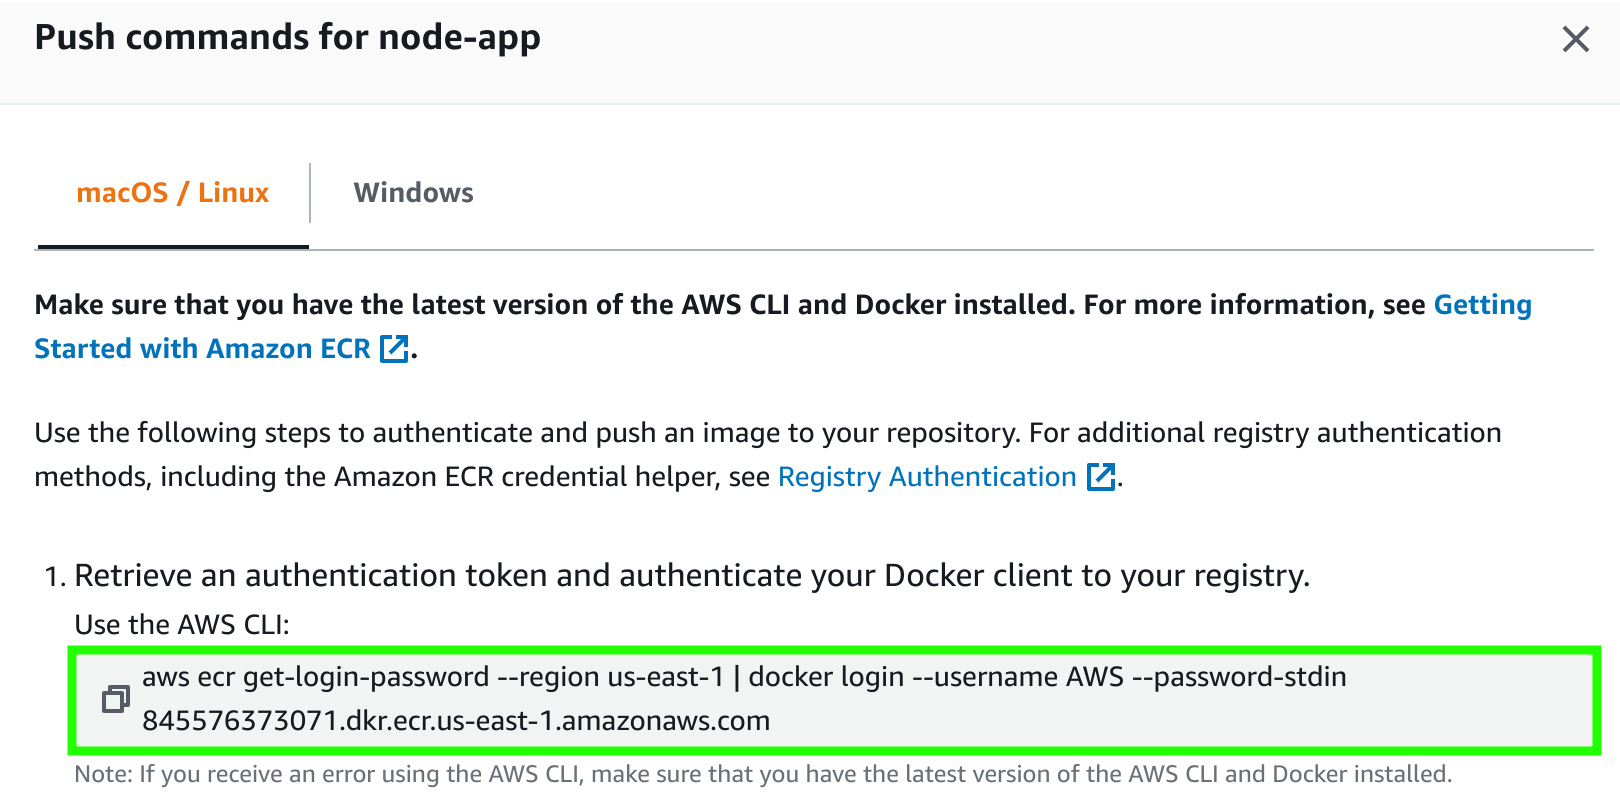
4. Now, paste the command in your terminal and hit Enter. This command retrieves an authentication token and authenticates your Docker client to your AWS ECR.
If successful, you will see the following output with a message that says Login Succeeded.

5. Run the following commands to change your working directory (cd) to your project directory and build (docker build) a Docker image (node-app).
cd nodeapp
docker build -t node-app .
If the build is successful, you will see a similar output to the one below.

6. Copy the third push command (docker tag) in the Push commands window, and run the command in your terminal to add the latest tag to your image. Doing so allows you to push the image to your repository.

7. Finally, copy the fourth command (docker push), and run it on your terminal to push your Docker image to your repository on ECR.

You will see an output similar to the one below if you have pushed your Docker image to your repository successfully.

Registering Docker Images on AWS ECR with GitHub Actions
You have just successfully configured resources and pushed Docker images to your repository on AWS ECR. As incredible as these all sounds, the process could be most times time-consuming and stressful, performing everything by yourself.
Is there a way to save yourself the hassle of manually configuring everything? Yes! By using a CI/CD pipeline. And what better platform to choose than GitHub Actions? GitHub Actions is a CI/CD platform that allows you to perform and automate your build, test, and deployment pipeline.
1. Create a directory called .github in your project directory and a sub-directory called workflows. The workflows directory will hold your configuration files.
2. Next, create a file called deploy-to-aws-ecr.yaml, populate the code below, and ensure you replace the following:
ACCESS_KEY_IDandSECRET_ACCESS_KEY– your access key ID and secret access key.
node-app - your repository name on ECR.
The following code monitors all push commits on the main branch of your GitHub repository and builds a Docker image using the latest Ubuntu (ubuntu-latest) version.
For GitHub Actions to work successfully, build and deploy your Docker image to your AWS ECR repository. You must have a Dockerfile in your project that GitHub Actions will use to build your Docker image.
name: Deployment From GitHub to AWS Elastic Container Registry

on:
  push:
    branches: [ main ]

jobs:
  build:
    name: Build Docker image
    runs-on: ubuntu-latest

    steps:
    - name: Checkout
      uses: actions/checkout@v2

    - name: Configure AWS credentials
      uses: aws-actions/configure-aws-credentials@v1
      with:
        aws-access-key-id: ACCESS_KEY_ID
        aws-secret-access-key: SECRET_ACCESS_KEY
        aws-region: us-east-1

    - name: Login to Amazon ECR Private
      id: login-ecr
      uses: aws-actions/amazon-ecr-login@v1

    - name: Build, tag, and push Docker image to Amazon ECR
      env:
        REGISTRY: ${{ steps.login-ecr.outputs.registry }}
        REPOSITORY: node-app
        IMAGE_TAG: latest
      run: |
        docker build -t $REGISTRY/$REPOSITORY:$IMAGE_TAG .
        docker push $REGISTRY/$REPOSITORY:$IMAGE_TAG
3. On your project root directory, run the following git commands to commit and push your code to your GitHub repository.
git add . # Adds changes to staging area
git commit -m "update" # Commits your changes
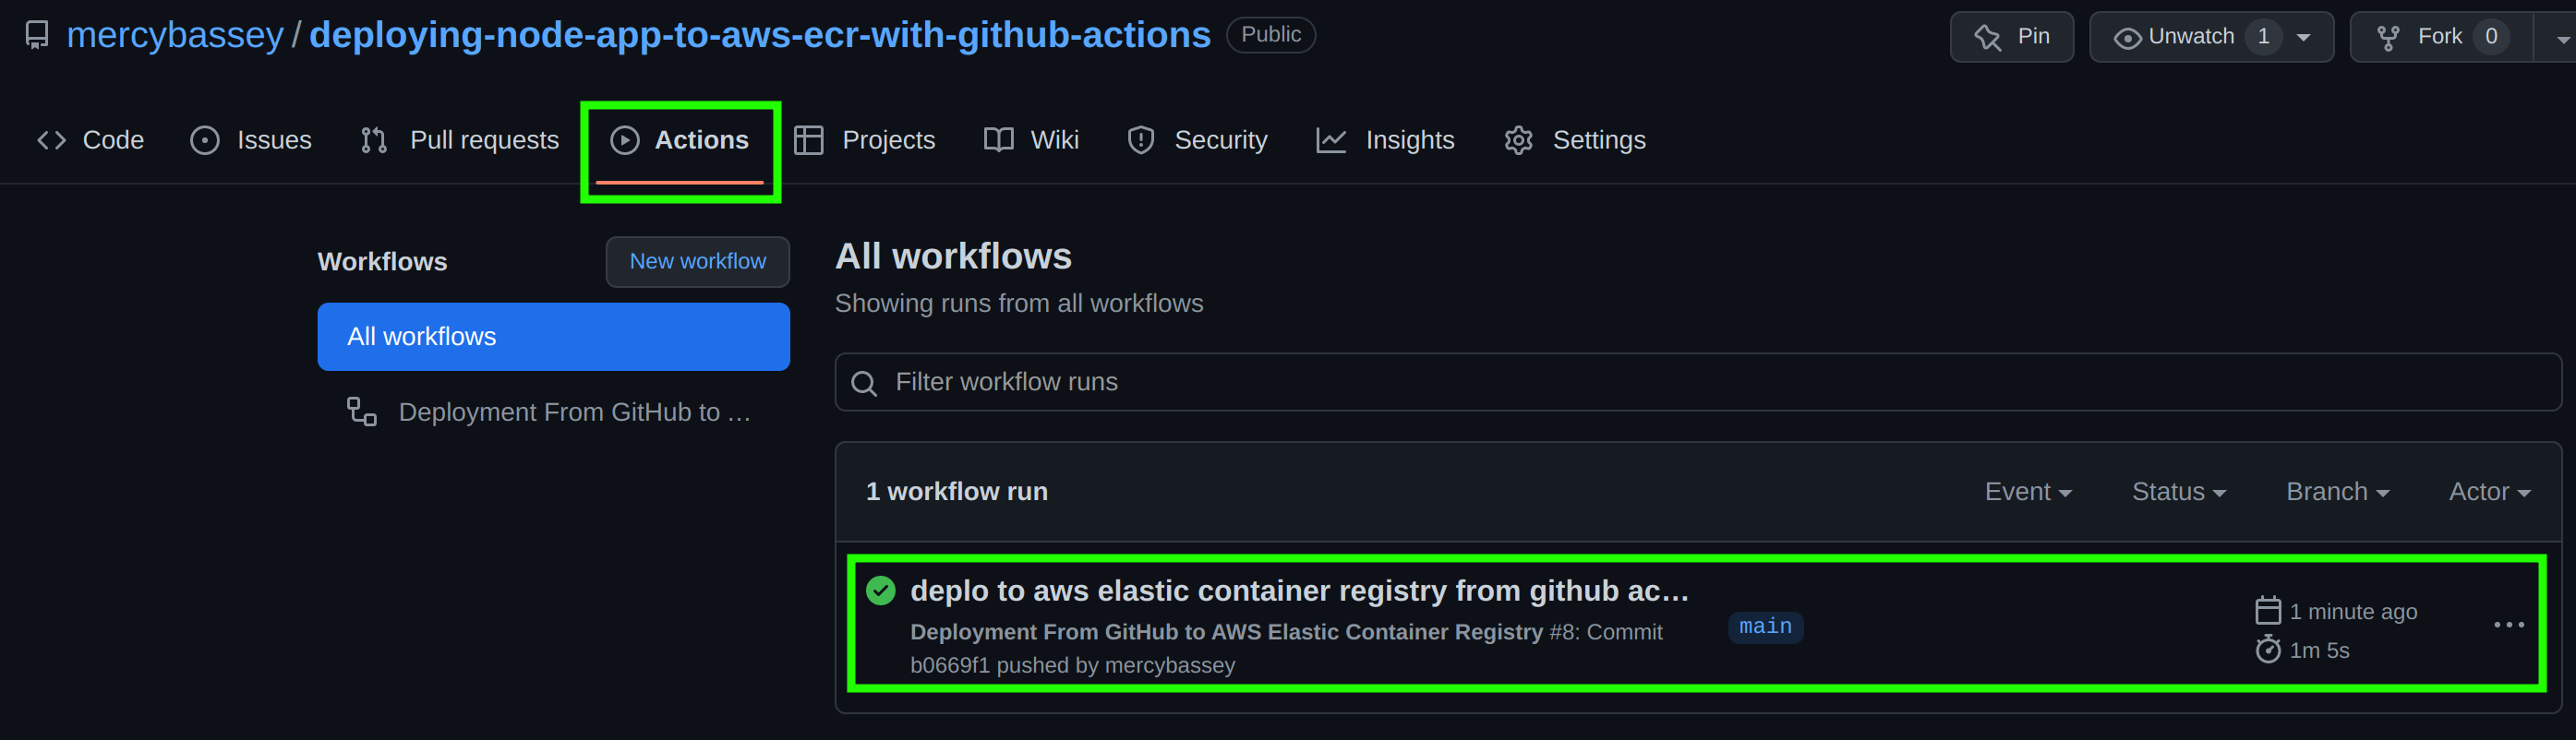
git push # Push code to GitHub4. Now, navigate your GitHub repository via your web browser, and click on the Actions tab to see all workflows.
The output below indicates GitHub Actions have successfully built and pushed a Docker image for your project to your repository on AWS ECR.
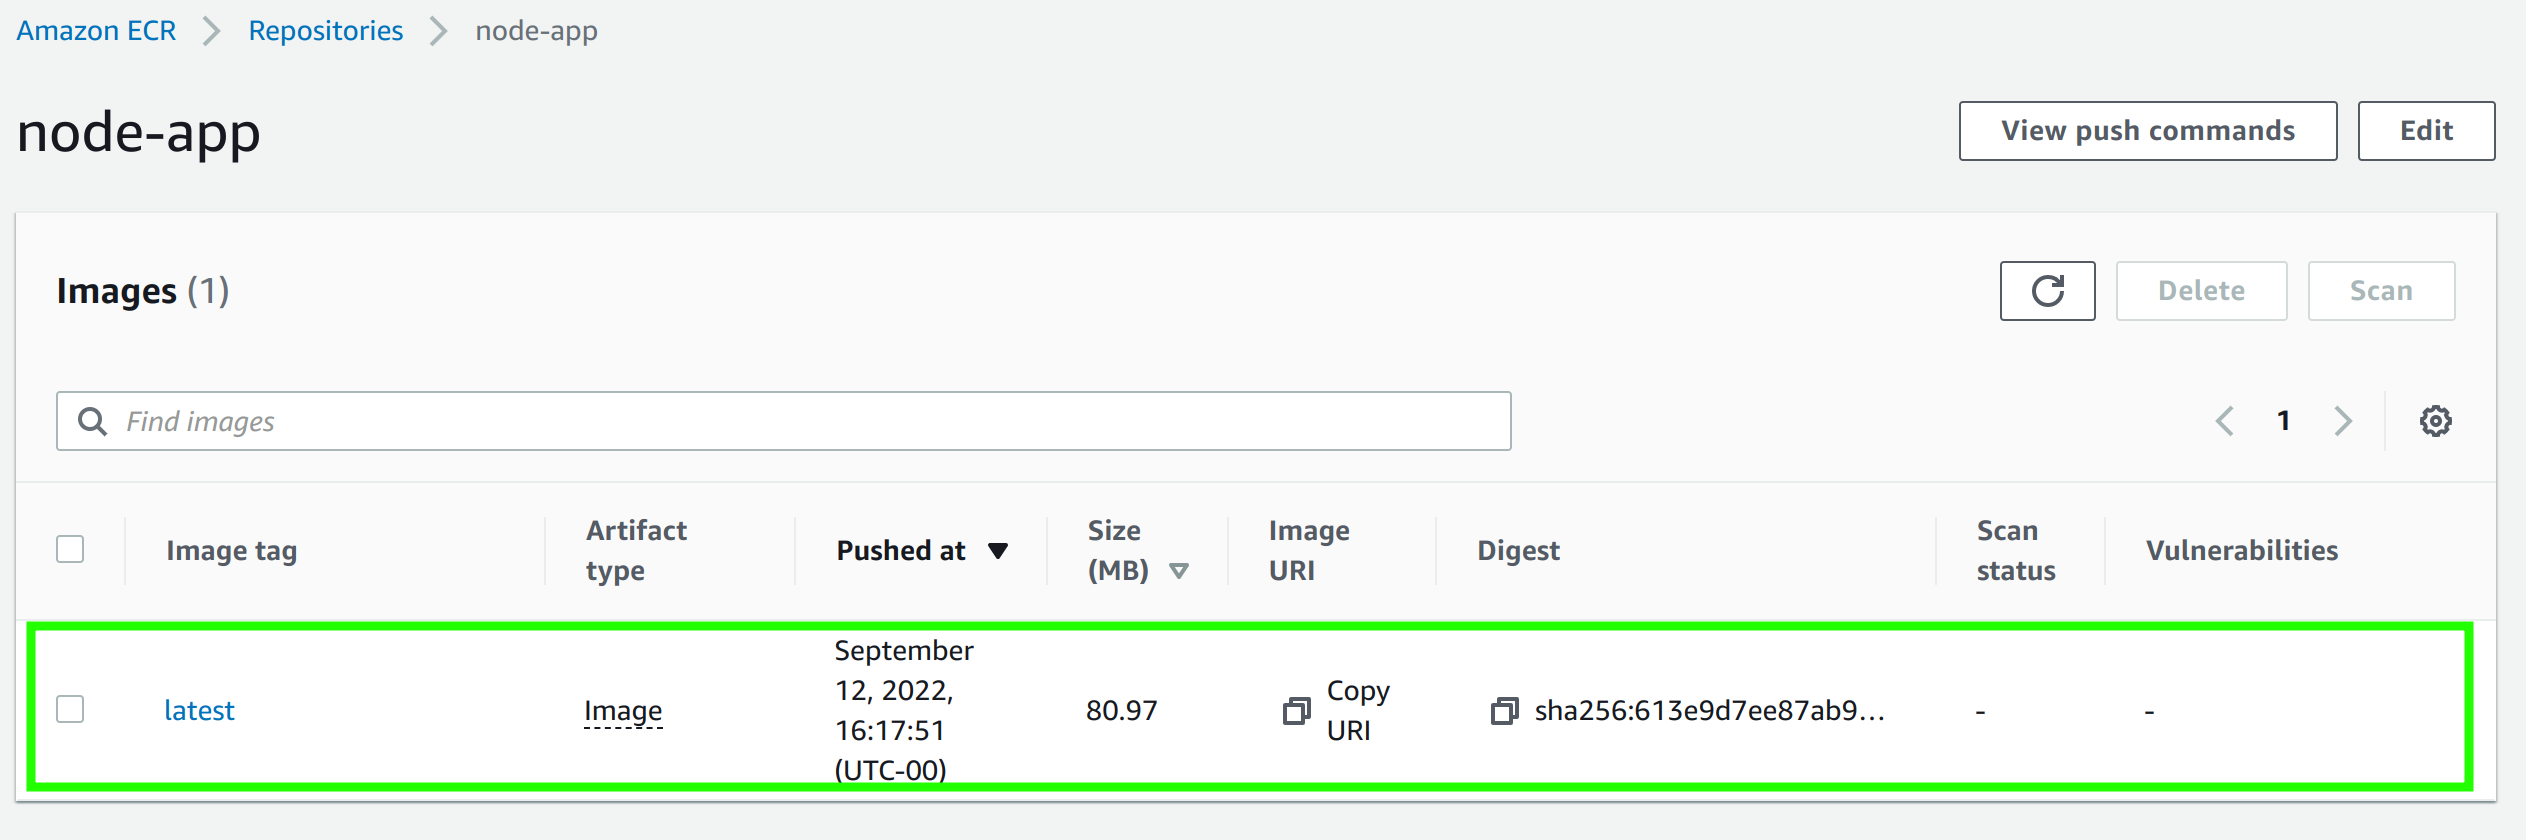
5. Finally, navigate your AWS ECR repository to confirm your Docker image was pushed successfully.
Below, you can see your Docker image was built and deployed successfully and tagged as latest.
Conclusion
Manual deployment can be a pain. But thanks to AWS ECR, and GitHub actions, you get to automate your Docker image deployments. And in this tutorial, you have learned how to create an IAM user to enable interaction with your repository on AWS ECR via the AWS CLI.
How else will you like to expand on this knowledge? Perhaps pull the Docker image via the Image URI to your local machine?


