

Manually managing and deploying static websites can be a hassle. But what if there is a solution that lets you quickly update and deploy your static websites? Say hello to AWS CodePipeline!
As a fully-managed continuous delivery (CI/CD) service, AWS CodePipeline helps you automate deployments for quick and reliable application and infrastructure updates.
In this tutorial, you will learn about AWS CodePipeline and deploy a static website to an AWS S3 bucket.
Stay tuned and automate deployments to your production environment!
Prerequisites
Ensure you have the following in place to follow along, as this tutorial comprises hands-on demonstrations:
- An AWS account – A free tier will suffice.
- Static website files (HTML, CSS, JavaScript, and so on) to deploy – This tutorial uses a sample static website from AWS.
- An IAM user with AWSCodeCommitPowerUser policy attached – This tutorial uses an IAM user called codecommit-user.
Setting up an AWS CodeCommit Repository
Before taking advantage of the AWS CodePipeline for deploying a static website, you need a place to store your static website files. In this case, you will create an AWS CodeCommit repository, a fully-managed source control service.
With AWS CodeCommit, you can securely store source code and binaries and host secure Git-based repositories. Moreover, AWS CodeCommit works seamlessly with your existing Git tools.
To create a CodeCommit repository, follow these steps:
1. Open your favorite web browser, and log in to your AWS Management Console.
2. Next, search for and select CodeCommit from the search results to access the CodeCommit dashboard (step three).
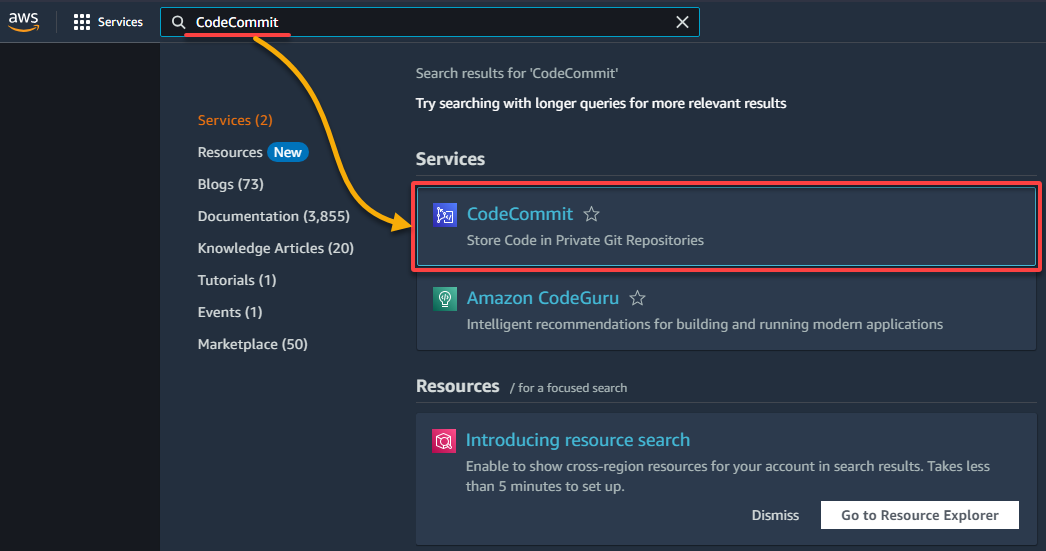
3. On the CodeCommit dashboard, click Create repository to initiate creating a new AWS CodeCommit repository.
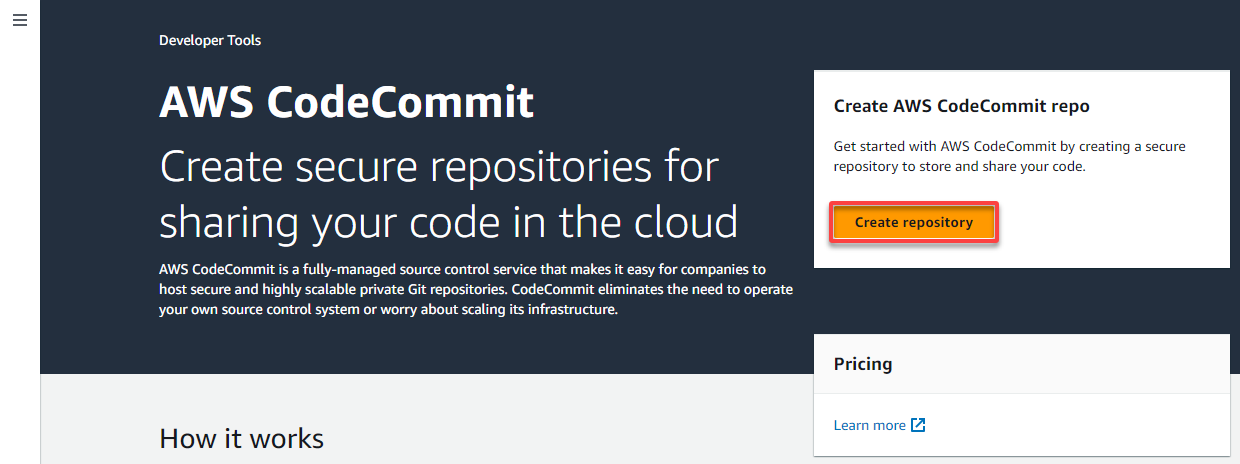
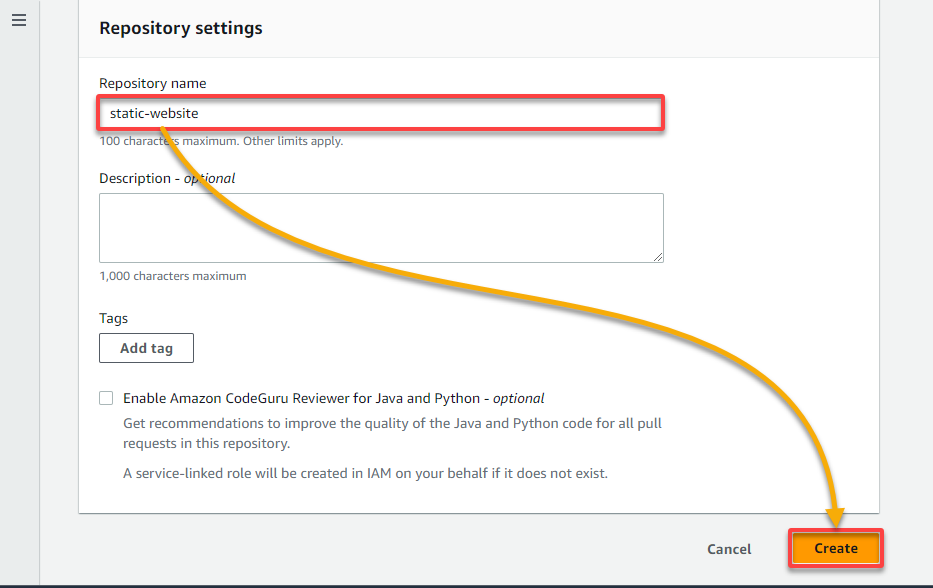
4. Now, provide a Repository name (i.e., static-website), leave the rest as default, and click Create (bottom-right) to create your new AWS CodeCommit repository.
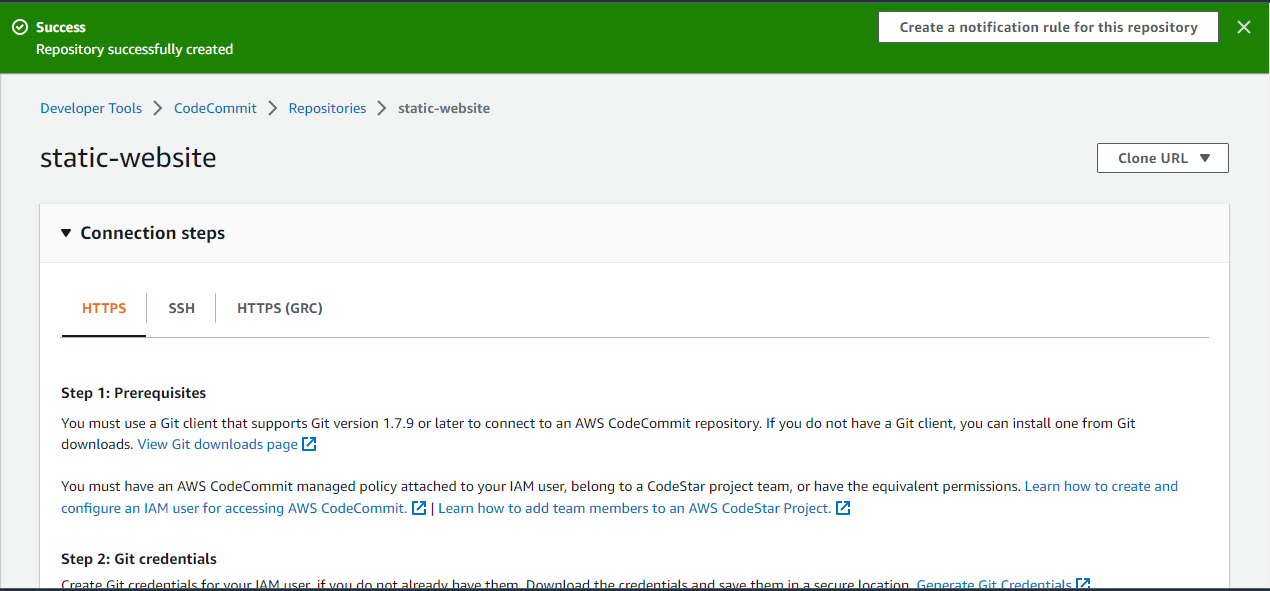
Once created, your browser redirects to the repository page, as shown below, with a success message at the top.
Generating HTTPS Git Credentials for AWS CodeCommit
With the repository created, you must ensure you can access it and add your project files. One way to do so is by creating Git credentials for your IAM user. You will use these credentials when interacting with CodeCommit repositories using HTTPS URLs.
To generate Git credentials for your IAM user:
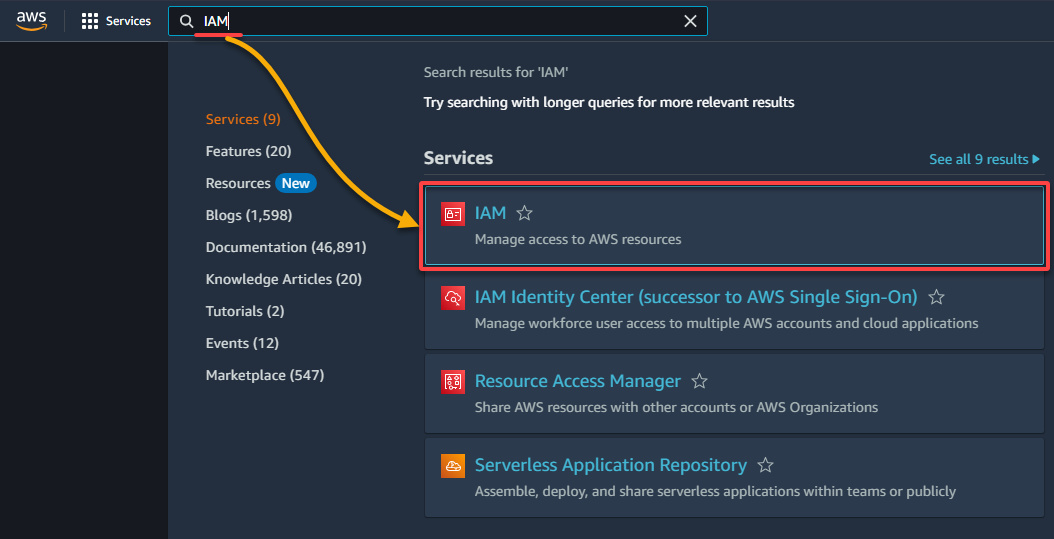
1. Search for and choose IAM in your AWS Management Console to access the IAM dashboard.
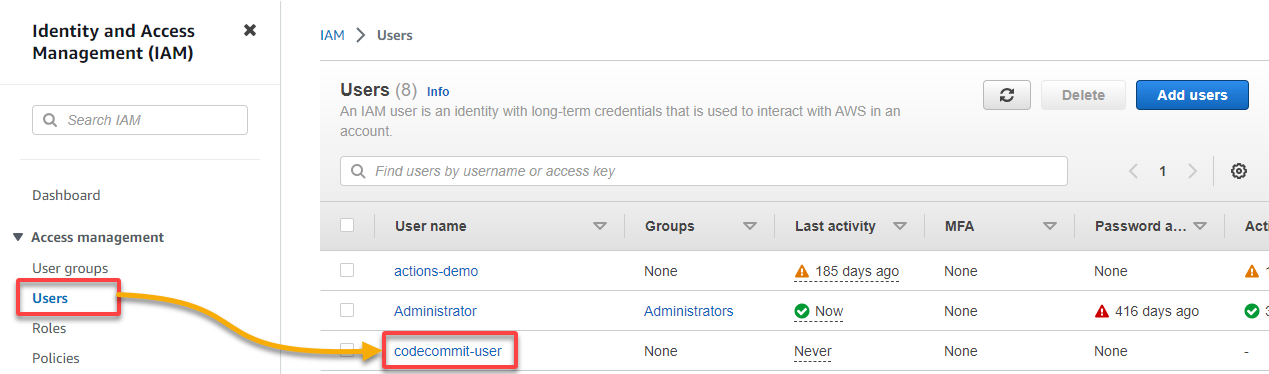
2. On the IAM dashboard, navigate to Users to access the Users page, and click on your IAM user (i.e., codecommit-user) to access the user’s details page.
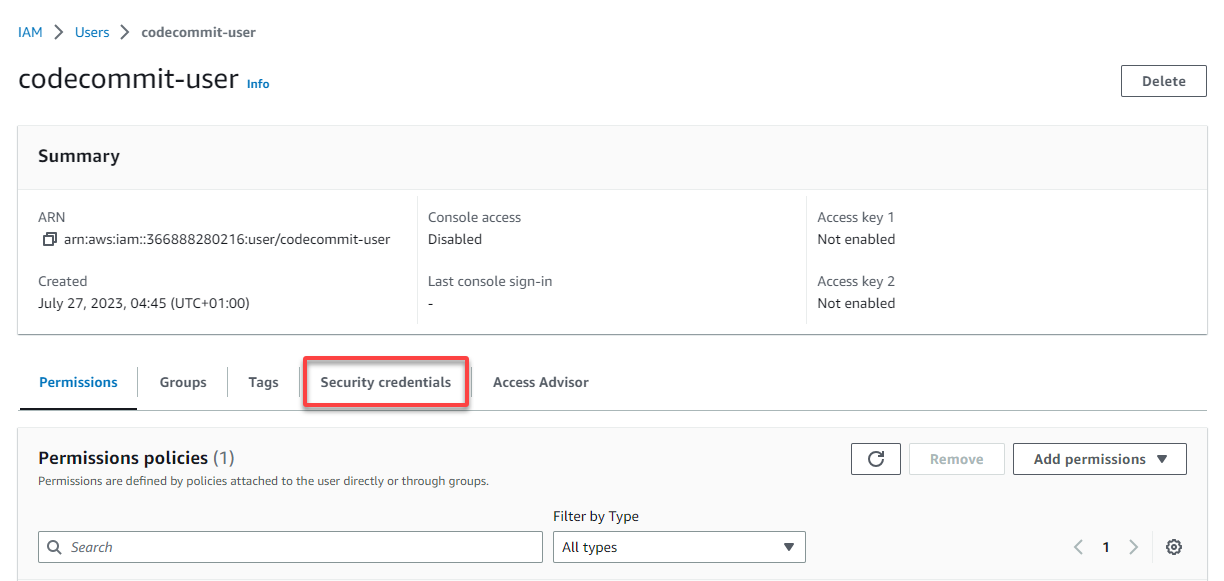
3. Next, click on the Security credentials tab on the user’s details page to view options for generating the Git credentials for the user.
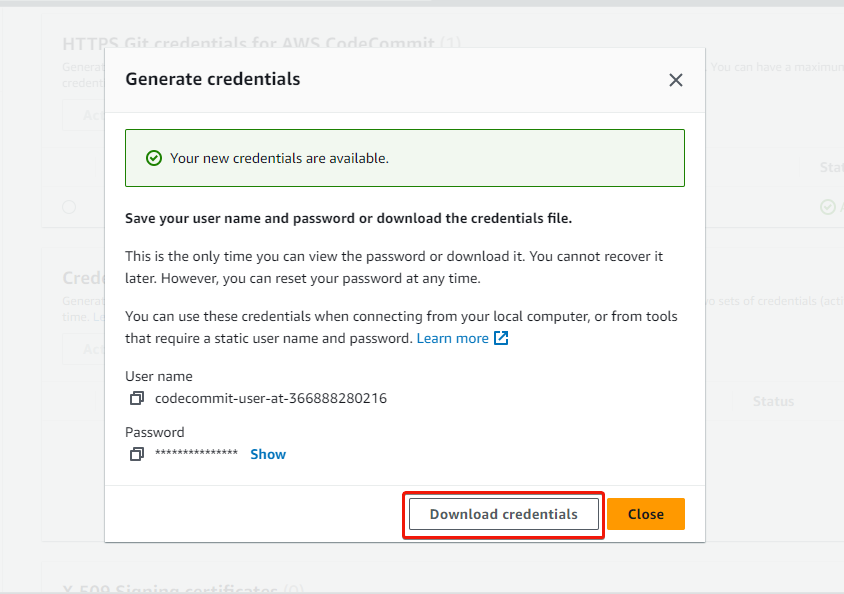
4. Now, scroll down to the HTTPS Git credentials for AWS CodeCommit section, and click on Generate credentials to generate HTTPS Git credentials for your IAM user.
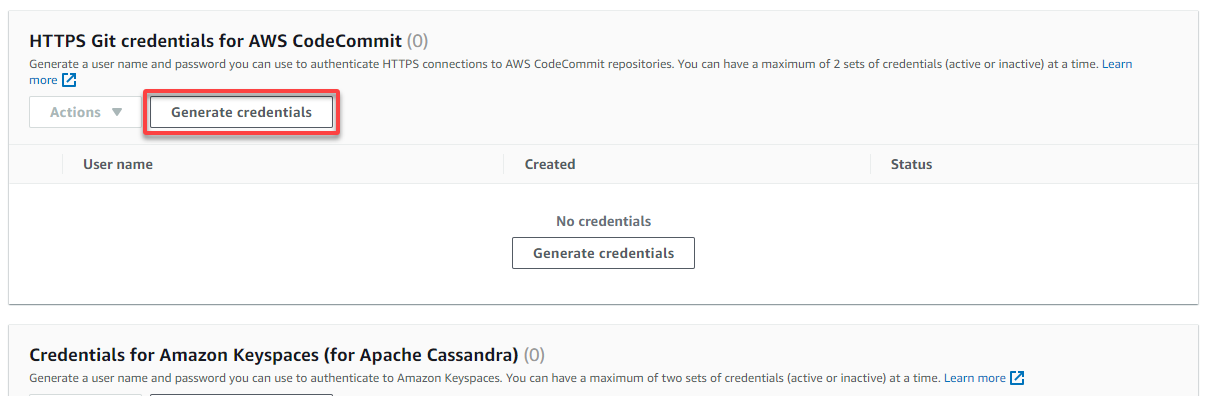
5. Lastly, copy the generated credentials or click Download credentials to download the credentials for later use.
Cloning the AWS CodeCommit Repository
Now you have HTTPS Git credentials, ensure you can add files and make commits. How? You must clone your repository on your local computer to provide you with the initialized repository.
To clone your AWS CodeCommit repository:
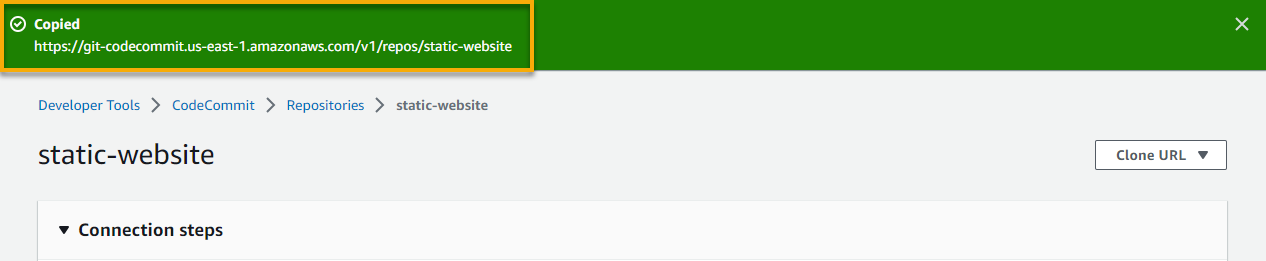
1. Navigate to your repository details page, click the Clone URL dropdown (top-right), and choose Clone HTTPS. This action lets you copy the HTTPS URL to clone your repository.

If successful, you will see a notification at the top of the page, as shown below.
2. Next, open a terminal, and run the git clone command below to clone your repository from the repository URL (repo_URL) you copied in step one.
git clone <repo_URL>When prompted, input your IAM user’s credentials and click OK to authenticate cloning your repository.
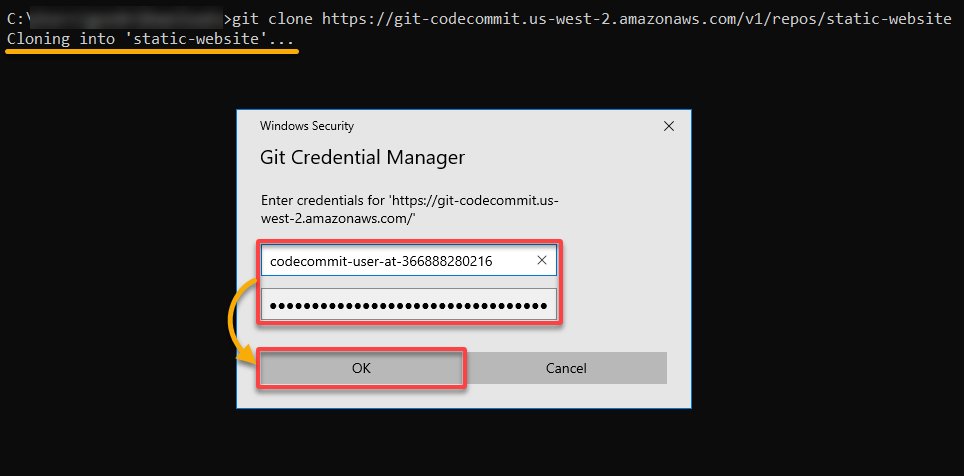
Once authenticated, the empty repository will be cloned to your local computer.

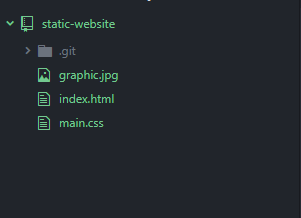
3. Copy or move your static website files to the cloned repository’s directory on your local computer.
If you use the sample website files provided in this tutorial, your file structure should appear as in the image below.
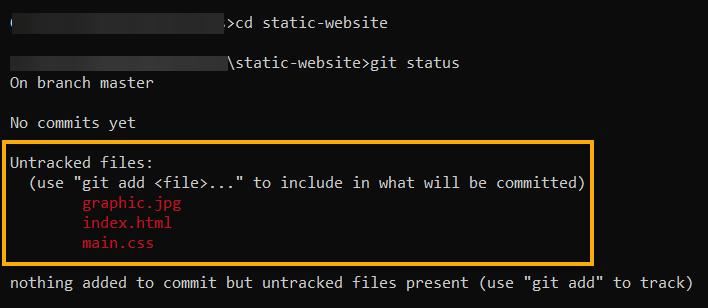
4. Now, navigate to your repository’s directory in your terminal, and run the below git status command to check the current state of your repository.
git statusAs shown below, you will see your static website files are listed as untracked files.
5. Execute each git command below to add, commit, and push your website files to your AWS CodeCommit repository
# Stages all the changes in the working directory
git add .

# Create a commit with the changes that were staged.
git commit -m "Added website files"

# Push the local commits to the remote repository
git push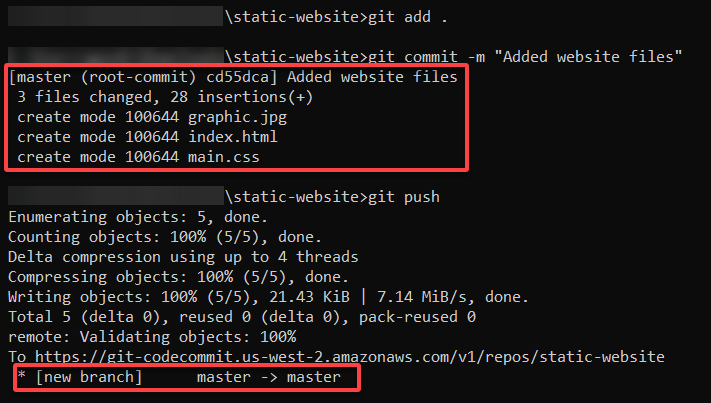
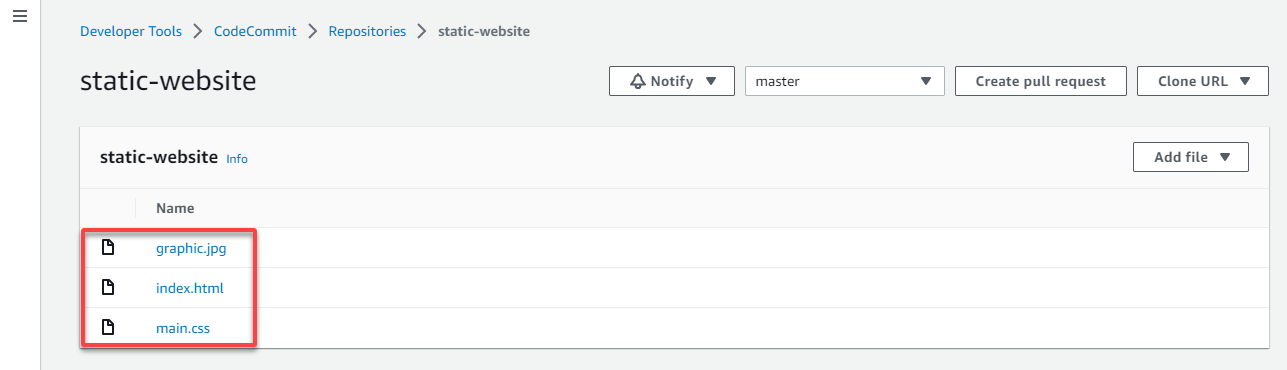
If successful, you will see your website files added to your repository, as shown below on your AWS CodeCommit repository page.
Creating an AWS S3 Bucket to Use as a Static Website
With your AWS CodeCommit repository containing your website files, you need a place to deploy your website. In this case, you will create an AWS S3 bucket to use as a static website.
To create an AWS S3 bucket for your website deployment:
1. Search for and choose S3 in your AWS Management Console to access the S3 dashboard.

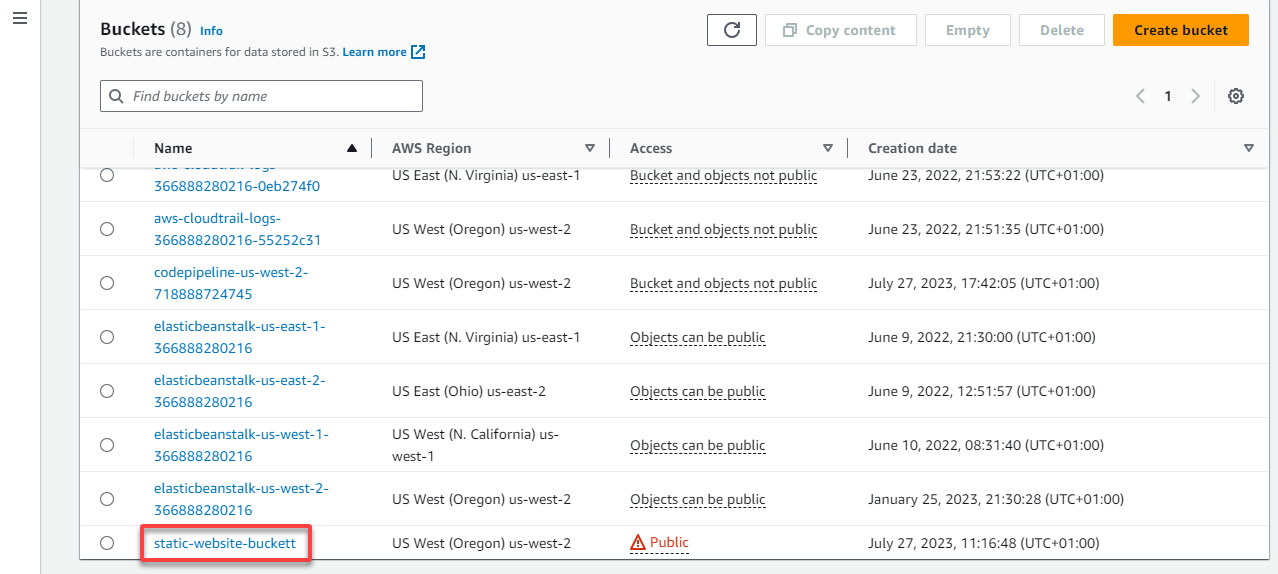
2. Next, click your newly-created S3 bucket (static-website-buckett) on the Buckets page.
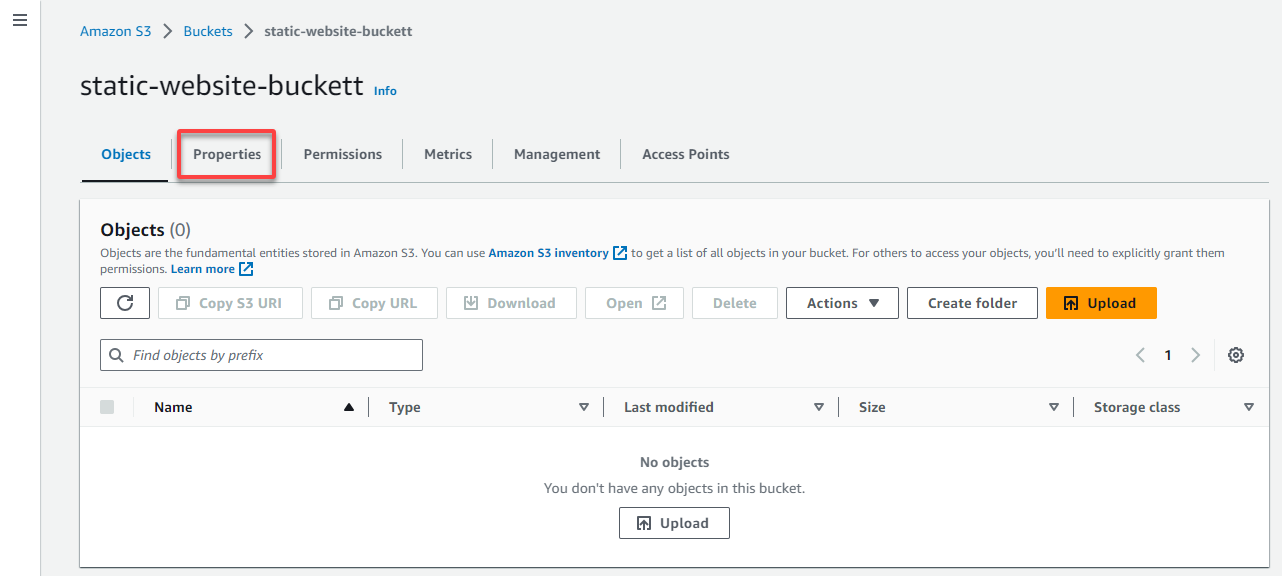
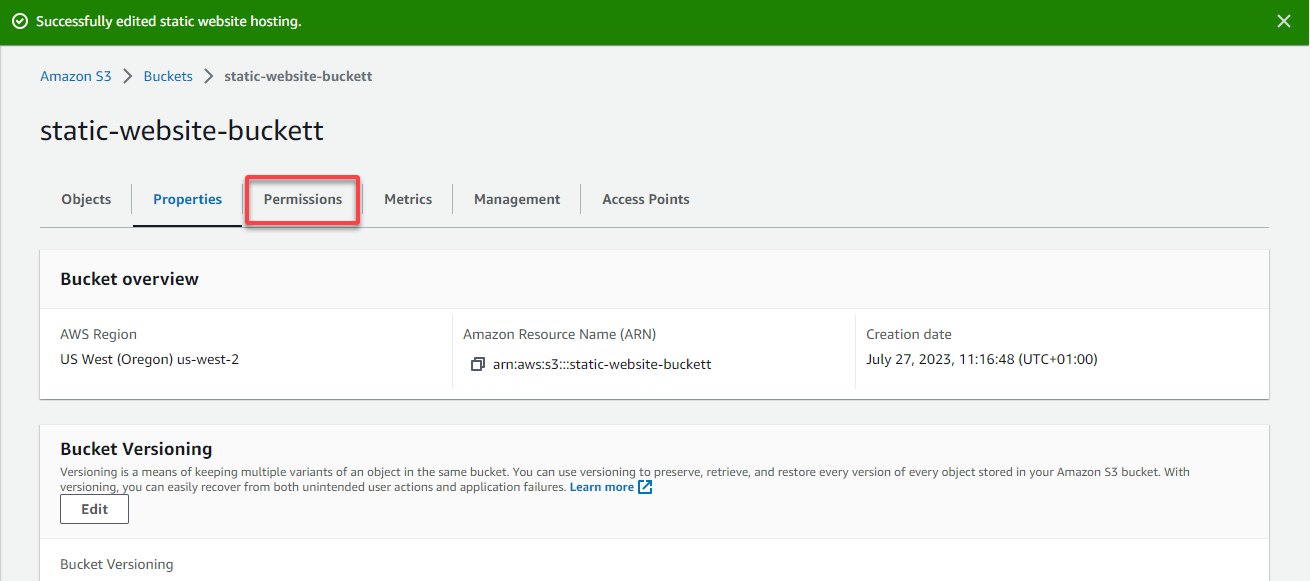
3. Navigate to the Properties tab to view the bucket’s properties.
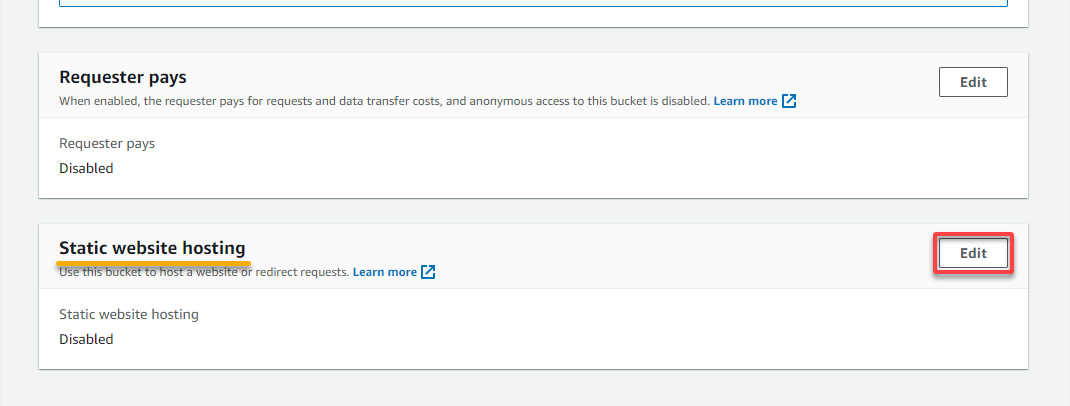
4. Now, scroll down to the Static website hosting section and click Edit.
5. Configure the static website hosting as follows:
- Static website hosting – Choose the Enable option to enable static website hosting for the bucket since you will use it as a static website.
- Index document – Specify your website’s default or home page (i.e., index.html).
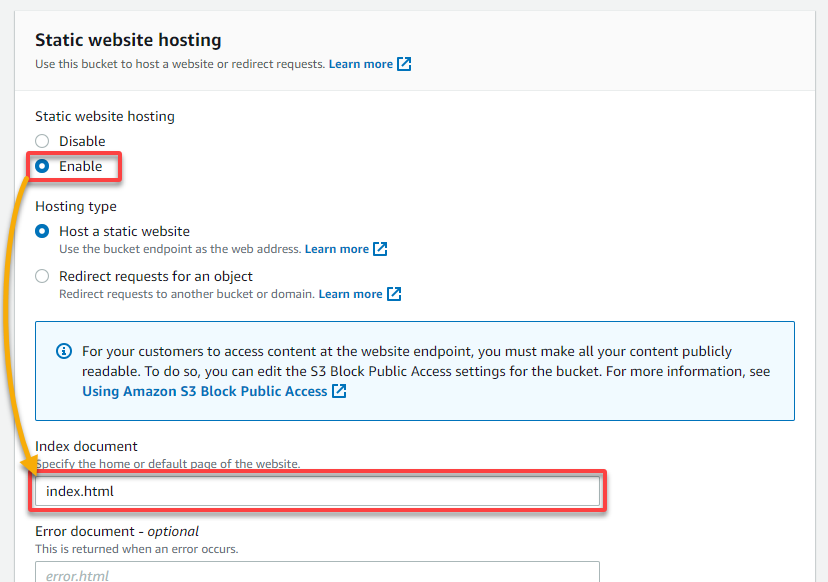
6. Leave the rest as default and click Save changes.

7. Next, navigate to the Permissions tab since you must add a bucket policy to control access to your bucket and its objects (files).
8. Scroll down to the Bucket policy section and click Edit to edit the bucket policy.
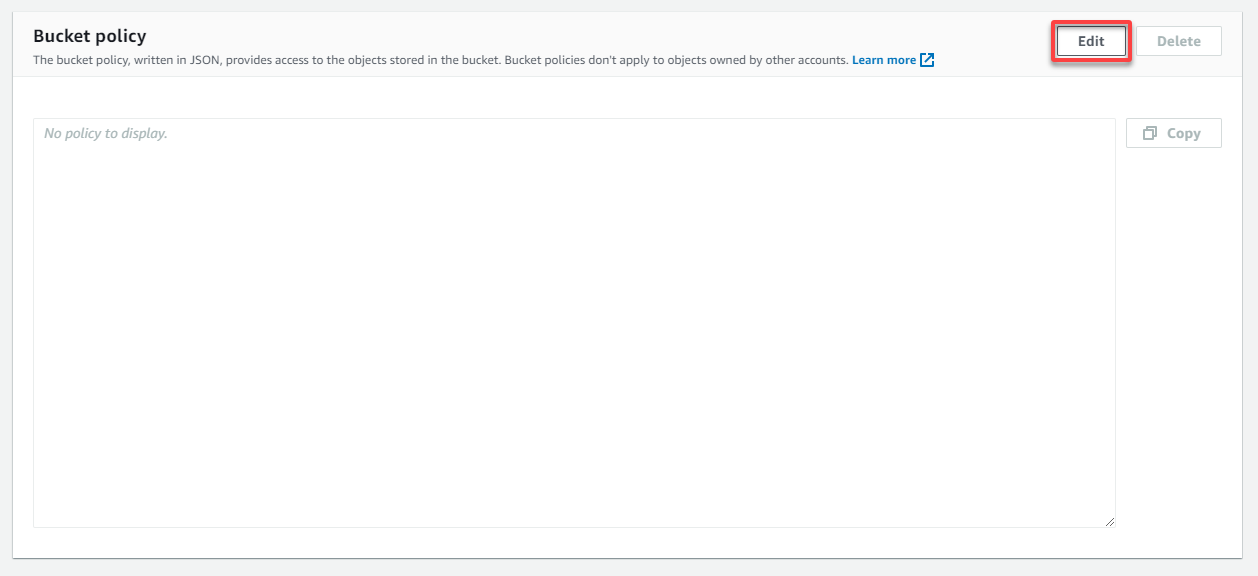
9. Ultimately, populate the following policy in the policy editor, replacing <bucket_name> with your s3 bucket name.
This policy allows public read access to all objects (files) in your S3 bucket so that users can access your static website’s content online.
💡 Note that making objects publicly accessible may not be desired for sensitive data.
{
	"Version":"2012-10-17",
	"Statement":[
		 {
		   "Sid": "PublicReadGetObject",
		   "Effect": "Allow",
		   "Principal": "*",
		   "Action": ["s3:GetObject"],
		   "Resource": ["arn:aws:s3:::<bucket_name>>/*"]
		 }
	]
}
If there are no errors, you will see a success message, as shown below, which indicates the bucket policy has been updated successfully.

Setting up an AWS CodePipeline
Just because you now have a “static” website does not mean you will leave it as is. Websites are ever-changing to cater to trends and best user experience. So take advantage of a pipeline that lets you define the workflow of your release process.
AWS CodePipeline is highly configurable and lets you describe how a new code change progresses through your release process.
To set up your AWS CodePipeline, follow the steps below:
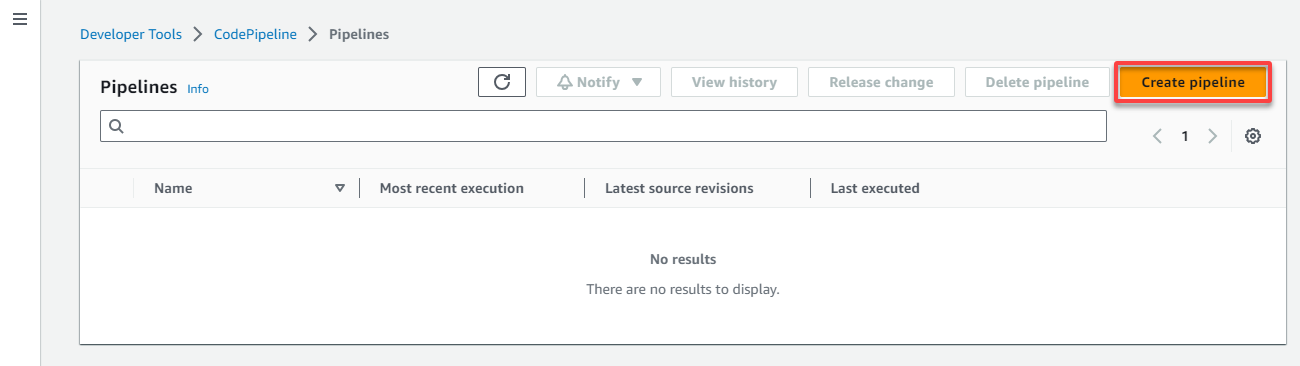
1. Search for codepipeline and choose CodePipeline ins the search results to access the AWS CodePipeline dashboard.

2. Next, click Create pipeline (upper-right) to initiate creating a new pipeline.
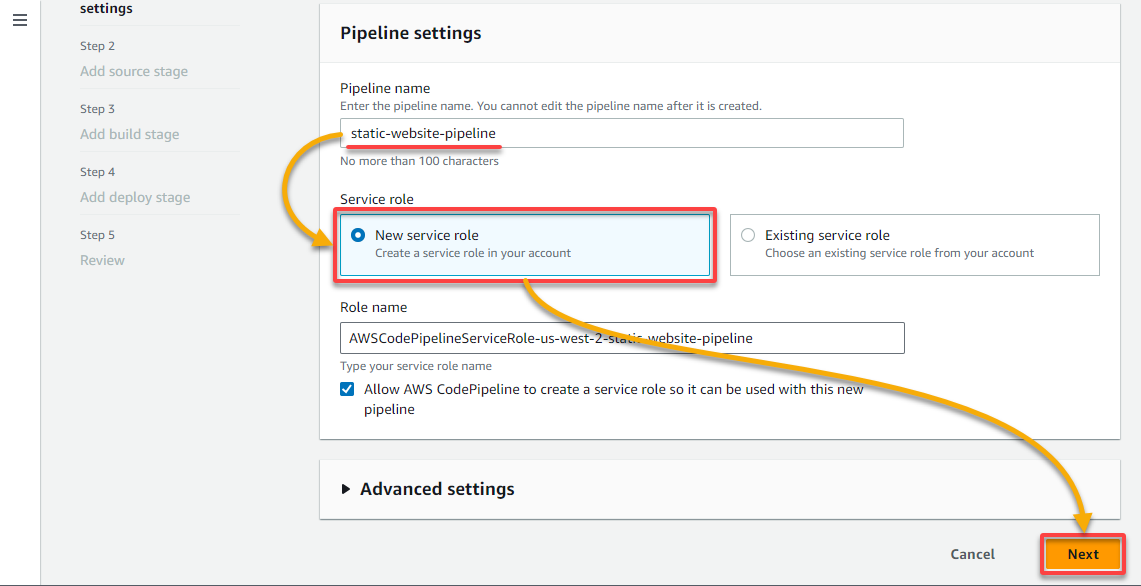
3. Configure the pipeline settings with the following:
- Pipeline name – Provide a unique name for your pipeline (i.e., static-website-pipeline).
- Service role – Choose the New service role option if you wish to create a new service role to use with the pipeline. Otherwise, choose Existing service role if you already have an existing service role.
Once configured, click Next to confirm the settings and continue.
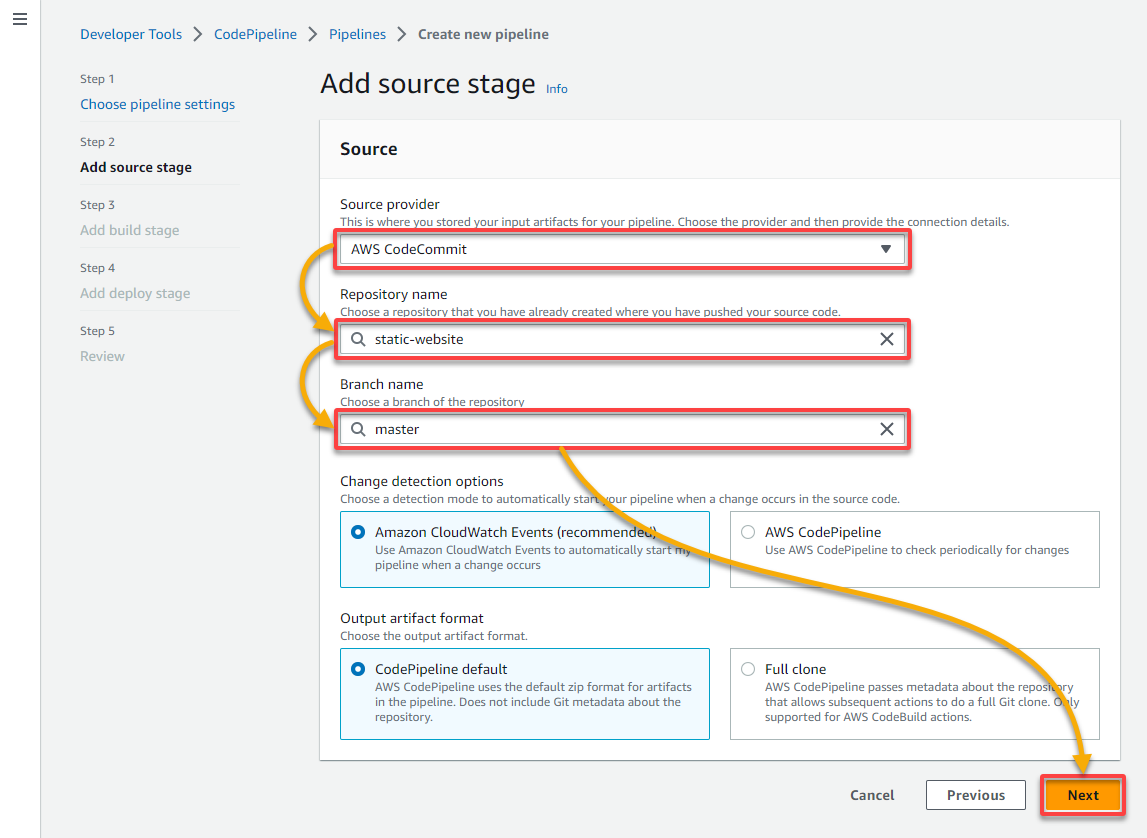
4. Now, select the following for the source settings:
- Source provider – Choose AWS CodeCommit as the source provider.
- Repository name – Search and select your AWS CodeCommit repository (i.e., statice-website).
- Branch name – Search and select your branch (i.e., master) containing the website files to deploy.
Leave the rest as default, and click Next.
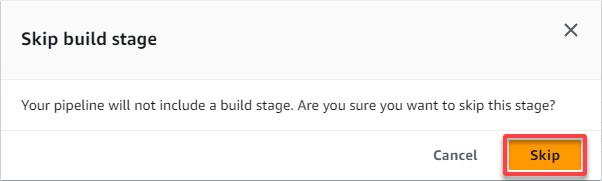
5. Click on Skip build stage since the website for this demonstration does not require compilation or build steps.
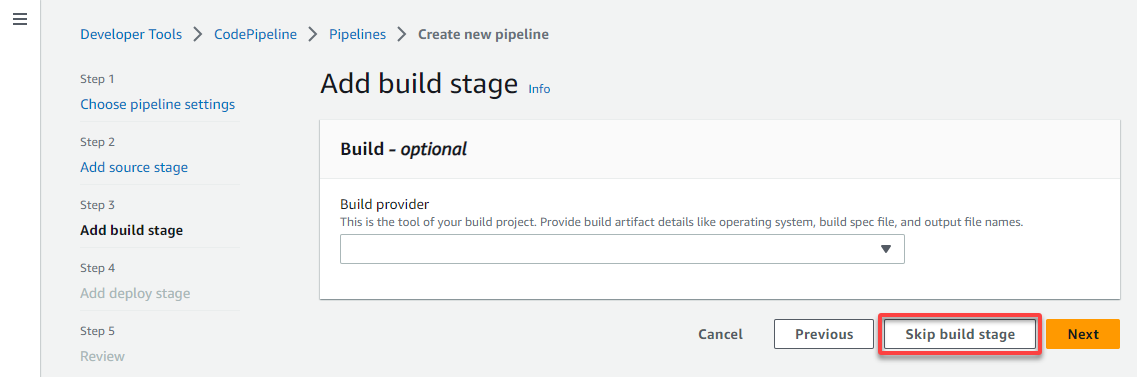
When prompted, click Skip to confirm skipping the build stage.
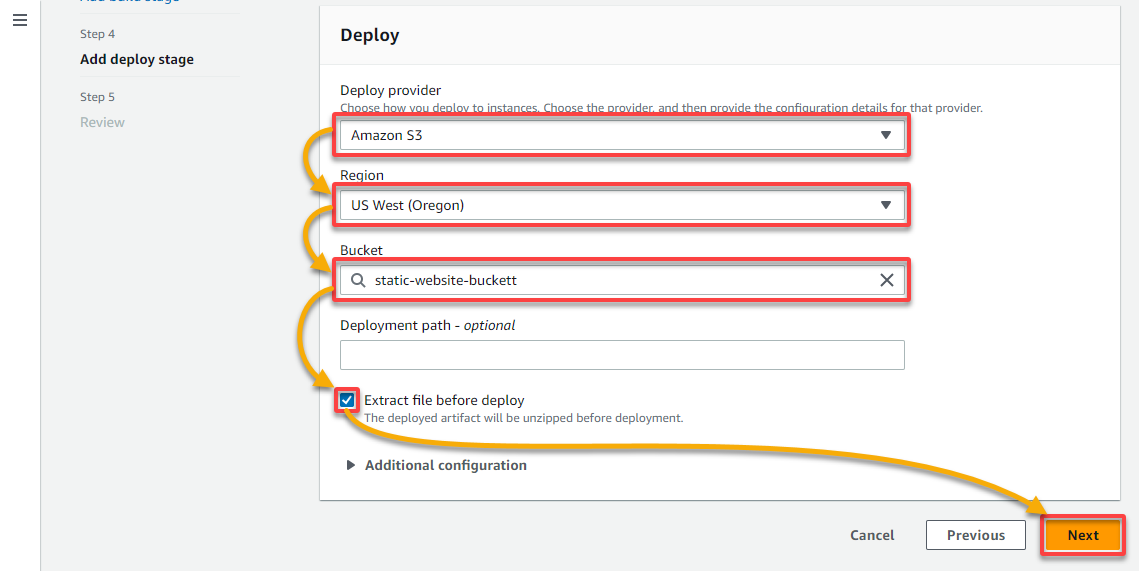
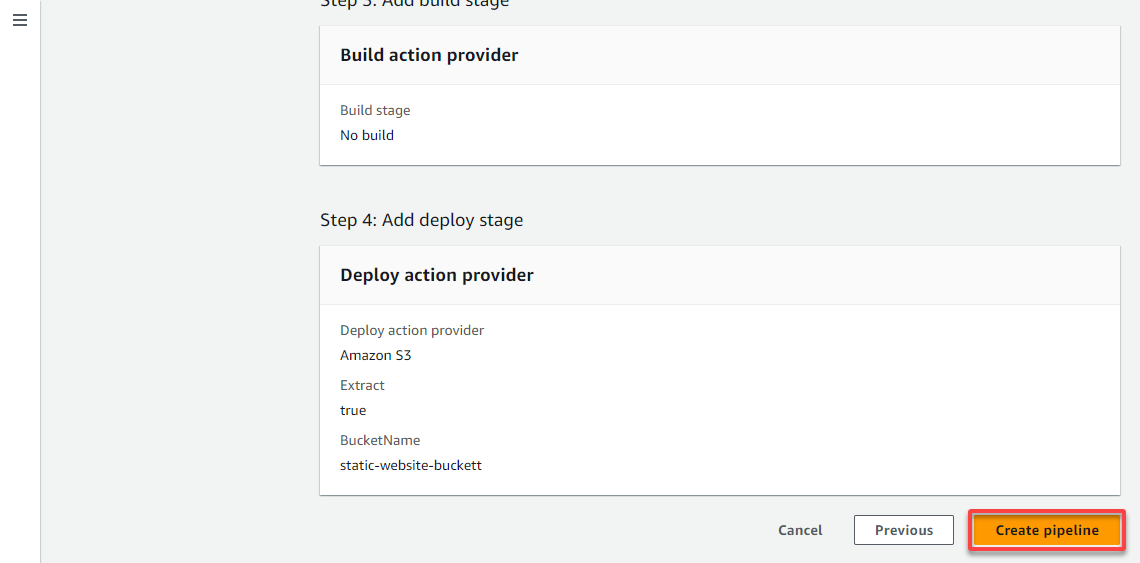
6. Next, configure the deploy stage as follows:
- Deploy provider – Choose Amazon S3 as the deploy provider since you use an S3 bucket for your static website.
- Region – Select a region closest to your location.
- Bucket – Choose your S3 bucket (static-website-buckett) for hosting your website as the destination.
- Extract file before deploy – Tick this checkbox to ensure the deployment artifact unzips before deployment.
Once configured, leave the rest as default, and click Next to continue.
7. Lastly, review the pipeline information, and click Create pipeline to finalize creating your pipeline.
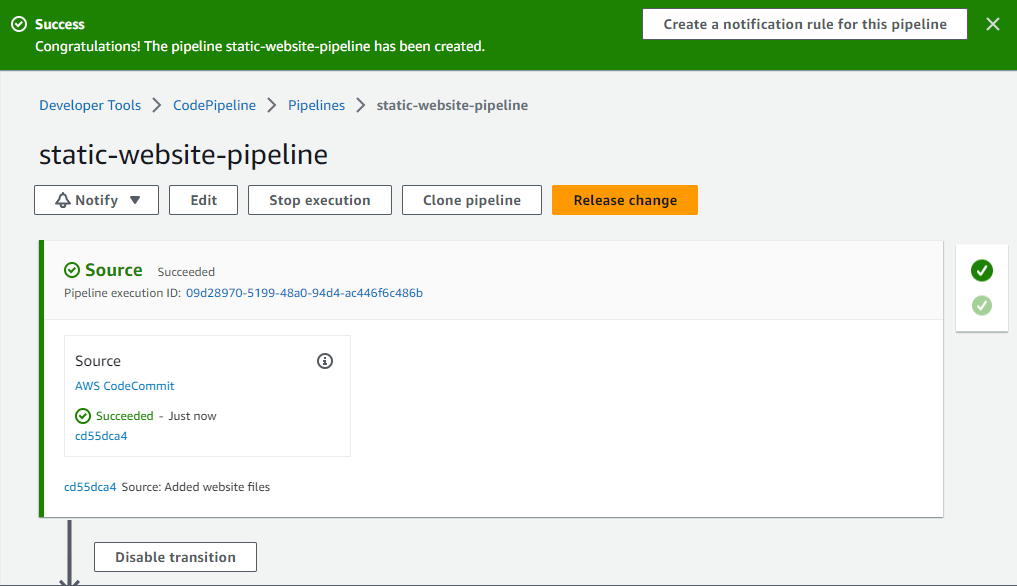
You will see a success notification of the pipeline creation in your pipeline’s details page, as shown below.
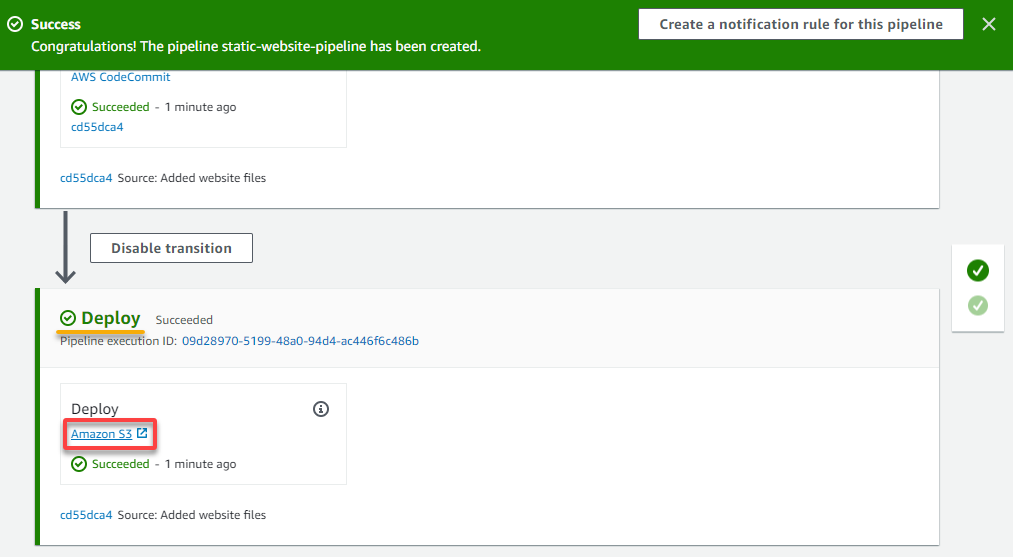
With all the stages set up, CodePipeline automatically starts the deployment process. CodePipeline takes the changes from the CodeCommit repository and deploys them to the S3 bucket configured for website hosting.
Testing the Static Website Deployment
With all the configuration completed, the last step is ensuring your deployment works. How? You must first retrieve your S3 bucket’s endpoint to view your static website deployment.
To test your static website deployment:
1. Scroll down to the Deploy step on your pipeline’s details page, and click Amazon S3.
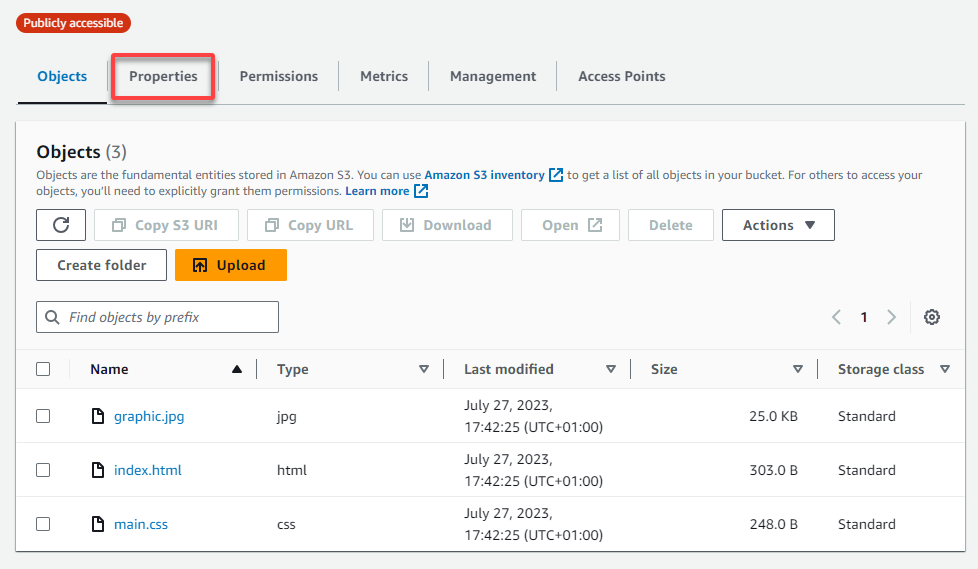
Your browser redirects to your S3 bucket indicated in the deploy stage, which contains your website files.
2. On the bucket page, click on the Properties tab to view the bucket properties.
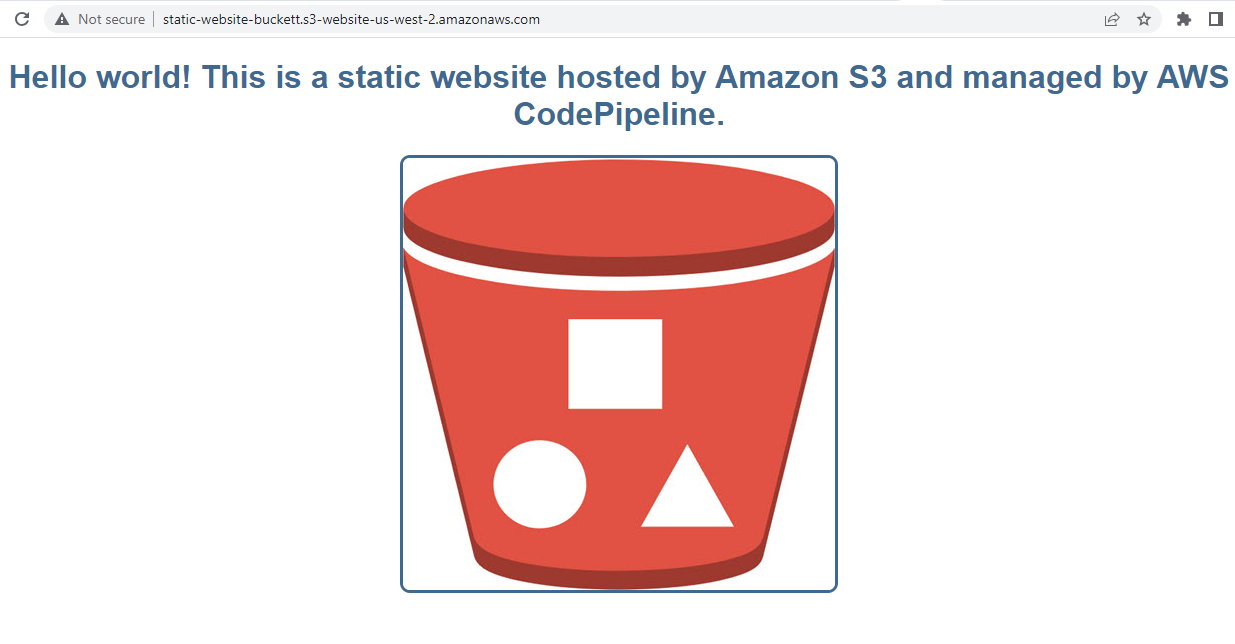
3. Finally, scroll down to the Static website hosting section and navigate to the URL below to test your deployment.
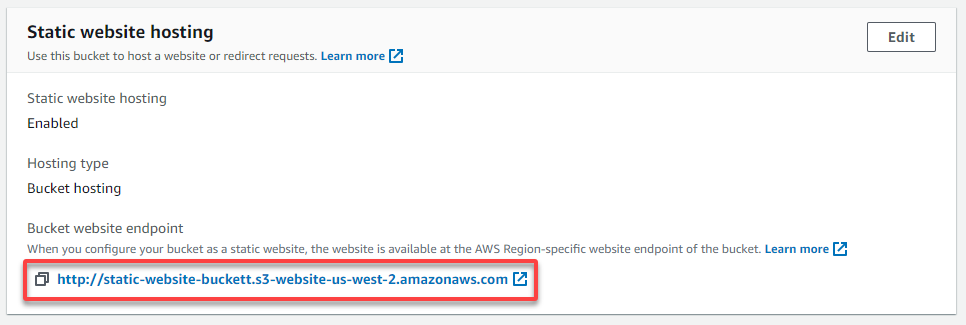
If everything is set up correctly, you will see your static website live and accessible online.
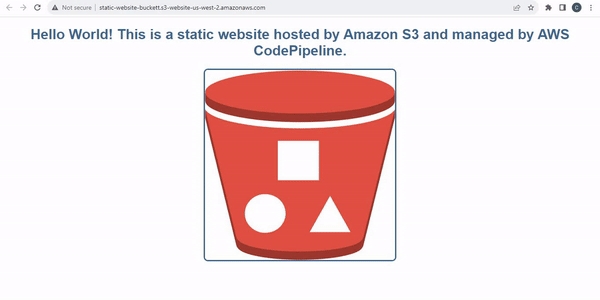
4. Modify the index.html file on your local computer not to include the “Hello World!” string.
5. Now, add, commit, and push the change to your AWS CodeCommit repository.
You should see your commit message on your pipeline’s page and that the pipelines ran after you pushed the changes.

6. Ultimately, refresh the page, and you will see the changes reflect automatically, as shown below.
Conclusion
Deploying a static website on AWS S3 with AWS CodePipeline provides a seamless and automated way to manage your website’s deployment process. And in this tutorial, you learned that with this setup, you can focus on developing your website and pushing new updates. Let AWS take care of the deployment and hosting aspects.
With this knowledge, why not use CodePipeline with CloudFormation? Start automating the creation and updating of your static website’s entire infrastructure!


