


Static websites are fast and easy to set up. You can host a static website just about anywhere, but where’s the best place? If you have an AWS account, hosting your static website in an AWS S3 bucket is a great choice. Couple that setup with AWS’s content delivery network (CDN) CloudFront, and you’ll have an AWS S3 Static SSL website set up in no time!
Not a reader? Watch this related video tutorial!
Not seeing the video? Make sure your ad blocker is disabled.
In this tutorial, you will learn how to securely set up a demo static website hosted on S3 with CloudFront acting as a CDN for your website.
If you are comparing DIY static hosting with a managed site builder, compare 10Web for AI website building and managed WordPress hosting before choosing a paid website platform.
Prerequisites
This tutorial will run through various examples. If you’d like to follow along, be sure you have the following in place:
- An existing AWS S3 bucket – This tutorial will use an S3 bucket called gudnex-pail. Be sure the bucket is not blocking public access. When complete, your static website will be available on the Internet and must be accessed publicly.
- An AWS IAM user with various admin rights. The tutorial will touch many different AWS services, so the tutorial is using the root account.
- A registered domain name (optional). If you’d like to learn how to use a registered domain name to host your static website, you’ll need one later in the tutorial.
- A static website or frontend application – The tutorial uses an Interior Consultant GitHub repo as an example.
Uploading Website Files to S3
Once you have your S3 bucket created and have a set of website files that will make up your website, it’s time to upload the website to your S3 bucket.
1. Open your favorite web browser and navigate to the AWS Management Console.
2. Navigate to the S3 bucket you intend to host your website.
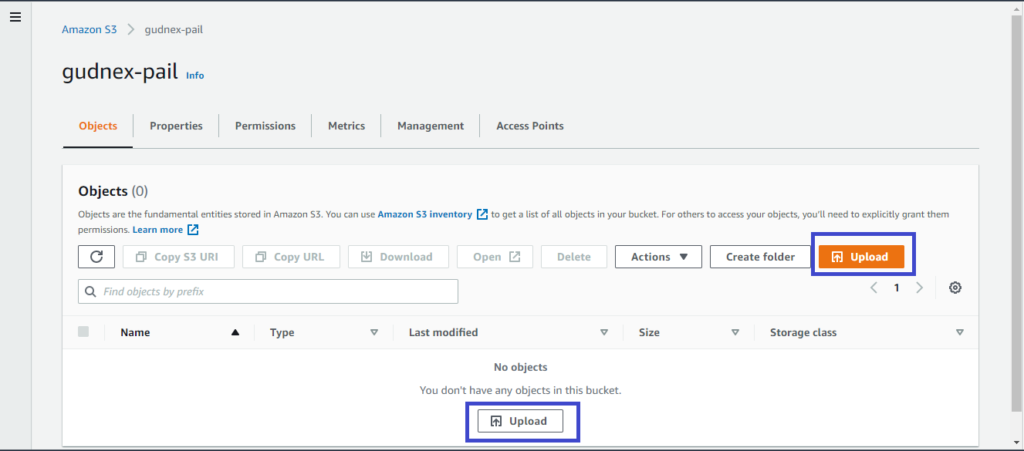
3. On the Objects tab of the S3 bucket page, click on Upload, add all of the files for your website and click on Upload at the bottom when finished. If you’re using the tutorial’s demo project, clone the GitHub repo for your local computer and upload all files to the S3 bucket.
Click the Add files button to add files and the Add folder button to add folders. Do not upload the entire project at once by uploading the top project folder. You’ll find that the hierarchy is not as you expect.
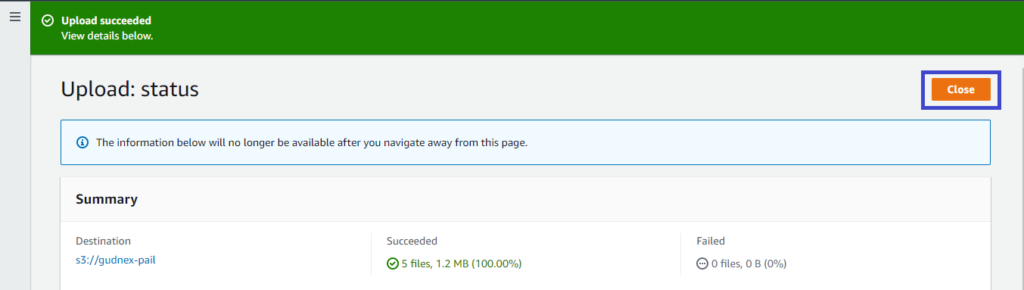
4. Finally, click on Close to go back to the S3 bucket. You should now see all of your files and folders in the S3 bucket.
Ensure that your index page (index or default) is at the root of the S3 bucket!
Securing the S3 Bucket
After uploading your files to the S3 bucket, you must secure the bucket by assigning an S3 bucket policy. You’re setting this policy for all public users to read objects (the website files) inside the bucket.
1. While on your S3 bucket in the AWS Management Console, click on the Permissions tab and scroll down to the Bucket policy.
2. Below, edit the bucket policy by clicking on the Edit button.
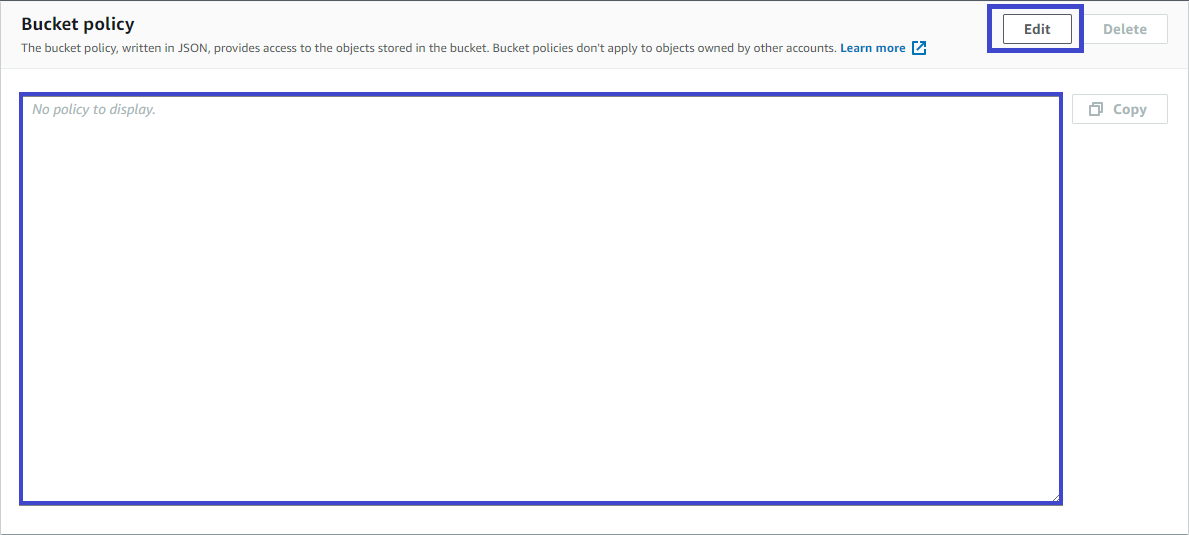
3. Inside the Bucket policy box, copy and paste the following bucket policy. The below bucket policy creates permission that allows all users ("Principal": "*") to read any objects ("Action":["s3:GetObject"]) inside of the S3 bucket.
{
"Version":"2012-10-17",
"Statement":[
{
"Sid":"AddPerm",
"Effect":"Allow",
"Principal": "*",
"Action":["s3:GetObject"],
"Resource":["arn:aws:s3:::<your bucket name here>/*"]
}
]
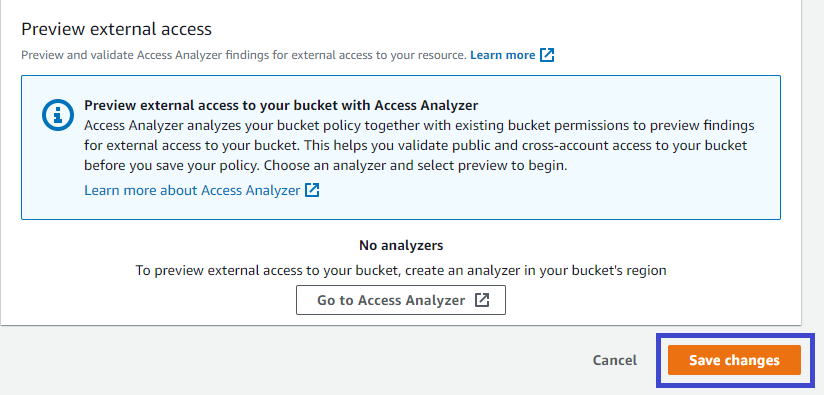
}4. Save the bucket policy by clicking on Save changes at the bottom of the page.
Enabling Static Website Hosting
After setting the bucket policy, you must enable static website hosting for the bucket since you’re using the bucket as a static website.
1. In your S3 bucket, click on the Properties tab and scroll down to the Static website hosting section.

2. Get access to the static website hosting settings by clicking on the Edit button under the Static website hosting section.

3. Now, enable the Static website hosting by selecting the Enable option, as shown below.
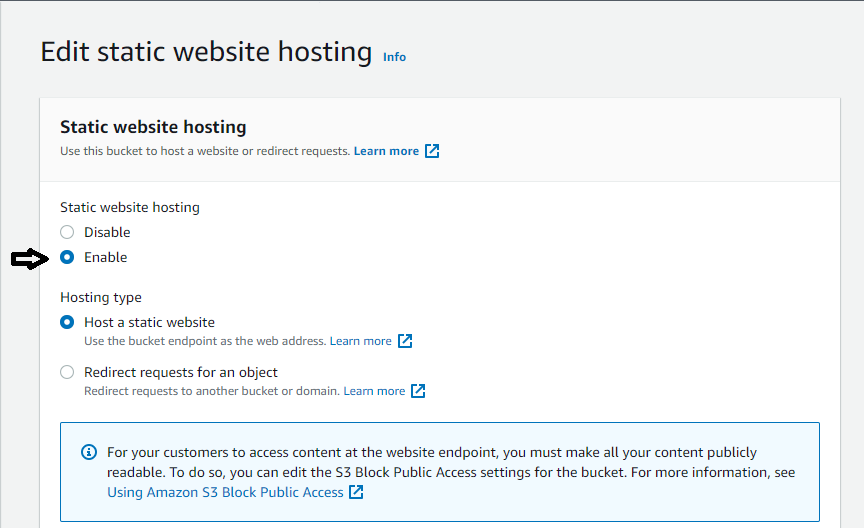
4. Provide your website’s default home page (Index document) and error page (Error document). You can leave the Error document field blank as it is optional. The index document is the default page the users will see when they access your website. But if an error, the error document will appear instead.
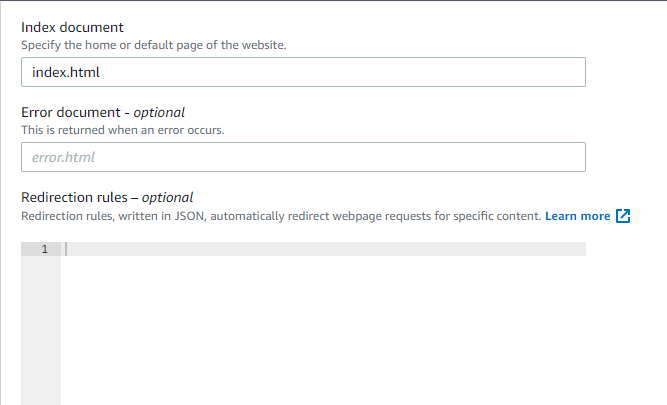
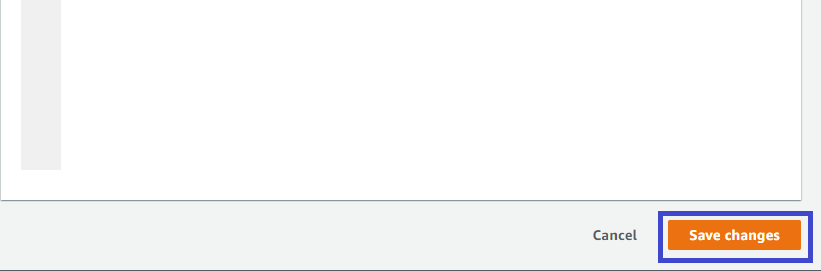
5. Save the changes you made in the Index and Error document field by clicking on the Save changes button, as shown below.
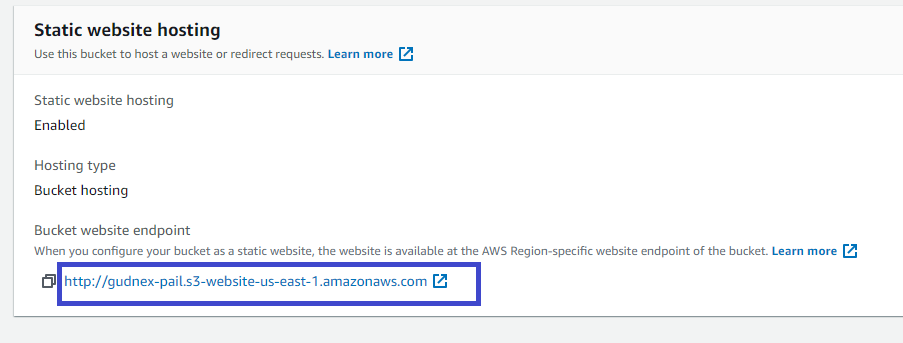
6. Take note of the website endpoint that you can see by scrolling down to the Static website hosting section in the Properties area. The website endpoint is a URL you’ll use to test your website. This endpoint will return the index document you set up in step 4.
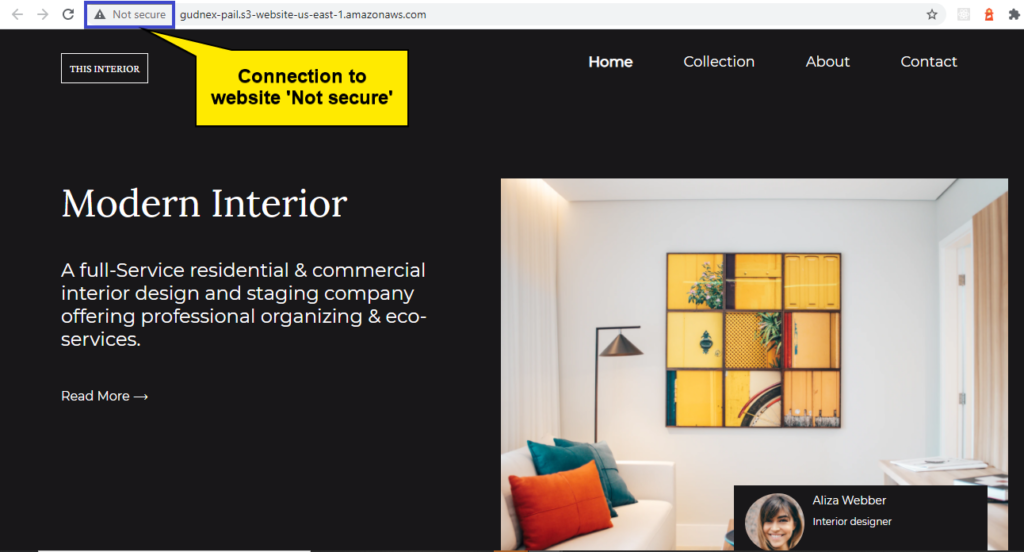
7. Finally, test out your website. To do so, paste the website endpoint you took note of in step 6 to your browser’s address bar. If your setup is correct, like you see below, you’ll get to access your website publicly.
Right now, your website is not secure, as you can see indicated in the address bar (Not secure). You’ll work on securing your website later in the tutorial.
Creating a Hosted Zone
At this point, Internet users can now access your website via the website endpoint defined in step six in the previous section. But, typically, you’ll want your users to access your site via a custom domain like www.mydomain.com.
When setting up a custom domain, you must first create a DNS zone that will contain a CNAME record that will forward traffic from www.mydomain.com to your website endpoint. Since your static website is in AWS, you can use AWS Route 53 to serve as your domain’s DNS provider.
In Route 53, let’s create a hosted zone for your custom domain that will contain the DNS records you need to direct requests to your custom domain to your static website endpoint.
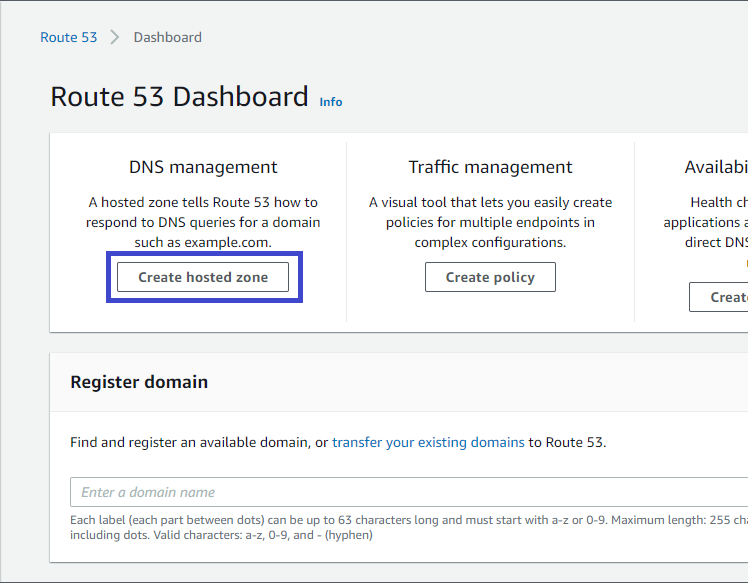
1. Search for Route 53 in the search bar from the AWS management console and click on Route 53 when it comes up in the search results.
2. Click on the Create hosted zone button to start creating a hosted zone, as shown below.
3. Enter your domain name, like example.com, as shown below under the domain name text field. This domain name is what the user will use to access your website.
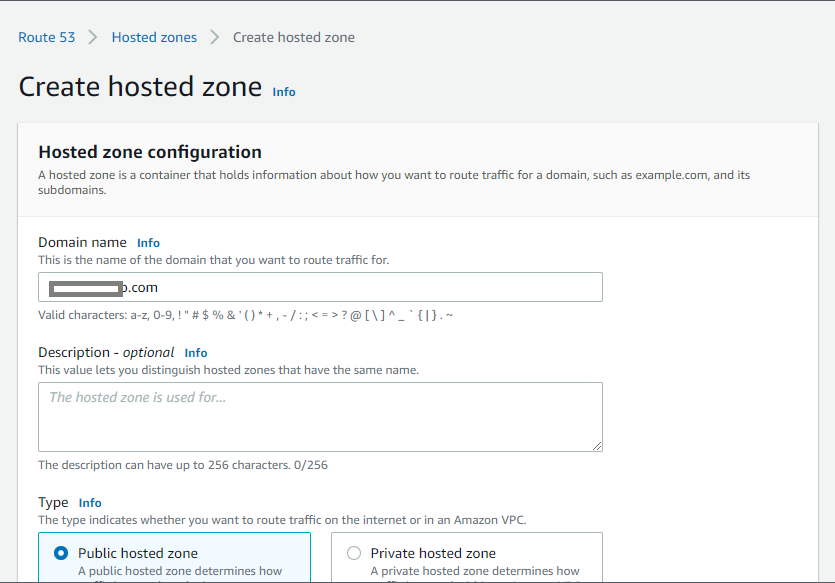
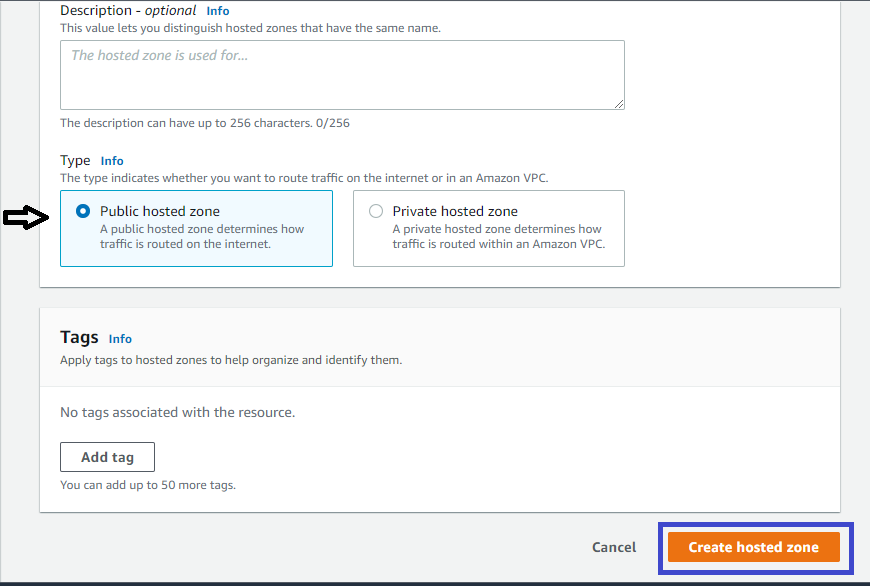
4. Ensure that the Public hosted zone is selected for the Type, as you are concerned with routing traffic on the Internet and not a Virtual Private Cloud (VPC).
Now, create a hosted zone by clicking on the Create hosted zone button at the bottom of the page.
5. If you’ve created your hosted zone successfully, you’ll see the below success message at the top of the page. The success message also shows that Name Server (NS) and Start of Authority (SOA) records have been added to the domain name. NS connects URLs to your website server’s IP address, while SOA records identify the base DNS information about the domain.
Take note of the name servers shown below, as you’ll use them later for an NS update.
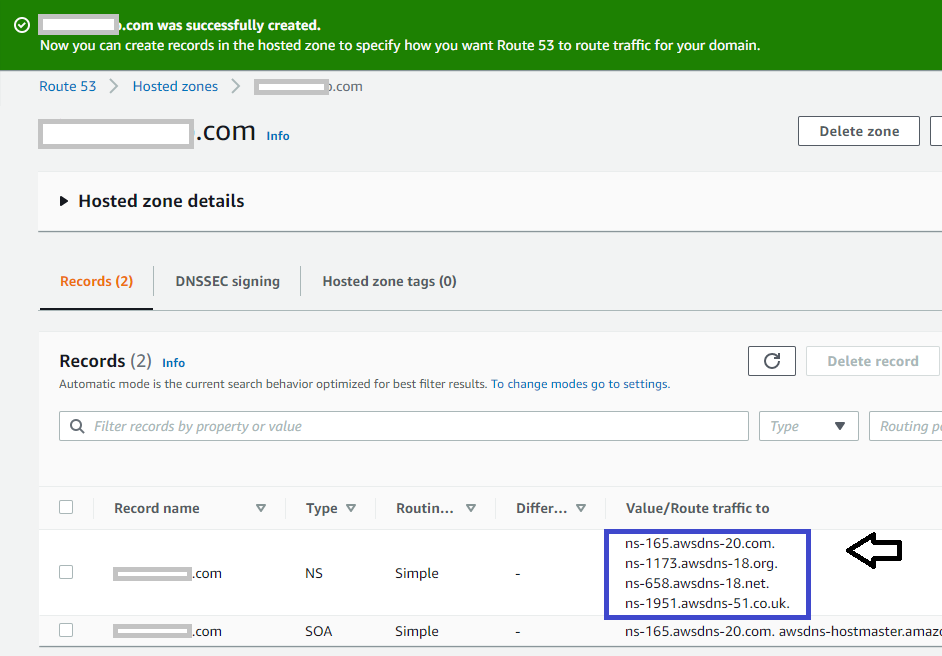
6. Provide the name servers you see in step five to your domain registrar. Doing so tells your domain registrar what DNS provides to look for. In this case, since your DNS records are in AWS Route 53, you’ll point them there.
Since updating the name servers differs across providers, below are guides on how you can do so on a few popular hosting platforms:
Getting a Secure Sockets Layer (SSL) Certificate
Now that you have set up your hosted zone and updated the name servers, it’s time to request an SSL certificate for your domain to secure connections to your website using HTTPS.
In this tutorial, you’ll request a certificate for your domain using the Amazon Certificate Manager (ACM). But if you already have a publicly issued certificate, import that into ACM instead of requesting one. Both an existing public-issued and requested certificate encrypt the HTTP connection to/from your static website.
AWS requires that you request or import the certificate in the US-East-1 region to use the certificate with CloudFront.
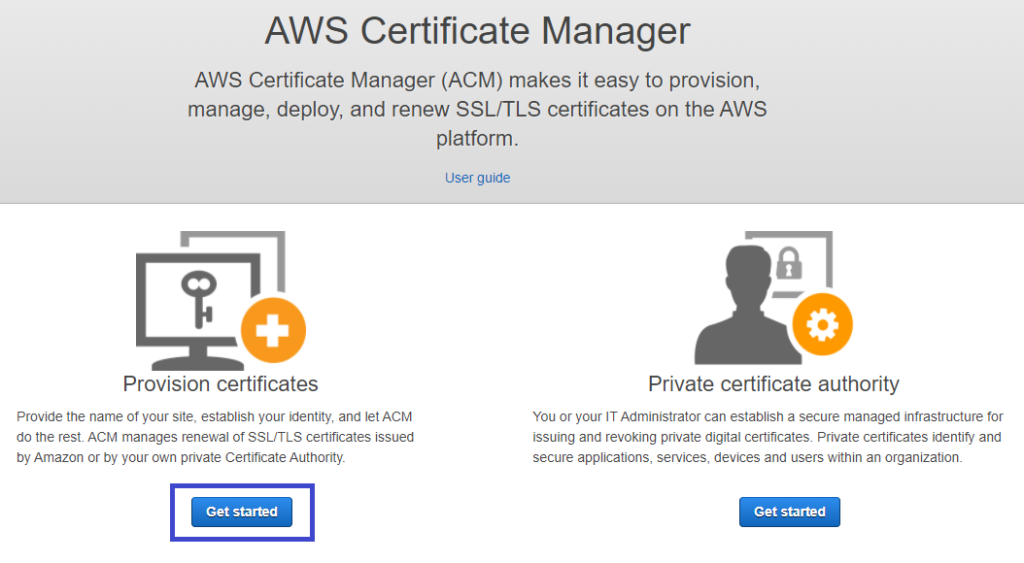
1. Search for ACM or Amazon Certificate Manager in the search bar and click on certificate manager in the AWS management console.
2. Click on the Get started button under Provision certificates to get an SSL certificate, as shown below.
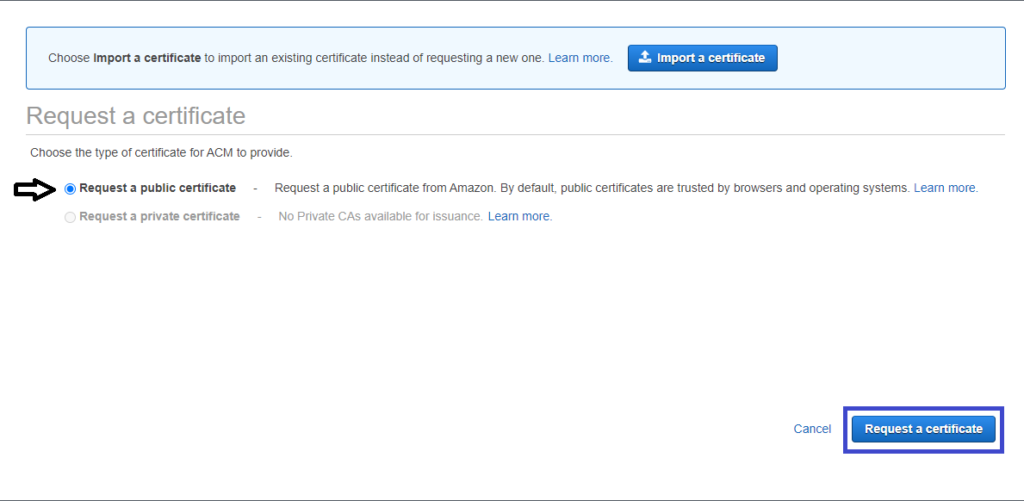
3. Now, request a public certificate by selecting the Request a public certificate option, then click on the Request a certificate button. Since your website will be available on the Internet, you must have a public certificate that clients trust.
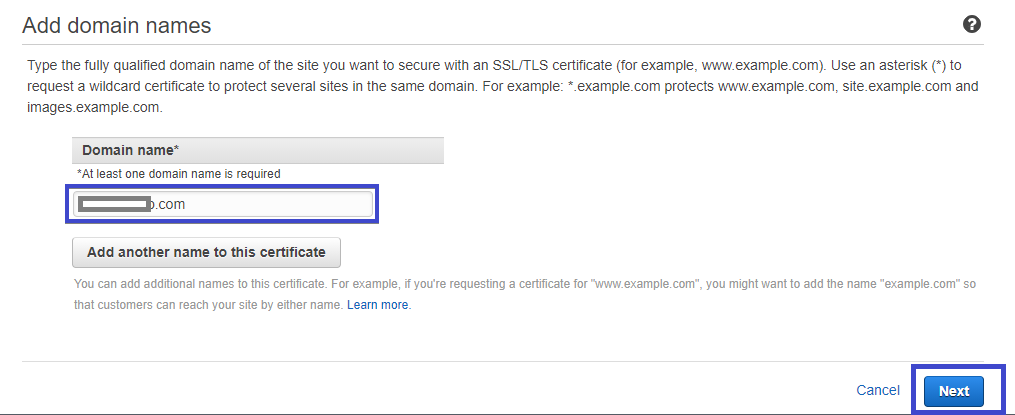
4. Enter the domain name you registered earlier, like example.com, as shown below.
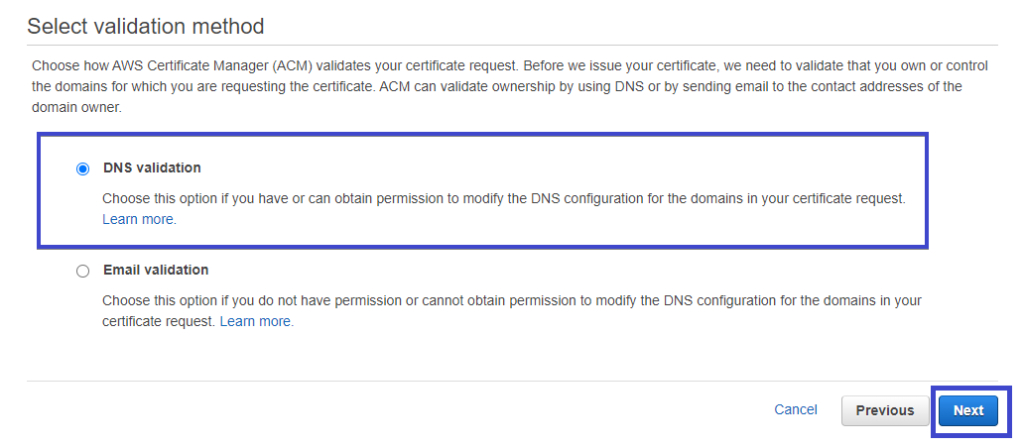
5. Now, validate the certificate request ACM provides you by selecting the DNS validation option, like the image below. DNS validation will force you to create a CNAME record to the DNS configuration of your domain to ensure you own the domain.
You can also choose the Email validation option if you don’t have permission to update your domain’s DNS zone.
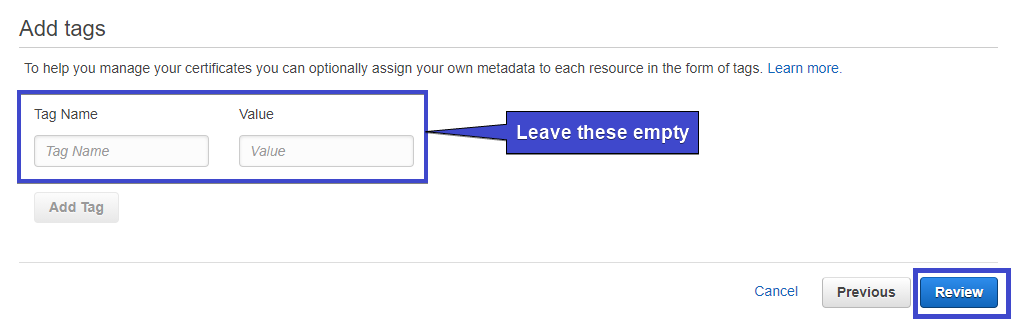
6. Next, do not add any tags and click Review. You could add tags here if you’d like to organize these resources based on an organizational structure.
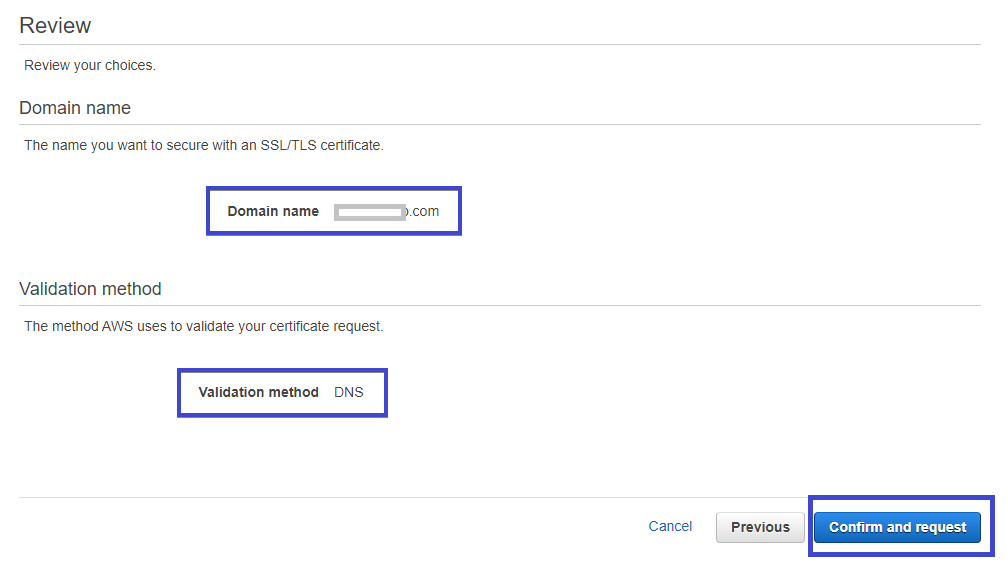
7. Review your entries and if they are correct, submit the request by clicking on the Confirm and request button.
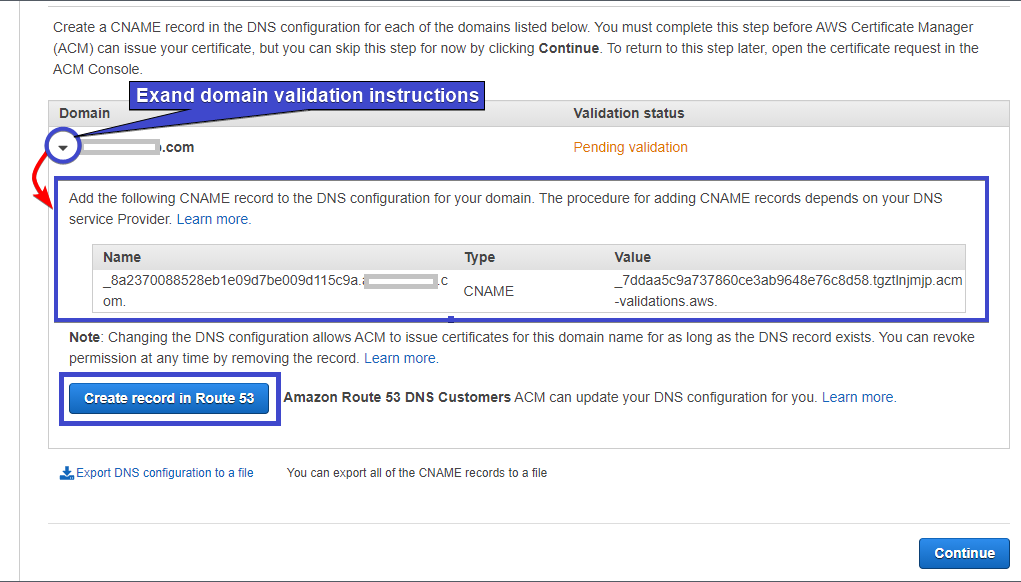
After submitting the request, you’ll see the Request in progress notice shown below. The notice states that you will need to perform further action to complete the validation and approval of the certificate.
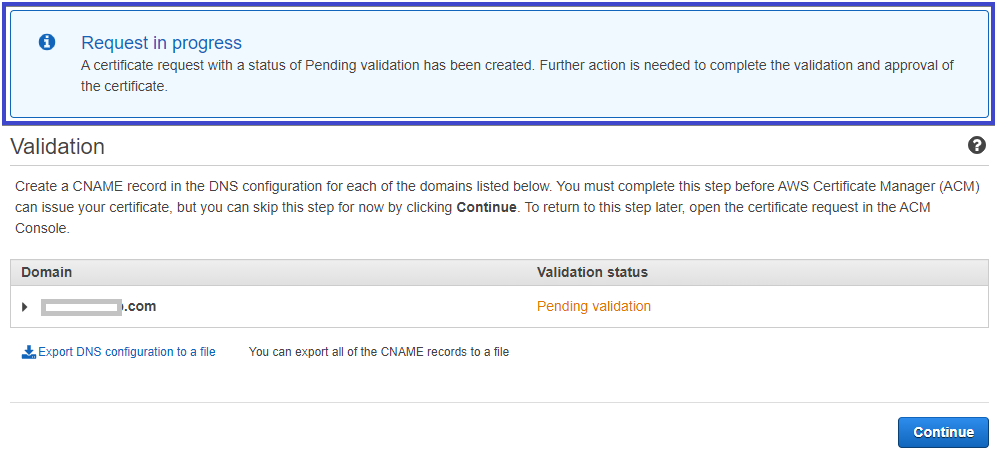
8. Now, click on the right arrow icon beside the domain in the Domain column to expand the instructions to validate your domain.
You can see below, to validate the domain, you need to add a CNAME record to the DNS configuration of your domain. The name and the value for the record will be provided, and you’ll set up the record in the provider’s platform.
Setting up the record depends on the provider. But since you have created a hosted zone in Route 53 earlier, click on the Create record in Route 53 button. Doing so will automatically add the record to the hosted zone.
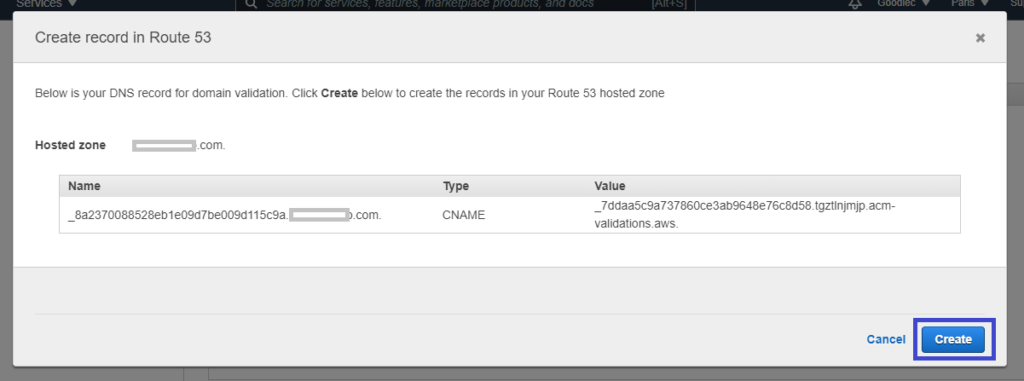
9. Click on the Create button in the pop-up window to finalize creating the record in Route 53, as shown in the following image.
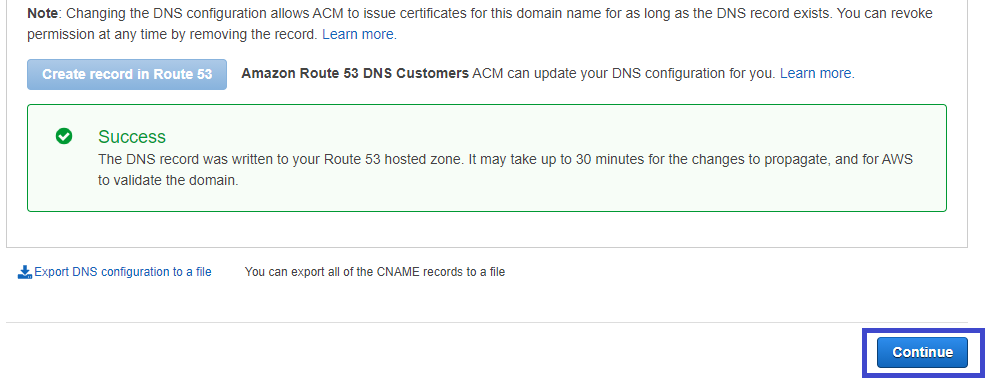
10. Finally, click on the Continue button and you should be redirected to the dashboard where you can see the certificate’s status.
Below you can see the Pending validation status, which indicates the certificate manager is trying to validate the ownership of the domain.
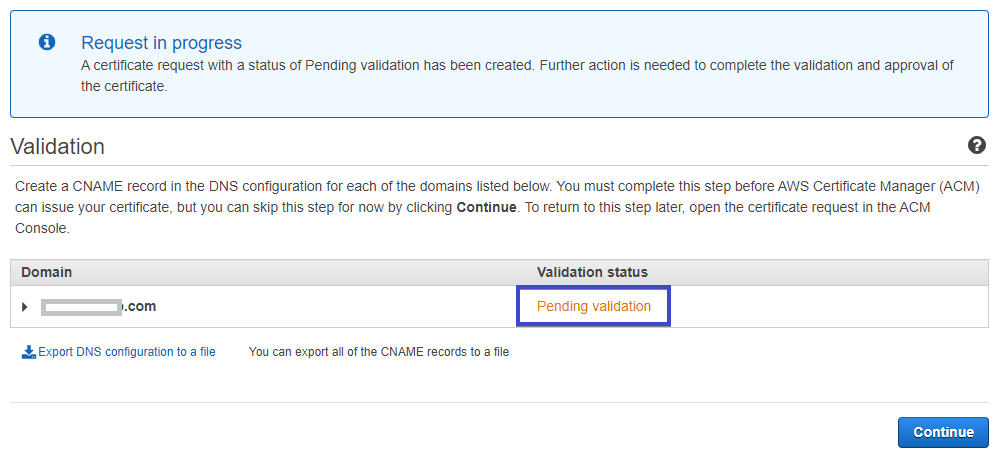
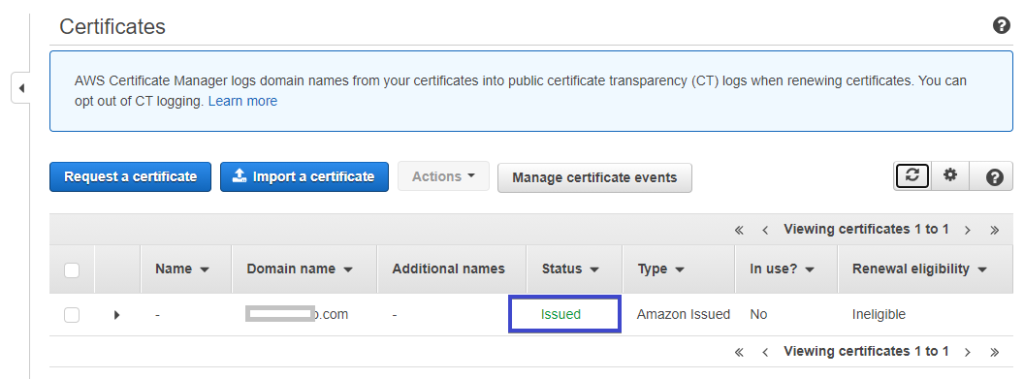
The domain validation could take up to 30 mins. Once validated, the license will be issued, and the status will change to Issued, as you see in the screenshot below.
Distributing an AWS S3 Static Website via CloudFront
Your domain has been issued an SSL certificate, but your website contents are being hosted from S3 which doesn’t support HTTPS. To serve a secure version of the website, you can use Amazon CloudFront which is AWS’ Content Delivery Network (CDN) service to serve the content of your static website being hosted on Amazon S3.
Using a CDN like AWS CloudFront will also distribute your website closer to your audience to improve performance and resiliency.
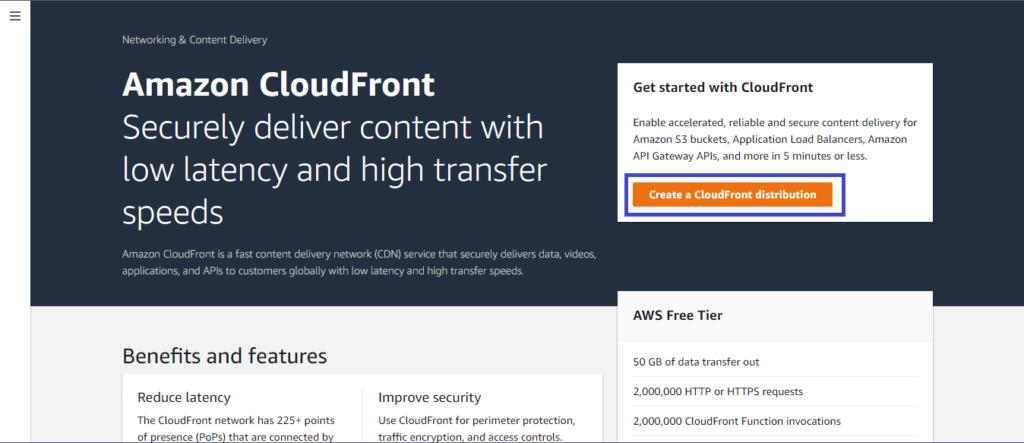
1. From the AWS management console, search for CloudFront in the search bar and click on CloudFront from the results that come up.
2. Create a CloudFront distribution by clicking on the Create a CloudFront distribution button, as shown below. A distribution is a single CDN set up for a specific website or resource.
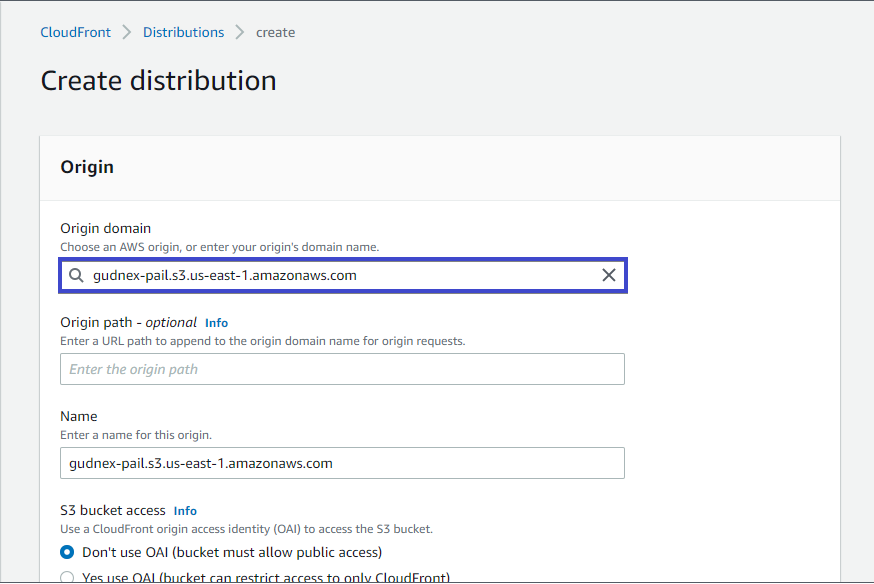
3. Set an origin domain by entering your S3 bucket endpoint in the Origin domain field. The origin domain indicates where your website content is stored. Setting up an origin domain indicates where you want to get the resource to be served via the distribution.
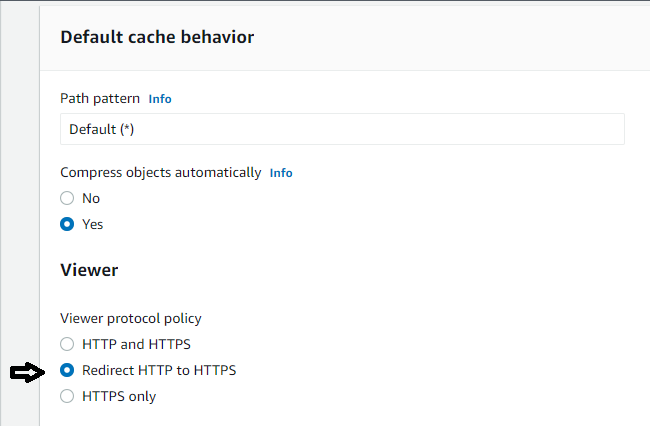
4. Now, scroll down to the Default cache behavior section, and select the Redirect HTTP to HTTPS option under Viewer protocol policy. This option forces all HTTP traffic destined to the static website to HTTPS to ensure that the website contents are always served securely.
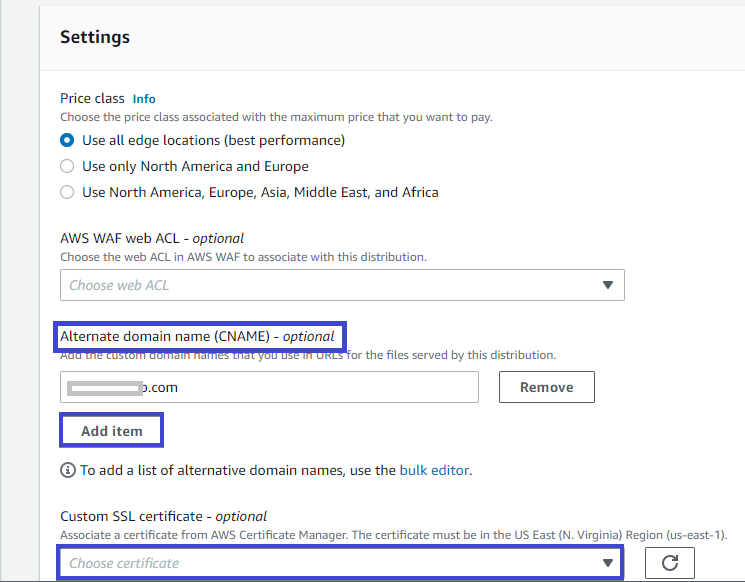
5. Scroll down to the Settings section, and click on Add item, as shown below. Doing so sets your domain name for secure access to your website rather than the domain name CloudFront assigns to the distribution.
Type your domain name (example.com) in the input field below the Alternate domain (CNAME) section. Also, select the certificate that was issued to your domain earlier in the Custom SSL certificate field.
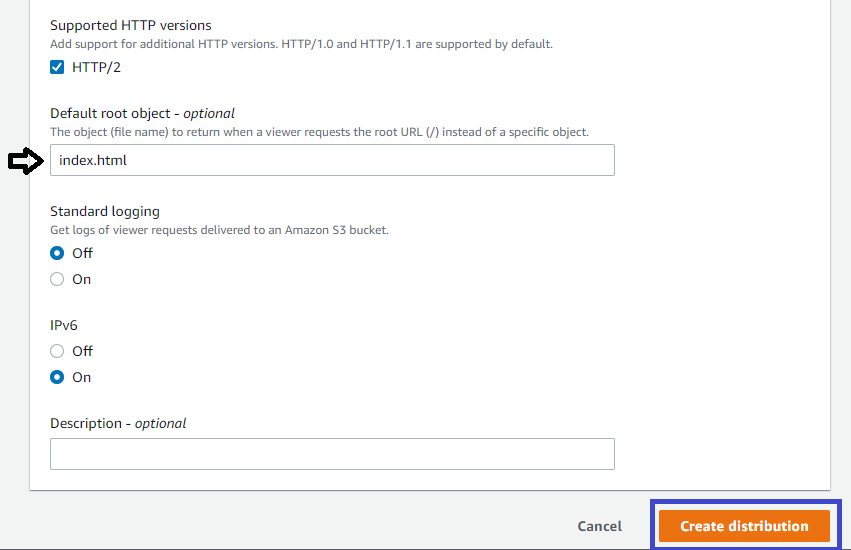
6. Next, scroll down to the default root object field and input the default home page name. You can see below that index.html is the default home page.
Leave the rest of the settings as they are the default when distributing a static website in CloudFront. Click the Create distribution button at the bottom to create the distribution.
If you created your distribution successfully, you should see a notification at the top to that effect.

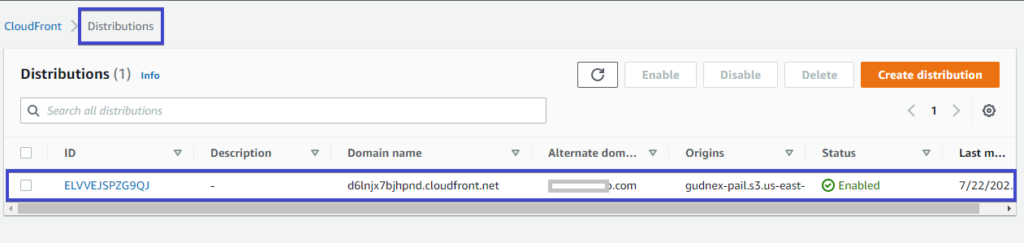
7. Click on Distributions to see your newly created distribution as indicated in the image below.
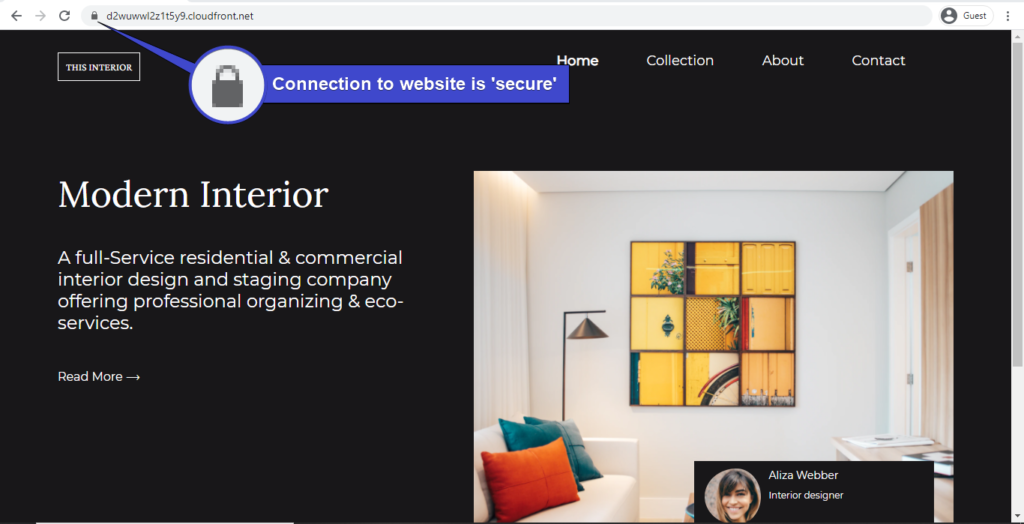
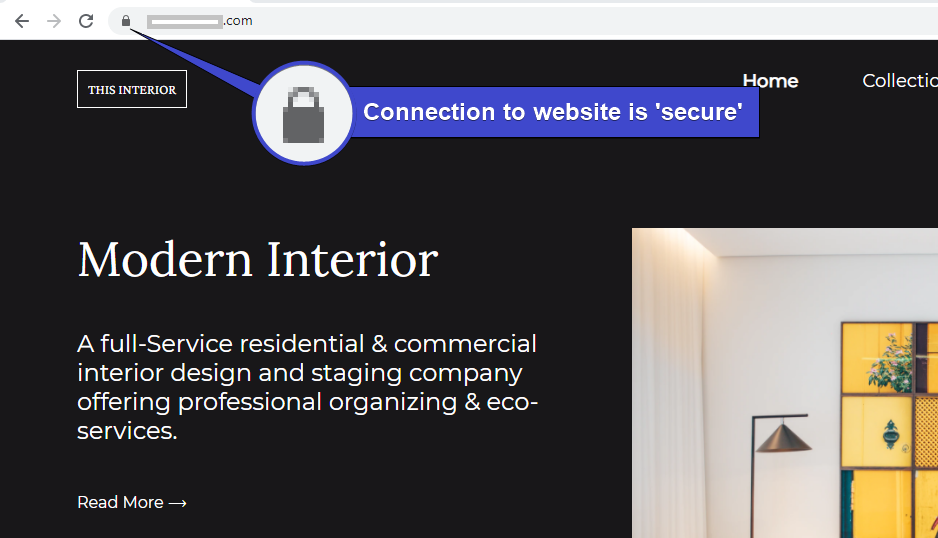
8. Finally, copy the distribution’s domain name in the Domain name column, and paste it in a browser’s address bar to test if your website shows as secure. You should see your website’s home page displayed by default.
You’ll either see an https prefix or a padlock icon in your browser’s address bar, which indicates that the connection to the website is secure like you see below.
Configuring CloudFront to Use Your Own Domain
At this point, CloudFront is still directing traffic to your S3 bucket endpoint; it’s not using your custom domain. Let’s change that. Perhaps you want to use your own domain to distribute your website instead of the one provided by CloudFront. If so, you need to create an A record for the domain name you previously registered.
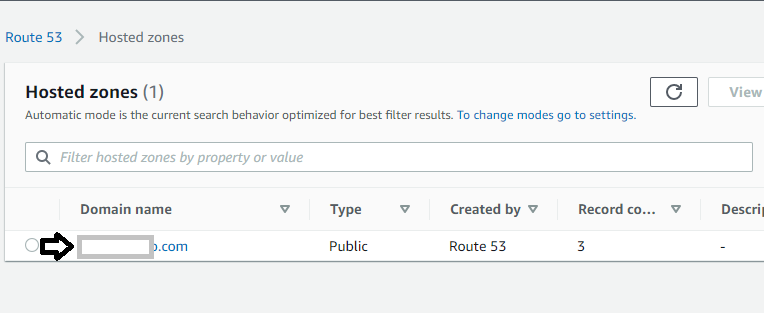
1. Click on Hosted zone under DNS management in Route 53 dashboard to access your hosted zone(s) list.

2. On the Hosted zones page, click on your domain name in the table. Doing so will redirect you to a page where you’ll create an A record type. An A record routes this domain’s incoming traffic to your CloudFront distribution.
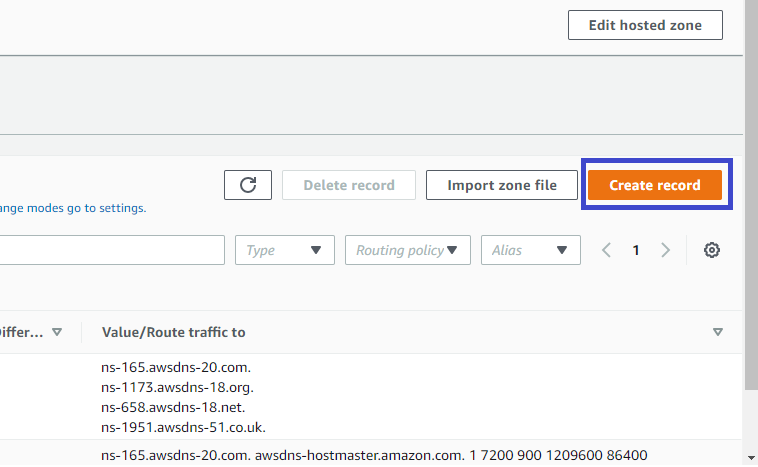
3. Now, click on the Create record button to create a record, as shown below.
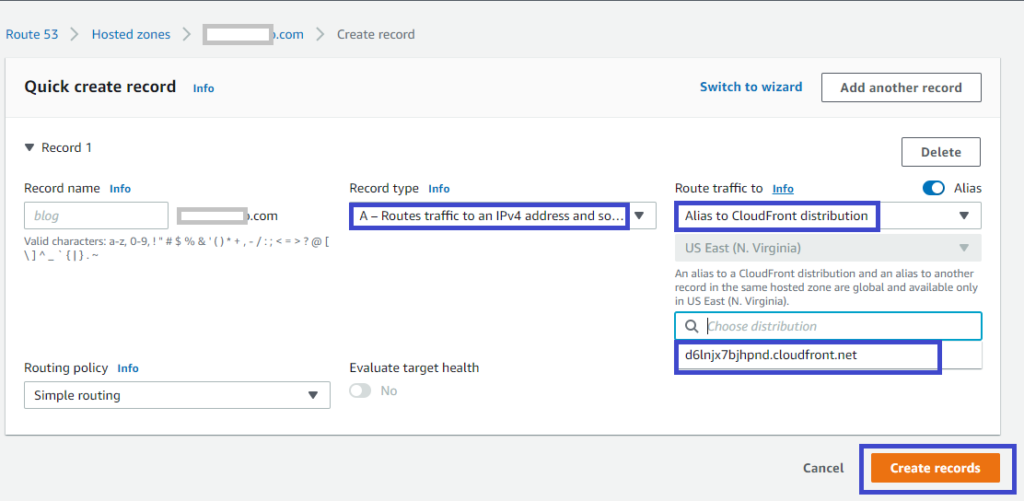
4. On the Quick create record page, configure the following items, like in the screenshot below:
- Select A as record type from the Record type select field.
- Activate the alias option and indicate that you want to create an Alias by clicking on the Alias toggle button at the right-most part of the page. An Alias is what lets you route traffic to a selected AWS resource. The resource you want to route traffic, in this case, is the CloudFront distribution that you created earlier.
- Set the domain traffic to route to a CloudFront distribution. Do so by selecting the Alias to CloudFront distribution in the Route traffic to select field. You should see that a region (US-East-1) has been selected by default.
- Now, select your CloudFront distribution domain name in the Choose distribution field, and click on the Create records button. Doing so will route the domain traffic to your CloudFront distribution.
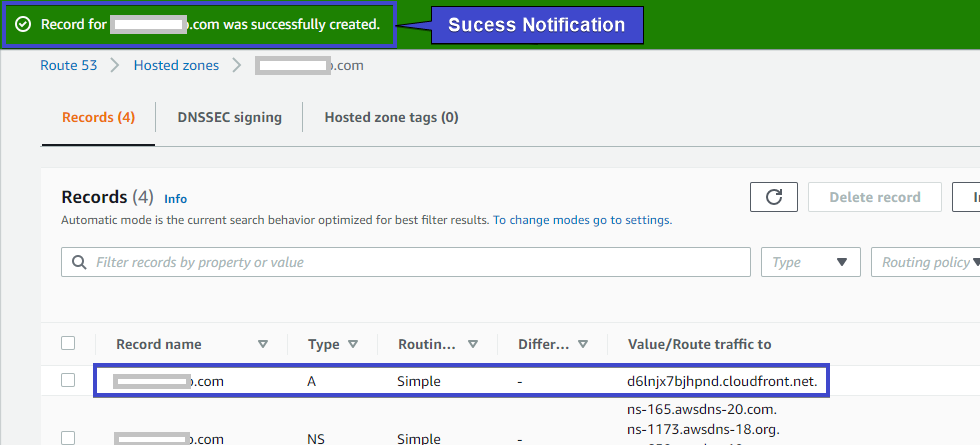
If you successfully created the record, you should see a notice at the top of the page. You can see below the A record is listed in the Records table.
5. Finally, navigate to your website via the custom domain you configured.
Notice that even though you used HTTP to access the website, your browser redirected you to HTTPS. The browser did this because of the viewer protocol policy you defined in step 4 of the “Distributing Website via CloudFront” section.
Propagating your domain may take some time, so the changes might not reflect immediately.
Conclusion
Throughout this tutorial, you’ve learned how to use some AWS services to host your static website. You’ve also experienced securing your website with an SSL certificate and optimizing your website’s distribution with CloudFront.
Now, would you turn to AWS S3 and CloudFront to secure your next static website project?


