


AWS Cloud9 is a cloud-based Integrated Development Environment (IDE) service that offers plenty of tools to code, test, and release software within a browser in a serverless environment. You can configure the IDE to your preferences for different programming languages, such as Python, JavaScript, etc.
AWS Cloud9 is similar to a desktop IDE because it provides all the configuration options for code formatting, binding shortcut keys, and more. The service lets you store your project’s files locally on remote servers, easily switch between different computers, and quickly onboard other developers.
If you want to collaborate on projects hosted on several third-party repositories, including GitHub or AWS Code commit, Cloud9 is a definite winner! This tutorial teaches you to launch a Cloud9 environment and explore various, including shared environments and source-control with GitHub.
Prerequisites
To follow this hands-on tutorial, ensure you have the following requirements.
- An AWS account. A free tier account should suffice.
- You must know your AWS account ID.
- There must be at least two AWS Identity and Access Management (IAM) users in your AWS account. This tutorial has the following IAM users.
| Username | Policy | Role |
| ata_admin | Administrative Access | The administrative user with full access to the AWS account. |
| ata_user1 | None | A normal IAM user without any assigned permission or policy. |
If you haven’t created any IAM users yet, refer to the official documentation – Creating an IAM user in your AWS account.
Creating the IAM Group with AWS Cloud9 Permission
Creating a group is an excellent way to control access to your AWS resources. Instead of assigning permissions to individual users, you can attach an existing policy to the group. The group members will inherit the permissions that the group has.
To create a new group in AWS, follow these steps.
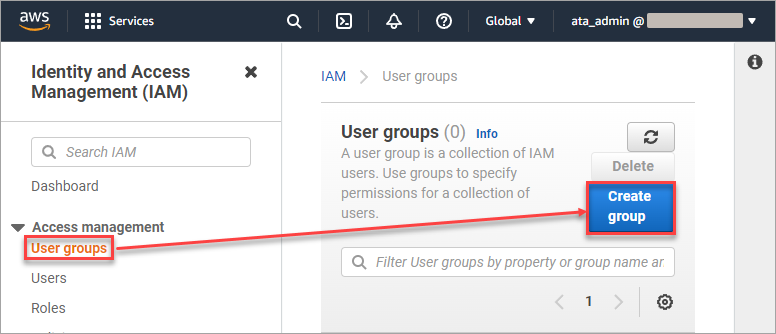
1. Open your preferred web browser and navigate to the IAM console.
2. If you haven’t logged in yet, log in using your IAM admin user account.
3. In the IAM console’s navigation pane, click User Groups → Create group.
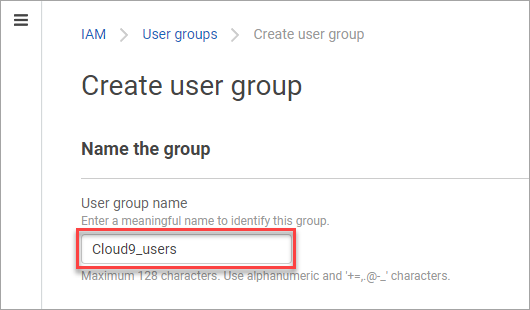
4. On the Create user group page, enter a name for the new group. The group name in this example is Cloud9_users.
5. Scroll down to the Add users to the group – Optional section. Check the box next to the user name that should become members of this group.

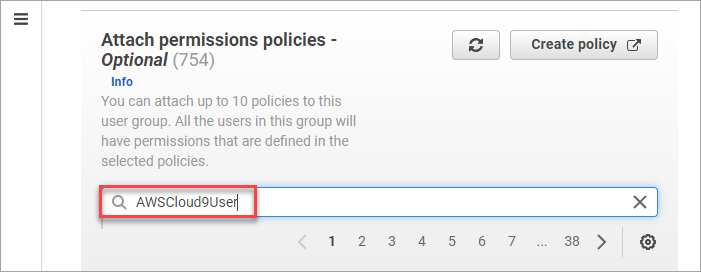
6. Scroll down to the Attach permissions policies – Optional section. Type AWSCloud9User in the search box and press Enter.
The AWSCloud9User policy provides permission to create AWS Cloud9 development environments and to manage owned environments.
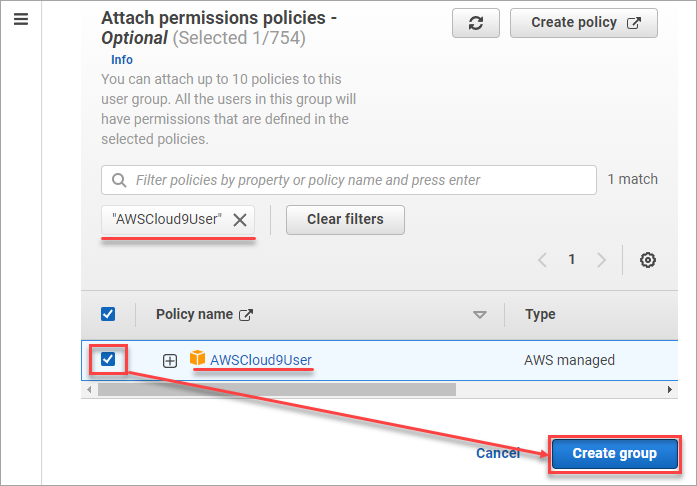
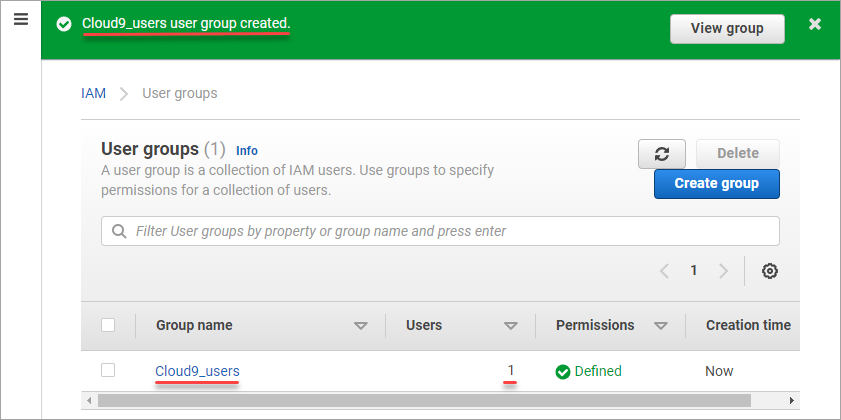
7. Check the AWSCloud9User under the Policy name list and click Create group.
Wait for the group creation process to finish, and you should see a banner at the top, similar to the screenshot below. You have successfully created the Cloud9_users group.
When new users need access to AWS Cloud9, you can add those users as members of the Cloud9_users group, and they will inherit that permission.
Refer to Adding and removing users in an IAM user group to know how to add new users to the group.
Creating a New AWS Cloud9 Environment
In AWS Cloud9, an environment is where you store your development projects and run the tools to develop applications. Developers can collaborate on different projects in real-time in the same environment. But first, the user must create an AWS Cloud9 environment.
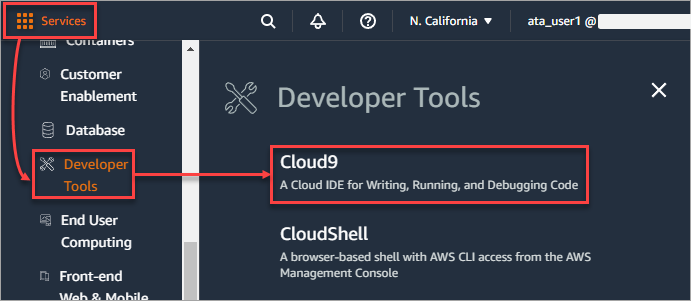
1. On the AWS Console, click Services → Developer Tools → Cloud9.
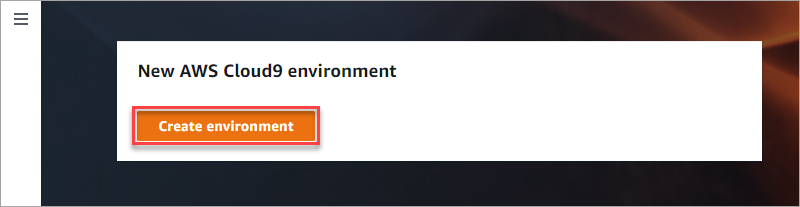
2. At this point, you do not have any environments yet. To create one, click Create environment.
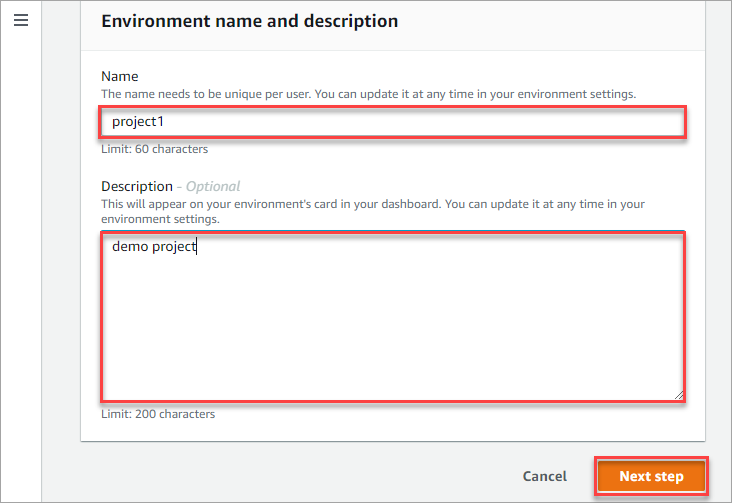
3. Under the Environment name and description, enter the Name of the project and the Description. The environment name in this example is project1. Once you’ve entered the name and description, click Next step.
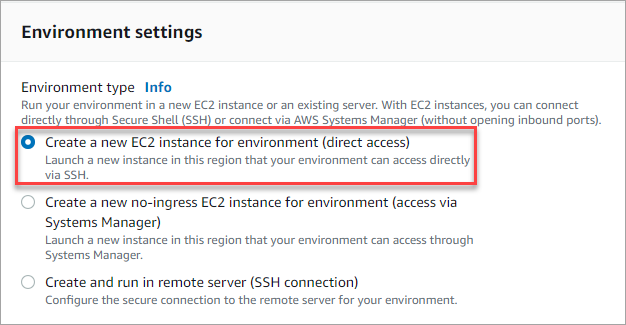
4. Under the Environment settings, do the following, select the Environment type. Your choices are to create the environment in a new Amazon Elastic Compute Cloud (EC2) instance (direct SSH access or via Systems Manager) or in an existing server (direct SSH access).
For this tutorial, choose the Create a new EC2 instance for environment (direct access) option.
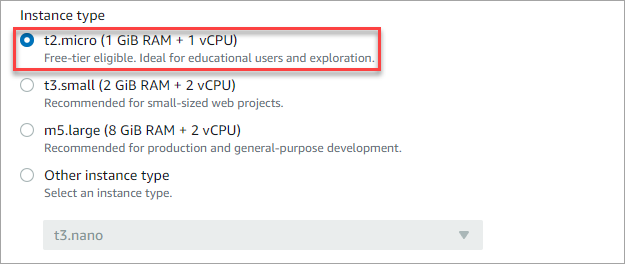
5. Scroll down to the Instance type section and select the server size for your environment. For this example, choose the t2.micro option, which is free-tier eligible.
6. Next, scroll down to the Platform section and select your environment’s platform. Leave the default recommended option, Amazon Linux 2. Also, leave the default Cost-saving setting value and click the Next step button.
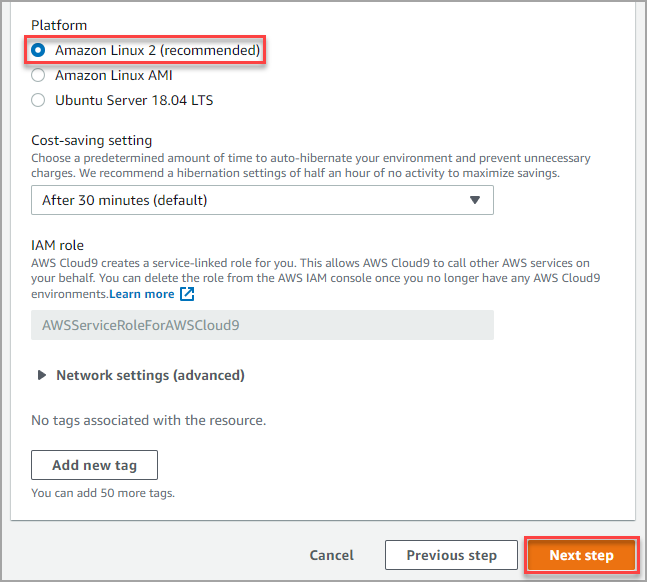
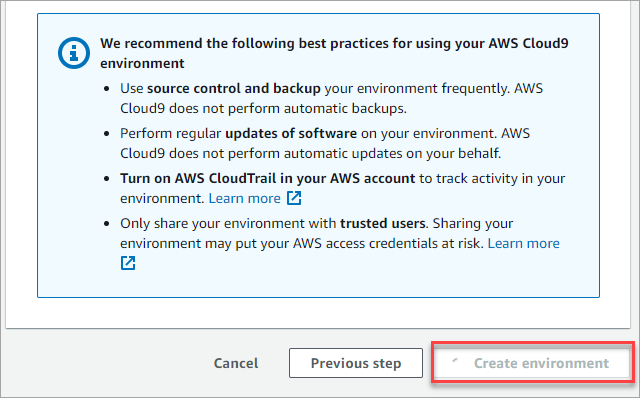
7. Review your environment configuration summary on the next page and click Create environment.
You will see the below image while you wait for the environment creation to finish.

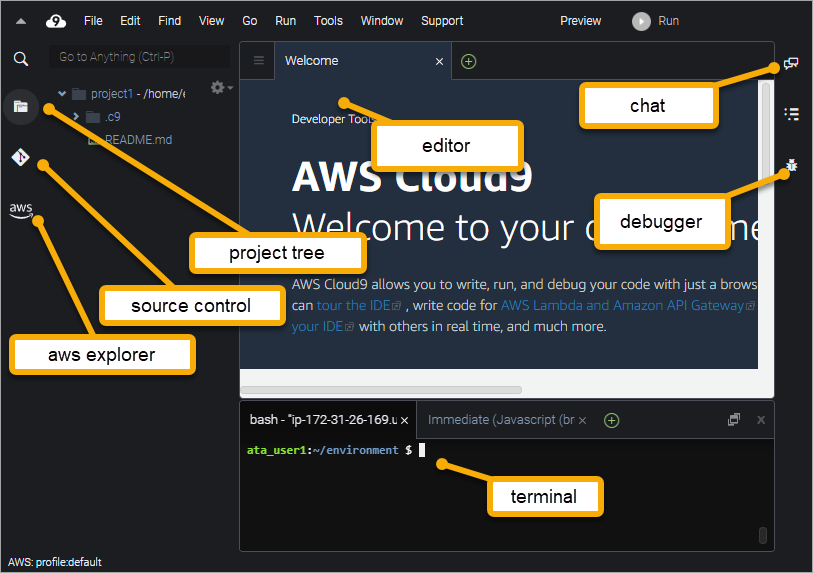
Your AWS Cloud9 environment is now ready. As you can see below, Cloud9 automatically opens the IDE’s environment folder (project1).
Inviting Members to the AWS Cloud9 Environment
An excellent feature of the AWS Cloud9 IDE is the native ability for real-time collaboration. By default, an environment only has one member, which is the environment creator.
If you have a team that needs to collaborate on the same project, AWS Cloud9 lets you share the environment and assign read or read and write permissions.
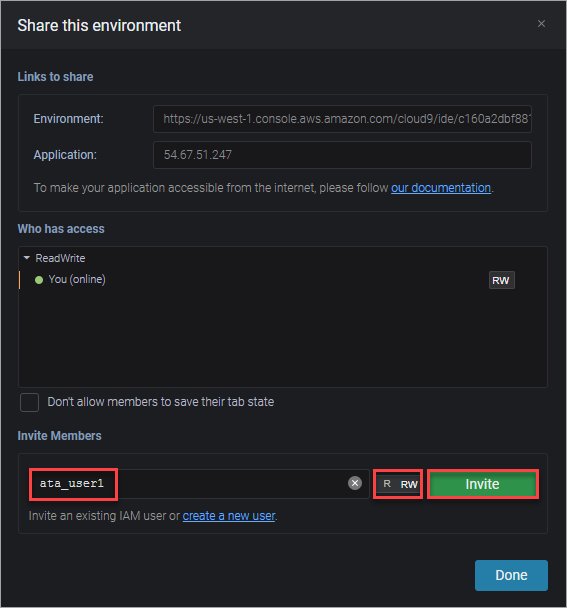
1. Click the Share button on the top-right of the AWS Cloud9 IDE.

2. Next, type the user name you wish to invite into the environment under the Invite Members section. Choose the access level; R = read, RW =read-write. Click the Invite button.
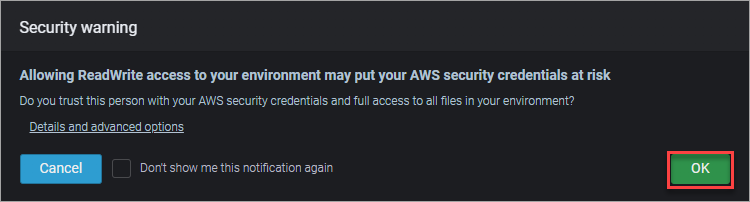
3. If you give RW access to the user, you will get the security warning message below. To confirm that the action, click OK.
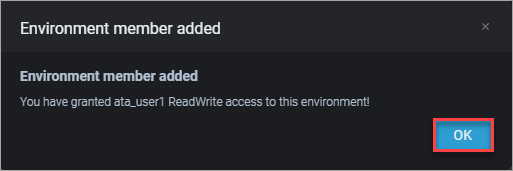
4. You’ll receive the confirmation message below that the member addition was successful. Click OK to close the message.
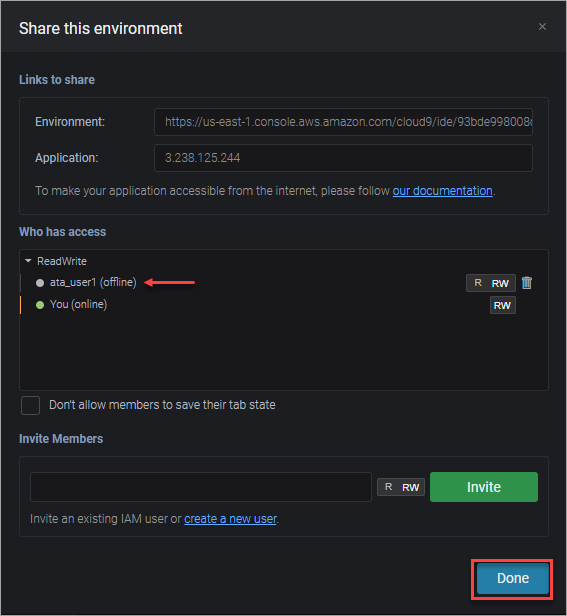
5. As you can see below, the Who has access list shows the new user you added to the environment. Click Done to exit this form.
Collaborating in the AWS Cloud9 Environment
You’ve added a new member to your environment, and it’s time to test their access. You and the other member can now collaborate on the project, send messages directly within the IDE, and more.
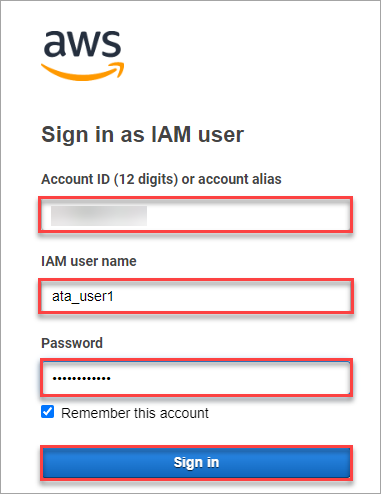
1. Open a new browser window or an Incognito or InPrivate tab.
2. Log in to the AWS Cloud9 console using the ata_user1 account.
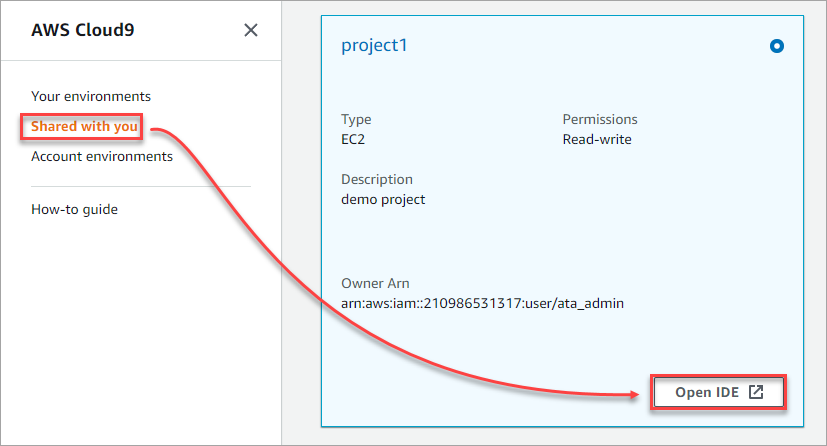
3. Next, click the Shared with you link on the left-hand side. This link opens the list of environments other users shared with you. As you can see below, the project1 environment is available to the user with read-write permissions.
Click the Open IDE link to open the AWS Cloud9 IDE in a new tab.
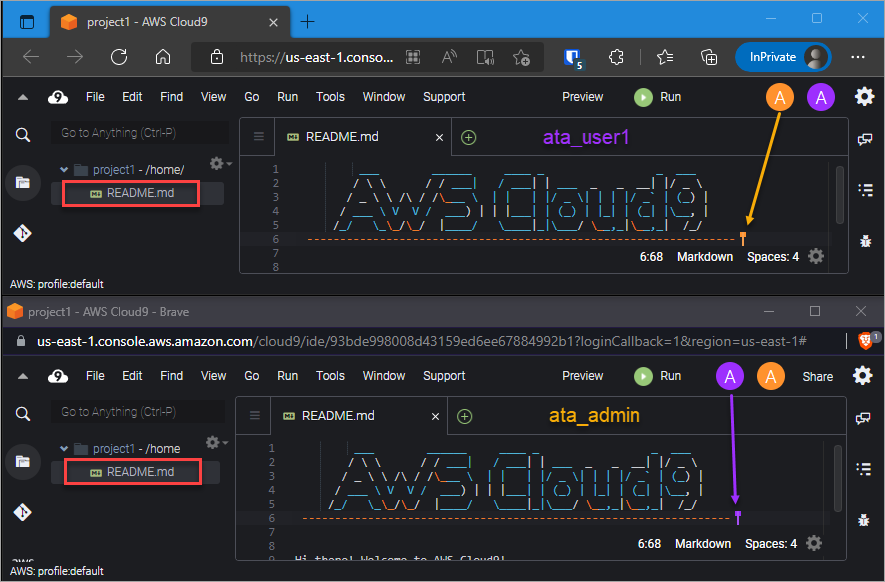
4. Once the environment is open, double-click the README.md file to open it in the editor.
Repeat the same step in the IDE of ata_admin. As you can see below, both users can see which are accessing the same file simultaneously and their current location in the file.
5. Move the cursor to the end of the file and start typing anything. You’ll see that the changes appear on both users’ IDEs in real-time.

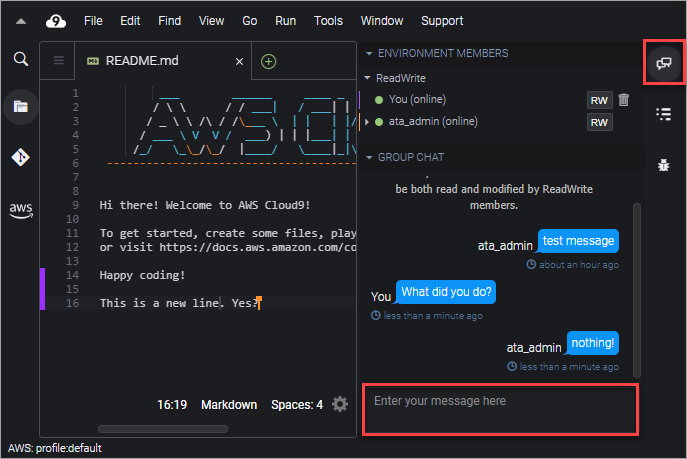
6. Click the Chat icon on the right-hand side to chat with the group members. Type the message in the box and press Enter to send.
Conclusion
With AWS Cloud9, you can create, run, and debug code in a serverless environment and support multi-languages and the AWS Cloud Development Kit (CDK).
AWS Cloud9’s native support for real-time collaboration, group chat, and source control makes this IDE an excellent development environment for teams of all sizes.


