

Deploying applications to the cloud, such as in AWS, can be manual or through automation tools. Suppose you are working with a basic application with only a handful of cloud resources; manual deployment could be manageable. But, as the complexity increases, manual deployment is no longer practical. In such cases, the AWS Cloud Development Kit (CDK) will be a lifesaver. In this article, you’ll learn some AWS CDK Examples.
AWS CDK is an open-source development framework for defining cloud infrastructure as code (IaC). CDK allows you to code in modern programming languages like Java and Python to automate AWS infrastructure.
By following this tutorial, you’ll learn to create and deploy a basic AWS CDK app, from initializing the project to deploying the resulting AWS CloudFormation template. The app will contain one stack, which contains one resource: an Amazon API Gateway to call the Lambda function.
Prerequisites
To follow along with this hands-on tutorial, make sure you have the following requirements.
- An AWS account. A free tier account should suffice.
- An AWS Identity and Access Management (IAM) user with the AWSCloudFormationFullAccess policy attached to the account
- The Access Key ID and Secret Access Key of your IAM user.
- A Windows or Linux computer. This tutorial will be using a Windows 10 PC.
- Your computer must have the following software to follow along.
- Node.js (with tools), here version 16.15.0 LTS is used. According to the AWS CDK documentation
Node.js versions 13.0.0 through 13.6.0 are not compatible with the AWS CDK due to compatibility issues with its dependencies.
- Git, here the version used is 2.36.0.
- The latest AWS CLI version, here 2.6.2 is used.
- Python version 3.10.4 is used (3.6 minimum).
- A code editor, such as Visual Studio Code (VSCode), which this tutorial will use.
Installing AWS CDK
AWS CDK converts the infrastructure code to a CloudFormation script before execution. AWS CDK includes a library of AWS constructors for each AWS service, such as Amazon S3 buckets, Lambda functions, Amazon DynamoDB tables, and so on.
The main CDK package is called aws-cdk-lib, which contains base classes like Stack and App used in most CDK applications.
For the guide, you will be using Python as the programming language to provision cloud resources using CDK. Before starting, make sure to configure your workstation with your credentials and an AWS region if you have not already done so.
1. Open a terminal and run the below command to initiate the AWS CLI configuration.
aws configure2. Type in your AWS Access Key ID, Secret Access Key, and Default region name. Do not change the Default output format empty.

3. Type the following command to check the calling IAM user id. This role will be the one with which you will create and have complete access to your CDK app.
aws sts get-caller-identity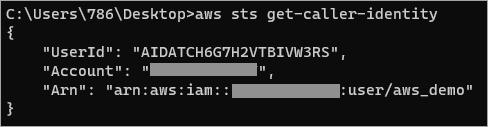
4. Next, install the AWS CDK CLI (aws-cdk)on your computer by running the Node Package Manager (npm) command.
npm install -g aws-cdk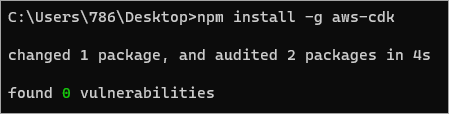
5. Restart your terminal and confirm the AWS CDK version you installed. As of this writing, the latest CDK version is 2.23.0 (build 50444aa).
cdk --version
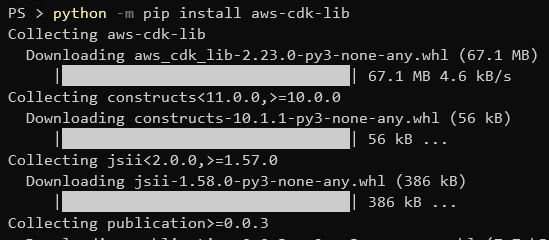
6. Finally, execute the following command to install the aws-cdk-lib module, which contains the base classes for most CDK applications.
python -m pip install aws-cdk-libWait for the installation to finish.
Creating Your First AWS CDK Example Application
Two core concepts of AWS CDK are stacks and constructs. Stacks are the smallest deployable unit in AWS CDK. Resources defined in a stack are assumed to be a single unit. These stacks contain constructs that encapsulate AWS resources to create a reusable cloud component.
For example, the resources can be an s3.Bucket that represents an Amazon S3 bucket or sqs.Queue that represents an Amazon SQS queue.
Now you have successfully installed AWS CDK CLI and its Python module, the next step is to create a new CDK project.
1. Create an empty directory and invoke cdk init to create an AWS CDK project. You may create the project directory anywhere you have access. In this example, the directory will be on the user’s Desktop.
# Create an empty directory for the project
mkdir cdk_py_project && cd cdk_py_project

# Create the CDK project and set Python as its language
cdk init app --language python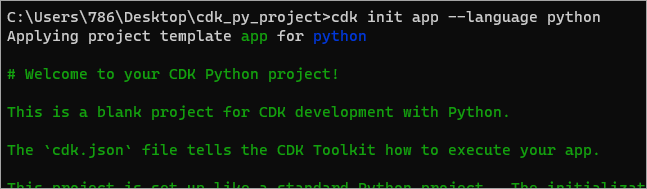
2. The cdk init command created files and directory structure. The command also created a virtual environment to run Python and install packages and AWS CDK core dependencies.
To activate the virtual environment, run the below command.
.venv\\Scripts\\activate.batAs you can see below, you have now entered the virtual environment. The prompt changed to have the (.venv) prefix.

3. Next, install the CDK project requirements by running the below command and for the installation to complete.
python -m pip install -r requirements.txt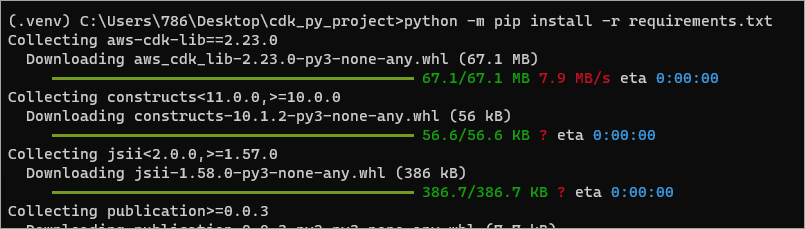
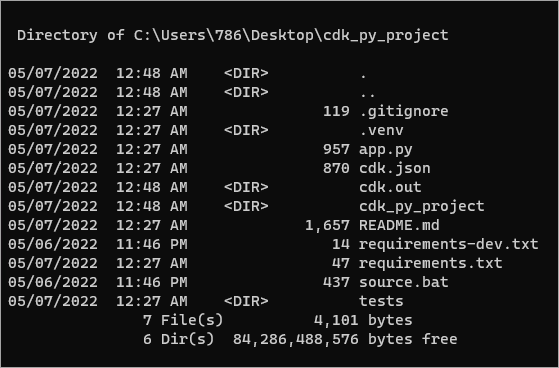
4. After the installation of the requirements, list the directory contents to view the files and folders.
dirYou should see a similar output as below. The folder you will be working with is cdk_py_project. The app.py file instantiates the instance of the stack that you will create.
5. Lastly, verify everything is working correctly by listing the stacks in your app with the following command.
cdk listAt this point, you should only see one stack.

Synthesizing an AWS CloudFormation Template From the Application
You’ve finished defining the resources into the stack. Next, you’ll need to translate these resources into an AWS CloudFormation template using a process called synthesizing.
Run the below command to synthesize the CDK app into a CloudFormation template. The process may take several seconds to a few minutes complete.
cdk synth
If your app contains more than one stack, you must specify which stack to synthesize by adding the stack name to the command. For example,
cdk synth <stack name>.
You’ll see a similar output like the screenshot below after the command ends.
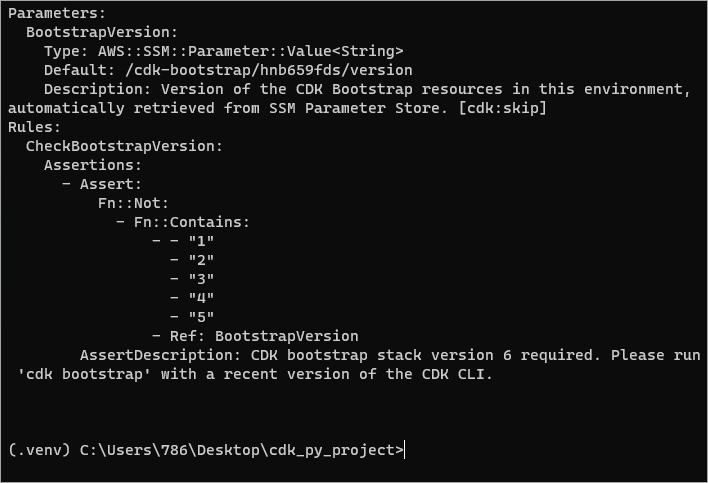
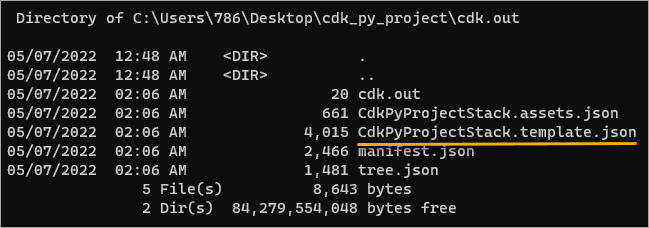
The command saves the template into a JSON document called <stack name>.template.json under the cdk.out directory. To confirm, list the contents of the directory like so.
dir cdk.out
Bootstrapping the Environment
AWS CDK requires resources to perform the deployment. Specifically, the resources CDK requires are an S3 bucket for storage and specific IAM roles to perform the deployment. The process of provisioning these initial resources is called bootstrapping.
The bootstrap stack, also known as CDKToolkit, includes all these required resources. Follow the below steps to start the bootstrap.
1. Run the below command to install the bootstrap stack into your virtual environment and wait for the process to complete. cdk bootstrap
Listing the template directory contentsYou will see an output on the screen similar to the screenshot below.

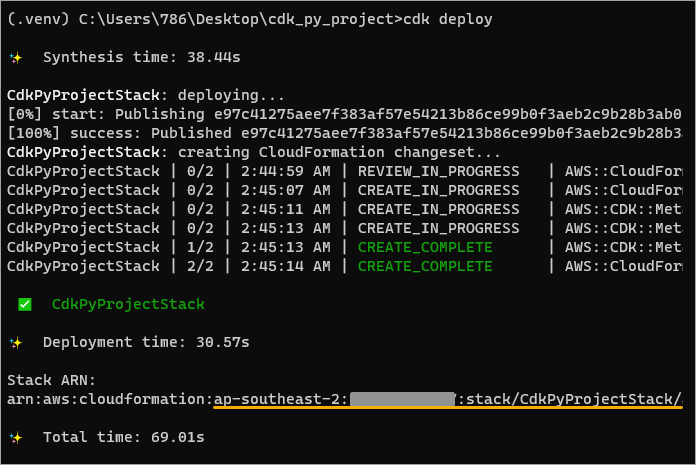
2. Next, run the below command to deploy the CDKToolkit to AWS.
cdk deployThe output will contain ACCOUNT-ID, STACK-ID, and REGION where you created the app.
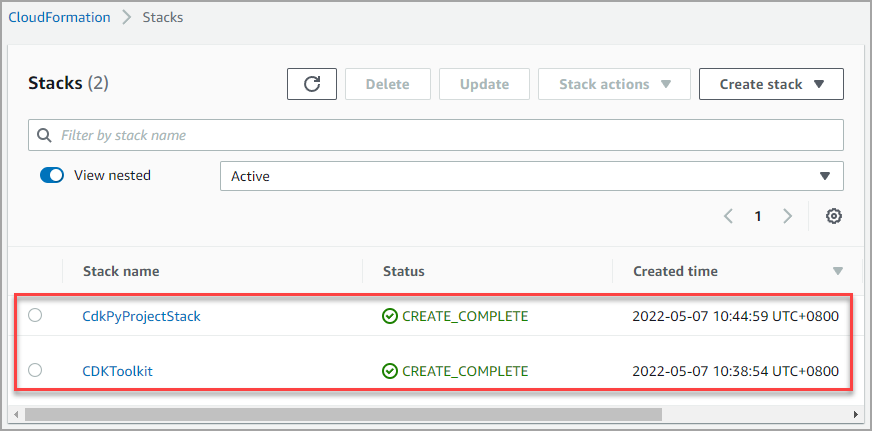
3. Now, open a web browser and navigate to the AWS CloudFormation console. Make sure you are in the right region. You should now see the stacks you deployed.
Updating your Application Code
You’ve deployed your AWS CDK stack, but because you haven’t added any code yet, the application doesn’t do anything. For your app to be useful, you must add your code for what you intend the app to do.
While there are many AWS CDK examples that exist that you can try, nothing beats creating your own AWS CDK example application from scratch. In this section, you will create a Lambda function that will handle the infrastructure and process the events for your application.
For simplicity, you will create a function that returns the current date and time, including the HTTP status code and HTTP headers.
1. First, open your project directory in the code editor. This example uses Visual Studio Code as the editor. # Open the current directory in VSCode code .
# Open the current directory in VSCode
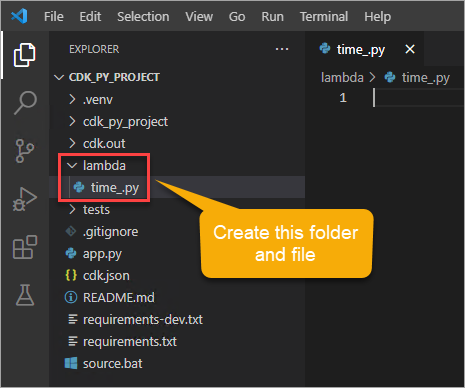
code .2. Next, create a directory called lambda at the root of your project. And under the lambda folder, create a new file called time_.py.
3. Copy the function code below and paste it into the time_.py file. This code returns the current date and time. Save the file after adding the code.
import json

import datetime


def handler(event, context):

    current_time = datetime.datetime.now()

    body = {

        "message": "Hello, the current date and time is " + str(current_time)

    }

    response = {

        "statusCode": 200,
        "headers": {
            'Content-Type': 'text/plain'
        },

        "body": json.dumps(body)

    }

    return response
4. Now, open cdk_py_project/cdk_py_project_stack.py.
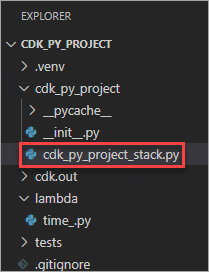
Replace the existing code with the one below. To briefly explain this code:
- Import
aws_lambdamodule as_lambda(note the underscore) becauselambdais a built-in identifier in Python. - The function will use the Python 3.9 runtime.
- The
time_.handlerrefers to the function handler in app.py.
from aws_cdk import (
    # Duration,
    Stack,
    # aws_sqs as sqs,
    aws_lambda as _lambda,
)
from constructs import Construct


class CdkPyProjectStack(Stack):

    def __init__(self, scope: Construct, construct_id: str, **kwargs) -> None:
        super().__init__(scope, construct_id, **kwargs)

        # Defines an AWS Lambda resource
        my_lambda = _lambda.Function(
            self, 'TimeHandler',
            runtime=_lambda.Runtime.PYTHON_3_9,
            code=_lambda.Code.from_asset('lambda'),
            handler='time_.handler',
        )
Save the cdk_py_project_stack.py file after editing.
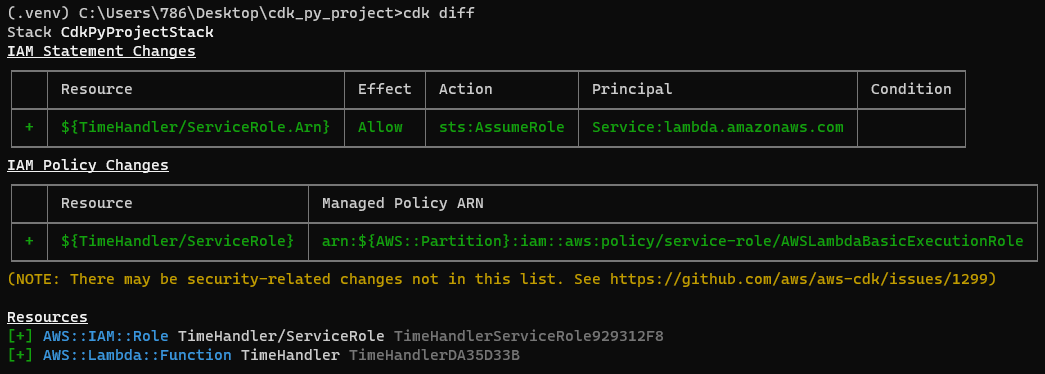
5. Before deploying your modified application, inspect the changes by running the below command. cdk diff
cdk diffBased on the result below, the code will synthesize an AWS::Lambda::Function resource and a couple of CloudFormation parameters that the toolkit will use to propagate the location of the handler code.
Deploy the AWS CDK Example Application
Finally, you can now deploy the application. In this example, when you deploy the application, the command uploads the lambda directory from your disk directly to the bootstrap bucket.
Run the below command to deploy the AWS CDK example application.
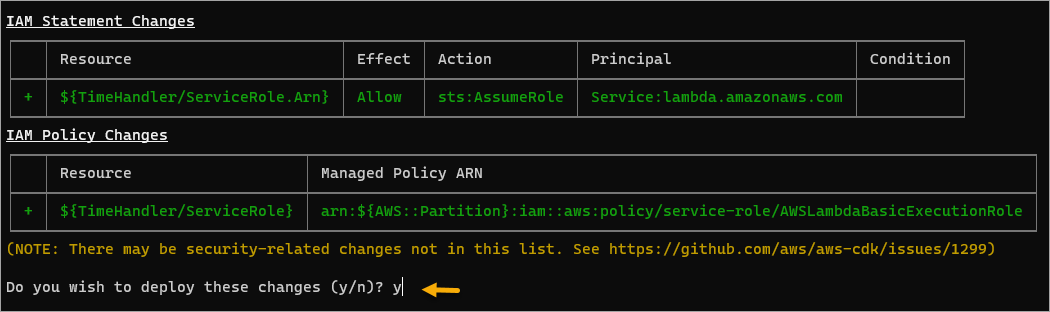
cdk deploy
Press Y to confirm the deployment.
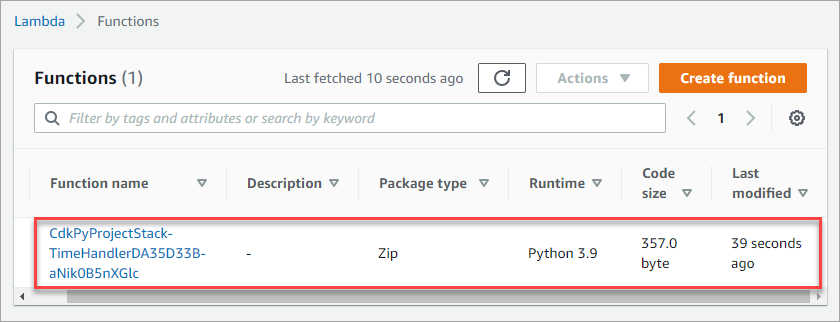
Using your web browser, navigate to the AWS Lambda Console, and you should see the function that you created and deployed.
Testing the AWS CDK Example Application
So you’ve deployed the application and confirmed its existence in the AWS console. But does it work? To find out, you must test the application by following the below steps.
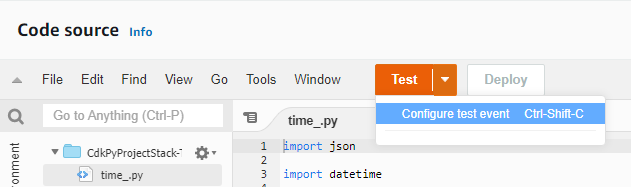
1. Click on the function name and scroll down to the Code source section.
2. Click on the Test button drop-down arrow and click Configure test event.
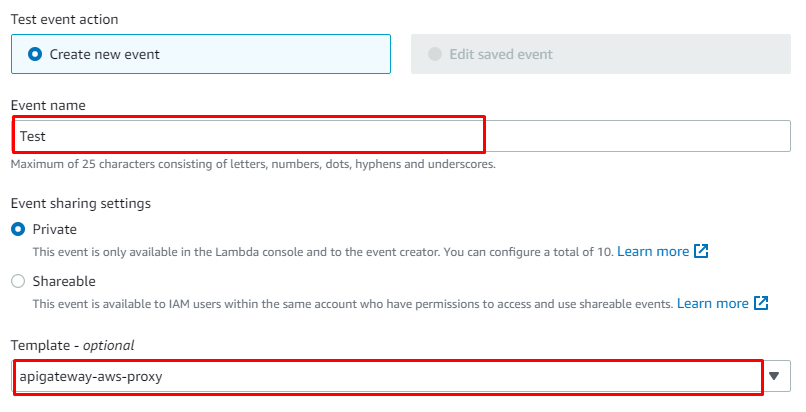
3. Enter Test as the Event name, select Amazon API Gateway AWS Proxy from the Event template list, and click on the Save button.
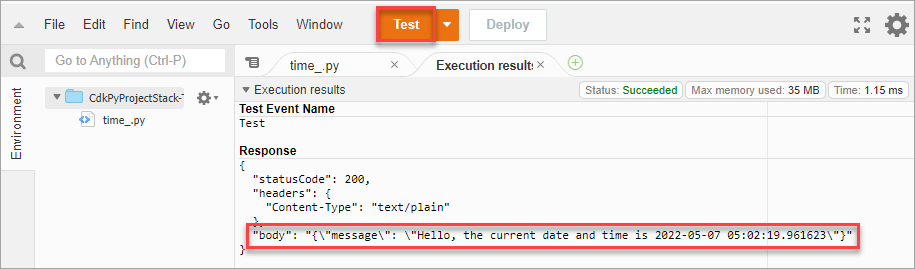
4. Now, click the Test button again and wait for the execution to complete. As you can see below, the function worked and returned the current date and time.
Cleaning Up
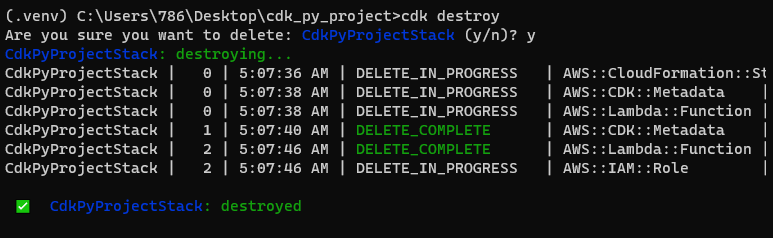
If at some point, the application is no longer necessary, you may need to destroy the stack. Destroying the stack means that you’re deleting the application along with all the resources that the bootstrapping created.
To destroy the stack, run the below command—Press Y at the confirmation prompt.
Conclusion
You’ve learned to wield the AWS CDK toolkit as a weapon of mass deployment. You’ve created and deployed an AWS CDK example application. Along with the application, the CDK toolkit also cloud-forms or provisions the resources that the application requires – eliminating efforts to create them separately.
What other AWS CDK examples would you be interested in trying out? Remember, you’re not limited to using Python when deploying applications with CDK!


