

Are you looking for a way to keep your Ubuntu system in its tip-top shape? You are in luck! Learn how to keep up to date with automatic upgrades in Ubuntu and upgrade your system regularly.
In this tutorial, you will learn how to set Automatic Upgrades on your machine, configured for total control over which packages to upgrade.
Stay tuned and let Automatic Upgrade keep your Ubuntu system stay up-to-date!
Requirements
This tutorial comprises hands-on demonstrations. To complete this tutorial, you will need the following:
- An Ubuntu system – This tutorial uses Ubuntu 20.04, but you can use any flavor of Ubuntu, including Ubuntu Desktop, Ubuntu Server, or Kubuntu.
- A user account with sudo privileges.
Installing Automatic Upgrades in Ubuntu
One of the quickest ways to ensure you get the latest updates as they are released is with the Automatic Upgrade. This tutorial will install Automatic Upgrade on your machine with the apt package manager.
1. Open your terminal and run the following apt update command to update your system’s package index.
sudo apt update -y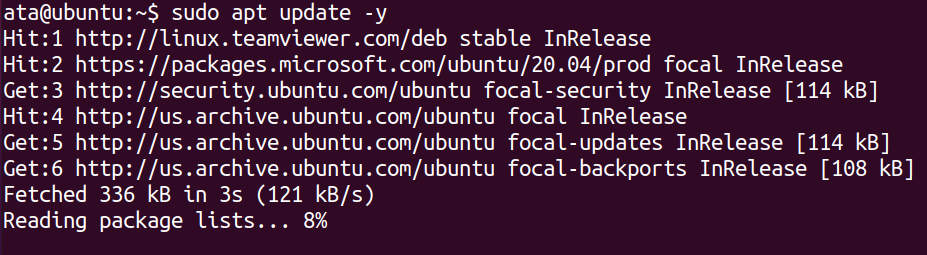
2. Next, run the below apt install command to install the unattended-upgrades package.
sudo apt install unattended-upgrades -y
3. Once installed, run the below systemctl commands to start and enable the unattended-upgrades service systemd unit. This command ensures that the service starts automatically at boot time and persists after reboot.
# Start the unattended-upgrades service
sudo systemctl start unattended-upgrades
# Enables the unattended-upgrades to start at bootup
sudo systemctl enable unattended-upgrades4. Finally, run the following command to check the status of the unattended-upgradesservice unit to ensure it runs correctly.
sudo systemctl status unattended-upgrades.service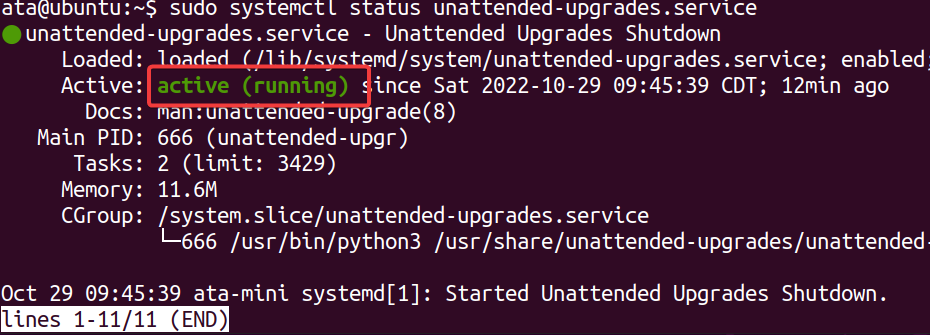
Configuring Automatic Upgrade
Installing and enabling Automatic Upgrade should work fine in getting automatic updates for your machine. But what if there are packages you do not want to get constant updates? Configuring Automatic Upgrade will do the trick.
To configure Automatic Upgrade, open the configuration file (/etc/apt/apt.conf.d/50unattended-upgrades) in your preferred text editor.
You will see a similar configuration to the one below. The // symbol in front of each option denotes the option is commented out, which the Automatic Upgrade service ignores.

Read on and see how you can get complete control over which packages get constant updates.
Ignoring Specific Packages
Why let other packages update if you can have them blacklisted? The Automatic Upgrade configuration file enables you to ignore specific packages. This feature can be useful whether you want to ignore packages totally or hold them off on upgrading until a later time.
Scroll down to the Unattended-Upgrade::Package-Blacklist section and add the names of any packages you want to blacklist, each on its line.
For example, add apache2 to blacklist the Apache package.

Enabling Extra Repositories
Only the official Ubuntu and security repositories are enabled by default in Automatic Upgrade. But you can allow other repositories to include in the upgrade process.
Scroll down to the Unattended-Upgrade::Allowed-Origins section.
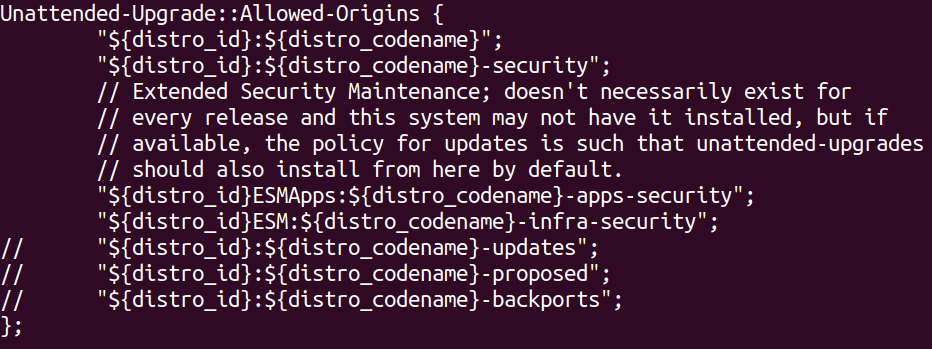
Now, remove the // symbols in front of any repositories you want to enable.
This tutorial enables all of the Ubuntu repositories, like:
- updates – for stable package releases.
- proposed – for testing new stable package versions.
- backports – for newer versions of existing stable packages.

Rebooting the System Automatically
Would you choose to reboot your system automatically after a successful upgrade? Why not? Doing so helps ensure your system is always up-to-date. But this feature can also be disruptive if you are in the middle of using your system when an upgrade happens.
To enable automatic rebooting, scroll down to the Unattended-Upgrade::Automatic-Reboot line, remove the // symbol, and ensure the value is set to true.

Removing Unused Dependencies
Installed dependencies only consume storage space. Why not remove them? This configuration lets you configure whether or not unused dependencies should be automatically removed after a successful upgrade.
Note that while this feature helps keep your system clean, it can also remove packages that you still need but are no longer used by the upgraded packages.
To enable the removal of unused dependencies, find the Unattended-Upgrade::Remove-Unused-Dependencies line, remove the // symbol, and set the value to true.

Enabling Verbose Logging
When an upgrade fails, how do you know what caused it? Verbose logging is a great way to get more information about the automatic upgrade process.
This feature can help troubleshoot a failed upgrade or if you simply want to know more about what is happening behind the scenes.
To enable verbose logging, scroll down to the Verbose Logging line, remove the // symbol, and set the value to true. Once modified, save and close the file for the changes to take effect.

Enabling Unattended Automatic Updates
At this point, you should have a good understanding of how to configure Automatic Upgrade to meet your needs. But you still need a way, specifically a file, to tell the system when to run automatic updates. This file is named 20auto-upgrades and needs to be placed in the /etc/apt/apt.conf.d directory.
Managing or creating files in the /etc/apt/apt.conf.d directory requires a sudo privilege.
To enable Unattended Automatic Updates:
1. Create a file called 20auto-upgrades in the /etc/apt/apt.conf.d/ in your preferred text editor.
sudo nano /etc/apt/apt.conf.d/20auto-upgrades2. Next, add the following configuration options to the 20auto-upgrades file, save the changes and close the file.
This configuration is the bare minimum you need to get started with automatic updates, where:
- The first line tells the system to update the list of available packages daily. This option is necessary, so the system knows which packages have available updates.
- The second line tells the system to run unattended-upgrades once a day. This option is what performs the upgrade process.
- The third line tells the system to automatically clean up any old or unused files once a week.
APT::Periodic::Update-Package-Lists "1";
APT::Periodic::Unattended-Upgrade "1";
APT::Periodic::AutocleanInterval "7";
3. Lastly, run the below command to restart the unattended-upgradesservice to apply the changes.
This command does not provide output, but you test all configurations in the following section.
sudo systemctl restart unattended-upgrades.serviceTesting the Automatic Upgrade Configurations
You have managed to get everything configured. But how do you know all configurations are working? Regular updates happen once a day, so you should not have to wait too long.
But the quickest way to test your Automatic Upgrade configuration is by performing a dry run of the unattended-upgrade process.
Run the unattended-upgrade command below to conduct a –dry-run of all upgrades without actually installing any (–debug).
sudo unattended-upgrades --dry-run --debugYou will see a relatively long output. But at the beginning, you will see an output like the one below.
As you can see, the apache2 package is blacklisted, which indicates your configuration works in blacklisting packages from upgrading.

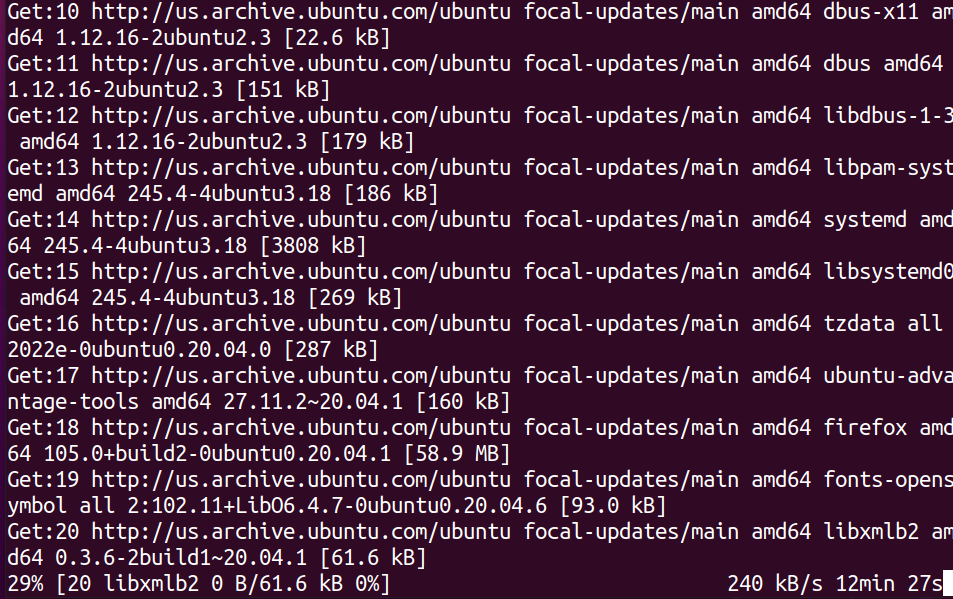
Now, scroll through the output, and you will see a section that looks like the one below, which shows available updates for several packages. Each update is downloaded but is not installed since you only conducted a dry run.
Viewing the Automatic Upgrade Logs
Once you have verified your configurations work, you may want to see what happened when you got a recent upgrade. The logs for unattended-upgrades are stored in the /var/log/unattended-upgrades file that you can view.
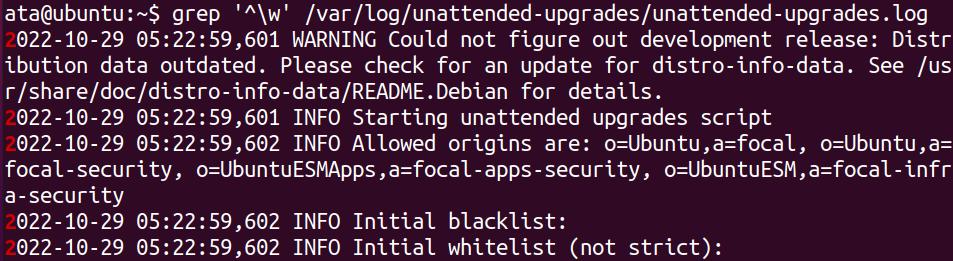
Run the below grep command to only display logs that start with a word character (^\w), filtering out all empty lines and ones that just contain dashes.
grep '^\w' /var/log/unattended-upgrades/unattended-upgrades.logBelow, you can see log information as follows:
- The last time the unattended-upgrades ran.
- Which packages were upgraded.
- When the process started and finished.
Conclusion
Keeping your server up-to-date is an essential part of maintaining its security. And in this tutorial, you learned how to install and configure automatic upgrades on Ubuntu. You have also tested your configurations and viewed the logs to see what happened the last time automatic updates ran.
At this point, you have complete control over which packages receive an automatic upgrade. But do not stop here! There are many more unattended-upgrade configuration options available for automatic upgrades.


