


As a system admin, you might have come across a situation where you need to manage multiple servers. This situation can be daunting unless you consider discovering the Ansible hosts file. Ansible hosts file or inventory is an important file that tells Ansible about the hosts to manage.
Ansible hosts file helps you to automate all these tasks. And in this tutorial, you’ll learn how to set up Ansible inventories from scratch.
Read on and never be timid managing multiple servers simultaneously!
Prerequisites
This tutorial will be a hands-on demonstration. If you’d like to follow along, be sure you have the following.
- Ansible control nodes, which can be your local machine – This tutorial uses Ubuntu 20.04 and AWS EC2 instances.
- A few servers that Ansible can manage (Ansible Hosts) – This tutorial uses Ubuntu and AWS EC2 host nodes. SSH keys and a user account that can access each node with sudo privileges are required.
- Ansible and Python installed on all the nodes (control nodes and host nodes). Ansible modules and commands require Python libraries.
- An AWS user with programmatic access (AWS Access Key and Secret Access Key) – This user must have permissions to create, manage AWS resources, and make API calls.
Setting up a Custom Inventory File
Now that you have all the prerequisites in place, it’s time to start configuring Ansible by setting up a custom inventory file. But first, you’ll have to check if both Ansible and Python are correctly installed.
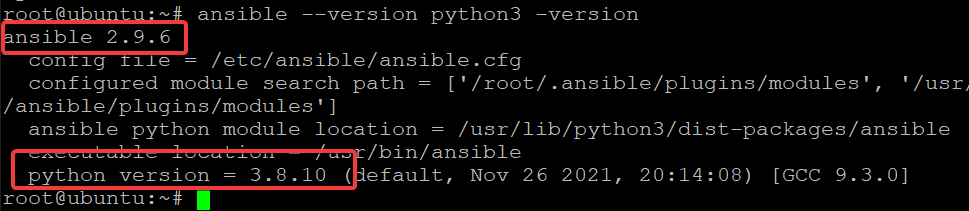
1. Run the command below to verify Ansible and Python versions installed on each node.
ansible --version python3 -versionYou’ll see the Ansible and Python version numbers, as shown below.
2. Open the default hosts file (/etc/ansible/hosts) using your favorite text editor to see what an Ansible hosts file looks like.
By default, Ansible looks for the hosts in the /etc/ansible/hosts file. The default inventory file contains different examples you can use as references while setting up your inventory.
Below, you can see the hosts file’s content is divided into many sections with examples:
- The [webservers] section is commented out, which is where you declare the hosts that will be used as web servers.
- The [dbservers] section is also commented out, where you declare hosts that will be used as database servers and so on.
The brackets [] are used to group hosts together to be targeted as a group in playbooks.
You can put one hostname or IP address in each group. For example, one server could be both a webserver and a dbserver. In that case, note that Ansible variables will come from all of the groups they are members of.
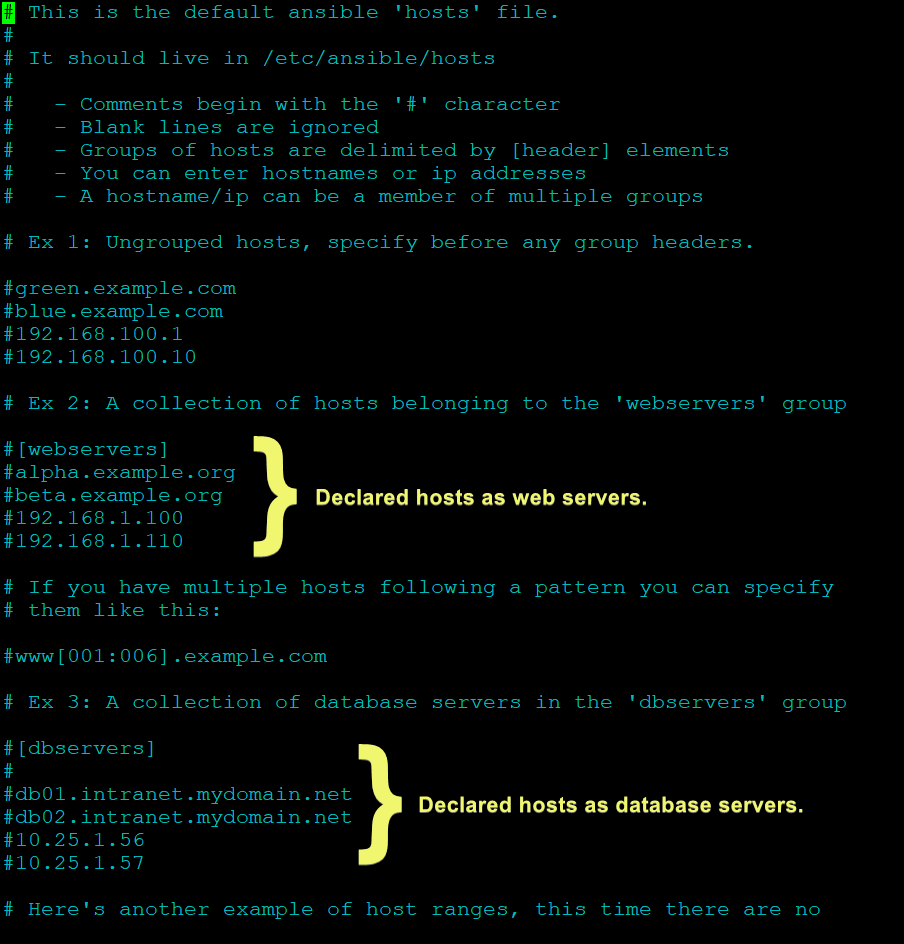
Depending on your needs, you can have as many groups as you want in your inventory file. For example, if you manage an extensive infrastructure, you might need different groups for each environment, such as dev, test, and production.
3. Run the below command to create a new directory (mkdir) named ansible in your home directory. The ansible directory stores all the files related to your Ansible project.
cd && mkdir ansibleYou can use the default inventory file without problems. But having your custom inventory file for each project you work on is good practice. How? First, using per-project inventory files helps you avoid running a playbook on the wrong group of servers. Second, you can share your inventory file with others who use Ansible.
4. Now, run the below commands to move into the newly-created directory (ansible), create and open a new inventory file named inventory.
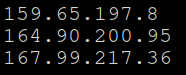
cd ansible && nano inventory5. Add your Ansible hosts ungrouped inside the inventory file, then save the changes and close the file. Note that only one entry per line is allowed, as shown below.
If you put more than one host on the same line, they will be considered one host. As a result, you’ll get an error when you try to run the playbook.
At this point, you have a basic but functional Ansible inventory file.
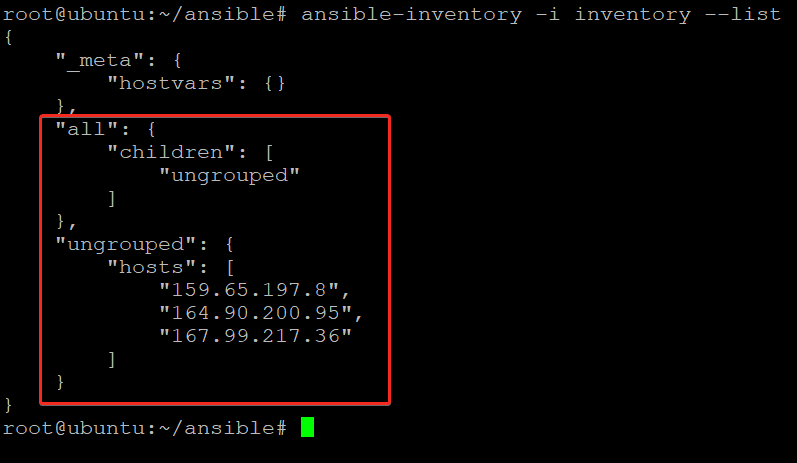
6. Lastly, run the below ansible-inventory command to –list all the hosts and groups in your inventory file (-i inventory).
You must use the -i option, or else, Ansible will look for the default hosts file instead.
ansible-inventory -i inventory --listEven though you only have three ungrouped servers listed in your inventory file, Ansible automatically infers two distinct groups, as follows:
- all – Contains all the servers from your inventory file, no matter how they are organized.
- ungrouped – Contains all the servers that don’t belong to any group.
Testing the Custom Inventory File
Now that you have a custom inventory file, you need to tell Ansible to use that file in your playbooks. But first, be sure to test the connectivity between your Ansible control server and the hosts in your inventory file.
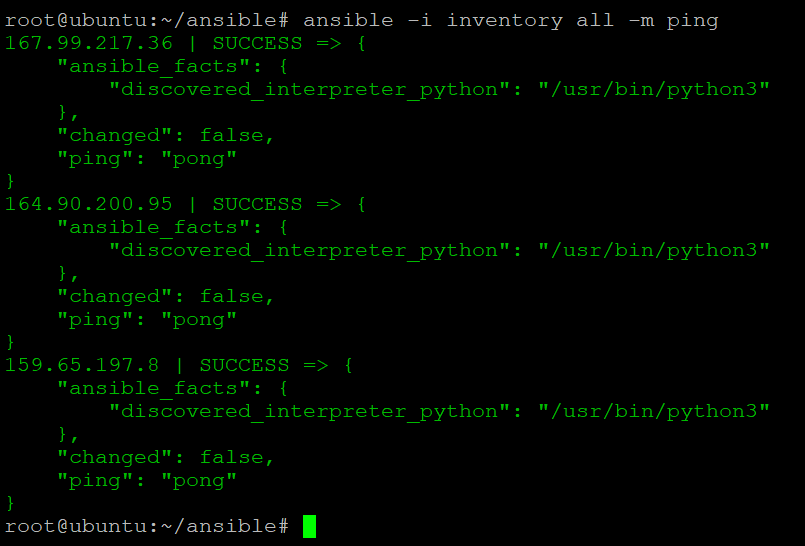
Run the below command to ping all servers in your inventory file (-i inventory) from your Ansible control server.
ansible -i inventory all -m ping
This command tests Ansible control servers, the hosts in your inventory file’s connectivity, and provides output as follows:
- SUCCESS – Verifies you can reach all servers listed in your inventory file from the Ansible control server.
- “discovered_interpreter_python” – The Python interpreter used on your remote servers. In this case, Python 3.
- “changed“: false – Indicates the ping module didn’t make any changes on your servers. The ping module is one of the few modules that doesn’t make any changes on your servers but simply returns information.
- “ping“: “pong“: This line indicates that the ping module was executed successfully. Your control node sends a ping request to all servers listed in your inventory file, and all servers respond pong.
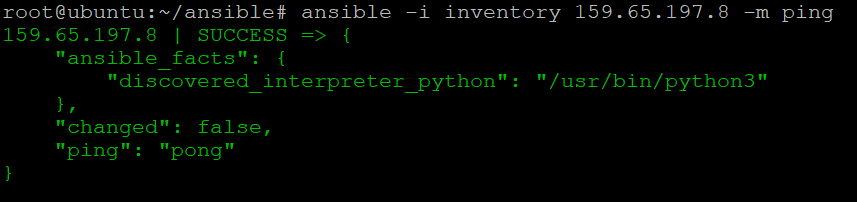
Now, run the following command to verify the connectivity of a specific server. Replace 159.65.197.8 with the actual name of your remote server.
ansible -i inventory 159.65.197.8 -m ping
The output below verifies connecting to a server with the IP address 159.65.197.8 is a SUCCESS.
Organizing Servers Into Groups
You’ve just created a basic inventory file with ungrouped hosts, and it works. So why group your servers? When you organize your servers into groups, they become more manageable. At the same time, you can apply a set of configurations or run a playbook on a specific group of servers instead of running it on all servers.
To organize your servers into their respective groups:
1. Open your custom inventory file in a text editor.
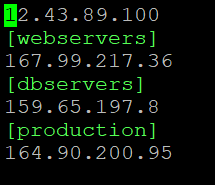
2. Add your servers into their groups, as shown below. This tutorial organizes servers into three groups (webserver, dbservers, and production), as shown below.
Save and close the inventory file when you are finished.
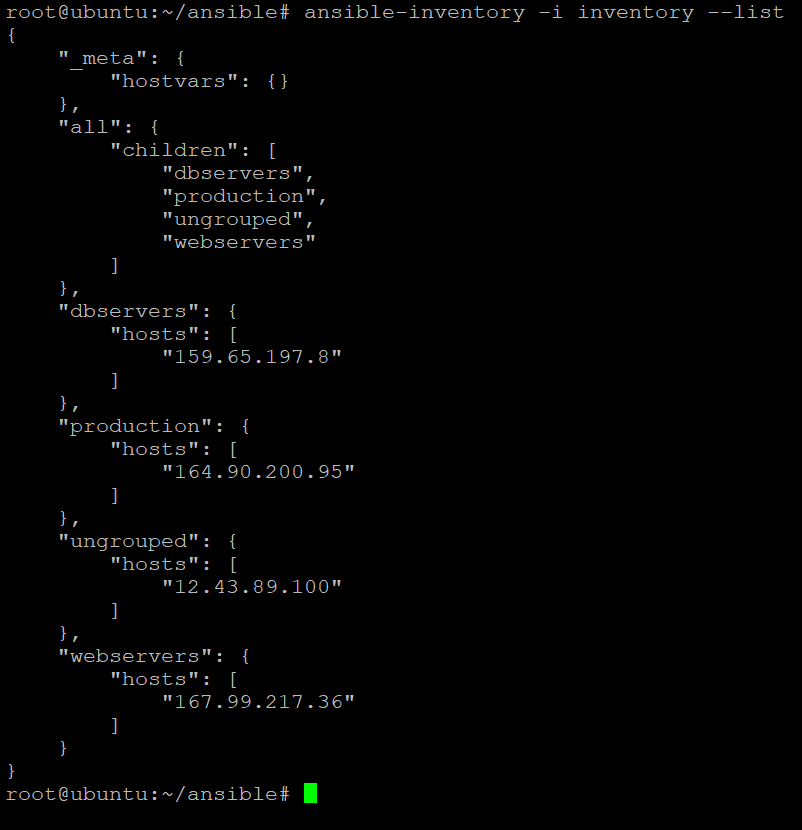
3. Now, run the below command to –list all hosts and groups in your inventory file (-i inventory).
ansible-inventory -i inventory --listThe output below shows that the servers are grouped into webservers, dbservers, and production. Notice all servers still belong to all group, and any servers that don’t belong to any groups are placed in the ungrouped group.
At this point, you already have a basic inventory file with a few servers organized into groups.
4. Run the following apt command to install the NGINX package on all servers in the webservers group. Ansible has a built-in apt module (ansible.builtin.apt) you can use to install packages on your remote Ubuntu servers.
ansible -i inventory -m ansible.builtin.apt -a "name=nginx state=present" webservers
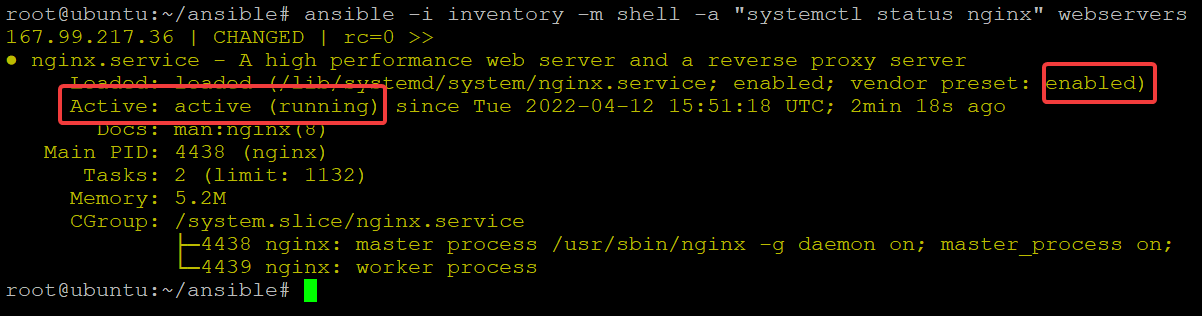
5. Lastly, run the below command to verify the status of the NGINX service that it’s running on all servers in the webservers group.
ansible -i inventory -m shell -a "systemctl status nginx" webserversThe output below indicates the NGINX service is running on all servers in the webservers group and are now ready to serve web traffic!
Similarly, you can perform other tasks not limited to the ones below:
- Install the MariaDB package on all servers in the dbservers group.
- Apply a set of configurations to all servers in the production group.
Working with Dynamic Inventory
So far, you’ve worked with Ansible playbooks and static and custom inventory files. But in the real world, you’ll work with cloud environments, such as AWS, Google Cloud, Azure, and so on. These platforms have their own APIs to manage infrastructure and services.
You may need to scale servers in and out frequently, in which a static inventory file will not work well. Infrastructures are constantly changing, and you’ll have to update the inventory file frequently.
Luckily, Ansible provides a way to work with cloud environments and external inventory called dynamic inventory. And in this tutorial, you’ll touch on the basic concepts of dynamic inventory in a short demo for AWS.
1. Run the below command to install the boto3 library. Ansible uses this library to query for information about hosts in AWS EC2.
pip3 install boto3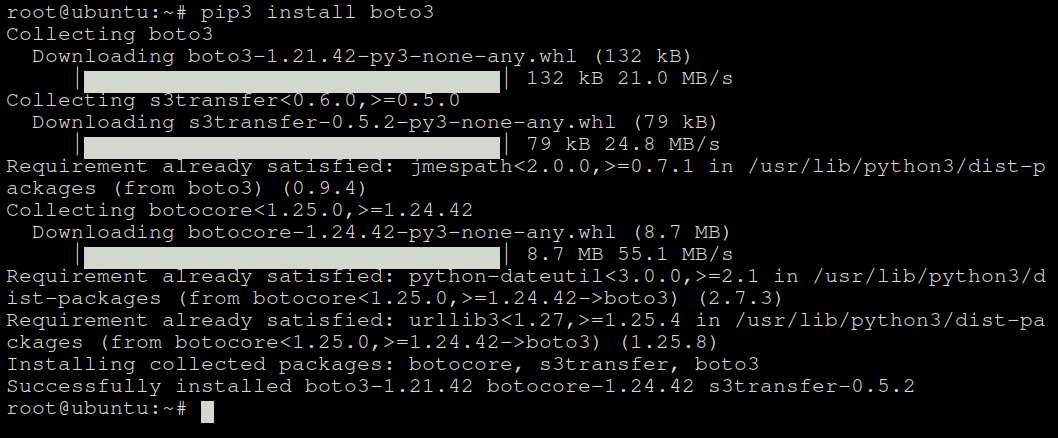
2. Next, run the below command to create a new directory (mkdir) called /opt/ansible/inventory and navigate to that directory (cd).
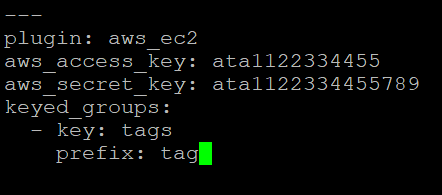
mkdir -p /opt/ansible/inventory && cd /opt/ansible/inventory3. Configure AWS EC2 dynamic inventory with the following:
- Create a new file called aws_ec2.yaml in your text editor, and populate the file with the below content. The aws_ec2.yaml file is the configuration file for the AWS EC2 dynamic inventory.
- Replace <YOUR-AWS-ACCESS-KEY-HERE> and <YOUR-AWS-SECRET-KEY-HERE> with your own AWS access and secret key.
- Save and close the aws_ec2.yaml file.
---
plugin: aws_ec2
aws_access_key: <YOUR-AWS-ACCESS-KEY-HERE>
aws_secret_key: <YOUR-AWS-SECRET-KEY-HERE>
keyed_groups:
  - key: tags
    prefix: tag
Note that you must include the — at the beginning of the file for YAML syntax. This symbol is not a typo but is required for Ansible to parse the file correctly.
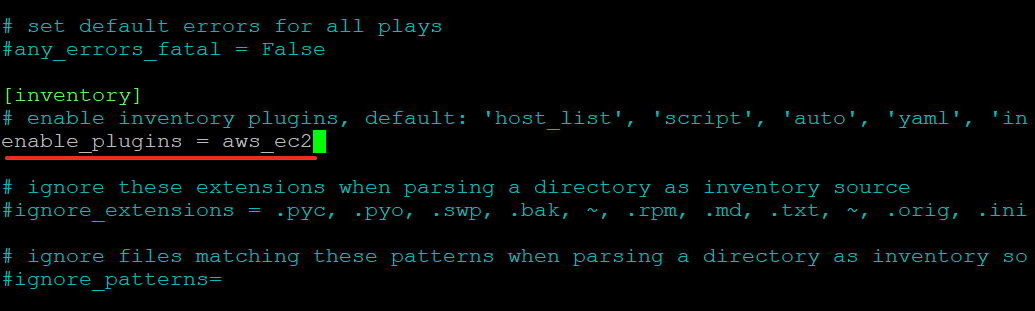
4. Open the /etc/ansible/ansible.cfg file in a text editor and enable the aws_ec2 inventory plugin with the following:
- Uncomment the enable_plugins directive by removing the # symbol at the beginning. This directive enables the aws_ec2 inventory plugin. Ansible uses this plugin to interact with AWS EC2.
- Set enable_plugins directive’s value to aws_ec2, as shown below.
- Save the changes and close the ansible.cfg file.
You’ve now successfully configured Ansible to use the AWS EC2 dynamic inventory.
5. Finally, run the below command to verify that Ansible can connect to AWS and pull information about the hosts.
ansible-inventory -i aws_ec2.yaml --graph In the output below, Ansible successfully pulled information about the two hosts in your AWS EC2 account. Each time you terminate or create an instance in AWS, the inventory updates automatically.
Now, group the servers by region or any other criteria (dbserver, webservers…). You can then install software on those servers using Ansible playbooks.
For example, you may want to group the servers by webservers and install NGINX on all the servers in that group just like you would for a static inventory.

Securing Sensitive Data in Inventory File
As you’ve noticed, the inventory file (aws_ec2.yaml) contains sensitive data, such as your AWS access key and secret key. Storing these keys in clear text in the inventory file is risky. Fortunately, Ansible provides you with a way to encrypt your inventory files using ansible-vault.
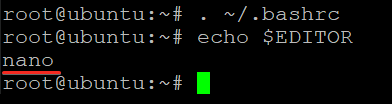
To encrypt your inventory files, you’ll first need to set the $EDITOR variable’s value in your shell. This variable tells Ansible which text editor (i.e., nano, vim…) to use when editing a file using ansible-vault.
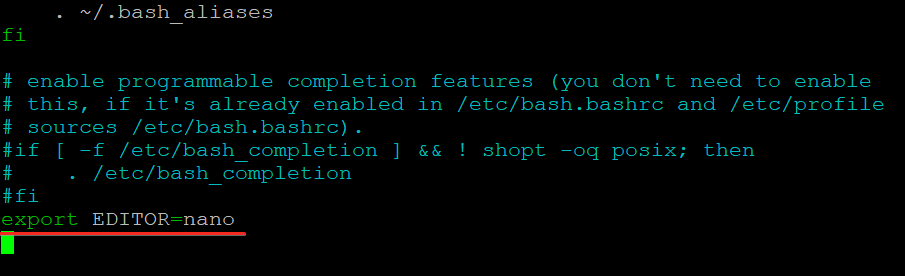
1. Open the ~/.bashrc file in your editor and add the export EDITOR=nano line to the end of the ~/.bashrc file. Be sure to replace nano with your preferred text editor, save the changes and close the editor.
The ~/.bashrc file is a shell script that Bash runs whenever the Bash shell starts up. This file is where you set environment variables, start background processes, and set the current user’s alias.
2. Next, run the following commands to source the script, apply the changes and verify that the EDITOR variable is set correctly.
# Source the script, and apply the changes
. ~/.bashrc
# Print the $EDITOR variable's value
echo $EDITOR
You’ll see the name of your text editor printed out on the terminal, as shown below.
3. Run the ansible-vault create command below to create a new encrypted inventory file to store your AWS access key and secret key. You can name the file as you like, but the file is named encrypted_inventory in this tutorial.
ansible-vault create encrypted_inventoryYou’ll be prompted to set and confirm a password to encrypt and decrypt the encrypted_inventory file.
A new encrypted_inventory file will be created and opened automatically in your default editor (nano), as you set in the $EDITOR variable.
The password should be more than eight characters, a mix of uppercase and lowercase letters, and at least one number or special character.

4. Add the inventory data to the encrypted_inventory file, save and close the file when you’re happy with the changes.
At this point, you’ve created an encrypted inventory file that can be used with the ansible-playbook command.
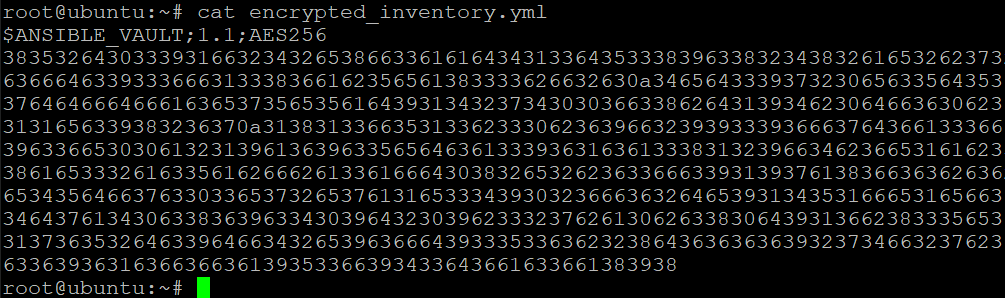
5. Run the cat command below to verify that the file is encrypted.
cat encrypted_inventory.ymlYou’ll see an output similar to the one below if the encrypted_inventory file is encrypted. The $ANSIBLE_VAULT;1.1;AES256 string indicates that the file is encrypted using Ansible Vault with the AES256 cipher.
The encrypted data is the random string of characters below the $ANSIBLE_VAULT string. No one can read your AWS access and secret keys without the correct password.
6. Finally, run the ansible-vault view command to decrypt and view the contents of the encrypted_inventory.yml file.
Provide the password you set for encrypting and decrypting the file in step three.
ansible-vault view encrypted_inventory.ymlAs you can see below, Ansible decrypts the encrypted_inventory.yml file and displays its contents after verifying the password.

Conclusion
This tutorial walked you through setting up and configuring Ansible inventories on your Ubuntu 20.04 server. You’ve created a custom Ansible inventory file/Ansible hosts file and organized servers into groups. You can now effectively manage multiple servers, like installing packages on all servers in a group simultaneously.
At this point, you can start using the Ansible hosts file to automate your server configuration and management tasks.
There’s a lot more to learn about Ansible. Why not start learning how to assign an inventory group alias to a variable? It’s time to make your playbooks more readable and easier to maintain.


