


The Xcopy tool, which stands for extended copy, is a popular command-line utility for copying massive amounts of data in Windows. Compared to the traditional copy command, Xcopy has more features and switches that give you better control when copying or moving files and folders.
In this guide, you will learn how to use Xcopy for various file copy scenarios. From copying a single file, multiple directories, applying filters or exclusions, and more. By the end, you will have gained the knowledge to use Xcopy in your day-to-day file copying tasks.
Let’s begin!
Prerequisites
To follow along with the examples in this guide, you’ll need the following.
- A Windows (server or client) computer. Xcopy comes built-in to Windows, and you don’t need to download anything else. This guide will use Windows 10 Build 1909.
- Xcopy works on the command prompt or PowerShell, and this article assumes that you already have one open.
Understanding the Xcopy Command
Xcopy is a command-line utility, which has been available out of the box since Windows 98. You can find this tool under the %WINDIR%\system32 folder with the executable name xcopy.exe.
Compared to the Windows copy command, Xcopy is much more efficient in copying files and directories. In addition, Xcopy has more options that make it more customizable and lets you control the file copy behavior.
Benefits
There are several benefits or advantages of using Xcopy that you will learn as you progress in this guide. But below are some of the benefits of using Xcopy.
- Faster copy operation on large sets of files and directories.
- Simplifies application deployment.
- Can replicate the source directory structure as is.
- Copy files while retaining the owner and access control list (ACL) information.
- Copy and overwrite read-only files.
- Can exclude files based on the file name, extension, or path.
- Can identify updated files, which is useful for differential backups.
- Integrate and use with scripts.
Limitations
As awesome as Xcopy is, it is not without limitations. Although these limitations may not be a deal-breaker, knowing what they are would be good before diving in.
- Cannot copy open files.
- No support for the Windows Volume Shadow Copy Service (VSS). This lack of VSS support makes Xcopy not suitable for backing up live operating system volumes.
- Insufficient memory error when the length of the path plus file name exceeds 254 characters.
Xcopy Syntax Reference
Xcopy lets you perform various file and folder copy operations. But first, you’ll need to understand its syntax and options. There are a lot of options that would change how Xcopy operates. To help you make sense of these options, the tables that follow will cover them in detail.
The first path designation refers to the source file(s); the second path designation refers to the destination file(s).
xcopy [source] [destination] [options][source]– Pathname for the file(s) to copy (accepts wildcards). You should specify the drive, path, and the files you would want to copy.[destination]– Pathname for the new file(s). If you don’t specify the destination path, the command will copy the files to the same path as the source.[options]– Can be any of the following options in the tables below. You can also view these options by running thexcopy /?command or visiting the Xcopy online documentation.
Source Options
| Switch | Explanation |
| /A | Copy files that have the archive attribute. |
| /M | Copy files with the archive attribute set, then switches off the archive attribute at the destination. Use this option when creating routine backups. |
| /H | Copy hidden and system files and directories. The default value is N. |
| /D:mm-dd-yyyy | Only copies that files with modification date on or after the given date. Without using this option, the command will copy only the files whose date/time is newer than the destination. |
| /U | Only copies the files that already exists at the destination. |
| /S | Copies folders and subfolders recursively excluding the empty one. |
| /E | Copies folders and subfolders recursively including the empty one. |
| /EXCLUDE:file1[+file2][+file3]… | Specify the text file(s) containing a list of strings to match absolute file paths to exclude. |
Destination Options
| Switch | Explanation |
| /I | If the destination does not exist, using this option assumes that the destination is a directory and creates it. If you omit this option, the command prompts to confirm if the destination is a directory or a file. |
| /R | Overwrites read-only files. |
| /T | Creates a recursive folder structure at the destination without copying the files. This option does not include copying empty folders. To include empty folders, use this option together with the /E option. |
| /K | Preserves the file attributes during the copy. Otherwise, the command will reset read-only attributes. |
| /N | Copies files using their short file names. |
| /O | Copies files including ownership and access control list (ACL) information. |
| /X | Copies files including file audit settings and ACL information (implies using /O). |
Copy Options
| Switch | Explanation |
| /W | Prompts for a key press before the copy process can start. |
| /P | Prompts (Y/N) before creating each file. |
| /Y | Suppresses the confirmation to overwrite destination file if exists. |
| /-Y | Prompts to confirm overwriting an existing destination file. |
| /V | Verifies that the source and destination file sizes are identical. |
| /C | Ignores errors and forces the command to continue copying. |
| /B | Copies only the symbolic link but not the link target file. |
| /G | Copies encrypted files to a destination that does not support encryption. |
| /J | Copies files without using the buffer. This switch useful when copying very large files. |
| /Q | Suppresses the display of file names while copying. |
| /F | Displays the full source and destination file paths while copying. |
| /L | Only displays which files to copy without copying them. This switch can be useful when testing Xcopy commands with multiple options to assess the expected result. |
| /Z | Copies files in restartable mode. Using this option, the command gracefully stops copying files during network interruption. The copying will resume after re-estabslishing the network connection. |
Working with Xcopy: Usage Examples
Now that you’re familiar with the Xcopy syntax and options, it’s time to begin actually using it by combining one or more options together. You’ll explore many different scenarios in the following sections to use Xcopy to copy files and folders.
Listing Files to Copy
If you have a file server containing a huge amount of files that you want to copy, perhaps to a backup location, testing out your Xcopy command first would be ideal. One situation when you’d want to test Xcopy is when you’re combining multiple Xcopy options.
Using the /L switch with Xcopy, you can simulate what would have happened when you issued the command by listing which files it would copy. This way, you can confirm whether your command will copy all the files that you intended.
XCOPY C:\Workarea\XCopyDemo C:\Workarea\XCopyDemoFolder /LCopying a Single File
The most basic operation you can do with Xcopy is copying a file from a source to a destination without using any options. For example, the command below will copy a text file to a destination directory, and the file name will be the same.
XCOPY C:\Workarea\XCopyDemo\NewFile.txt C:\Workarea\XCopyDemoFolderYou can also copy the source file and change the destination filename by running the command below.
XCOPY C:\Workarea\XCopyDemo\NewFile.txt C:\Workarea\XCopyDemoFolder\AnotherFile.txtCopying Files to a New Folder
With Xcopy, you can copy files and create the destination directory on the fly. To do so, you need to append the /I option to the Xcopy command.
For example, the command below copies the files from the C:\Workarea\Demo folder to the D:\Workarea folder. If the destination folder does not exist, Xcopy creates the destination folder using the /I option.
XCOPY C:\Workarea\Demo D:\Workarea /ICopying All Files and Folders Recursively
Aside from copying files from one folder to another, Xcopy also lets you copy folders and files recursively. And there are two ways you can do a recursive copy—with and without empty folders.
To copy all files and directories while ignoring empty directories, append the /S option to the end of the Xcopy command, as shown below.
XCOPY C: D: /SOn the other hand, to include empty directories during the recursive copy, add the /E option instead to the command.
XCOPY C: D: /EIncluding Hidden and System Files
By default, Xcopy does not include hidden and system files in copy operations. But if you need to force Xcopy to include hidden and system files, add the /H switch to the command.
The command below copies all files recursively, including hidden and system files. This command also ignores errors, creates the destination folders, and overwrites existing files.
XCOPY C:\Workarea\Documents D:\Workarea\Documents /S /H /C /YPreserving the Read-Only File Attribute
Another attribute that Xcopy can handle and preserve is the file’s read-only attribute. By default, when Xcopy copies a read-only file, it removes the file’s read-only attribute at the destination. To stop Xcopy from removing the read-only attribute, append the /K switch to the command.
For example, the command below copies a read-only file to another location, and the resulting destination file will still have a read-only attribute. This command will also overwrite the destination file if the file exists.
XCOPY C:\Workarea\XCopyDemo\NewFile.txt D:\Workarea /I /K /YAs a side-effect of preserving the file as read-only, Xcopy cannot overwrite the same file in future copy operations. But, you can force Xcopy to overwrite read-only files by adding the /R switch.
XCOPY C:\Workarea\XCopyDemo\NewFile.txt D:\Workarea /K /R /YFiltering Files to Copy
Suppose there are multiple files in the source folder and subfolders you want to copy. Xcopy allows you to input wildcards as a way to filter which files to copy.
For example, the command below copies only the files with the .cs extension recursively from the root of the C: drive to the root of the E: drive. This command will also ignore errors and overwrites existing files without prompting for confirmation.
XCOPY C:\*.cs E:\ /S /C /YExcluding Files and Folders from the Copy
A powerful feature of Xcopy is its ability to exclude files from the copy process. To use this feature, you can leverage the /EXCLUDE switch. This switch accepts the names of the file(s) that contain the exclusion lists.
First, you need to create or have a file containing the exclusion list. For example, you can have a text file called Exclude.txt that contains the following entries. As you can see, the exclusion file can have specific file names, file extensions, and folders as entries.
xyz.txt
Exclude.txt
.pdf
.png
\exclude\
To run Xcopy with exclusions, run the command below and specify the full path of the exclusion file to the /EXCLUDE switch. This command uses the C:\Workarea\XCopyDemo\Exclude.txt file.
XCOPY C:\Workarea\XCopyDemo C:\Workarea\Backup /S /Y /Exclude:C:\Workarea\XCopyDemo\Exclude.txtThe result? Xcopy runs to copy files but skips the xyz.txt, Exclude.txt, all files with .pdf and .png extensions, and all files under the exclude directory.
Performing a Differential Copy
When you need to backup files from one location to another, Xcopy has an option that lets you perform a differential backup. Instead of copying all files, a differential backup only copies the files where the modified date falls on or after a date that you specify to the /D:m-d-y switch.
For example, to copy only the files with the modified date on or after April 01, 2021, run the command below. Additionally, this command performs a recursive copy, ignores errors, and overwrites existing files at the destination.
XCOPY C:\Workarea\XCopyDemo C:\Workarea\Backup /D:04-01-2021 /S /C /YIf you do not specify a date with the /D option, Xcopy will copy only the source files that are newer than the destination files.
Copying Files Based on the Archive Attribute
Typically, backup programs remove a file’s archive attribute after a backup operation. After modifying a file (i.e., edit and save), Windows automatically resets the files archive attribute.
If you create a script to backup files using Xcopy, you can use the archive attribute to determine whether to copy or backup the file.
To copy files with the archive attribute, you can take advantage of the /A and /M switches. Which one of these switches to use depends on whether you want to preserve the file’s archive attribute or not.
The following command performs a recursive copy of files with the archive attribute only. The destination files will retain the archive attribute after the copy due to the /A switch.
XCOPY C:\Workarea\Demo D:\Workarea\Test /A /S /YIn contrast, to remove the source file’s archive attribute after copying to the destination, specify the /M switch instead.
XCOPY C:\Workarea\Demo D:\Workarea\Test /M /S /YRetaining File Owner and ACL Information
Imagine creating a backup of an entire profile folder. Each file may have different owners or unique permissions. Should you need to restore those files, you’d want the same owners and permissions intact.
This way, the whole process would seem seamless, and the users will still have the same access to the files they had before. But first, you need to make sure that you’re backing up those files while retaining the existing owners and access.
To copy files and retain the owner and ACL information, add the /O parameter to the xcopy command, as shown below.
XCOPY C:\Workarea D:\Work /O /I /YApart from retaining the owner and ACL information, you can also include the files’ audit settings. Copying audit settings can be useful if your organization applies group policy objects (GPO) to audit files.
To include file audit settings when copying files with Xcopy, use the /X switch. The /X switch implies the /O switch, too, so you don’t have to use both switches at the same time.
XCOPY C:\Workarea D:\Work /X /I /YCopying Files and Folders Over the Network
Not only can Xcopy copy files between locations on the same or different disks, but it can also copy files over the network. Unfortunately, copying files over the network is not always reliable. Network connections may suffer from short interruptions and, in some cases, total loss of connection.
Luckily, you can run Xcopy in restartable mode. Meaning, even if the copy progress stops due to a network error, the copy can resume after re-establishing the network connection. To run Xcopy in restartable mode, you’ll need to add the /Z switch to the command.
For example, the command below performs a recursive file copy from the C:\Workarea folder to a network location. The /Z parameter makes Xcopy run in restartable mode.
XCOPY C:\Workarea "\\SERVER01\Backup" /S /ZUsing the
/Zswitch, Xcopy also displays the file copy progress in percentage.
Copy Files Using Unbuffered I/O
Buffered I/O corresponds to how the operating system buffers disk reads and writes in the file system cache. While buffering speeds up subsequent reads and writes to the same file, it comes at a cost. As a result, unbuffered I/O (or a raw file copy) is the preferred method for copying a large file.
This copy method reduces the file system cache overhead and prevents the file system cache from being easily flushed with large amounts of file data.
To copy large files using unbuffered I/O, you can append the /J switch to the Xcopy command, as shown below.
XCOPY C:\Workarea\abc.mp4 D:\Temp /I /JCopying Files with Verification
Like any other tasks, copying files may not always return 100% successful results. Some files may become corrupted during transfer even if there are no visible errors.
With Xcopy, you can use the /V switch to verify that the destination and source files are identical based on their size after copying. Identical source and destination files indicate that the copy was successful and that file is intact.
The command below copies all files from C:\Workarea\XCopyDemo to C:\Workarea\Backup and verifies each file using the /V switch. The /F switch displays the source and destination files’ full path.
XCOPY C:\Workarea\XCopyDemo C:\Workarea\Backup /F /H /S /X /VCopying Encrypted Files
Xcopy also supports copying encrypted files to destinations that do not support encryption. Using the /G switch, Xcopy copies encrypted source files and creates decrypted destination files.
This copy mode is helpful, especially when backing up encrypted files to network shares or non-Encrypting File System (EFS) volumes.
Xcopy C:\Workarea\XCOPYDemo C:\Workarea\XCOPYDemoFolder /S /GCopying Folder Structures
In some situations, backup scripts or programs may require you to pre-provision the destination before copying the files from the source. When needed, you can use Xcopy to replicate the source folder structure without the content.
To do so, run the Xcopy command with /T switch. Using the /T switch will cause Xcopy to copy only the directory tree structure to the destination but ignores the empty directories.
You can also add the /E switch to the command to include empty directories, as shown in the example command below.
Xcopy C:\Workarea\XCOPYDemo C:\Workarea\XCOPYDemoFolder /T /ECommon Errors
If something can go wrong, it probably will. The same is the case when you’re copying files regardless of the volume. Below are the common Xcopy errors that you might encounter.
Invalid Number of Parameters
This error typically occurs when the command you’ve entered contains space characters in it. To avoid this error, when typing a source or destination path that contains space characters, you should surround the path with double-quotes.
For example, if the path is C:\Documents and Settings, enter the path as “C:\Documents and Settings”.
Cannot Perform a Cyclic Copy
This error happens if the source directory you are copying also includes the target directory. In this case, Xcopy would enter a loop, causing an error. When using Xcopy, the destination must be a fully independent directory or disk if you copy all directories and subdirectories.
Parse Error
This error occurs when you’ve typed wrong or invalid syntax in the command. As an example, you might encounter this error when you’ve specified your path in quotes and but the ending quotes are missing.
For example, the command below has a missing closing double-quote character in the destination path.
Xcopy C:\Workarea "C:\Workarea\XCopy Demo /S /I /E /YExit Codes
Xcopy returns an exit code for an operation, which you can use to determine if the operation was successful. Exit codes are useful, especially if your task or script takes actions based on the exit code it receives.
The command shell will save exits code in the %ErrorLevel% variable. Your code can then examine the value of this variable to determine the outcome of the Xcopy operation.
Below is a table that lists all the Xcopy exit codes.
| Exit Code | Purpose |
| 0 | This exit code means that there were no errors. |
| 1 | This exit code means that Xcopy did not find any files to copy. |
| 2 | This exit code means that the Xcopy was terminated by pressing CTRL+C. |
| 4 | This exit code means that an initialization error happened either because of insufficient memory or disk space or because you’ve entered invalid syntax. |
| 5 | This exit code means that there was a disk write error. |
Scripting with Xcopy
Apart from using Xcopy interactively, you can reap its benefits better if you use it to automate tasks with scripts. Below are a couple of examples that demonstrate how you can use Xcopy in scripts.
Xcopy Batch Script to Copy Data with Error Handling
This example batch script copies all files recursively with error-handling logic. And based on the error or exit code, the script returns a message showing the reason for the error.
To create the batch file, open a text or code editor of your choice, copy the code below, paste it to your editor, and save the file as copycomplete.bat.
@echo off
rem This batch file copies all source
rem files in all directories and sub-directories from the source
rem path (%1) to the destination path (%2)

xcopy %1 %2 /s /e

if errorlevel 4 goto lowmemory
if errorlevel 2 goto abort
if errorlevel 0 goto exit

:lowmemory
echo Insufficient memory to copy files or
echo invalid drive or command-line syntax.
goto exit

:abort
echo You pressed CTRL+C keys due to which the copy operation has been aborted.
goto exit

:exit
Next, to run the script, invoke its name in the command prompt or PowerShell, followed by the source and destination folders.
pycomplete.bat xcopydemo xcopydemofolder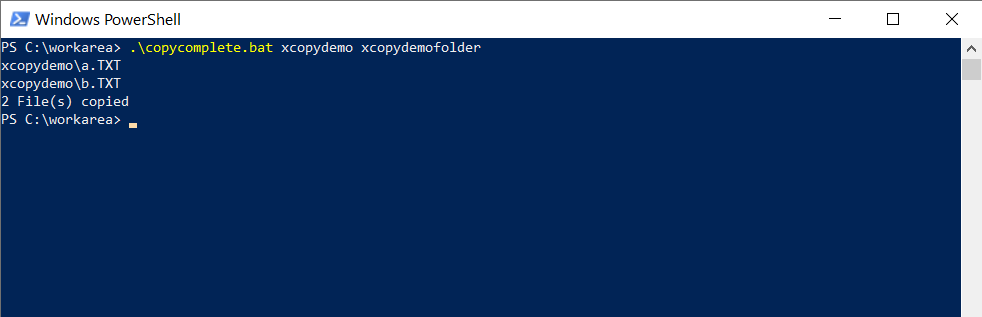
Xcopy Batch Script to Move Data
Xcopy has no built-in functionality to move files and folders from the source to the destination. But, as a workaround, you can create a script that would Xcopy the files first and then delete the files from the source.
The code below will copy the files to the destination. And if the copy process was successful, the script will delete the files at the source. Copy the code below and save it in a new file called movefiles.bat.
Rem Batch file to move files

Xcopy /D /V %1 %2

Rem If the Xcopy process is successful (0), then delete the files at the source.
if errorlevel 0 (
echo Xcopy process completed successfully
del /Q %1
exit /B
)

Rem Errorlevel is not 0
echo The copy process has failed.
Next, to execute the movefiles.bat batch file, invoke its name in the command prompt or PowerShell followed by the source and destination paths, as you did in the previous example.
movefiles.bat xcopydemo xcopydemofolderConclusion
If your job involves copying files in bulk or creating file backups, Xcopy is an excellent tool to help make your job easier. Xcopy delivers accurate and fast file copy results with many options to customize its behavior to fit your requirements.


