

Availability and access to data from various locations are vital for an organization’s smooth operation. And if you’re looking for ways to organize your shared folders and files or to keep copies of data from one server to another, Windows Servers Storage has a lot in store for you.
In this tutorial, you will learn how you can take advantage of the Windows Server Storage functionality.
Read on and start securely sharing data with your team!
Prerequisites
This tutorial will be a hands-on demonstration. To follow along, be sure you have the following:
- A working AD DS, a domain controller, and two file servers.
- A domain administrator account.
Creating Basic File Shares with Windows Servers Storage
A network (shared) folder is beneficial for users to save and share their files. But how? Creating shared folders for everyone or specific groups of people across the domain is a task the Windows Server Storage functionality can handle.
To see how shared folders work, you will create one via the Files and Storage Services inside the Server Manager.
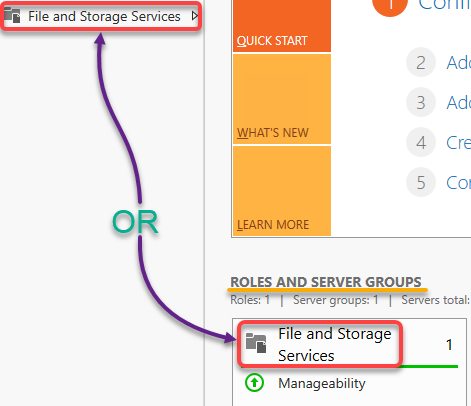
1. Open the Server Manager, and click Files and Storage Services in the left panel or under the ROLES AND SERVER GROUPS to launch the Files and Storage Services manager.
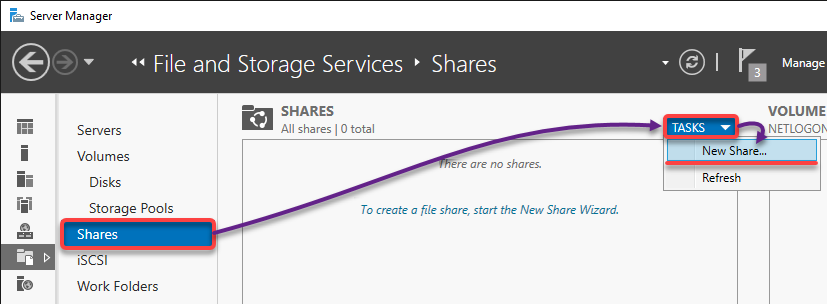
2. Next, click Shares (left panel) → TASKS dropdown field → New Share to initiate creating a new share.
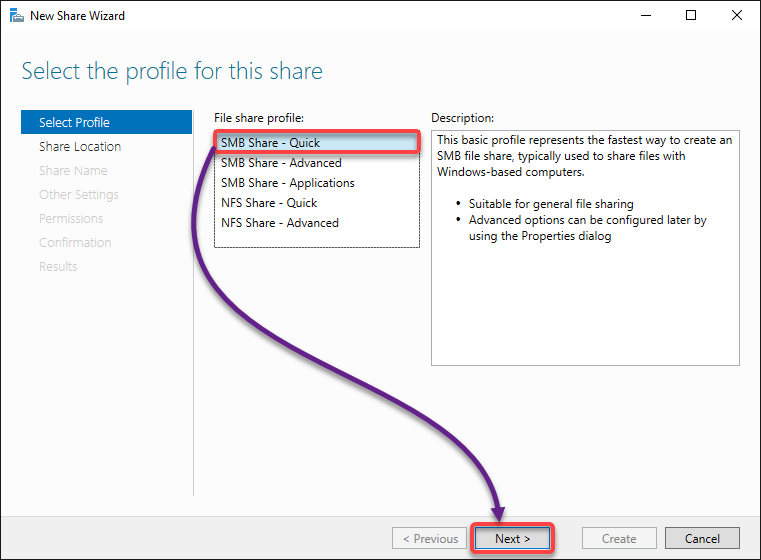
3. In the New Share Wizard, select SMB Share – Quick as the File share profile to create a general and basic file share, and click Next.
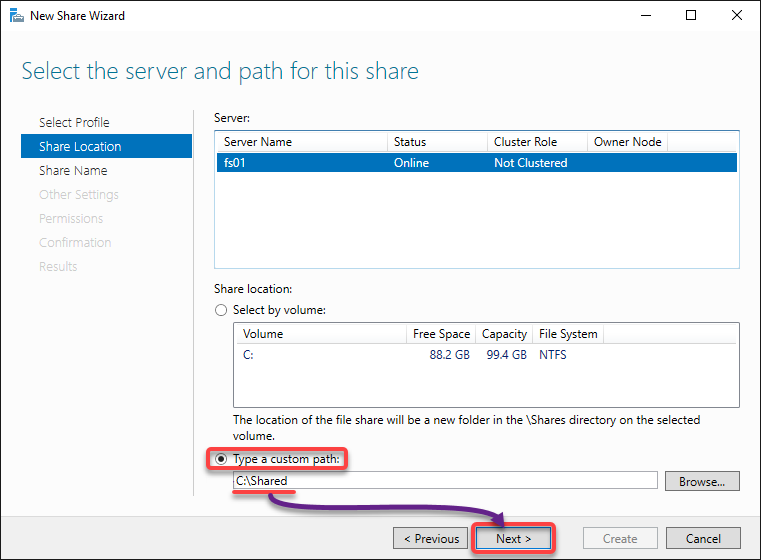
4. Now, select the Type a custom path option, set the share location (C:\Shared), and click Next.
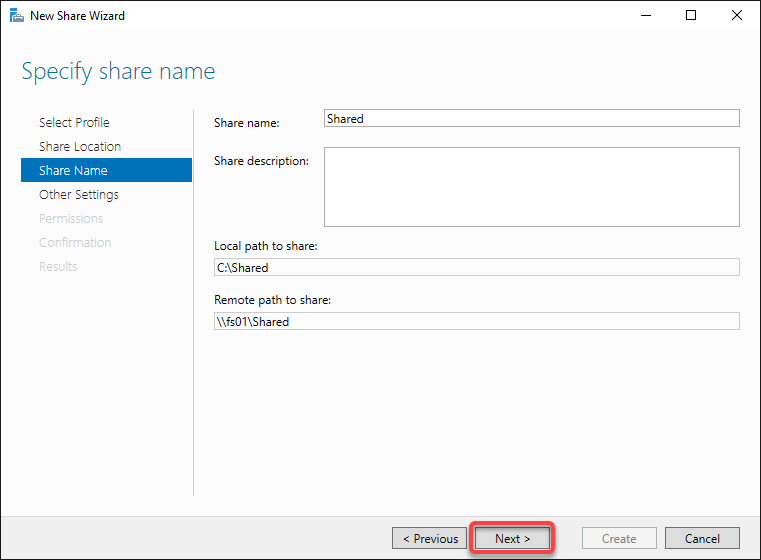
5. Keep the default settings below, and click Next.
- Share name – The default share name is the folder name.Local path to share – The path of the shared folder.Remote path to share – The network path of your shared folder in this format: \\ServerName\ShareName
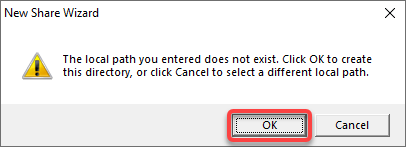
6. Click OK when prompted to create the share path (C:\Shared).
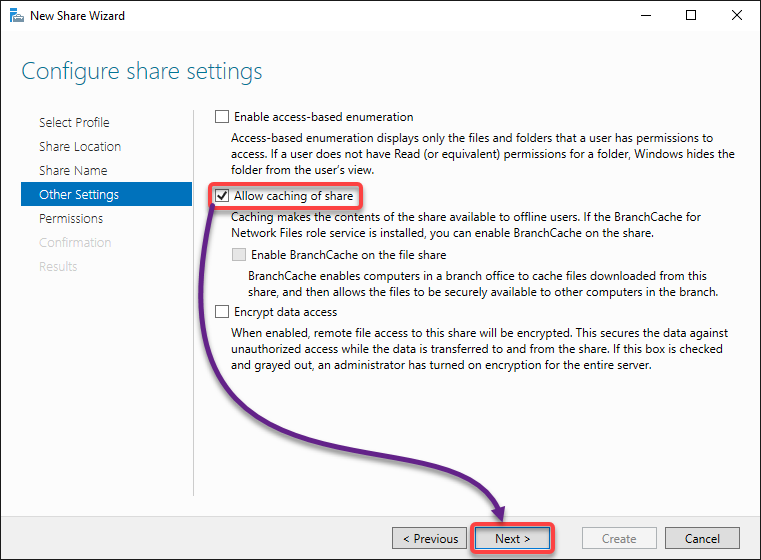
7. Next, keep the Allow caching of share ticked, and click Next. This option lets users take advantage of the share’s content while offline.
The other options are disabled by default, but they function as follows when enabled:
| Share Setting | Function |
| Access-based enumeration | Hides files and folders from users that do not have at least read permissions to access them. |
| Encrypt data access | Keeps data secured against unauthorized access during the transfer from and to the share. |
8. Click Next since you already have the necessary user permissions for this tutorial.
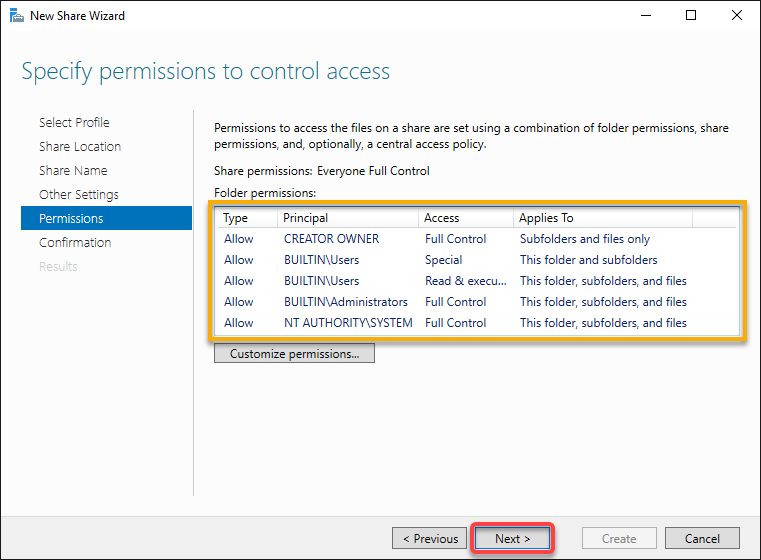
9. Confirm your settings selections, and click Create to create the share.

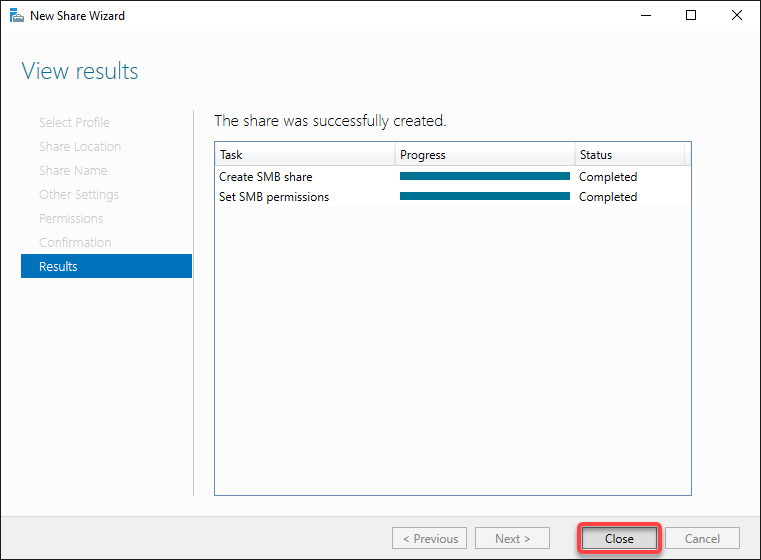
10. Click Close once the wizard successfully creates the share and sets permissions.
11. Lastly, repeat steps one to nine to create another share on the second server.
💡 Discover the File Server Resource Manager (FSRM) for Windows to manage how users share files and folders.
Enabling the DFS Namespaces and DFS Replication Roles
Regardless of which server you are working on, you typically want your files to be available in a heartbeat. The DFS Namespaces and DFS Replication roles provide structure and high availability to file sharing.
To take advantage of these roles, you must install them first:
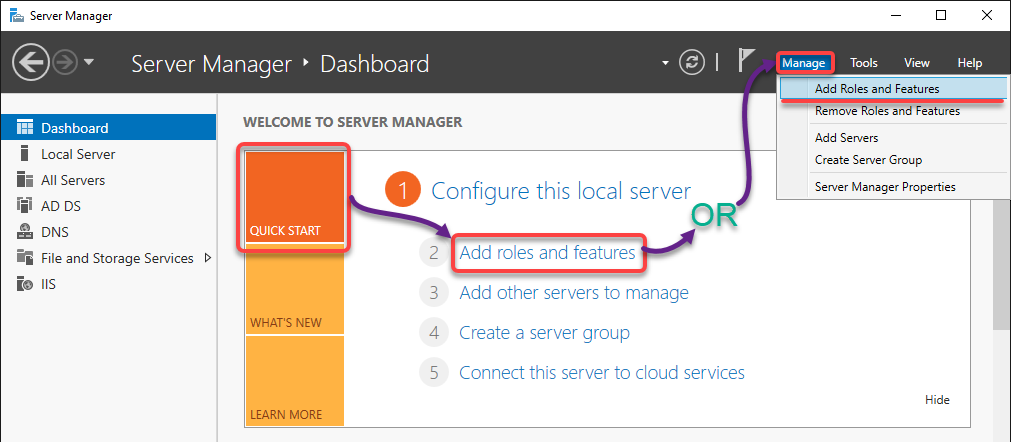
1. Open the Server Manager on your file server.
2. Under QUICK START, click Add roles and features, which opens a configuration wizard.
Alternatively, click the Manage menu (upper-right), and choose Add roles and features.
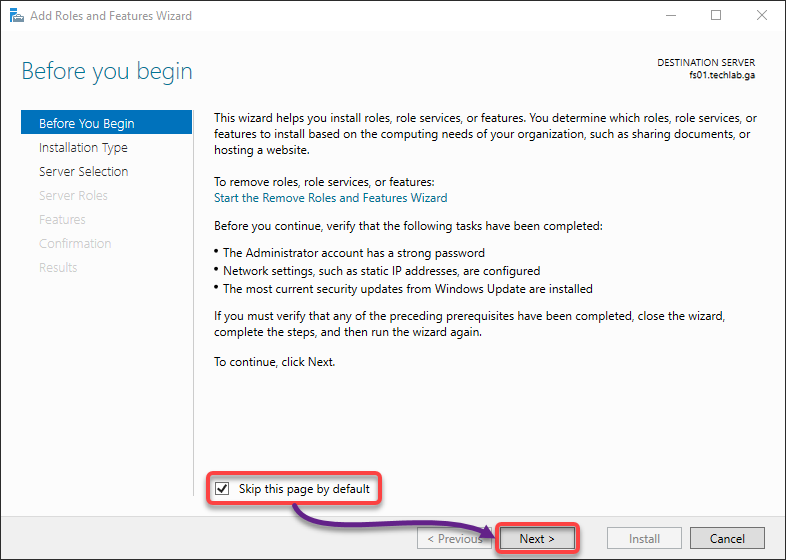
3. Tick the box below to skip this page by default in the future, and click Next to continue.
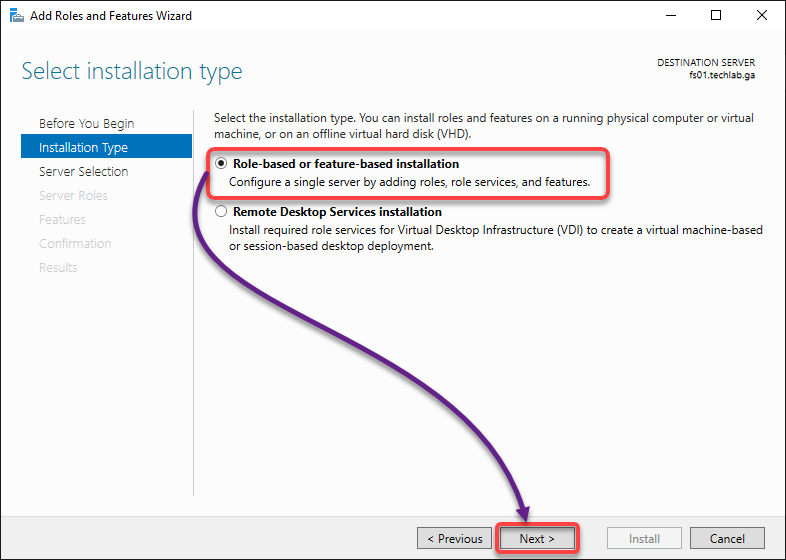
4. Now, select the Role-based or feature-based installation option since you are only configuring a single server, and click Next.
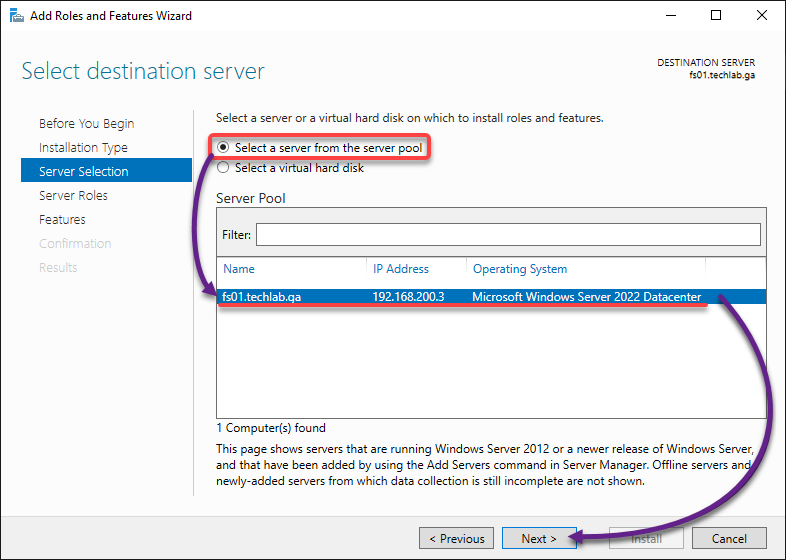
5. Choose a destination server with the following:
- Select the Select a server from the server pool option to list all available servers.Choose your server from the list that populates under Server Pool.Click Next to set the selected server as the destination server.
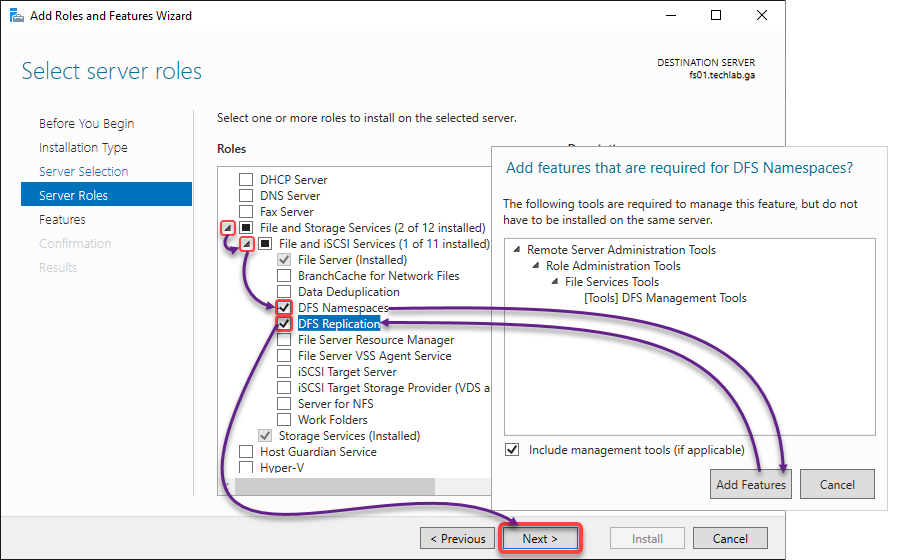
6. Add the DFS Namespace and DFS Replication roles as follows:
- Expand File and Storage Services → File and iSCSI Services.Tick the DFS Namespaces box, and a pop-up window appears.In the pop-up window, click Add Features to confirm adding the features.Tick the DFS Replication box, and click Next.
💡 Install DFS Replication only if you intend to replicate files on your servers.
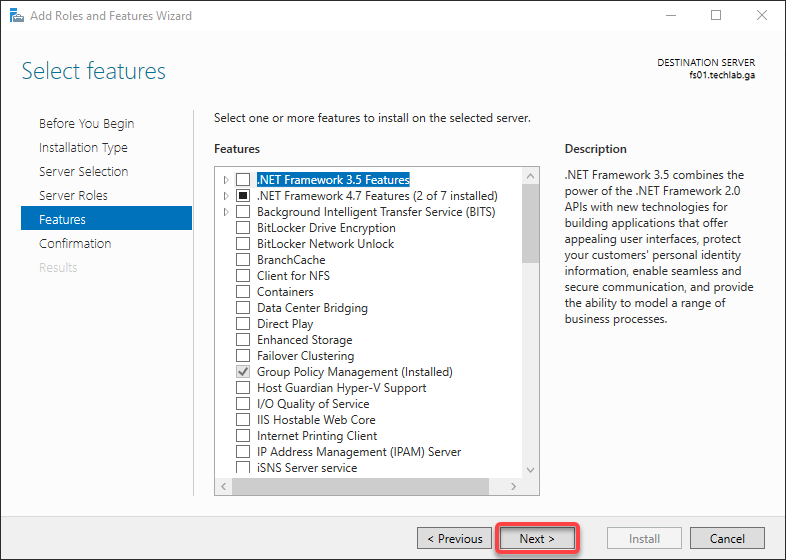
7. Keep the default features, and click Next.
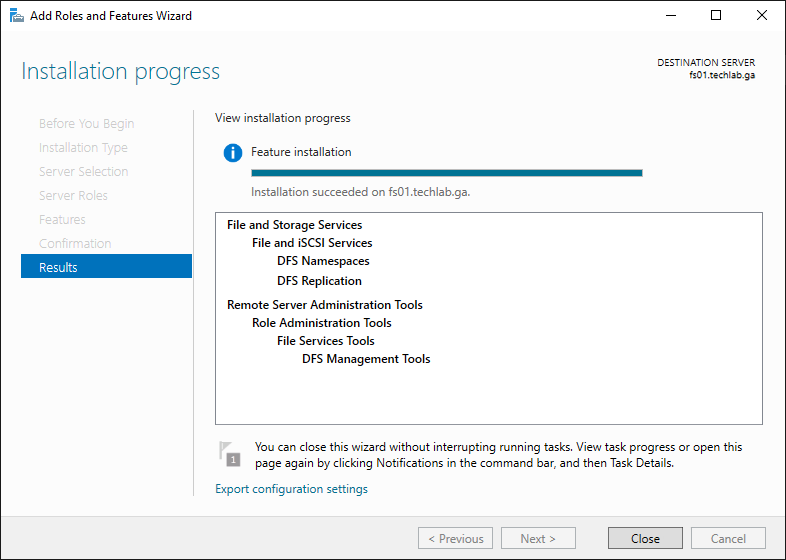
8. Review the installation summary, and click Install to install the selected roles and features.

9. Once installed, click Close to finish the installation and close the wizard.
10. Finally, follow steps two to nine to install DFS Namespaces and DFS Replication roles on the second file server.
Setting Up DFS Namespaces
You have successfully installed DFS Namespaces, but this role is not doing anything unless you create a namespace. DFS Namespaces allows you to group shared folders from different servers into one or more logically organized namespaces.
For example, you can group shared folders for similar purposes, like training materials for any department from separate locations.
To set up DFS Namespaces:
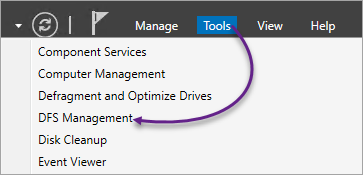
1. Click the Tools menu (upper-right) in the Server Manager, and choose DFS Management.
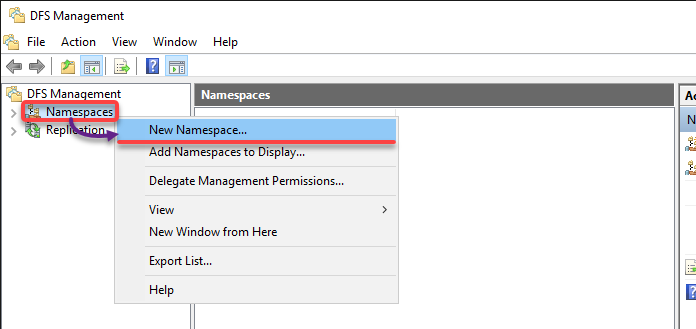
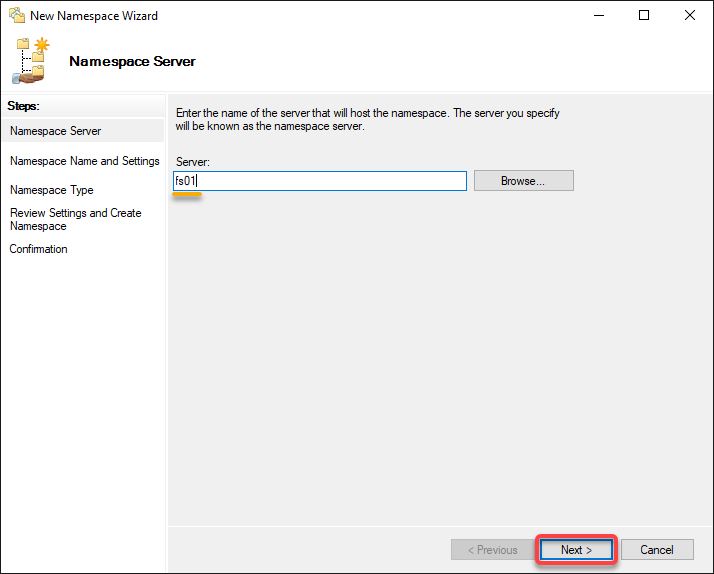
2. Next, right-click Namespaces (left panel), and select New Namespace, which opens a wizard where you can configure a new namespace (step three).
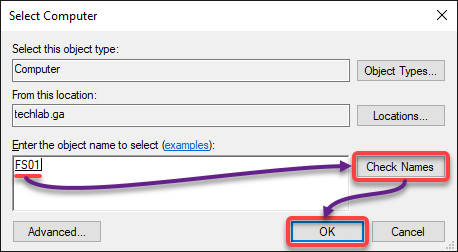
3. Click Browse, which opens a small window where you can select the server you need to host the namespace.
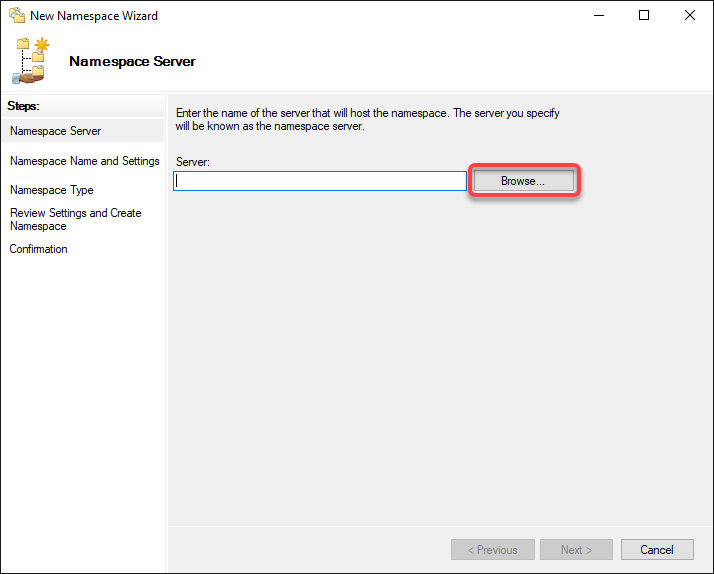
4. Type the server’s name, click Check Names to verify you chose an existing server, and click OK to confirm the selection.
5. Now, after selecting the server, click Next to continue.
6. Set a Name for the namespace (i.e., Shared), and click Next.
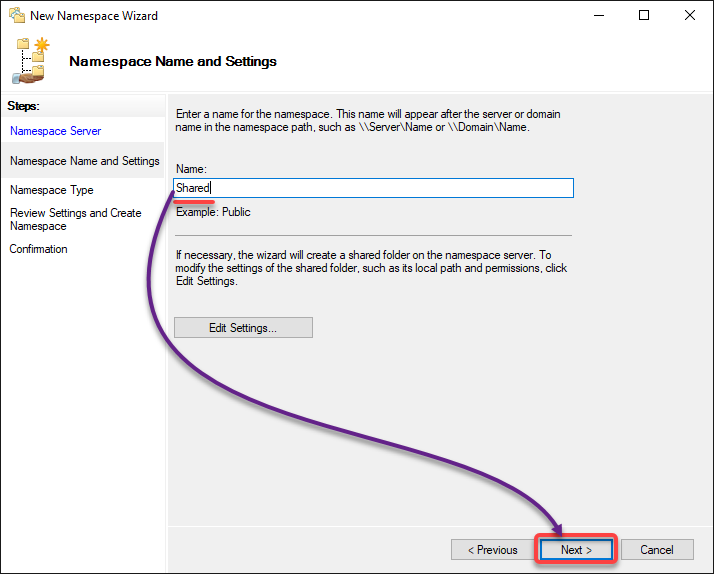
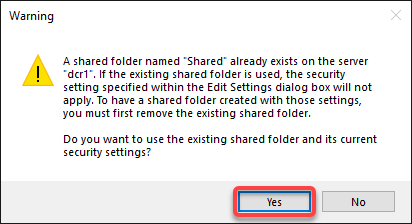
If you get a warning, as shown below, click Yes to keep the existing shared folder and its security settings.
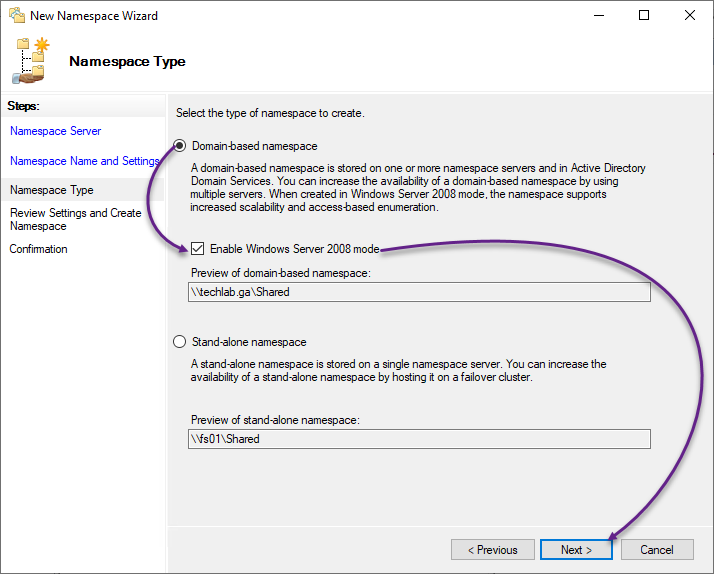
7. Next, configure the namespace type with the below information:
- Select the Domain-based namespace option for higher namespace server availability.Tick the Enable Windows Server 2008 mode box for compatibility with server versions as old as Windows Server 2008.Click Next to continue.
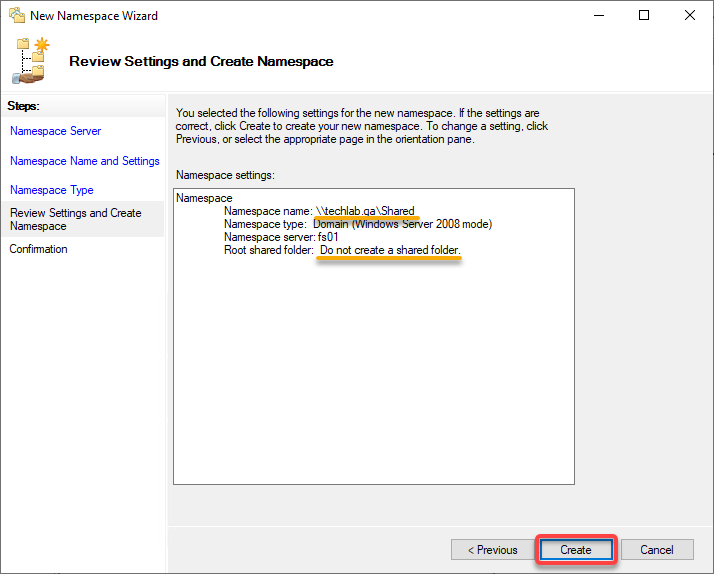
8. Complete setting up the DFS Namespace as follows:
- Review the details of your namespace settings.
- Take note of the namespace name, as you will need to access it later.
Notice that the root shared folder says Do not create a shared folder because you chose to keep an existing file share for your namespace.
- Click Create to complete creating the namespace setup.
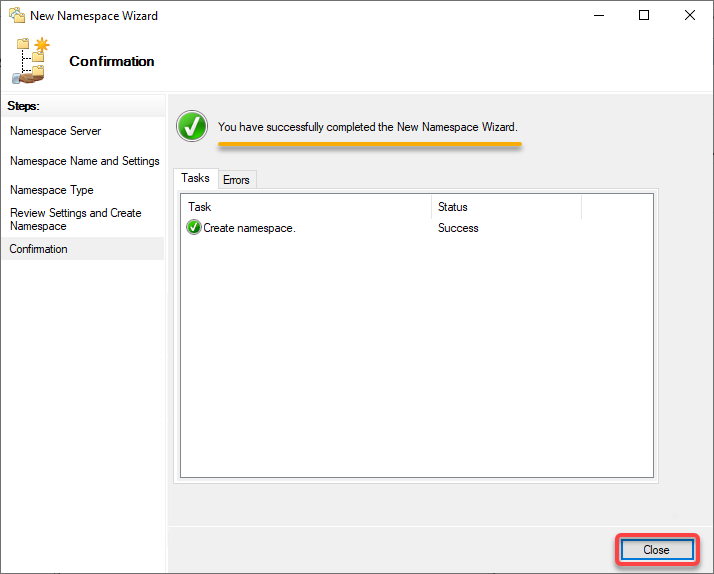
9. After creating the namespace, click Close to close the wizard.
10. Now, open File Explorer and navigate to your shared folder via the namespace name you noted in step nine (\\techlab.ga\Shared).
If successful, you will see an output similar to the one below.

Setting Up DFS Replication
DFS Replication is mainly for high data availability. DFS Replication allows you to replicate data for backup or content-sharing purposes. In this example, you will create a multipurpose replication group.
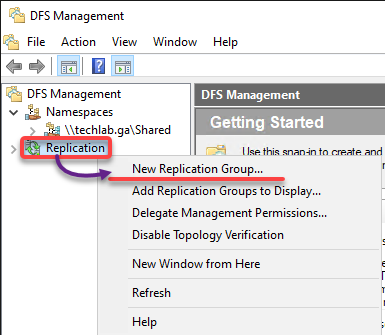
1. Right click Replication (left panel) in the DFS Management tool, and choose New Replication Group. A wizard appears, where you will configure a new replication group.
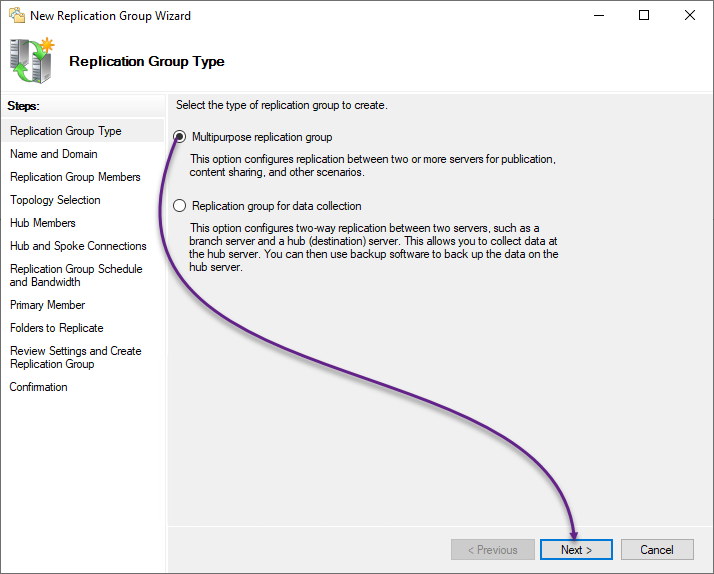
2. Next, pick one from the two replication group type:
| Replication Group Type | Description |
| Multipurpose replication group | Configures replication between two or more servers for any scenario that needs file sharing. |
| Replication group for data collection | This replication group type is for data replication between two servers for backup purposes. |
But for this example, choose the Multipurpose replication group option, and click Next.
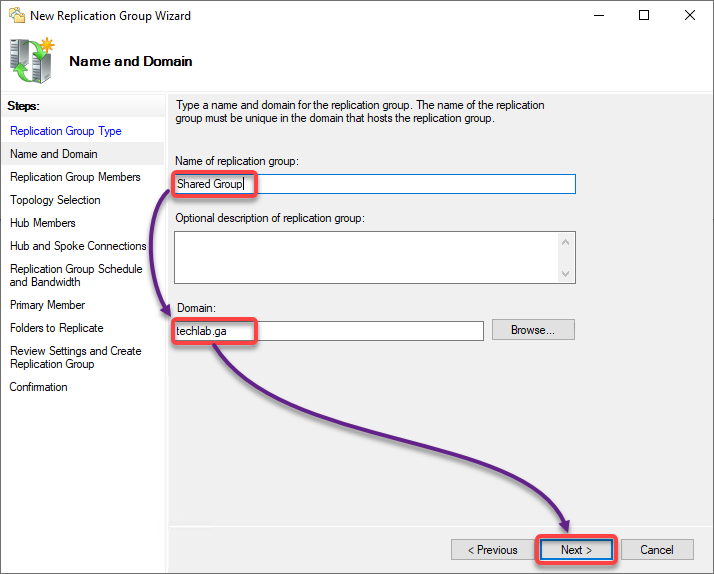
3. Input a replication group name, like Shared Group, and click Next since the wizard automatically fills in the Domain.
💡 If the Domain field is empty, click Browse and manually select your domain.
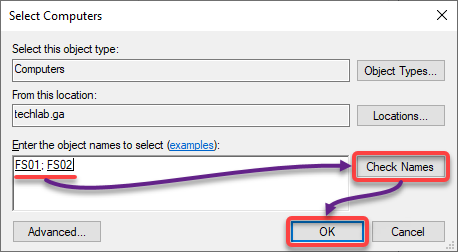
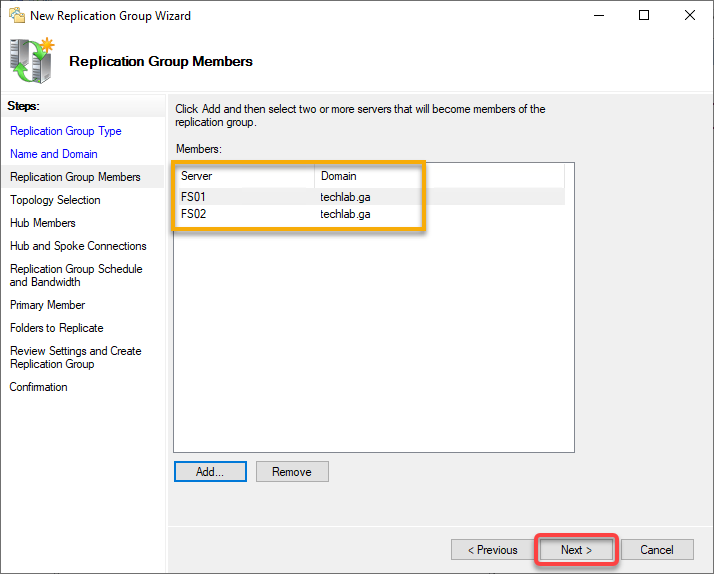
4. Now, click Add, and a pop-up window appears, where you will select the servers to add as group members.
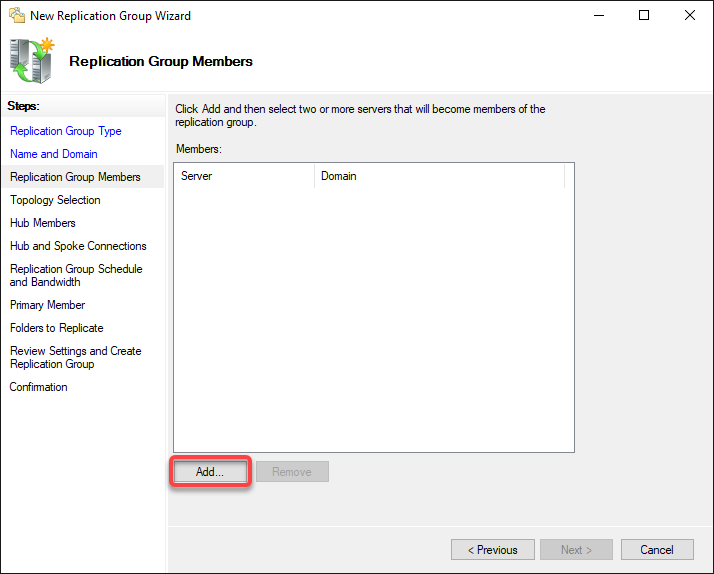
5. Input the name of two or more servers (separated by a semi-colon), and click Check Names to verify the servers’ existence in the domain. Once verified, click OK to add these servers as members of your replication group.
💡 Although you are creating the replication group on one of your servers, you must still add that server as a member of the said group.
6. After adding the members, click Next to continue.
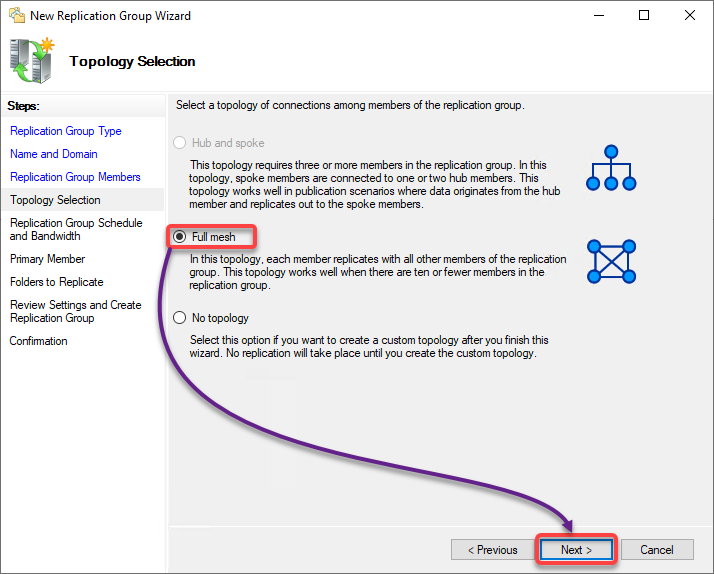
7. Pick one from the three Topology options, which are as follows:
| Topology | Description |
| Hub and spoke | This option is disabled by default if you are working with less than three servers. Data originates from hub members and replicates to the spoke members. But spoke members do not replicate data from one another. |
| Full mesh | This option is disabled by default if you are working with less than three servers. Data originates from hub members and replicates to the spoke members. But spoke members do not replicate data from one another. |
| No topology | This option lets you create a custom topology after creating a replication group. Replication will only take place after you create a custom topology. |
But for this example, select the Full mesh topology, and click Next.
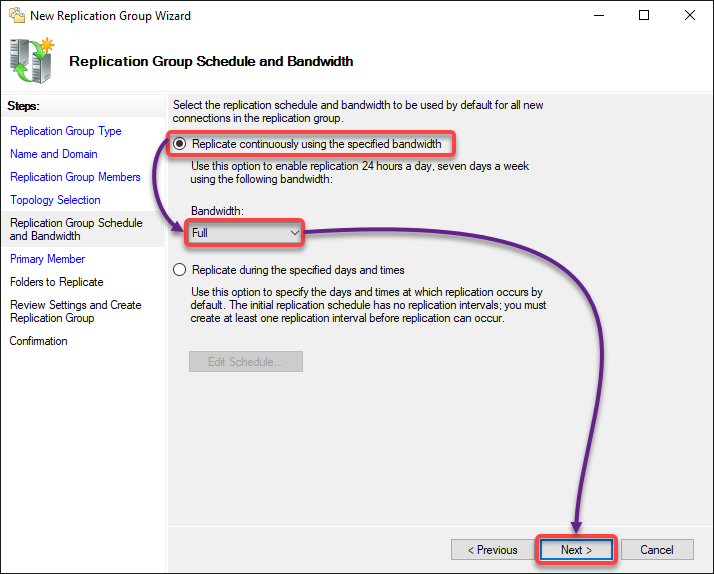
8. Select the Replicate continuously using the specified bandwidth option, leave the Bandwidth at Full, and click Next.
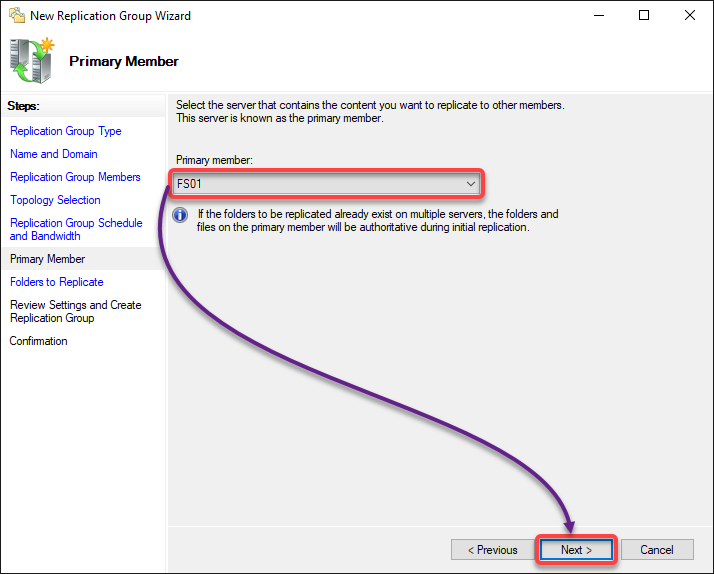
9. Now, choose your Primary member in the field below and click Next.
The primary member is the server where you are setting up the replication group for simplicity.
💡 The folder and files on the primary member have higher precedence if the folders to replicate already exist on multiple servers during initial replication.
10. Click Add, which opens a small window where you will select a folder on the primary member for other members to replicate.
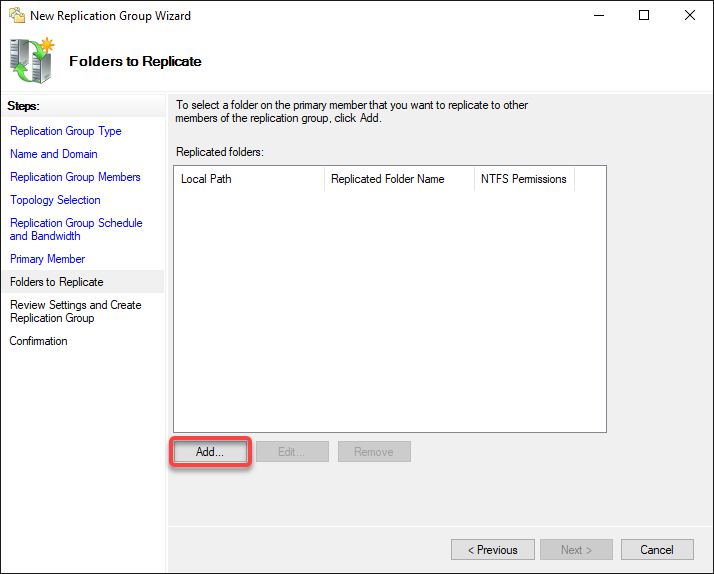
11. Set the shared folder path to replicate as follows:
- Type or browse the shared folder path (C:\Shared) on the primary member.Select the Use name based on path option for simplicity.Click OK to confirm the specified folder path, and close the pop-up window.
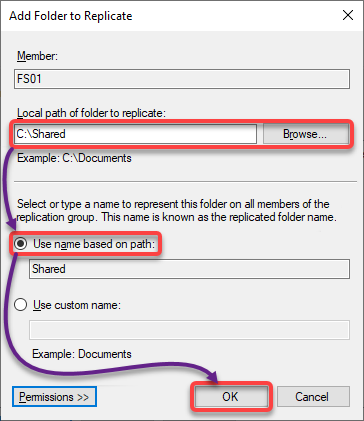
12. After adding the shared folder, click Next to continue.
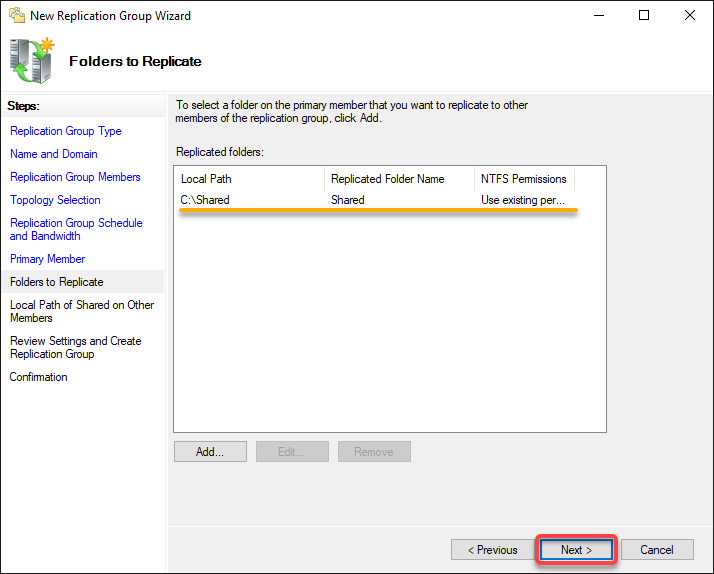
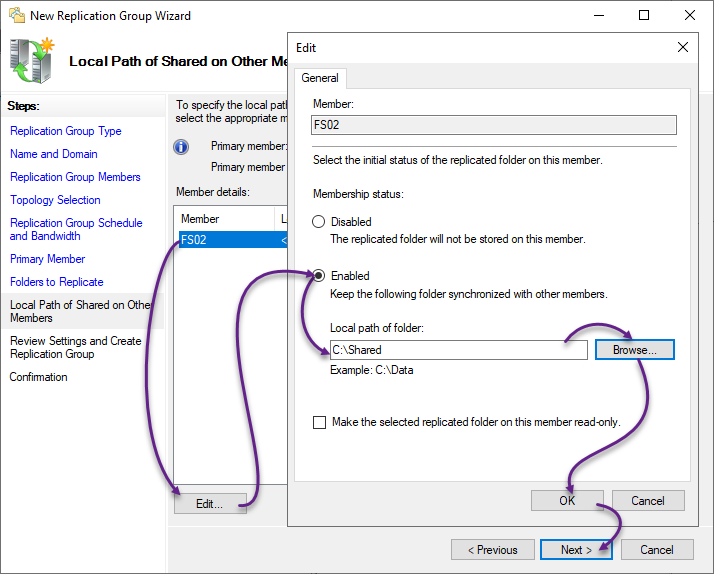
13. Select the name of the appropriate member, and click Edit to edit the member’s general properties.
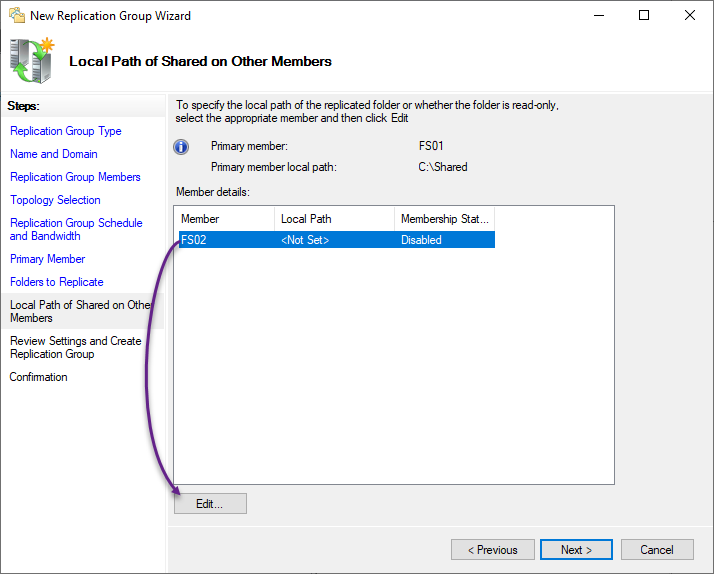
14. Configure the selected member’s general properties with the following:
- Select the Enabled option to keep the shared folder synchronized with other members.Input or browse the path of the shared folder (C:\Shared).Click OK to confirm the changes, and close the Edit window
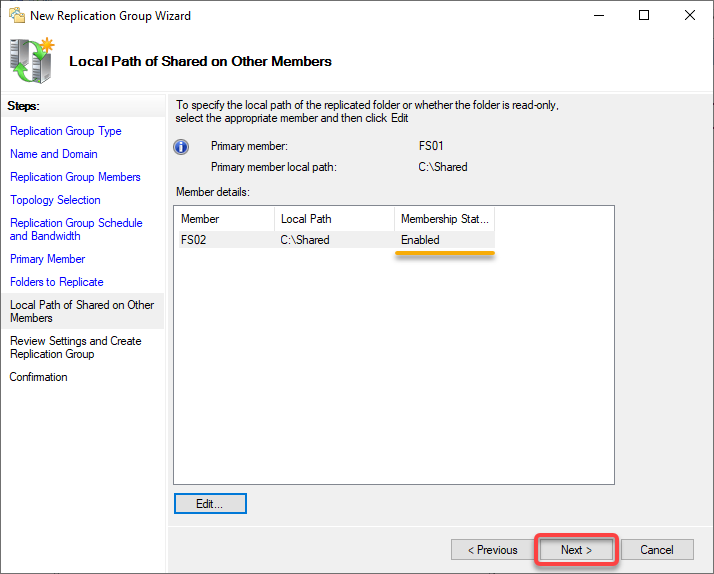
15. Click Next once the membership status is changed to Enabled, as shown below.
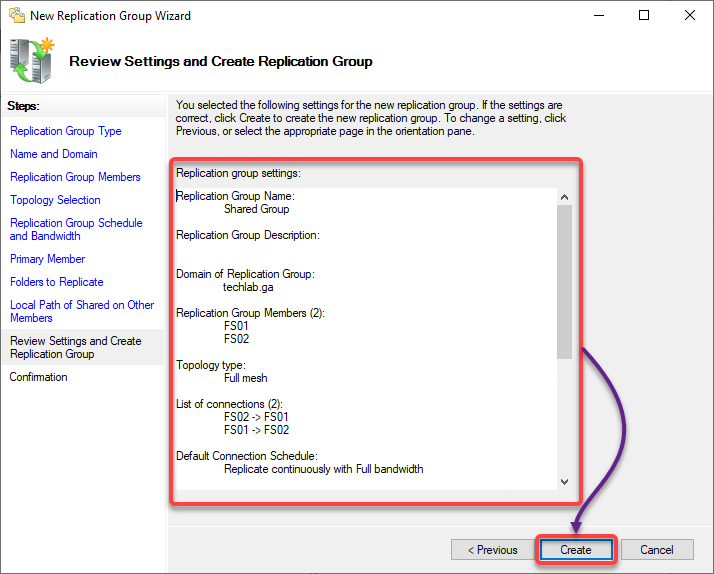
16. Review your selected settings, and click Create to finalize and create the replication group.
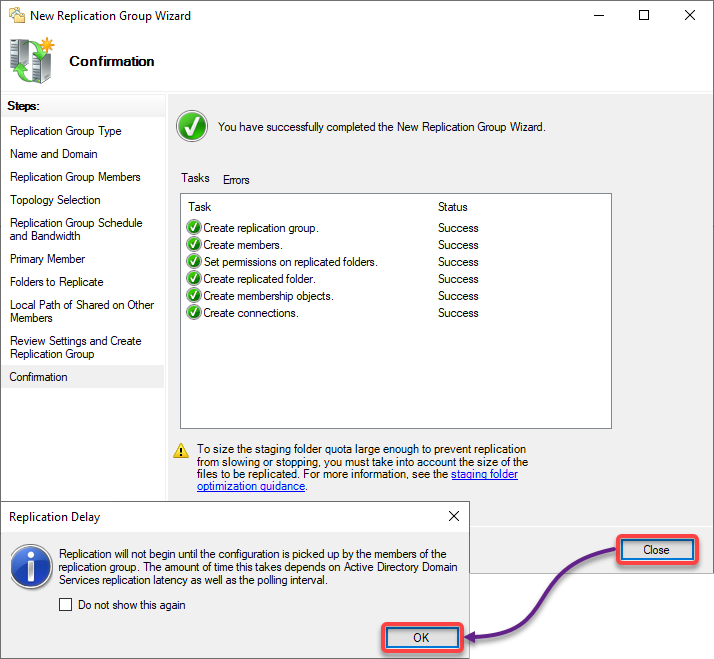
17. Ultimately, click Close to close the new replication group wizard, and click OK when the Replication Delay message appears, as shown below.
Testing the Replication Group
You have just achieved a milestone after successfully configuring your replication group. But how do you know the replication group works?
You will create a folder on the first server and a file on the second server to test if each server replicates the other.
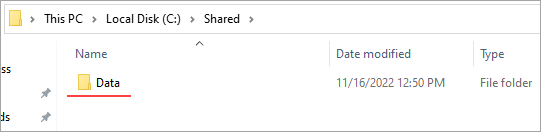
1. Access the DFS namespace on your first file server in File Explorer, and create a new folder called Data.

2. Next, switch to your second file server, and navigate to the local Shared folder.
If the replication is successful, you will see the Data folder inside the Shared folder, as shown below.
3. While still on the second file server, open the Data folder, and create a new text document called text. Doing so lets you test the replication from the second file server to the first file server.

4. Finally, switch to your first file server, and open the Data folder inside the Shared folder. You will see the text file if the replication works, like in the screenshot below.

Conclusion
Learning new tools and functionalities can be daunting at first. But in this tutorial, you have learned how to take advantage of Windows Servers Storage to create basic file shares.
You can now confidently use Files and Storage Services, configure a DFS namespace, and a DFS replication group.
But besides having shared folders, why not learn more about Data Deduplication (Dedup) to reduce the cost of duplicated data?


