
When writing the latest piece of code in Visual Studio Code (VS Code), do you ever catch yourself typing the same thing over and over again? Maybe you’ve typed a function declaration ten times today or defined the same set of parameters on command for the 20th time. Did you know you can get your time and sanity back using Visual Studio Code snippets?
Not a reader? Watch this related video tutorial!Visual Studio Code snippets are small pieces of text stored in VS Code. You can invoke these snippets via a menu or key sequence and can save a ton of time when you find yourself repeating blocks of text with few differences between each occurrence.
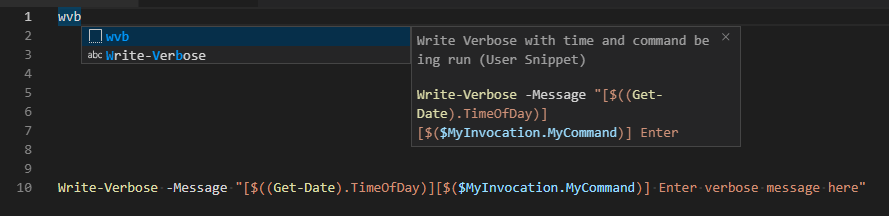
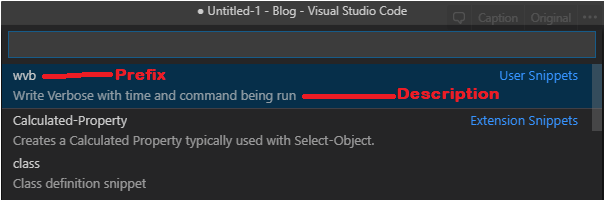
For example, below you can see by simply typing wvb in VS Code, you have the option to expand a good deal more text, as indicated by the Write-Verbose text in the box. This is the power of snippets!
In this article, you’re going to learn how to work with VS Code snippets, including using default snippets, extension snippets, and even creating your own!
Prerequisites
This is going to be a walkthrough article to get your hands dirty. If you plan to follow along learning how to work with VS Code snippets, you’ll need VS Code version 1.17 or greater. For full disclosure, I’ll be using VS Code 1.38.1 on Windows.
You can download the latest version of VS Code for your particular platform here.
Finding VS Code Snippets
Before you can begin building your own snippets (which you will), it’s important to learn how to find the built-in snippets available to you.
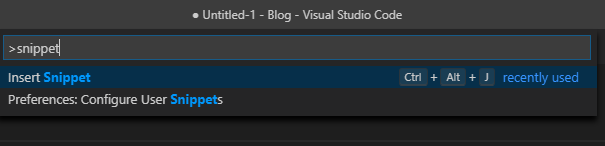
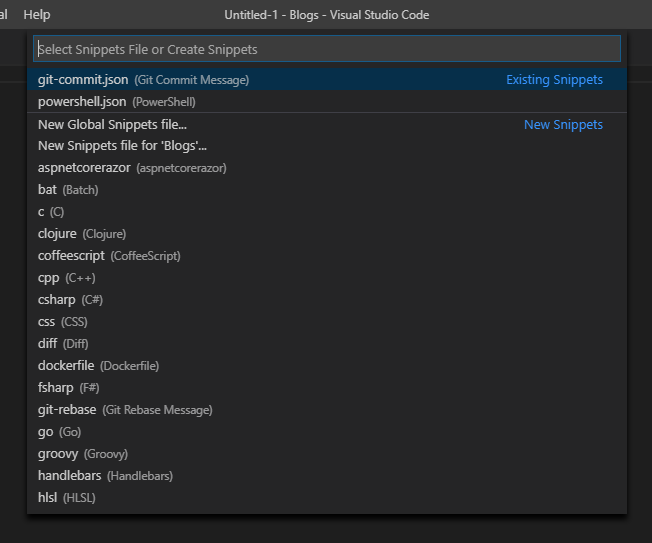
You can find all snippets in the menu interface. The menu interface allows you to review and to use snippets. To access the menu, you can either press F1 or Ctrl-Shift-P, type “snippet” and press Enter. You will see a menu pop up similar to what you see below.
When you hit Enter on Insert Snippet, you’ll see a drop-down of available snippets, as shown below. You can see there are quite a few snippets available by default and see more by scrolling down.
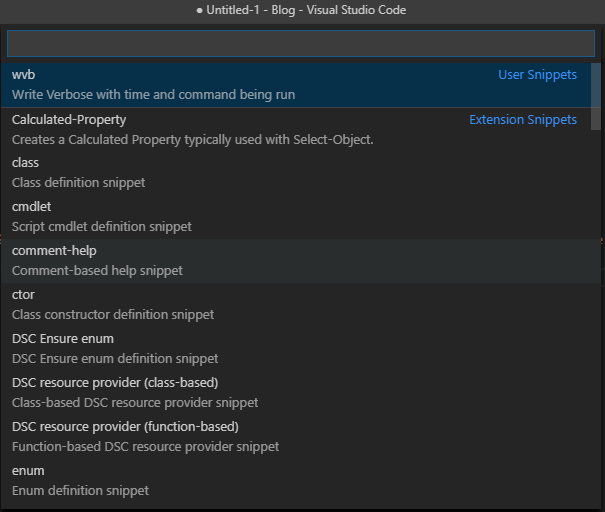
The drop-down of available snippets allows you to review the built-in snippets that are available through adding a language extension in VS Code.
Language Extensions
You can use VS Code to work with many different languages. Each language has it’s own nuances. To support these differences, VS Code supports language extensions.
Language extensions provide VS Code with smart editing features for different programming languages. Language extensions give programming language additional support such as:
- Syntax highlighting
- IntelliSense
- Formatting
- Error checking
- Snippet completion
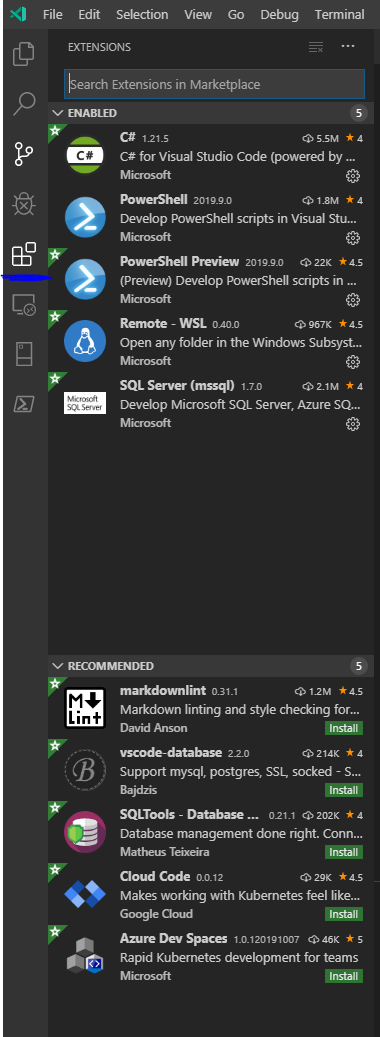
Extensions install through the VS Code Extension menu.
You can review the definition of these snippets given by the language extensions by opening the JSON file on Windows located at C:\Users<UserName>.vscode\extensions\ms-code.-\snippets.
Extensions, in of themselves, have nothing to do with snippets but you’ll find the that many extensions come with built-in snippets you should be aware of.
Expanding Snippets
When you select a snippet via the menu interface, you will see the contents of the snippet to the file. This process of converting the snippet definitions into useful code is called expanding.
When you call the prefix, VS Code reads that specific prefix and runs whatever instructions you define in the snippet. These instructions can vary from snippet to snippet. This entire process of calling, converting, and inserting of the snippet is called expanding.
Using VS Code Extension Snippets
Some snippets come, by default, in VS code but when you install an extension, they sometimes come with snippets of their own. Examples of extensions with included snippets are the Python extension from Microsoft, the PowerShell extension from Microsoft, and the C# extension from Microsoft.
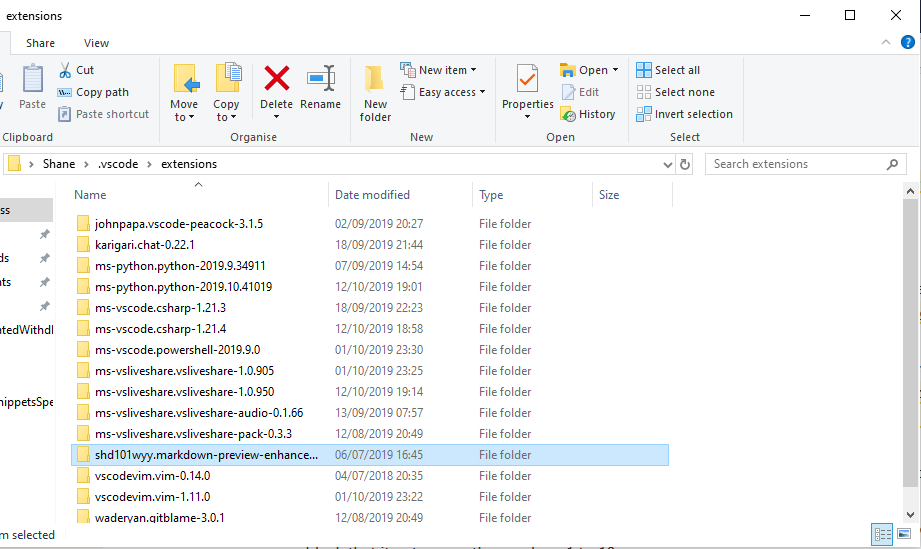
Where Extension Snippets are Stored
These extensions are normally installed in Windows under the C:\Users<UserName>.vscode\extensions directory of your computer as you can see below.
The folders for the extensions follow the ms-vscode.- naming convention. Each of these folders contains a snippet folder that has the snippets that are included with the extension.
Extension Code Snippet Example
To demonstrate using an extension snippet, let’s take the PowerShell extension for example. This extension comes with a couple of useful snippets called region and for to expedite creating PowerShell region blocks and *for* loops.
Let’s say you need to create a for loop in a PowerShell script enclosed in a region block. The code to do this is shown below. The code in the screenshot below is 50 characters long and creates a for loop inside a region block that iterates over the numbers 1 to 10.
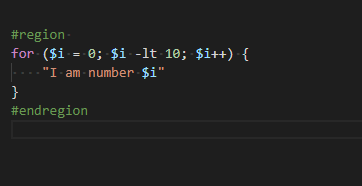
Rather than typing out every single character in this example, you can use two snippets that come installed with the PowerShell extension from Microsoft called region and for.
Take a look below to see how easy it is to use each of these snippets to save a ton of typing!
Creating Visual Studio Code Custom Code Snippets
You do not have to limit yourself to the snippets that come with VS Code itself or that come with extensions. Perhaps the existing extensions don’t contain the code layout that you need or you want to format these snippets yourself. Lucky for you, you can create your own snippets! In this section, you’ll see just how to do that.
To create a custom snippet, open your User Snippets in VS Code by clicking Files → Preferences → User Snippets. This will open up the snippet language selection scope for you. This is where you can specify a language in which you want to create the snippet. You can see an example of what this looks like in the screenshot below.
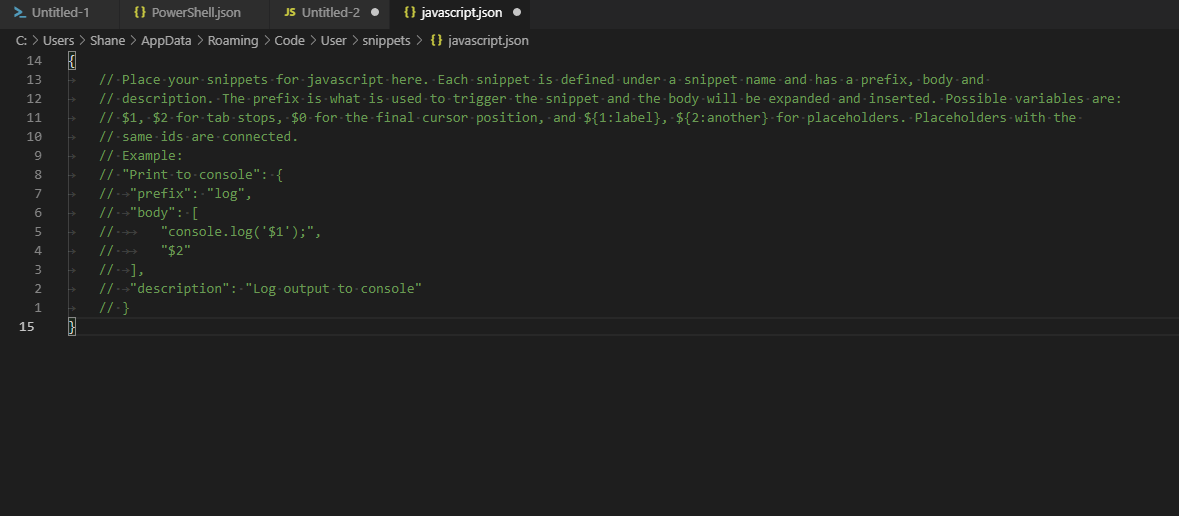
By choosing a language, VS Code will create a language.json file in C:\Users<UserName>\AppData\Roaming\Code\User\snippets on Windows. All user snippets created for different languages will have a file in this directory.
The languages you see available to you may differ from what you see above. In the above VS Code installation, many language extensions have already been installed.
Find the language that you want to create the snippet for and hit Enter to open up the language JSON file. This file is where your custom snippets will get stored, and it is here you can create your custom snippets.
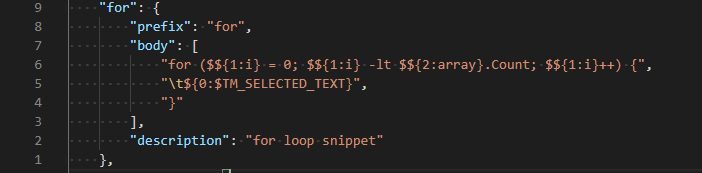
There are four data items to specify for a custom snippet:
- A snippet name (line 9 below)
- A prefix, which is what you’ll use to call your snippet (line 8 below)
- A body, which is your snippet code that is loaded into your scripts (lines 7 to 3 below)
- A description, which will show up in your IntelliSense (line 2 below)
Creating a Custom Python Snippet
Let’s see what it takes to create a custom snippet for the Python programming language. In this example, dt prefix will invoke a custom Python snippet. This snippet will print a message with the current time pre-populated.
Create the JSON File
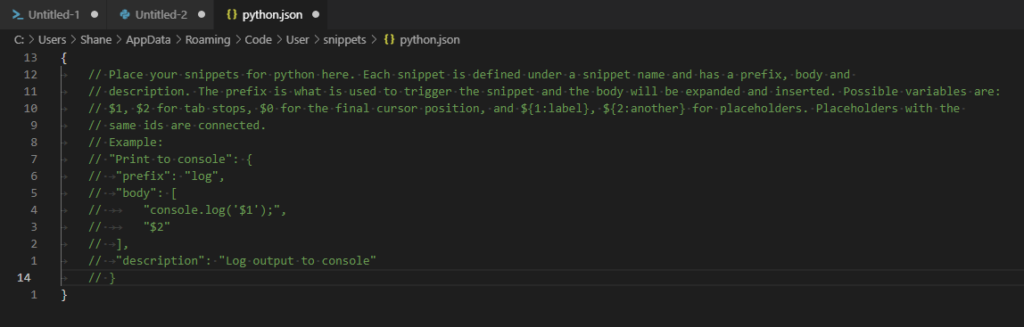
First open the snippet language selector, type Python, and hit Enter to create a python.json file. This will bring up a python.json file in the Windows C:\Users<UserName>\AppData\Roaming\Code\User\snippets folder.
You can see its default state in the image below.
Assigning a Name and Prefix
Now it’s time to begin editing the JSON file. First, define the name and prefix (dt). Snippet prefixes are short and clear as this is the value typed to call the snippet. The shorter the snippet prefix, the fewer characters to type when you want to call it.
You can see an example an example of what this looks like below.

Defining the Body
The body contains the code that will be expanded when the snippet is called. This code can be simple text and comments. It can also have other functions that you’ll see in later sections. If the body has many lines, there are a few gotchas you’ll need to watch out for.
- Each line needs to be in double-quotes
- Each line needs to end with a comma
- All the lines need to in square brackets (“[” and “]”)
You can see an example of what the example snippet body looks like below.

Defining the Description
The description is a message describing the prefix as seen below that’s defined below the body.

The description will be shown below the prefix in the snippet list and provides more information on what the snippet does. It also helps differentiate the snippet from similar ones created.
Below is an example screenshot of snippets identifying prefixes and descriptions.
If you don’t already have any custom Python snippets defined when you’re done creating the snippet you should have a python.json file that looks like the below code snippet.
{
    "DateTime Snippet": {
        "prefix": "dt",
        "body": [
            "import datetime",
            "dt = datetime.datetime.now()",
            "print(f\"The time is {dt} and this is a message\")"
        ],
        "description": "Prints a message with current time"
    }
}
Save this JSON file and now the custom snippet is available in any Python file in VS Code.
Now when you open a Python tab and type the prefix dt, the custom snippet below appears. Hitting Enter will expand the snippet body into the Python tab.
Creating a Custom JavaScript Snippet Using Included Text
Snippets are not isolated to the words you define in the snippet body. Snippets also can include text from the file you are calling them from.
VS Code has internal variables you can use. These are placeholders that take currently highlighted text and inserts it into the snippet. For example, by putting the variable $TM_SELECTED_TEXT in the snippet, you can show the selected text. Check out the VS Code Variables Reference page for a full breakdown of all internal VS Code variables.
To demonstrate, let’s create a snippet that simply creates a line to output the selected text to the console called log-it.
Open the snippet language selector, type JavaScript, and hit Enter to create a javascript.json file. This file will look similar to the python.json file created in the previous section. Although this time, it has sample Javascript code instead of Python code. You can its default state in the screenshot below.
Now create a snippet using the following JSON:
{
	"Print selected line to console": {
		"prefix": "log-it",
		"body": [
			"console.log('$TM_SELECTED_TEXT');"
		],
		"description": "Log highlighted text output to console"
	}
}
Save this JSON file and you now can use this snippet in your JavaScript files.
When you call this snippet with highlighted text, it will replace $TM_SELECTED_TEXT with whatever text you have highlighted. When you call this snippet without highlighted text, $TM_SELECTED_TEXT will be empty. You can see this in action in the screenshot below.
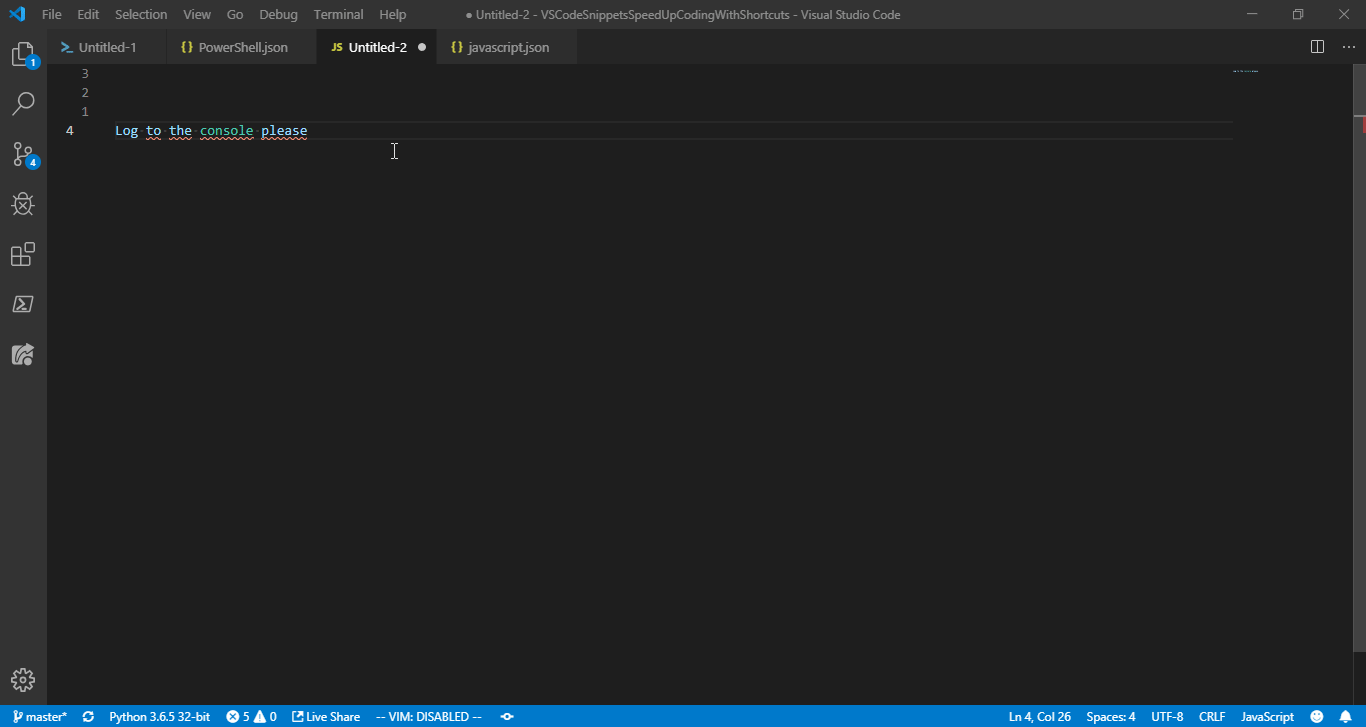
$TM_SELECTED_TEXTSnippet in ActionCreating a Custom PowerShell Snippet With Tab Stops
So far, the examples you’ve seen have been complete when called. Even the JavaScript assumes you’ve highlighted text beforehand. But what about the cases where you need to type values into the snippet after it’s called?
What if you want to type the value in the console.log() instead of using the highlighted text? What about if you want to type in various places in the snippet?
In this section, you’ll learn how to use tab stops to enable you to type text into the produced code the snippet expands to. Tab stops are set places in your snippet that the cursor will go to. These places get visited in order each time that you press tab. With these tab stops, you can type values into the snippet after it gets expanded.
Tab stops, defined by using the snippet variables $0, $1, $2 , and up in the snippet body, specify to the snippet where your cursor will go next when you call your snippet and hit tab.
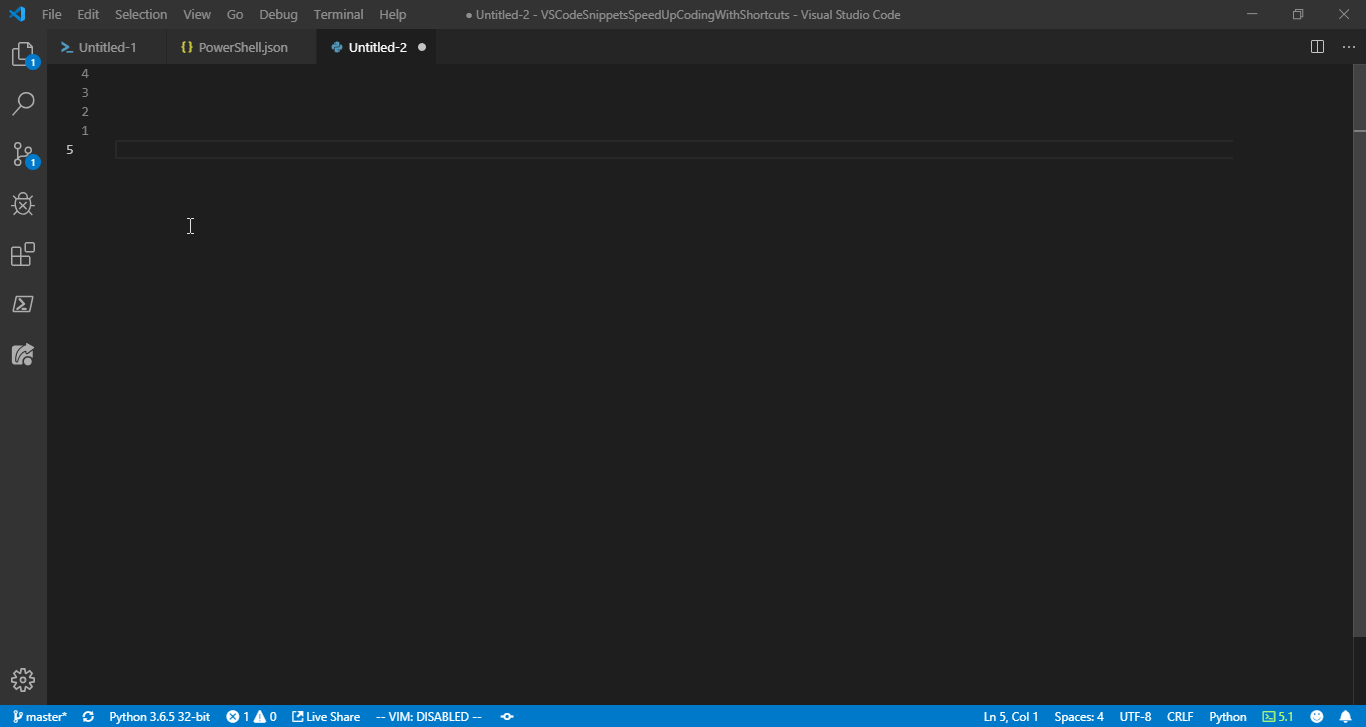
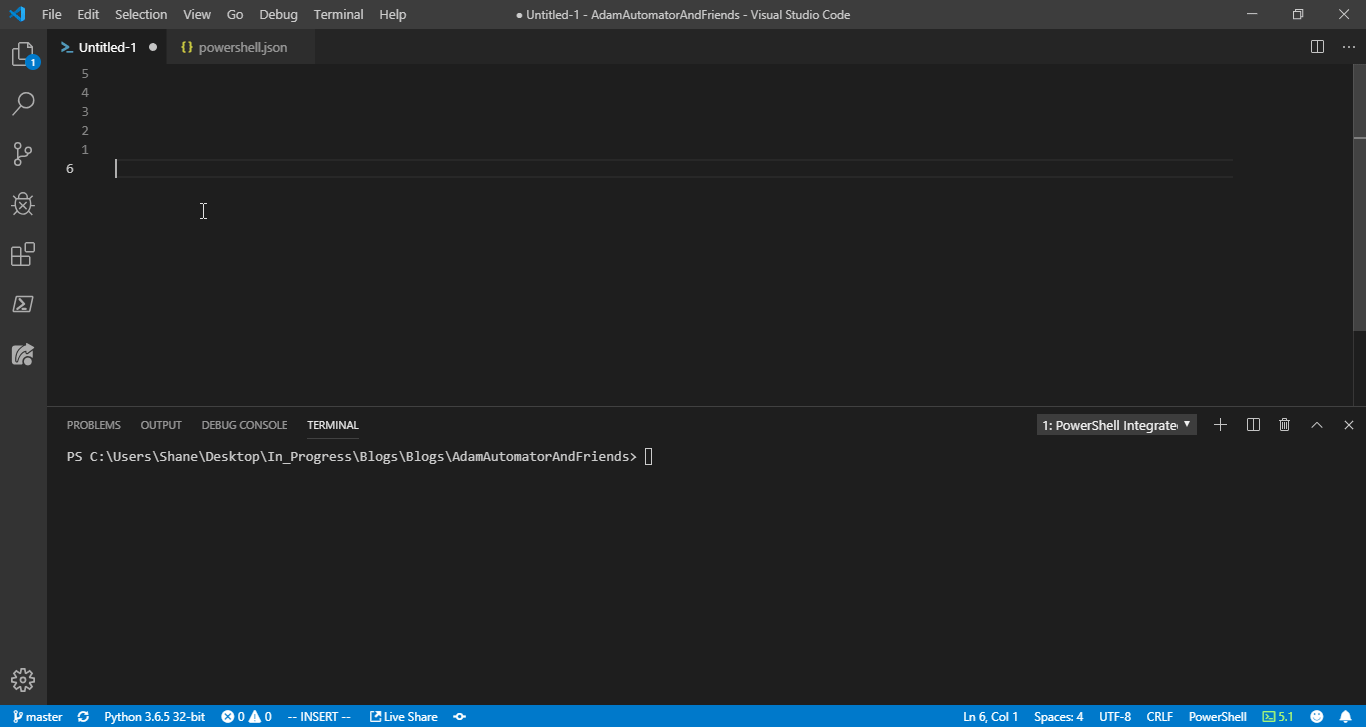
The tab stops follow normal ordering (1 follows 2 follows 3, etc.) with one exception: Tab stop 0 is the place the cursor will be on after all the other tab stops. To demonstrate this, the snippet below expands to a Write-Output message with the current date and a place for more text.
This body with two tab stops
$1at the end of theWrite-Outputmessage$0on the next line so the snippet will end on a blank line
{
    "DateTime Snippet PS": {
        "prefix": "dtPS",
        "body" : [
            "Write-Output -Message "The time is $((Get-Date).ToLocalTime()) and $1"","$0"
        ]
        "description": "PSCustomObject with 3 lines"
    }
}
Save this snippet and call it by typing the prefix dtPS in a PowerShell file.
When the snippet expands, your cursor jumps to the position of tab stop 1. From here, add the value or code that you want and press tab to jump the cursor to the next tab stop. This will continue all the way until you have gone through all the tab stops you specified.
You can see this in action in the screenshot below.
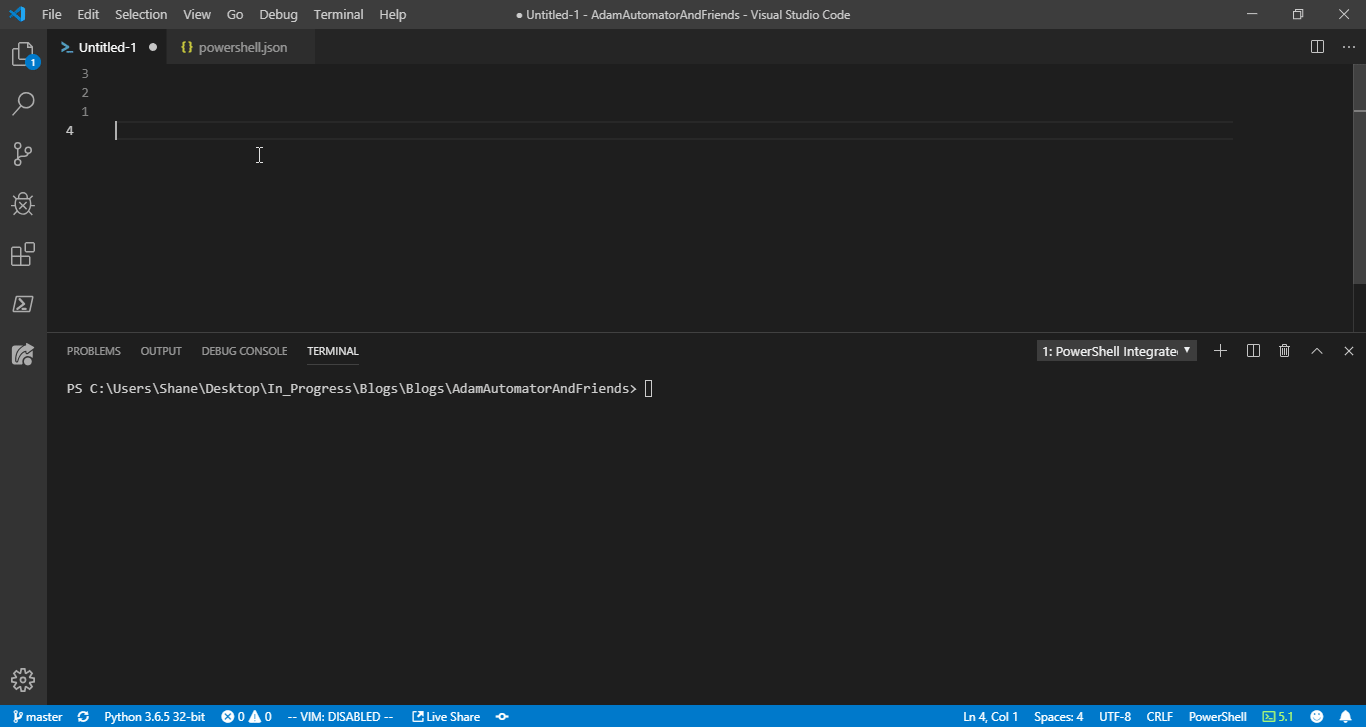
Adding Default Values to Tab Stops
While tab stops are great for a start, what if you need specific values usually in those spots but want the ability to change them, if necessary? Now it’s time to include default values.
The example above had a tab stop, but when the snippet expanded, there was no text in its place. The cursor jumped to the tab stop location and then the user had to take over.
If only there was a way that a value could be where the tab stop is—that way, the snippet could expand and that value will be expanded with it. When the tab stop gets to that location, the default value could get overwritten or it can get tabbed past.
Let’s check out how to add default values to custom snippets. You’ll do so by editing the above PowerShell snippet JSON file.
To start, open the snippet language selector, choose PowerShell, and change the tab stops from $1 to ${1:this is my default message}. The value after the colon becomes the default value. This value is expanded with the snippet.
When that tab stop is hit, two things can happen. The default value can be overwritten, or it can be tabbed past and it will keep its default value.
Below you can see the change in the body.
{
	"DateTime Snippet PS" {
		"prefix": "dtPS",
		"body" : [
			"Write-Output -Message \"The time is $((Get-Date).ToLocalTime()) and $1{1:this is my default message}\"",
			"$0"
		],
		"description": "PSCustomObject with 3 lines"
	}
}
Once updated and saved, these default values are expanded and also show up in the IntelliSense window when called, as shown in the screenshot below.
Default messages are good examples of what you can do with tab stops. Tab stops also give you the option of choice. In the next section, you’re going to see an example of adding choices to your tab stops.
Adding Choices to Tab Stops
Tab stops are not limited to having a default value or no value at all. They can be defined in the VS Code snippet definition to give the user options when the snippet expands as well.
Perhaps you have a situation where you want to choose a different value or command in a snippet. Rather than creating three different snippets with different choices, you can edit the snippet to present a choice with a tab stop, as shown in the screenshot below.
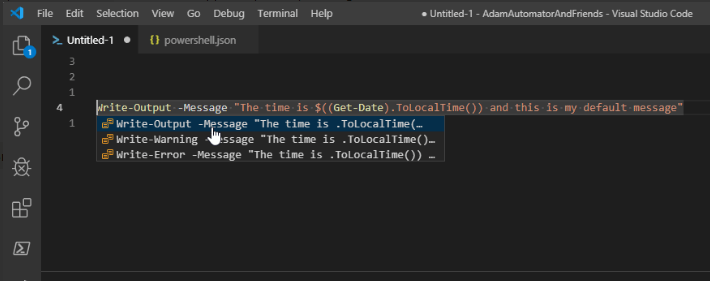
Tab stops will present a choice when the following syntax is used in the body of the snippet:
${N|Choice1,Choice2,Choice3[,Choice]|}The tab stop shown above has been modified to give the choice of:
Write-OutputWrite-WarningWrite-Error
This was done by placing two pipe characters ( | ) after the tab stop. Choices are put inside the pipe characters, separated by commas. You can see this in the code block below.
${1|
    Write-Output -Message \"The time is $((Get-Date).ToLocalTime()) and this is my default message\", // <-- Choice 1
    Write-Warning -Message \"The time is $((Get-Date).ToLocalTime()) and this is my default message\", // <-- Choice 2
    Write-Error -Message \"The time is $((Get-Date).ToLocalTime()) and this is my default message\" // <-- Choice 3
|}
Below you can see the example snippet.
{
    "DateTime Snippet PS" {
        "prefix": "dtPS",
        "body" : [
            "Write-Output -Message \"The time is $((Get-Date).ToLocalTime()) and this is my default message\", Write-Warning -Message \"The time is $(Get-Date).ToLocalTime()) and this is my default message\", Write-Error -Message \"The time is $(Get-Date).ToLocalTime()) and this is my default message\"|}",
            "$0"
        ],
        "description": "PSCustomObject with 3 lines"
    }
}
When the custom snippet expands now, the choice of which option to choose will appear in an IntelliSense window, as seen in the screenshot below.
From here, you can select the choice you want and watch it get expanded out into that choice. In our example screenshot below, the entire line of code is replaced with the option to choose from three different Write commands, and it shows that each one can be called and run without issue.
Summary
Custom snippets can be simple text or code. They can have tab stops so you can include messages, default values, or choices, as well as highlighted text.
It doesn’t have to be an arduous task of typing out every single character of every single code block. With snippets, you don’t have to remember the exact syntax for a for, a foreach, or a switch statement every time. Snippets are the perfect fit for this niche.
I’ve shown Python, JavaScript, and PowerShell snippets in this post. VS Code snippets are available for many, many more languages. Your limits are only what you use and what you can think of!


