

VMware ESXi and vCenter have a flash-based web UI, which may no longer work on the latest web browsers. VMware Workstation can connect to ESXi and vCenter servers but getting it is not cheap. What other option is there to manage virtual machines? VMware Remote Console (VMRC) is the answer!
In this tutorial, you’ll learn about what VMRC is, how to install it on supported platforms, and ultimately how to use it to connect and manage virtual machines on remote hosts.
Prerequisites
Have or need VMware ESXi hosts? Check out the VMware vSphere virtualization suite integrated with VMware vCenter for comprehensive management and advanced features. Need more localized VM capabilities? Check out VMware Workstation PRO & Player!
If you plan on following along with the examples below, here’s what you will need:
- A modern web browser such as Edge, Chrome, and Firefox. The examples in this article will use Microsoft Edge.
- An ESXi or vCenter server. This article uses ESXi 7.0.
- A computer running on Windows 10 or Linux. There will be examples in this article for VMRC in Windows and Linux.
- Download the VMRC setup file for your computer’s operating system (Windows and/or Linux). As of this writing, the latest VMRC version is 12.0, which this tutorial will use.
Update (2025): Following Broadcom’s acquisition of VMware, downloads have moved to the Broadcom Support Portal. You’ll need to create a free Broadcom account to access downloads. macOS users can also find VMRC in the App Store.
- Install the Chocolatey package manager on your computer only if you plan to install VMRC on Windows without downloading the installer from VMware.
What is the VMRC?
The VMRC is a standalone application that provides access to virtual machines on remote VMware virtual machine hosts.
Accessing remote consoles with VMRC allows you to modify VM settings directly, such as allocated vCPU’s, RAM, and disk. Performing tasks such as restarting, suspending, or resuming a virtual machine are also possible through VMRC.
What’s more, you can upgrade VMware Tools or modify boot configurations. Need to attach a USB device to a VM? VMRC can do that too!
Installing and Using VMware Remote Console on Windows
Before connecting to a VM on a remote host, you have to first install VMRC on your computer. And on Windows, there are a few ways you can install VMRC. Whether using the GUI or command-line, VMRC got you covered.
Installing VMRC using the Setup Wizard
One way to install VMRC is by downloading the installer and running the VMRC setup wizard. To do so, follow these steps:
1. On your computer, locate the VMRC setup file you downloaded.
2. Right-click on the VMRC installer zip file and click Extract All.
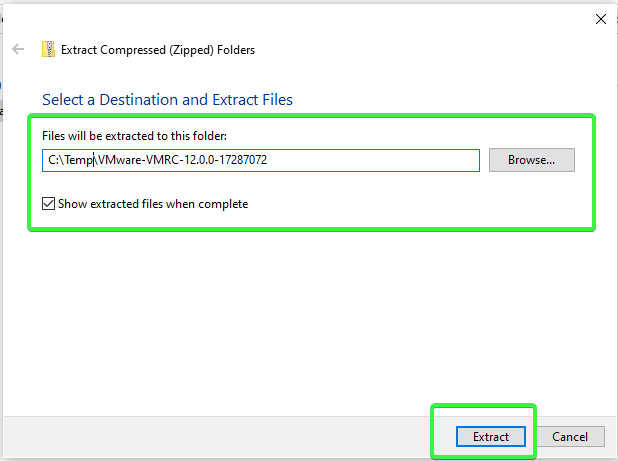
3. When asked to select a destination, enter the temporary location to extract the files and click Extract. In this example, the destination is in C:\Temp.
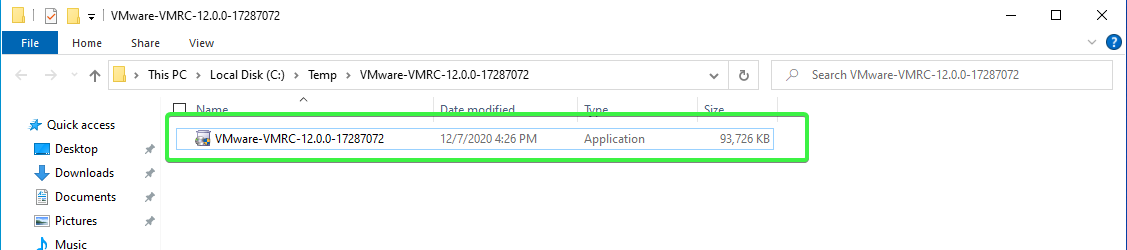
4. After extracting the zip file, double-click the VMRC setup file to launch the installation wizard. In this example, the setup filename is VMware-VMRC-12.0.0-17287072.
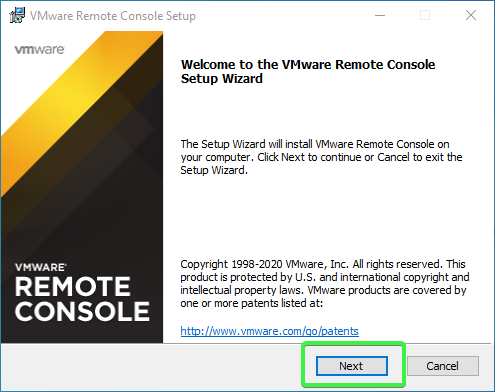
5. On the Welcome to the VMWare Remote Console Setup Wizard page, click Next.
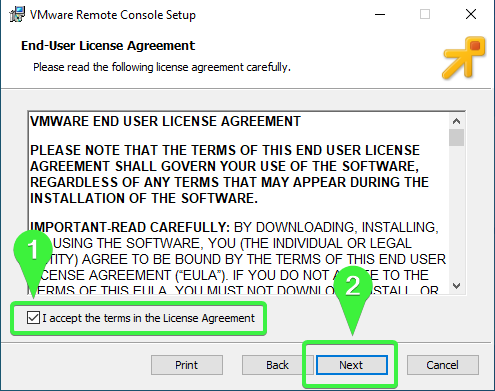
6. Read through the End User License Agreement if you wish. Otherwise, accept the terms of the agreement and click Next.
7. On the Custom Setup page, leave the default installation path and click Next.

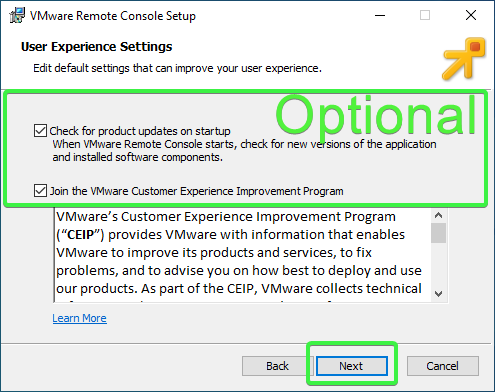
8. On the User Experience Settings page, check or uncheck the settings to:
- Check for product updates on startup – this setting enables or disables the VMRC automatic software updates.
- Join the VMware Customer Experience Improvement Program (CEIP) – this setting enables or disables VMRC technical data collection.
Note that you can change these settings anytime within VMRC after installing.
After you’ve made your selection, click Next to continue the installation.
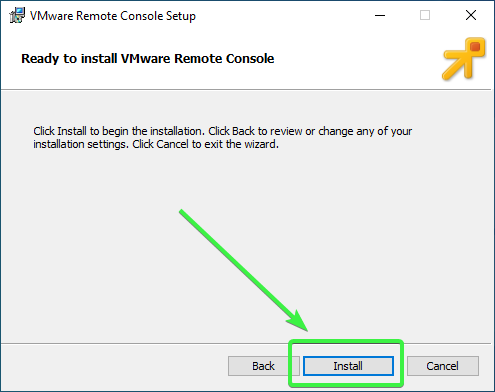
9. Next, on the Ready to install VMware Remote Console page, click Install.
10. Lastly, after completing the VMRC, click Finish to close the setup wizard.
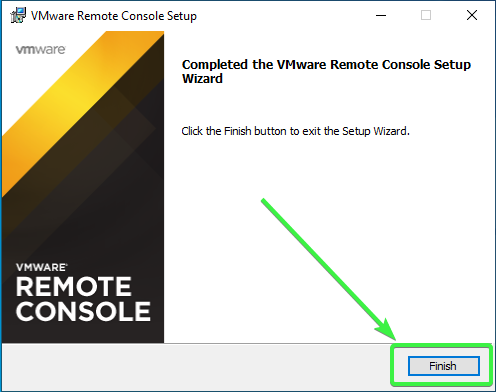
Congratulations! You’ve successfully installed VMRC for Windows.
Installing VMRC using the Command-Line (Silent Install)
Apart from installing using the setup wizard, VMRC has a command-line setup, too. The VMRC command-line setup method is ideal when performing a silent installation manually, via Group Policy, or as part of a software deployment script.
To perform a silent installation of VMRC on your Windows computer, open PowerShell as admin and change the working directory to the VMRC setup file’s location.
Next, copy the command below and run it in PowerShell. You’ll notice there are switches and parameters following the setup filename. Below is a breakdown of the options.
/s– hides the installation window./v– passes parameters to the installer./qn– parameter that tells the installer to perform a silent installation.EULAS_AGREED=1– parameter to accept the license agreement. Changing the value to0means rejecting the license agreement, and the setup will not continue.
You will not see the license agreement during the silent installation. To read the license agreement, perform a standard installation instead.
AUTOSOFTWAREUPDATE=1– parameter to enable VMRC’s automatic software update. Change the value to0to disable automatic updates.DATACOLLECTION=0– parameter to disable joining the customer experience improvement program (CEIP). Change the value to1to enable joining the CEIP.
.\VMware-VMRC-12.0.0-17287072.exe /s /v "/qn EULAS_AGREED=1 AUTOSOFTWAREUPDATE=1 DATACOLLECTION=0"Installing VMRC using Chocolatey
Chocolatey brings the convenience of installing software (packages) in Windows from online repositories. If you don’t want to download the VMRC installer manually, VMRC is also available as a Chocolatey package.
To install VMRC using Chocolatey, open PowerShell as admin and copy the code below and it in PowerShell. cinst is the command to install a package, followed by the package name vmrc. The -y option confirms all prompts, which, in this example, accepts the license agreement.
cinst vmrc -yYou have now installed the latest VMRC client.
Now that you’ve installed VMRC, your next step is to test that it works. And what better way to test VMRC than connecting to a VM. There are two methods to connect to a VM with VMRC. Let’s explore those methods next.
Connecting to a VM using a Web Browser
One way to use VMRC is by launching it from the vSphere or ESXi web clients. To do so:
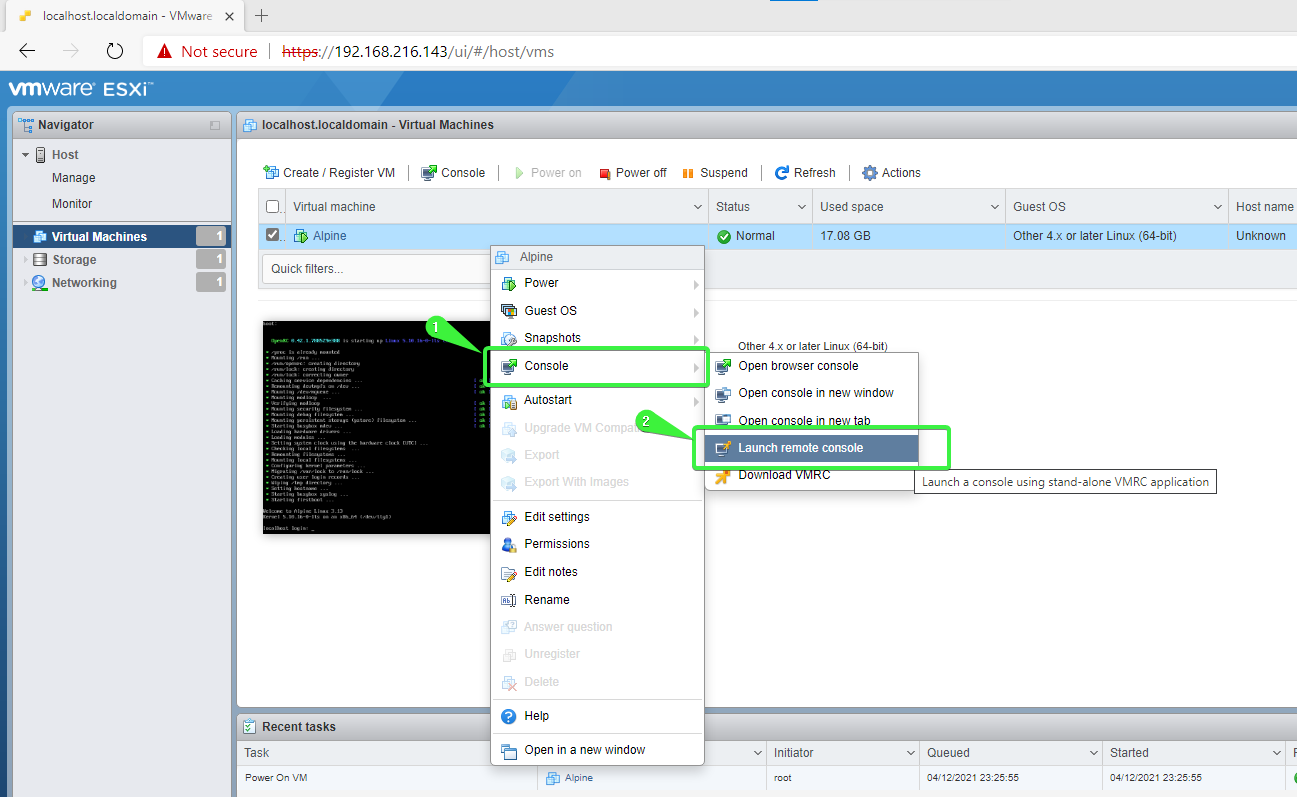
1. On your web client, navigate to the Virtual Machines view.
2. Right click the virtual machine you want to connect to and click on Console —> Launch remote console.
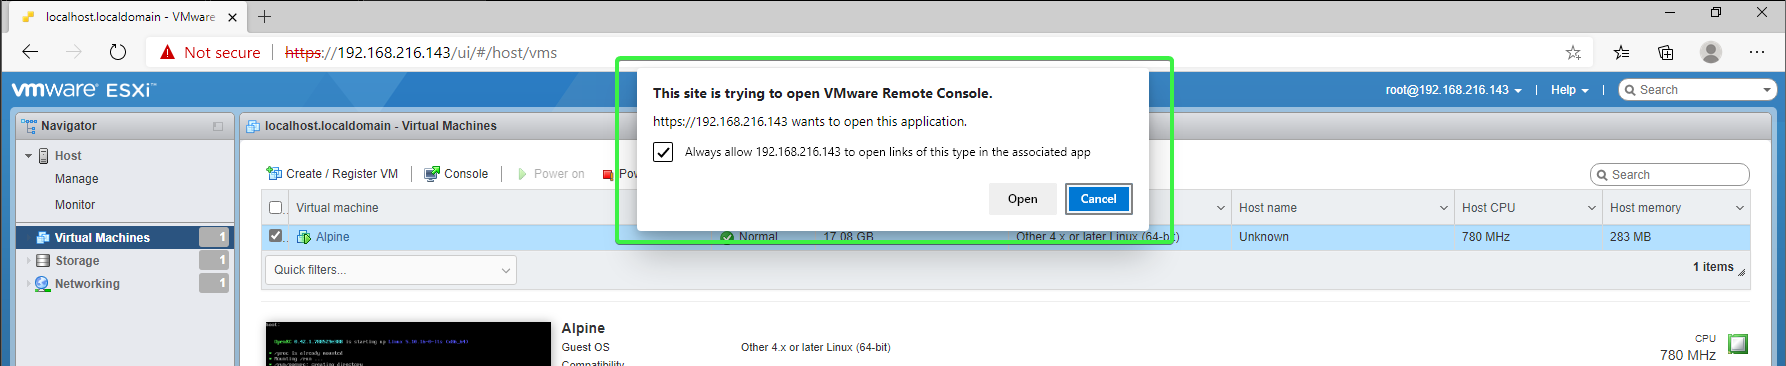
3. On the pop-up box saying This site is trying to open VMware Remote Console, put a check on the Always allow to open links of this type in the associated app box. Click Open.
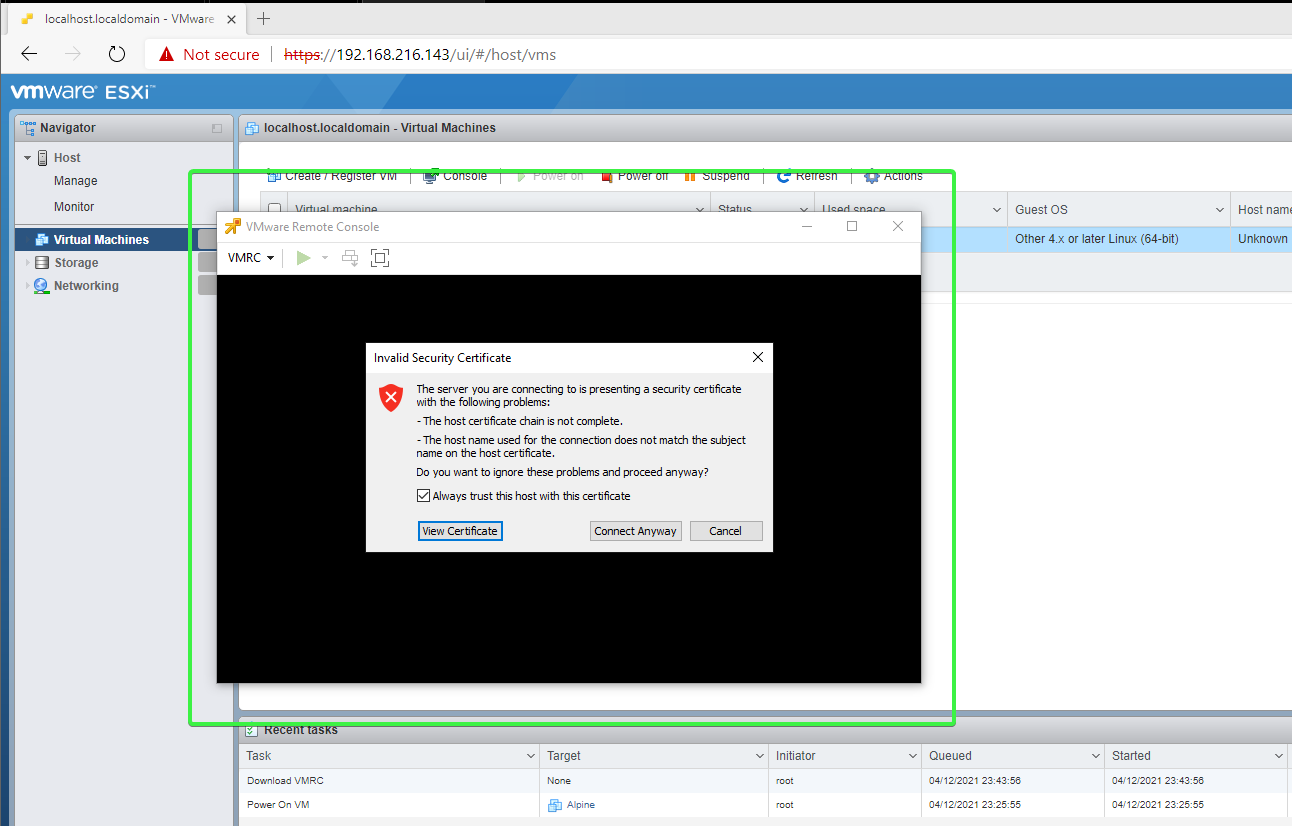
4. Next, the VMRC application will launch using the connection settings for the virtual machine you. If you receive a certificate message, check the Always trust this host with this certificate box and click Connect Anyway.
5. When prompted for login credentials, enter your virtual machine host root account or your vSphere user account with access rights to the virtual machine guest.
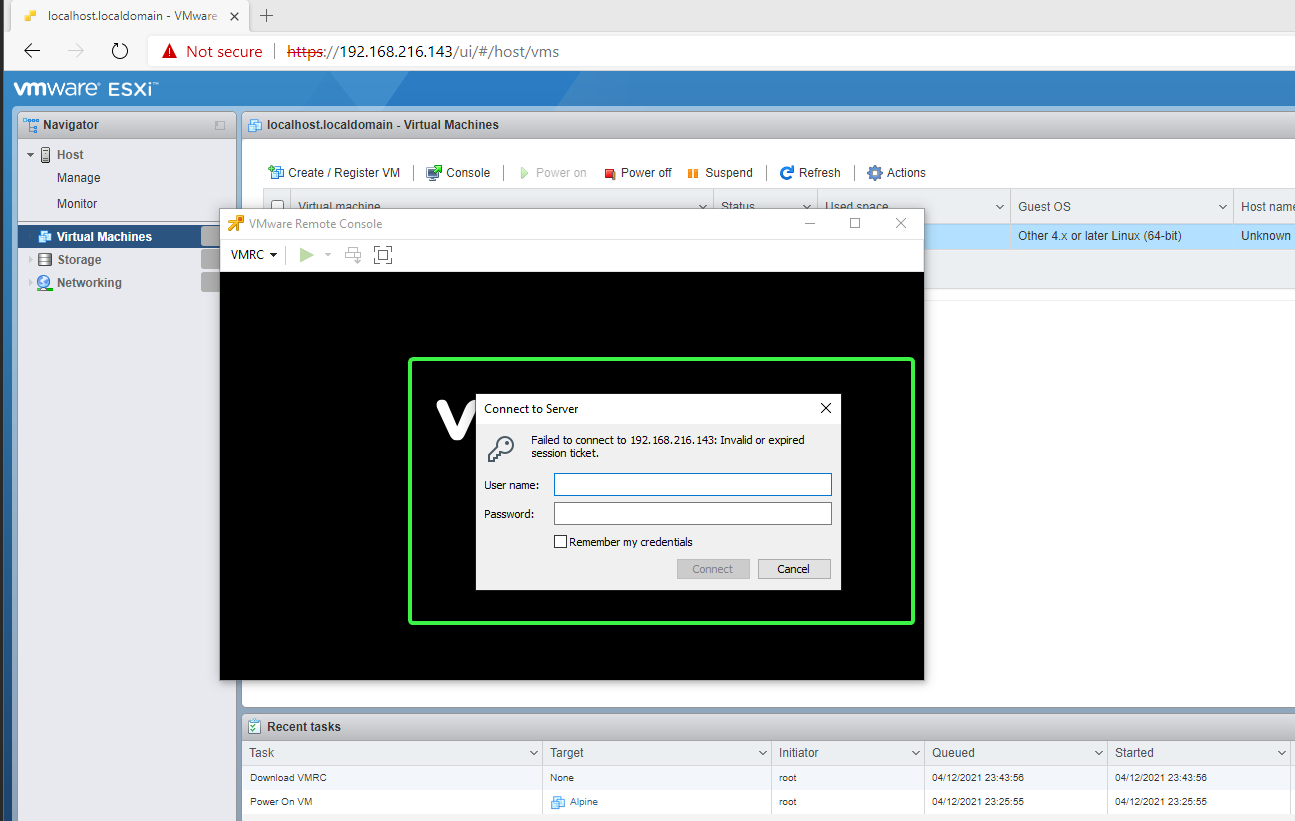
You have successfully connected to the remote virtual machine console.
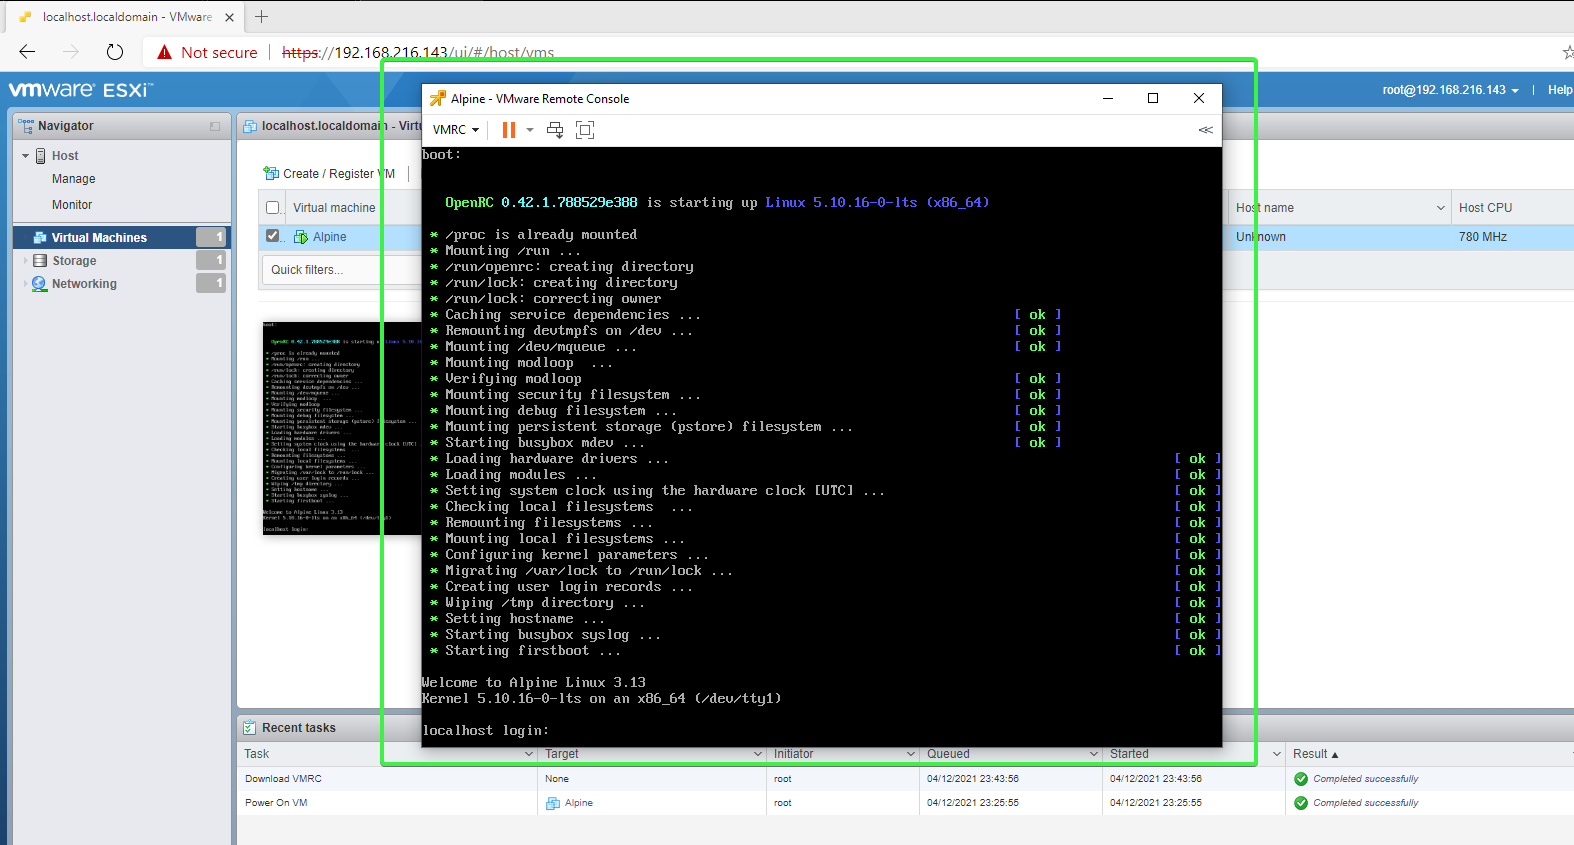
At this point, you can close the browser. The VMRC will stay open, and you can continue working on the virtual machine.
Connecting to a VM using PowerShell
To run VMRC in PowerShell, you’ll need to execute the vmrc.exe command. The command’s syntax is as shown below. remote_host is the address of the remote host, and VM-ID is the virtual machine ID.
.\vmrc.exe vmrc://remote_host/?moid=VM-IDFor example, to connect to a remote VM with an ID of 1 on host 192.168.216.143, run this command in PowerShell.
# To make the commands shorter, push the current directory onto the stack
Push-Location 'C:\Program Files (x86)\VMware\VMware Remote Console'

# Now run VMRC using a URI
.\vmrc.exe vmrc://192.168.216.143/?moid=1
Installing and Using VMware Remote Console on Linux
Installing VMRC on Linux involves entering a few commands into the terminal and responding to prompts. And afterward, connecting to a VM would require invoking VMRC using the terminal as well.
Installing VMRC using Bash
Follow the steps below to install VMRC on a Linux computer.
1. Open a Bash terminal.
If you are using Gnome-shell, press the Super key (Windows logo on most keyboards) and type “Terminal” in the search bar.
2. Switch to the root user.
sudo su -3. Set the execution bit for the VMRC installation package that you downloaded. To do so, copy the command below and run it in the terminal. Make sure to change the installation package path if needed.
chmod +x /home/bkindle/Downloads/VMware-VMRC-12.0.0-17287072.x86_64.bundle4. Next, run the installation package by typing the installation package filename and press Enter.
/home/bkindle/Downloads/VMware-VMRC-12.0.0-17287072.x86_64.bundle5. The installation displays the license agreement on the screen—press q to skip to the end.
6. At the next prompt, type yes or y to accept the agreement.
7. Finally, to let VMRC check product updates, type yes or y.
The installation begins and only takes a few moments to complete.
Connecting to a VM Using Bash
The syntax to run VMRC on Linux is similar to the command in Windows. The only difference is, in Linux, the vmrc command does not have the .exe extension.
vmrc vmrc://remote_host/?moid=VM-IDFor example, to connect to a remote VM with an ID of 1 on host 192.168.216.143, run this command in the terminal.
vmrc vmrc://192.168.216.143/?moid=1 Configuring VMRC Preferences
When you install VMRC, there are default settings that might not be to your liking. You can configure these settings from VMRC’s Preferences windows. To access the Preferences, on the VMRC window, click on the VMRC dropdown menu —> Preferences.
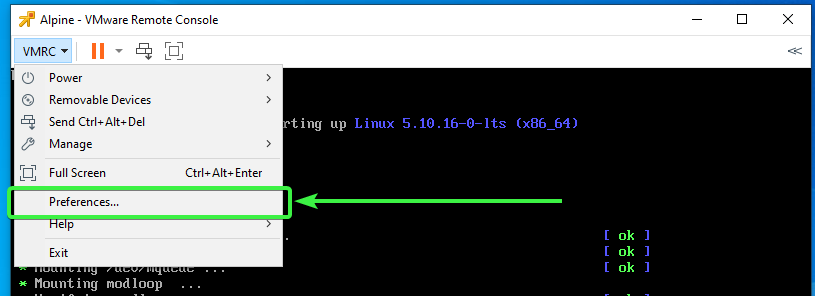
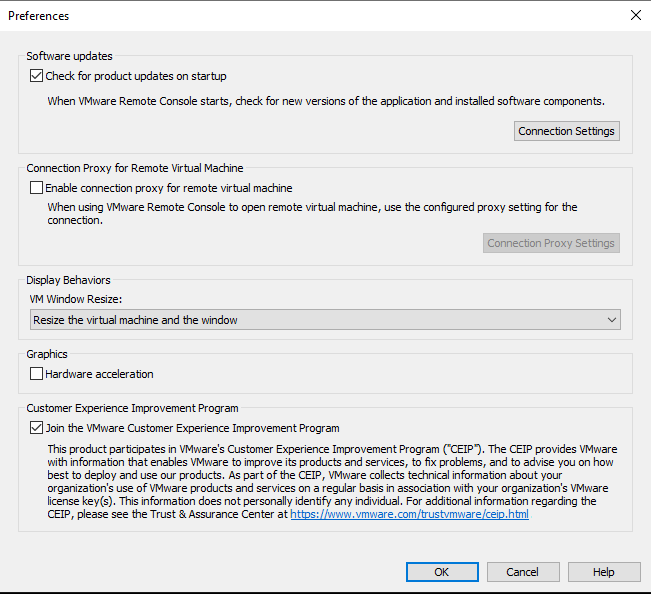
Once you’re in the Preferences window, here are the settings that you can change according to your preference.
- Check for product updates on startup – Enables or disables automatic updates check.
- Enable connection proxy for remote virtual machine – Enables or disables connection proxy.
- VM Window Resize – Let’s you choose the remote console’s display resolution. Options are:
- Resize the virtual machine and the window – The VM’s display resolution will automatically resize to fit the VMRC window.
- Stretch the virtual machine in the window – The VM’s display will stretch to fill the VMRC window without changing the resolution.
- Hardware acceleration – Enables or disables hardware acceleration. Enabling this setting can improve performance and reduce power consumption.
- Join the VMware Customer Experience Program – Join or opt-out of the CEIP. This option is the same that you see while you are installing VMRC.
Managing Virtual Machine Settings in VMRC
Suppose you need to adjust a few settings for a virtual machine guest, but you don’t want to connect to ESXi or vSphere. Instead, you connect to a single virtual machine using VMRC and manage the VM settings from there.
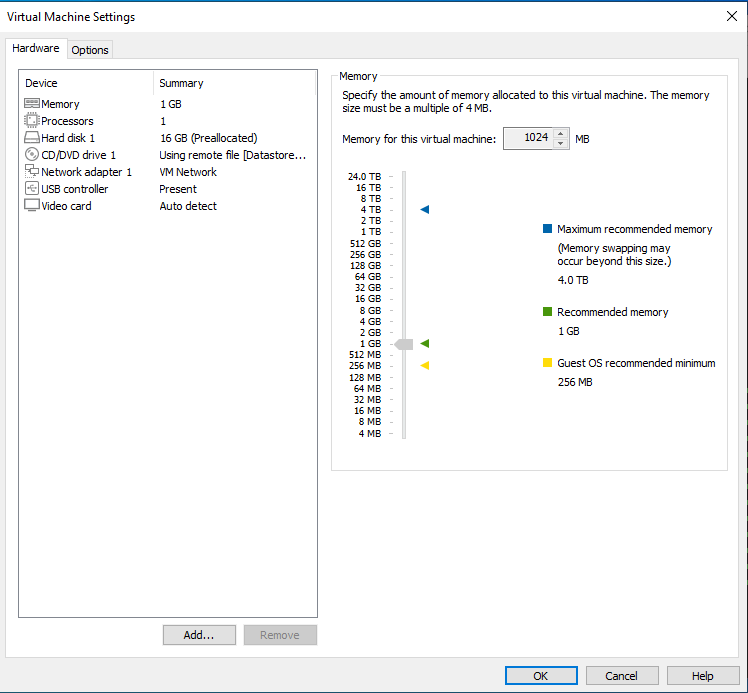
To access the virtual machine settings in VMRC, click the VMRC dropdown menu —> Manage — Virtual Machine Settings. Or, while on the VMRC window, press CTRL+D. Either method opens the Virtual Machine Settings window.
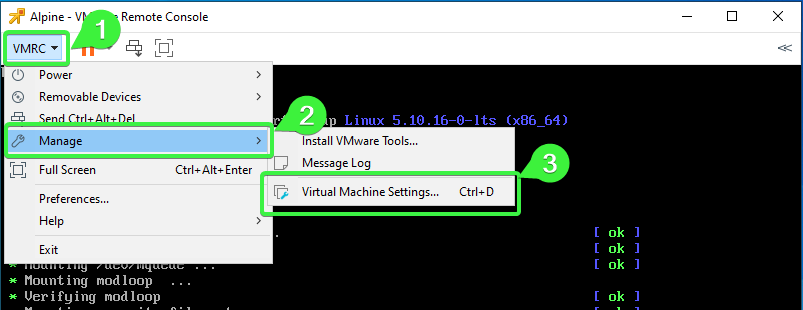
The Virtual Machine Settings window should be familiar if you’ve managed virtual machines in the web UI before. Here you can change the memory, processors, add additional hard disks, optical drives, network adapters, USB controllers, video cards, and more.
Conclusion
Have or need VMware ESXi hosts? Check out the VMware vSphere virtualization suite integrated with VMware vCenter for comprehensive management and advanced features. Need more localized VM capabilities? Check out VMware Workstation PRO & Player!
In this article, you learned about what VMware Remote Console (VMRC) is—a free tool for accessing and managing virtual machines in a standalone interface. You’ve learned how to download and install VMRC on both Linux and Windows machines using different methods.
Additionally, you’ve learned the different ways to use VMRC to connect to virtual machines on remote hosts. Now that you know how to install and connect to VMs with the VMRC, would you consider using VMRC in your daily management tasks?


