


Do you remember the last time you accessed a server physically? Certainly not for cloud-hosted servers such as Azure Virtual Machines (Azure VMs). Admins use Secure Shell (SSH) to access Linux servers. But did you know you can SSH into Azure VM that runs on Windows, too?
Not a reader? Watch this related video tutorial!In this article, you’ll learn how to set up your Azure VM for SSH access. For in-depth details on configuring SSH on a Windows Azure VM for access, check out How to Set Up OpenSSH on a Windows Server.
Prerequisites
To effectively follow the examples and demos in this article, you’ll need to meet these requirements below.
- A virtual machine in Azure either Windows or Linux. This article uses Windows Server 2019 Datacenter with the name ataWindows and IP address of 40.117.77.227.
Allowing SSH into Azure VM via Network Security Group
Before configuring the Azure VM operating system, the first step is to ensure that SSH communication is allowed at the VM level. To allow SSH means creating an inbound port rule to permit SSH traffic through port 22 in the VM’s network security group (NSG).
For Linux VMs, port 22 is allowed by default during deployment. The succeeding instructions apply to both Windows and Linux Azure VMs if port 22 is not permitted. Let’s dive in!
This procedure opens port 22 to your Azure VMs from the internet. Please consult your organizational policy before opening any ports publicly, especially in production.
- First, log in to the Azure Portal if you haven’t yet.
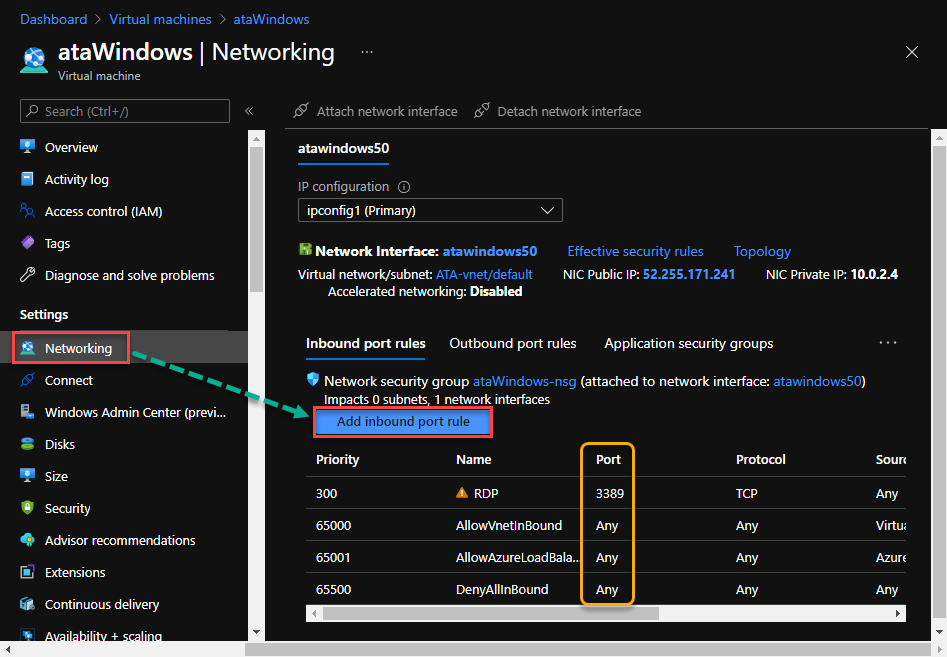
2. Once in the Azure Portal, navigate to the Virtual Machines blade and click on your virtual machine. In this example, the virtual machine name is ataWindows.

3. Next, under the Settings section, click Networking. You’ll see the list of existing inbound port rules. To add a new rule, click on Add inbound port rule.
4. On the Add inbound security rule fly-out menu, fill out the following fields.
- Source – Leave the default value (Any) to allow incoming traffic from anywhere. If you’d rather lock this down to a specific IP address or subnet, you may also do so here.
- Source port ranges – Leave the default value (*) to allow incoming traffic from any port numbers.
- Destination – Leave the default value (Any) to allow incoming traffic to any IP address in the Azure VM.
- Service – Choose SSH from the dropdown menu.
- After choosing SSH, the Destination port ranges and Protocol values changes automatically to 22 and TCP, respectively.

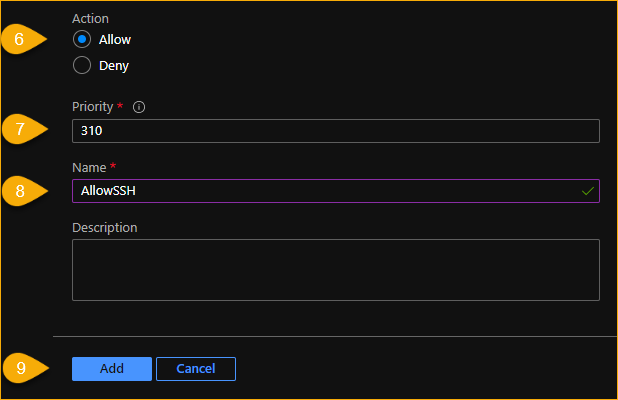
- Action – Choose Allow to dictate that the rule you are creating is to allow the traffic.
- Priority – Using a lower number gives the rule a high priority in the list of rules. In this example, the default priority is 310. Refer to the list of existing inbound rules (as shown in step 3), to decide what priority number you want to assign. In most cases, the default priority is fine, which is the case in this example.
- Name – Enter a name to assign to the rule. Choose a name that describes the rule you’re creating. In this example, the name is AllowSSH.
- Lastly, click on Add. Clicking on Add will close the fly-out menu and continue to add the new rule.
5. After creating the new inbound port rule, you should see the new rule listed under the inbound port rules, as shown below.
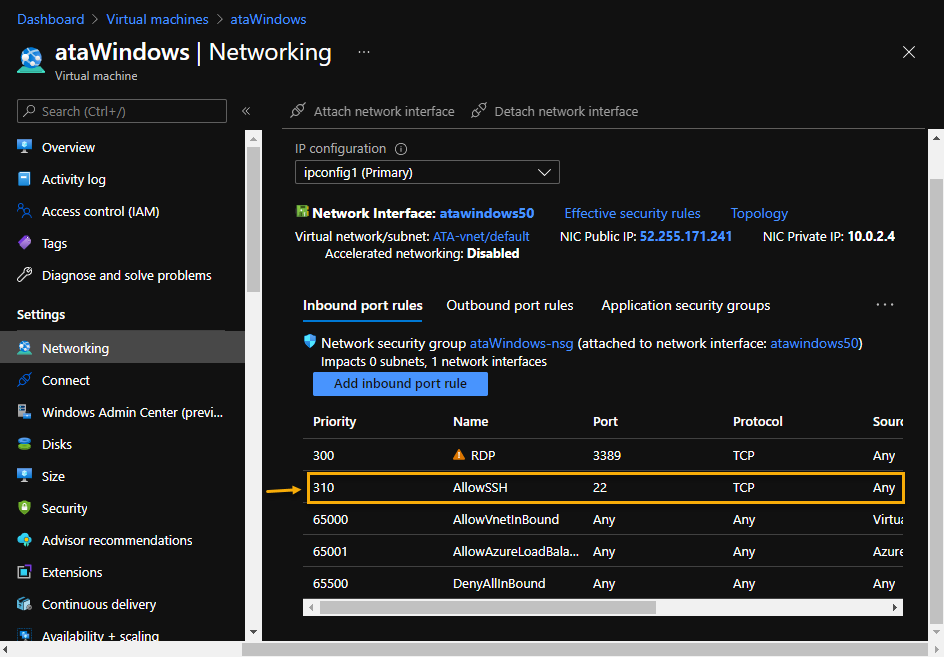
At this point, your Azure VM is allowing SSH communication. You must now configure both the SSH client and server. To do so, check out the article How to Set Up OpenSSH on a Windows Server for in-depth instructions.
Next Steps
In this article, you learned how to configure SSH into Azure VM. But you’re not done yet! You still need to configure SSH on the client and server. Be sure to check out How to Set Up OpenSSH on a Windows Server for in-depth instructions.


