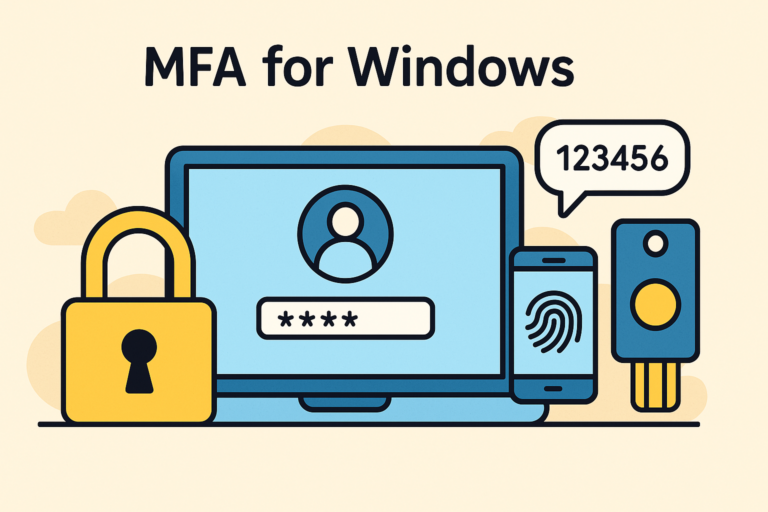

Specops Secure Access addresses a key need for many organizations: enabling multi-factor authentication (MFA) for Windows in Active Directory environments. The solution is designed to strengthen access security, particularly for workstations, servers, and VPN connections.
This new solution from Specops Software, an Outpost24 company, enables Active Directory users to benefit from MFA across multiple scenarios:
- Logging into a Windows workstation or server
- Connecting via Remote Desktop (e.g., on an RDS server)
- Remote VPN access, when integrated with NPS (RADIUS authentication)
In addition to their password, users must provide a second factor of authentication, which can include:
- A code received via SMS
- A one-time password (TOTP) generated by Specops ID, Google Authenticator, Microsoft Authenticator, or similar applications
- A biometric factor (such as facial recognition with FaceID on iPhone), via the Specops ID app
- A physical security key, such as a YubiKey
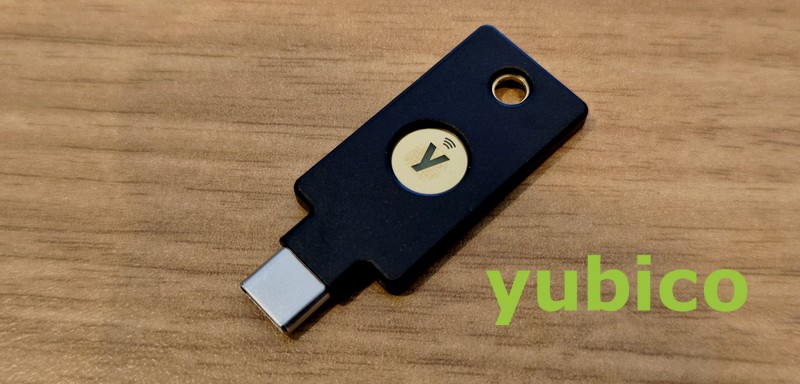 Example of a YubiKey security key
In this article, we’ll walk you through the deployment of this solution and its day-to-day use from an end-user perspective.
Deploying Specops Secure Access
Components
The deployment of Specops Secure Access (SSA) relies on the same core components as other solutions from this vendor, such as Specops uReset:
- A GateKeeper server, which acts as a bridge between the on-premises infrastructure, particularly Active Directory, and the Specops Cloud platform. It is not recommended to install this role on a domain controller.
- A Specops client, to be installed on machines where MFA should be enforced. The vendor provides an MSI package, making it easier to deploy at scale across multiple devices.
- A Specops tenant, i.e., access to the Cloud platform, which serves as the central hub for configuring all Specops solutions that integrate with the Cloud.
If you are already using Specops solutions, integrating this new product requires little additional technical effort beyond the financial investment. The necessary components are already in place (although an upgrade may be required depending on your current version).
Note: Even though the solution leverages the Cloud, sensitive data is stored locally in Active Directory and remains encrypted.
Group Policies
Beyond the previously mentioned components, configuring Specops Secure Access requires defining two Group Policies:
- A GPO to target the users who must enroll in and use MFA for authentication
- A GPO to target the computers where users must authenticate with MFA
This means that a user can log on to a machine without MFA if that device is not within the scope of the GPO. However, MFA becomes mandatory if the machine is targeted by the Specops Secure Access GPO. Note that once the GPO applies to a machine, all users (except local accounts) must authenticate using MFA. Specops plans to provide more flexibility on this point in a future update.
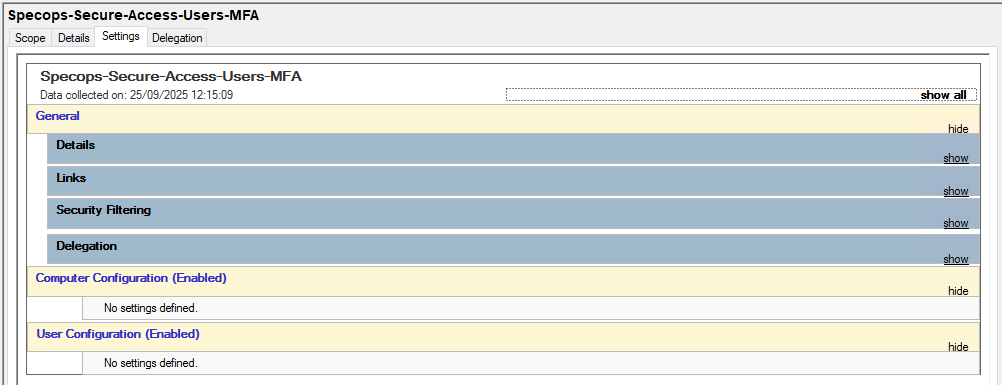
The first GPO, here named “Specops-Secure-Access-Users-MFA”, is only used to target the users who need to register for MFA. No parameters need to be configured within this GPO.
The second GPO, here named “Specops-Secure-Access-Computers-MFA”, is used to configure the behavior of Specops Secure Access, specifically, how MFA is enforced, on the machines. Administrative templates must be integrated into Active Directory in order to access the new policy settings required to configure the solution.

Configuring Specops Secure Access
This section covers the implementation of SSA in an Active Directory environment to enable MFA for Windows logons and Remote Desktop (RDP) connections. We assume that the Gatekeeper has already been deployed on a server, as installing this component is straightforward and done using an executable provided by the vendor.
Gatekeeper Configuration
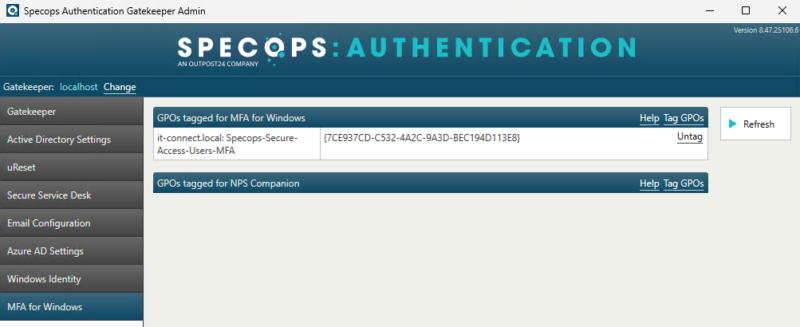
To configure MFA for Windows, navigate to the “MFA for Windows” section in the Gatekeeper console. The main task here is to select the GPO that targets the users who must be secured with MFA. The second entry visible in the screenshot below, referring to NPS, is used for VPN authentication through NPS.
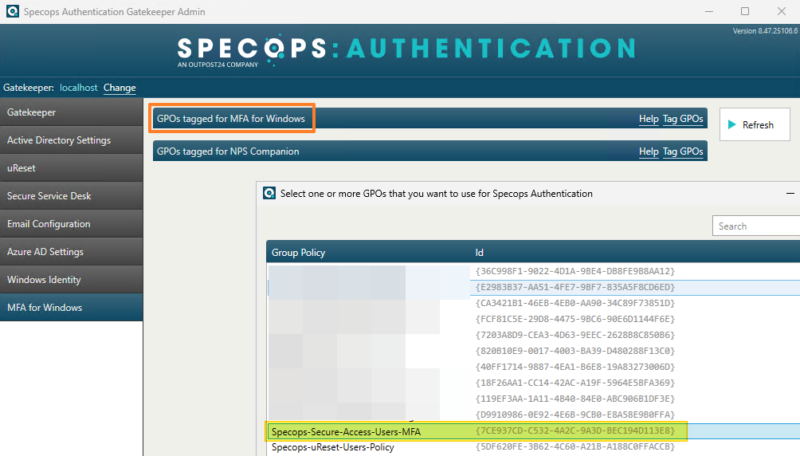
For this walkthrough, we are selecting only a single GPO.
Selecting Authentication Factors
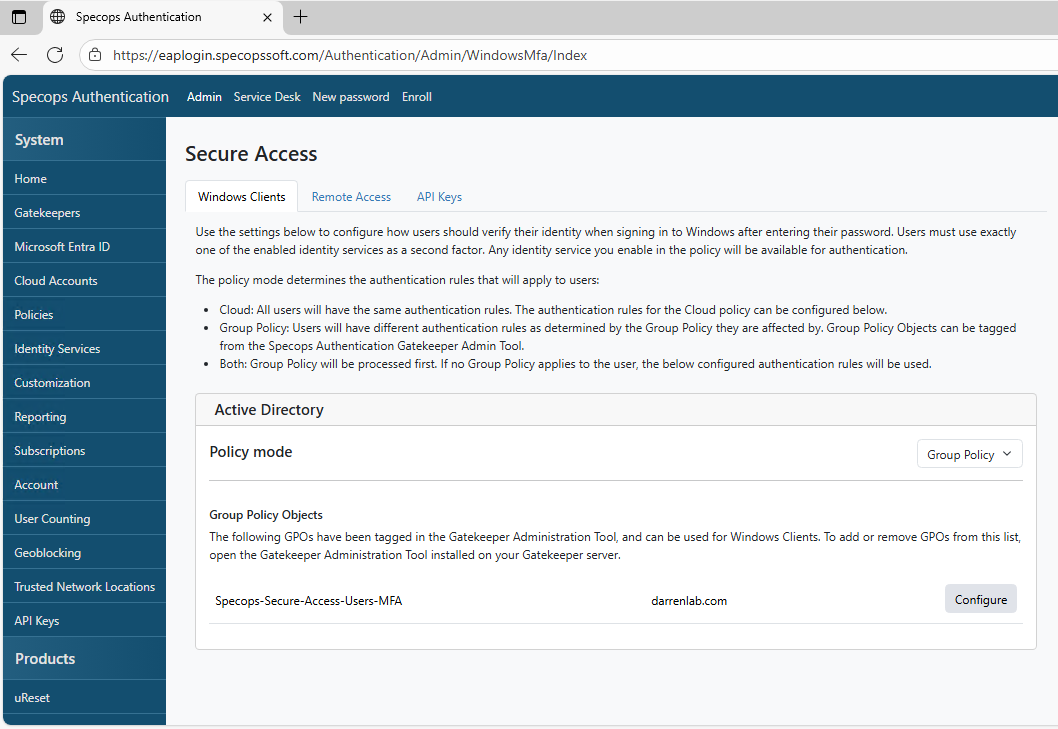
The next stage of the configuration is carried out through both Group Policy and the Cloud console. In the Specops Cloud portal, our Group Policy is properly synchronized. You must click the “Configure” button to define which authentication methods are allowed for the second factor.
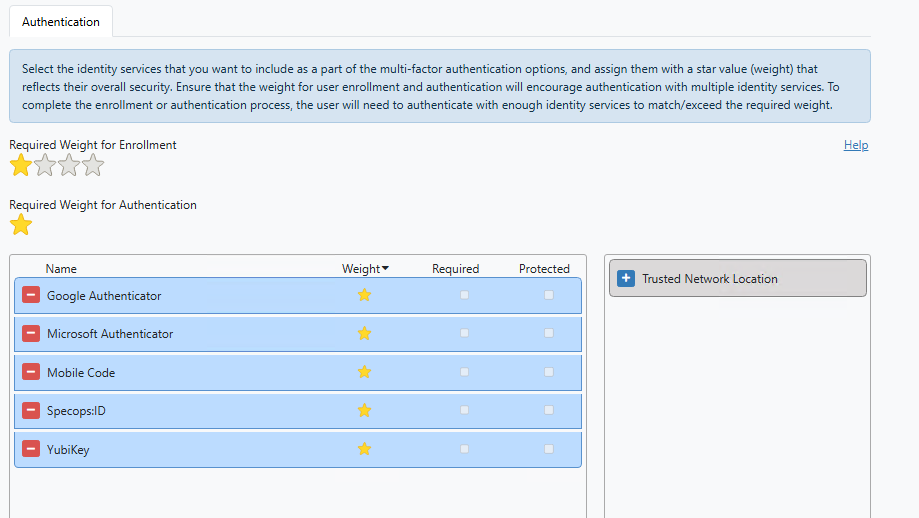
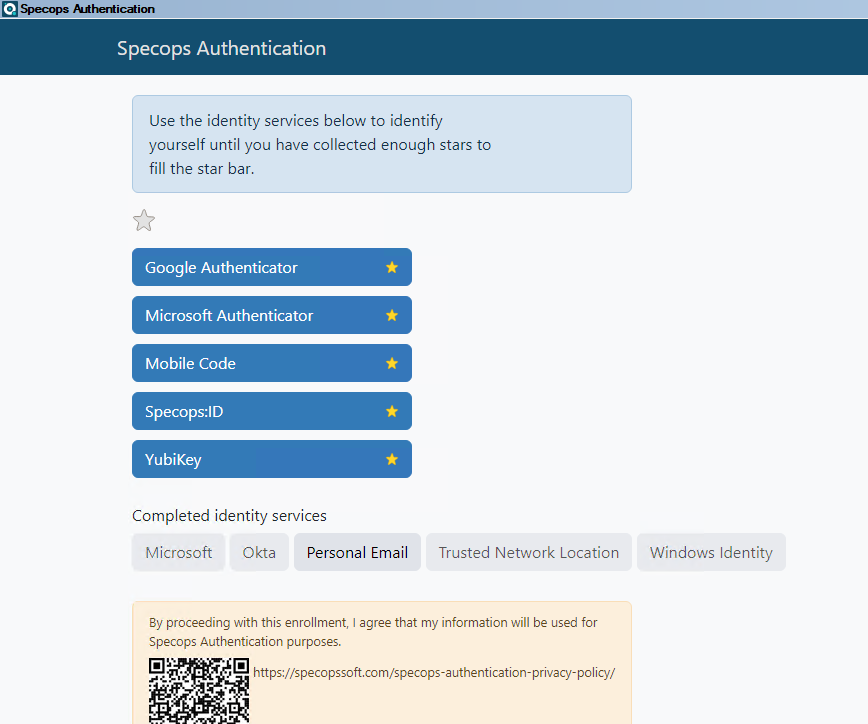
You decide which methods you want to authorize. When configuring MFA for their accounts, users will be able to choose from these methods. There are five available options: Microsoft Authenticator, Mobile Code (SMS), Specops ID (TOTP code or biometrics), Google Authenticator, and YubiKey (physical security key).
In this setup, the enrollment requirement is set to 1 star, and each method is worth 1 star. This means that a user can register with just one method to complete their MFA setup. If you want users to configure at least two methods, you must increase the required weight to 2 stars, for example.
Note: If you want to use a YubiKey for MFA, you must create an API key in the Yubico portal. Online MFA does not require configuring Smart Card authentication.
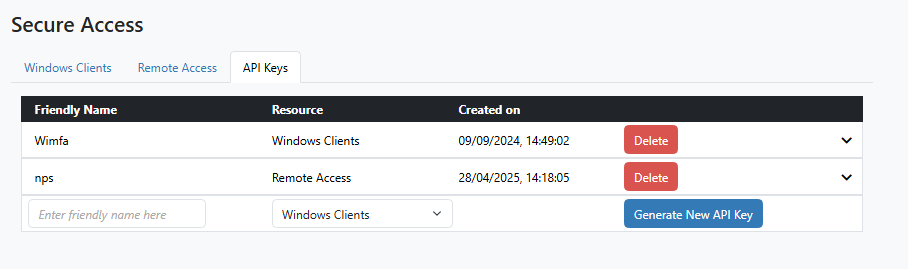
The final step in the Cloud interface is to create an API key. Be sure to record this information carefully, as it will need to be entered into the GPO.
Configuring MFA with a GPO
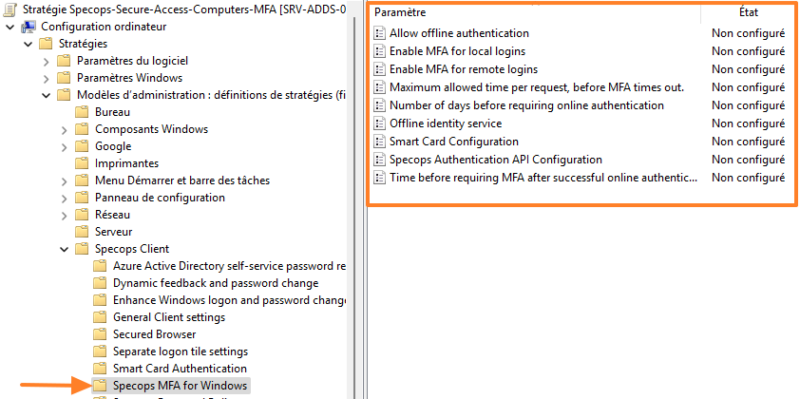
Now we will configure the Group Policy named “Specops-Secure-Access-Computers-MFA”, which is intended to be applied to Windows machines. The SSA configuration settings can be found in the following location:
Computer Configuration > Policies > Administrative Templates > Specops Client > Specops MFA for Windows
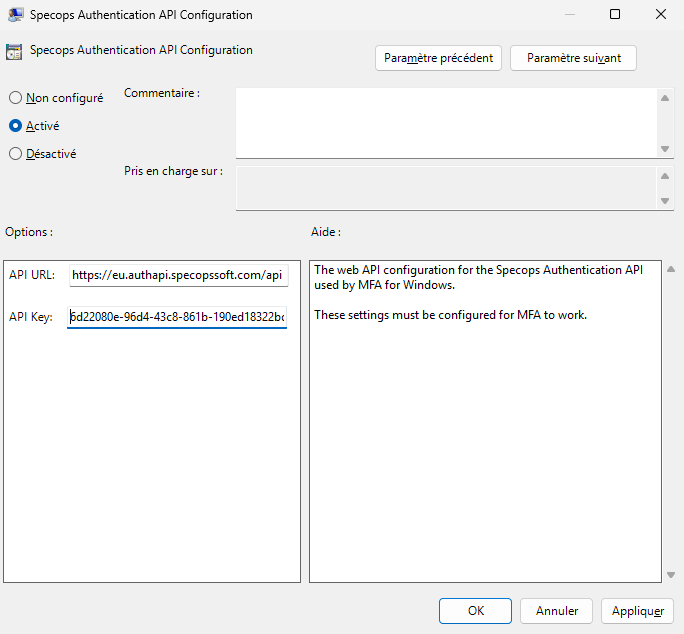
We must start by configuring the setting named “Specops Authentication API Configuration” to specify the API URL and API Key. These details were obtained earlier from the Cloud portal.
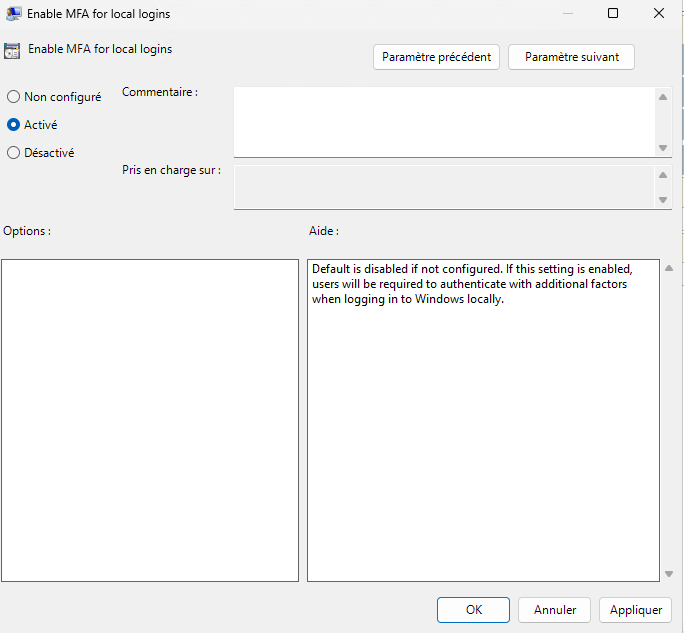
Next, enable the setting “Enable MFA for local logins” to enforce MFA on Windows logon. Note that this does not enable MFA for logon with local user accounts, but only for Active Directory user accounts.
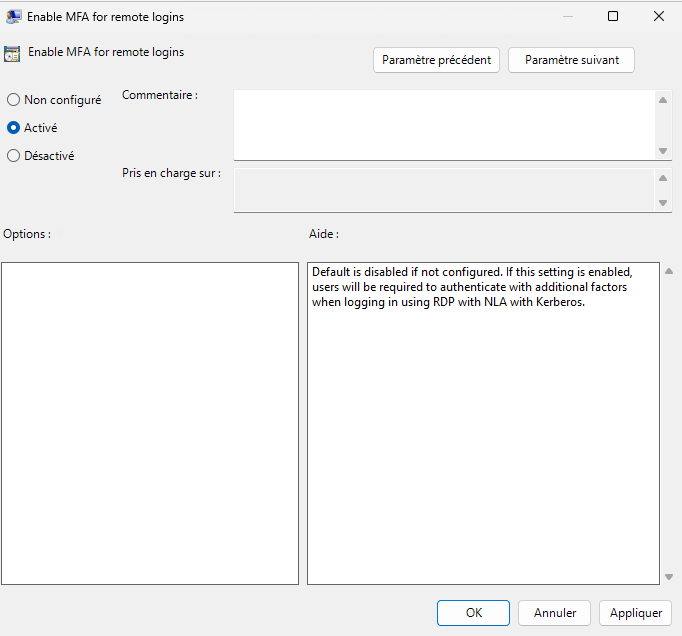
If you plan to enable MFA for Remote Desktop connections, you must enable the setting “Enable MFA for remote logins.”
Specops Secure Access is an online MFA service, meaning there are communications between your machine (via the Specops Client), Active Directory, and the Specops Cloud. However, the application also supports offline MFA, which is particularly useful for mobile users. In this case, you must specify which method is allowed, with Specops ID being the default option. You can also choose to allow or disallow offline MFA using the “Allow offline authentication” setting.

We have now completed the configuration! Additional settings are available, including options to:
- Define a custom timeout for MFA requests (request expiration period)
- Configure Smart Card authentication to allow YubiKey use with offline MFA (not required for online MFA)
- Set MFA recurrence: should a user be required to complete MFA every time they log on or unlock their session, or only once every 4 hours (or at another interval)? For example, a user may log in in the morning with both password and MFA, and if they lock and unlock their session 30 minutes later, only the password will be required.
The Group Policy configuration is now complete! Of course, both GPOs must be linked to Organizational Units in Active Directory.
The Specops Client
The configuration is ready, but one element is still missing: the Specops client must be installed on the machines where MFA will be used. If you are using MFA on a server via Remote Desktop (e.g., in an RDS environment), the client must be installed on the servers (it is not required on the client device, unless local MFA is also enforced).
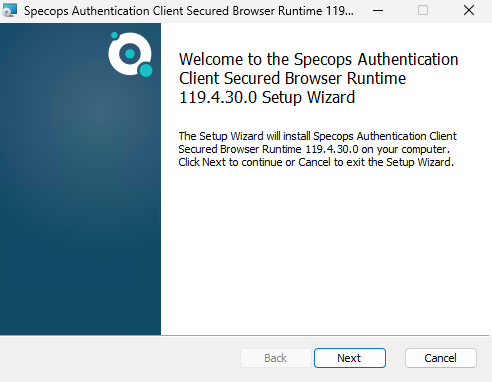
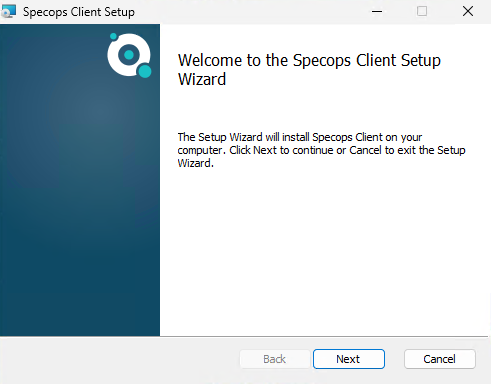
Installation is straightforward but involves two steps, since three components must be installed:
- Specops Authentication Client Secured Browser Runtime
- Specops Client
- .NET 8.0 Desktop Runtime (Microsoft component)
MSI packages are available to administrators to simplify large-scale deployment across multiple machines.
No configuration is required, the installation alone is sufficient, since all settings are pushed through the GPO.
MFA on Windows in Practice
It’s time to see MFA for Windows in action! For each user, the first step is to complete MFA enrollment. Exceptions may apply if your users have already enrolled with Specops uReset (self-service AD password reset), as authentication factors are shared between the two solutions.
MFA Enrollment
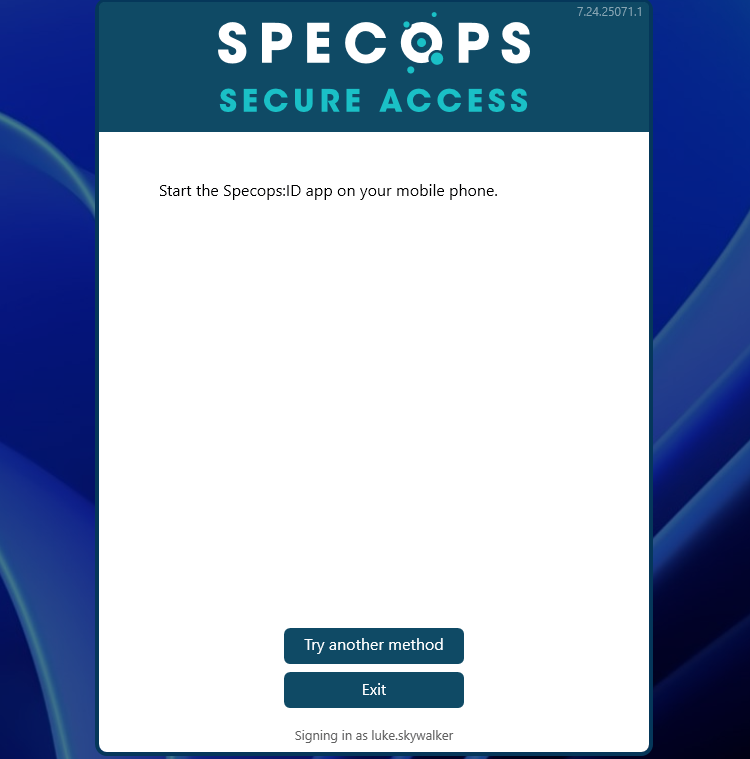
The next time a user logs on to their Windows session, the Specops Secure Access window will appear. The user must then click the “Register” button to complete their MFA enrollment.

The user will need to choose one authentication factor from those authorized by the administrator. The process is simple and takes only a few seconds, provided the user already has a TOTP application installed on their smartphone (or a YubiKey).
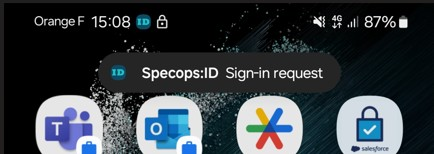
Signing in with MFA
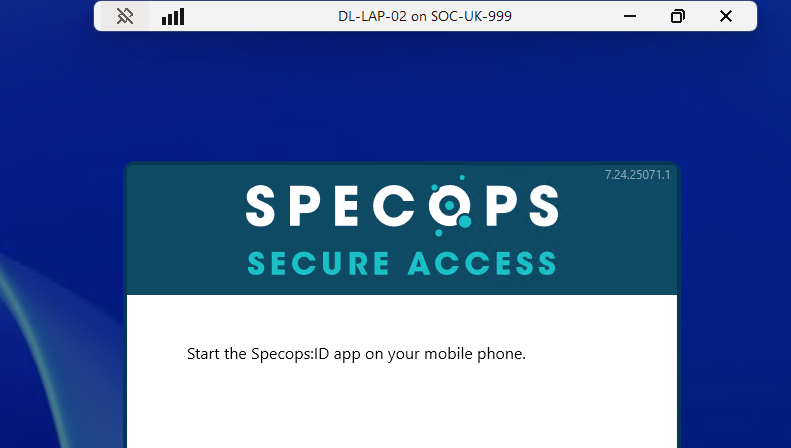
When the user logs on to their Windows session, after entering their password, they will be required to complete MFA authentication. The image below shows the authentication request on the smartphone (left) and the notification displayed on the PC (right).
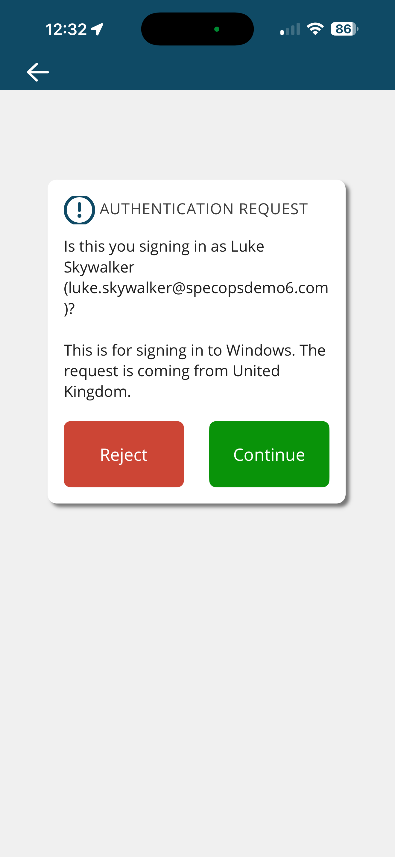
On the smartphone, using the Specops ID app, the user simply scans their fingerprint—simple, effective, and secure. The user’s session then opens on the computer.
If the same user connects to a remote server via Remote Desktop, they must once again verify their identity with both their password and MFA (provided the remote server is within the scope of the MFA policy).
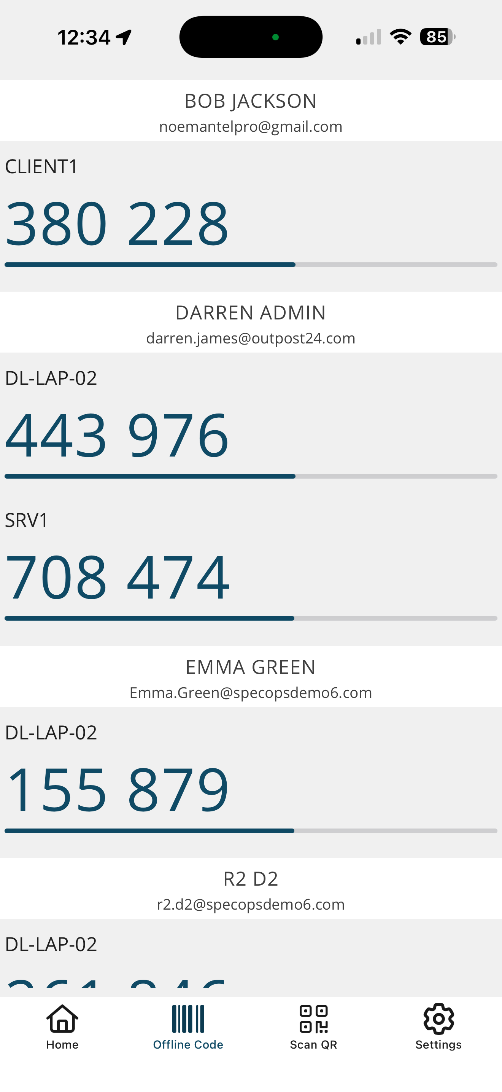
The Specops ID app can store multiple user accounts. The “Offline Code” section displays the TOTP codes for your machine (or for the machines where you have previously logged in).

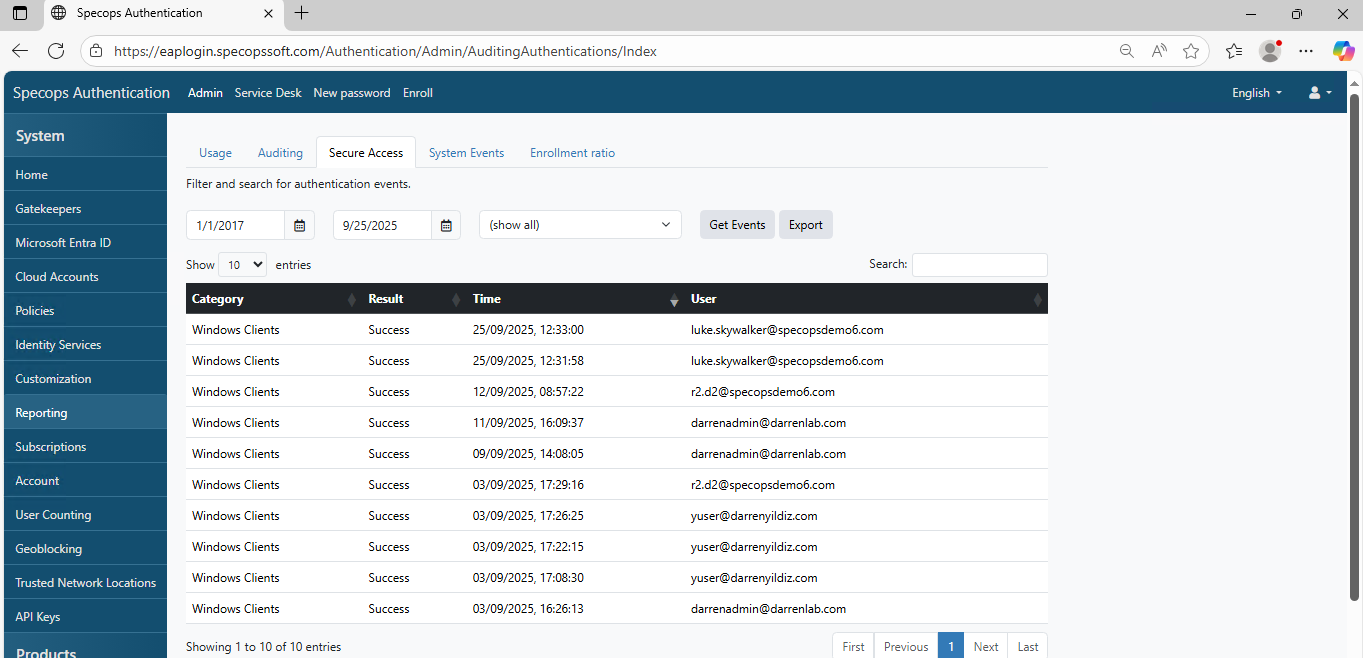
Be aware that every MFA login is logged. This information is available in the “Report” section of the Specops portal. The data can be exported manually. Specops is also working on adding a feature to facilitate integration with a SIEM or other third-party applications.
Conclusion
After reading this article, you now have a solid overview of how the new Specops Secure Access solution works. Its implementation is technically straightforward and relies on Specops components that have been tried and tested for years (Gatekeeper, Specops Client, Cloud Console, etc.). For organizations using Active Directory, MFA for Windows is now within your reach!


