

Love using the command line in Linux but had to switch to Windows? Relax, you have Scoop Windows as your package manager. Scoop is a command-line installer for Windows that lets you quickly install and update packages without breaking anything.
In this tutorial, you’ll learn how to install and use Scoop to manage packages on your Windows machine.
Read on and never resort to multiple click-through installers again!
Prerequisites
This tutorial will be a hands-on demonstration. If you’d like to follow along, be sure you have a Windows 10 machine with administrative privileges. This tutorial uses Windows 10 21H2.
Installing Scoop Windows Package Manager
Scoop can save the day when you feel tired of installing or managing software with your usual package manager. But as incredible as Scoop may sound, it doesn’t come installed on your system by default.
Before using Scoop, you need to install it on your Windows machine:
1. Open PowerShell as administrator, and run the below Set-ExecutionPolicy command to set your execution policy to RemoteSigned. Doing so ensures you can run PowerShell scripts you wrote or downloaded from the Internet.
Set-ExecutionPolicy RemoteSigned -Scope CurrentUserInput Y and press Enter when prompted, as shown below, to confirm the execution policy change.

2. Next, run the following command to download Scoop’s installer script (get.scoop.sh) and run that script to install Scoop on your system with elevated privileges (-RunAsAdmin).
Invoke-Expression "& {$(Invoke-RestMethod get.scoop.sh)} -RunAsAdmin"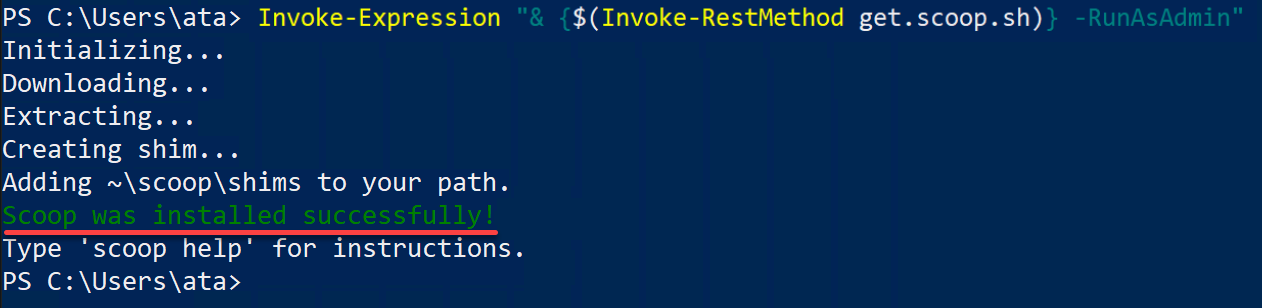
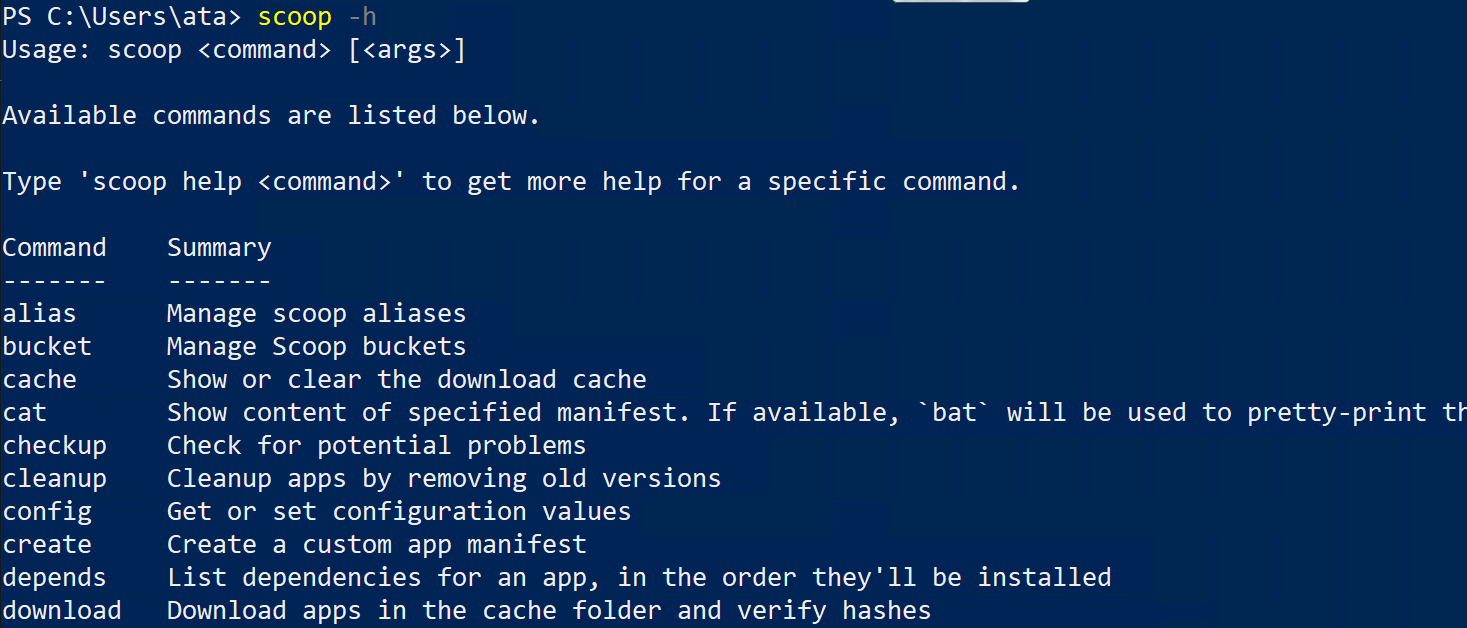
Now, run the below scoop command to display a list of available commands for Scoop.
scoop -hThe output below confirms that you’ve successfully installed Scoop on your system.
Finding and Installing Packages with Scoop
Now that you have a package manager, you may wonder what to install via Scoop. Luckily, Scoop lets you search packages available to install with the bucket command.
The bucket command lists all repositories (or buckets) containing Scoop packages. These buckets are like the package repositories used in Linux that contain a list of available packages and their dependencies.
To find and install packages with Scoop:
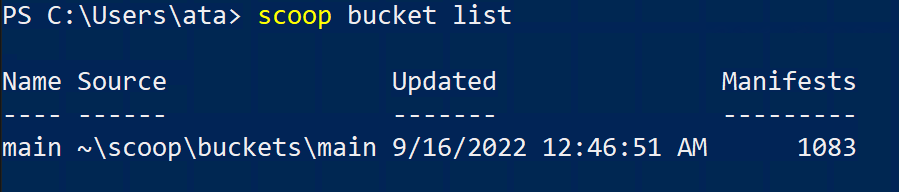
1. Run the below scoop command to list locally available buckets.
scoop bucket listThe output below indicates that the main bucket contains 1083 packages you can install.
Each Scoop bucket has manifest files, which are updated periodically to add new packages and remove old ones. These files describe how to install a package and its dependencies.
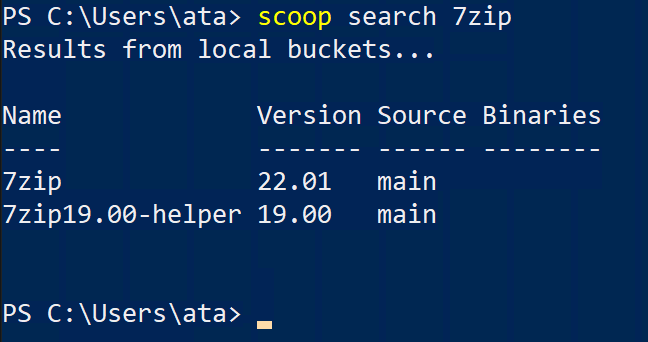
2. Now, run the command below to search for a specific package, like 7zip, in all available buckets.
scoop search 7zipThe output below shows two packages that match the search term 7zip (7zip and 7zip19.00-helper) from the main bucket. You can also see the version number of each package.
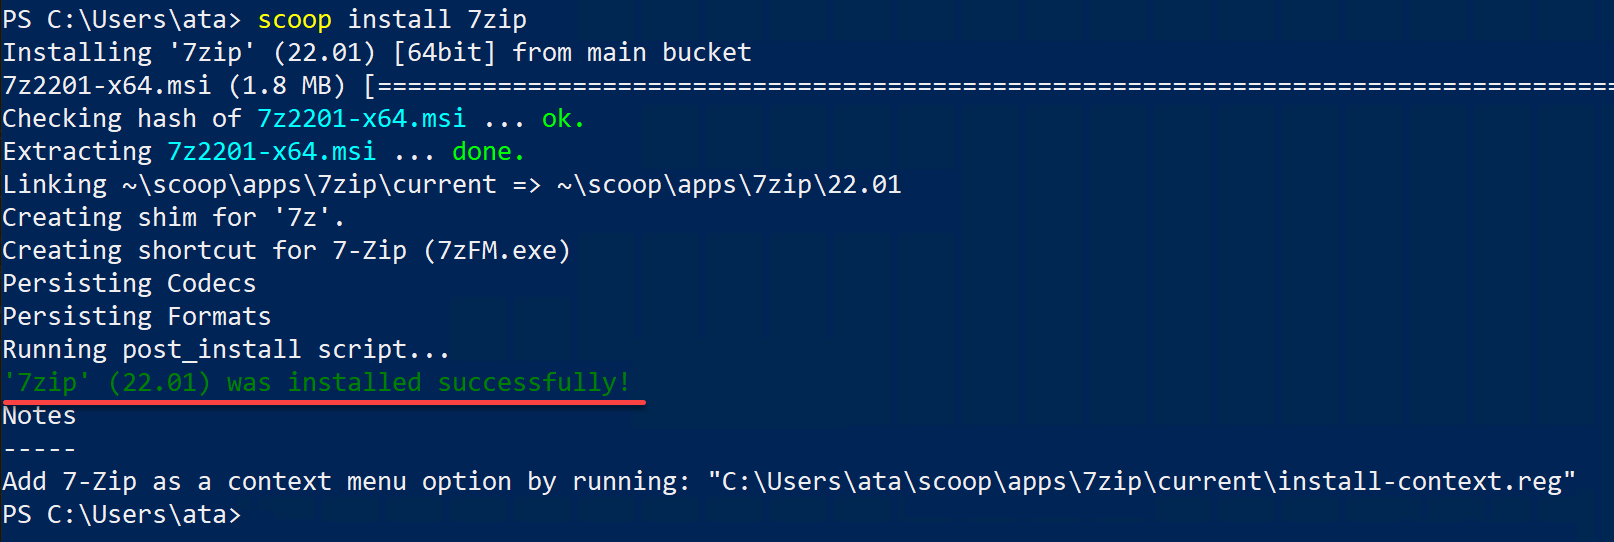
3. Once you’ve found a package, run the following command to install the 7zip package.
scoop install 7zipAt this point, 7zip should be installed and ready to use! Did you notice you don’t need to click through multiple buttons to install a program? Installing programs eliminates permission pop-ups.
With Scoop, a one-liner command is enough to install as long as you know the package’s name.
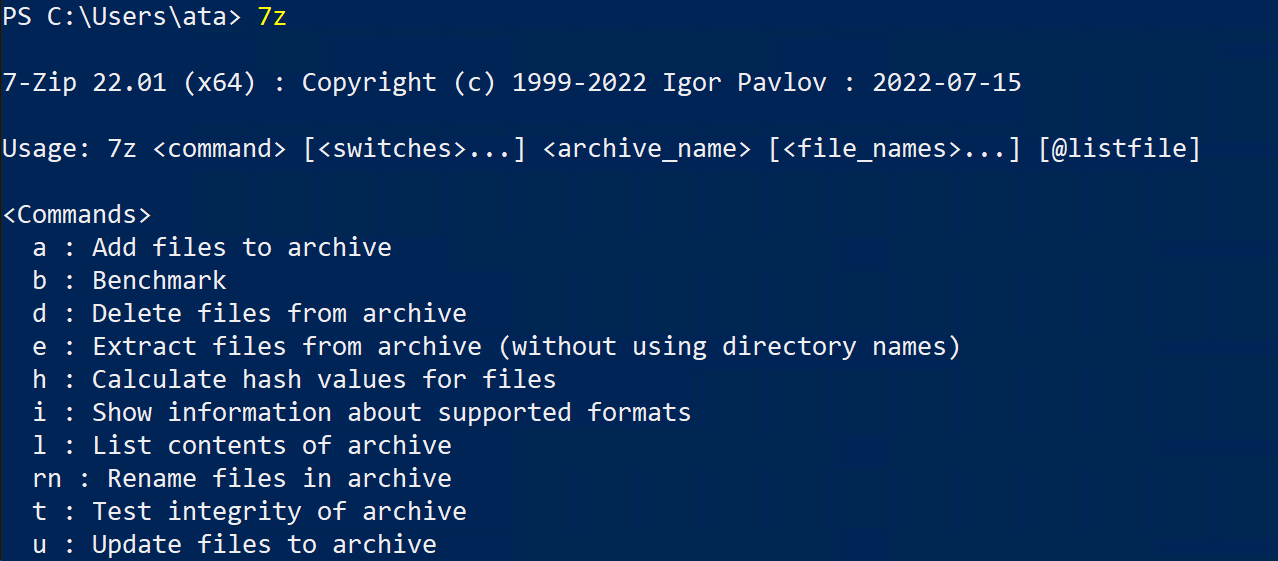
4. Now, run the 7z command below to verify your 7zip installation, which should display a list of available options for the 7z command.
7zThe output below confirms that 7z has been successfully installed. But perhaps you plan to install multiple packages at once. If so, let Scoop do the dirt work for you in the following step.
5. Lastly, run the following command to install the 7zip and nodejs packages.
Why install them one by one when you can install them all in one go? Scoop lets you install multiple packages specified and separated by spaces. This feature is helpful when you already have a list of packages to install.
scoop install 7zip nodejs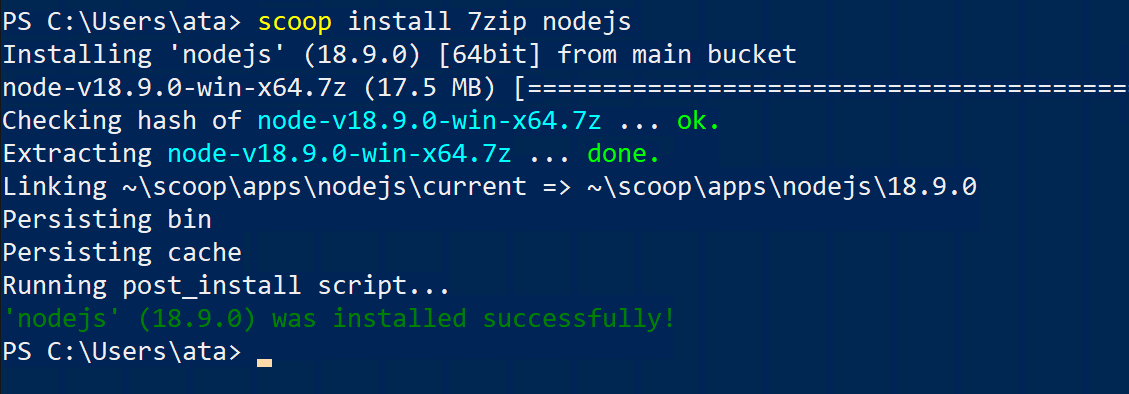
Updating Packages with Scoop
Keeping your packages updated is one way to keep your system healthy. Once your package is installed, Scoop helps you get the latest features or bug fixes.
No worries, updating packages with Scoop is just like installing them.
1. Run the scoop update command to update Scoop itself to its latest version and app manifests.
scoop update 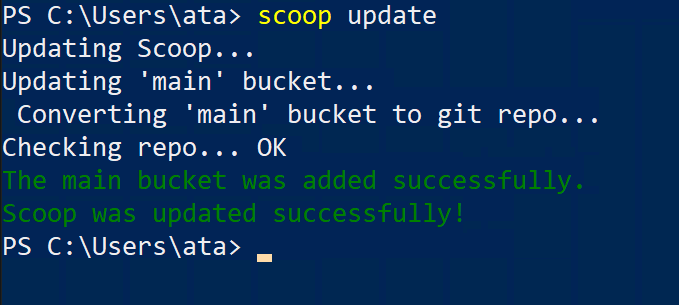
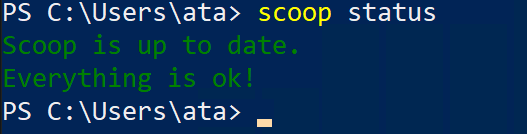
2. Next, run the following command to check the status of Scoop of other packages if they’re outdated.
scoop statusThe output below shows Scoop is up to date.
3. Now, run the command below to update a specific package you have in mind, in this case, the 7zip package.
Selectively updating your packages eliminates the risk of breaking anything, especially when you are in the middle of working on a project.
scoop update 7zip 
Perhaps you want to go ballistic and update all your packages. If so, run the same scoop update and append the * character to update all packages simultaneously, as shown below.

Adding Extra Bucket/Versions and Installing Multiple Versions of a Package
As you’ve seen, Scoop installs packages from buckets. And by default, Scoop comes with a handful of useful buckets such as main, versions, and extras.
If you wish to install packages from other buckets beside the main one, you must configure Scoop to know about the bucket.
1. Run the following scoop command to list known available buckets by the community.
scoop bucket known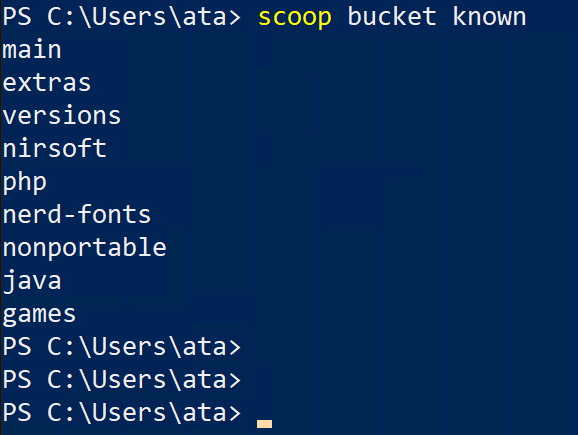
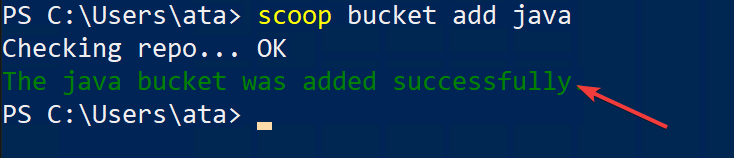
2. Next, run the below command to add the java bucket.
scoop bucket add javaAfter adding a new bucket, you can now install packages with Scoop from that bucket.
3. Now, run the command below to install the openjdk package from the java bucket.
This command installs the latest version of openjdk (v18 at this time of writing). This package is an open-source implementation of the Java Platform, Standard Edition. Many programs require Java to run, so installing it is a good idea.
scoop install openjdk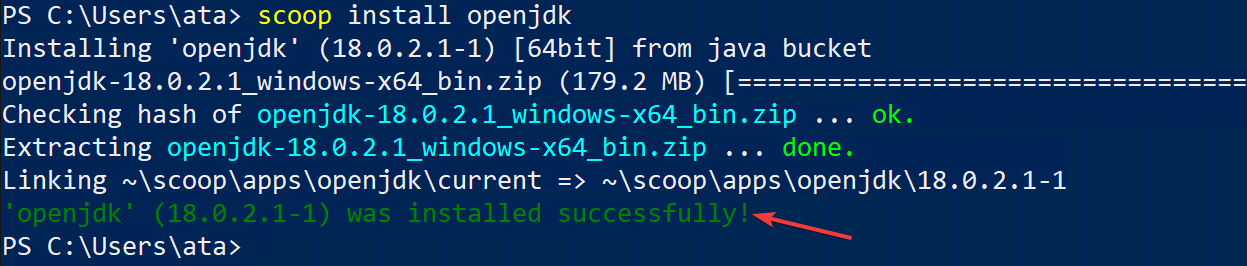
Note that you can also install a different version of Java by specifying the package’s version, as shown below. This command allows multiple versions of Java to be installed on your system.
scoop install openjdk12

Switching Between Package Versions
Perhaps you’ve installed different versions of Java, as previously demonstrated. But suppose you have one program that requires Java 18 and another that requires Java 12. How do you switch between those versions?
Worry not! Scoop supports switching different versions of the same package with the reset command.
1. Run the below reset command to switch to Java 12 (openjdk12).
scoop reset openjdk12
2. Next, run the following java command to check the current active Java –version.
java --versionBelow, you can see that Java 12 is the one currently active.

3. Now, run the following command to switch back to the latest package version (openjdk).
scoop reset openjdk
4. Finally, rerun the java command below to check the current active Java –version.
java --versionThe output below confirms that you’ve switched back to Java 18.

Conclusion
Installing and managing packages don’t have to be a complex task. Luckily, you’ve learned how to install use Scoop in Windows for more convenient package management. You’ve realized that installing and keeping different versions of the same package is possible with Scoop.
At this point, you should be more confident about installing and updating packages in your system. Now, why not create a custom app manifest of your own and share it with the Scoop community?


