


When you apply an Active Directory (AD) Group Policy Object (GPO) across hundreds or even thousands of target computers, chances are it’s going to take a while for them all to receive it. How do you know when a computer receives a new policy or retrieves updated policy settings? Using the RSOP tool.
Not a reader? Watch this related video tutorial!The RSOP tool or Resultant Set Of Policy, is a built-in Windows tool that allows you to discover what policy settings are applied to local and remote computers. If you’re wondering what configuration GPOs are setting on your PC, read on!
Let’s get started.
Prerequisites
This tutorial will run through a few different demos. If you’d like to follow along, be sure you have the following:
- An Active Directory domain – Any version of AD will work. This tutorial will use a domain called HomeLab.Local.
- A domain-joined Windows PC with at least one GPO applied to it to test local GPOs. This tutorial will use a PC called Win10VM1.
- A second domain-joined Windows PC if you want to run RSOP remotely. This tutorial will use a PC called Win10VM3.
- TCP ports 445, 135, RPC dynamic ports, and all ports for WMI open on the remote computer. You can create a starter GPO called Group Policy Reporting Firewall Ports to ensure all ports are open.
- Local administrator rights on both the local PC and remote PC.
- A GPO with an AD group configured with deny permissions. DeniedGPOUsers AD group with no users added to it and deny permissions will be used in this tutorial.
What is the RSOP tool?
When you assign a GPO to a computer in Active Directory, that computer should reach out to the domain controller and, based on the defined GPO refresh interval, soon see that GPO and attempt to apply the settings the GPO defines.
When the computer applies the GPO settings, those policy settings are then stored on the computer in the Common Information Management Object Model (CIMOM) database using the Windows Management Instrumentation (WMI). To inspect those applied settings, run the RSOP tool. The RSOP tool generates a report on the policies that are applied (or planned) for users and computers on the PC.
RSOP is great for troubleshooting instances where you have multiple, conflicting policies. Using RSOP, you can inspect which GPOs took precedence and overrode another.
Modes
RSOP has two different modes to help you with discovering how GPOs affect target computers; logging and planning mode.
- Logging mode – The most common use of RSOP that’s used to generate a report on all applied policies for all logged-on users and the computer itself.
- Planning mode – A less common use of RSOP that allows you to simulate what settings will apply to a computer if one or more GPOs were applied to them. Planning mode works to determine what will happen when a user is moved to a different AD group, for example.
Inspecting Locally-Applied GPOs with RSOP
Let’s now get started with some hands-on demonstrations of RSOP. First, let’s cover how to bring up the RSOP tool and what kind of information you can expect to see.
On your local, domain-joined Windows PC, open a command prompt or PowerShell window as an administrator.
If you don’t run a command prompt or PowerShell as administrator, RSOP will not have access to the computer settings (only logged-in user settings). When you run RSOP, you will receive an error indicating you have insufficient permissions.
Next, run the command rsop.msc. This action will bring up the RSOP MMC snap-in.
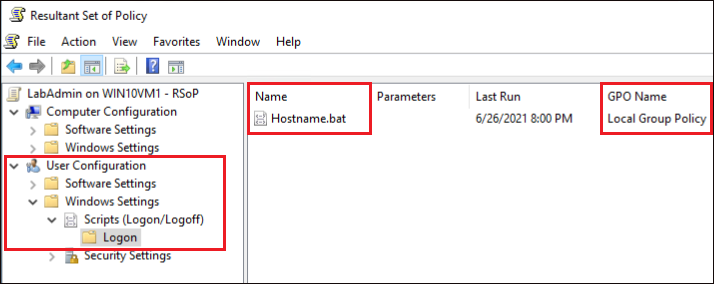
When you bring up RSOP, it will immediately begin reading all applied policies and generating a report. RSOP defaults to logging mode. Below you’ll see the results of running RSOP on a computer called WIN10VM1 logged in as a user called LabAdmin.
Expand each of the folders and you’ll see every setting across all GPOs that are applied to that particular user or computer.
If you do not see an expected GPO setting for a recently-created GPO, run the gpupdate /force command on the PC to manually refresh the policy settings.

For example, below you’ll see a local policy called HostName.bat assigned to the user logon on the PC. Inside the policy is a batch file called HostName.bat under User Configuration —> Windows Settings —> Scripts —> Logon.
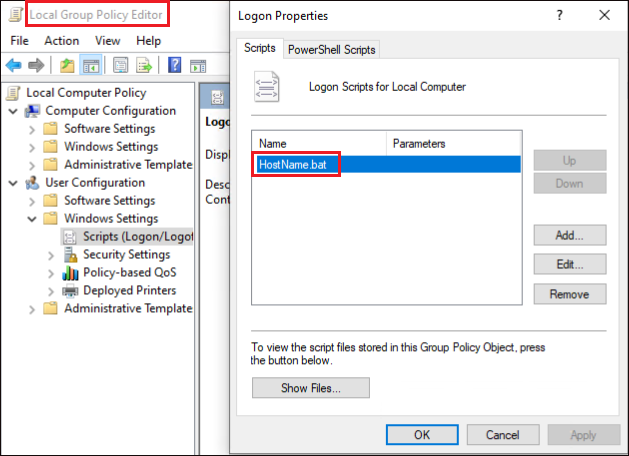
Running RSOP on a computer that has local policy configured, you’ll see the Logon script applied and the Policy Name that applied it.
Testing Policy Changes with RSOP’s Planning Mode
Perhaps you’re ready to roll out an important GPO to many computers. You could “test in production” by applying it immediately to all computers at once, or you could use RSOP’s planning mode.
Using planning mode, you can simulate many different scenarios if you’d apply a GPO to a computer such as when:
- The target PC has a slow network connection
- You enable loopback processing
- The target PC has many GPOs applied to it to test policy precedence
- A user logs onto the target PC or the computer account is in different AD groups and an AD group is denied permission to the GPO.
- A user or computer is moved between domains, OUs or even AD sites.
- A WMI filter is applied to an OU
Planning mode will help you account for all of the conditional variables that GPOs can throw at you.
To run RSOP in planning mode:
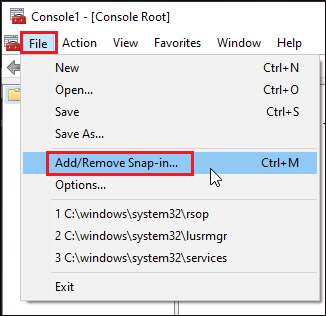
1. Open a command prompt or elevated PowerShell console and type mmc. This will open MMC console.
Note you cannot simply run rsop.msc in this instance. The only way to change the RSOP mode is when you add an MMC snap-in, as you’ll see.
2. In the MMC console, open the File menu and click Add/Remove Snap-in, as shown below.
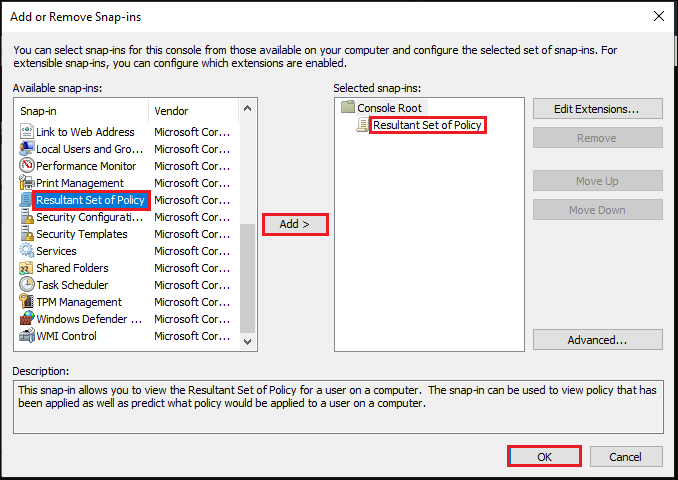
3. In the Add or Remove Snap-ins dialog box, select Resultant Set of Policy and click Add to move the snap-in from the left window to the right window.
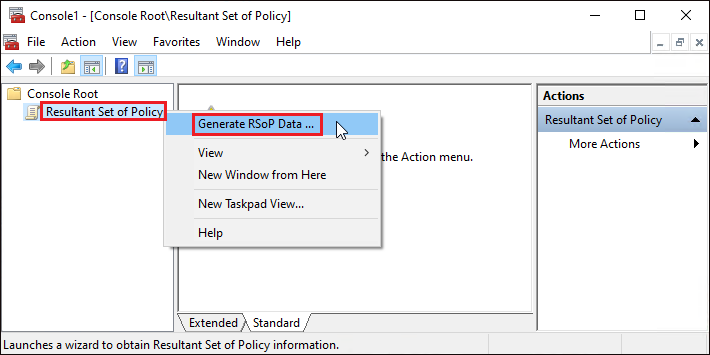
4. Next, right click on the Resultant Set of Policy MMC snap-in, as shown below, click on Generate RSOP Data and Next to skip past the intro step.
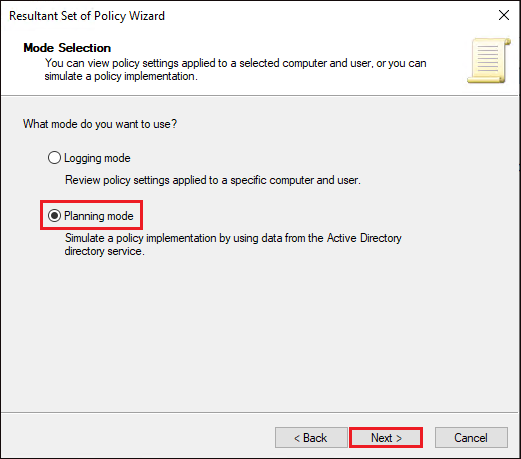
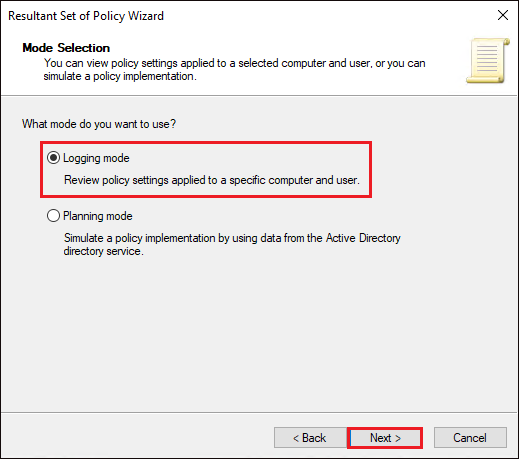
5. On the Mode Selection screen, select Planning mode and click Next to get to the Computer Selection screen.
6. Next, click Browse under User Information to select the user that might be affected by an upcoming GPO. Also, click Container and Browse under Computer Information to select the OU that will contain a PC this user may be logging into.
In the following screenshot, the simulation will provide all of the settings that a user called HOMELAB\User01 would receive if they were to log into any computer in the Desktop VMs OU.

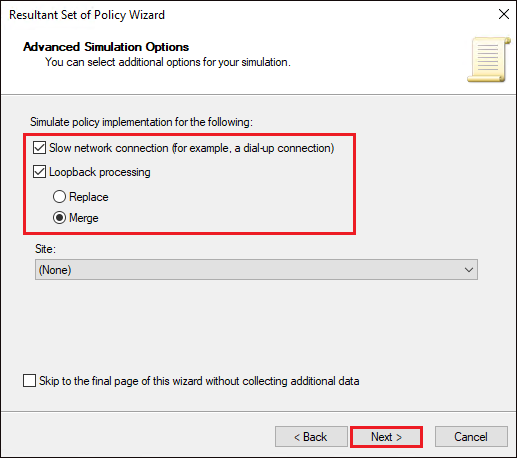
7. Now, select options if you’d like to simulate a few more situations:
- Group Policy’s slow link detection
- Loopback processing – Selecting Replace or Merge will replace/merge the user policy settings and computer policy settings in case of a conflict.
- Site – To simulate the desktop being logged into’s AD site.
Click Next when complete.
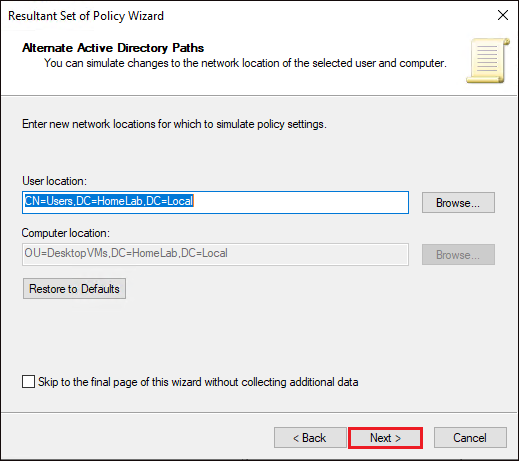
8. If you don’t plan on directly applying the GPO to the OU that the user or computer will be in, click Browse to change the OU for either object. When complete, click Next.
In step six, you defined the OUs that the user and target computer would be located in. Here, you are defining the OU that you plan on applying the GPO to.
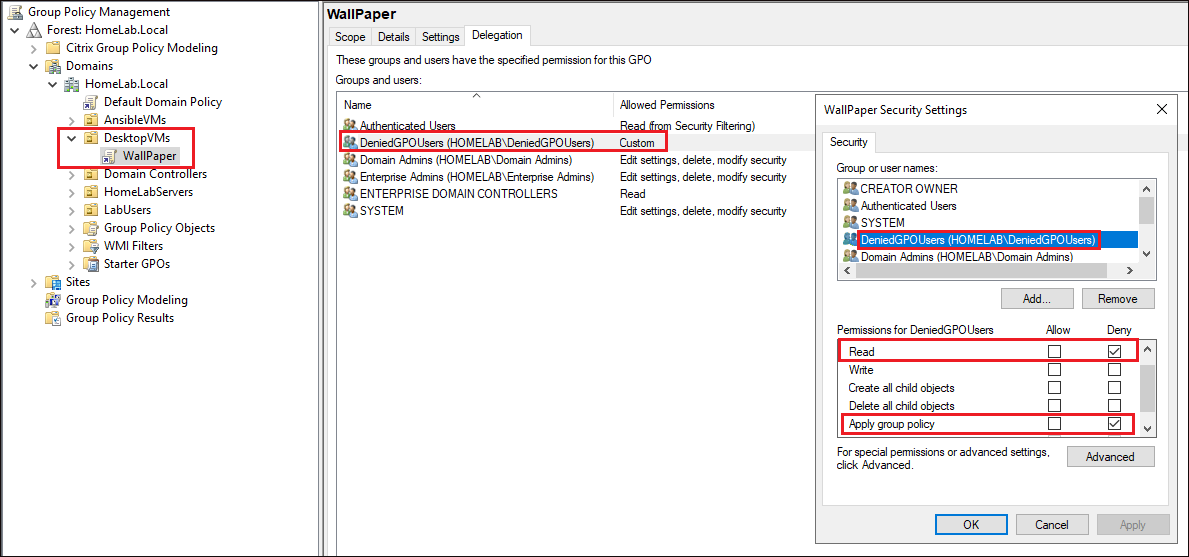
9. Now, enter the AD group you plan for the user to be in by clicking Add. For this tutorial, the user will be in the DeniedGPOUsers group.
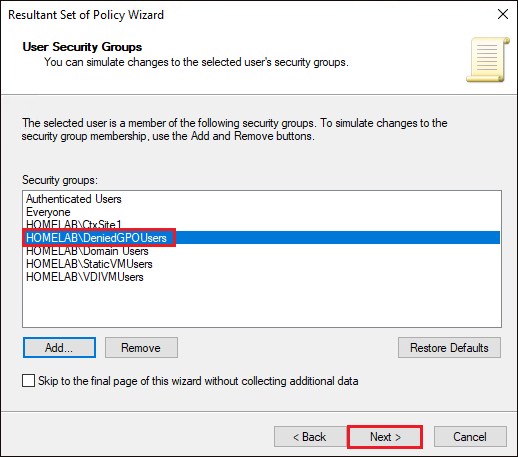
You’ll see below that the DeniedGPOUsers group is denied from applying this GPO.
10. Next, for this tutorial, step through the screens for defining WMI filters and computer groups. If, however, you do plan on setting up a WMI filter on the GPO or are denying/allowing GPO application by the AD group the computer account is in, you may make these simulated changes.
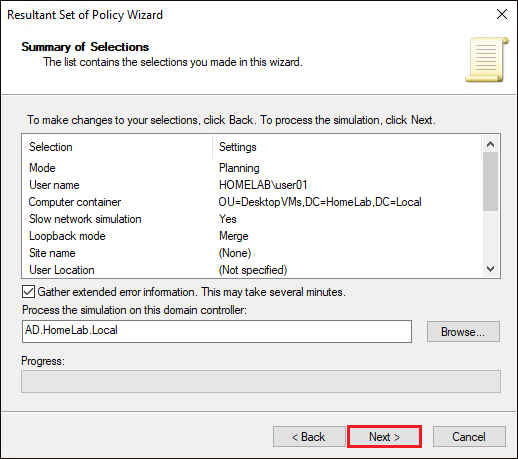
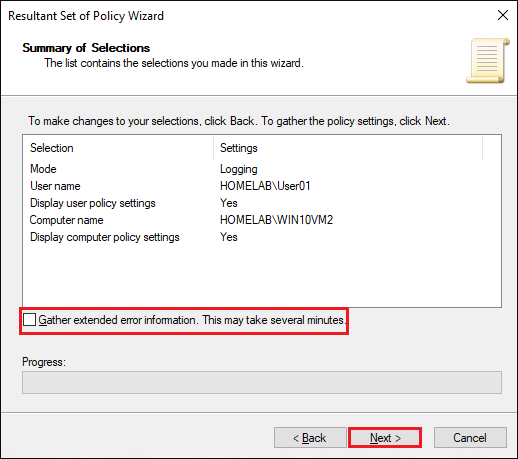
11. Finally, on the summary screen, review all the details. Leave the Gather extended error information option enabled and click Next. When you enable the extended error information option, RSOP snap-in collects more error information when it performs the query. This error message includes network or AD issues that affect the policy when it is implemented. Enabling this option may greatly increase the time to process the simulation, but will provide more verbose information should an error occur.
After RSOP console is generated, right click on computer configuration or user configuration node and click properties. Then click on Error information tab to view any errors that are generated while simulating the policy.
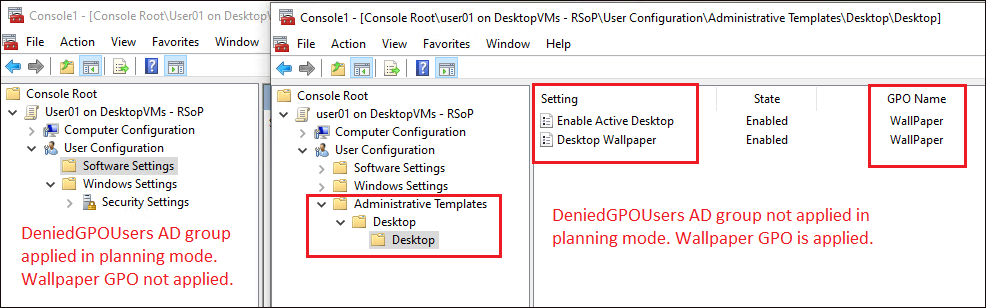
12. Once RSOP is complete, navigate through the folders under Computer configuration and User configuration to verify the policies that are applied.
You’ll see two windows below; on the left, you’ll see the actual GPO applied (RSOP in logging mode) and on the right, you’ll see what RSOP would look like if the user were removed from the DeniedGPOUsers AD group.
Inspecting Remotely-Applied GPOs with RSOP
To prevent having to go to each computer’s local console, RSOP also allows you to inspect settings remotely for both logging and planning mode. In in this demonstration, the tutorial will use logging mode.
1. Open RSOP by running through steps 1-4 in the Testing Policy Changes with RSOP’s Planning Mode section above.
2. On the Mode Selection screen, choose Logging mode and click Next to come to the Computer Selection screen.
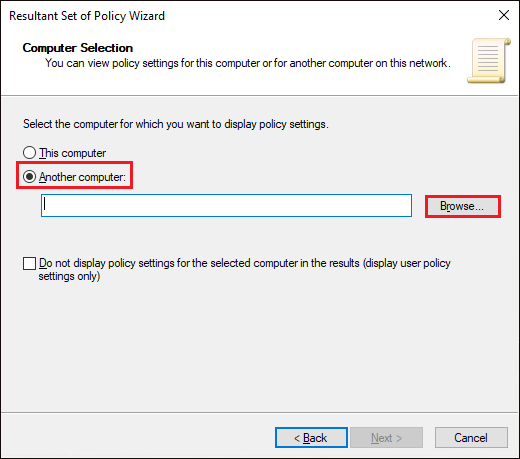
3. On the Computer Selection screen, choose Another computer since you’re going to be querying a remote computer and click Browse.
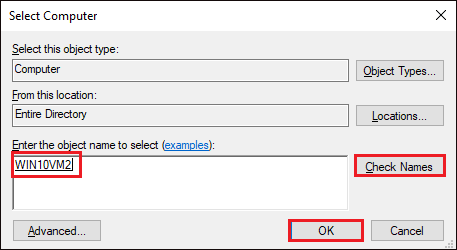
4. In the Select computer box, enter remote PC name and click Check Names. This action will search for the computer’s AD computer account. If found, it will underline the PC name, as shown below.
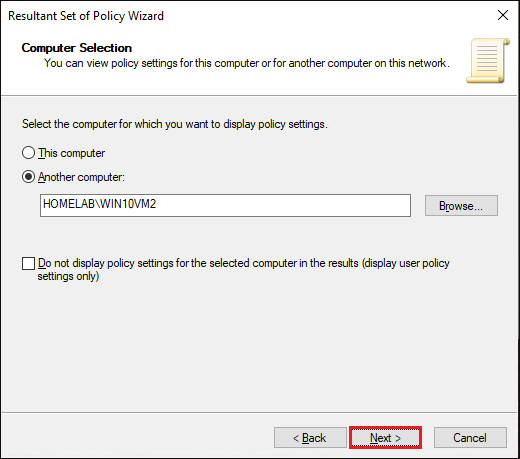
5. Click Next on the Computer Selection screen. Here, you could select Do not display policy settings for the selected computer in the results… but you’re going to inspect both computer and user settings.
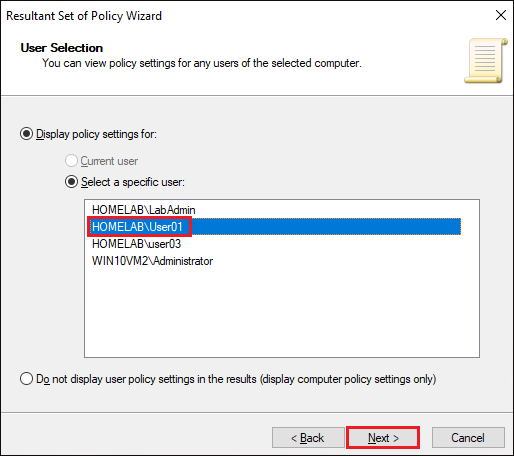
6. Next, choose the user you’d like to inspect applied user policies for. You will see the list of users who have logged on to the remote computer at least once.
Select a user from the list and click Next.
Notice the Current user option is greyed out. RSOP doesn’t support finding the remotely logged-in user. You must explicitly pick one.
7. Uncheck the Gather extended error information checkbox. Click Next to continue. RSOP will now connect to the remote computer and attempt to retrieve all RSOP settings for both the selected user and the computer.
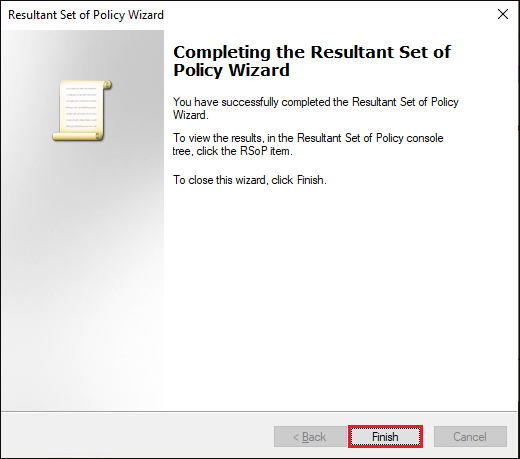
8. Click Finish when done.
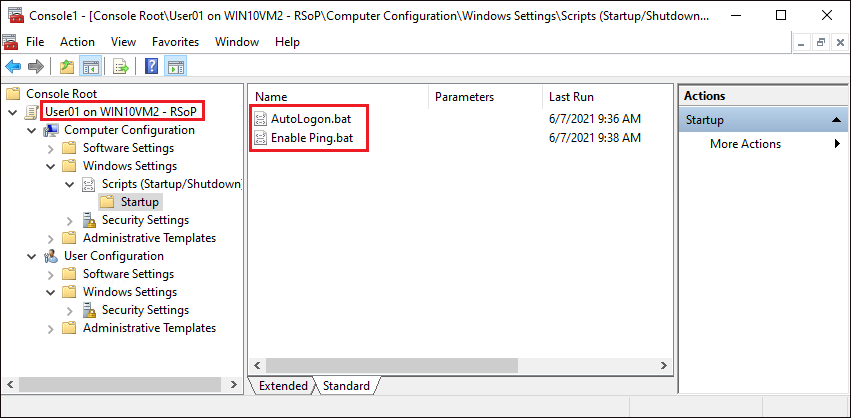
9. You will now the exact same MMC snap-in you did when inspecting local settings. But this time, the settings came from a remote PC.
Conclusion
The RSOP tool is handy when you need to quickly find all the applied GPO settings targeted to a computer or user. Using this tool allows you to see the applied settings; not just all the settings for GPOs targeting a specific computer or user.
Where do you see yourself using RSOP in the future?


