


Backing up your data is always a good idea, and you should always have at least two backups of your data: one local and one off-site. You never know what could happen to your data, right? So is there a perfect tool for data backup? With Amazon Relational Database Service (RDS), you can create an RDS snapshot (storage volume snapshot) of your DB instance.
In this tutorial, you’ll learn how to create an AWS RDS Snapshot to get a complete backup of your DB instance and all its data.
Stay tuned, and secure your data with AWS RDS Snapshots!
Prerequisites
This tutorial will be a hands-on demonstration. If you’d like to follow along, be sure you have the following.
- An AWS account with active billing – If you do not have an AWS account, you can create one for free.
- An IAM user with AWS Access Key ID and Secret Access Key – This tutorial uses an IAM user called rds-cli-user.
- An Amazon RDS DB instance running – The instance can be a MySQL, PostgreSQL, MariaDB, Oracle, or Microsoft SQL Server DB instance.
- AWS Command Line Interface (AWS CLI) installed and configured.
Creating an RDS Snapshot via the Amazon RDS Management Console
Instead of individual databases, Amazon RDS creates a snapshot of your DB instance. This behavior backs up your entire DB instance along with all its data.
You can use the Amazon RDS Management Console, AWS CLI, or Amazon RDS API to create an RDS snapshot. But in this tutorial, you’ll start with the Amazon RDS Management Console (a GUI) that allows you to create, view, and manage your Amazon RDS resources.
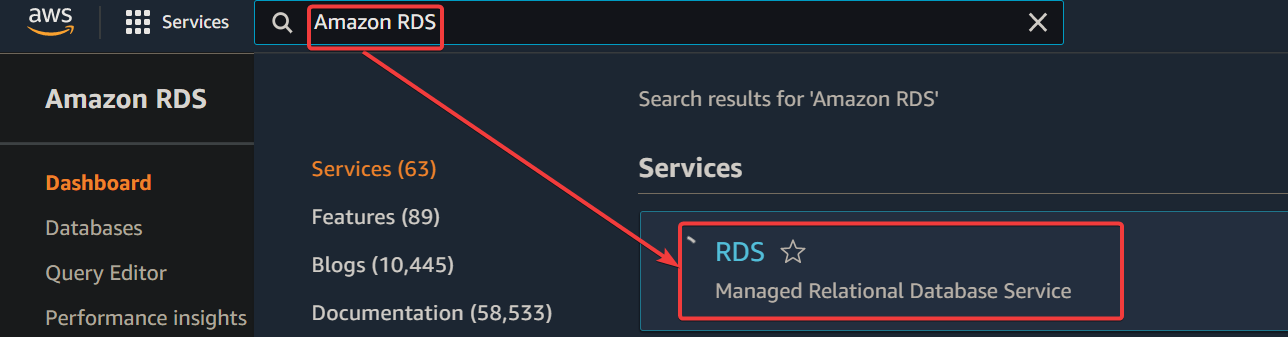
1. Log in to the AWS Console, search for Amazon RDS, and select RDS from the list, as shown below, to access the Amazon RDS Dashboard (step two).
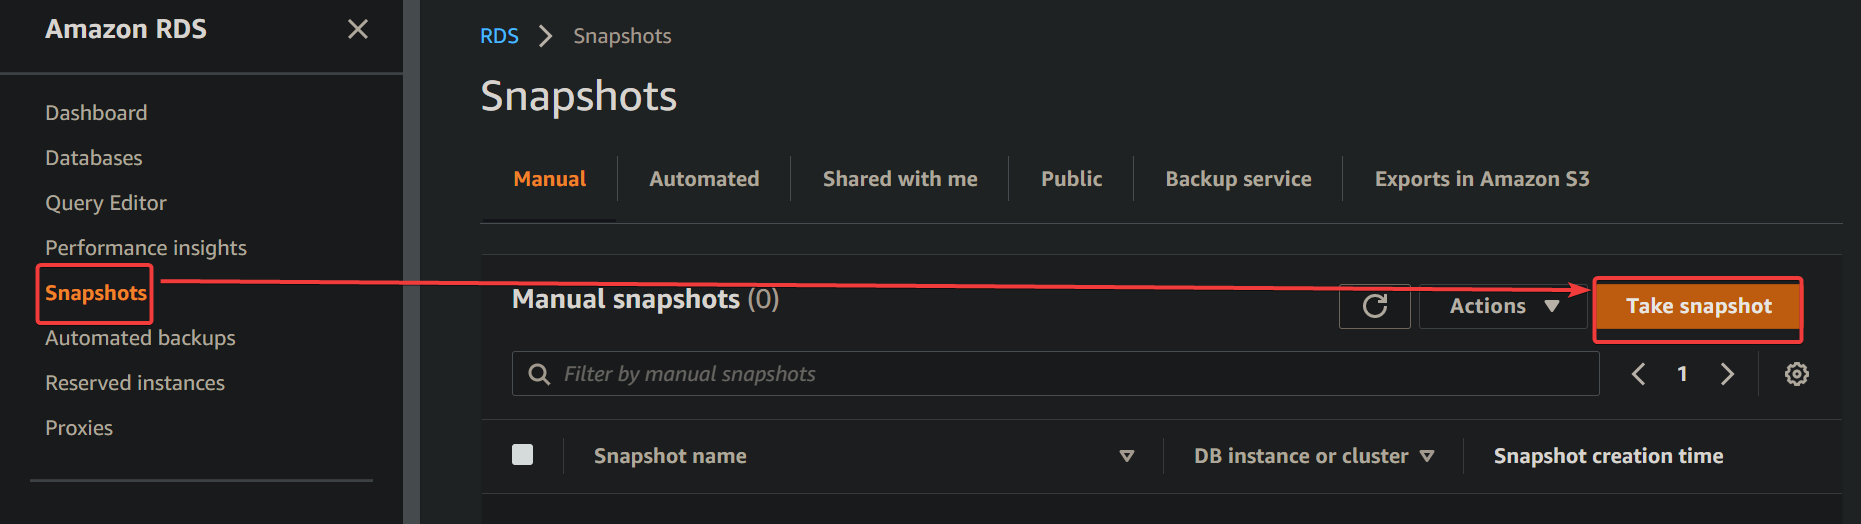
2. Next, click on Snapshots in the left sidebar → Take Snapshot to open the Take DB Snapshot page where you can take a snapshot.
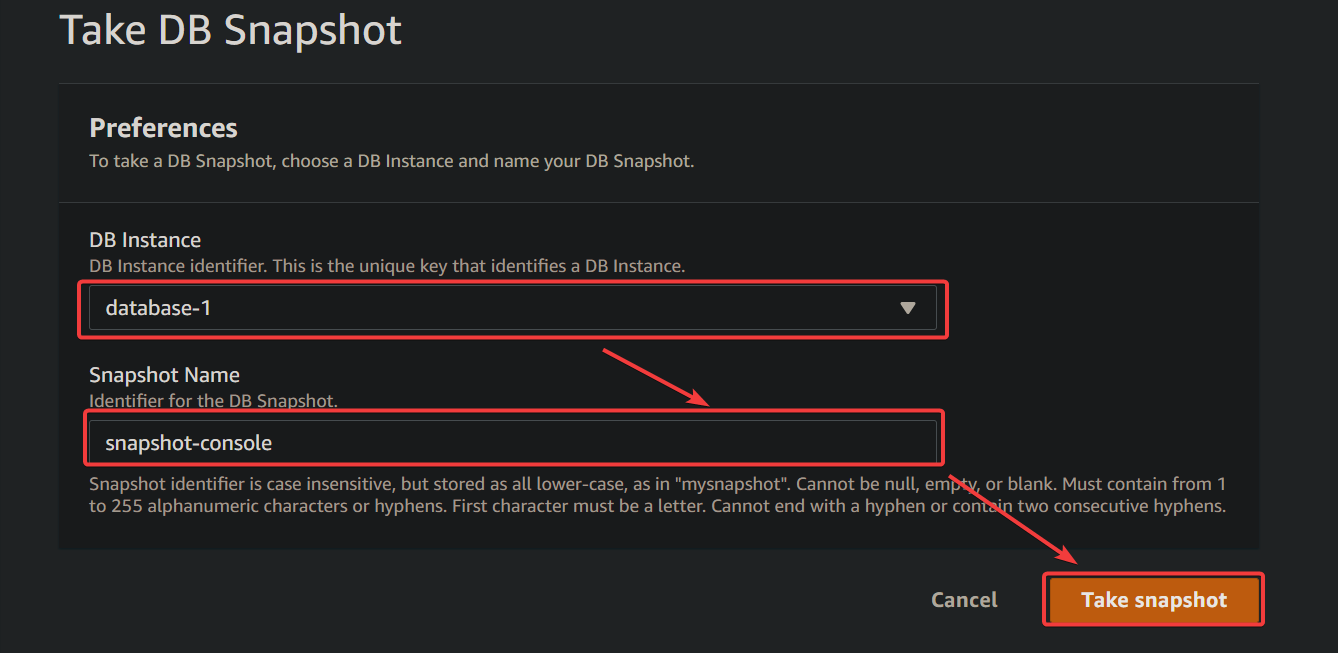
3. Take a DB Snapshot with the following:
- DB Instance – Select the DB instance you like to take a snapshot of from the drop-down field.
- Snapshot Name – Provide a snapshot name (unique for your AWS account and region) in the field provided.
The length of the snapshot name must be between one and 255 characters, including upper-case, lower-case letters, digits, and hyphens (-).
- Click Take snapshot (bottom-right) to create a snapshot of your selected DB instance. The Snapshots page appears, displaying all the snapshots you have created (step four).
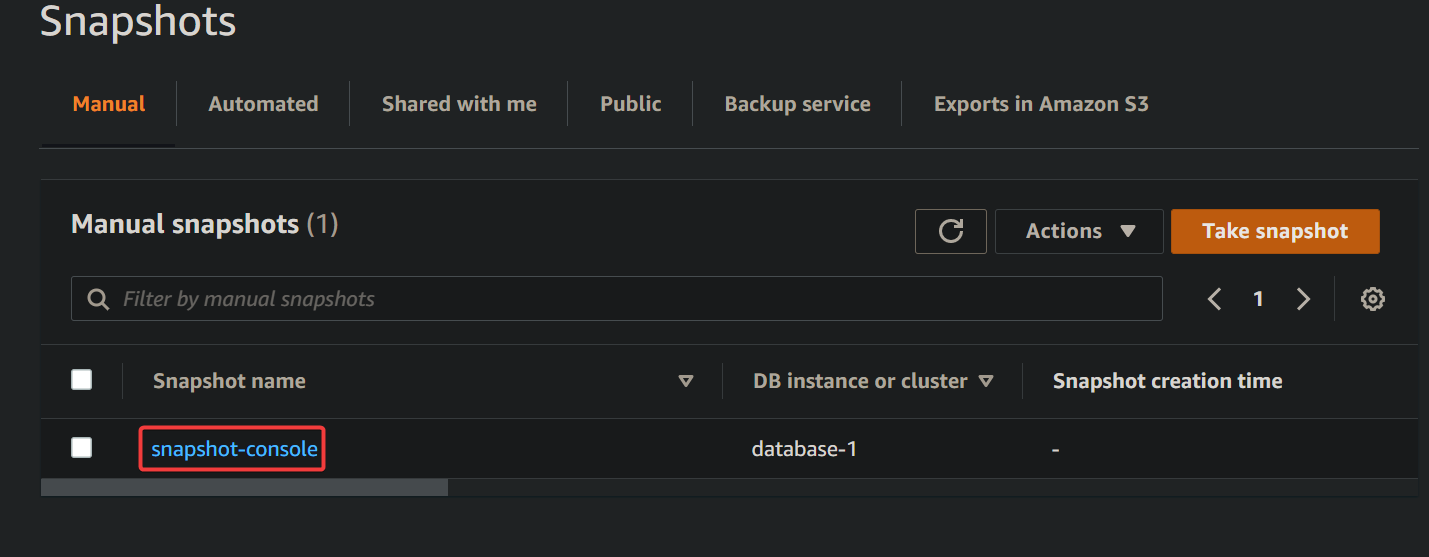
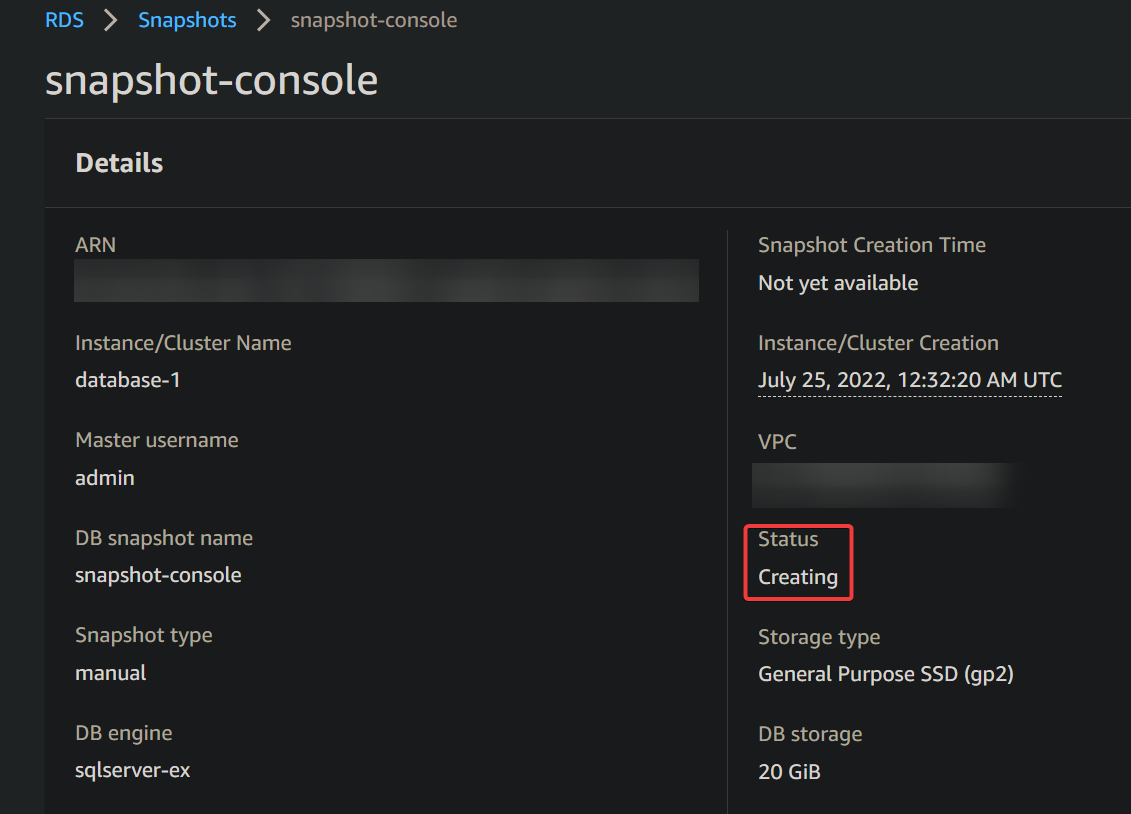
4. Lastly, click on the hyperlinked snapshot name (snapshot-console). Doing so opens the Snapshot Details page that displays information about your snapshot, such as when it was created, its size, and its status.
You can see in the screenshot below that the snapshot status is Creating, indicating that the snapshot is being created.
The creation takes time, depending on the size of your DB instance. In most cases, the process takes almost 15 minutes to create a snapshot around 20GB in size.
Once the status changes to Available, the snapshot has been successfully created and is now available for use.
Unlogged data tables in MySQL, PostgreSQL, and MariaDB DB instances might not be replicated to the snapshot. Hence, unlogged data is not included in the snapshot.
For long-term backup storage, saving your snapshot to an S3 bucket is most recommended. Snapshots that exist only on Amazon EBS volumes can be lost if the underlying volume fails, is deleted, or its data becomes corrupted.
Creating an RDS Snapshot via the AWS CLI
You’ve successfully created an RDS snapshot via the Amazon RDS Management Console. But if you’re mostly working on a command line environment, creating an RDS snapshot via the AWS CLI is also possible. AWS CLI allows you to manage your AWS resources on a terminal.
The Amazon RDS Management Console is great for simple, one-off tasks but doesn’t offer much flexibility when you need to script or automate tasks, unlike AWS CLI. You can use AWS CLI to script repetitive operations, like a CI/CD pipeline, making your work easier and less time-consuming.
To create an RDS Snapshot via the AWS CLI, you must first attach a policy with necessary permissions to your IAM user.
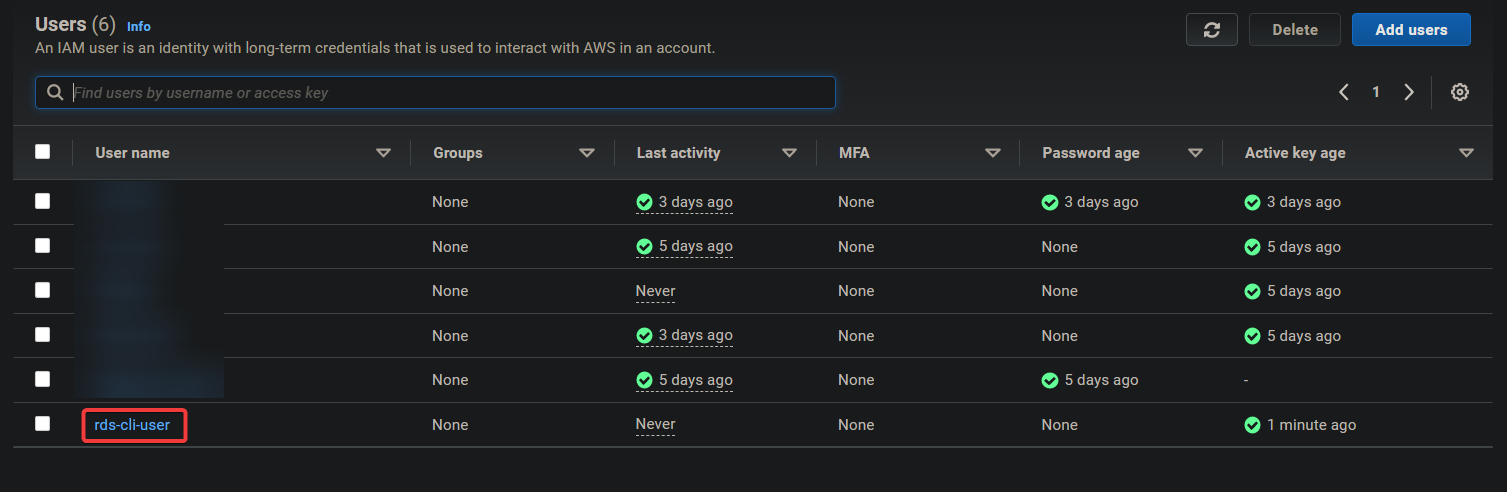
1. On AWS Management Console, navigate to the Users page and click on your hyperlinked user name (rds-cli-user) to access the user summary page (step two).
2. Next, click on Add inline policies under the Permissions tab, as shown below, to initialize creating a policy.

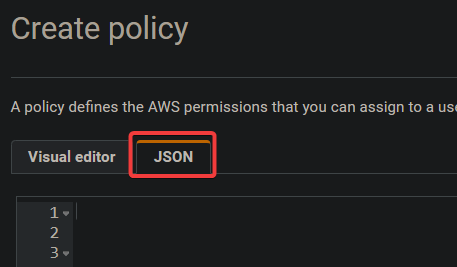
3. On the Create policy page, click the JSON tab to choose to add policies in JSON format.
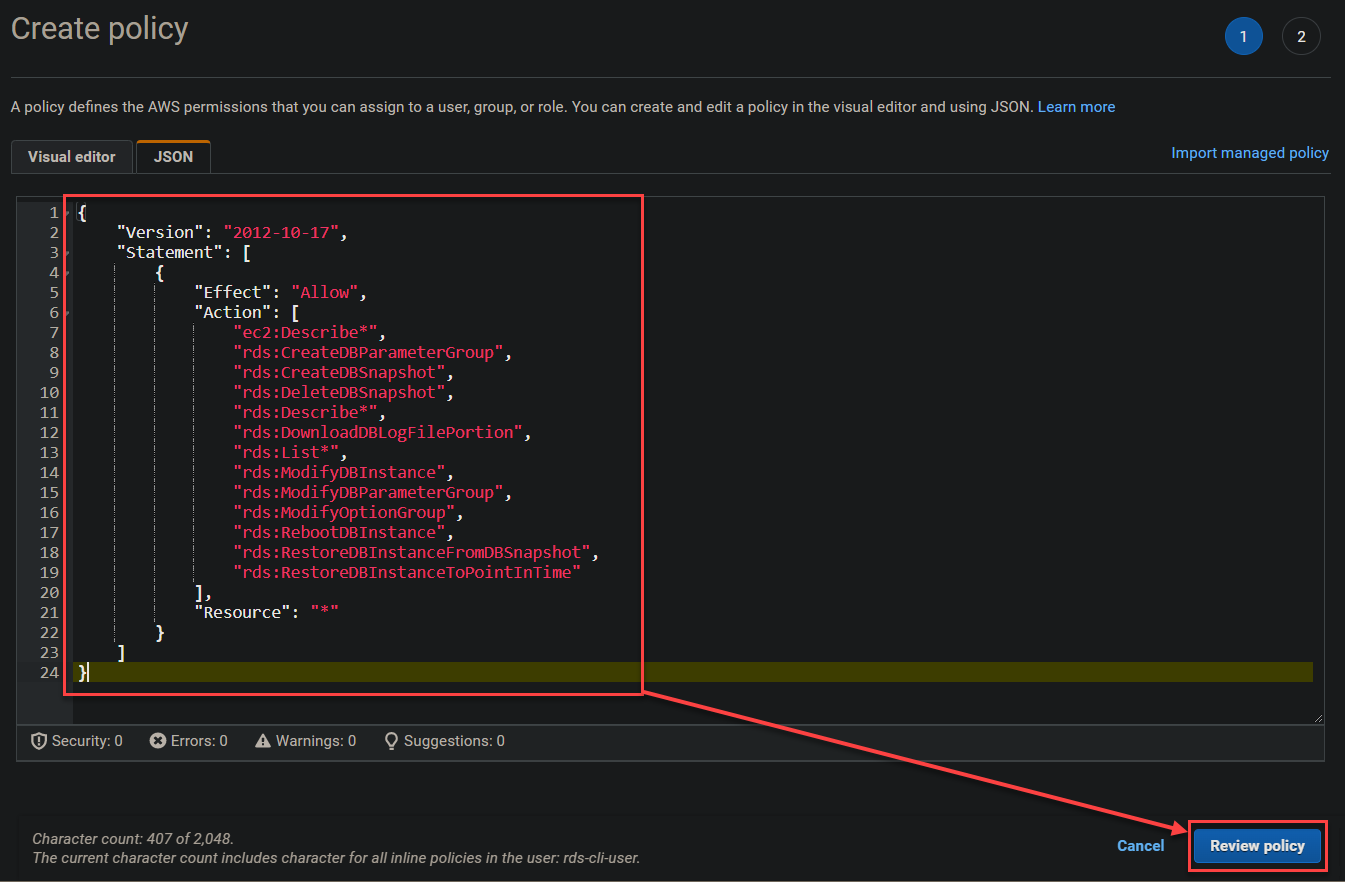
4. Add the following policy to the policy editor, and click on Review policy.
This policy gives your IAM user the necessary permissions to perform various actions on RDS resources and EC2 resources like the following:
- Creating a new snapshot
- Describing an existing snapshot
- Deleting an existing snapshot
- Listing EC2 instances, etc.
{
    "Version": "2012-10-17",
    "Statement": [
        {
            "Effect": "Allow",
            "Action": [
                "ec2:Describe*",
                "rds:CreateDBParameterGroup",
                "rds:CreateDBSnapshot",
                "rds:DeleteDBSnapshot",
                "rds:Describe*",
                "rds:DownloadDBLogFilePortion",
                "rds:List*",
                "rds:ModifyDBInstance",
                "rds:ModifyDBParameterGroup",
                "rds:ModifyOptionGroup",
                "rds:RebootDBInstance",
                "rds:RestoreDBInstanceFromDBSnapshot",
                "rds:RestoreDBInstanceToPointInTime"
            ],
            "Resource": "*"
        }
    ]
}
After adding the policy, click the Review policy button (bottom-right).
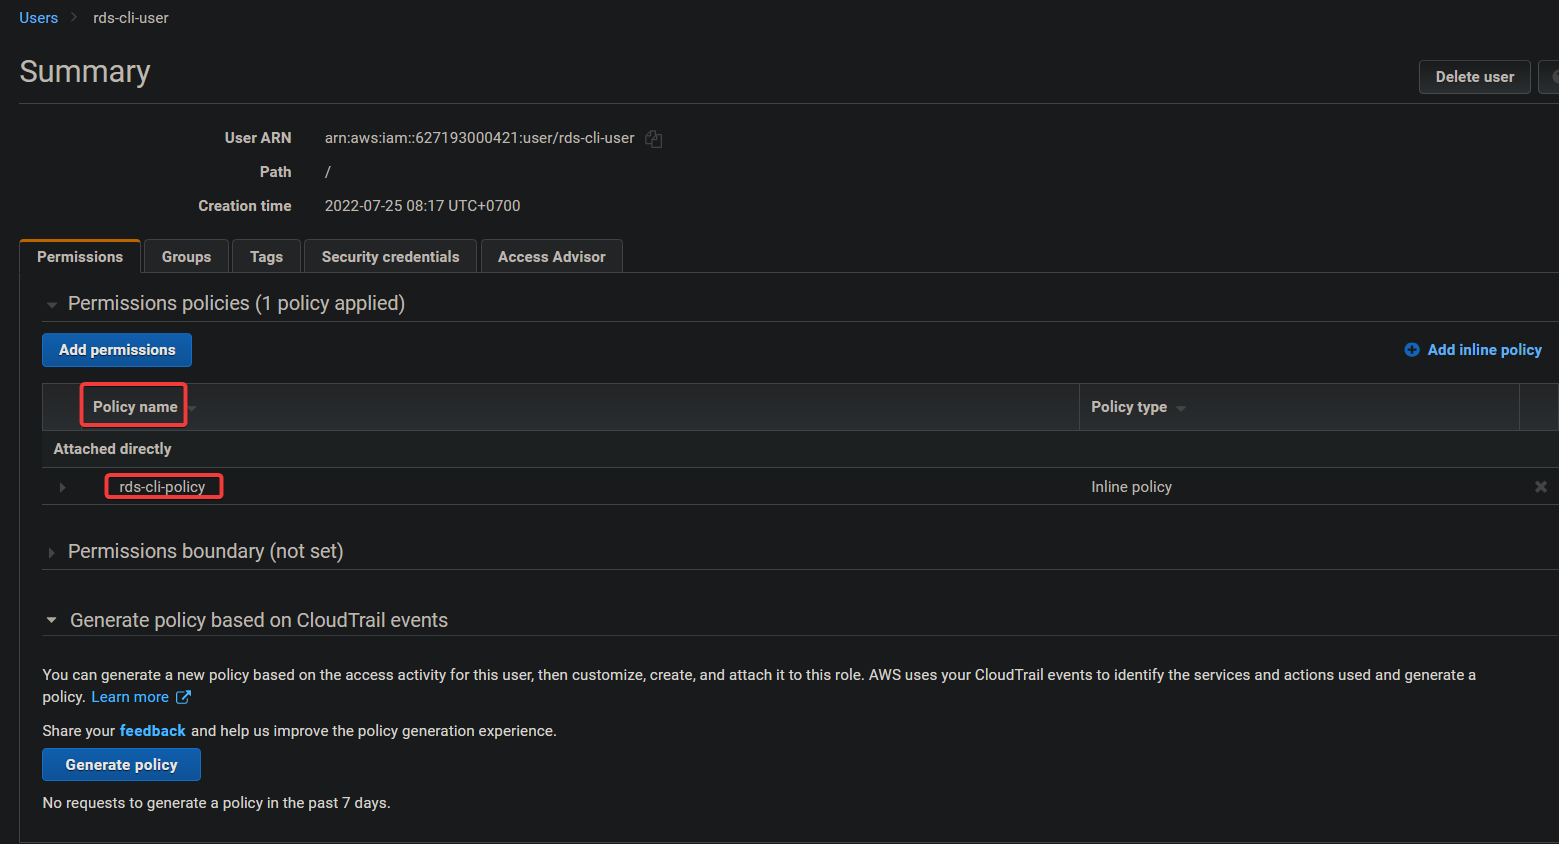
5. Provide a unique name for the policy (rds-cli-policy), and click on Create policy to finalize creating the new policy.
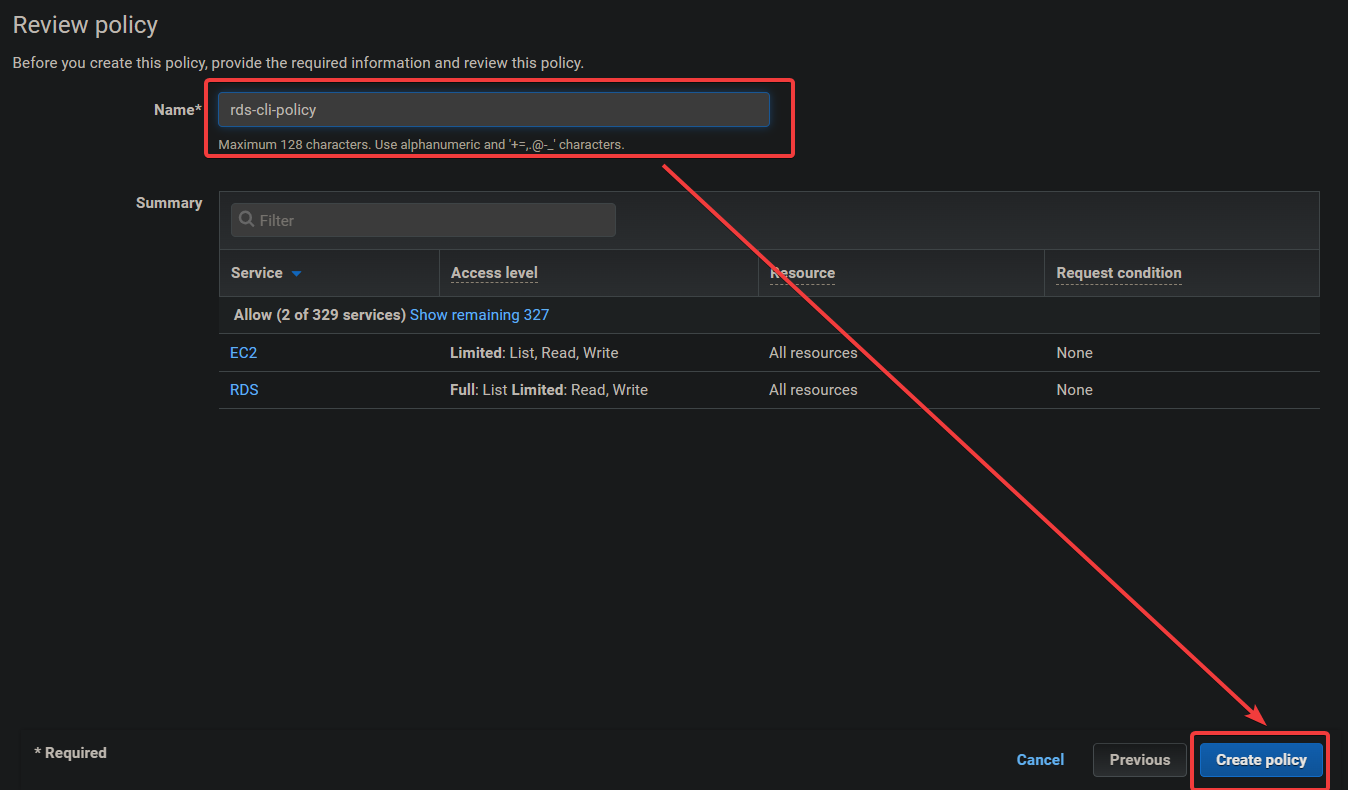
You’ll see the newly-created policy under the Policy name column on the Summary page, as shown below.
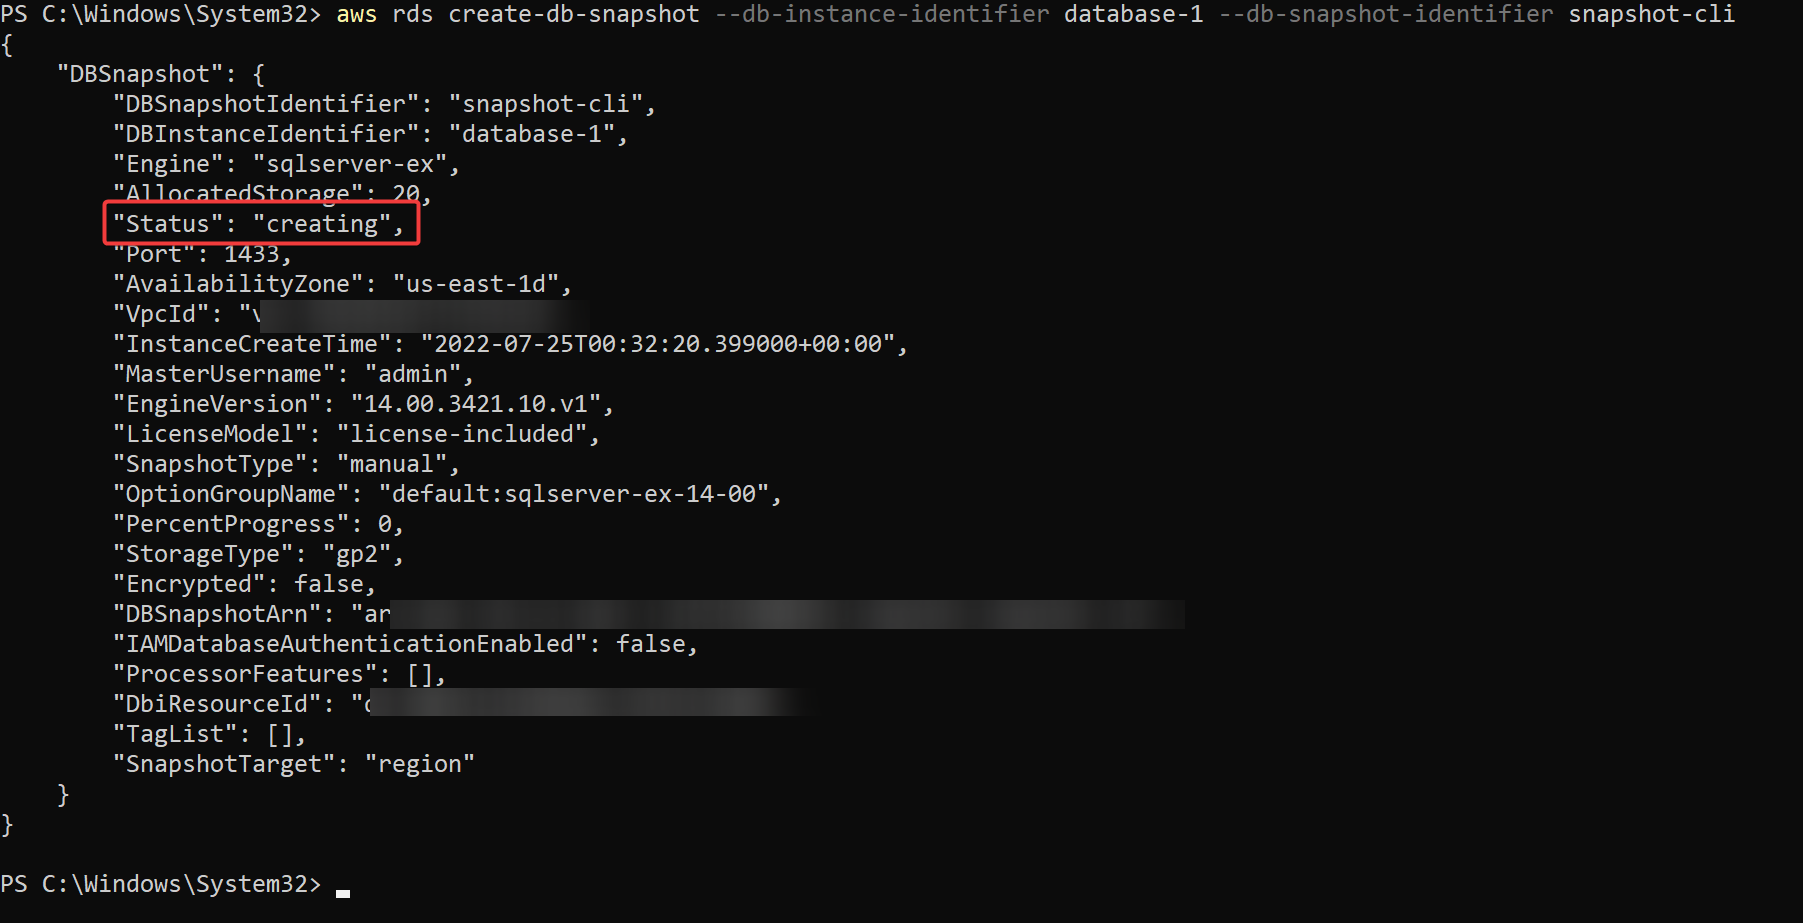
6. Next, run the following create-db-snapshot command to create an RDS snapshot of your DB instance (database-1) and name the snapshot as snapshot-cli. You can change snapshot-cli with your preferred snapshot name as it’s arbitrary.
aws rds create-db-snapshot --db-instance-identifier database-1 --db-snapshot-identifier snapshot-cliBelow, you can see that the snapshot shows the creating state and is not yet ready to be used.
The process takes time complete as a full backup of your database is performed first before creating the snapshot.
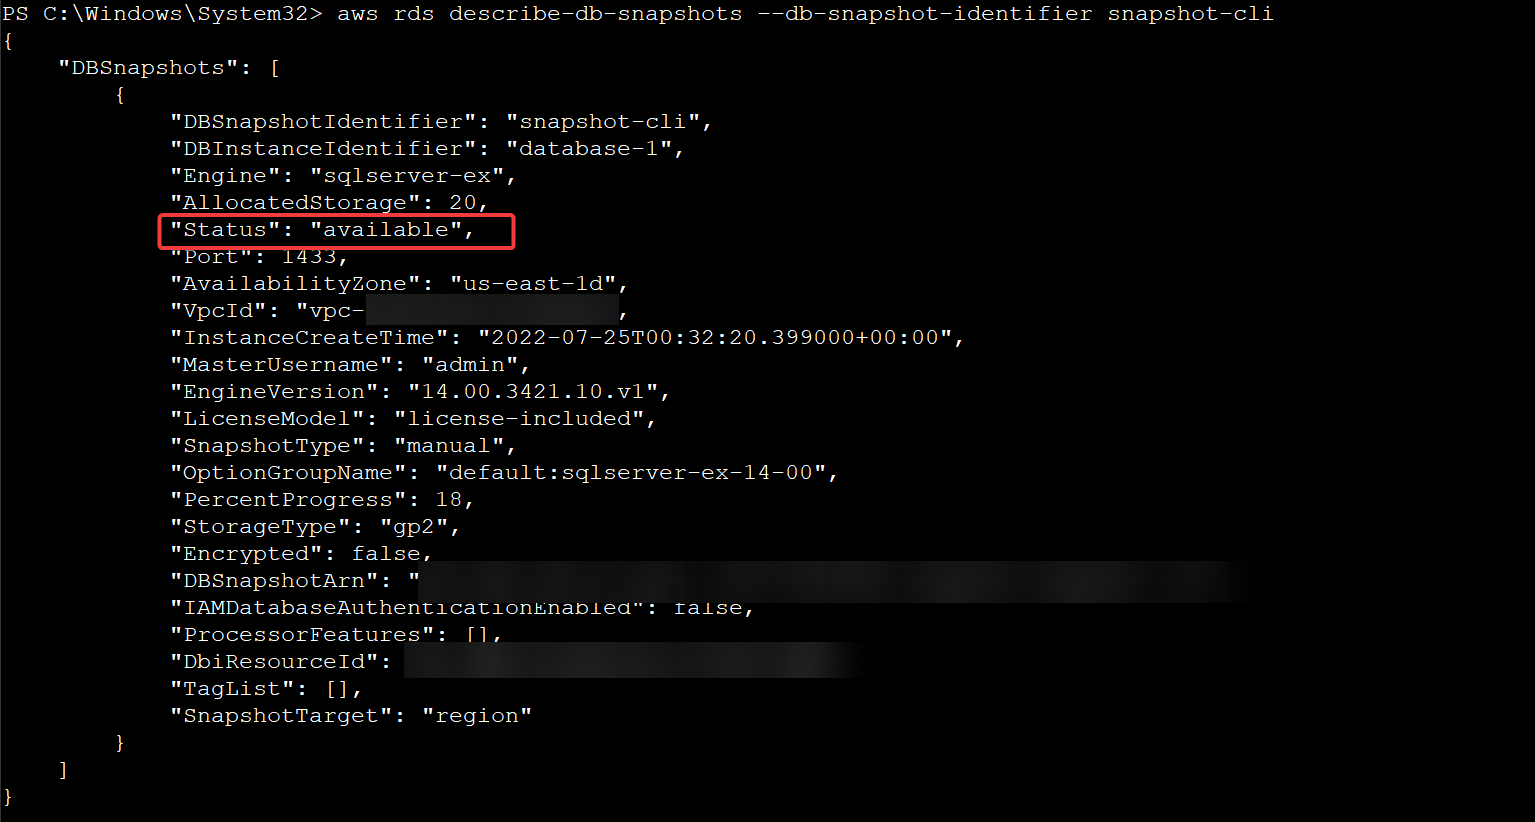
7. Now, run the below describe-db-snapshots command to check the status of your snapshot.
aws rds describe-db-snapshots --db-snapshot-identifier snapshot-cliAs you can see below, the status changed to available, indicating the snapshot is ready to be used and that your inline policy works as intended.
Restoring Data From an RDS Snapshot
You’ve created your RDS snapshot, so your data is safe and secure. But suppose your server has crashed, and you want to use the snapshot to restore your database. How do you restore your data?
You can restore your data via the Amazon RDS Management console or AWS CLI. But for a start, you’ll restore data with the former.
Restoring via the Amazon RDS Management Console
1. Sign in to the AWS Management Console and navigate the RDS service page.
2. Next, initiate restoring data using a snapshot with the following:
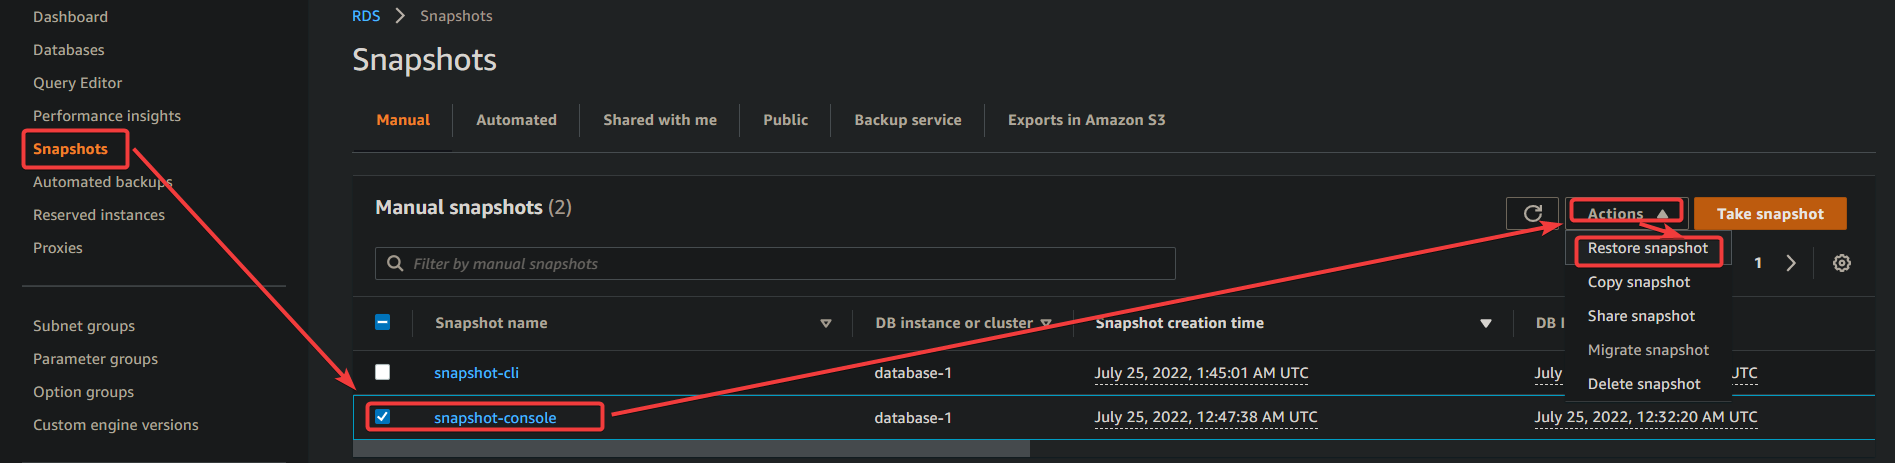
- Click Snapshots to access the list of snapshots available.
- Tick the checkbox next to the snapshot you’ll use for restoring your database.
- Click on the Action drop-down button, and choose Restore snapshot. This action opens the Restore DB instance page.
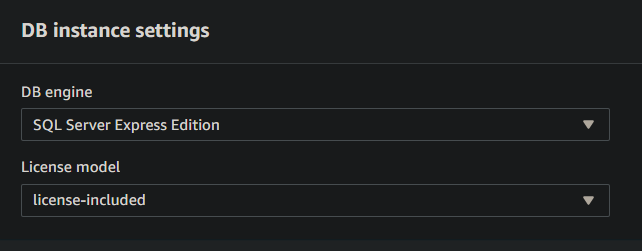
3. Keep the default settings for the DB engine and License model. These values are pre-populated based on your snapshot.
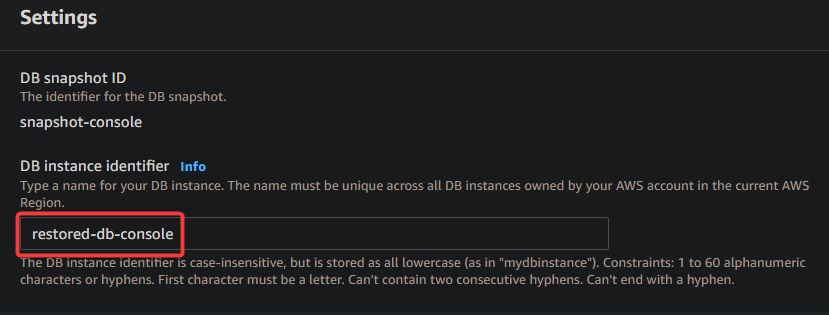
4. Now, under the Settings section, set a name for your new database instance in the DB instance identifier field.
You could use the old name if you deleted the old database instance after you took a snapshot. But it’s recommended that you use a new name to avoid any confusion.
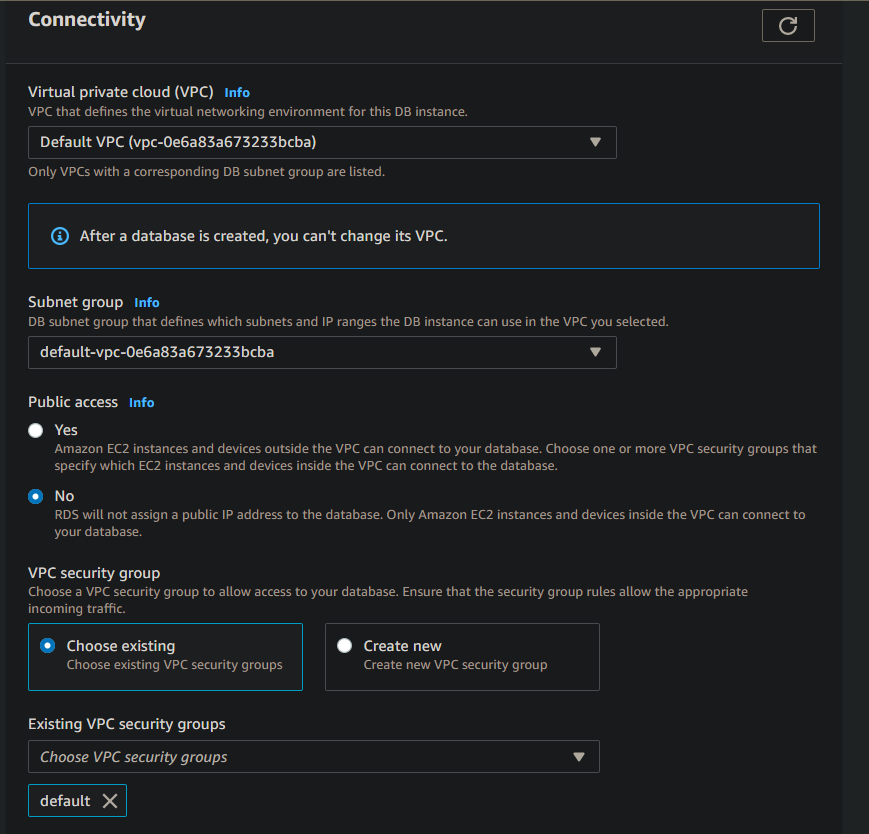
5. Leave the default settings under the Connectivity section as they are based on the values of your snapshot. But you can change these settings as you see fit.
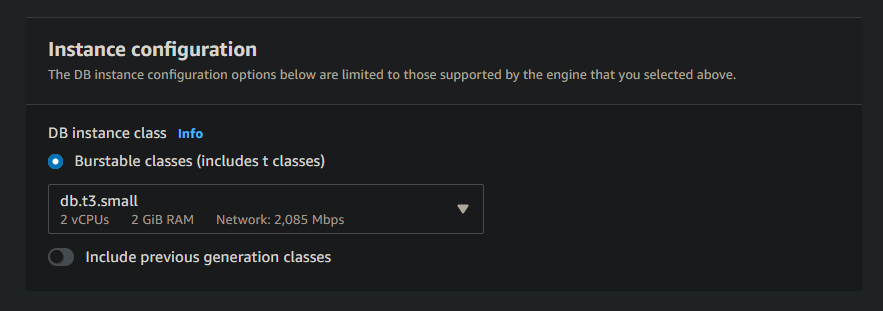
6. Select the instance class and storage type based on your needs on the Instance configuration page from the drop-down field.
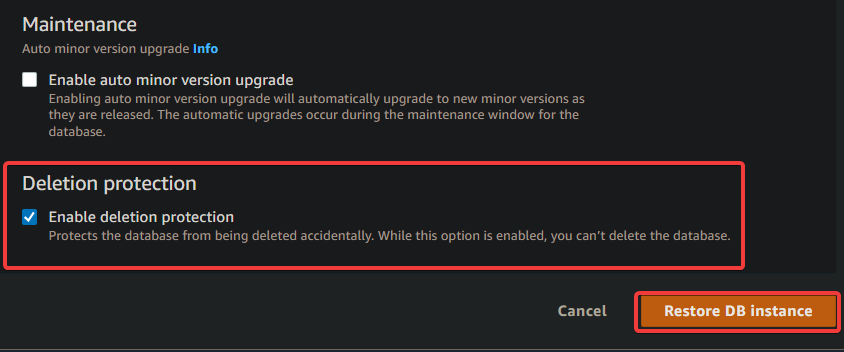
7. Lastly, tick the Deletion protection option under the Maintenance section to protect your database instance from accidental deletion.
Keep all other settings on default, and click Restore DB instance to restore your database from the selected snapshot.
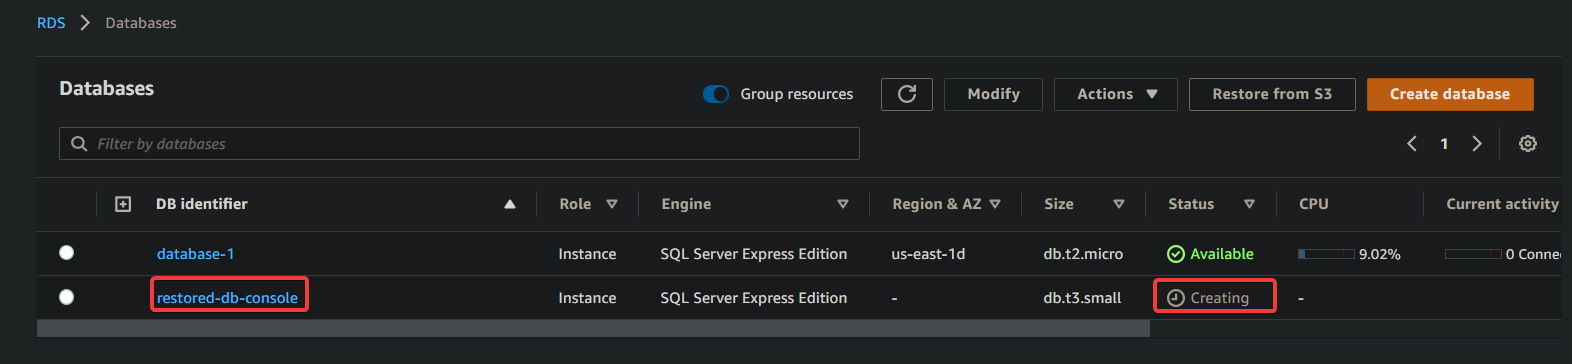
Once completed, you’ll see a list of all DB instances, including the one you just restored, as shown below.
The new instance will be in the Creating state and eventually changes to Available, and you can connect to your database and use it as usual.
Restoring via the AWS CLI
No doubt restoring data from a snapshot using the Amazon RDS Management Console works. But then again, you’ll have to click on the GUI just to restore your data manually.
Luckily, you can achieve the same goal using AWS CLI and running a few commands. AWS CLI lets you restore data from a snapshot so long as you know the snapshot’s name.
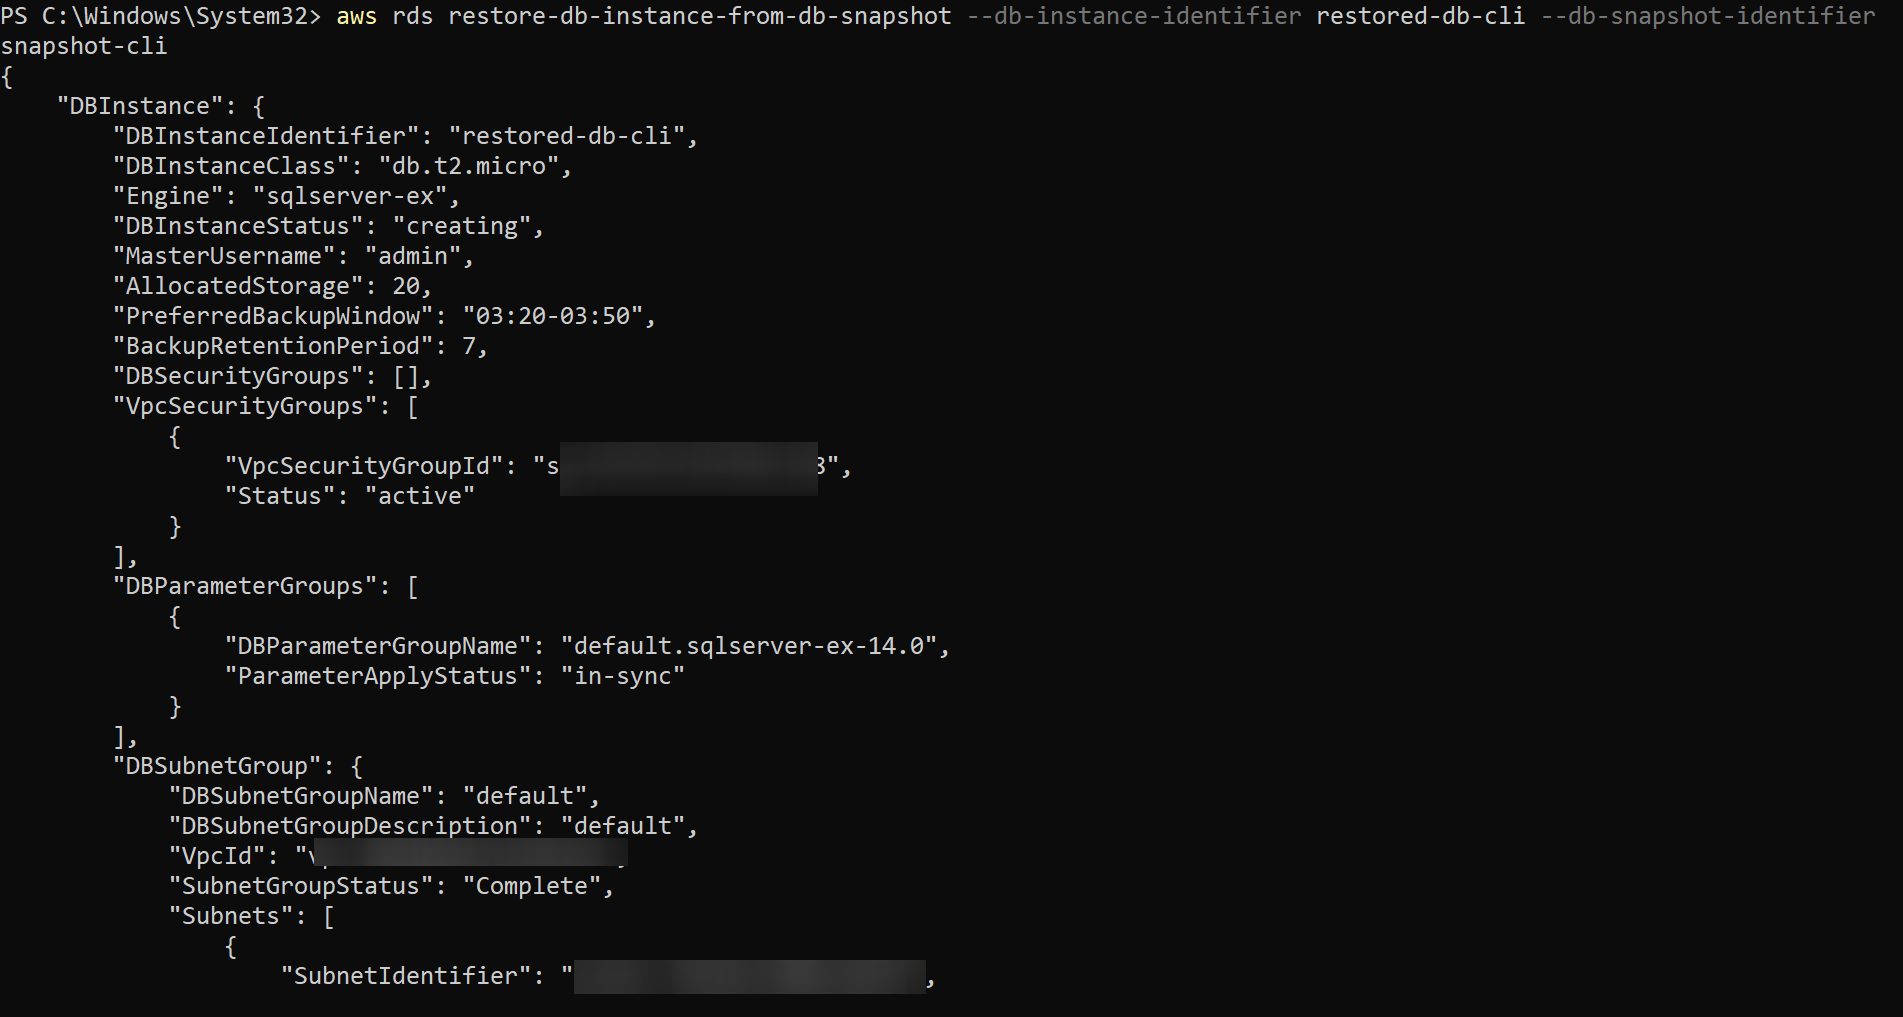
Run the below restore-db-instance-from-db-snapshot command to restore your database instance (snapshot-cli) named restored-db-cli. This command uses the default values for all other settings.
aws rds restore-db-instance-from-db-snapshot --db-instance-identifier restored-db-cli --db-snapshot-identifier snapshot-cli
Next, run the following command to check the status of your new database instance (restored-db-cli).
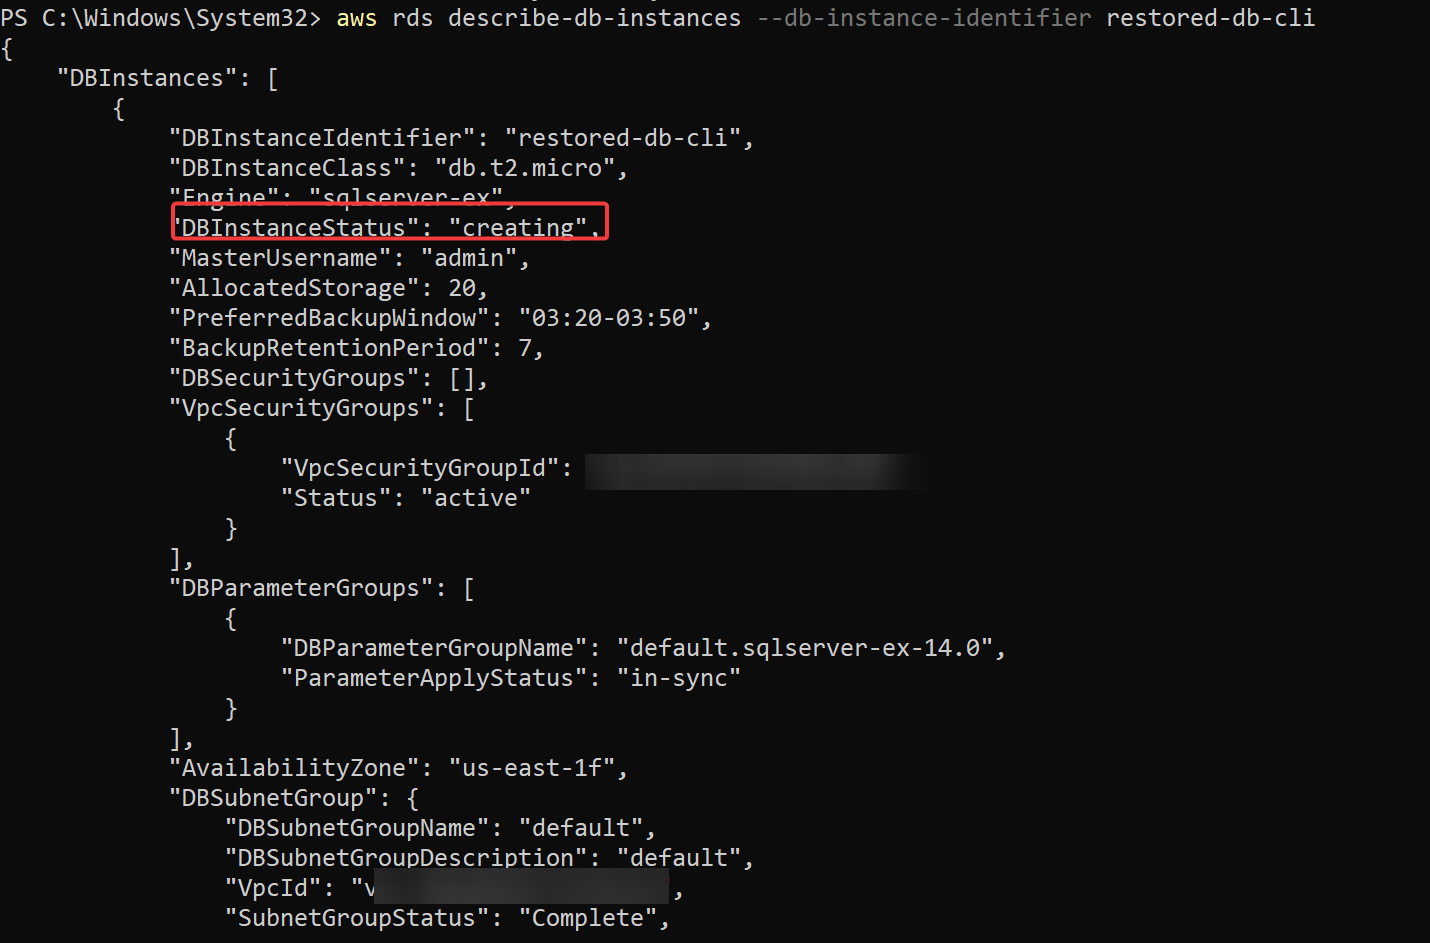
aws rds describe-db-instances --db-instance-identifier restored-db-cli
Like with the Amazon RDS Management Console, the output below shows the new database instance is in the creating state. Once the status changes to available, you can connect to your database and use it as usual.
Cleaning Up Resources
If you no longer need the RDS snapshot and database instance, there’s no need to keep them. Clean up your resources by deleting them to avoid incurring any charges.
The fee for storing an RDS snapshot is up to $0.10 per GB/month at the time of this writing. So if your snapshot is 50 GB in size, you will be charged $5 per month. You are also charged for the storage used by your database instance. The rate depends on the storage type and region you use.
To clean up your resources:
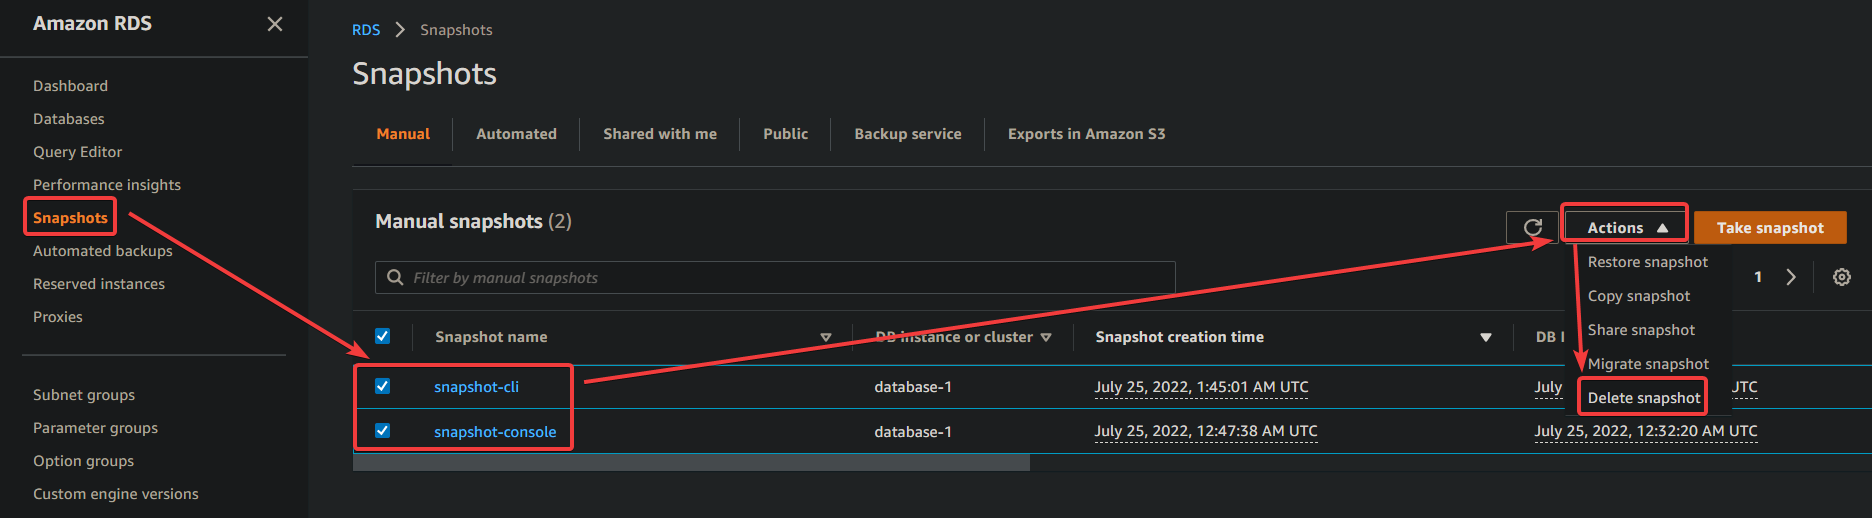
1. On your Amazon RDS page, initiate deleting your snapshots with the following:
- Select Snapshots (left sidebar) to access the list of snapshots available.
- Tick the checkbox next to the snapshot you want to delete.
- Click on the Action drop-down button, and choose Delete snapshot to delete the selected snapshots.
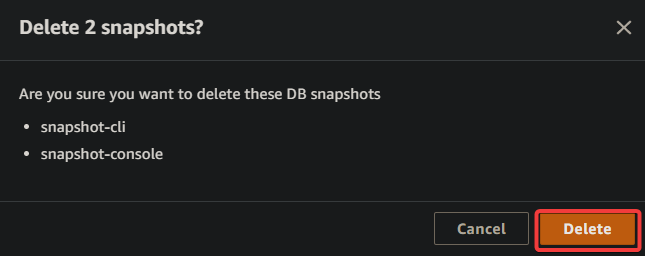
2. Next, review the list of snapshots to delete, and click the Delete button to confirm deleting the snapshots.
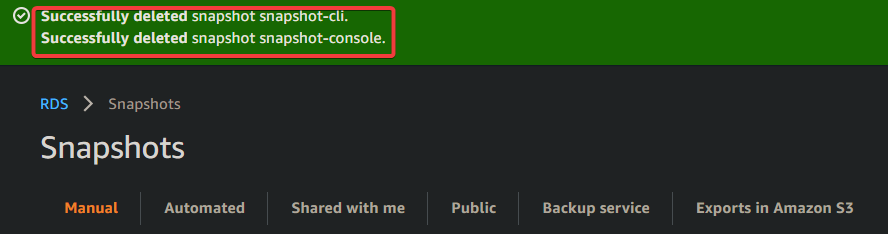
The notification on the screenshot below confirms the snapshots have been successfully deleted.
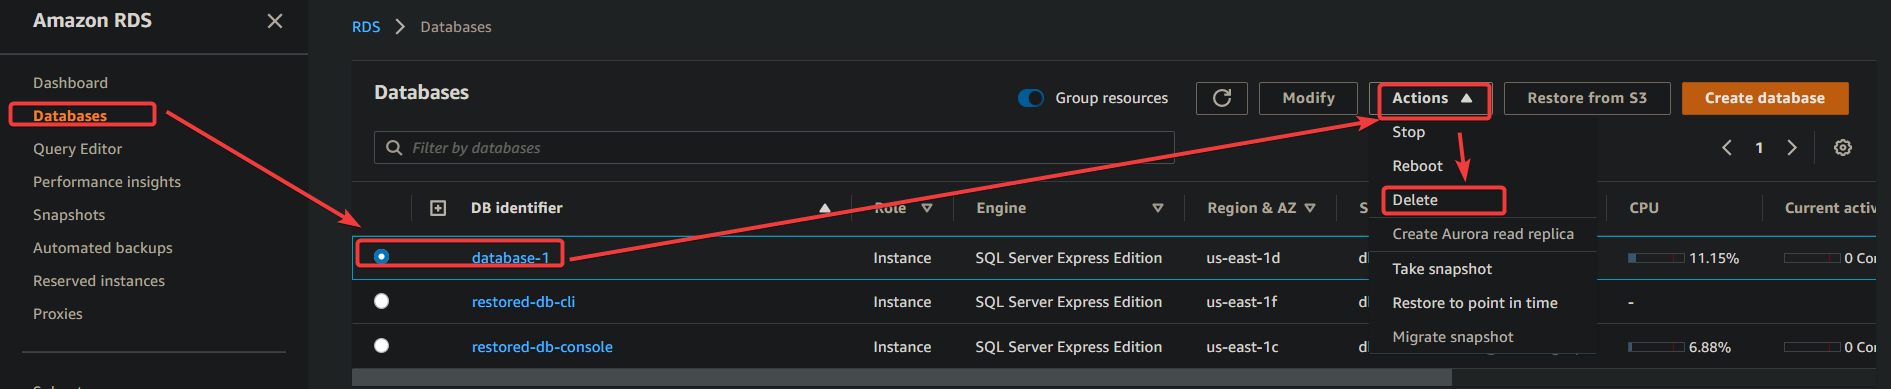
3. Initiate deleting the database instance with the following:
- Navigate to the Databases page, where you can see the list of available databases.
- Tick the radio button next to the instance you want to delete.
- Click on the Action drop-down button, and choose the Delete option to delete the selected database.
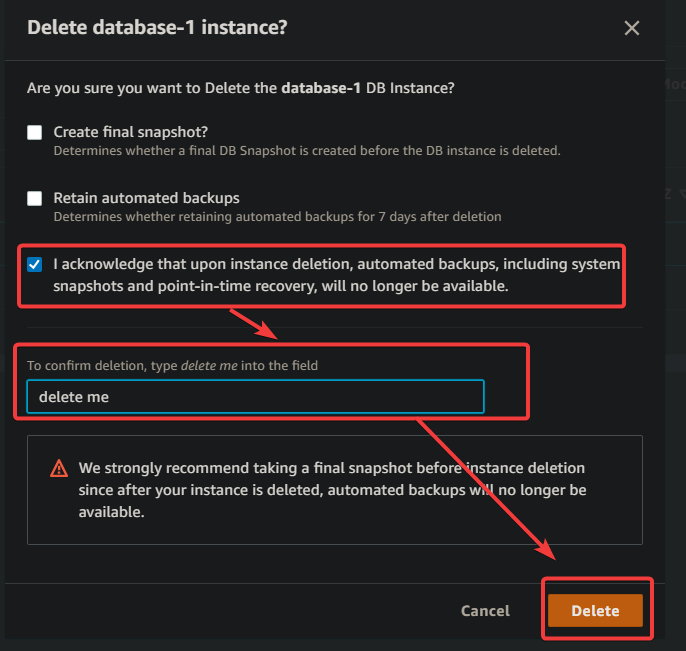
4. Now, tick the acknowledgment option, type delete me in the text box, as shown below, and click Delete (bottom-right) to delete the selected database instance.
Conclusion
Losing or finding out your data has been corrupted can be catastrophic. But with creating an AWS RDS Snapshot, rest assured that your data is in good hands. In this tutorial, you’ve learned how to create and restore an RDS snapshot using the AWS Console and AWS CLI.
At this point, if something goes wrong, you can confidently use your snapshots to back up your database and restore them anytime.
With this newfound knowledge, why not create a multi-AZ RDS instance for even more protection? Or try out some of the other storage types available? There are many possibilities, so get creative and experiment with AWS RDS to see what you can come up with!


