


If you’ve heard about Pulumi and the whole Infrastructure as Code (IaC) way of provisioning resources but aren’t necessarily sure where to start, this tutorial is for you.
This tutorial will introduce you to Pulumi and how it can help provision infrastructure quickly. The tutorial will also build an actual project in Azure to help you see just how much time you can save than building resources by hand.
Let’s get it on!
What is Pulumi?
In the DevOps world, engineers need to automate as many tasks as possible to build efficient pipelines. Engineers must standardize and codify as many tasks as possible. One of those tasks is provisioning the infrastructure to support software.
Pulumi is a development platform that allows users to craft IaC solutions with code to then call upon to deploy resources across on-prem and in nearly every cloud environment.
Pulumi allows developers to write instructions for provisioning resources in multiple languages, define the state of your infrastructure, and Pulumi figures out how to make it happen.
Building a Pulumi Project from Scratch
To understand the power of Pulumi, let’s build an actual project. This project will build a few different resources in Azure written in Python but you can build just about any resources in another language with Pulumi. The project will:
- Create an Azure resource group.
- Create an Azure storage account.
- Create an Azure key vault.
- Clean up all resources created.
By the time you’re done with this project, you should have a good introductory understanding of what Pulumi can do and how to build a project with it.
Prerequisites
To ensure you can follow along with the tutorial, be sure you have the following:
- A Windows 10 or later PC – Pulumi will work with other operating systems, but some tutorial parts will depend on Windows.
- A Pulumi account
- An Azure account to creates the resources.
- The Chocolatey package manager installed locally.
- Python v3.6+ – This tutorial will use Python v3.8.2.
- Azure CLI
Open your terminal of choice (PowerShell in this case), and let’s get started!
Installing Pulumi
To get started, you’ll first need to install Pulumi. One of the quickest ways to install Pulumi is to use the Chocolatey package manager. Once you have Chocolatey installed, run the following command to install the Chocolatey Pulumi package.
choco install pulumi -y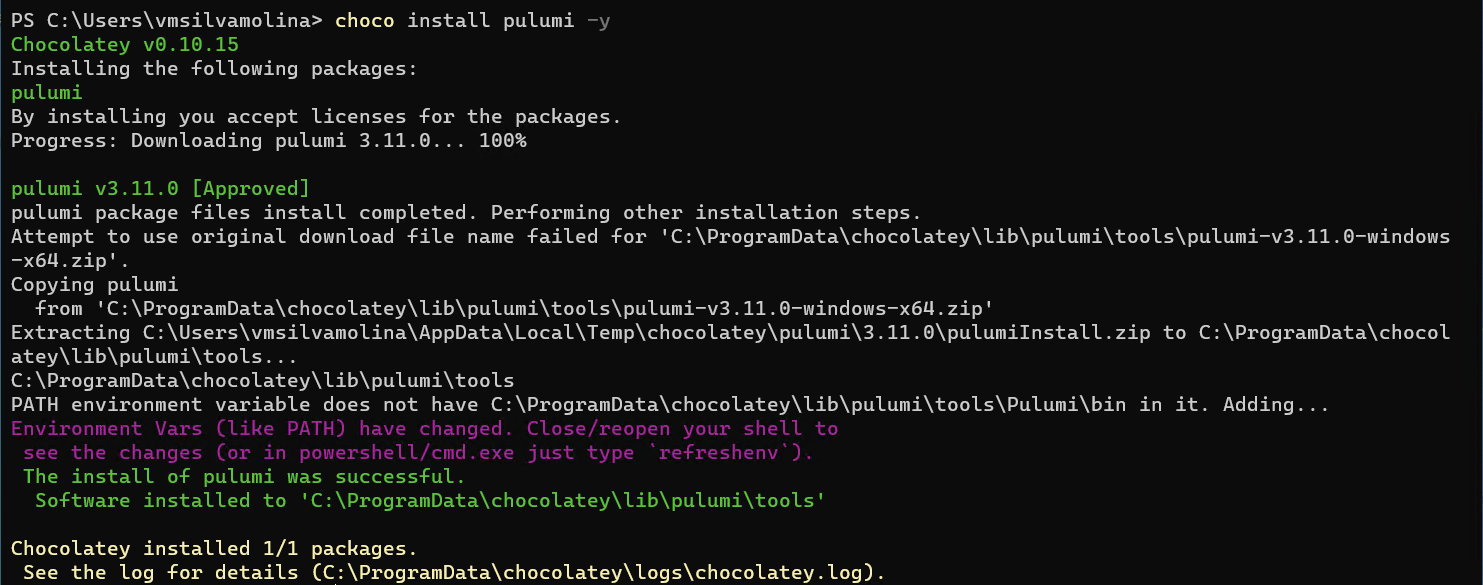
Setting up Pulumi Access to Azure
Once you’ve installed Pulumi, it’s time to set up access to Pulumi itself and give Pulumi access to Azure to create the resources.
To access Azure on the command-line, Pulumi uses credentials stored via the Azure CLI. Pulumi can use an Azure user account or service principal to authenticate to Azure, but this tutorial will use a user account.
To provide credentials to Pulumi, you must first provide credentials to the Azure CLI.
1. Run the below command, and the Azure CLI will provide you with a URL to visit, where you will provide your username and password.
az loginOnce complete, Pulumi will know where to find your Azure credentials and will use that to authenticate to Azure.
2. Now, open your browser, navigate to the app and log in with your Pulumi account.
3. Click on the Settings tab and then on Access Tokens. In the Access Tokens tab, you’ll see all of the tokens you’ve previously created to authenticate with the Pulumi command-line client.
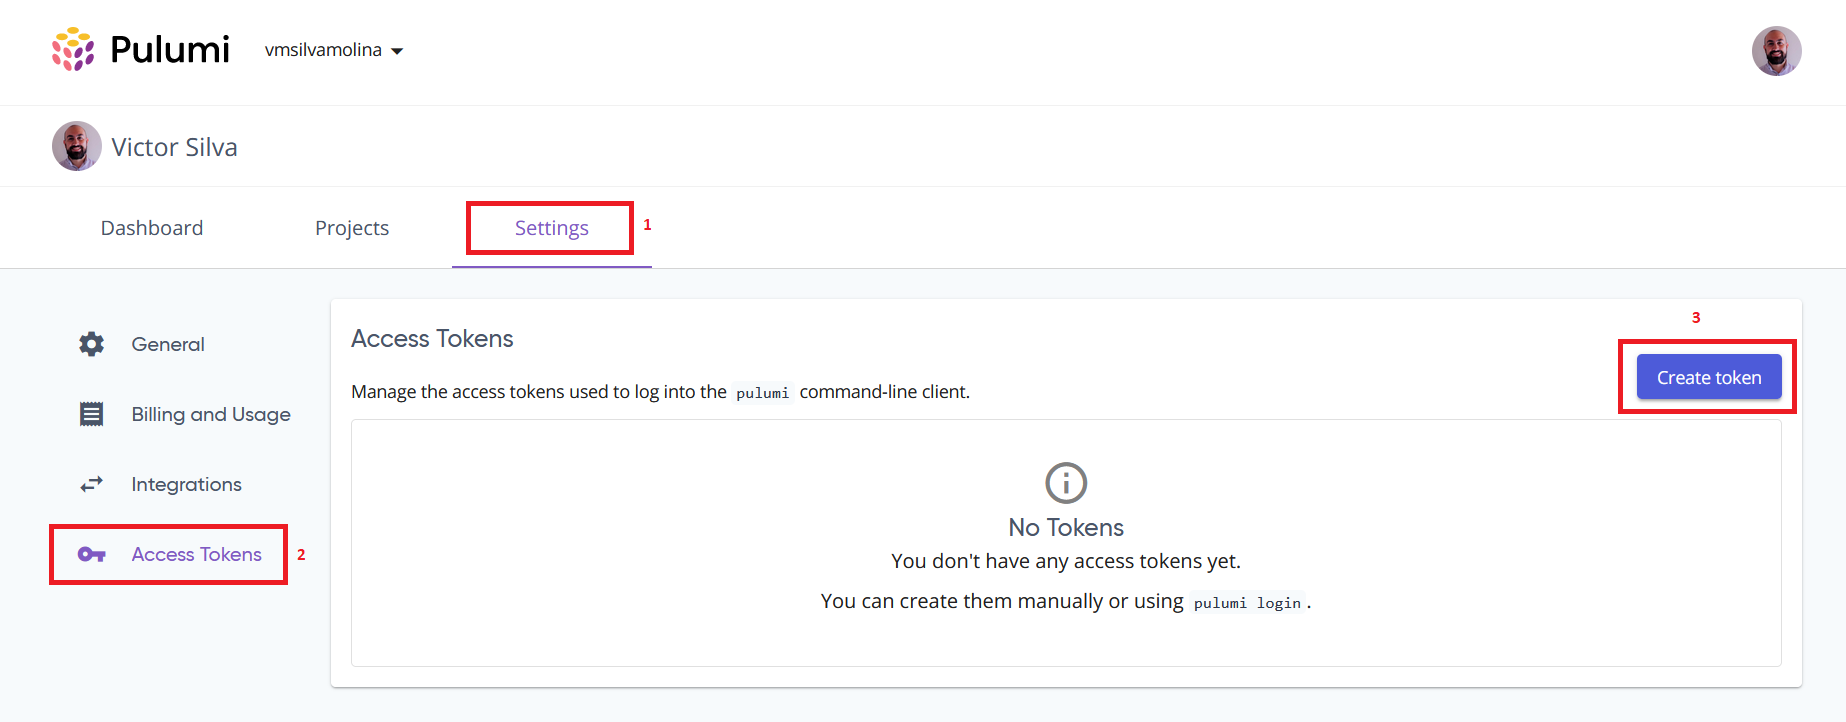
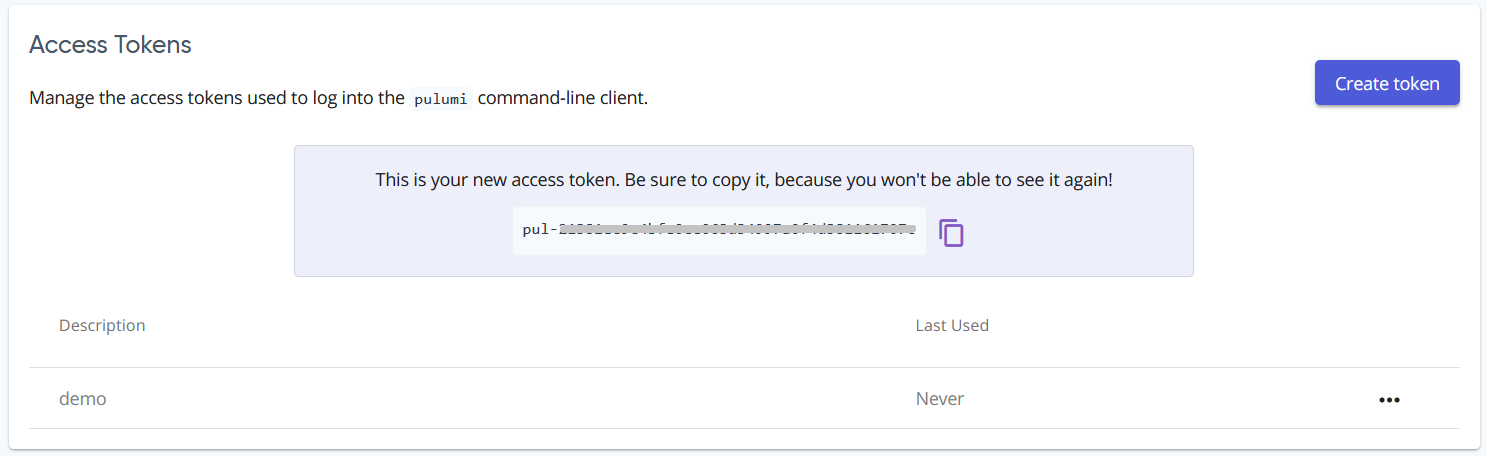
4. Click on Create token and provide a friendly name. This tutorial is calling the token demo. Once created, click on the paper icon to the right of the token to copy it to your clipboard.
Creating a Pulumi Project
Now that you’re all set up and ready to go, let’s create a Pulumi stack and project! Pulumi refers to a project as a folder containing all the files and data it needs to function properly. A stack is an isolated and independently configurable instance of a Pulumi program.
1. To keep this tutorial’s files straight, create a new folder to store all of the project’s files and change to the directory.
mkdir ~/demo
cd ~/demo
2. Next, invoke the Pulumi command-line client to create a new project with the azure-python template (based on the cloud and language specified).
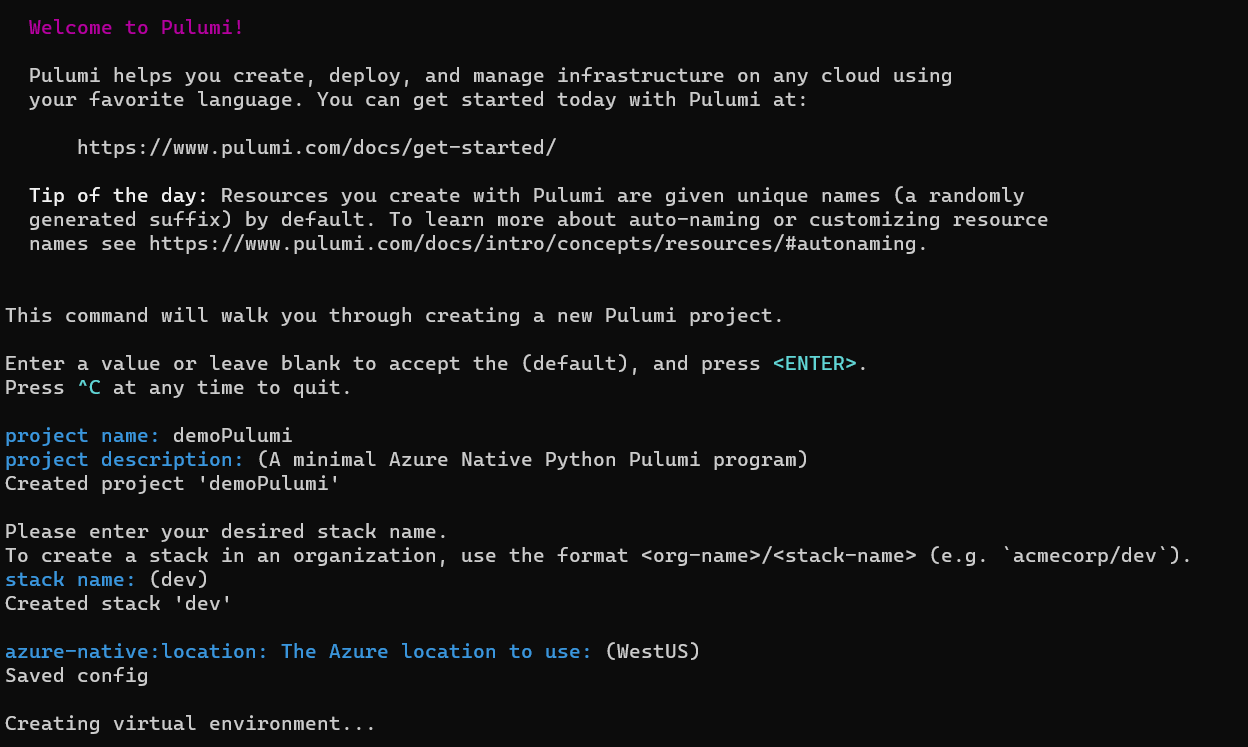
pulumi new azure-pythonWhenever you create a new Pulumi project for Azure, Pulumi creates an Azure resource group, storage account. exports the storage account’s primary key.
Since this is the first time you’re invoking the command-line client, Pulumi will prompt you for the access token from the previous section. Paste that access token into the terminal.

3. Now, provide answers to each prompt Pulumi gives you. This tutorial will be using all defaults.
- Project name
- Project description
- Stack name
- Azure Location – You’ll learn how to change this attribute in the next section.
Don’t worry if you receive an error message about the failed action to run the wheel-building process. Pulumi should still finish the project build. The error is mentioned on the GitHub page here and is still open.
When the process finishes, you will see a like below.

4. Next, set the Azure region you’d like to create all future resources with the pulumi config set command. pulumi config set azure-native:location eastus
pulumi config set azure-native:location eastusOnce you’ve created the project and need to change anything about it, you can use the
pulumi config setcommand to change any necessary attributes.
5. Now, review the project by listing all of the files in the current directory with ls. You should see three different files in this project directory.
- Pulumi.yaml – A YAML file that defines the Pulumi project such as the name, description, and runtime like
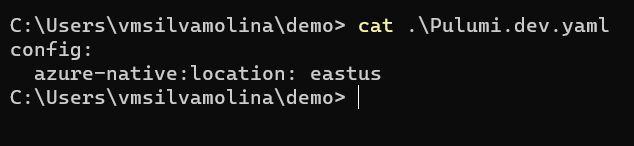
nodejs,python,dotnet, orgo. - Pulumi.dev.yaml – A YAML file specific to the environment you’re deploying resources to; in this case, the dev environment. This file contains various configuration values, such as a different number of servers for a specific role, specific sizes for VMs, etc., for the initialized stack. At this time, Pulumi.dev.yaml should only have the Azure location defined with the last command executed.
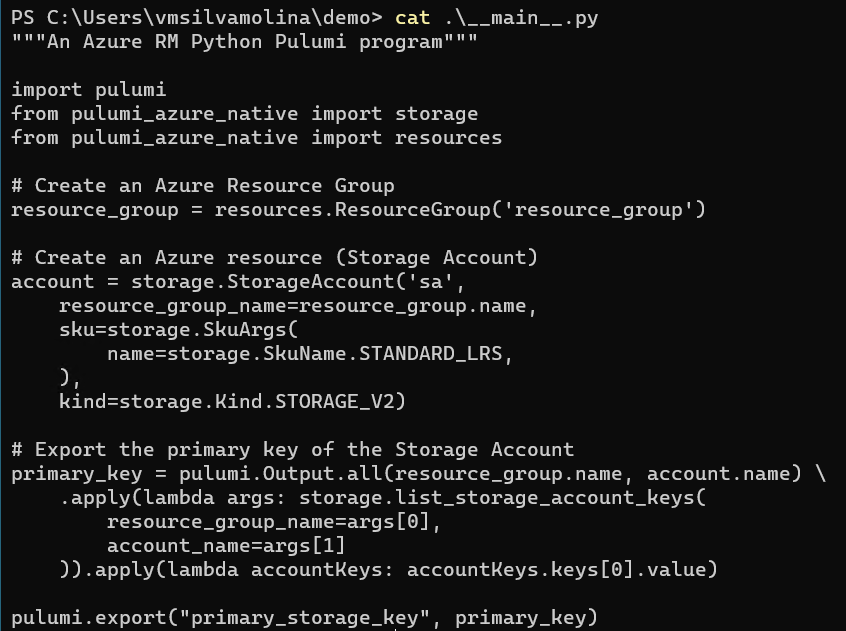
- main.py – The Python script that will define all of the Azure resources Pulumi will build.
6. Next, find your Azure AD tenant ID and user object ID for the user account you provided earlier. You’ll need these values to add to the Python script, defining where to query and create resources. To do that, run the following commands.
## Find the Azure tenant ID
az account list --query "[?isDefault]" | findstr "tenantId"
## Find the Azure user ID
az ad signed-in-user show --query "[objectId]"
7. Open a code editor and edit the main.py script to add the tenantId and objectId variables, replacing the 0s with your specific IDs found in step six.
Also, add the Azure keyvault resource. The tutorial is creating this resource as an example. You’re free to create any kind of Azure resource you’d like. You’ll see the key vault uses an access policy assigned to the logged user (object_id=objectId).
import pulumi
from pulumi_azure_native import storage
from pulumi_azure_native import resources
from pulumi_azure_native import keyvault

# Define two variables needed to run this program (get the info from Azure)
tenantId = "00000000-0000-0000-0000-000000000000"
objectId = "00000000-0000-0000-0000-000000000000"

# Create an Azure Resource Group
resource_group = resources.ResourceGroup('resource_group')

# Create an Azure resource (Storage Account)
account = storage.StorageAccount('sa',
    resource_group_name=resource_group.name,
    sku=storage.SkuArgs(
        name=storage.SkuName.STANDARD_LRS,
    ),
    kind=storage.Kind.STORAGE_V2)

# Create a second Azure resource (Key Vault)
vault = keyvault.Vault("vault",
    properties=keyvault.VaultPropertiesArgs(
        access_policies=[keyvault.AccessPolicyEntryArgs(
            object_id=objectId,
            permissions=keyvault.PermissionsArgs(
                certificates=[
                    "get",
                    "list",
                    "delete",
                    "create",
                    "import",
                    "update",
                    "managecontacts",
                    "getissuers",
                    "listissuers",
                    "setissuers",
                    "deleteissuers",
                    "manageissuers",
                    "recover",
                    "purge",
                ],
                keys=[
                    "encrypt",
                    "decrypt",
                    "wrapKey",
                    "unwrapKey",
                    "sign",
                    "verify",
                    "get",
                    "list",
                    "create",
                    "update",
                    "import",
                    "delete",
                    "backup",
                    "restore",
                    "recover",
                    "purge",
                ],
                secrets=[
                    "get",
                    "list",
                    "set",
                    "delete",
                    "backup",
                    "restore",
                    "recover",
                    "purge",
                ],
            ),
            tenant_id=tenantId,
        )],
        enabled_for_deployment=True,
        enabled_for_disk_encryption=True,
        enabled_for_template_deployment=True,
        sku=keyvault.SkuArgs(
            family="A",
            name="standard",
        ),
    tenant_id=tenantId,
    ),
    resource_group_name=resource_group.name,
    vault_name="demopulumikeyvault")

# Export (print in the output) the primary key of the Storage Account
primary_key = pulumi.Output.all(resource_group.name, account.name) \
    .apply(lambda args: storage.list_storage_account_keys(
        resource_group_name=args[0],
        account_name=args[1]
    )).apply(lambda accountKeys: accountKeys.keys[0].value)

pulumi.export("primary_storage_key", primary_key)
Deploying Azure Resources with Pulumi
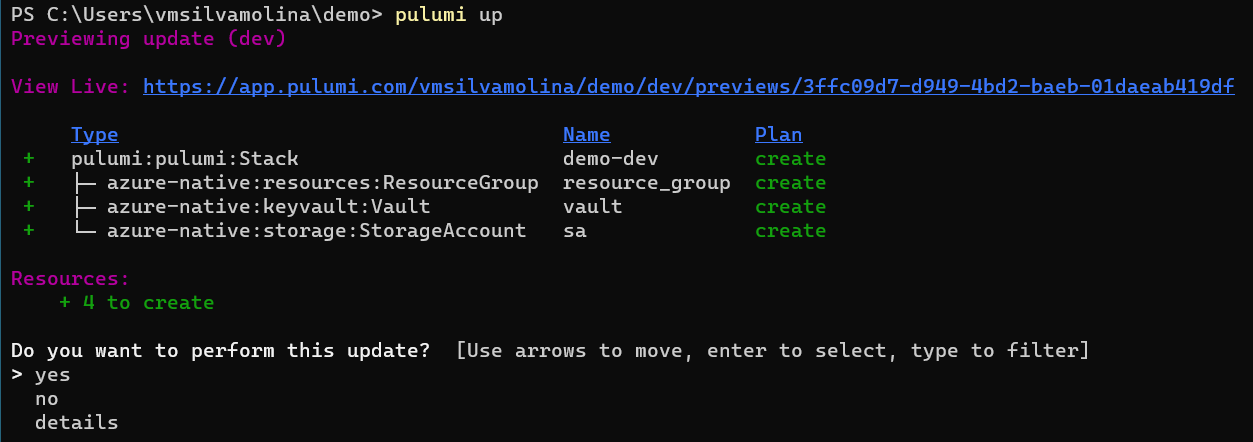
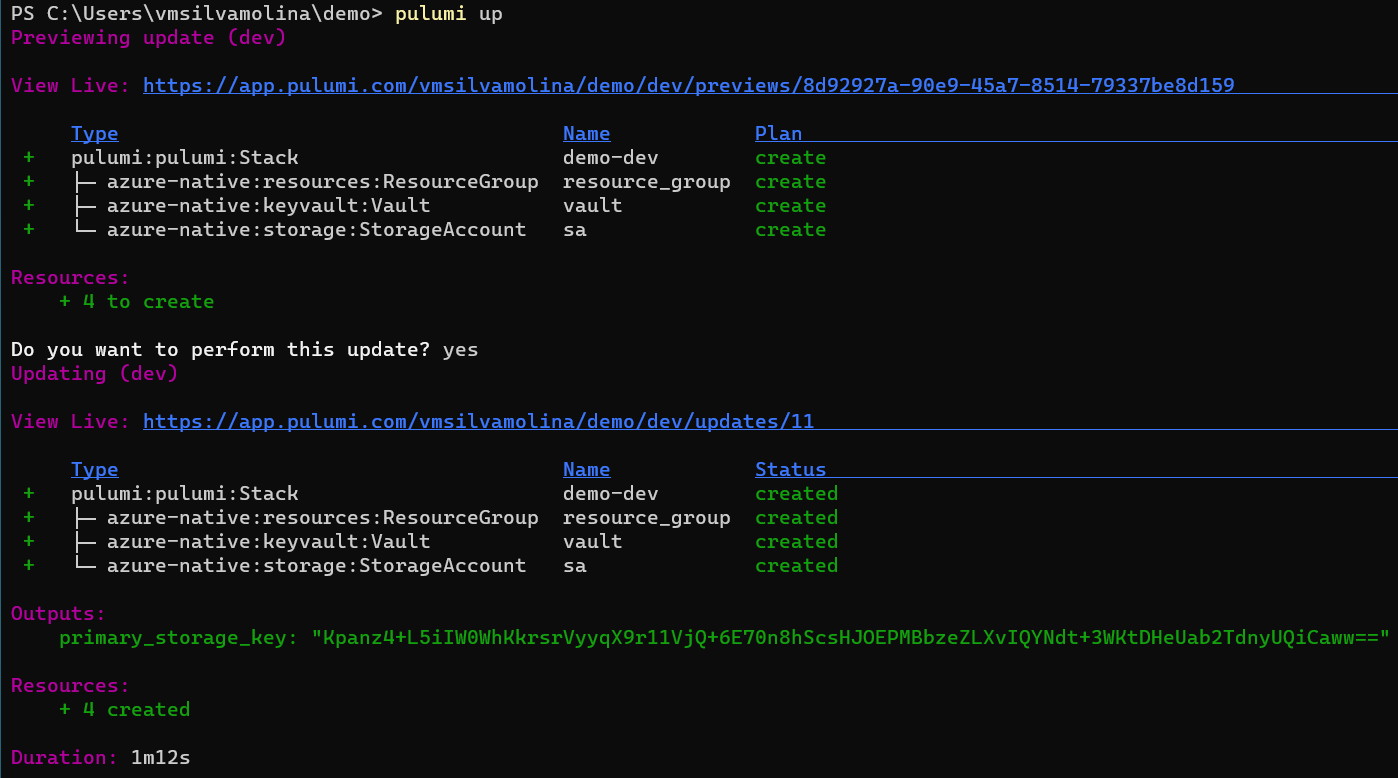
Now that you’ve created the project, you should be ready to deploy it! To do so, run pulumi up to start the deployment to Azure and select Yes to continue deployment, as shown below.
If all goes well, you should see a great status under the Outputs section and the number of Resources created in green.
Cleaning Up
Once you’re done learning with the resources you just provisioned with Pulumi, go ahead and clean things up with pulumi destroy, providing the stack directory that contains the Pulumi project.
pulumi destroy -s ~/demo/devConclusion
Pulumi is an excellent tool to manage cloud resources and start to work in a modern cloud engineering way taking advantage of development skills. This tutorial only covered creating Azure resources with Python but you can build many different resources in different clouds, even with different languages with Pulumi.
What do you plan to create with Pulumi?


