

Are you looking for a graphical way to notify users of your scripts or gather feedback? The world has changed since the good old days of Windows.MessageBox-based message boxes. But luckily, a modern PowerShell message box is up to the task. How?
In this tutorial, you will learn two of the newer and more powerful tools you can use to generate a PowerShell message box, Terminal.Gui and Avalonia. Between these two tools, you can not go wrong.
Read on and craft message boxes that users simply cannot ignore!
Prerequisites
This tutorial will be a hands-on demonstration. To follow along, be sure you have the following:
- PowerShell 7+ – This tutorial uses PowerShell 7.3.
- A Fedora machine – This tutorial uses Fedora 35 (with PowerShell installed) to create and launch the Terminal.Gui-based message box, though this also will work in Windows as well.
- A Windows machine – This tutorial uses Windows 10 to create and launch the Avalonia-based message box
Crafting a PowerShell Message Box via the Terminal.Gui
The Terminal.Gui tool provides Terminal User Interfaces (TUI), which lets you create a PowerShell message box using the terminal. But before creating a PowerShell message box, you must first install Terminal.Gui on your system.
1. Log in to your Fedora machine, open the terminal, and run the pwsh command below to access the PowerShell prompt.
pwsh
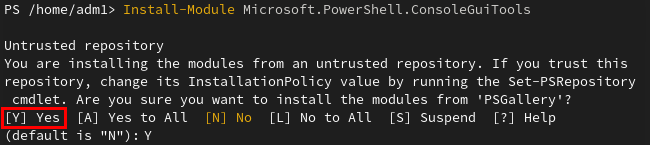
2. Next, execute the Install-Module cmdlet below to install the ConsoleGuiTools module. This module gives you access to the Terminal.Gui tool in PowerShell.
Install-Module Microsoft.PowerShell.ConsuleGuiToolsType Y and press Enter when prompted, as shown below, to trust the source repository of the module and start the installation.
3. Once installed, create a new file in your favorite text editor, populate the following script into the file, and save it. You can name the script as you like, but this tutorial’s choice is prompt-test.ps1.
The code below tells PowerShell to launch a message box with the Query method of the Terminal.Gui.MessageBox object. Query, which is the focal point of the code below, takes at least three arguments, as follows:
Query(title, message, buttons)| Arguments | Description |
| Title | The message box’s title is set to “Important” for this tutorial. |
| Message | The text to display to the user of your application. For this tutorial, the message is set to “Do you love PowerShell?”. |
| Button | The names of the buttons in the message box, in this case, Yes and No. Each will be assigned an internal numerical value (0 and 1) based on its position. That value will be returned to the script for onward processing. |
# Import the module
Import-Module Microsoft.PowerShell.ConsoleGuiTools

# Load the Terminal.Gui assembly
$module = (Get-Module Microsoft.PowerShell.ConsoleGuiTools -List).ModuleBase
Add-Type -Path (Join-path $module Terminal.Gui.dll)

# Initialise Terminal.Gui
[Terminal.Gui.Application]::Init()

# Create a message box and assign the result of a selection to a variable
$result = [Terminal.Gui.MessageBox]::Query("Important", "Do you love PowerShell?", @("Yes", "No"))

# Utilise the result of the selection
# Write output to the terminal window and close the message box
if ($result -eq 0)
{
    # Shutdown the GUI application gracefully
    [Terminal.Gui.Application]::shutdown()
    write-host("It's good you love PowerShell!")
}
if ($result -eq 1)
{
    # Shutdown the GUI application gracefully
    [Terminal.Gui.Application]::shutdown()
    write-host("Too bad, PowerShell is great. Give it a chance.")
}
💡 Besides creating a script, note that you can invoke a message box or other visual user interface elements directly from the prompt.
4. Now, switch to your PowerShell prompt, and run the below command to execute the script (*prompt-test.ps1*) from the working directory (.)
./prompt-test.ps1If the script works, a small message box appears on your screen, as shown below.
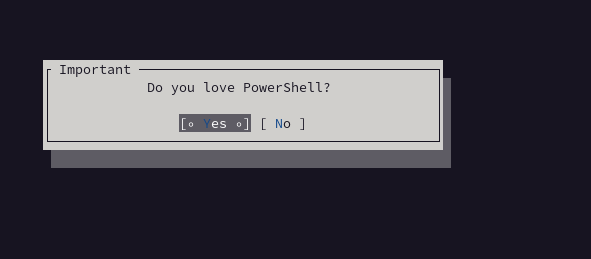
5. Lastly, select an option, Yes or No, and see what response you will get in your PowerShell prompt. You can use the mouse or the keyboard for navigation.
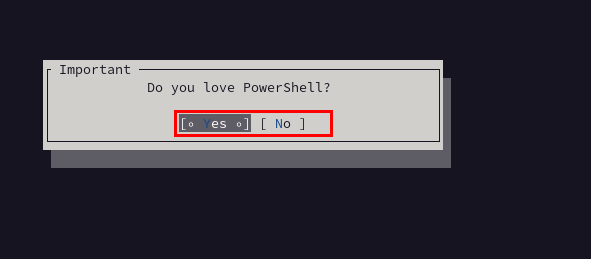
Based on your chosen option, you will have the appropriate response in your PowerShell prompt, as shown below.

Creating a PowerShell Message Box with Avalonia
If you are more into seeing a Windows message box, Avalonia is an excellent option. You will generate a message box using Avalonia, which provides a full-blown GUI window.
But first, you must register NuGet as a package source. Avalonia and other necessary packages will be downloaded through NuGet.
Log in to your Windows machine, open PowerShell as administrator, and run the following command. This command registers (Register-PackageSource) NuGet as a package source under MyNuget (or any name you prefer).
Register-PackageSource -Name MyNuGet -Location <https://www.nuget.org/api/v2> -ProviderName NuGet
Installing Avalonia
Before taking advantage of Avalonia, like Terminal.Gui, you first have to install Avalonia on your machine.
1. Execute the Install-Package cmdlet below to install the netstandard.library package for your user account only. This package is a dependency for Avalonia.
The command below turns on the -SkipDependencies switch to avoid errors with non-critical netstandard.library dependencies.
Install-Package -Name netstandard.library -Scope CurrentUser -SkipDependenciesType A and press Enter to confirm the installation when prompted, as shown below.

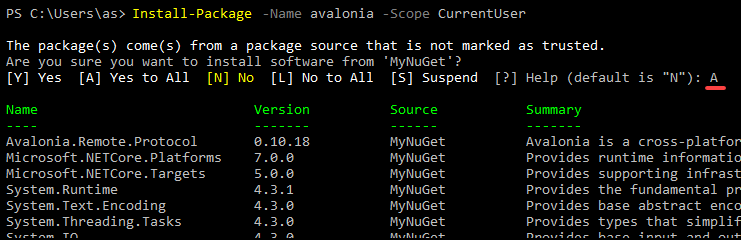
2. Next, run Install-Package to install the avalonia package for the CurrentUser only. Installation for the current user allows you to carry on without an elevated command prompt.
Install-Package -Name avalonia -Scope CurrentUserConfirm the installation when prompted, as shown below, and you will see a list of dependencies and packages installed along the way.
3. Now, run the below command to install the PSAvalonia package, which provides direct PowerShell bindings for Avalonia.
Install-Package -name psavalonia -scope CurrentUser 
Creating a Message Box
With Avalonia and its dependencies installed, you can create a modern PowerShell message box. You will create a PowerShell script that functions similarly to your script for Terminal.Guit o create your message box.
1. Create a new file, add the code below, and save it as a PowerShell script. You can name the script as you prefer, but this tutorial uses msgbox.ps1 as the script name.
This code functions similarly to your script for Terminal.Gui, but this time, the message box is designed via XAML.
# Design a message box
$Xaml = '<Window xmlns="https://github.com/avaloniaui"
        xmlns:x="http://schemas.microsoft.com/winfx/2006/xaml"
        xmlns:d="http://schemas.microsoft.com/expression/blend/2008"
        xmlns:mc="http://schemas.openxmlformats.org/markup-compatibility/2006"
        mc:Ignorable="d" d:DesignWidth="300" d:DesignHeight="200"
		Width="300"
		Height="200"
        x:Class="avaloniaui.MainWindow"
        Title="Important">
   <StackPanel>
	<TextBlock Margin="10" Name="msg" VerticalAlignment="Top" Width="200" Height="25"> Do you love PowerShell? </TextBlock>
	<Button Width="160" Name="button1">Yes</Button>
	<Button Width="160" Margin="10" Name="button2">No</Button>

    </StackPanel>
</Window>'

# Convert XAML description to Avalonia object
$window = ConvertTo-AvaloniaWindow -Xaml $Xaml

# Map Avalonia controls to PowerShell variables
$Button1 = Find-AvaloniaControl -Name 'button1' -Window $Window
$Button2 = Find-AvaloniaControl -Name 'button2' -Window $Window

# Handle responses once the message box is loaded.
# Write to the terminal and close the message box.
$Button1.add_Click({
	write-host("It's good you love PowerShell!")
	$window.close()
	})
$Button2.add_Click({
	write-host("Too bad, PowerShell is great. Give it a chance.")
	$window.close()
	})

# Show message box
Show-AvaloniaWindow -Window $Window
2. Next, run the pwsh command below to execute your script (msgbox.ps1).
pwsh .\msgbox.ps13. Now, select any option from the message box that appears.
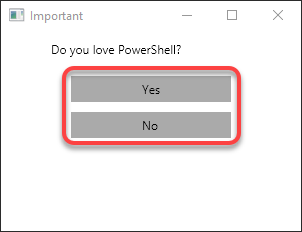
Based on your chosen option, the appropriate response is returned to the terminal like the one below.

Conclusion
The skills in creating PowerShell message box come in handy with your PowerShell scripts, whether to make interactive tasks or notify users. And in this tutorial, you have discovered tools (Terminal.Gui, and Avalonia) to craft a modern PowerShell message box.
Why not get further acquainted with either of the tools you learned about in this tutorial?
With Terminal.Gui, try adding extra elements like checkboxes and menus to your message box. Or perhaps, visually design the message box with Ironman Software’s Terminal GUI designer. For Avalonia, you can play around with more controls, such as textboxes, combo boxes, and calendars.


