


Coming across hashtables for the first time, you may wonder what they are and how they play a crucial part in your scripts or commands. Worry not! This tutorial has you covered in getting started using PowerShell hashtable.
In a nutshell, hashtables allow you to store and manipulate data using key-value pairs, which can be accessed quickly and efficiently. And in this tutorial, you will learn the basics of hashtables and how to use them for your PowerShell scripts and commands.
Read on and start expanding your skill set with PowerShell hashtables!
Prerequisites
This tutorial will be a hands-on demonstration. To follow along, be sure you have a system with PowerShell v5+ installed and configured. This tutorial uses Windows 10 with PowerShell 7, but other versions of PowerShell and Windows will work.
Creating a PowerShell Hashtable
Retrieving specific data can turn into “a needle in a haystack” situation at some point. But with hashtables, you can quickly search particular items in an extensive data collection.
In PowerShell, hashtables are flexible data structures used in many ways, such as storing configuration data, passing arguments to cmdlets, and storing data in a script.
To see how a PowerShell hashtable works, you will first have to create one as follows:
1. Open a PowerShell session, and run the following command, which does not produce output but declares a variable called name to reference an empty hashtable.
As you can see below, similar to the arrays in PowerShell, hashtables are defined using the @ symbol.
$name = @{}2. Next, run the below command to verify the name variable’s type (GetType()).
$name.GetType()The name variable’s type is Hashtable, as shown below. This information confirms your hashtable was successfully created.

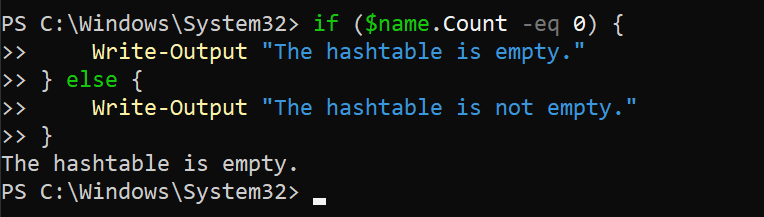
3. After verifying your hashtable, run the following code to check if the hashtable is empty or not.
The code below determines if the Count property is equal (-eq) to 0, and prints a corresponding message.
# Compare if the Count property value is equal (-eq) to 0
if ($name.Count -eq 0) {
	# If yes, print the below message.
  Write-Output "The hashtable is empty."
} else {
	# Otherwise, print the message below instead.
  Write-Output "The hashtable is not empty."
}Below, you can see the hashtable is empty since you just created it, and there are no key-value pairs defined in it.
Adding Items to a PowerShell Hashtable
You have just created a practically empty PowerShell hashtable, which can only be useful if you add items. How? By adding key-value pairs to the hashtable.
Similar to an array, but instead of using integers as indices, a PowerShell hashtable uses keys (which can be any data type) to identify the values. This feature allows a quick insertion, retrieval, and deletion of items from the hashtable, as the key quickly locates the corresponding value.
Below is the syntax for adding a key-value pair to a PowerShell hashtable, where:
$hashtable– The name of the hashtable.$key– The name of the key, which are case-insensitive. For example, “FirstName” and “firstname” would be considered the same key in a hashtable$value– The value to associate with the key.
$hashtable[$key] = $valueRun the following code, which does not produce output to the console but declares key-value pairs, and add them to your hashtable ($name).
In a hashtable, the key lets you perform a hashing function, which maps the key to a specific location in the hashtable’s internal data structure.
💡 Hashtable values can be of any type, such as numbers, strings, arrays, objects, and other data types as values in a hashtable.
# Declare the key FirstName
$key = "FirstName"
# Declare the value of the key
$value = "John"
# Add the item to the hashtable
$name[$key] = $value
# Declare the key LastName
$key = "LastName"
# Declare the value of the key
$value = "Doe"
# Add the item to the hashtable
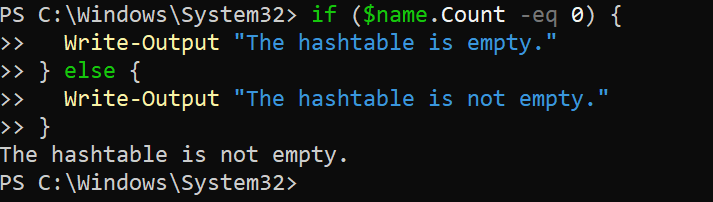
$name[$key] = $valueNow, rerun the code below to check if your hashtable is empty.
if ($name.Count -eq 0) {
  Write-Output "The hashtable is empty."
} else {
  Write-Output "The hashtable is not empty."
}
As shown below, you will receive a message saying the hashtable is not empty this time.
Retrieving Items from a PowerShell Hashtable
Suppose you are confident that your hashtable is not empty. How do you know which items exist in your hashtable? Luckily, you can retrieve items from your hashtable too.
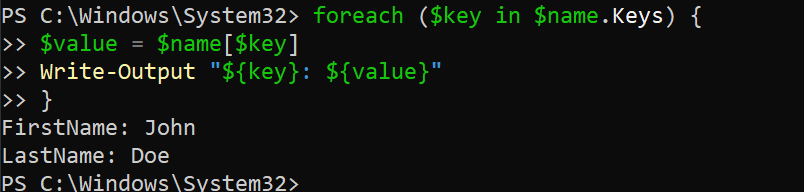
Run the code below to retrieve and output (Write-Output) all items from your hashtable in key-value pairs, one per line.`
# Iterates through all the key-value pairs in the hashtable
foreach ($key in $name.Keys) {
	$value = $name[$key]
  # Outputs all the key-value pairs in the hashtable, one per line.
	Write-Output "${key}: ${value}"
}
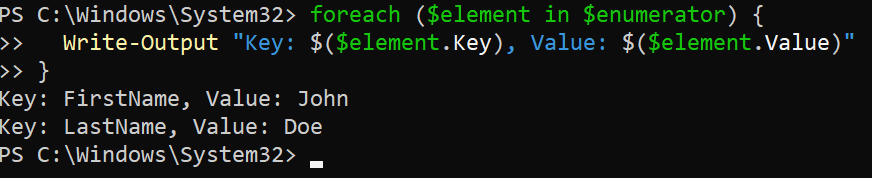
Now, run the below code to retrieve and print (Write-Output) all items in a hashtable to the console.
💡 Note that you will often use the following code through this tutorial. You can avoid copying and pasting the same code multiple times by creating a function, but it is out of the scope of this tutorial.
# Get an object that can be used to iterate over the elements of a collection.
$enumerator = $name.GetEnumerator()
foreach ($element in $enumerator) {
	# Outputs a string that includes the key and value of each element in the collection.
	Write-Output "Key: $($element.Key), Value: $($element.Value)"
}
This time, you can see indications of which are the keys and values among the items listed.
Creating Hashtables with Predefined Values
So far, you have only looked at creating empty hashtables. But if you know that certain values will always be needed in your hashtable, you can create one with predefined values.
Hashtables with predefined values can save you time and make your code more efficient since you do not have to add the values to the hashtable later on.
💡 Note that creating hashtables does not produce output. But no worries. In this tutorial, you will verify each hashtables post creation.
1. Run the below command to create a hashtable ($hashtable1) with three key-value pairs.
$hashtable1 = @{
"Key1" = "Value1"
"Key2" = "Value2"
"Key3" = "Value3"
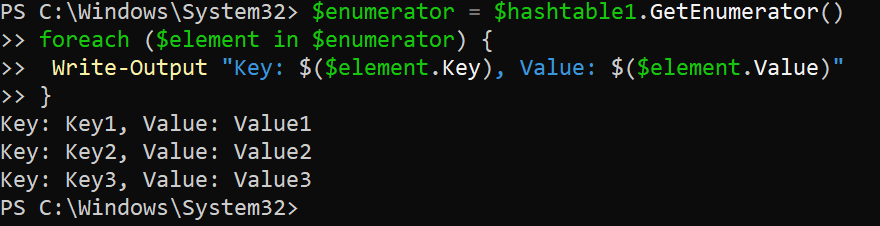
}2. Next, run the following code to verify the new hashtable (hashtable1) exists.
# Get an object that can be used to iterate over the elements of a collection.
$enumerator = $hashtable1.GetEnumerator()
foreach ($element in $enumerator) {
  # Outputs a string that includes the key and value of each element in the collection.
	Write-Output "Key: $($element.Key), Value: $($element.Value)"
}
You will see that the values for each key-value pair are printed on the screen as expected. This output confirms the predefined values are stored in the appropriate locations in the hashtable.
3. Now, run the code below to create a hashtable ($hashtable2) with predefined values using a loop (or an array).
$keys = "Key1", "Key2", "Key3"
$values = "Value1", "Value2", "Value3"
$hashtable2 = @{}
for ($i = 0; $i -lt $keys.Count; $i++) {
$hashtable2[$keys[$i]] = $values[$i]
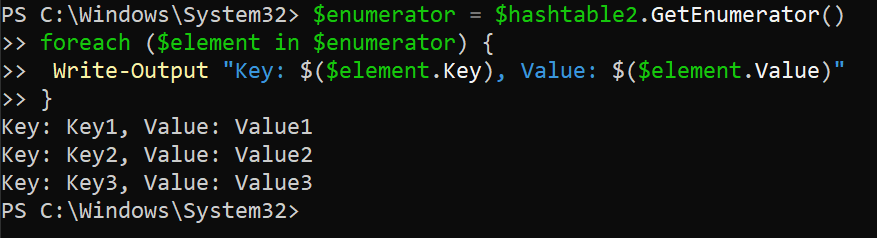
}4. Lastly, run the below code to verify that the new hashtable (hashtable2) was created successfully.
# Get an object that can be used to iterate over the elements of a collection.
$enumerator = $hashtable2.GetEnumerator()
foreach ($element in $enumerator) {
	# Outputs a string that includes the key and value of each element in the collection.
	Write-Output "Key: $($element.Key), Value: $($element.Value)"
}
The output below confirms that the loop method works when creating a hashtable with predefined values. But since the items are listed randomly, jump to the following section for a fix.
Creating an Ordered List of Items in Hashtables
By default, the items in a hashtable are stored in no particular order. But what if you need an ordered list? You can also create an ordered list of items in your hashtables to arrange data in a specific order.
To create an ordered list of items in your hashtable, use the [ordered] attribute as follows:
1. Run the following code to create an [ordered] list of items in a hashtable ($hashtable3).
$hashtable3 = [ordered]@{
"Key1" = "Value3"
"Key2" = "Value2"
"Key3" = "Value1"
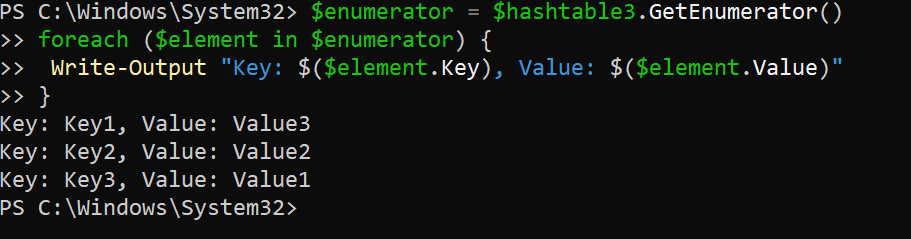
}2. Next, run the following code to verify the ordered list of hashtables has been created successfully.
# Get an object that can be used to iterate over the elements of a collection.
$enumerator = $hashtable3.GetEnumerator()
foreach ($element in $enumerator) {
	# Outputs a string that includes the key and value of each element in the collection.
	Write-Output "Key: $($element.Key), Value: $($element.Value)"
}
As shown below, the listed items remain in the order you defined them when you created the hashtable.
Some possible benefits of using an ordered hashtable include but are not limited to the following:
| Benefits | Description |
| Easier to read and debug | The elements are displayed in a predictable order, which can be especially useful if you work with many elements of a large hashtable. |
| Improved performance | An ordered hashtable can be more efficient when accessing elements frequently in a specific order. |
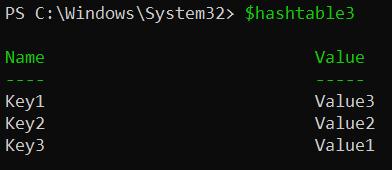
3. Lastly, call your ordered hashtable ($hashtable3) to confirm further you will still get an ordered list of items.
$hashtable3The output below confirms that you will still get an order list of items regardless of how you access your hashtable.
Updating Existing Items in Hashtables
Data constantly changes and if you have existing hashtables, updating them is a crucial task. For example, you are using a hashtable to store configuration values. If so, you may need to update the value of a key if the configuration changes.
To update a PowerShell hashtable, the = assignment operator will do the trick as follows:
1. Run the below command, which does not provide output, but updates the value of the key Key2 in $hashtable3 to NewValue2.
$hashtable3["Key2"] = "NewValue2"Next, run the command below to Add() a new key-value pair (Key4 = NewValue4 to the hashtable ($hashtable3).
Adding a new key-value pair does not produce output like updating existing lists in hashtables, but you will verify the changes in the following step.
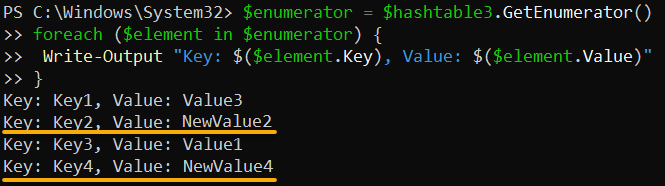
$hashtable3.Add("Key4", "NewValue4")3. Run the following code to verify that the values of the keys in your hashtable ($hashtable3) have been updated.
# Get an object that can be used to iterate over the elements of a collection.
$enumerator = $hashtable3.GetEnumerator()
foreach ($element in $enumerator) {
	# Outputs a string that includes the key and value of each element in the collection.
	Write-Output "Key: $($element.Key), Value: $($element.Value)"
}
💡 In PowerShell, each key in a hashtable must be unique. If you try adding a key-value pair already in the hashtable, you will get an error like the one below. To avoid getting this error, jump to the following step.

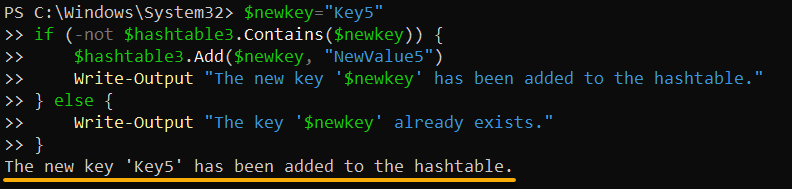
4. Now, run the following code, which uses the Contains() method to check if the key you try to add already exists in the hashtable before adding the key-value pair.
# Define the variable to hold the new key
$newkey="Key5"
# Check if $newkey already exists in the hashtable.
if (-not $hashtable3.Contains($newkey)) {
	# If not, add the new key-value pair.
	$hashtable3.Add($newkey, "NewValue5")
	Write-Output "The new key '$newkey' has been added to the hashtable."
} else {
	# If the key exists, print a message.
	Write-Output "The key '$newkey' already exists."
}
If the new key does not exist, you will get the message below, saying the new key has been added to the hashtable.
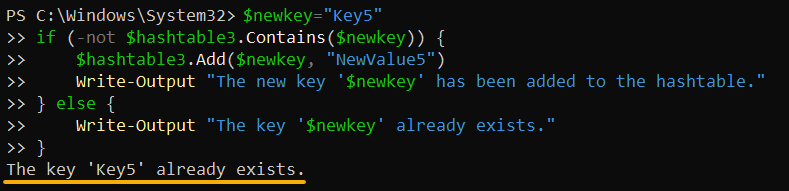
Otherwise, as shown below, you will get a message if the key you are trying to already exists.
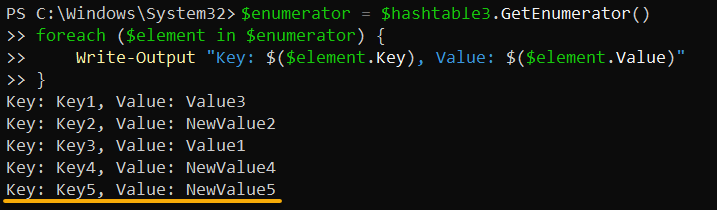
5. Lastly, rerun the code below to retrieve all items in your hashtable ($hashtable3).
# Get an object that can be used to iterate over the elements of a collection.
$enumerator = $hashtable3.GetEnumerator()
foreach ($element in $enumerator) {
	# Outputs a string that includes the key and value of each element in the collection.
	Write-Output "Key: $($element.Key), Value: $($element.Value)"
}
Below, you can see the newly-added key (Key5) and other items you have added so far to the hashtable.
Removing Items from a Hashtable
Too many items in a hashtable, especially unnecessary ones, may only lead to confusion. Removing items that are no longer relevant or needed from your hashtable will do you a favor.
Suppose your hashtable contains a list of users and their information. If so, remove users from your hashtable if they are no longer active.
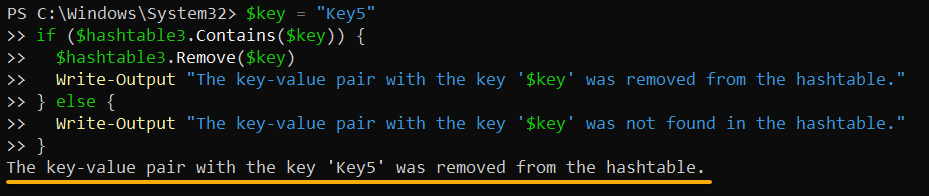
Run the code below to remove a specific item (Key1) from your hashtable ($hashtable3).
$key = "Key5"
if ($hashtable3.Contains($key)) {
  $hashtable3.Remove($key)
  Write-Output "The key-value pair with the key '$key' was removed from the hashtable."
} else {
  Write-Output "The key-value pair with the key '$key' was not found in the hashtable."
}
Below, the output prints a message saying the key has been removed. But if the key does not exist, you will get a message saying the key was not found.
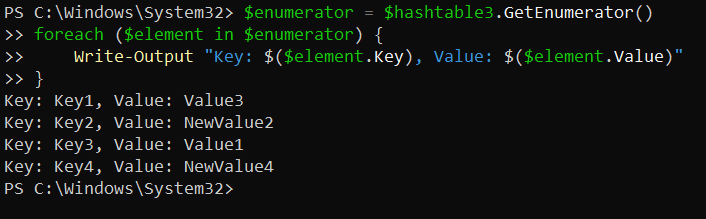
Now, run the following code to check all items in your hashtable and verify if the item deletion was successful.
# Get an object that can be used to iterate over the elements of a collection.
$enumerator = $hashtable3.GetEnumerator()
foreach ($element in $enumerator) {
	# Outputs a string that includes the key and value of each element in the collection.
	Write-Output "Key: $($element.Key), Value: $($element.Value)"
}
Below, you can verify that the key-value pair with key ‘Key5’ no longer exists in your hashtable.
Conclusion
With a key-value pair structure and fast access, a PowerShell hashtable is well-suited for managing large amounts of data in various scenarios. And in this tutorial, you learned how to create, add to, update, and remove items from hashtables. All these give you the skills to use hashtables effectively in your scripts.
Why not take your newly-acquired skills to the next level? Consider incorporating hashtables into your scripts for more advanced tasks, such as data manipulation and transformation. Or experiment with combining hashtables with other data structures in PowerShell, such as arrays and objects, to solve more complex problems?


