


Are you fed up with repeatedly performing the same GitHub tasks through the web interface? Or eyeing to kick your workflow a notch with automation? Lucky for you, the PowerShellForGitHub module is just around the corner to unlock PowerShell GitHub abilities!
In this tutorial, you’ll learn how to use PowerShell, the PowerShellForGitHub module for common GitHub operations, and more.
Level up your workflow effectively with automation today!
Prerequisites
This tutorial will be a hands-on demonstration. If you’d like to follow along, be sure you have the following:
- A GitHub account with a public repository.
- A GitHub personal access token (PAT).
- A computer with at least Windows PowerShell 5.1 or PowerShell 7.x installed – This tutorial uses PowerShell version 7.2.3.
Installing the PowerShellForGitHub Module
The PowerShellForGitHub module embraces the benefits of PowerShell to provide command-line interactions and automation for the GitHub API. The quickest way to install the PowerShellForGitHub module is to use the PowerShell Gallery within a PowerShell console.
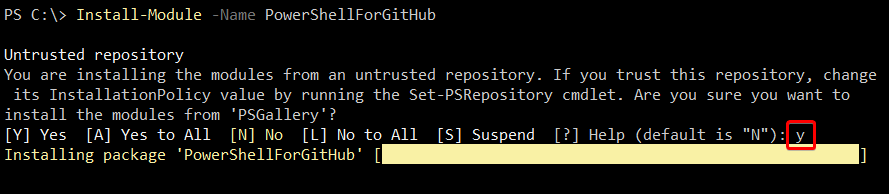
1. Open PowerShell as administrator, and run the Install-Module command below to install the PowerShellForGitHub module from the PowerShell Gallery.
Install-Module -Name PowerShellForGitHubType y and press Enter to continue the installation, as shown below.
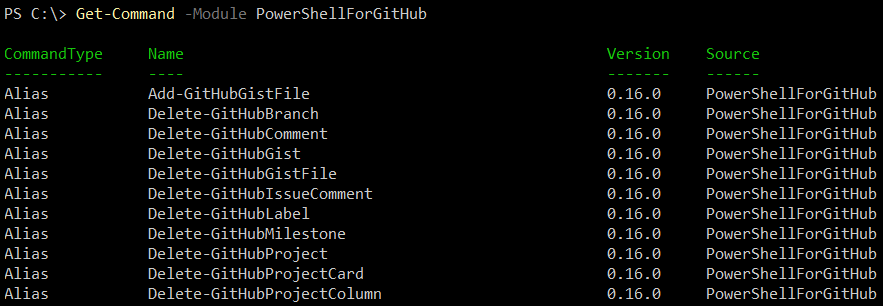
2. Now run the following Get-Command to verify if the module (-Module) is installed successfully. This command lists all cmdlets available for the PowerShellForGitHub module.
Get-Command -Module PowerShellForGitHubYou run Get-Command since Get-Module doesn’t provide an output for the PowerShellForGitHub module.
If you’ve installed the PowerShellForGitHub module successfully, you’ll get a long list of available cmdlets for the module, as shown below.
3. Lastly, run the following Set-GitHubAuthentication command to connect to your GitHub account.
Set-GitHubAuthenticationYou can enter anything as the username, which is required but will be ignored anyway. But be sure to enter your personal access token as the password.
After connecting successfully to GitHub, you can start using the cmdlets of the PowerShell GitHub module.

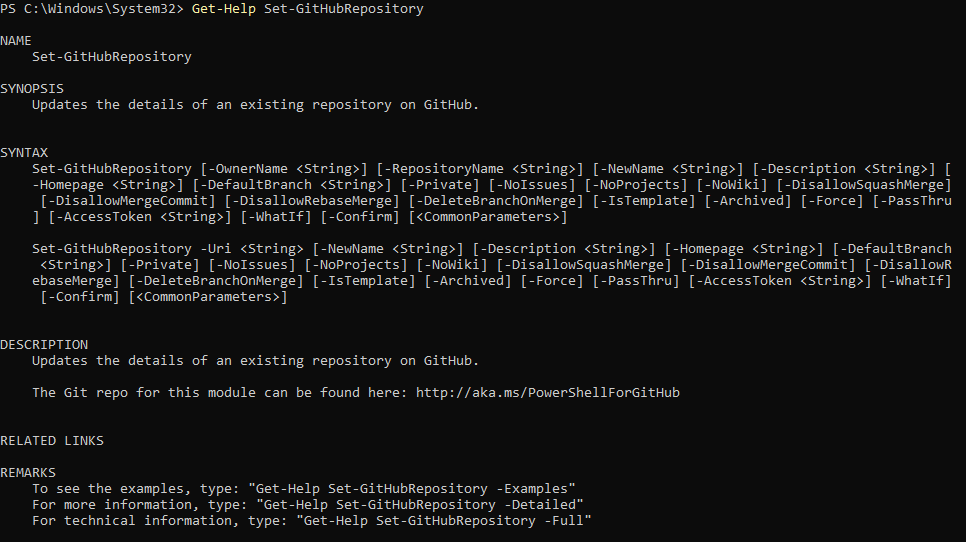
If you’re unsure how a PowerShellForGitHub module cmdlet works, run the Get-Help command followed by the cmdlet in question, as shown below: Get-Help Set-GitHubRepository
Creating GitHub Repositories with PowerShell Function
Now that the PowerShellForGitHub module is installed kick off this tutorial with one of the best things PowerShell GitHub can offer, creating your own tools! How? By creating PowerShell functions.
PowerShell functions allow you to organize scripts and promote the re-use of code, dramatically increasing the usability and readability of your code.
1. Create a PowerShell script file, add the code below to the file, change the values accordingly, and save the file as myscript.ps1.
The code below is a PowerShell function that performs the following:
- Create a repository (
New-GitHubRepository).
- Add a (help) file (
Set-GitHubContent), and create a commit (-CommitMessage).
- And optionally create a branch (New-GitHubRepositoryBranch).
Function CreateRepo {
param ($Owner,$RepoName,$Branch,$HelpFilePath,$HelpFileContent,$FirstCommitMessage)
# Creating a new repository
New-GitHubRepository -RepositoryName $RepoName
# Add a file and perform first commit
Set-GitHubContent -OwnerName $Owner -RepositoryName $RepoName -Path $HelpFilePath -CommitMessage $FirstCommitMessage -Content $HelpFileContent -BranchName main
# Add a branch if the 'Branch' parameter is specified
If ($Branches) {
New-GitHubRepositoryBranch -OwnerName $Owner -RepositoryName $RepoName -TargetBranchName $Branch
}
}
# Call the CreateRepo function - Be sure to replace the values below accordingly
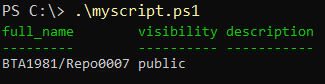
CreateRepo -Owner BTA1981 -RepoName Repo0007 -Branch develop -HelpFilePath README.md -HelpFileContent '# README' -FirstCommitMessage 'Adding README.md'2. Now, run the script (myscript.ps1) and see how the function works.
.\myscript.ps1After running the script, you’ll get an output of the name and visibility of the repository created by the script.
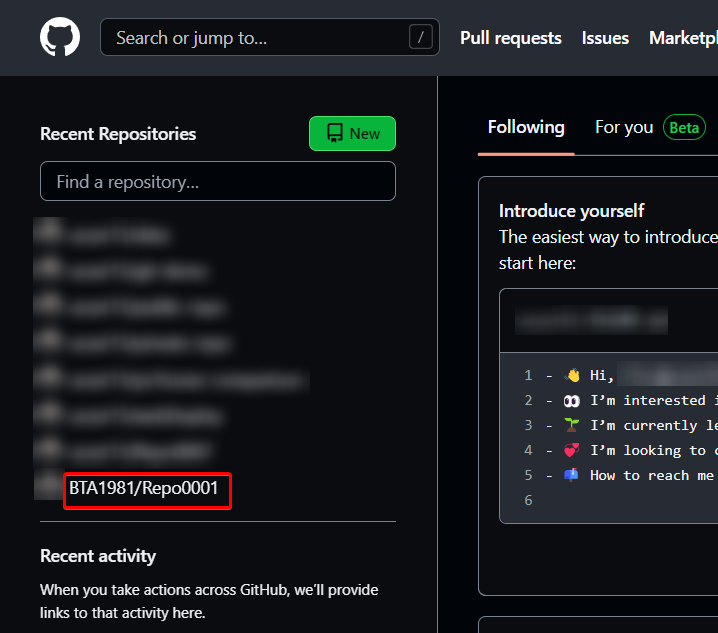
3. Lastly, open your favorite web browser, navigate to GitHub, and see the newly-created repository, as shown below.

Performing Queries and Creating Custom Reporting
Creating a GitHub repository by running a script is cool and all. But another cool use-case for combining PowerShell with GitHub is performing queries and creating custom reporting. How? By using the PowerShell GitHub pipeline.
With PowerShell pipeline, you can create powerful queries with just a little code and chaining commands together with the pipeline operator ‘|.’
Housekeeping within the GitHub repositories is crucial. And perhaps, you need more insight into repositories that haven’t been updated within a certain period.
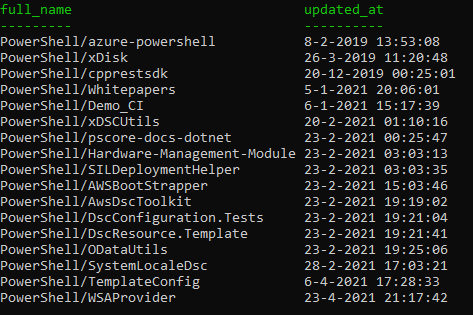
1. Run the following command to get an overview of the GitHub repositories from the PowerShell team that haven’t been updated within the last year.
# - < WHAT DOES THIS COMMAND DO? >
# Get-GitHubRepository - Get all repositories from the owner PowerShell team.
# Where-Object - Where the repository isn't updated in the last year (Get-Date).
# Sort-Object - Sort results based on the last updated date/time.
# Select-Object - Show the full name and date/time when each repository was last updated

Get-GitHubRepository -OwnerName PowerShell |
Where-Object {$_.updated_at -lt (Get-Date).AddMonths(-12)} |
Sort-Object updated_at | Select-Object full_name,updated_at
Notice how much the pipeline operator is used. Without the pipeline operator, you’ll need to create several variables to store data before you can use that data for another cmdlet.
Below, you can see the list of each repository that hasn’t been updated within the last year.
Your output isn’t limited to the PowerShell console only. You can also create a report of the output in a text or CSV file.
2. Now, run either of the commands below to fetch the list of GitHub repositories. But this time, no output is displayed on the console since the output is exported either to a text file (Out-File) or CSV file (Export-CSV).
Note that you can replace the file’s path and name (C:\Outdated.txt and C:\Outdated.csv) as you like.
# Export the output to the C:\Outdated.txt file
Get-GitHubRepository -OwnerName PowerShell |
Where-Object {$_.updated_at -lt (Get-Date).AddMonths(-12)} |
Sort-Object updated_at | Select-Object full_name,updated_at |
Out-File -FilePath C:\Outdated.txt

# Export the output to the C:\Outdated.csv file
Get-GitHubRepository -OwnerName PowerShell |
Where-Object {$_.updated_at -lt (Get-Date).AddMonths(-12)} |
Sort-Object updated_at | Select-Object full_name,updated_at |
Export-Csv -Path C:\Outdated.csv3. Finally, run either of the Get-Content commands below to view the content of your report file, depending on which file type you used for creating the report.
Get-Content C:\Outdated.txt
Get-Content C:\Outdated.csv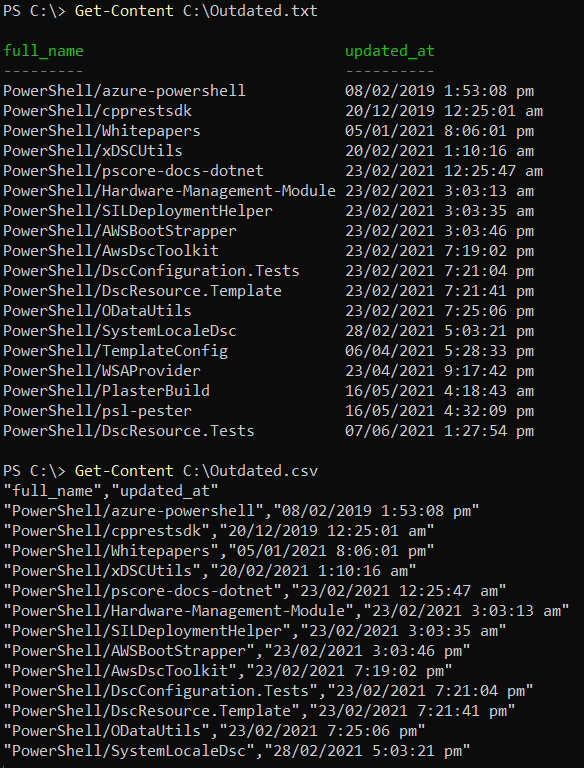
Performing Configuration Changes in Bulk
Typically, you must perform configuration changes in bulk, like changing multiple repository visibilities. Fortunately, the PowerShellForGithub module supports these kinds of changes.
Imagine you have a lot of GitHub repositories to manage, and you need to change all repositories starting with the name “REPO00” from public to private visibility.
Run the below command to perform the following:
- Lookup a user’s (
BTA1981) repositories with names starting withREPO00. - Change each matched repositories’ visibility to
-Private.
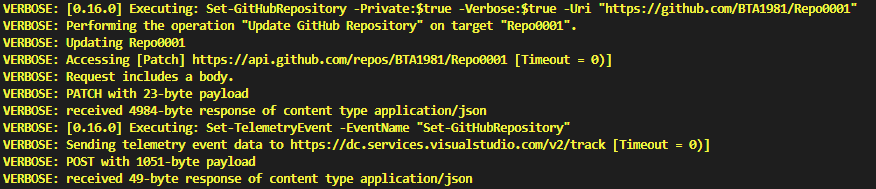
Get-GitHubRepository -OwnerName BTA1981 | Where-Object { $_.name -like "REPO00*" } |
Set-GitHubRepository -Private:$True -Verbose
As you can see below, adding the -Verbose parameter outputs detailed information about the operation done by the command.
Dealing with Repository Issues Automatically
Who doesn’t have repetitive and tedious tasks to perform when you spot a new issue or pull request? Why struggle? Let the PowerShellForGitHub module save the day.
1. Open your myscript.ps1 file, and replace the code with the one below, but be sure to change the values with your own.
The code below comments on the most recent issue within a repository that hasn’t been recently updated.
# - < WHAT DOES THIS CODE DO? >
# Get-GitHubRepository - Get all the GitHub issues
# labeled (Get-GitHubIssue) as a bug from the specified repository.
# Where-Object - Where there hasn't been an update for a day (Get-Date).
# New-GitHubIssueComment - Add a custom GitHub issue comment
Get-GitHubRepository -OwnerName BTA1981 -RepositoryName Repo0001 | Get-GitHubIssue -label 'bug' |
Where-Object { $_.updated_at -lt (Get-Date).AddDays(-1)} |
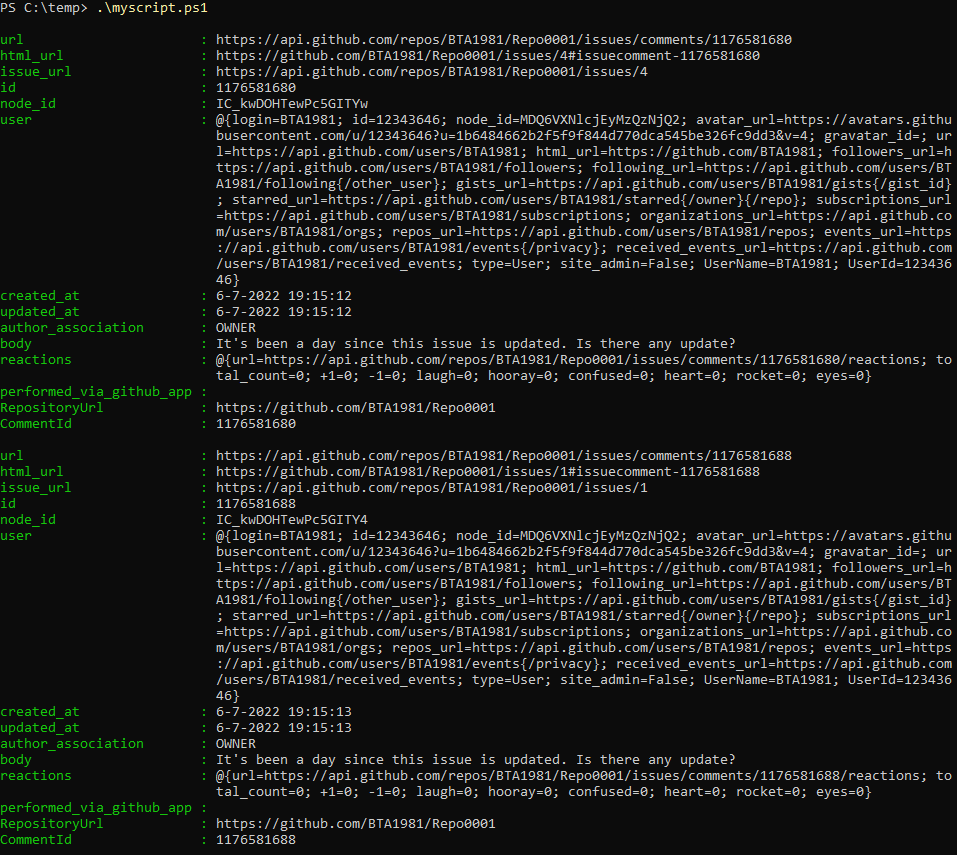
New-GitHubIssueComment -Body "It's been a day since this issue is updated. Is there any update?"2. After replacing the code, save the file, and run the script.
.\myscript.ps1The output of the script will show details about each comment that’s being updated with a new comment with our script.
3. Navigate to GitHub on your browser, and click on the repository you specified (Repo0001) within the code.
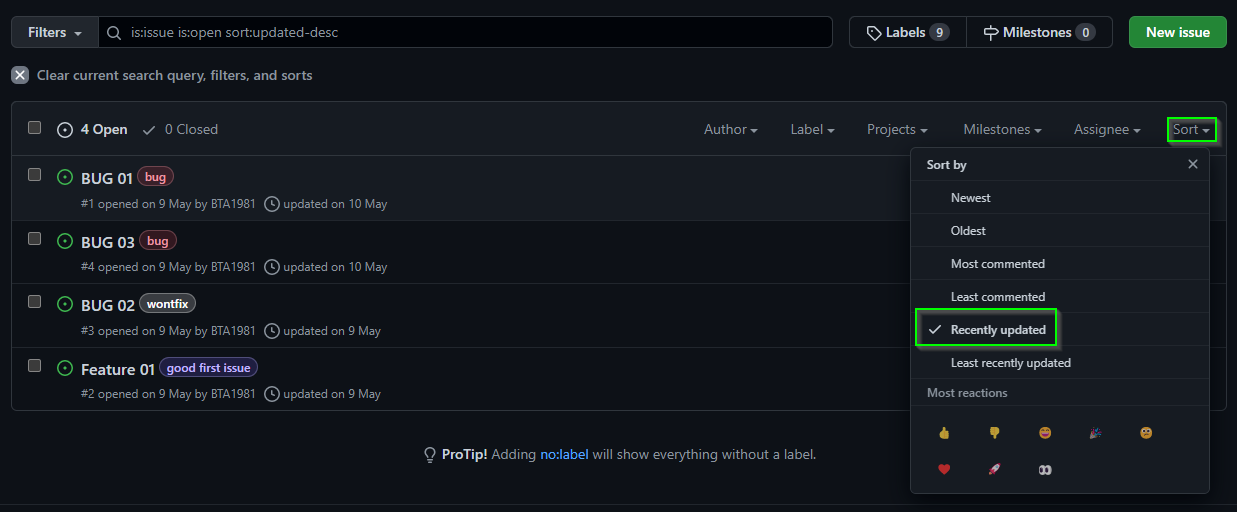
4. Now, click on the Issues tab (top-left), and you’ll see an overview of the issues for the repository, as shown below.
Click on the Sort dropdown menu, choose the Recently updated option, and click on a BUG that hasn’t been updated in a day.
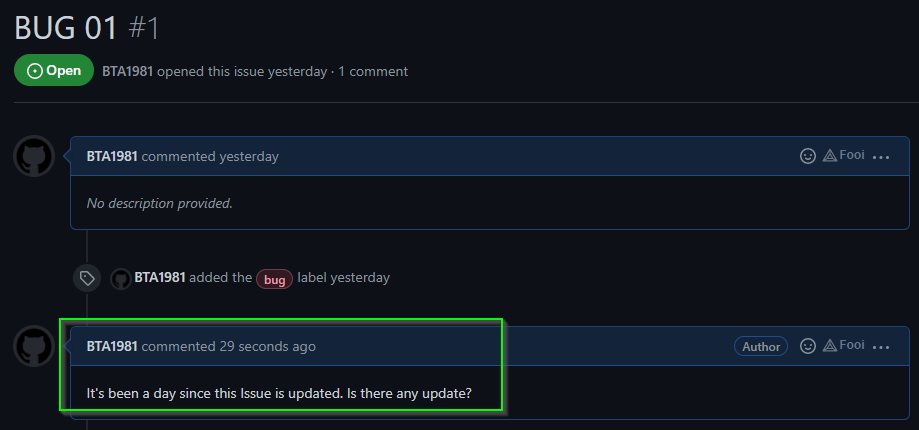
Below, you can see a new comment saying the issue hasn’t been updated.
5. Replace the content of your myscript.ps1 file with the code below, another example of eliminating repetitive tasks.
The code below automatically assigns a new GitHub issue to a user whenever there is a new issue for a specified repository.
# The GitHub username you want to assign the issue to.
$Assignee = 'bta1981'
# The account owner of the repository you want to assign an issue for.
$Owner = "BTA1981"
# The name of the repository that has the issue you want to assign.
$Repository = "Repo0001"

# - < WHAT DOES THIS COMMAND DO? >
# Get-GitHubRepository - Get the most recent GitHub issue (Get-GitHubIssue)
	# for the specified repository ($Repository)
# Add-GitHubAssignee - Assign a user to the most recent issue

$MostRecentIssue = Get-GitHubRepository -OwnerName $Owner -RepositoryName $Repository |
Get-GitHubIssue | Sort-Object -Descending -Property created_at | Select-Object -First 1 |
Add-GitHubAssignee -OwnerName $Owner -RepositoryName $Repository -Assignee $Assignee -Issue $MostRecentIssue.IssueNumber -Verbose
6. After replacing the code in your myscript.ps1 file, run the script.
The script immediately changes the assignment of the GitHub issue to the assignee (BTA1981) you’ve specified.
.\myscript.ps1Because of the -Verbose parameter in the script, there’s detailed input being shown about the GitHub issue that’s being assigned by the script.

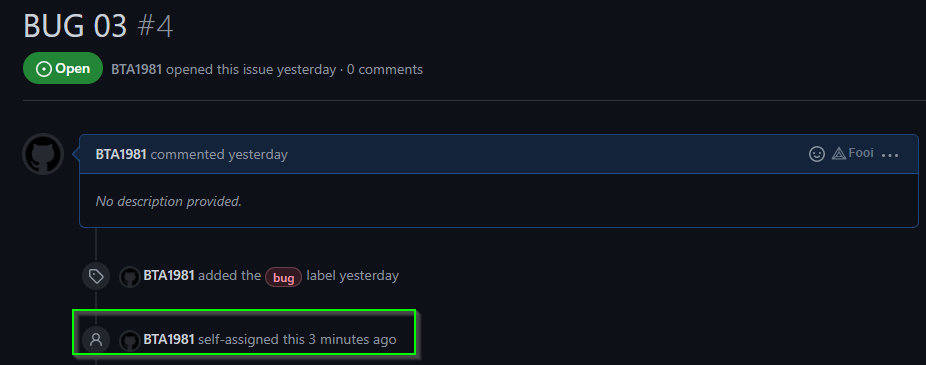
7. Finally, navigate to the most recent issue within the GitHub repository you specified (Repo0001) to verify that the script assigns the issue.
Creating Pull Requests for Multiple Repositories
Managing pull requests, especially if you have many repositories, can be a pain. But the good news is that managing pull requests is another feature of the PowerShellForGitHub module.
Note that you’ll be using PowerShell splatting on your code for better readability, bundling up the parameters you want to supply to command, and passing them in a table. PowerShell splatting is much better than writing one long line of code.
Open your myscript.ps1 file and replace the code with the one below. Be sure to change the values with your own, and save the changes.
The code below sends pull requests in repositories (repo0001, and repo0002), and merges the changes from the feature01 branch to the main branch.
# Create a hashtable with some variables
$prParams = @{
    OwnerName = 'bta1981'
    RepositoryName = "$repo"
    Title = 'Add simple file to root'
    # Head branch (containing the changes to be merged)
    Head = 'feature01'
    # Target branch of the pull request where the head changes will be merged.
    Base = 'main'
    Body = "Adds a simple text file to the repository root.`n`nThis is an automated PR!"
}

# Create a variable with an array that contains the repositories we want to target
$Repos = @('repo0001', 'repo0002')
# Go through all repositories and create the new pull requests
ForEach ($Repo in $Repos) {
    New-GitHubPullRequest @prParams
}
After changing the values in the script, save the changes and run the script.
.\myscript.ps1
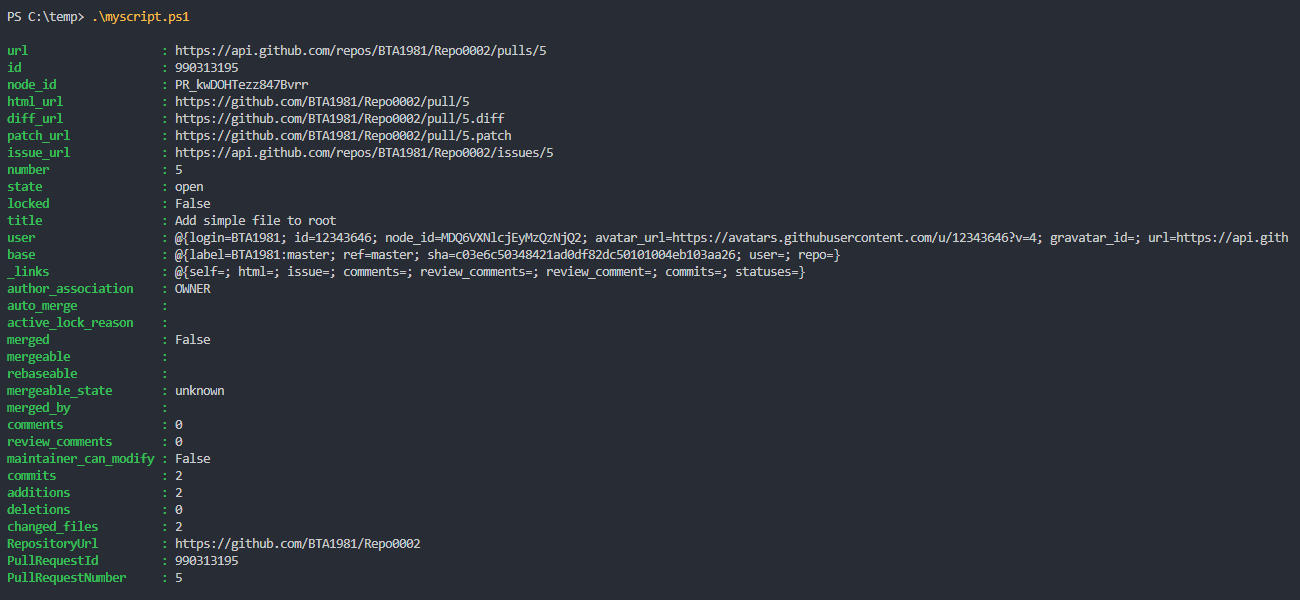
Now, navigate to the pull requests on GitHub. You’ll see a new pull request for the repositories you specified on your myscript.ps1 script.

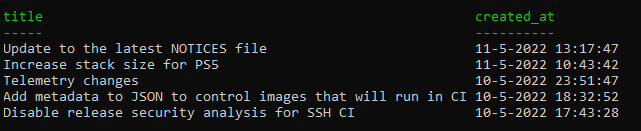
Alternatively, run the below command to get a better/plain insight into your pull requests sorted by age in -Descending order. The code below finds the five most recent (-first 5) pull requests within all repositories of the owner PowerShell that start with the name Power.
Get-GitHubRepository -OwnerName PowerShell | Where-Object { $_.name -like "Power*" } |
Get-GitHubPullRequest | Sort-Object created_at -Descending | Select-Object title,created_at -first 5
Conclusion
This tutorial aims to get you started using the PowerShellForGitHub module for automating common PowerShell GitHub operations. Did it go well?
You’ve learned about installing and making a connection with the PowerShellForGitHub module. And at this point, you can confidently manage your GitHub repositories locally and remotely so long as you have PowerShell and the PowerShellForGitHub module.
Now, look at your day-to-day GitHub workflow and try to incorporate and modify pieces of the examples you’ve learned in this tutorial. It’s time to take your PowerShell GitHub productivity to the next level!


