
Are you ready to perform your PowerShell 7 upgrade and get access to all of the new features? If so, this article is for you.
When PowerShell 6 was released, it was to bring a basic version of PowerShell to all platforms (PowerShell Core). With PowerShell 7 (the latest PowerShell version as of this writing), we’re now looking for all platforms to be equal in the PowerShell they can deliver (both Windows PowerShell and PowerShell Core).
In this article, you’ll learn how to perform a PowerShell 7 upgrade manually and how to automate the update process going forward with mass deployments via GPO and PowerShell Remoting.
At the time of this writing, the current release of PowerShell 7 is Preview 3. Most of the references in this article will apply to this version.
How to Perform PowerShell 7 Upgrade On a Machine
Like PowerShell Core 6.0, the process to install PowerShell Core 7 is similar. Let’s look at a few different ways to install PowerShell 7 on a single machine.
Before beginning your PowerShell 7 upgrade, make sure to review the prerequisites. You’ll notice that these are the same requirements for PowerShell version 6.
- The Universal C Runtime must be installed
- Windows Management Framework (WMF) 4.0 or newer – only if you’re on a version of Windows 7 or Windows Server 2008R2. Later versions of Windows like Windows 8.1, Windows 10, and Windows Server 2016, WMF is not required.
Installing PowerShell 7 manually
To start the PowerShell 7 upgrade, download PowerShell 7. To do that, go to the GitHub Releases page for PowerShell and find the version you want to install. For this article, we’re using the PowerShell 7.0.0 preview 3 release. On Windows, scroll down a bit and download the PowerShell-7.0.0-preview.3-win-x86.msi MSI package and run it.
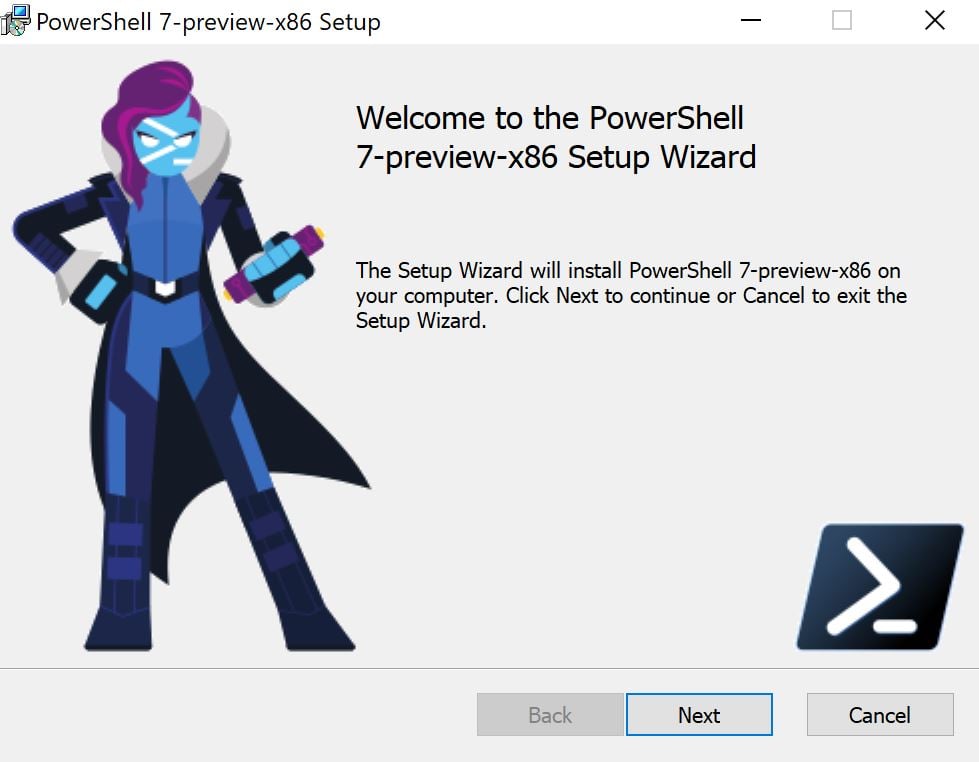
The wizard will ask you a few simple questions, like where you want PowerShell to be installed. When doing a PowerShell 7 upgrade, using a separate installation directory is important if you want to run multiple PowerShell versions side by side.
The wizard will also ask if you want to register PowerShell to the PATH environment variable. Adding the PowerShell installation folder to your PATH makes it easy to open PowerShell 7 after a PowerShell 7 upgrade.
Another option is Register PowerShell to the Windows Event Logging Manifest. When enabled, this option takes advantage of the robust logging that ships with this version of PowerShell.
Next, it asks if you’d like to enable PowerShell Remoting from the get-go which can help with all remote tasks.
Finally, you’ll be asked if you’d like to Add ‘Open Here’ context menus to Explorer. This option enables you to right click on any folder when browsing in the Windows Explorer and open a PowerShell window within that working directory.
Although the last two are completely optional and up to you, I’d highly highly recommend enabling the first two, like so:

Once you’ve answered all their questions, click Next and the installation will commence.
Opening PowerShell 7
Once installed, you can run PowerShell 7 by opening up any command line terminal and typing pwsh-preview.
Note that you will not use this command name once version 7 of PowerShell is out of the “preview” phase. Once it’s out of preview, you’ll be able to launch PowerShell 7 with
pwsh.
Installing PowerShell 7 with PowerShell
The Microsoft PowerShell team lead, Steve Lee, tweeted a handy way to install PowerShell 7 (PowerShell 7 upgrade) using PowerShell’s Invoke-RestMethod cmdlet. This code snippet uses the command to query the PowerShell GitHub repository, download an installation script which then downloads and installs PowerShell 7 with a single line.
Below you will find the syntax to do that. Open up a Windows PowerShell console and run the one-liner below.
iex "& { $(irm https://aka.ms/install-powershell.ps1) } -UseMSI -Preview"This code snippet is using the PowerShell Invoke-Expression cmdlet (iex in the one-liner) to accept a string and run it as PowerShell code. This string calls the Invoke-RestMethod cmdlet (irm in the one-liner) to download the script which Steve has written. I’d highly recommend using the link and checking out the code for yourself before running this command!
The snippet then passes the UseMSI and Preview parameters to the script to grab and install the latest MSI.
If you’d like to run this script completely silent and unattended, you can use the Quiet parameter. At the time of this writing, the Preview parameter still points to PowerShell 7 Preview 3.
Installing PowerShell 7 with a Module
Another way y0u can get PowerShell 7 installed is by using Jeff Hicks‘ PowerShell module called PSReleaseTools. This module, much like Steve’s one-liner, helps keep your PowerShell version up to date.
With two lines of PowerShell, you can download the module with Install-Module and using the Install-PSPreview command that comes with the PSRelaseTools module, you can get PowerShell 7 preview installed.
PS51> Install-Module -name PSReleaseTools -Force
PS51> Install-PSPreview -mode Quiet
Deploying PowerShell 7 Across an Organization
There are a couple of options when it comes to deploying PowerShell 7 at scale. Let’s look at two common ways to make it happen.
Deploying PowerShell 7 with a GPO
You can automate your PowerShell 7 upgrade deployments across many machines using Group Policy Objects. PowerShell is easy to deploy via GPO since it lends itself to other Microsoft technologies while packaged as an MSI. When you deploy this via GPO, you will want to be aware of a few things.
Use a Computer-Based GPO
First make sure to use a computer-based policy and not a user-based policy. You can read more on the differences between these two policies here. On servers, more often than not, users aren’t interactively logging in which kicks off a deployment.
If you’re deploying PowerShell 7 to a many servers, you’ll want the deployment to happen regardless of user interaction with the machine.
Set up a Network File Share
Also make sure the network share you put the PowerShell 7 MSI on has the appropriate permission set to allow all of the servers in your environment access it. Although beyond the scope of this article, you can find more here on creating file shares.
Set up the GPO
You’ll then create your GPO with the following steps:
- Place the MSI in the assigned file share which your computers can access.
- Create a starter GPO within the Group Policy Management Console. You can read more on starter GPOs here
- Once the GPO is created, open it up and navigate to Computer Configuration –> Software Settings.
- Right-click Software Installation then select New –> Package.
- In the dialog box, add the full UNC path to the MSI. For instance, if a file share called folder is on the server.namef, the path would be \\server.name\folder\powershell-7.msi
- Click Open –> Assigned –> OK.
Attach the GPO to the Required OU(s)
Once created, attach the GPO to the required OU(s). Check back in a couple of hours and the deployment should be mostly complete.
Check GPO Installation Progress
If you prefer a more hands-on approach to checking your Group Policy deployment, check out this short script below which will create a report with the Group Policy object applied to computers in a specific OU.
Be sure to change the OU distinguished name (OU=Domain Controllers,DC=mylab,DC=local) to your OU.
Note that you can run this on a domain controller or a domain-joined computer with the PowerShell ActiveDirectory module installed.
$computers = Get-ADComputer -Filter * -SearchBase 'OU=Domain Controllers, DC=mylab, DC=local'
ForEach ($computer in $computers) {
    Get-GPResultantSetOfPolicy -Computer $computer -ReportType HTML -Path c:\temp\$computer.html
}
If you’d like to spot check specific servers, the below command will come in handy. It reaches out to a remote computer ($computer) and checks the version of PowerShell installed on that computer with $PSVersionTable.PSVersion.
PS> Invoke-Command -Computername $computer -Scriptblock {$PSVersionTable.psversion}Lastly, if you find any computers that don’t have the group policy applied, you can run the following command and it will force group policy to refresh on the target computer:
PS> Invoke-GPUpdate -Computer $computerDeploying PowerShell 7 with PowerShell Remoting
PowerShell remoting is a great way to perform PowerShell 7 upgrades across your environment quickly. Although this may seem a little meta, PowerShell is a robust enough scripting language to assist with the installation of its replacement.
Before you start, ensure that PowerShell remoting is enabled and that you have set up the appropriate permissions for executing remote commands across your environment. You can find a guide on how to enable PSRemoting via GPO here.
Since you know know about the one-liner that to install PowerShell covered earlier, you’ll need to “wrap” that command in a scriptblock and tell the Invoke-Command command to execute it across one or more remote machines.
Below is an example of looping through a list of computers stored in the $computers array then running the install-powershell.ps1 script on all of them.
$creds = $(Get-Credential)
ForEach ($computer in $computers) {
    Invoke-Command -ComputerName $computer -Credential $creds {iex "& { $(irm https://aka.ms/install-powershell.ps1) } -UseMSI -Preview -Quiet"}
}
Summary
There are so many reasons to keep your PowerShell version up to date, at least on your own machine if not in your production environment. You’ll be able to use the latest features, take advantage of the performance enhancements, and even ensure that your older code won’t break on the newer versions.
As you can see, there are many ways to download and install new versions of PowerShell. Pick the PowerShell 7 upgrade method that best suits your environment and requirements.


