


Are you thinking of displaying the contents of files either for automation or troubleshooting purposes? How about editing and managing files based on the contents of another file? Don’t worry; PowerShell cat is an excellent tool in your arsenal.
Not a reader? Watch this related video tutorial!In this tutorial, you will learn to harness the versatility of the PowerShell cat to display your files’ contents in many ways.
Prerequisites
This tutorial will be a hands-on demonstration. If you’d like to follow along, all you need is a computer with Windows PowerShell 5.1 or PowerShell 7 and up. This article uses a Windows 10 machine with PowerShell 5.1
Setting Up the Tutorial Directory
To have a more consistent experience while following this tutorial, prepare a tutorial directory by performing the following steps.
1. Open a PowerShell window and create a new folder c:\PsCat by executing the below command. This new folder will be your working directory throughout this tutorial.
# Create the C:\PsCat folder and change the working directory
New-Item -Type Directory -Path C:\PsCat -Force ; Set-Location C:\PsCat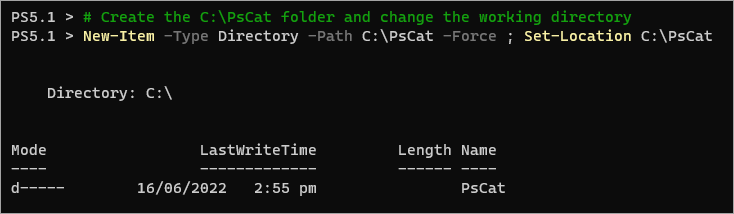
2. Next, run the below commands to create three sample files with different contents.
# Create File1.txt containing 5 lines
1..5 | ForEach-Object { "File1.txt: Line $_" } | Out-File File1.txt
# Create File2.txt containing 10 lines
1..10 | ForEach-Object { "File2.txt: Line $_" } | Out-File File2.txt
# Create File3.txt containing 100 lines
1..100 | ForEach-Object { "File3.log: Line $_" } | Out-File File3.log
3. Finally, list the tutorial directory contents.
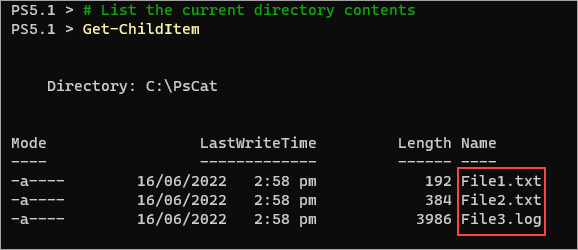
# List the current directory contents
Get-ChildItem
You should see three files; File1.txt, File2.txt, and File3.log.
Unveiling the PowerShell Cat Command
Those who worked on Linux may be familiar with cat as the command to read the contents of a file. The PowerShell cat command has the same function. But note that the PowerShell cat is only an alias of the Get-Content cmdlet.
Apart from cat, there are other aliases for the Get-Content command, which you can find out by running the below command.
Get-Alias -Definition Get-Content
As you can see below, gc and type are also aliases of Get-Command, along with cat.
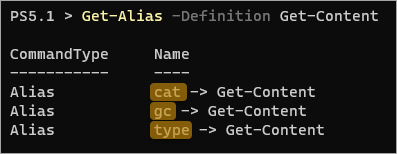
This tutorial will only use cat as the Get-Content alias for consistency.
Displaying the Contents of a File with PowerShell Cat
The primary and most basic usage of the PowerShell cat is showing a file’s contents on the screen. Running the cat command followed by the filename will tell the command to output the file’s contents for display only.
Run the below command to read the File1.txt file and output the data on the screen.
cat File1.txt
You should see the contents of File1.txt on your screen, as shown below.

Showing Lines from the Top
Reading or displaying a file’s entire content is not always practical, especially when dealing with huge files with hundreds of lines or so.
Reading the first few lines of the file may help identify whether the file is what you need. PowerShell cat allows you to display a specific line or lines from a file to have a quick look.
To display a collection of lines from the beginning of the file, specify the -TotalCount parameter followed by the number of lines. The -TotalCount parameter also has aliases -Head and -First, which you may use interchangeably.
Run the below command to display the first five lines in c-text.txt.
The -TotalCount parameter has aliases too, which are -Head and -First that you may use interchangeably.
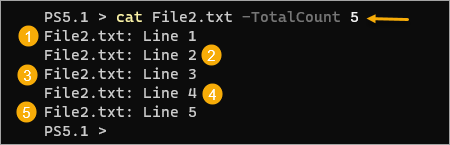
cat File2.txt -TotalCount 5
The result will display only the first five lines, as shown below.
Showing Line from the Bottom
On the other hand, you can also view the file’s contents from the bottom by specifying the -Tail parameter or its alias, which is -Last. This method is typical when troubleshooting with log files, where it is common only to know the last set of entries before a program crashes.
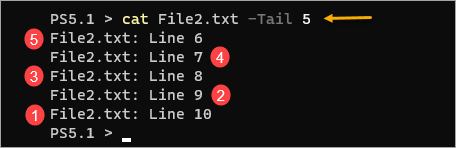
Execute cat with the -Tail parameter to view the last five lines of File2.txt.
cat File2.txt -Tail 5
The output in your terminal should resemble the result below, showing you the last five lines from the bottom.
Merging Contents Into a New File
Instead of simply showing the content on the screen, you can redirect the standard out of a command to a new file in PowerShell. Moreover, the PowerShell cat can read multiple files at once, which makes merging contents possible.
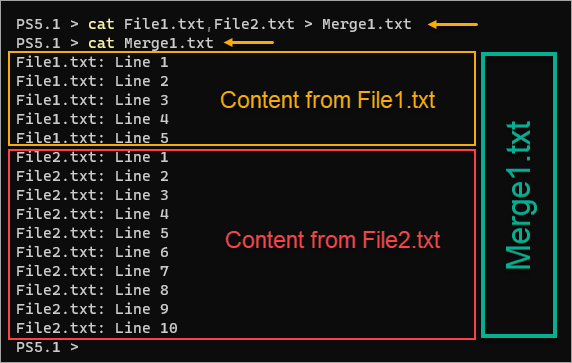
1. Run the cat command to concatenate File1.txt and File2.txt as follows. The output redirect (>) sends the command output to the new file called c-text.txt.
cat File1.txt,File2.txt > Merge1.txtYou can also achieve the same result by piping the cat output to Out-File instead of using the redirect operator (>).
cat File1.txt,File2.txt | Out-File Merge1.txt2. Execute cat again to display the contents of the new Merge1.txt file as follows.
cat Merge1.txtThe screenshot below should be similar to the output on your screen. As you can see, you have successfully merged the contents of the File1.txt and File2.txt files into the new Merge1.txt file.
3. Finally, delete Merge1.txt to maintain the original set of files in the tutorial directory.
Remove-Item Merge1.txtAppending the Contents of One File to Another
Another thing you can do with the Linux cat command is appending the contents of one file to another instead of overwriting the file or creating a new one.
Below are two ways in PowerShell to append the content to a file. The first method pipes the PowerShell cat output (|) to the Add-Content cmdlet. The second method uses the double output redirection symbol (>>).
1. Run any of the below commands, and the result will be the same.
# PowerShell cat with Add-Content
cat File1.txt | Add-Content File2.txt
# PowerShell cat with double redirection symbol (append)
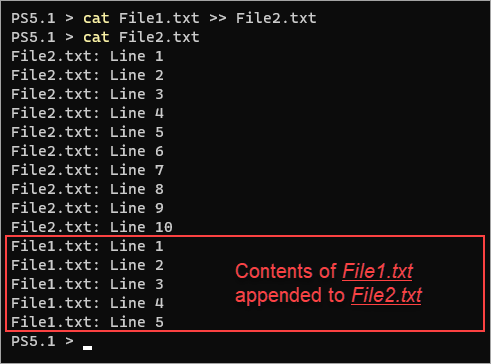
cat File1.txt >> File2.txt2. Run the following command to confirm the added content of the File2.txt file.
cat File2.txtAt the tail end of the file, you should see the contents of File1.txt, similar to the image below.
3. Now that you’ve demonstrated appending contents to an existing file, run the below command to overwrite the tutorial file File2.txt with its original contents.
# Overwrite File2.txt containing 10 lines
1..10 | ForEach-Object { "File2.txt: Line $_" } | Out-File File2.txt
Filtering Files
The PowerShell cat accepts wildcards and patterns as location inputs. This feature comes in handy when there are mixed types or filenames, and you want to filter, include, or exclude items.
Displaying All Files
Your current working directory contains three files, two *.txt and one *.log. To display the contents of every file in this directory, specify the asterisk (*) wildcard at the end of the path.
cat .\\*
Your terminal should quickly display the contents of all files. The below animation has reduced speed for better demonstration.

Displaying Files with Specific File Extensions
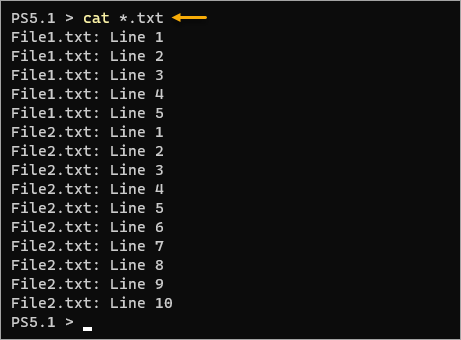
What if you only need to read files with specific file extensions? There are several ways you can do so. For example, you only need to read *.txt files. The first way is to apply the wildcard to the input path. Run the below command to read all files with the *.txt extension.
cat *.txt
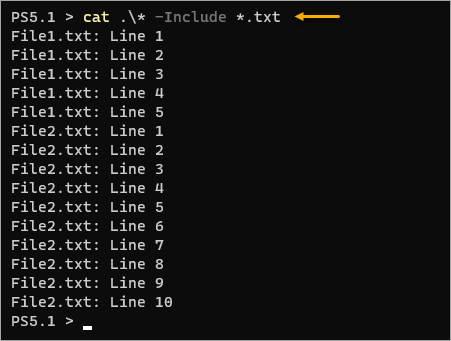
Another way is to specify the -Include parameter followed by the wildcard pattern. Run the command below to read all files in the folder but only include files with the *.txt extension.
cat .\\* -Include *.txt
Filtering with Exclusion
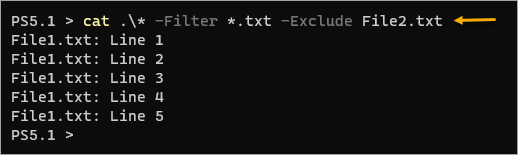
Instead of specifying which files to include, add the -Exclude parameter. For example, run the code below to filter all files with the *.txt extension excluding File2.txt.
cat .\\* -Filter *.txt -Exclude File2.txt
As you can see below, even though File2.txt match the *.txt filter, PowerShell cat ignored it because the filename is in the -Exclude list.
Paginating the Output
When you run cat to display large files results in a fast-moving stream of text that only stops after reaching the bottom. This behavior is not too helpful for reading the contents of a file.
To make reading large files on the screen manageable, you can apply pagination to your output. Pagination allows you to view only the contents that fit on the window.
You can achieve pagination by piping the PowerShell cat output to the built-in more function or the Out-Host cmdlet.
For example, run either below commands to display the File3.log with pagination. Either command will produce the same result and interaction options.
cat File3.log | more
# OR
cat File3.log | Out-Host -Paging
The result only shows you the contents that fit your current window size.
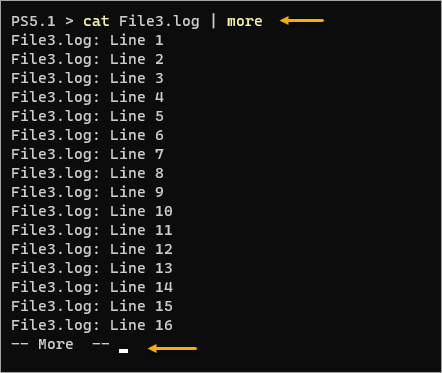
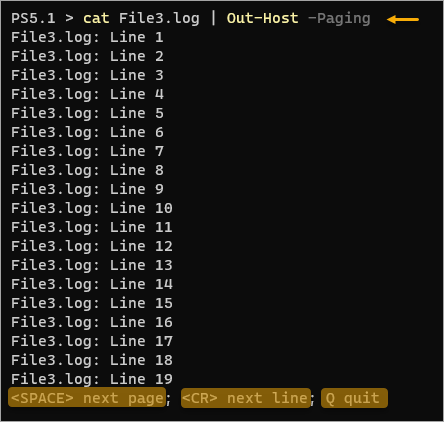
At this point, you have three options for interaction.
- Press
SPACEto display the next whole page. - Press carriage return (
CR) orEnterto display the following line. - Press
qto exit the pagination.
Conclusion
Congratulations! By making it this far, you have learned to use cat to display files in PowerShell. PowerShell cat is an alias for Get-Content and is a versatile tool.
You can achieve more with PowerShell cat than what this tutorial covered. For your next step, further expand your knowledge on Get-Content, this time as a Tail equivalent.


