


Does dealing with complex tasks in the Linux command line make you long for a quicker solution? Picture this: effortlessly passing the output of one command to another like magic! The pipe command in Linux is your ticket to crafting a seamless chain of operations that gets the job done efficiently.
In this tutorial, you will uncover the power of the pipe command to revolutionize your workflow in Linux. Seamlessly feed the output of one command as input to another, saving precious time and effort along the way.
Sounds good? Dive right in and supercharge your productivity!
Prerequisites
Before harnessing the pipe command in Linux, ensure you have a Linux machine. This tutorial uses an Ubuntu 22.04 LTS.
Mastering grep Integration with the Pipe Command in Linux
As you start getting to know the pipe command, one of the tools you will quickly become acquainted with is the grep command.
You know those moments when you are stuck in log file hell, spotting errors or navigating through directories? Cue the pipe (|) and grep commands! Together, they make tasks quicker and more precise.
To see how the pipe (|) command works with grep, follow these steps:
1. Open a terminal and execute the following commands to perform the following:
- Create three files (
touch) (i.e.,/report.txt,/summary.txt, and/notes.pdf) in the~/Documentsdirectory. - Change the working directory (
cd) to the~/Documentsdirectory.
These commands do not provide any output, but the files will be created, which you will verify in step two.
touch ~/Documents/report.txt ~/Documents/summary.txt ~/Documents/notes.pdf
cd ~/Documents
2. Next, run the command below, chaining ls with the grep command to display files that end with .txt only.
This command works as follows:
ls– Lists all files in the directory.|– Passes the output oflstogrep.grep '.txt$'– Filters and displays only those filenames ending with.txt.
ls | grep '.txt$'If successful, the command returns the files report.txt and summary.txt, where the search term .txt colored in red, as shown below.
The pipe (|) command is not a standalone command that can be used independently but lets you chain commands. This functionality allows you to direct one command’s output into another’s input, performing complex tasks with minimal effort.

|) and grep commands3. Now, repeat the same command in step two, but this time, change the search term to report regardless of its file extension.
ls | grep 'report'Notice the command returned the report.txt file with the filename in red.

Manipulating Data with the Pipe and awk Commands
While grep is an excellent choice for searching and filtering text based on patterns, Awk shines in more complex data manipulation through simple and chained commands.
Awk’s prowess is particularly notable when combined with the pipe (|) command for enhanced functionality and streamlined data processing.
To manipulate data with combined pipe (|) and awk commands, proceed with the following:
1. Execute the following command to generate a simple CSV file named data.csv (arbitrary) ~/Documents directory.
This command provides no output to the terminal but inputs the specified content in the CSV file.
echo -e "name,age,role\nAlice,30,Developer\nBob,35,Manager\nCharlie,25,Designer" > data.csv2. Once generated, run the command below to list only the names and roles from the CSV, excluding the age column.
This command achieves the following:
- Output the content of the file using (
cat data.csv). - Direct the output to
awkwith the pipe (|) command. - Specify that commas (
,) separate fields (-F). - Display the first and third fields (
{print $1, $3}) (name and role) from each line.
cat data.csv | awk -F, '{print $1, $3}'The output below shows a list of data from only tic fie: name and role.

|) and awk commands3. Lastly, pipe (|) the data.csv file’s content to awk to calculate the average age of the individuals.
Apart from data manipulation, Awk also supports basic mathematical operations, making it a versatile tool for various tasks.
cat /data.csv | awk -F, 'NR>1 {sum += $2; count++} END {print "Average Age:", sum / count}'If successful, you will see an Average Age of 30 in the output.

Harnessing sed for Streamlined Text Editing
Awk makes complex data manipulation and analysis look easy. But for in-line text transformations and pattern-based editing, talk sed. When combined with the pipe (|) command, sed can apply text modifications directly to the streamed output of other commands.
For instance, when processing log files, you can extract specific information or change certain patterns.
To harness sed for streamlined text editing, carry out the following:
1. In the ~/Documents directory, open the greetings.txt file in your preferred code editor (i.e., nano or vim).
2. Next, add the following lines to the file as the contents you will manipulate in the subsequent step.
Hello, world!
Welcome to the world of Linux.
Goodbye, world!
3. Now, run the cat command below to execute the following actions:
- View (
cat) the content of thegreetings.txtfile. - Pipe (
|) the resulting output tosed. - Change every occurrence of the word
worldtouniverselike so.
cat greetings.txt | sed 's/world/universe/g'Assuming all goes well, you will see an output similar to the one below, where all worlds are changed into universe.

sed and pipe (|) commandsMonitoring the System Memory and CPU Performances
Beyond just handling text and data, the pipe (|) command shines in system administration tasks. You know, like keeping tabs on how your system’s doing.
This capability turbocharges basic commands, letting you process and analyze data on the fly—a big deal in keeping your system in tip-top shape.
To monitor system memory and CPU performances, proceed with these steps:
Execute the following commands to run top in batch mode (-b) to allow piping.
This command executes once (-n 1) and then filters the output for chrome.
# Move away from the ~/Documents directory
cd ..
# Displaying the top processes and filtering for those related to "chrome."
top -b -n 1 | grep chrome
The following result is a snapshot of current CPU usage for Chrome processes.
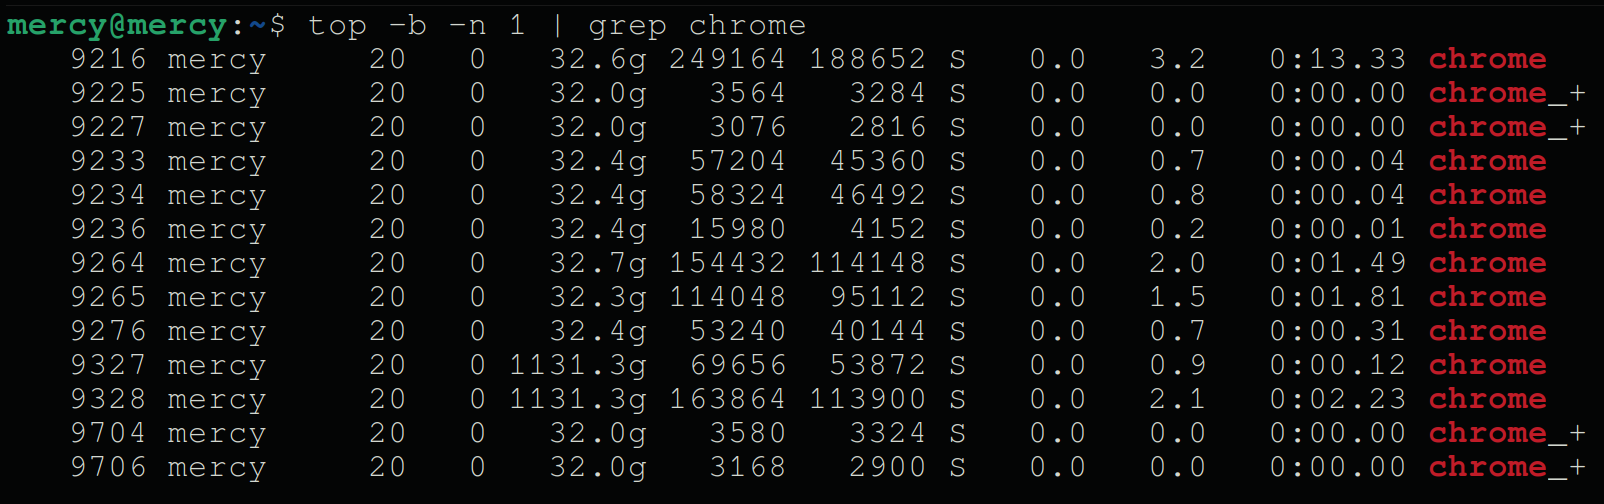
top and pipe (|) commands💡 The
topcommand provides a dynamic, real-time view of a running system. You can also pipe its output togrepto filter for specific processes or keywords.
Now, run the command below to combine awk and free to display the total and available memory (/^Mem:/) on your machine in an easy-to-read format (-h).
free -h | awk '/^Mem:/ {print "Total Memory: " $2 "\nAvailable Memory: " $7}'
Streamlining File System Management
Navigating through directories, organizing files, and ensuring data integrity are only a few challenges system administrators and users face. How do you overcome this challenge? Streamlining file system management is just one of the solutions the pipe (|) command offers to enhance productivity and simplify complex file operations.
Combining utilities like du (disk usage) and sort to identify large files or directories helps in effective disk space management.
To streamline file system management, proceed as follows:
Execute the following command to identify the 10 (arbitrary) largest directories within the working directory (in this case, the home directory).
This command performs the following:
du -sh *– Compute each item’s size in the current directory.sort -rh– Sort items in reverse order of size.head -n 10– Display the top ten largest items.
du -sh * | sort -rh | head -n 10As shown below, the list displays the top 10 largest directories within the working directory.

Identify files larger than a certain size (e.g., 100MB) within the ~/Music directory using the following command:
Now, run the command below to complete these tasks:
find . -size +50M– Find files larger than 50 MB within a specific directory (i.e., ~/Music).
xargs du -h– Calculate the disk usage of each file and display the sizes in a human-readable format.sort -rh– Sort items in reverse order by size (larger than 50 MB), displaying the largest files at the top.
find . -size +50M | xargs du -h | sort -rh
💡 Tip: You can explicitly target files only (
-f) with the following command instead:find . -type f -size +50M | xargs du -h | sort -rh
Enhancing System Insights Through Log File Analysis
Amidst the complexities of managing diverse systems, uncovering the root cause of issues can often feel like finding a needle in a haystack. Fortunately, log file analysis, the beacon of light in the sea of system data, is within reach.
Piping, especially when combined with commands like grep, awk, sort, and uniq, turns log file analysis from a daunting task into a manageable one.
To unlock invaluable insight through log file analysis, proceed with the following:
Execute the following commands to find entries tagged with error from the system logs (syslog).
System logs in Linux are often stored in /var/log and are often logged with tags like error, fail, or critical.
cd /var/log
grep -i error syslog
The -i option makes the search case-insensitive, ensuring you catch Error, ERROR, and any other case variations (in red).
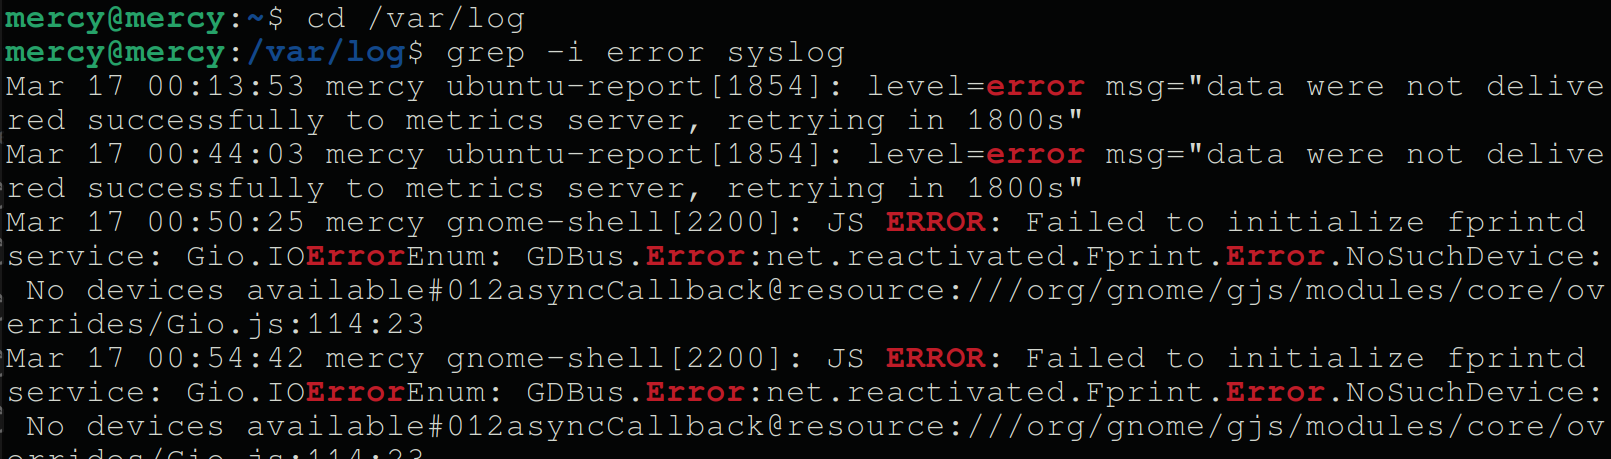
Lastly, run the following command to see how frequently errors occur, and pipe the output to wc -l to count the number of lines.
grep -i error syslog | wc -lThe output below says the total number of error messages in the syslog is 146.

Conclusion
Throughout this tutorial, you have delved into the powerful world of the pipe command in Linux. You have mastered transforming complex Linux tasks into streamlined operations effortlessly. You have unlocked a whole new level of efficiency and productivity in your Linux adventures.
How else would you like to experiment further with the pipe command? Why not consider diving into real-time monitoring with piping? Or perhaps explore its integration into scripting for automation?


