

The on-premises infrastructure typically remains when your organization’s directory service moves to the cloud, particularly Azure Active Directory. This co-existence is known as a hybrid setup and can often confuse end users because some tasks they need to do on-premises while some are in the cloud.
One example is resetting or changing passwords. Some organizations require password change in their on-premises AD. If the users attempt to reset their passwords in Azure AD, they get an error, which leads to service desk calls and a decline in user experience.
Remove Exchange on-premises without compromising ease of management. Use EasyEntra instead of AD Users & Computers – Completely Free!
What’s the right move? You should enable password writeback in Azure AD and your hybrid Active Directory infrastructure. Stay tuned; this tutorial teaches you how to enable password writeback step by step.
Scan Your AD for 930+ Million Compromised Passwords. Download Specops Password Auditor, a FREE read only tool that identifies password-related vulnerabilities.
Prerequisites
This tutorial will be a hands-on demonstration. If you’d like to follow along, be sure you have the following:
- An Azure AD tenant – Register a free account if you don’t have one.
- An admin account with a Global Administrator or Hybrid Identity Administrator role in Azure AD.
- An on-premises Active Directory environment already configured with the latest Azure AD Connect – This tutorial uses a Windows Server 2019 Datacenter with Azure AD Connect 2.1.15.0.
- The Self-Service Password Reset feature is already enabled in your Azure AD tenant.
- (Optional) The Azure AD PowerShell module is installed on your Windows Server or management computer.
Checking Password Writeback Support
Before enabling password writeback, you must ensure that all the necessary conditions are met. Not all Azure AD tenants support password writeback to on-premises AD. Follow the succeeding section to check and confirm password writeback eligibility and support.
The primary condition to enable password writeback is the Azure AD Premium license.
To check whether you have an Azure AD P1 or P2 license:
1. Open your favorite web browser, and log in to the Azure Active Directory admin center.
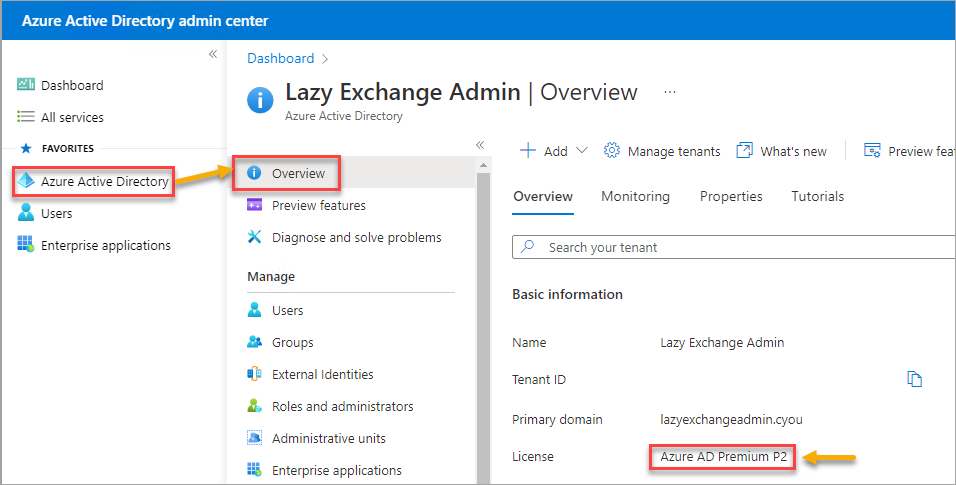
2. Next, click the Azure Active Directory → Overview blade.
You will see Azure AD Premium P1 or Azure AD Premium P2, similar to the screenshot below.
3. Alternatively, open PowerShell as admin and run the Connect-AzureAD command below to connect to the Azure Active Directory first.
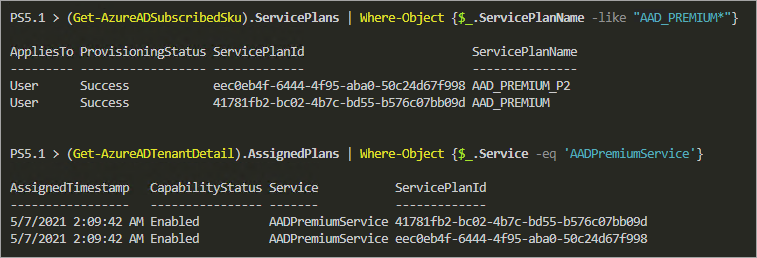
Connect-AzureAD4. Now, run either of the following commands to list your tenant’s Azure AD Premium license.
(Get-AzureADSubscribedSku).ServicePlans | Where-Object {$_.ServicePlanName -like "AAD_PREMIUM*"}
(Get-AzureADTenantDetail).AssignedPlans | Where-Object {$_.Service -eq 'AADPremiumService'}
The table below shows the license information about the Azure AD Premium.
| Service Plan ID | License Name | Get-AzureADSubscribedSku | Get-AzureADTenantDetail |
| 41781fb2-bc02-4b7c-bd55-b576c07bb09d | Azure AD Premium P1 | AAD_PREMIUM | AADPremiumService |
| eec0eb4f-6444-4f95-aba0-50c24d67f998 | Azure AD Premium P1 | AAD_PREMIUM_P2 | AADPremiumService |
The screenshot below confirms that this tenant has an Azure AD Premium P2 license.
Finding the Azure AD Connect On-Premises Directory Account
When you installed and configured Azure AD Connect, the installation process automatically created a forest login account. This account must have specific permissions for the password writeback to work properly.
If you don’t know the current Azure AD Connect domain login account:
Open PowerShell as admin, and run the below commands to perform the following:
- IImport (Import-Module) the AdSyncConfig module. This module is included in Azure AD Connect, located on C:\Program Files\Microsoft Azure Active Directory Connect\AdSyncConfig\AdSyncConfig.psm1.
- Get the Azure AD Connector account name (Get-ADSyncADConnectorAccount).
Import-Module 'C:\\Program Files\\Microsoft Azure Active Directory Connect\\AdSyncConfig\\AdSyncConfig.psm1'
Get-ADSyncADConnectorAccount
You’ll get the following result, showing the ADConnectorAccountName property contains the Azure AD Connector account name.

Configuring Password Writeback Permissions
Azure AD Connector account must have the following permissions to the on-premises Active Directory domain.
- Reset password
- Write lockoutTime
- Write pwdLastSet
- Unexpire Password on each domain root in the forest.
The good news is that you don’t need to set these permissions manually. The AdSyncConfig module includes a cmdlet called Set-ADSyncPasswordWritebackPermissions that conveniently sets all the necessary permissions.
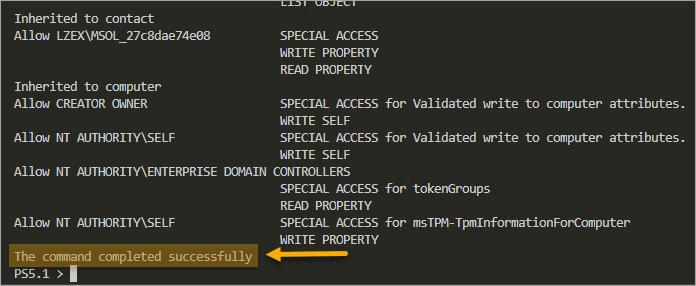
To set the password writeback permissions, run the below command in PowerShell. Ensure to replace the ADConnectorAccountName and ADConnectorAccountDomain values with yours.
Set-ADSyncPasswordWritebackPermissions `
    -ADConnectorAccountName MSOL_27c8dae74e08 `
    -ADConnectorAccountDomain LAZYEXCHANGEADMIN.CYOU `
    -Confirm:$false
Wait for the command to finish quickly, and you’ll get a confirmation message, as shown below.
Enabling Password Writeback in Azure AD Connect
Now that you’ve confirmed your Azure AD tenant’s password writeback eligibility and configured password writeback permissions. But is that it? Well, not close enough. The next step is enabling password writeback in Azure AD Connect.
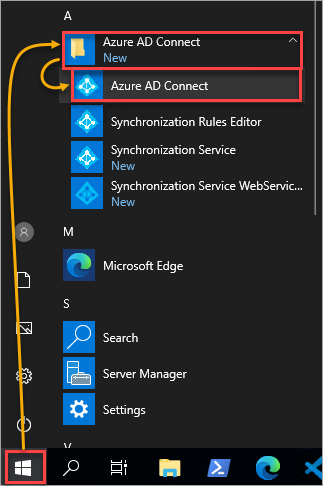
1. Open Azure AD Connect on your server.
2, On the Welcome to Azure AD Connect page, click Configure.

3. On the Additional tasks page, click Customize synchronization options → Next.

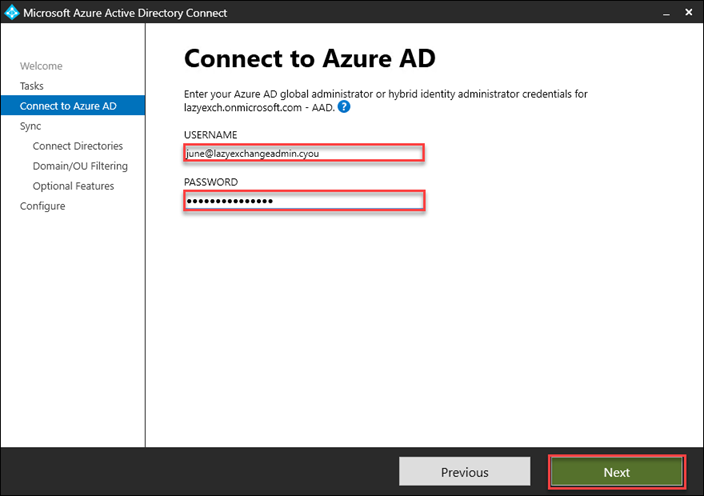
4. Now, on the Connect to Azure AD page, type your global administrator or hybrid identity administrator credentials and click Next.
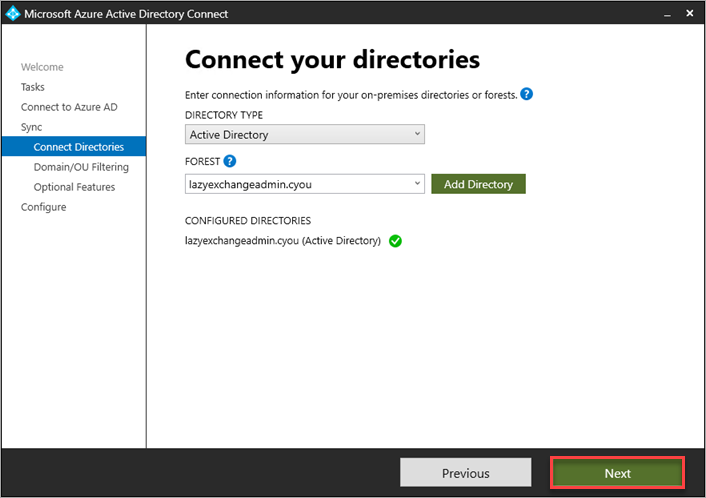
5. Don’t change anything on the Connect your directories page and click Next.
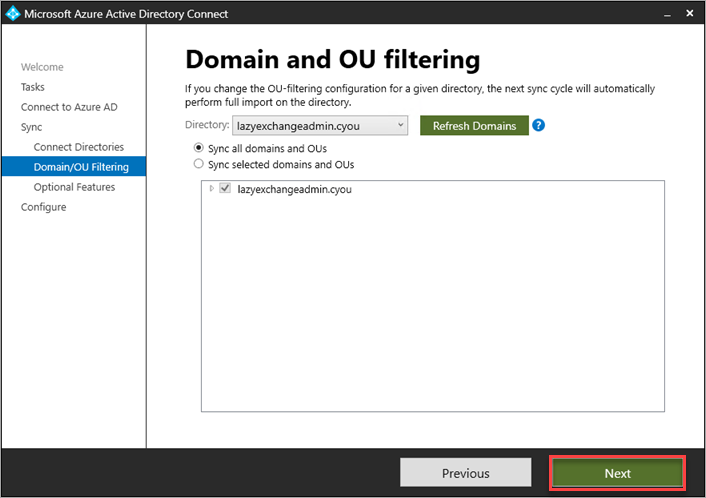
6. Keep the defaults in the Domain and OU Filtering page to sync with all domains and OUs, and click Next.
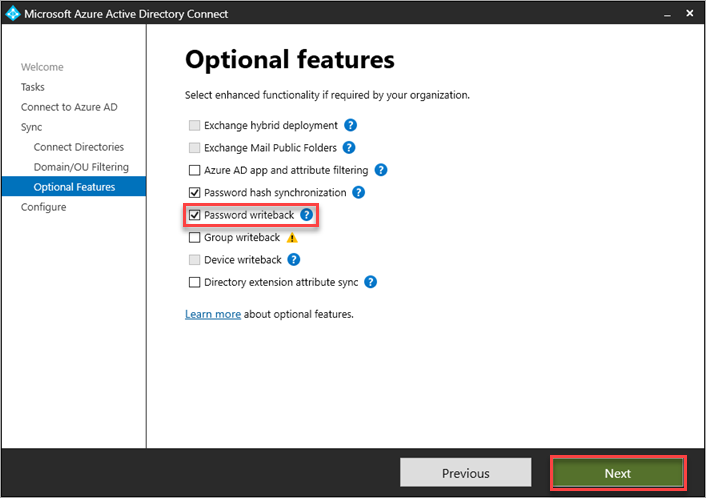
7. On the Optional features page, tick the Password writeback feature since you’re enabling the password writeback, and click Next.
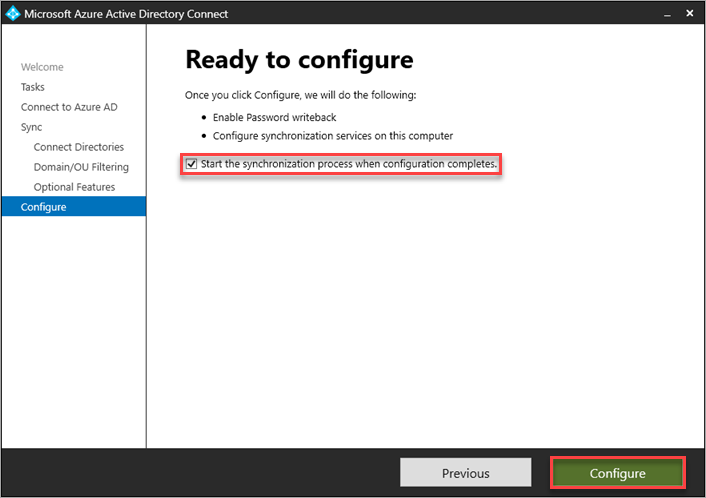
8. Leave the Start synchronization process box checked, and click Configure to start the synchronization as soon as the configuration completes.
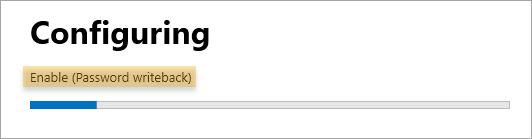
As you can see below, the configuration enables the password writeback feature.
9. Lastly, wait for the configuration to finish and click Exit to close Azure AD Connect.

Enabling Password Writeback in Azure Active Directory
You’ve enabled password writeback in Azure AD Connect, but you must also ensure that password writeback is enabled in Azure Active Directory.
Open the Azure Active Directory admin center in your web browser.
Now, enable password writeback with the following:
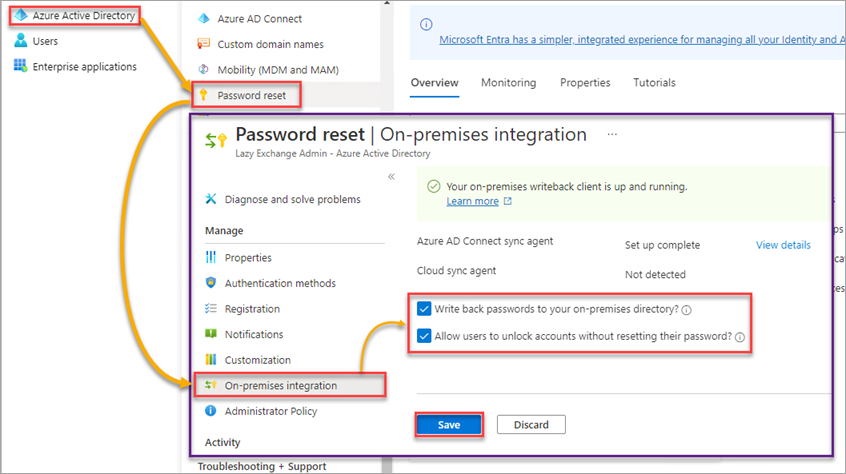
- Click Azure Active Directory → Password Reset → On-Premises Integration.
- Enable the Write back passwords to your on-premises directory and Allow users to unlock accounts without resetting their password options.
Note: The Allow users to unlock accounts without resetting their password feature is not mandatory for password writeback to work. This feature is optional and only applicable to give users the option to unlock their accounts without resetting their passwords.
- Lastly, click on the Save button to save the changes.
Note: As of this writing, there is no dedicated PowerShell cmdlet to enable the password writeback feature in Azure AD.
Testing Password Writeback
After enabling the password writeback feature, you must test the user experience to ensure everything is in good shape.
The Azure AD password writeback feature enables your hybrid users to perform password change and reset actions. Follow the steps in the succeeding sections to test both.
The following sections use a hybrid / on-premises sync-enabled account called [email protected] to log in to Azure AD.

Password Change
Performing a password change is for users who know their old passwords and want to change them.
1. Navigate to the My Account page in your web browser.
2. Log in using a non-administrator hybrid user account.
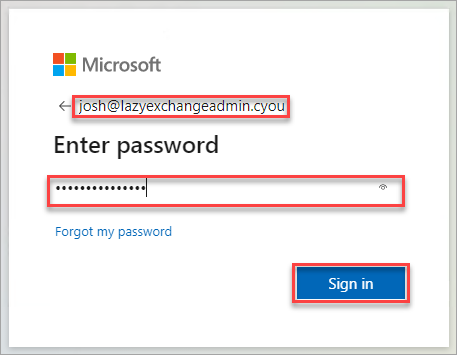
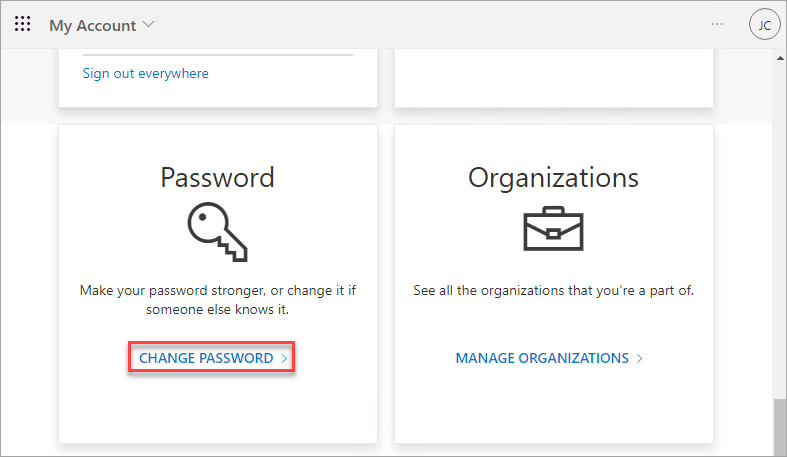
3. On the My Account page, click the CHANGE PASSWORD link to initiate changing the account’s password.
4. Now, type your old password in the Old password field and your new password in the Create new password, and Confirm new password fields.
Click on Submit once you’re happy with the new password to change the account’s password.
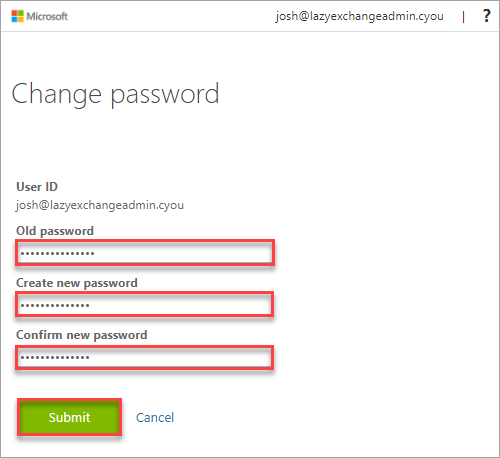
Since Azure AD will write the password back, the new password is subject to the password requirements policy in your on-premises AD.
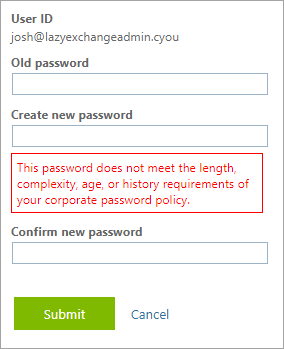
If the new password is unacceptable, you’ll get the error below.
Password Reset
On the other hand, the password reset action does not require your old password. This action is best if you forgot your password or your account is locked.
Note: Resetting a password using the self-service password reset in Azure AD automatically unlocks the user account.
1. Open a web browser and navigate to the self-service password reset page.
2. Enter your username and the captcha code and click Next.

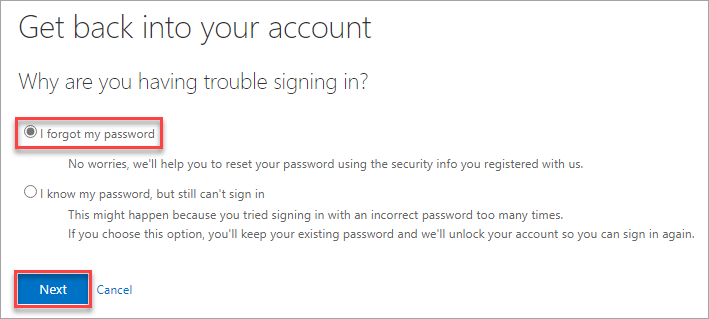
3. Select either of the options for getting back to your account:
- I forgot my password – This option lets you reset your password
- I know my password, but still can’t sign in – This option unlocks your account instead of resetting your password.
In this example, select the I forgot my password option and click Next to initiate resetting your password.
4. Now, specify the verification method information. The verification methods are what the users registered when they were first enabled for the self-service password reset.
In this example, the verification method is via text message.
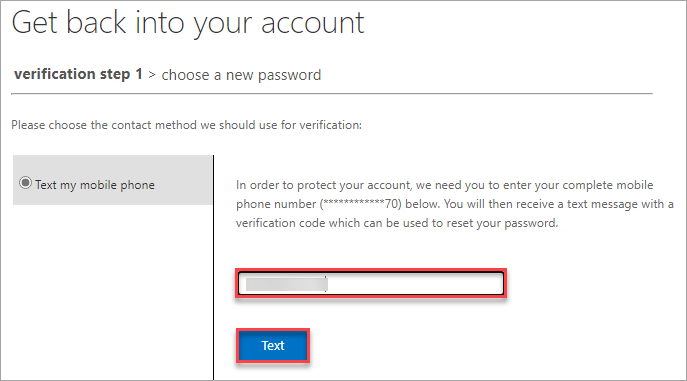
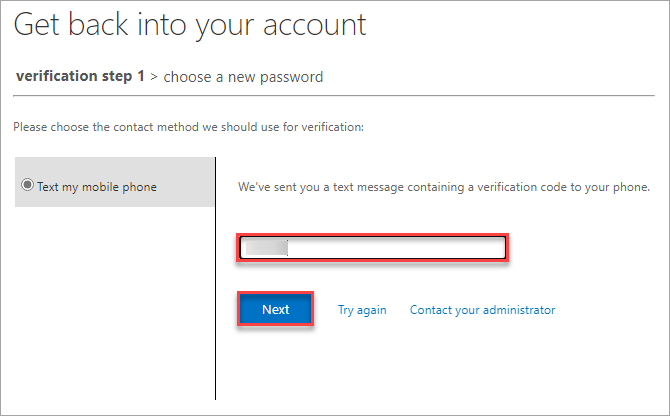
5. Look for the verification code sent to your phone, input the code in the empty field below, and click Next.
If the verification code is valid, your browser redirects to a page where you can set your new password.
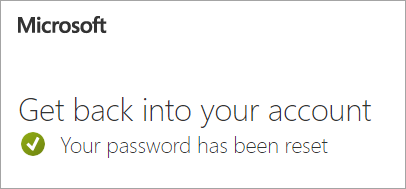
6. Finally, enter your new password in both fields and click Finish to finalize resetting your password.
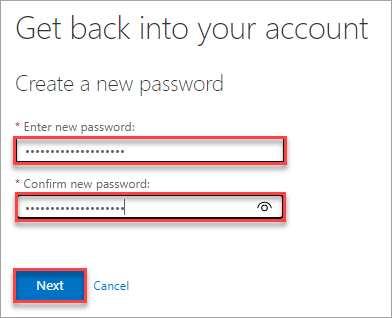
If the password reset is successful, you’ll get a confirmation message, as shown below.
Like the password change action, resetting the password also adheres to the password policy in your on-premises AD.
Extend the functionality of Group Policy and simplify the management of fine-grained password policies. Target any GPO level, group, user, or computer with dictionary and passphrase settings with Specops Password Policy. Try it Free!
With EasyEntra, first-level support teams can focus on what instead of where! Manage AD, Entra ID, and Exchange Online from a consolidated, intuitive console.
Conclusion
Enabling password writeback in a hybrid environment is a significant step toward keeping passwords in sync between your on-premises AD and Azure AD. In this tutorial, you’ve gone through how users can change or reset their password or unlock their account directly in Office 365.
This task may be daunting at first. But, as this tutorial demonstrated, implementing password writeback is not complicated. So long as you meet the requirements, enabling password writeback is a breeze.


