

Is your team getting bombarded with password reset requests? Let’s admit it; users tend to forget their passwords or manage to get themselves locked out from time to time. It’s time to allow self-service password resets for Office 365 and let your users handle it.
Users can quickly get inconvenienced and frustrated having to go through a case management process so that their passwords can be reset. Unless the user is a VIP, most password reset requests are treated as low priority and can take days before they get processed.
Remove Exchange on-premises without compromising ease of management. Use EasyEntra instead of AD Users & Computers – Completely Free!
These concerns can be addressed by implementing the self-service password reset in Office 365 or SSPR. With SSPR, users can be allowed to perform password reset operations on their own accounts. Implementing SSPR may significantly improve user experience and bring down the number of password reset-related requests.
In this article, you will learn about how to enable, configure, and test the self-service password reset service. You’ll learn how SSPR can be implemented for cloud-only and hybrid organizations.
Modernize identity security with MFA, SSO, and self-service password reset. Download ManageEngine ADSelfService Plus.
Prerequisites
This article is a walkthrough, and if you plan to follow along, you need to have the following requirements in place.
- A working Azure AD or Microsoft 365 Tenant. If you do not have this yet, you can request for a trial account.
- A Global Administrator user account. This account will be used for the configuration and management of SSPR.
- A non-administrator cloud-only account. This account will be used for testing the SSPR user experience. In this article, the cloud-only account named CloudUser will be used.
- [OPTIONAL] On-Premises Windows Active Directory with Azure AD Connect installed and configured for sync. This is optional and only needed if you plan to enable password writeback to Windows Active Directory.
- A non-administrator account in Windows AD that is synced to Azure AD. In this article, the On-Premises user account *HybridUser *****will be used.
- A group to which the non-administrator account is a member. This group will be used as the target to allow SSPR. In this article, SSPR will be enabled to target only the members of the group named SSPR-Users.
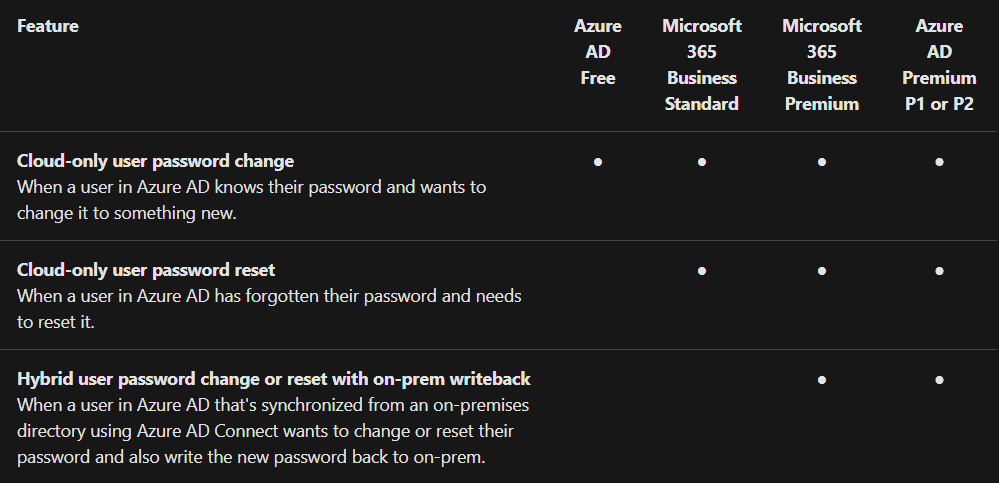
- Depending on the intended implementation of SSPR features, a different license or subscription might be required. Please refer to the image below, showing the features and required licenses.
Knowing the Self-Service Password Reset State Options
The process of enabling self-service password resets for Office 365 is straightforward. But, the act of enabling is not the same as carefully implementing.
One of the biggest concerns when implementing new features is how users can be impacted. It is a good thing that SSPR can be enabled to target only members of a selected group. This helps limit the possible impact to a minimum, especially when implementing SSPR in batches.
There are three states for SSPR. Each state represents how SSPR is applied (or not applied) to users.
- None – In this state, SSPR is disabled for every user in your tenant.
Note: SSPR is always enabled for admins even if the state of SSPR is set to None. Admins are required to use two authentication methods to reset their own passwords using SSPR.
- Selected – In this state, SSPR is applied to a selected group only. This is useful when doing a staged rollout. Using this state, you can add users to a target group in batches. This is the SSPR state that will be used in this article.
Note: SSPR allows only one group as a target at a time when you choose the Selected state. However, nested groups are allowed.
- All – Choosing to enable SSPR in this state will apply SSPR to all users in your tenant.
Enabling SSPR for Organizations with Cloud-Only Setup
For cloud-only organizations, enabling self-service password resets for Office 365 is only a matter of flipping a switch to turn it on and apply the most basic setup. The steps below will teach you how to do just that.
First, log in to the Microsoft Azure portal using your global administrator account and go to the Azure Active Directory blade.
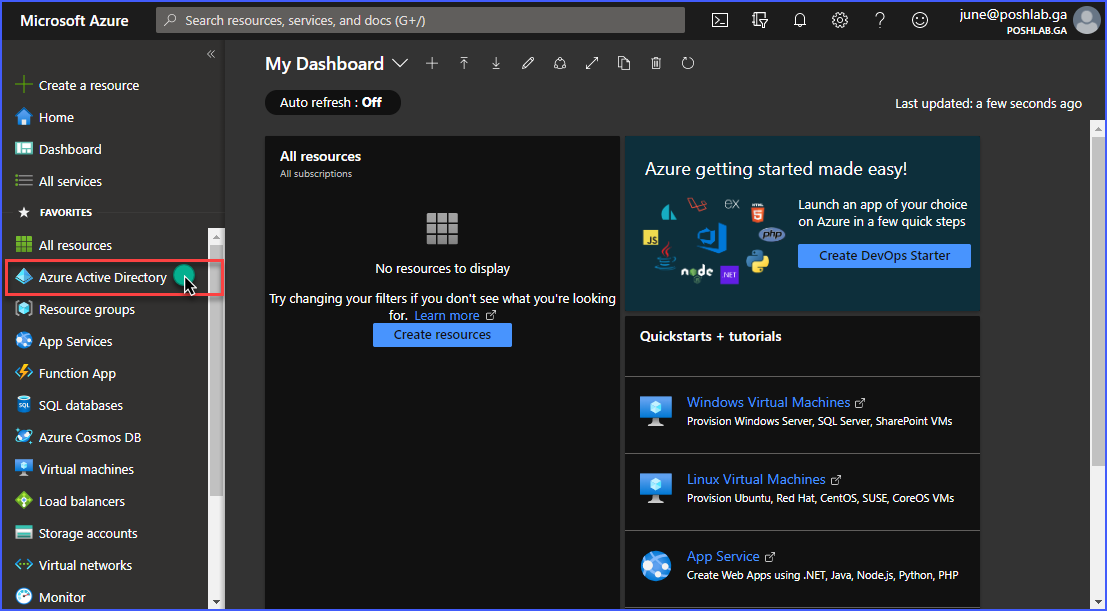
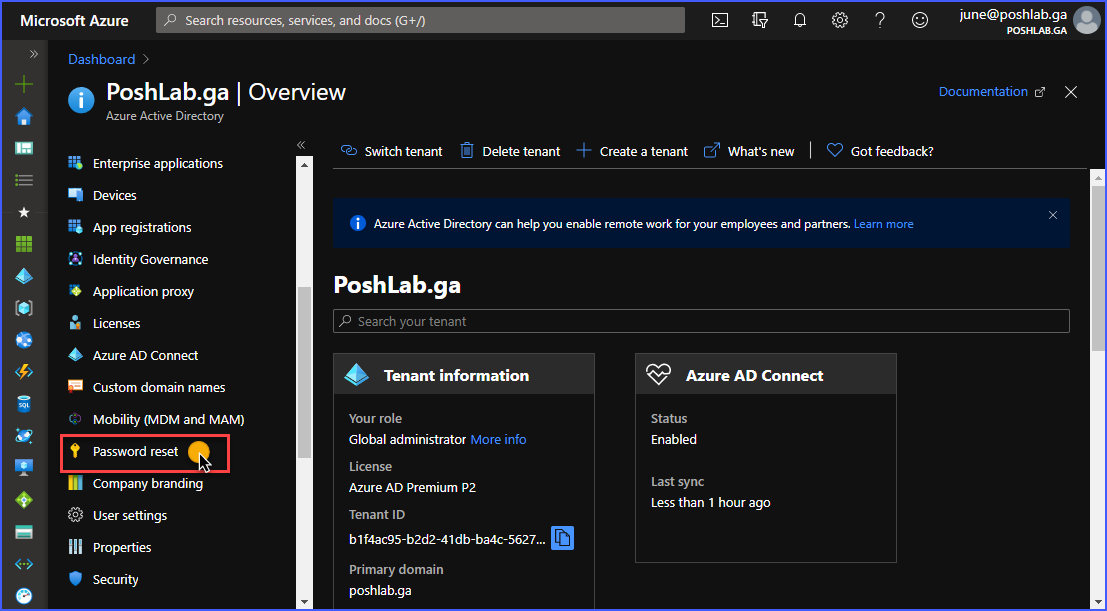
In the Azure Active Directory page, under the Manage section, locate and click on Password Reset.
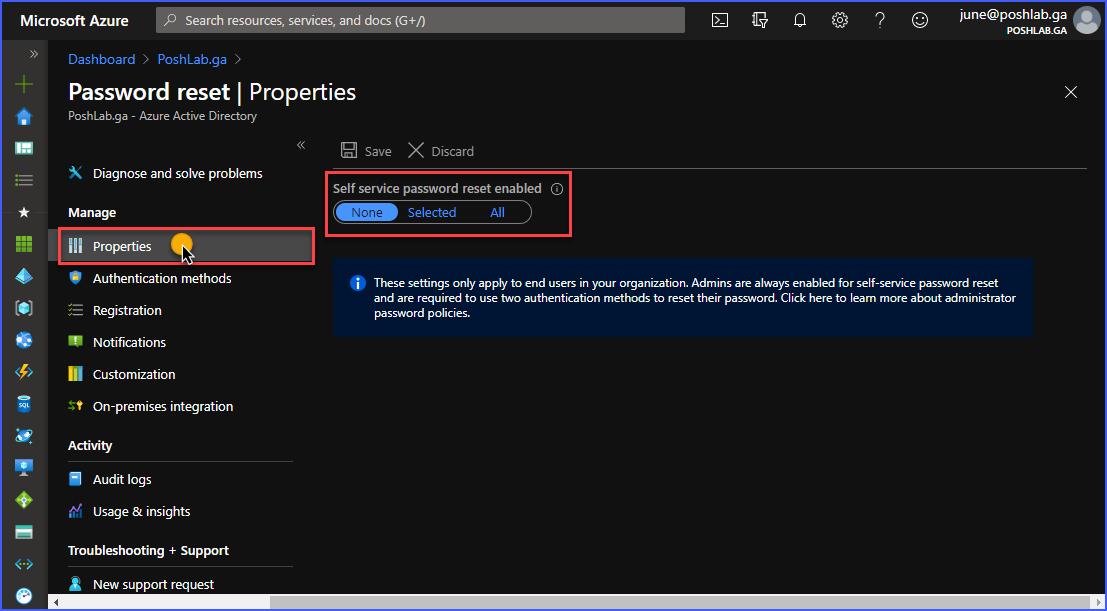
Inside the Password reset blade, under the Manage section, click the Properties menu blade. Then, you will be presented with the current state of the self-service password resets for Office 365. As you can see from the screenshot below, the current self-service password resets for Office 365 state is None – which means that SSPR is currently turned off for all end users.
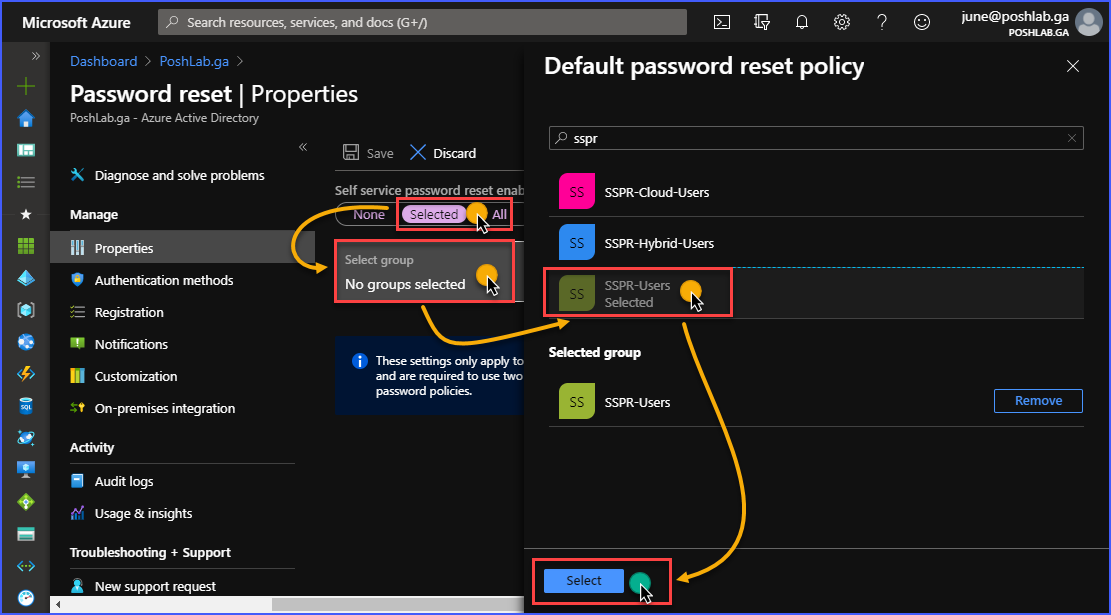
Next, change the status of the SSPR to Selected. Then you need to specify the target security group whose members will be enabled for self-service password resets for Office 365. In this example below, the name of the group selected in SSPR-Users. Click on the Select button after choosing the target group.
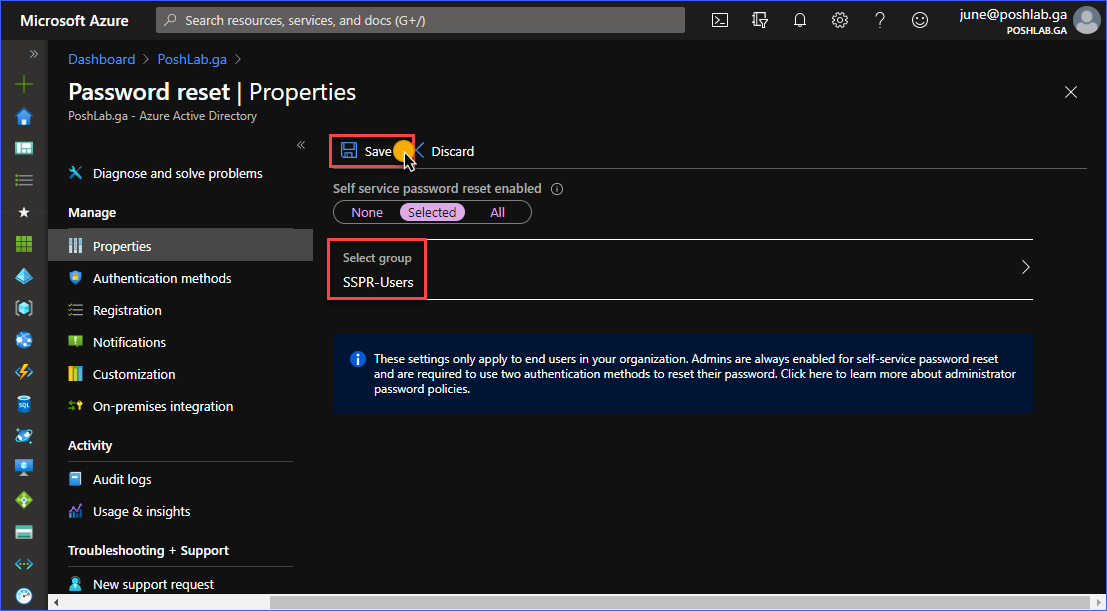
As you can see from the image below, the chosen group SSPR-Users has been selected. Now, click on Save to finally enable SSPR.
Enabling SSPR for Organizations with Hybrid Setup
In the previous section, you’ve learned how to enable SSPR, which applies to a selected group of cloud-only users. In this section, you’ll learn what needs to be done should your organization’s users are synced from on-premises Active Directory to Azure AD with Azure AD Connect.
Since hybrid user accounts are initially created in the on-premises AD, the password that was reset must be written back to the on-premises AD. And to do that, the Password writeback feature must be enabled in Azure AD Connect.
Enabling Password Writeback Feature in Azure AD Connect
To enable the Password writeback feature, you must have access to the server where Azure AD Connect is installed. Follow these steps to enable Password writeback.
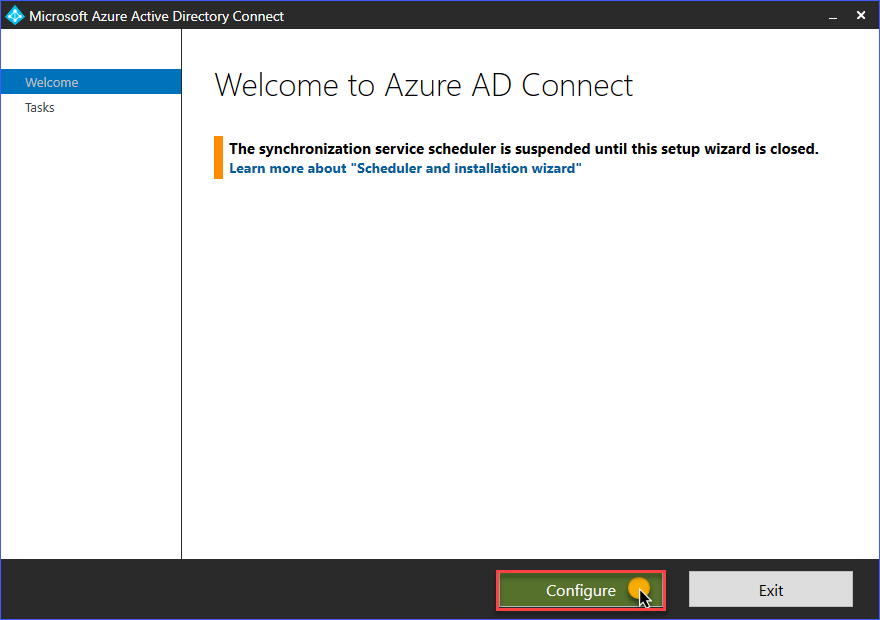
Launch the Azure AD Connect configuration program, then click on Configure.
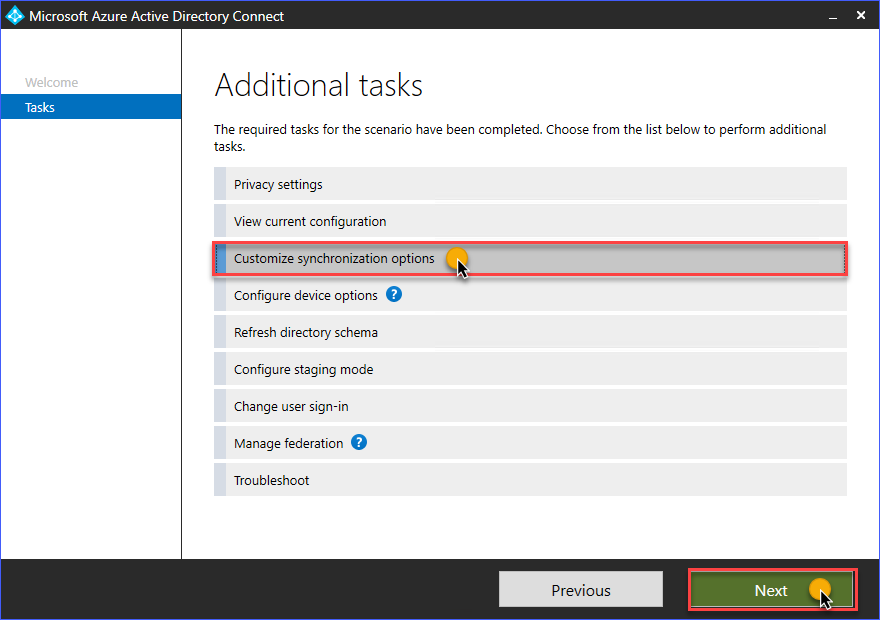
Then, under the Additional tasks, select Customize synchronization options. Click Next.
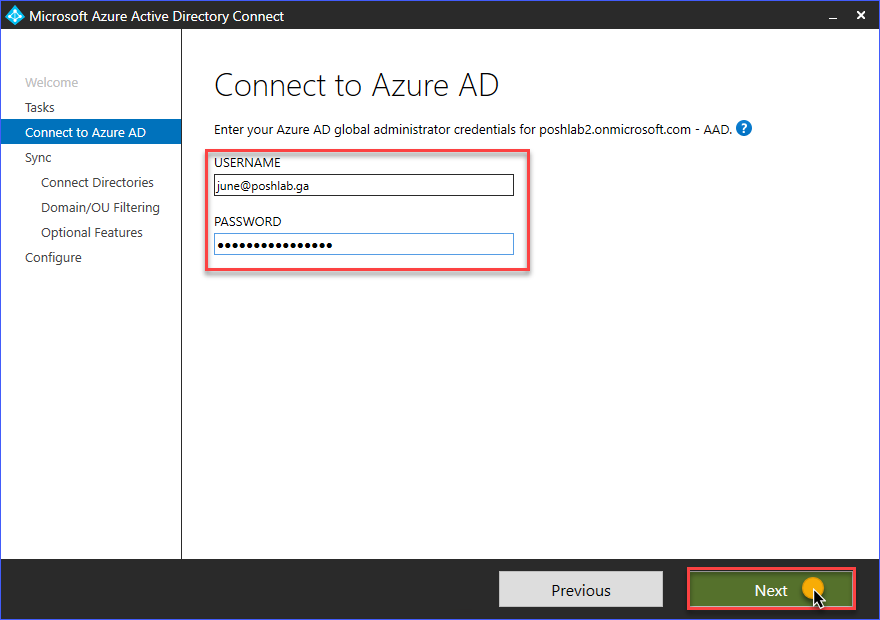
In the Connect to Azure AD page, enter your global administrator account credentials. Click Next.
Click through the next pages until you arrive at the Optional Features page. Put a check on the Password writeback checkbox and click Next.

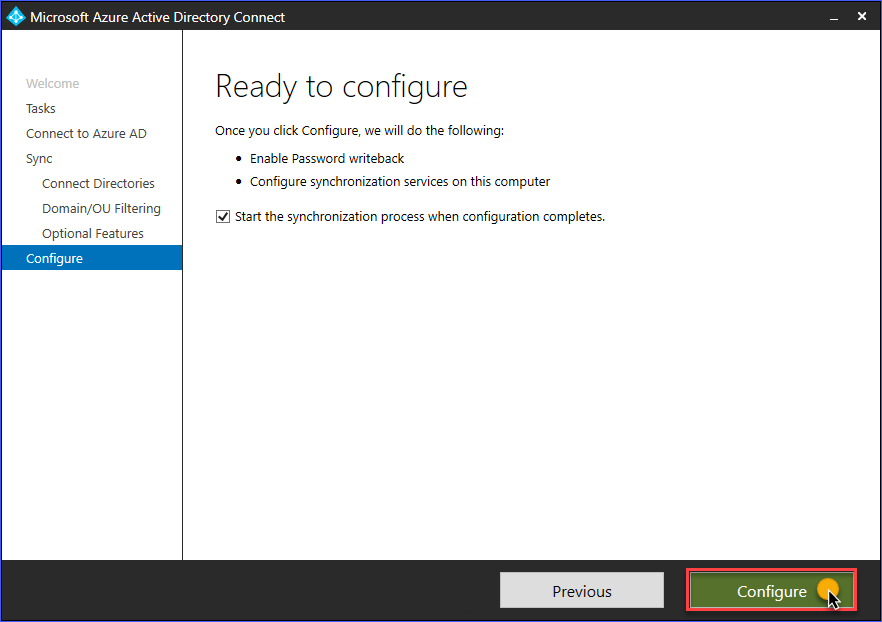
Next, in the Ready to configure page, click on Configure. Then, wait for the configuration process to complete.
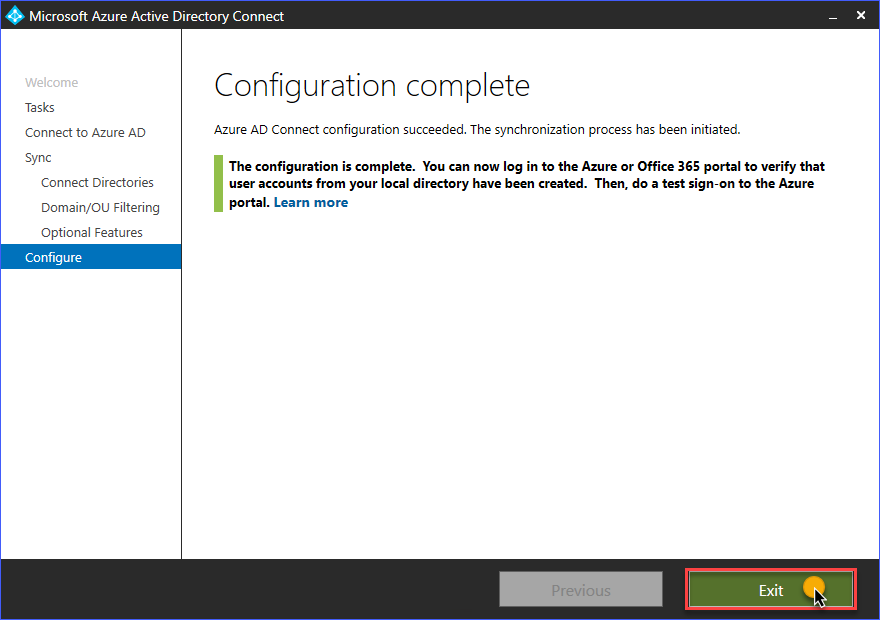
You should see the same status as the image shown below, indicating that the configuration has been successful. Click Exit.
Configuring Self-Service Password Resets for Office 365 Options
So far, in this article, you’ve learned how to enable SSPR with default options. Even with the default options, SSPR is already functional.
However, more options can be configured and customized, which may help you further control SSPR to conform to your organization’s requirements. These options include authentication methods, registration, notifications, support contact links or email, and on-premises AD integration.
Configuring Registration Options
Before users can use self-service password resets for Office 365, they will need to register their authentication information first. In the Registration menu blade, there are two configuration settings as you’ll see in the screenshot below.
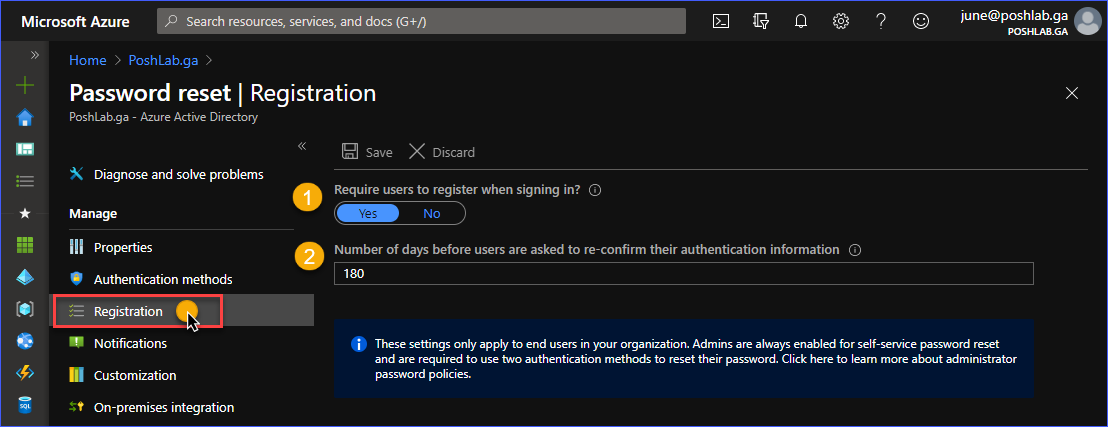
As you can see from the image above, the two options are:
- Require users to register when signing in? – This configuration controls whether or not the users are forced to register their authentication information during the next time they log in. If this is set to No, admins will need to educate the users on how they can manually register their self-service password reset information. By default, this setting is set to Yes.
- Number of days before users are asked to re-confirm their authentication information – This value determines when the users are required to update or reconfirm their authentication information for SSPR. By default, the value for this setting is set to 180 days.
In this article, the default configuration will be used.
Configuring Authentication Methods
When users attempt to reset their own password, self-service password resets for Office 365 will require users to prove their identity. You can configure SSPR to require up to two authentication methods.
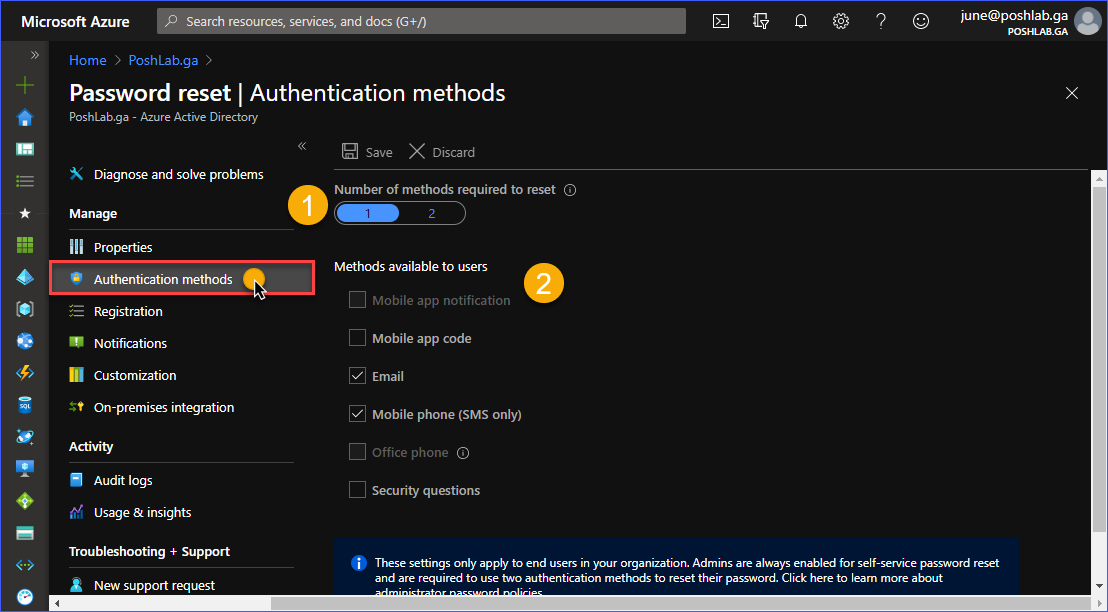
As seen from the image above, there are two settings:
- Number of methods required to reset – This determines how many authentication methods are required for the users when they attempt to reset their own passwords. The default for this setting is 1.
- Methods available to users – This shows a list of possible ways for users to authenticate before they can reset their account passwords. These methods include using the Microsoft Authenticator app (code and notification), email, SMS, office phone, and security questions.
In this article, the default configuration will be used.
Configuring Notifications
It is a good idea for users and admins to get notified by email whenever a password reset operation is performed on their respective accounts.
When users are notified, they are allowed to validate that it was themselves that performed the password reset.
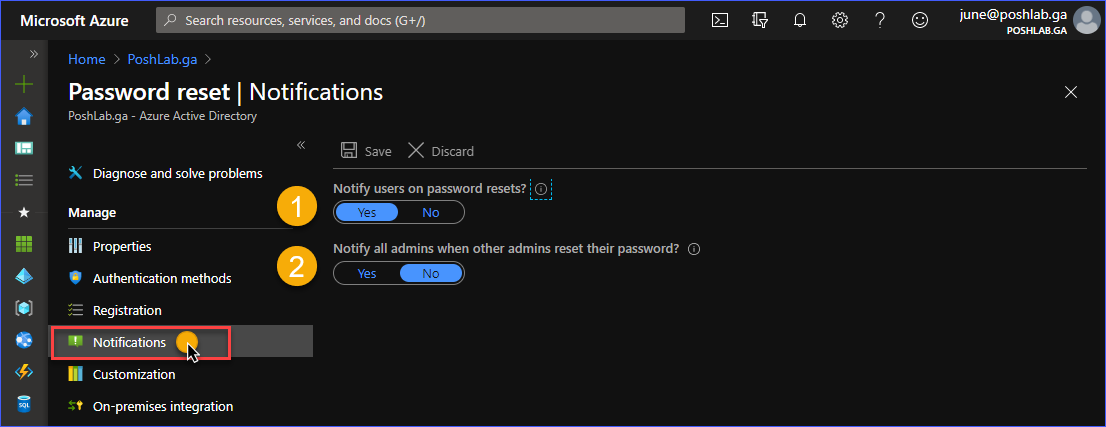
The image above shows that you have the option to Notify users on password resets and Notify all admins when other admins reset their password.
In this article, the default configuration will be used.
Configuring Support Contact Information
Another configuration available is to customize the support contact information for SSPR. This configuration provides a way for users to reach out to your helpdesk or admins.
As you can see below, the default setting to 1) Customize helpdesk link is set to No. Changing the option to Yes will allow you to specify a 2) Custom helpdesk email or URL.
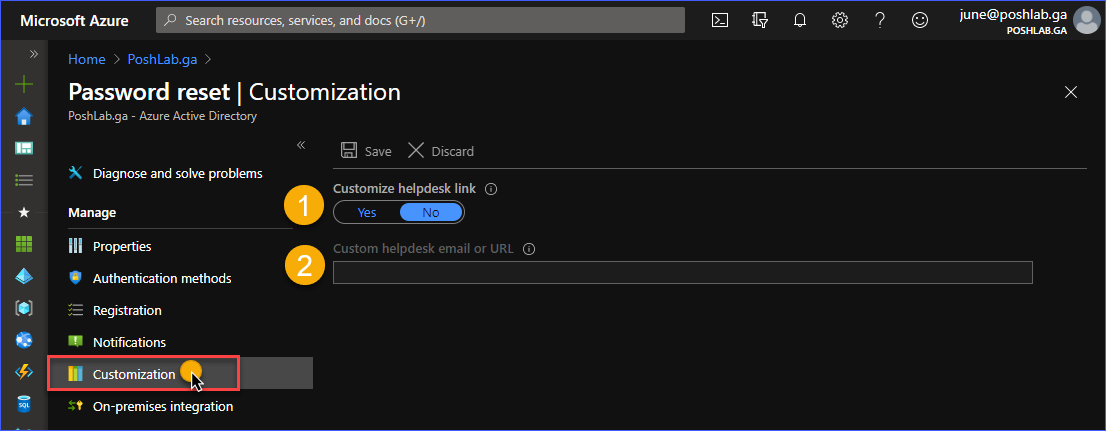
In this article, the default configuration will be used.
Configuring On-Premises Integration
In the On-Premises integration menu blade, you are shown the status of the on-premises writeback client availability. You will be able to confirm whether or not the password writeback feature is working.
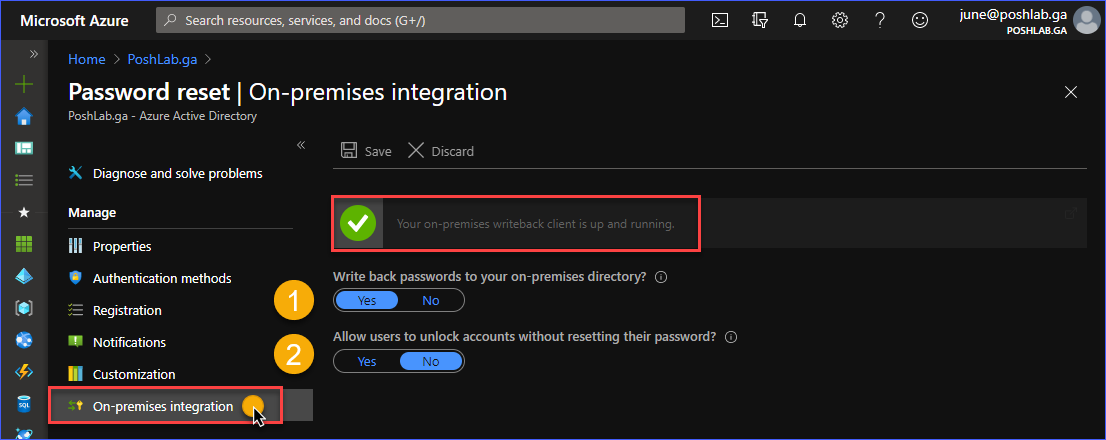
As you can see from the image above, you have the option to:
- Turn on or off the password writeback option to the on-premises directory.
- Turn on or off the ability of users to unlock their locked-out accounts without requiring a change of password.
In this article, the default configuration will be used.
Testing Self-Service Password Reset User Experience
So far, in this article, you’ve learned how to enable the self-service password reset in Office 365 and the different configuration options available. In this section, you will be able to test and get familiarized with the self-service password reset user experience.
Registering the Self-Service Password Reset Authentication Information
By default, once self-service password resets for Office 365 is enabled, users are automatically prompted to register their authentication information. Users can also manually go to the SSPR registration link (https://aka.ms/ssprsetup) by themselves.
See the demonstration below as an example of when the user CloudUser logs in to the Office 365 portal.
As you can see from the demonstration above, upon successfully signing in to the Office 365 portal, the user was asked to register the authentication information. Since the SSPR registration requires only one authentication method, registering only a phone number was enough.
Performing a Password Reset
If the user has been registered with self-service password reset, and needs to reset the account password, they need to go to the password reset URL at https://aka.ms/sspr.
The demonstration below shows how to perform a self-service password reset.
As seen from the demonstration above, once the user was able to authenticate using SMS code, the password was able to be changed.
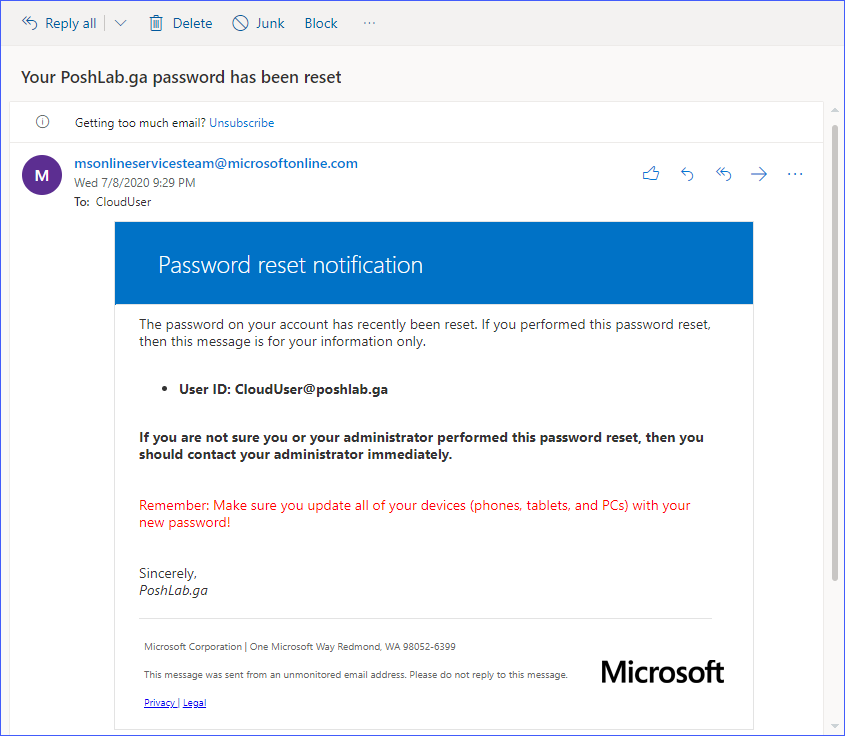
The image below shows the password reset notification that is sent to the user as part of the self-service password reset process.
Modernize identity security with MFA, SSO, and self-service password reset. Download ManageEngine ADSelfService Plus.
Summary
Self-service password resets for Office 365 proves to be a convenient and secure way for users and admins to reset their own passwords.
When users are provided with the option for resetting their passwords, the long wait time for resolution is eliminated, and interruption to productivity is minimized.
In this article, you’ve learned how to enable self-service password reset and apply it to a specific group. You’ve also learned about the different configuration options available to have more control over how SSPR works for your organization.
With EasyEntra, first-level support teams can focus on what instead of where! Manage AD, Entra ID, and Exchange Online from a consolidated, intuitive console.
You’ve also learned step-by-step how the self-service password reset user experience works including the registration process and the email notification.
More configurations can be integrated with SSPR than what’s covered in this article, like, setting up policies and banned passwords. Now you have the knowledge that should make you more confident to implement SSPR for your Office 365 tenant.


