


You’ve probably heard of OSQuery, an open-source SQL-powered operating system instrumentation toolkit used by Facebook and many others. You may have even been using it unknowingly on your systems. But what exactly is OSQuery?
With OSQuery, you can perform detailed system monitoring, gather information on processes and users, and more than simply logging data to disk. And in this tutorial, you’ll learn about many different features and capabilities of OSQuery.
Ready? Read on to learn more about comprehensive system monitoring with OSQuery!
Prerequisites
This tutorial will be a hands-on demonstration. If you’d like to follow along, be sure you have a Linux-based system. This guide uses Ubuntu 20.04, but any other Linux-based system will also work.
Installing OSQuery on Ubuntu
OSQuery lets you perform intuitive low-level OS monitoring on Linux systems. OSQuery provides many different tools and features that allow users to customize their experience and perform more complex queries. But to take advantage of OSQuery, you’ll first have to install it on your system.
You’ll install OSQuery via OSQuery’s official repository. This repository allows you to install OSQuery as a service and keeps your system up to date with the latest version.
1. Run the below apt update command to update your local repository while accepting all prompts automatically (-y) during the update.
apt update -y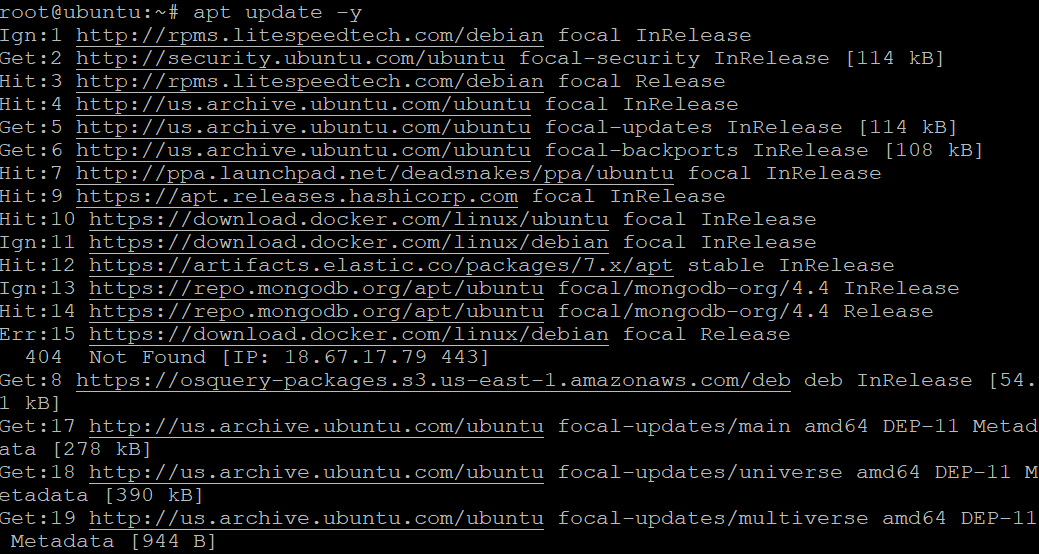
2. Next, run the echo command below to add the OSQuery repository to your system.
The tee command allows you to take the output of the echo command and write it the /etc/apt/sources.list.d/osquery.list file. The system uses this file to add new software repositories.
echo "deb [arch=amd64] https://pkg.osquery.io/deb deb main" | sudo tee /etc/apt/sources.list.d/osquery.list
3. After adding the OSQuery repo, run the apt-key command below to add the OSQuery public key (1484120AC4E9F8A1A577AEEE97A80C63C9D8B80B) to your system. Your system uses this key to verify the integrity of packages downloaded from the repository.
Note down the OSQuery public key to verify if it’s added to your system later.
sudo apt-key adv --keyserver keyserver.ubuntu.com --recv-keys 1484120AC4E9F8A1A577AEEE97A80C63C9D8B80B
4. Now, rerun the apt update command to update your repositories with the new OSQuery repository.
apt update -y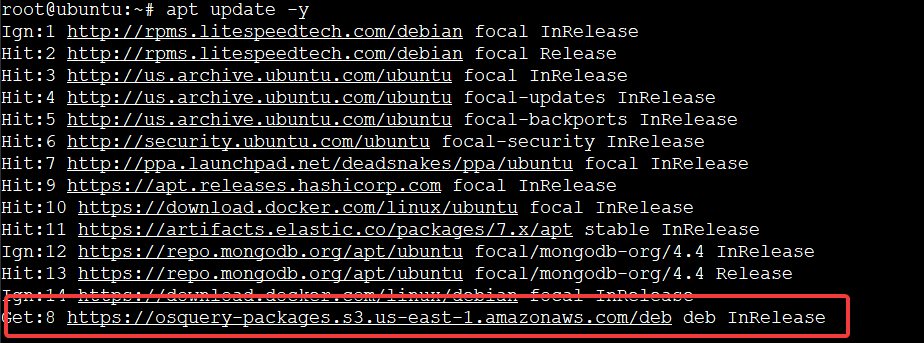
5. Run the following apt-cache command to check that the apt package index contains the OSQuery repository. This command prints the repository version and OSQuery version.
apt-cache policy osquery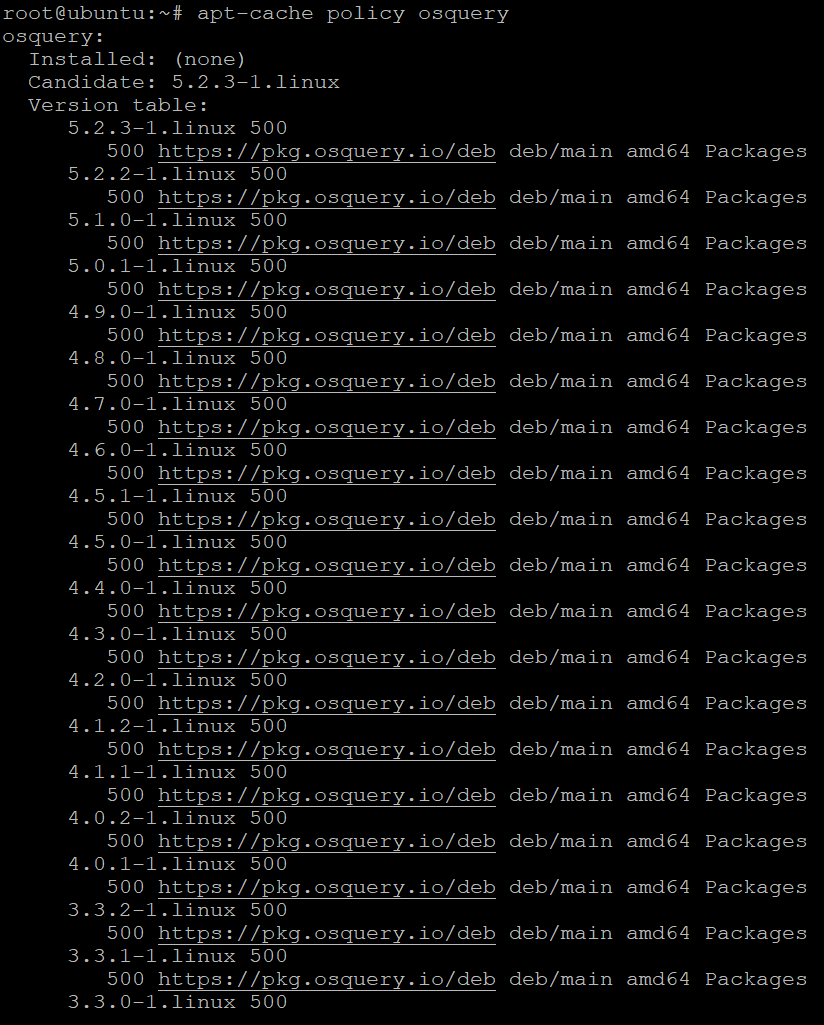
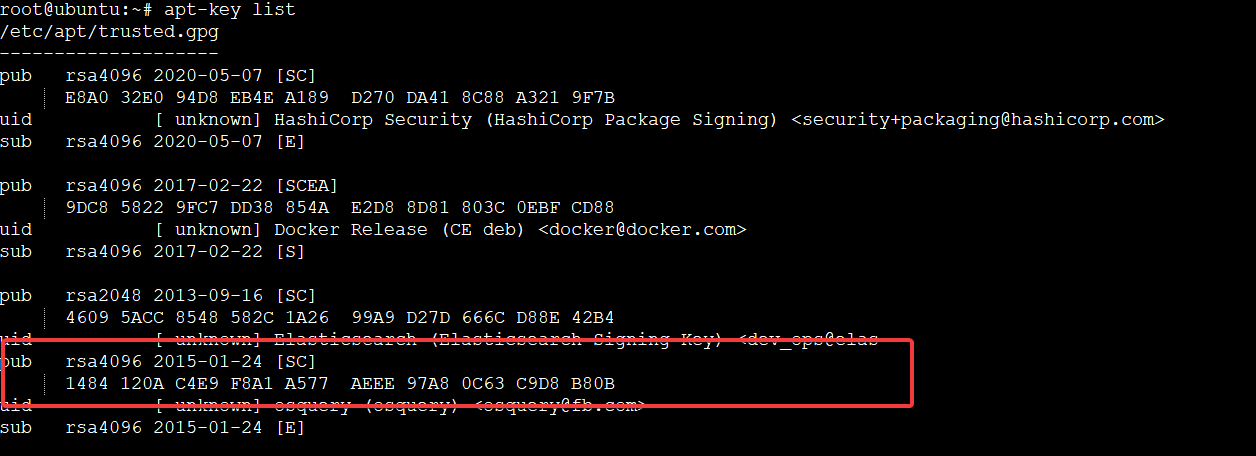
6. Next, run the below command to verify that the OSQuery public key has been added to your system.
apt-key listYou can see below that the output includes the text pub followed by a long string of characters, which is the key fingerprint. Notice below that the highlighted output contains the OSQuery public key you noted in step four.
7. Run the apt install command below to install OSQuery and its dependencies while automatically accepting prompts (-y).
sudo apt install osquery -y
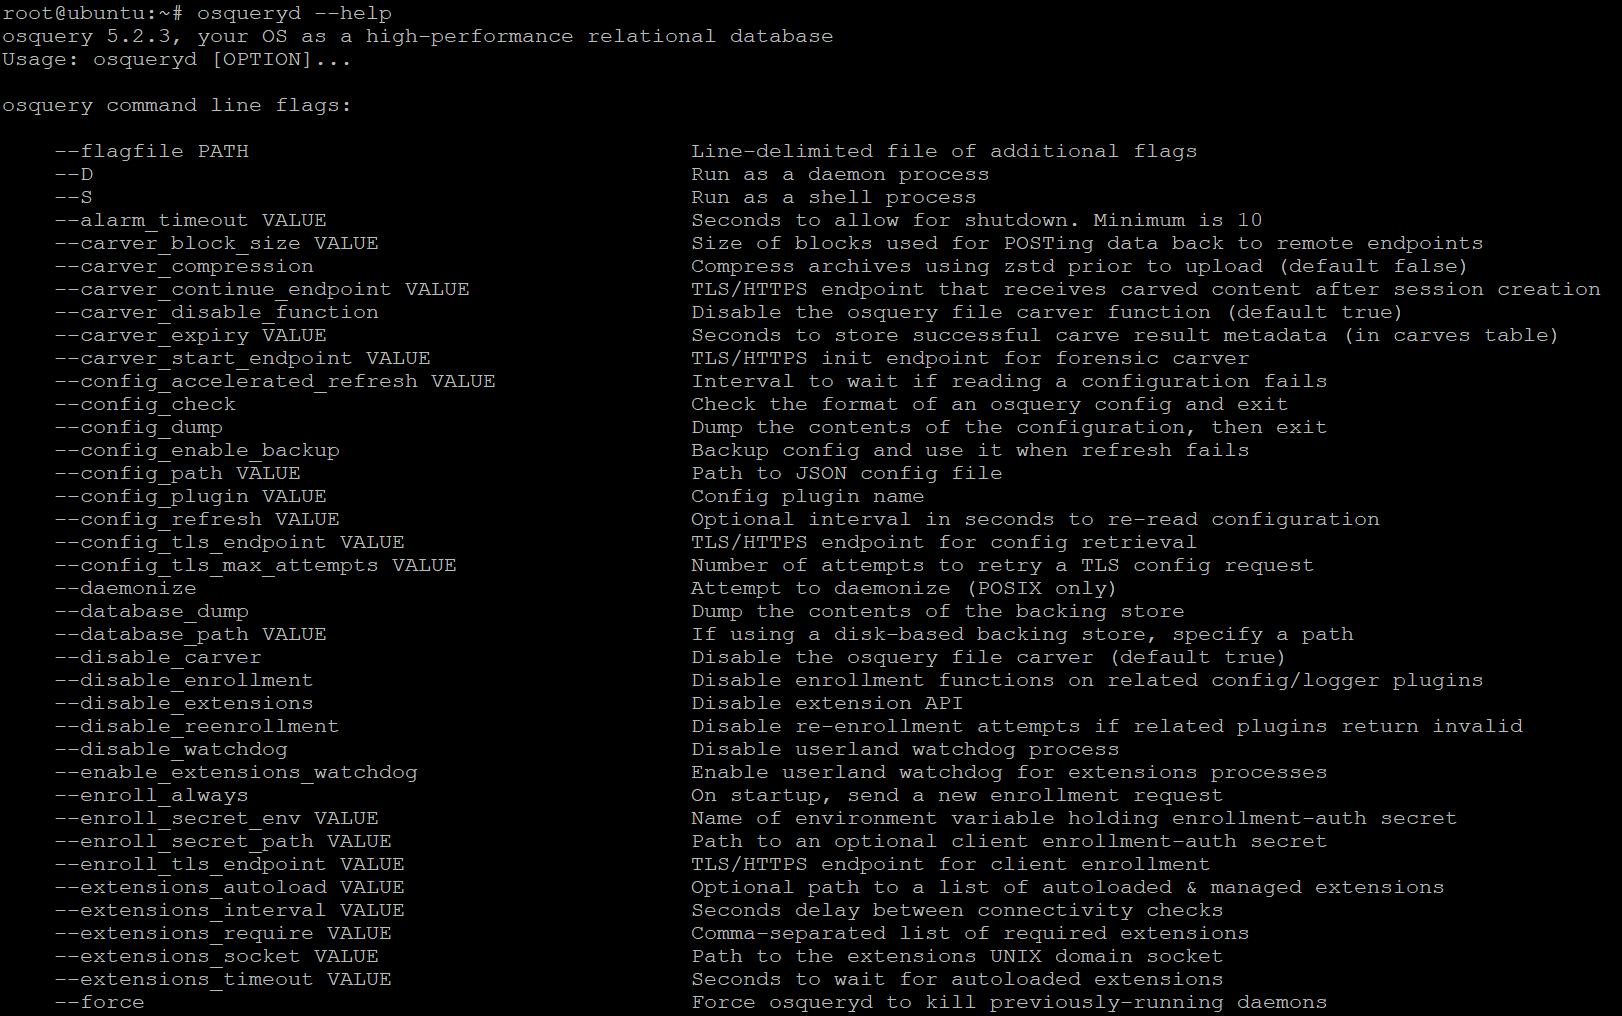
8. Once OSQuery is installed, run the following osqueryd command to show all available command-line options (–help) for the OSQuery daemon.
osqueryd --helpBelow, you can see various options you can append to the osquery command. This output also confirms that OSQuery is installed and running on your system.
9. Now, run the below command to see all available command-line options (–help) for the osquery interactive shell. By default, OSQuery comes with an interactive shell that allows you to perform queries on your system. This shell is similar to the MySQL shell or the MongoDB shell.
osqueryi --helpDon’t see any output? Your OSQuery daemon might not be running. In that case, run the below command to start your OSQuery daemon. The osqueryctl tool lets you manage many different aspects of your OSQuery installation, like starting or stopping the OSQuery daemon.
osqueryctl start osqueryd
10. Lastly, run the below command to enter the OSQuery interactive shell. This command lets you interact directly with your system and perform queries.
The ability to perform comprehensive system monitoring using an interactive shell can be handy for administrators to analyze system data or troubleshoot issues quickly.
osqueryi --verbose
To exit the OSQuery interactive shell, run the .exit command
Querying All Tables
You now have access to the OSQuery interactive shell, so feel free to start querying data. How? Start by querying all the tables. Since the OSQuery interactive shell is like any other SQL shell, each table stores information about a specific aspect of your system.
For example, the processes table stores information about all the processes running on your system. To perform queries, you first need to know what tables are available.
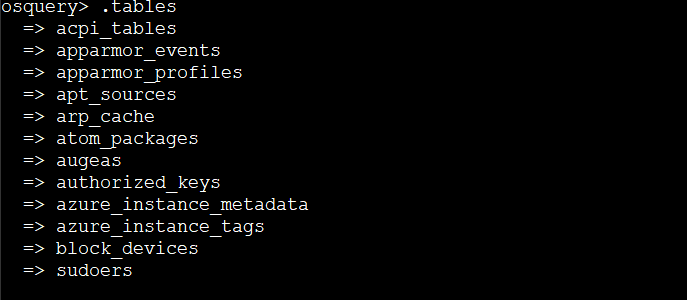
Run the command below to see all available tables.
.tables
The output below shows all the available tables in the OSQuery interactive shell. As you can see, many tables contain information about various aspects of your system.
The output below is just a small sample of the available tables.
Listing All Users Information
Suppose you want to monitor your system for potential security issues. One way to do so is by querying the users table in the OSQuery interactive shell to get all users information on your system.
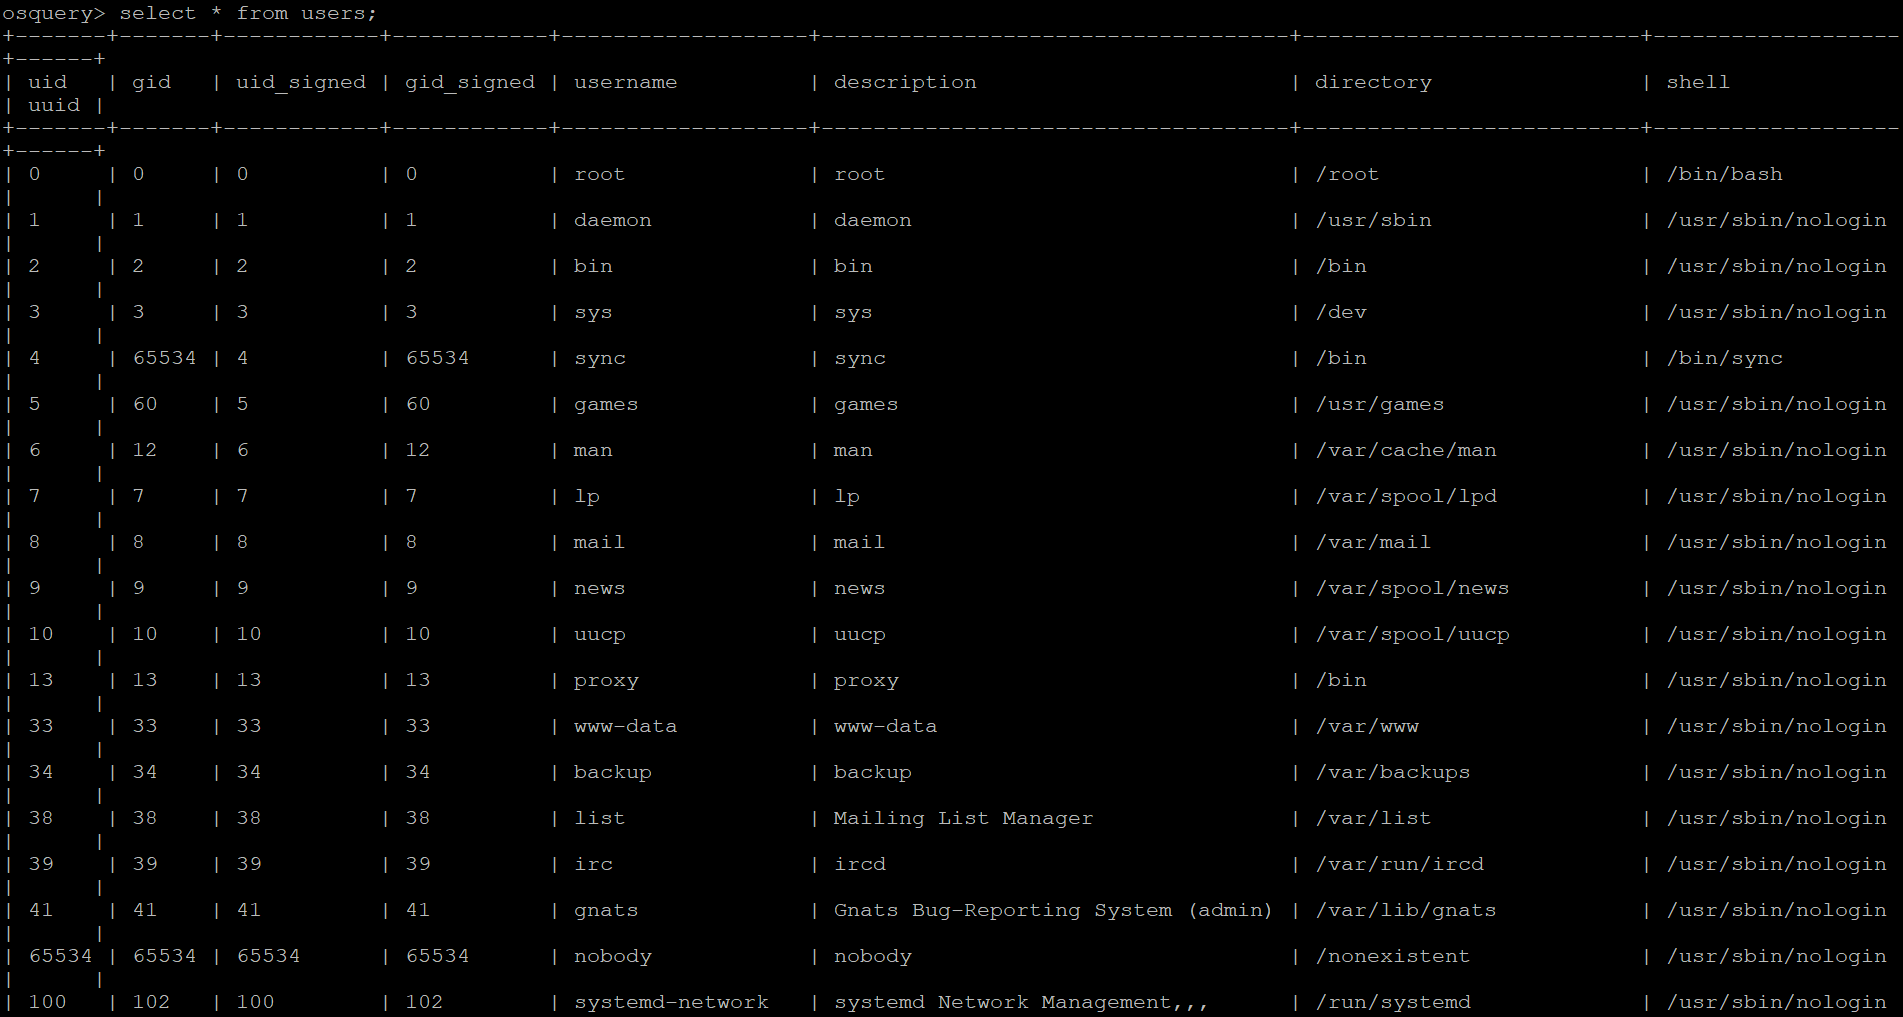
Run the following query to list all user information from the user's table. The select statement retrieves data from a table, while the * wildcard character selects all columns from the users table.
select * from users;
In the output below, you’ll see the following information:
- uid and gid (User ID number and Group ID number). You can use either of these values to query the system for information about a specific user or group.
- uid_signed – The User ID for which the Group ID is valid. You can use this value to query the system for information about users’ privileges.
- username – The username associated with the account. You can use this value and the User ID to query the system for information about a specific user.
- description – The user’s description.
- Directory – The user’s home directory. You can use this value to query the system for information about a specific user’s files and location.
- shell – The user’s default shell. You can use this value to query the system for details about a specific user’s shell. For instance, you might want to know if a user has set their shell to something other than the default. Or maybe you want to know if a user has a restricted shell like /bin/false.
Note down one of the usernames you’d like to get more information about each user.
Now, run the query below to get more information about your target user. For example, the nobody user sounds like a good candidate for further investigation. Replace nobody with the username you noted in step one.
select * from users where username="nobody";
Below, you can see that the nobody user has a uid of 65534 and a gid of 65534. This user’s directory is set to /nonexistent, and their shell defaults to /usr/sbin/nologin. This user does not belong to any additional groups.

In Linux and Unix systems, the nobody user is used for access control. This access control allows the system to provide processes and services with an account that has no privileges or permissions. As a result, it effectively restricts what that process or service can do.
For example, you might want to run FTP on your server and ensure that FTP can only access a specific set of files and directories simultaneously. At the same time, it ensures not logging in as a particular user or accessing any other files on your server.
In this case, you could configure FTP to use the nobody account, which disables any login access to your SSH server (/usr/sbin/nologin). At the same time, allows access to the specific files and directories that you’ve configured.
Listing Processes Information
Apart from monitoring users in your system, you may also want to monitor suspicious or unwanted processes, CPU and memory utilization. If so, you’ll have to look into the processes table.
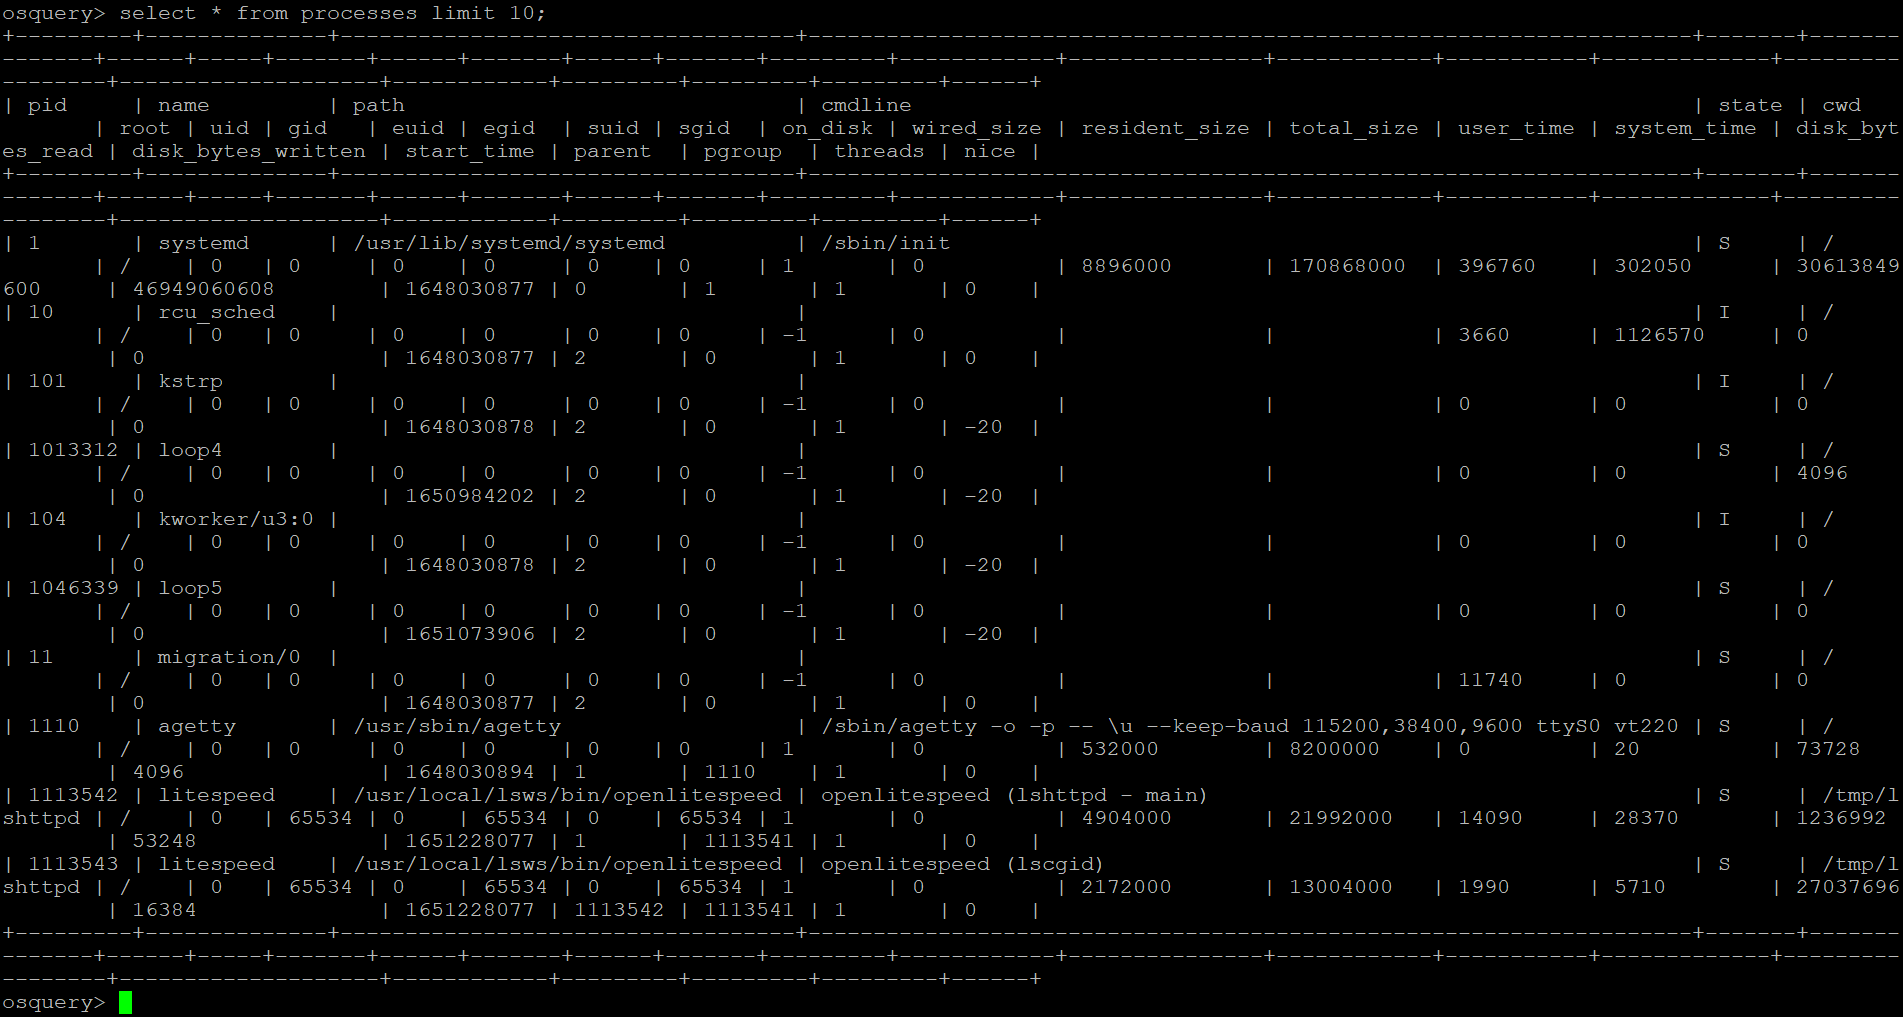
Run the following query to list all the processes running on your system. The limit clause specifies the number of results to return. In this case, you request 10 results, where only the first ten processes will be listed.
select * from processes limit 10;
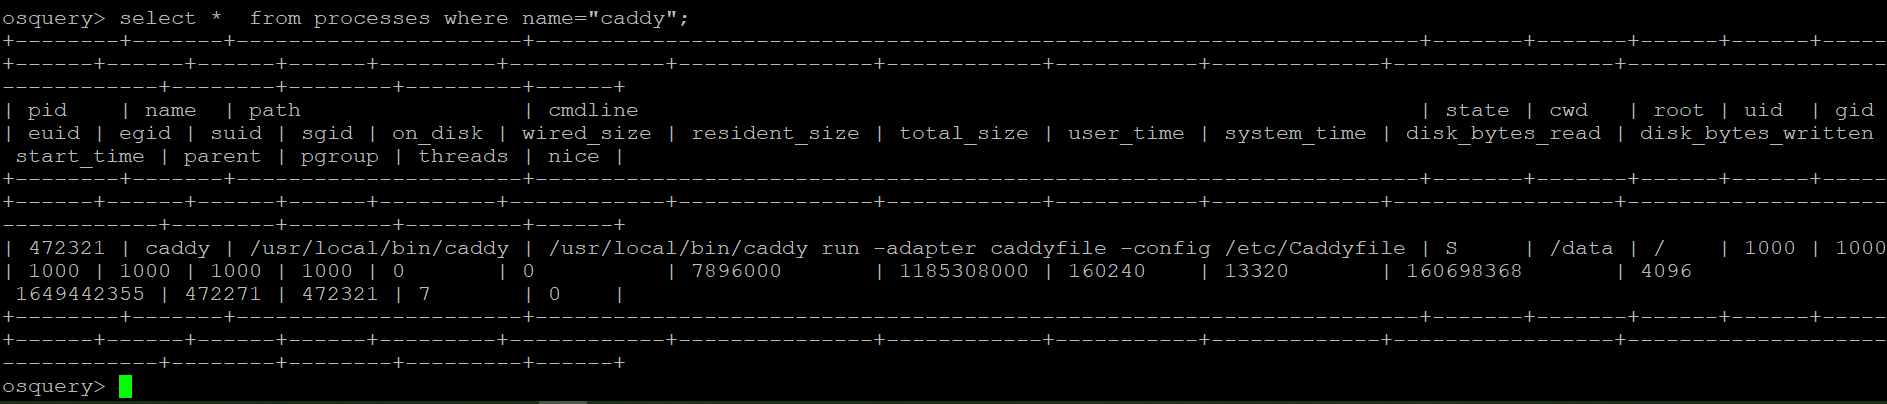
If you like to query a specific process instead, specify the process’ name in the query, as shown below. Suppose you want to know more about the caddy process, a web server you are using on your system.
Run the following query to retrieve information about the caddy process from the processes table.
select * from processes where name="caddy";
Finding a System’s OS Version
Awareness of your system’s OS version helps you to find documentation and resources to help you with troubleshooting issues on your system. And the good news is that OSQuery offers a way to check your system’s OS version from the os_version table, even if you’re on a remote server.
Run the following query to retrieve information about the version of your OS. The os_version table lets you find your operating system’s name, version, and platform.
select * from os_version;
You’ll see a list of information about your OS, including the name and version number, as shown below.

Displaying Listening Ports
Suppose your SSH server is running, but how can you be sure it’s running on a standard port? Or maybe you want to see if any of your services have unexpected open ports. If so, querying information from the listening_ports table will do the trick.
You can use the listening_ports table to find out which ports are open, the process name, and PID responsible for the port.
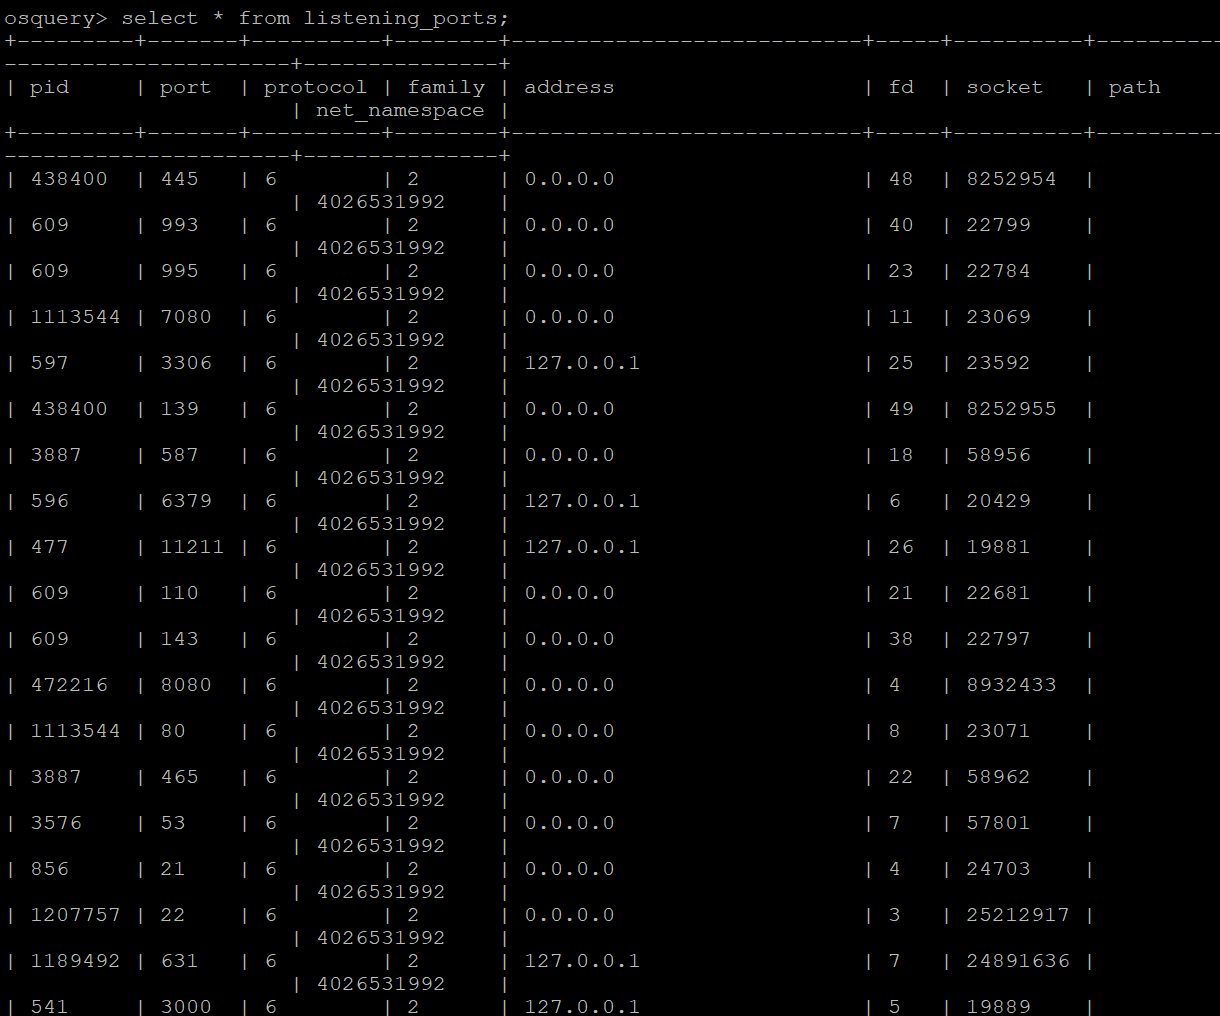
Run the following query to retrieve a list of all listening_ports on your system.
select * from listening_ports;
You’ll see a list of all open ports on your system with details such as its process name and PID, as shown below. You can use this information to investigate any open ports you’re not expecting.
Listing Currently Logged-in Users
Your server is dedicated to a public website that anyone can access. So naturally, you’ll want to ensure unauthorized users can’t log in to your system. And as part of securing your server, you can use OSQuery to list the currently logged-in users so that you can investigate any suspicious activity.
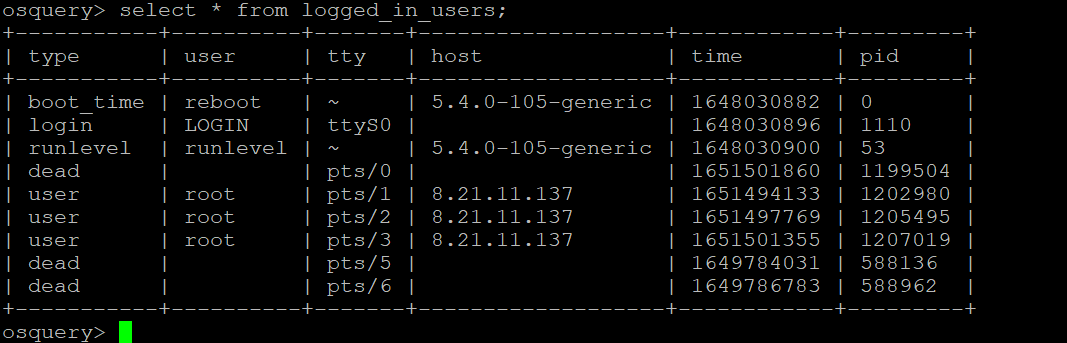
Run the following query to retrieve information about all logged-in users on your system.
select * from logged_in_users;
You’ll see a list of all users currently logged in to your system and information about each user, like in the output below. You can use this information to investigate any unauthorized users logged in.
Logging Outputs to Files on Disk
Perhaps you’re running an app on your server with a lot of logging output. If so, instead of printing the output on the console, why not store the output in a file on disk?
OSQuery lets you log outputs directly to files on your system so you can review them later. Or you may want to share the log files with someone else for further analysis.
Run the following query to log all the process output to a CSV file (--csv). You can name the file as you like, but the file is called process.csv in this tutorial.
This command doesn’t provide output on the console. But at this point, you should have a file called process.csv that contains all the output from your query.
osqueryi --csv 'select * from processes;' > process.csv
You can also specify the full path of where you want to save the output file, as shown below: osqueryi –csv ‘select * from processes;’ > ~/myoutputs/process.csv
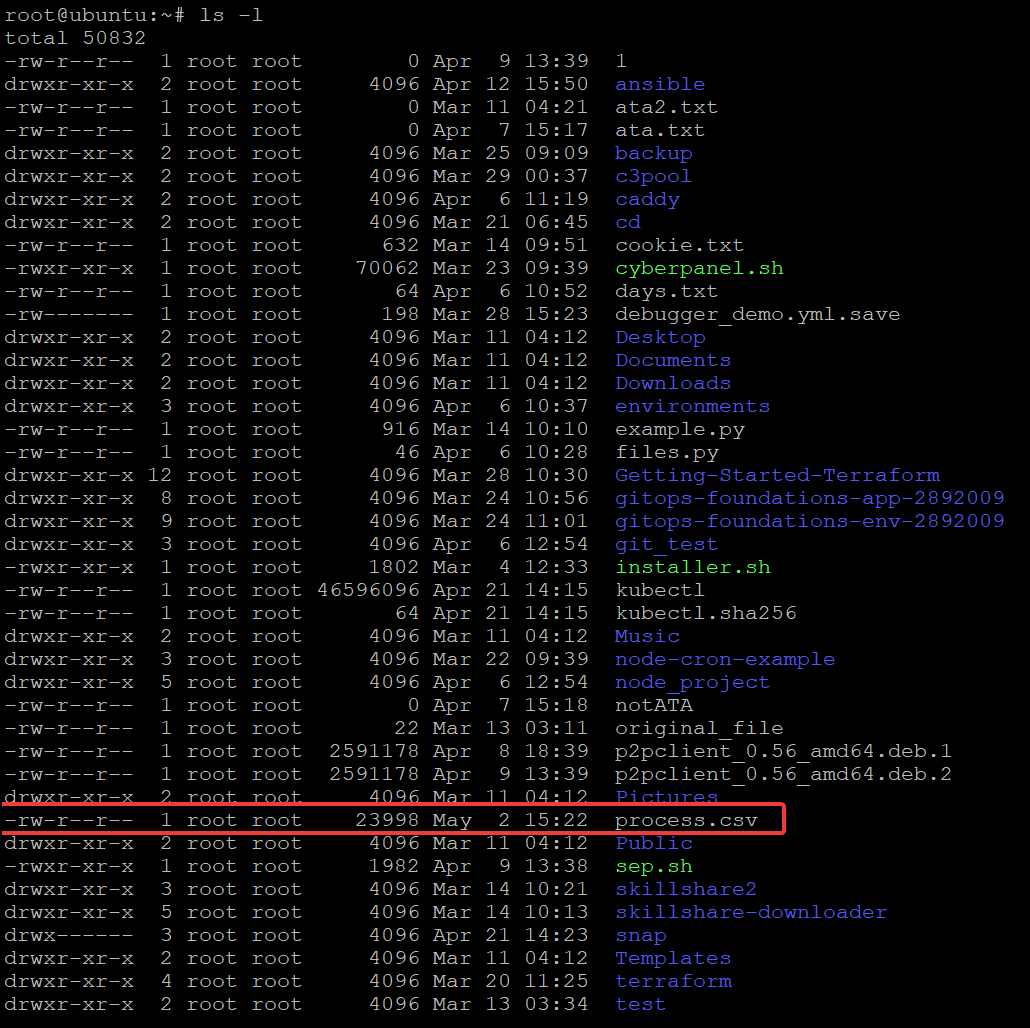
Now, run the ls command below to check that your process.csv file exists in the working directory.
ls -l
Conclusion
In this tutorial, you’ve learned how to install and use OSQuery to monitor and manage your system. You’ve touched on the basics of querying information from different tables depending on your need, from listing users to logging outputs to files.
You can now confidently and efficiently monitor and manage your system from a simple, but interactive query interface of OSQuery.
Now, why not use OSQuery to monitor your system for security threats, log aggregation, and anomaly detection?


