


Identity-related attacks are often happening and can result in compromised user accounts. Some examples of these identity attacks are phishing and password spray. Attackers are becoming more creative and smart. A single user who is insufficiently informed about the dangers of threats like phishing could very well be the entry point for these malicious activities. Hence, what Office 365 MFA is all about.
Luckily, there’s more than one layer of security available to protect Office 365 users’ identities; Multi-factor Authentication MFA. MFA, as the name implies, employs multiple layers of authentication. Typically, these are:
- Something you know (password, PIN)
- Something you have (security key, token generator)
- Something you are (biometrics; face, fingerprint)
Think of MFA is like the vitamin that you take. You don’t like it, and sometimes it is annoying. But, they’re what helps protect you from the nasties. The point is, that preventing credential theft is better than reacting to it after it has already happened.
In this article, you will learn about controlling access to services in Microsoft Office 365 with the use of MFA and conditional policies.
Note: The name Office 365 has been replaced with the term Microsoft 365. You may see that both the name Microsoft 365 and Office 365 may be used interchangeably in this article.
Prerequisites
In this article, the assumption is that you have some working knowledge of Office 365 and Azure Active Directory. To follow along with the examples, you should have admin access to an Office 365 tenant, preferably to a test tenant. It is strongly discouraged to use your production Office 365 tenant.
Using Security Defaults to Enforce Multi-factor Authentication
One way to set up multi-factor authentication for Office 365 is to turn on the security defaults in Azure Active Directory. Turning on security defaults means turning on a default set of preconfigured security settings in your Office 365 tenant.
These security settings include:
- Enforced multi-factor authentication for administrators. Office 365 admin accounts are protected using MFA as a stronger method of identity verification.
- Enforced multi-factor authentication for all users. All users are required to set up MFA in office 365.
- Blocking legacy authentication. Client apps that do not use modern authentication or those that use older protocols like IMAP or POP3 will be blocked from any authentication attempts.
- Protecting privileged actions. This applies to accessing Azure Resource Manager to manage your tenant. Anyone who is accessing the Azure Resource Manager will be required to provide an additional authentication method.
Note: If your Microsoft 365 Tenant was created on or after October 22nd, 2019, the security defaults might be enabled in your tenant.
Some Things to Consider Before Enabling Security Defaults
If you read the four bullet points above, you should realize that while turning on the security defaults provides excellent benefits, the potential impact must be considered. Careful planning to ensure that access to Office 365 is not interrupted.
One of the situations that you may need to consider before enabling security defaults, is when you have PowerShell scripts that are used for automation. Once you enable the security defaults, those scripts may stop working.
Another potential impact is if modern authentication is not enabled in Exchange Online. Outlook clients will not be able to authenticate using MFA. This situation will cause log-in loops and prevent users from accessing their mailboxes.
Note: Using security defaults does not provide granular control over the security settings applied to the whole organization. It is an on-off type of configuration only.
Enabling Security Defaults in Azure Active Directory
Disclaimer: This article does not intend to tell you whether you should enable security defaults in your Office 365 tenant. This article only covers the “how”. The decision to enable security defaults is your responsibility.
The act of enabling security defaults is as simple as toggling a single switch. In fact, the process literally involves flicking just one switch.
When you’ve made all the considerations, and careful planning has been done, follow these steps to turn on security defaults and enable MFA in Office 365.
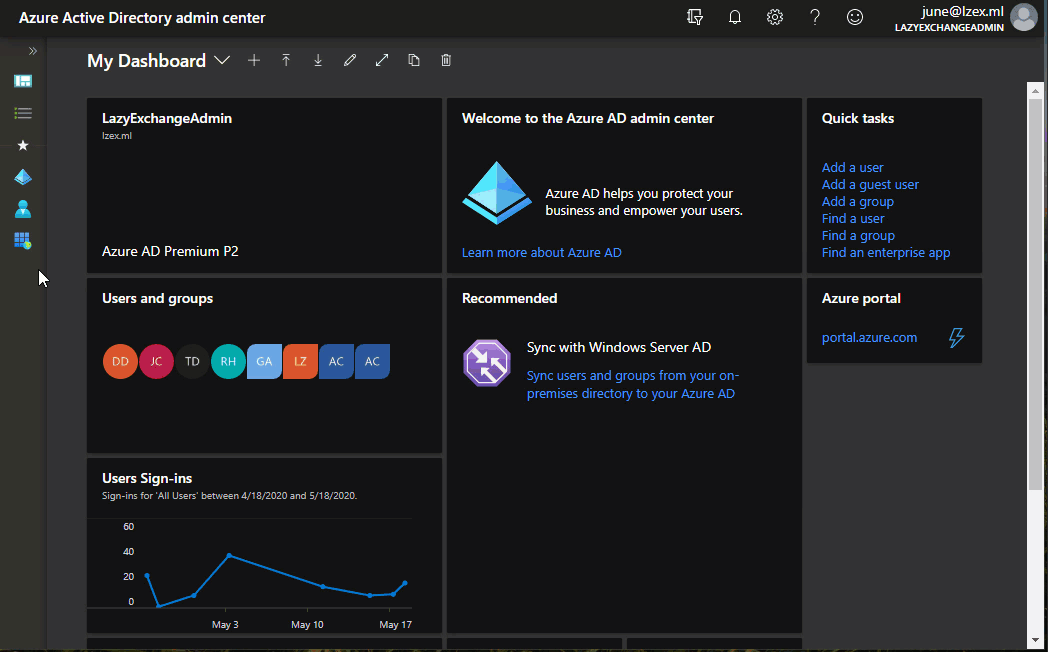
- First, log in to the Azure Active Directory admin center.
- Then, go to Azure Active Directory —> Properties.
- Next, scroll to the bottom of the Properties page and click on the Manage Security Defaults link.
- Lastly, click Yes under the Enable Security defaults fly-out, and click Save.
You can refer to the demonstration below. As you can see, in the end, you should get a confirmation at the upper right portion of the page that the default policy was saved.

Testing the Office 365 MFA Setup Experience
What happens after MFA is enabled? Do users automatically get locked out, or will the users have the option to continue without MFA within a fixed amount of time? That is what you’ll find out in this section.
Just like in any configuration change, any administrator worth their salt would take the extra step(s) to confirm that whatever settings they’ve put in place actually works.
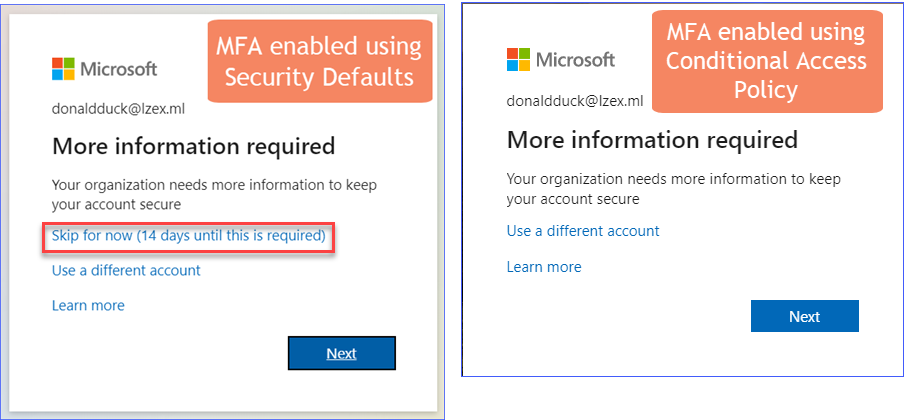
Users will not notice that MFA has been enabled right away, especially if they’re already logged in to Office 365. But the next time that users are required to sign in to Microsoft 365 again, they will see an additional log-in message like the one shown below.
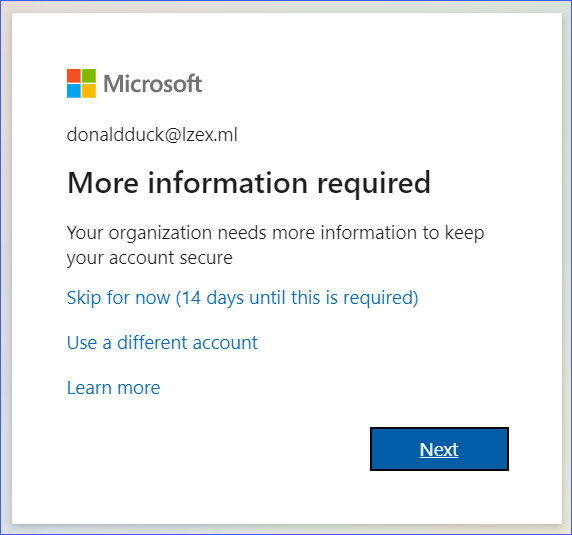
As you can see from the image above, the user is given some options. The Skip for now option means that the user can log in without requiring MFA until the grace period lapsed. However, if the user clicks on the Next button, the process of setting up their account for MFA will start.
Suppose that the user clicked on the Next button. Typically, there’s also an option to specify a phone number where the user can receive the authentication code as a text message. But, in the demonstration below, the user opted to set up the Microsoft authenticator app.

From this point forward, every time a user logs in to Office 365, they would have to perform another step to approve or provide a code to pass the authentication.
Note: For older apps and protocols that do not support using modern authentication and MFA, app passwords may be used instead. For more information, visit Create an app password for Microsoft 365
Using Conditional Access Policies to Enforce Multi-factor Authentication
Implementing conditional policies allows for more control over security configurations, as opposed to enabling security defaults where the changes are uniformly applied tenant-wide. However, conditional access policies require an Azure AD Premium (P1) license.
Some examples of granular control that can be achieved with conditional policies are:
- Choose which Office 365 resources will require MFA.
- Allow access to resources only when the origin is from a trusted location.
- Specify approved apps for accessing Office 365 resources like Exchange Online and SharePoint Online.
The list above is just some of the scenarios where conditional access policies may apply. In the next sections, there will be examples that show how to create conditional policies and test them as well.
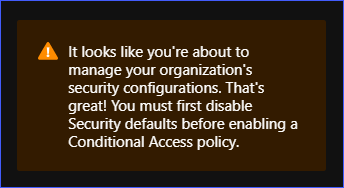
Note: Using conditional access policies requires that the security defaults are disabled. This means that it will also disable MFA in Office 365 until you have turned-on your new conditional policies.
Creating a Conditional Access Policy in Office 365 to Enable MFA
There are times when your organization may decide that only a specific service may need to be protected with MFA. In this example, you’ll learn how to create a sample conditional access policy to require MFA only when accessing Exchange Online.
Conditional Access policies can only be created in Report-Only mode if the security defaults are enabled in your tenant. You must disable security defaults first before turning on conditional access policies. Otherwise, you will encounter the message similar to the one below.
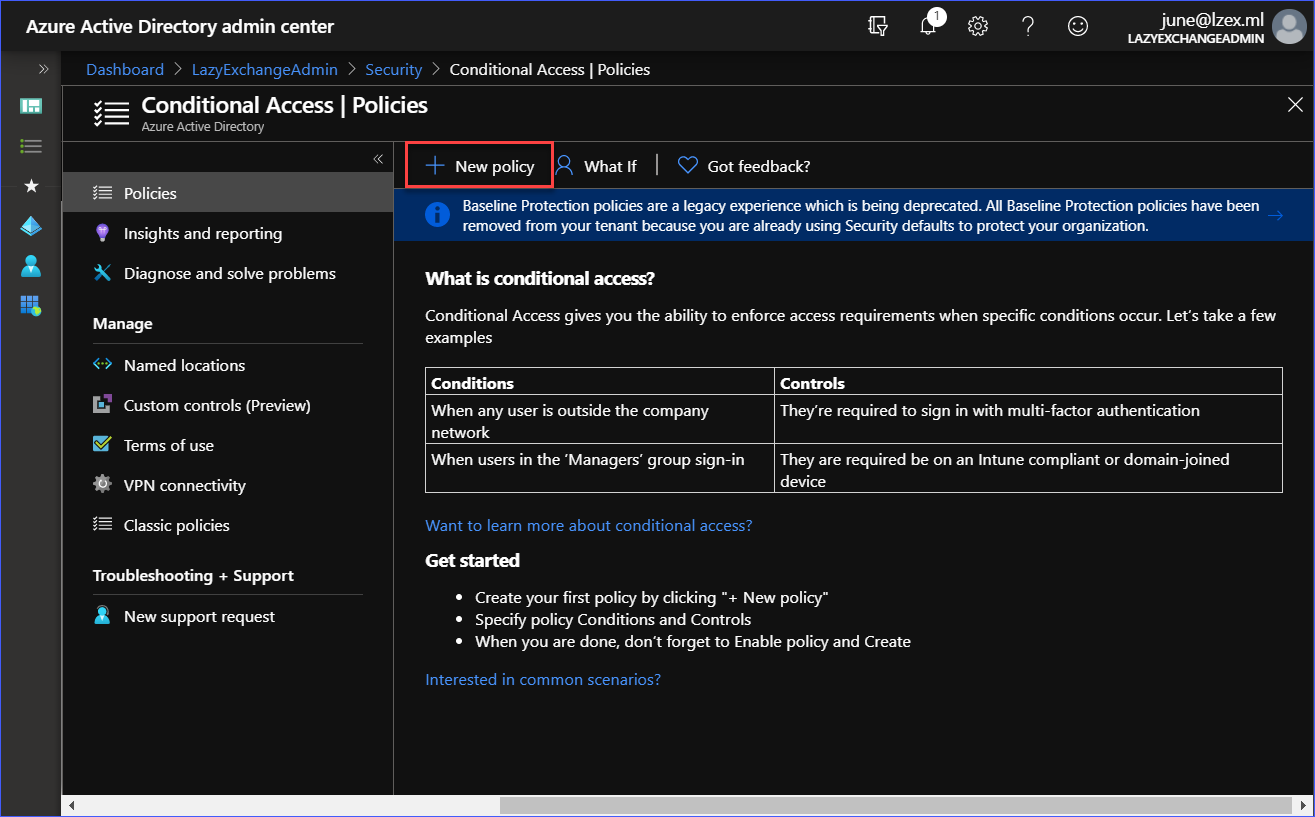
To create a new conditional access policy, log in to the Azure Active Directory admin center. Then, go to Azure Active Directory —> Security. You see the Conditional Access | Policies page like the one shown below. Click on the New policy button to start creating a new policy.
Next, create the policy with the following settings:
- Name: Require MFA for Exchange Online
- Assignments: All Users (no exclusions)
- Cloud app or actions: Office 365 Exchange Online
- Access Controls: Require multi-factor authentication
- Enable policy: On
You can refer to the demonstration below to create the new policy.
As you can see from the demonstration above, the conditional policy with the name Require MFA for Exchange Online was created and turned on. Based on the policy settings, the policy is applied to all users when logging in to Exchange Online, then MFA will be required.
Testing the Conditional Access Policy MFA Enforcement
When multi-factor authentication is enabled through a conditional access policy, the users will be forced to register and set up their MFA credentials.
Unlike when MFA was enabled from security defaults, there is no option to skip the MFA registration when using conditional access policies.
The below demonstration shows that logging in to Exchange Online will require the user to approve the sign-in request using the Microsoft Authenticator app.
In contrast, logging in to the SharePoint Online site does not require MFA, as seen in the demonstration below.
This is just one example of using conditional access policies to control access to Office 365 and enable MFA. Here are other things that you may want to try at this point:
- Include SharePoint Online as a target of the conditional policy to force MFA.
- Require MFA when accessing Exchange Online, but only if the source is from the browser (OWA). If access is coming from the Outlook Desktop Client, it should be excluded from MFA.
- Create a policy to only allow mobile access to Exchange Online and SharePoint Online using the approved Office 365 mobile apps (e.g., Outlook for IOS/Android)
Resetting Multi-factor Authentication Registration
Microsoft has published extensive documents about fixing MFA-related problems. You may view those articles from these links:
- Common problems with two-factor verification and your work or school account
- Troubleshooting Azure Multi-Factor Authentication issues
Apart from those listed above, there will be times when a user’s MFA registration must be reset. Some instances when an MFA reset would be needed is when the user has changed mobile phones or has changed phone numbers.
And, if users are unable to sign in because of not passing the MFA sign-in requirements, the admins can reset the MFA registration for the users. Then, the user will be prompted to register with MFA again during their next sign-in attempt.
There are a few ways to reset the MFA registration of a user.
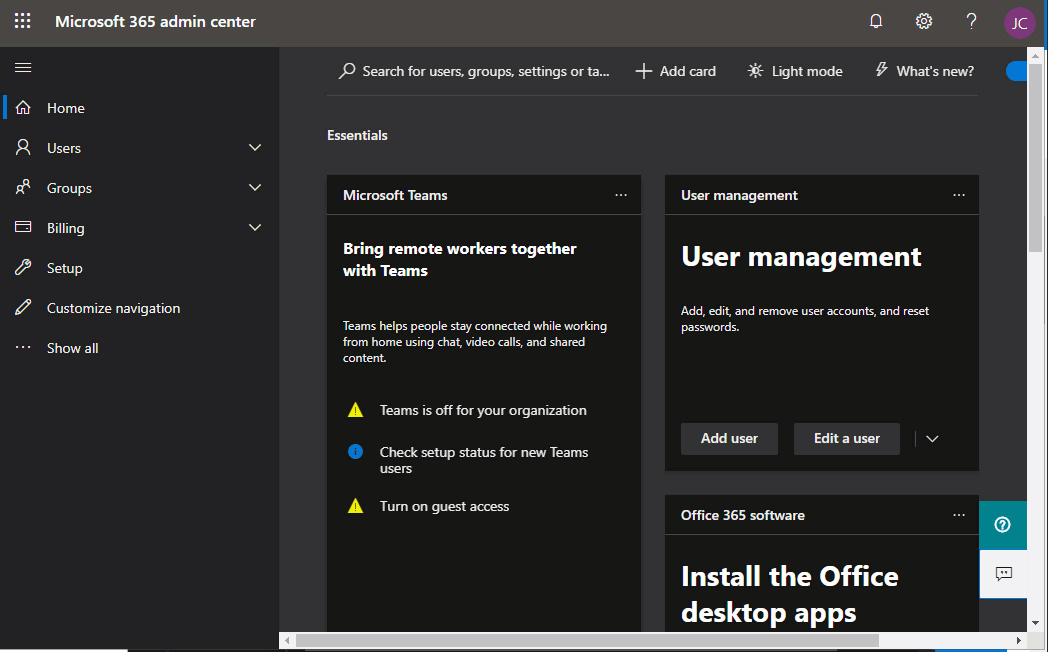
Resetting MFA Registration From The Microsoft 365 Admin Center
To reset a user’s MFA registration, log in to the Microsoft 365 Admin Center. Then, go to Users —> Active Users and click on the Multi-factor authentication button.
You will be taken to the multi-factor authentication page. Next, select the name of the user from the list then click on the Manage user settings link. Put a checkmark on Require selected users to provide contact methods again, then click Save. See the demo below.
Resetting MFA Registration from the Azure Active Directory Admin Center
The MFA registration can also be cleared out from the Azure Active Directory Admin Center.
To reset the MFA registration using this method, go to Active Directory —> Users. Then, click on the user from the list. Once on the user’s properties page, scroll down until you see the link that says Authentication Methods and click on it. Lastly, click on the Require re-register MFA button.
Refer to the demo below on how to reset the MFA registration.
Resetting MFA Registration using the Office 365 PowerShell
This method requires connecting to Office 365 PowerShell. When your PowerShell session is already established, copy the code below and paste it into your PowerShell console to run it.
Make sure to change first the value of the $upn variable to the correct user principal name of the user. You may refer to the comments above each command to know more about what each line of command does.
# user principal name of the account
$upn = '[email protected]'
# Reset MFA
Reset-MsolStrongAuthenticationMethodByUpn -UserPrincipalName $upn
If the code above ran successfully, then there should be no output returned on the screen. The output would look similar to the demo below.

Conclusion
In this article, you’ve learned that there is more than one way to enable multi-factor authentication for your Microsoft 365 users. These two options – security defaults and conditional access policy – uses the MFA methods already included in Office 365 and Azure AD.
You’ve also learned the difference in MFA user experience, depending on how MFA was enabled. With security defaults, MFA is enabled tenant-wide with no customization opportunities.
Enforcing MFA through conditional access policies gives you multiple configuration options as to how to control access to Office 365 services. However, this option requires an Azure AD Premium license, which is not always an option for all organizations.
Additionally, you learned a few different ways to reset the MFA registration of the users. These ways of resetting MFA include the Microsoft 365 admin center, Azure Active Directory admin center, and Office 365 PowerShell.
I hope that the knowledge you gained in this article helps you become aware of how MFA can help your organization protect users from identity-related attacks. The next time you have questions or concerns about MFA, maybe you don’t have to go straight to Office support agents right away for help and try things out on your own.
Further Reading
- What is Phishing?
- What is Password Spraying?
- Azure Active Directory Conditional Access
- Azure Active Directory Security Defaults
- What are Azure AD Security Defaults, and should you use them?
- How to: Require approved client apps for cloud app access with Conditional AccessCreate an app password for Microsoft 365


