


Do you need to set up a lab that needs multiple hosts? Or test an application in an isolated environment? Hyper-V nested virtualization could be the right setup you need. Hyper-V is a built-in feature or role to Windows you only need to enable to start using. And it’s free!
Not a reader? Watch this related video tutorial!Keep reading, and you will learn how to set up Hyper-V to enable nested virtualization. By the end of this article, you will have created, installed, and configured nested virtual machines (VM) with one physical host. Let’s begin!
Prerequisites
This article is a hands-on, how-to approach. And to follow along with the instructions, you’ll need the following requirements.
- A host (physical) machine with a CPU that supports hardware virtualization (VT-x, AMD-V).
- The host machine must have enough memory to run the Hyper-V virtual machines. The VM in this tutorial will use 4GB of memory.
- For hosts with an Intel CPU, the host operating system (OS) must be Windows Server 2016, Windows 10 version 1607 (Anniversary Update), or later. For AMD-powered hosts, the minimum operating system is Windows 10 Build 19636. This article will use Windows 10 Pro version 20H2.
- An operating system installation ISO file. In this article, the OS installer ISO filename is c:\ISO\windows_server_2016.iso. You’ll use this ISO file to install the nested VM guest OS.
- Hyper-V for Windows 10 or Hyper-V for Windows Server, depending on your host’s operating system. This article uses Hyper-V on a Windows 10 host.
Creating A NAT-Enabled Virtual Switch
To set up Hyper-V nested virtualization, you must first create a network for VM hosted on a host to communicate. To do that, you’ll need to create a NAT-enabled virtual switch that all VMs will use and reach the Internet.
On a Windows 10 Hyper-V host, a NAT-enabled virtual switch already exists called Default Switch. But, to experience an end-to-end Hyper-V nested virtualization setup, let’s assume that the Default Switch does not exist on your Hyper-V host even if your host OS is Windows 10.
To create a NAT-enabled virtual switch, follow these steps.
1. First, on your Hyper-V host computer, open PowerShell as admin.
2. Next, run the command below in PowerShell to create a new internal virtual switch called vNAT.
Creating a virtual switch installs a new virtual network adapter in Windows called vEthernet (vmSwitchName), where vmSwitchName is the virtual switch name.
In this example, since the virtual switch name is vNAT, the new virtual network adapter name will be vEthernet (vNAT).
# Create a new virtual switch with the new vNAT and the type is Internal.
# This command also automatically creates a virtual network adapter with the name "vEthernet (vNAT)"
 New-VMSwitch -SwitchName vNAT -SwitchType Internal
3. Now, assign an IP address and subnet mask to the vEthernet (vNAT) network adapter by running the command below in PowerShell. This command will assign the IP address of 192.168.200.1 and the subnet mask of 255.255.255.128 (/25) to the network adapter.
The IP address and subnet mask in this command are only examples and may not apply to your environment. To avoid connectivity issues, choose a subnet mask that is not already in use in your home or office network.
# Assign an IP address and subnet to the "vEthernet (vNAT)" network adapter.
 New-NetIPAddress -IPAddress 192.168.200.1 -PrefixLength 25 -InterfaceAlias "vEthernet (vNAT)"
4. Next, create a NAT object on your Hyper-V host that will translate your VM’s internal network address. Do so by running the command below in PowerShell.
# Create a new NAT object called vNATNetwork in Windows for the virtual switch's internal IP address
 New-NetNat -Name vNATNetwork -InternalIPInterfaceAddressPrefix 192.168.200.0/25 -Verbose
Creating the First-Level Guest Virtual Machine
To set up Hyper-V nested virtualization, you must first create and configure the first-level virtual machine which is the VM that you intend to eventually be a Hyper-V host. This tutorial will refer to this first-level virtual machine as L1-VM.
There are two methods to create a virtual machine: Hyper-V Manager (GUI) and PowerShell. Either method will produce the same virtual machine.
Method 1: Creating a Virtual Machine using the Hyper-V Manager
To create the L1-VM using the Hyper-V Manager, follow these steps.
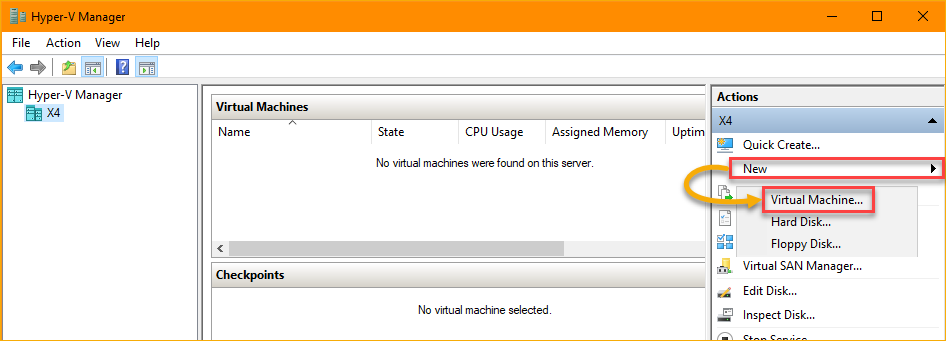
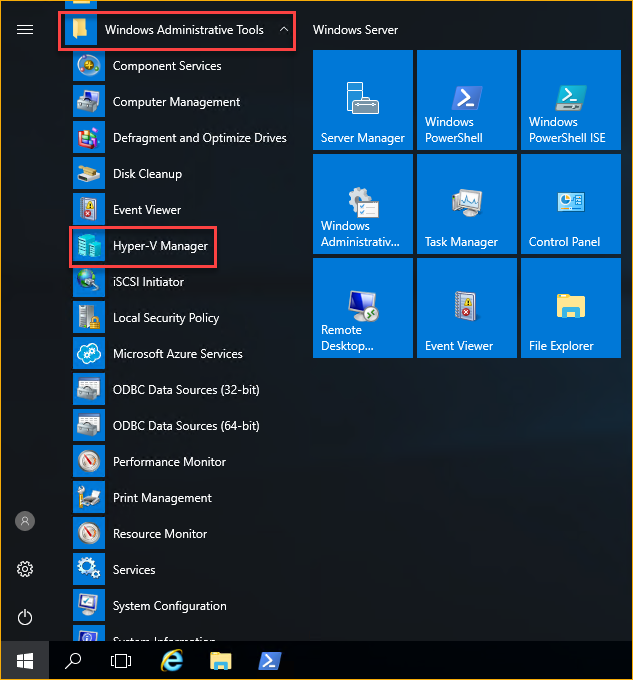
1. On your host machine, open the Hyper-V Manager. To do so, click on Start —> Windows Administrative Tools —> Hyper-V Manager.

2. Once the Hyper-V Manager window is open, on the Action pane, click New —> Virtual Machine.
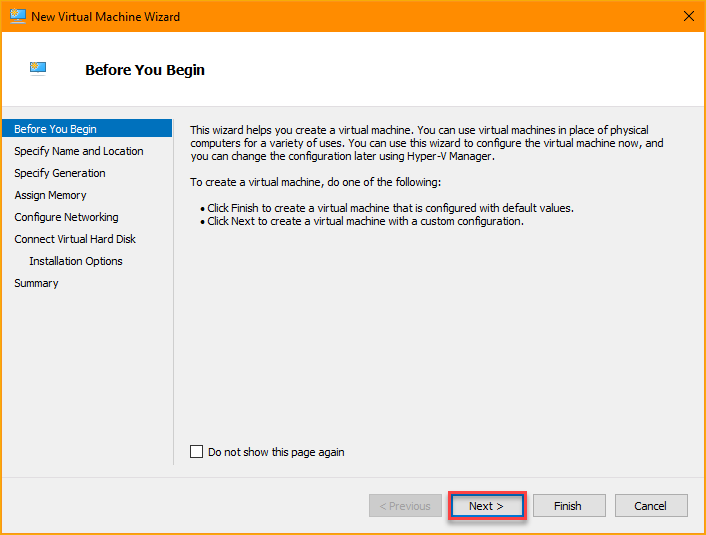
3. Once in the New Virtual Machine Wizard window, on the Before You Begin page, click Next.
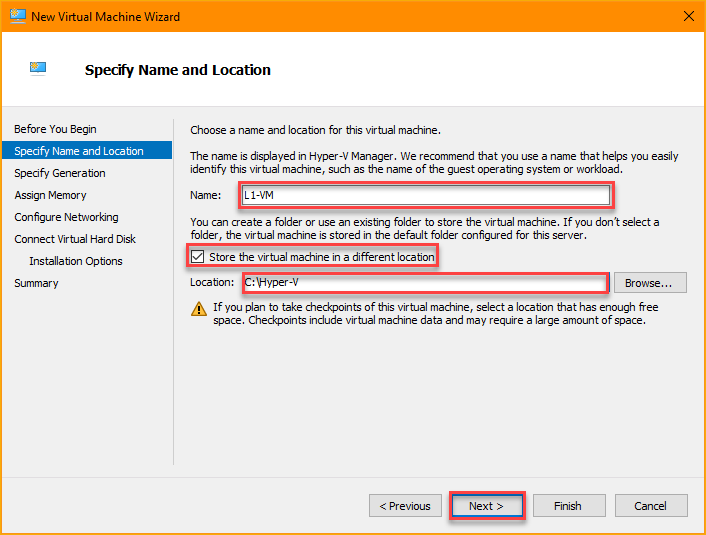
4. On the Specify Name and Location page, type the new virtual machine’s name in the Name box. In this example, the VM name is L1-VM.
If you need to change the location for the new VM, put a check on the Store the virtual machine in a different location box, then browse or enter the path in the Location box. If the folder path you specify does not exist, the wizard will create it.
Changing the VM location is useful when you need to choose a location with enough storage space. Or to organize the VMs location in your preferred folder.
Otherwise, to accept the default location, leave the box unchecked. In this example, the new VM’s location is C:\Hyper-V. Click Next after configuring the VM name and location.
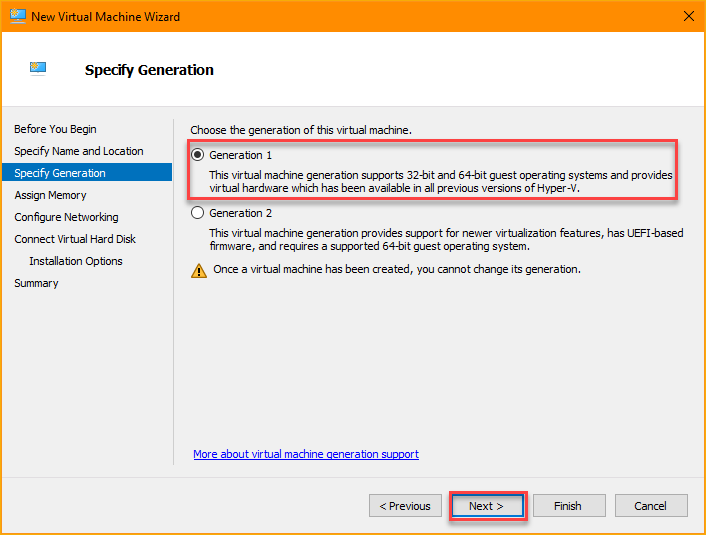
5. Next, on the Specify Generation page, choose the VM generation version. The options are:
Generation 1 – Supports 32-bit and 64-bit guest operating systems from Windows 7 and Windows Server 2008 onwards. This example will use a Generation 1 VM.
Generation 2 – Supports only 64-bit guest operating systems from Windows 8 and Window Server 2012 onwards. This generation also has UEFI-based firmware. After selecting a VM generation, click Next.
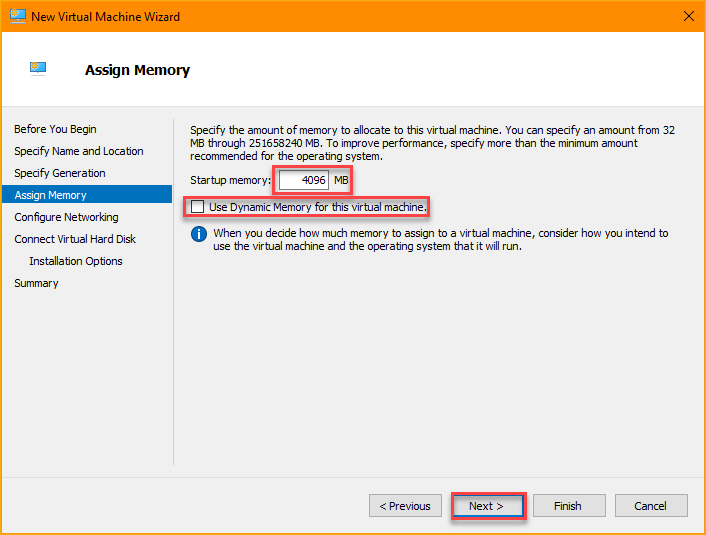
6. On the Assign Memory page, specify how much memory to assign the VM. This example assigns 4GB (4096 MB) of memory to the VM.
7. Uncheck the Use Dynamic Memory for this virtual machine box. Hyper-V nested VMs does not support dynamic memory. After finalizing the memory settings, click Next.
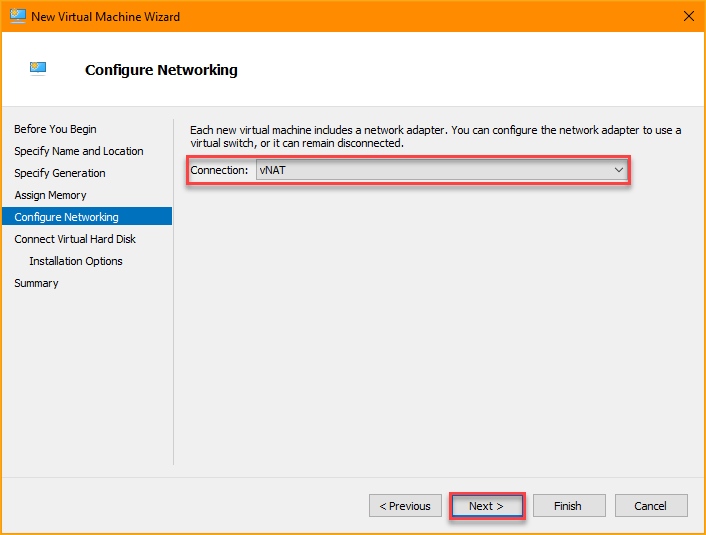
8. On the Configure Networking page, select the virtual switch call vNat that you created earlier in this article.
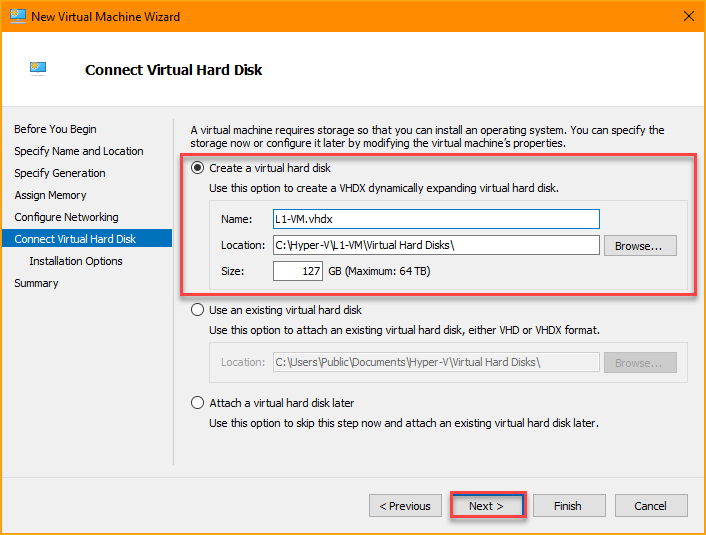
9. Next, on the Connect Virtual Hard Disk page, you have the option to:
- Create a virtual hard disk – This option creates a new virtual hard disk (VHD) and lets you customize the name, location, and size. The new VHD will be empty, and you will have to install an operating system afterward.
- Use an existing virtual hard disk – This option lets you choose an existing VHD (if you have one) that you want to be attached to the VM instead of creating a new one.
- Attach a virtual hard disk later – Choose this option if you want to skip this step and continue creating the VM without a VHD. You can still create a new or attach an existing VHD after you’ve created the VM.
This example selects the Create a virtual hard disk option and leaves the default name, location, and size values. Customize these values if you prefer. After making your selection, click Next.
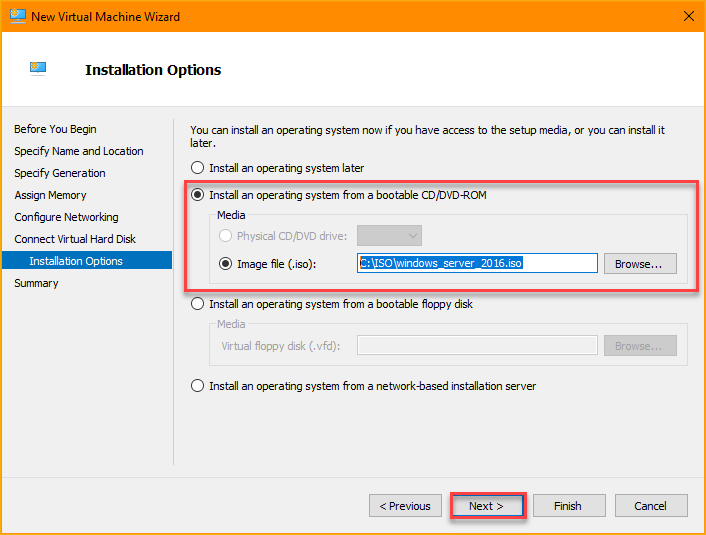
10. On the Installation Options page, choose how you want to install the operating system (OS):
In this example, the VM will install the OS using the bootable CD/DVD-ROM option. The OS installation media is an ISO file in C:\ISO\windows_server_2016.iso. When you’ve made your selection, click Next.
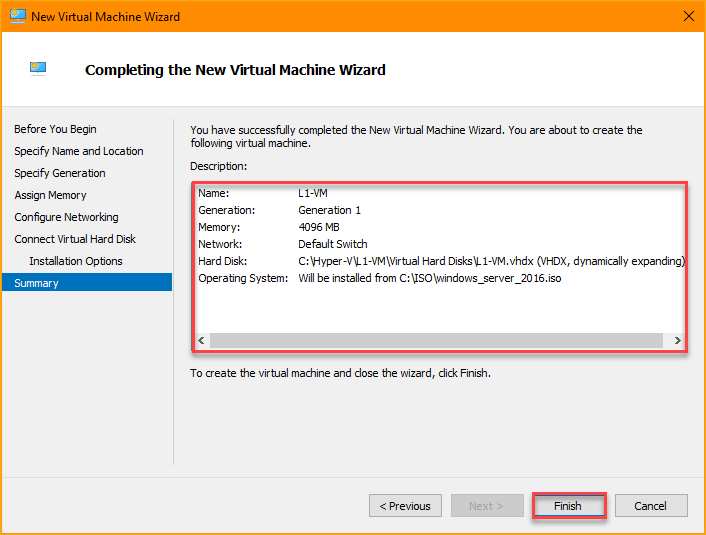
11. Finally, on the Completing the New Virtual Machine Wizard page, review the new VM’s Description. When you’re sure that you didn’t miss a step, click Finish.
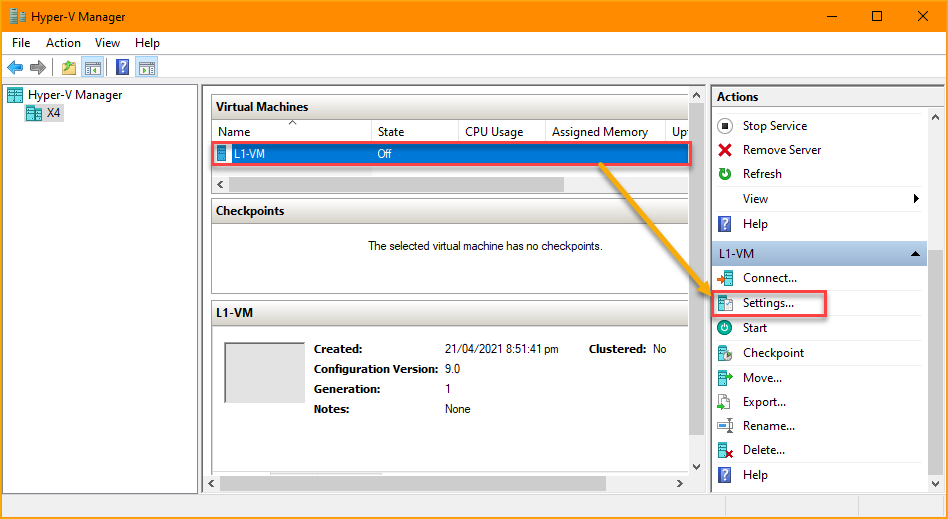
12. Now that you’ve created the VM, increasing the VM’s processor count is optional but recommended to improve the VM’s performance. To do so, click to select the VM and click on the Settings menu on the Action pane.
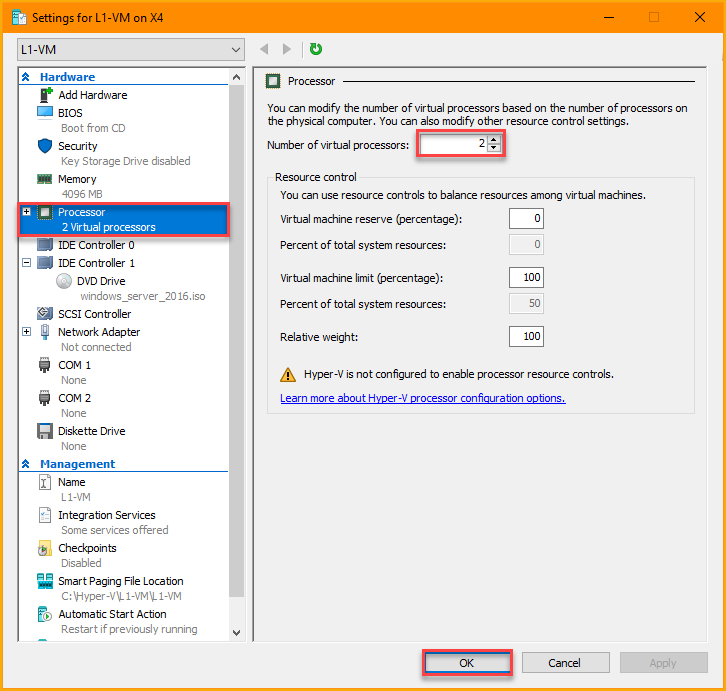
13. Once you’re on the Settings window, click Processor on the left pane. Next, increase the Number of virtual processors. In this example, the new processor count is 2. You can assign more if your host the capacity.
Method 2: Creating a Virtual Machine using PowerShell
Instead of clicking through multiple steps when creating a VM in Hyper-V Manager, another method to create a Hyper-V VM is by PowerShell.
To create and configure a new VM, follow the steps below.
1. On the Hyper-V host computer, open PowerShell as admin.
2. Next, run the code below in PowerShell to create a new VM called L1-VM. The code snippet below uses splatting to prepare the new VM’s parameter values. Refer to the inline comments to know what each parameter does.
# Prepare the new VM's properties.
 $newVM_splat = @{
     # Set the name of the new VM.
     Name = 'L1-VM'
     # Set the VM's generation version to generation 1.
     Generation = 1
     # Set the VM's memory size to 4GB
     MemoryStartupBytes = 4GB
     # Set the boot option to CD.
     BootDevice = 'CD'
     # Set the virtual switch called vNAT the VM will use to connect.
     SwitchName = 'vNAT'
     # Set the location where to create the new VM.
     Path = 'C:\Hyper-V\L1-VM'
     # Set the location where to create the new VM's virtual hard disk.
     NewVHDPath = 'C:\Hyper-V\L1-VM\VHD\L1-VM.vhdx'
     # Set the new virtual hard disk size to 100GB
     NewVHDSizeBytes = 100GB
 }
 # Create the new VM.
 New-VM @newVM_splat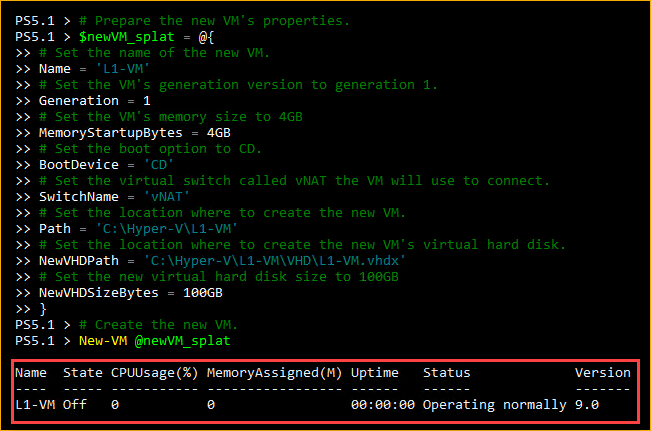
3. After creating the VM, run the command below to increase the VM’s processor count. The default processor count of a new VM is 1, which may cause the VM to run slow. The command below increases the CPU count to 2. You may add more if your host has the capacity.
# Set the VM's processor count to 2. You may increase the CPU if your host has the capacity.
 Set-VM -VMName L1-VM -ProcessorCount 2
4. Next, disable the dynamic memory on the VM by running the command below. Hyper-V nested virtualization does not support dynamic memory.
# Disable VM's Dynamic Memory.
 Set-VMMemory -VMName L1-VM -DynamicMemoryEnabled $false
5. Run the command below to mount the ISO file to the VM’s DVD drive. You’ll use this ISO file to install the operating system later on L1-VM.
# Set the ISO file's path to mount on the VM's DVD drive.
 Set-VMDvdDrive -VMName L1-VM -Path C:\ISO\windows_server_2016.iso
Enabling Nested Virtualization
To enable nested virtualization in Hyper-V, you have to expose the host’s virtualization extensions, such as VT-x for Intel and AMD-V for AMD, to the virtual machine. These virtualization extensions add functionality to the logical processors on a VM to support virtualizing an already virtualized CPU.
To enable the virtualization extension, invoke the Set-VMProcessor cmdlet as shown below.
1. Open PowerShell as admin on your Hyper-V host machine.
2. Next, copy the code below and run it in PowerShell. This command will enable the virtualization extensions on the VM’s virtual processor.
# Enable the VM's virtualization extensions
 Set-VMProcessor -VMName L1-VM -ExposeVirtualizationExtensions $true
3. Lastly, to confirm that the command was successful, run the command below in PowerShell. This command gets the value of the VM processor’s ExposeVirtualizationExtensions value. The value should be True, as you can see in the screenshot below.

Installing The Guest Operating System
Now that you’ve created the first-level (soon-to-be virtualized Hyper-V host) guest VM and configured its settings, it’s time to install the operating system on the soon-to-be Hyper-V host. To do so, proceed as follows.
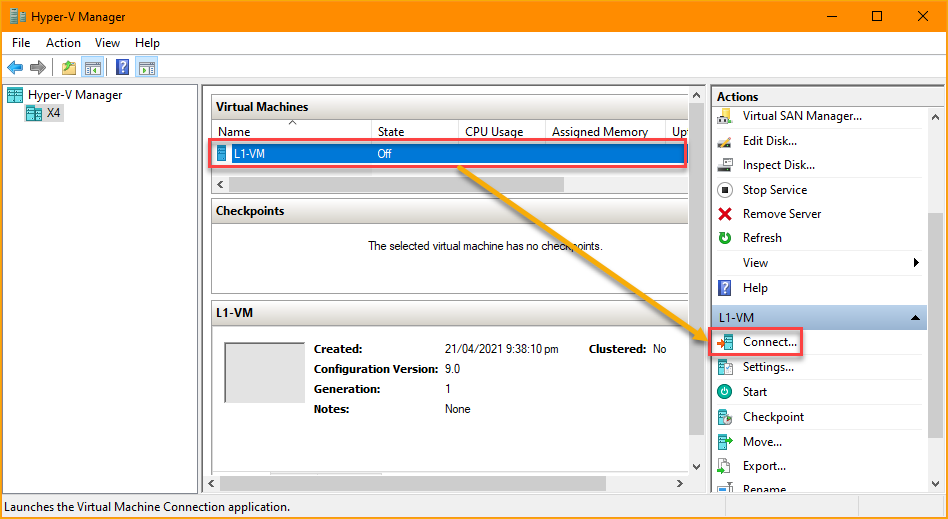
1. Open Hyper-V Manager on your Hyper-V host.
2. Click to select the VM name, in this example, L1-VM, and click Connect. Doing so will launch the Virtual Machine Connection window.
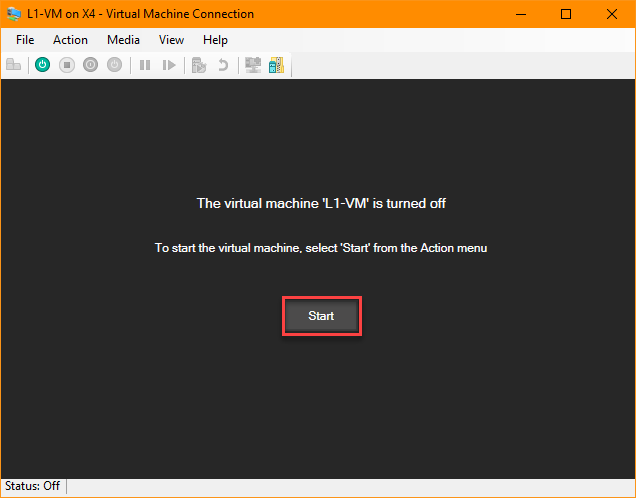
3. On the Virtual Machine Connection windows, click Start to boot up the virtual machine.
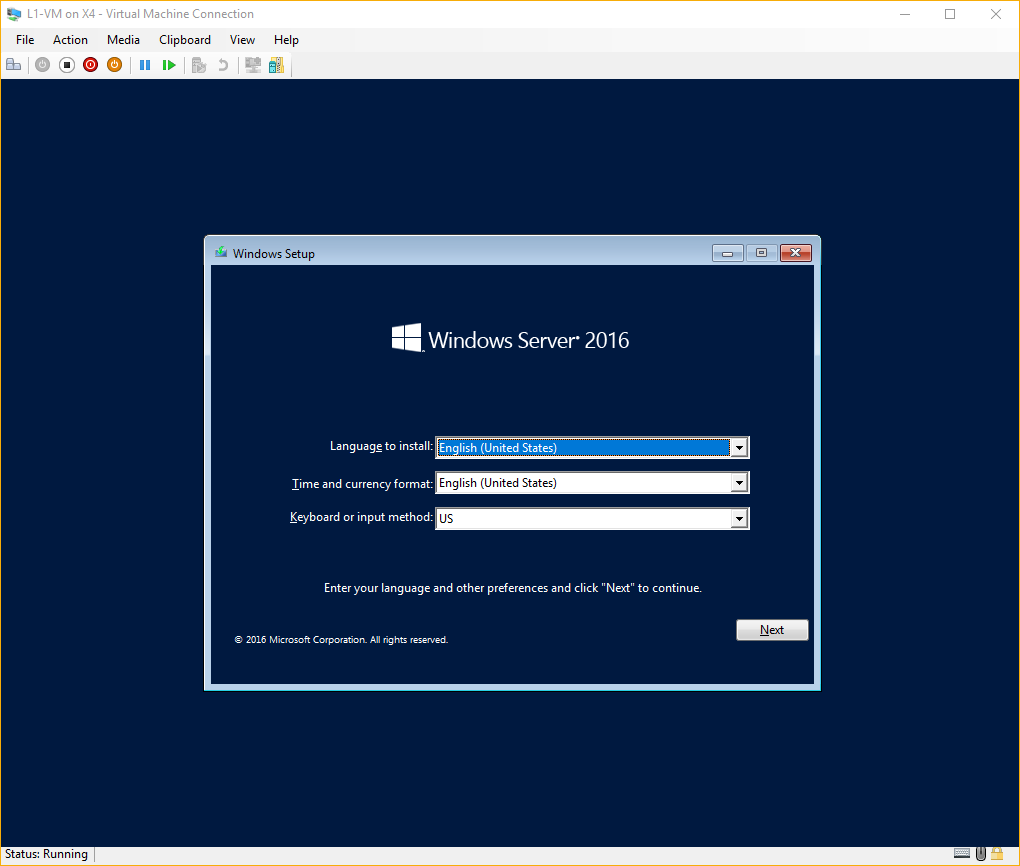
4. Now, proceed with the operating system installation to completion.
Connecting To The Network
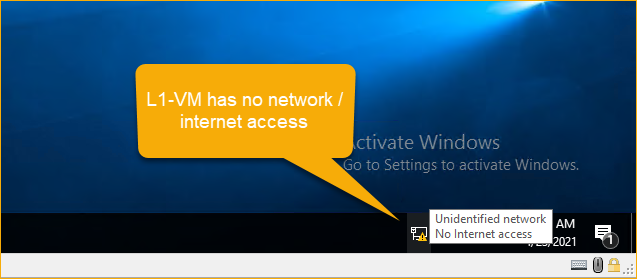
After you’ve installed the operating system on the VM, you’ll notice that the network status on the system tray shows a warning symbol. This warning symbol means that the VM is not connected to the network and has no access to the internet.
To resolve this error, you need to configure the network adapter settings on L1-VM by assigning an IP address, subnet mask, default gateway, and DNS address. To do so, follow these steps.
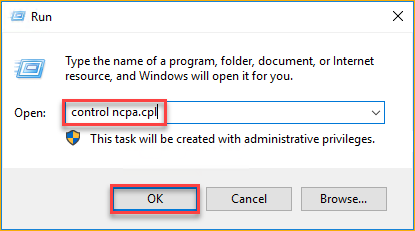
1. On L1-VM, right-click on the Start button and click Run.
2. Type control ncpa.cpl in the Open box and click OK. This command will launch the Network Connections applet.
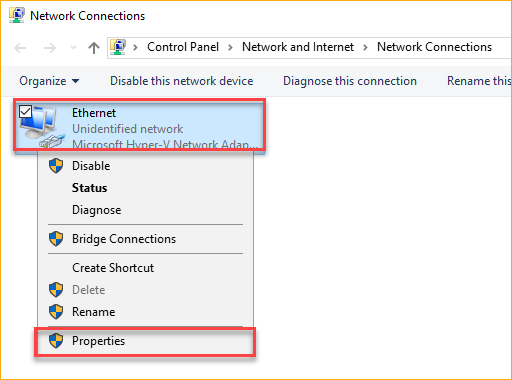
3. On the Network Connections applet window, there should only be one network adapter by default called Ethernet. Right-click on Ethernet and click on Properties.
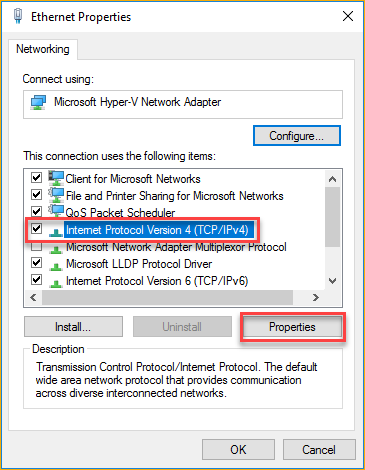
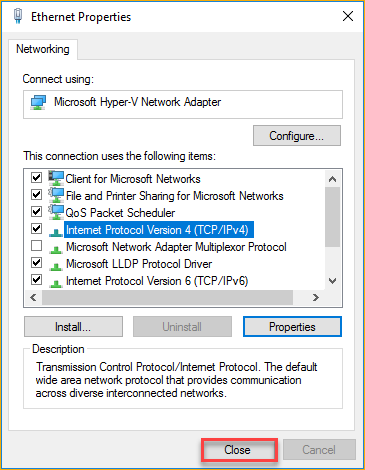
4. Next, click to highlight (DO NOT UNCHECK!!!) Internet Protocol Version 4 on the Ethernet Properties page and click the Properties button.
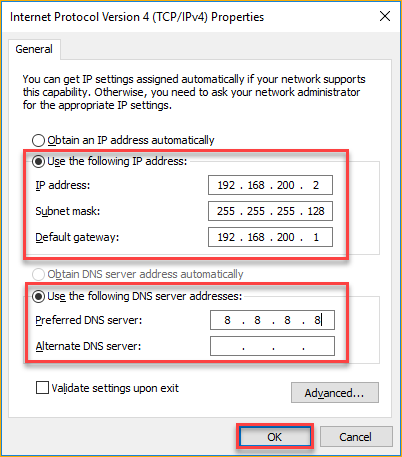
5. Inside the Internet Protocol Version 4 (TCP/IPv4) Properties windows, click on Use the following IP address and enter the values for:
- IP address – Enter the IP address you want to assign to L1-VM. The IP address you enter has to be within the range of the virtual switch you created on the Hyper-V host. For example, the vNAT virtual switch IP range is 192.168.200.0/25, making the available IP address range from 192.168.200.2 to 192.168.200.126. In this example, the IP address for L1-VM is 192.168.200.2.
- Subnet mask – Specify the netmask address of the virtual switch’s IP address range. For 192.168.200.0/25, the subnet mask is 255.255.255.128.
- Default gateway – Enter the IP address of the virtual switch. In this example, the virtual switch IP address is 192.168.200.1.
6. Next, enter the Preferred DNS server IP address. If you have a DNS server, perhaps in your home or office network, use that address. Otherwise, you can use a public DNS server address. In this example, the DNS server address is 8.8.8.8, which is Google’s public DNS server.
You can also add an Alternate DNS server if needed. But for this example, the preferred DNS server is enough. When you’ve completed the network address configuration, click OK.
Back on the Ethernet Properties window, click Close to apply the changes.
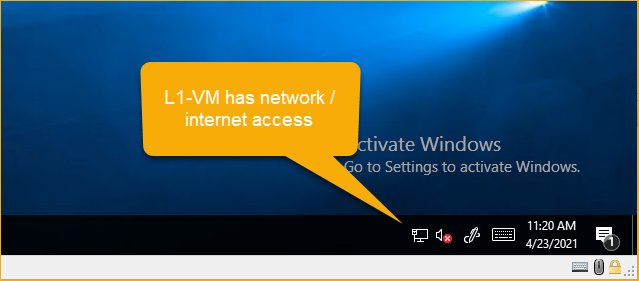
You’ll see that the network status has changed to connected.
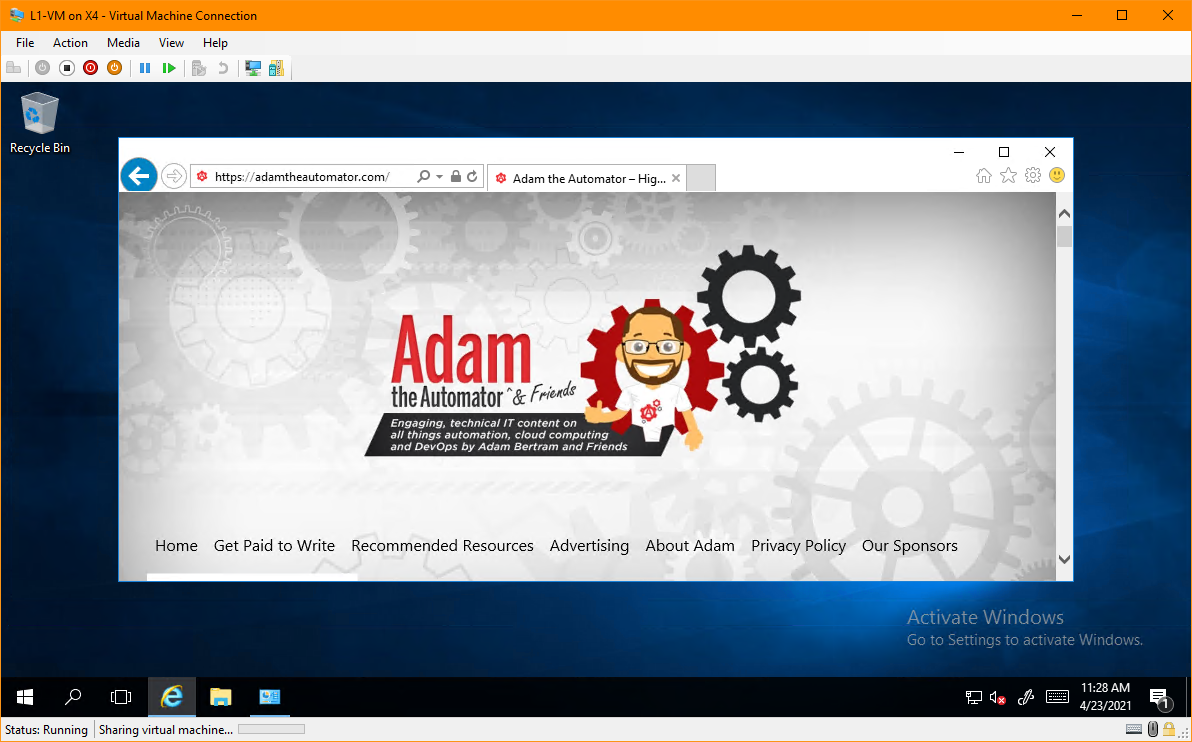
8. Finally, to test the network, open a web browser on L1-VM and navigate to a website.
Installing Hyper-V On The First-Level Virtual Machine
So far, you’ve created the soon-to-be Hyper-V host VM of your nested virtualization setup. But, the ultimate test is to install Hyper-V inside L1-VM and create the second-level (guest) VM.
Hyper-V installation will vary depending on L1-VM’s operating system. Refer to Hyper-V for Windows 10 or Hyper-V for Windows Server. This example installs Hyper-V on Windows Server 2016.
To install Hyper-V on L1-VM, ensure you’re at the L1-VM console and:
1. Open PowerShell as admin.
2. Run the command below in PowerShell to install Hyper-V. The -IncludeManagementTools switch installs Hyper-V management tools, such as the Hyper-V Manager and the Hyper-V PowerShell module. The -Restart parameter reboots L1-VM after the installation.
Install-WindowsFeature Hyper-V -IncludeManagementTools -RestartYou’ll see an install progress indicator, as shown below. Wait for the installation to finish, and L1-VM should reboot automatically.

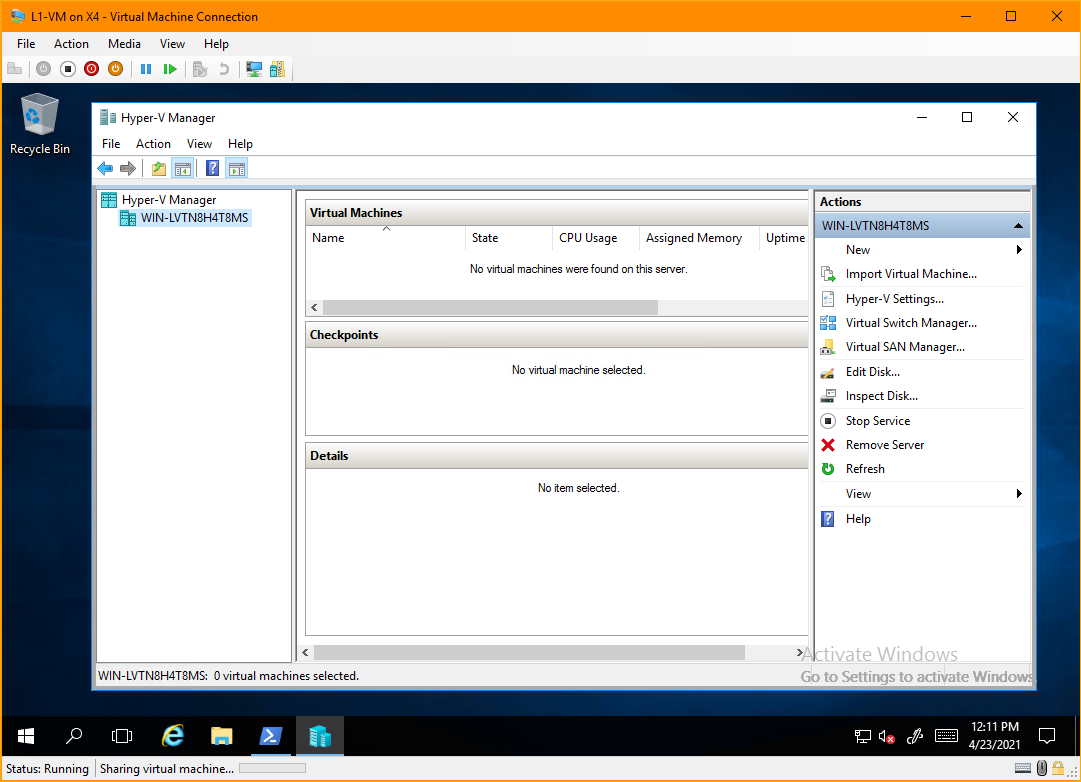
When L1-VM has restarted, launch the Hyper-V Manager on L1-VM. To do so, click Start —> Windows Administrative Tools —> Hyper-V Manager.
Congratulations! You have now installed Hyper-V inside a Hyper-V guest VM!
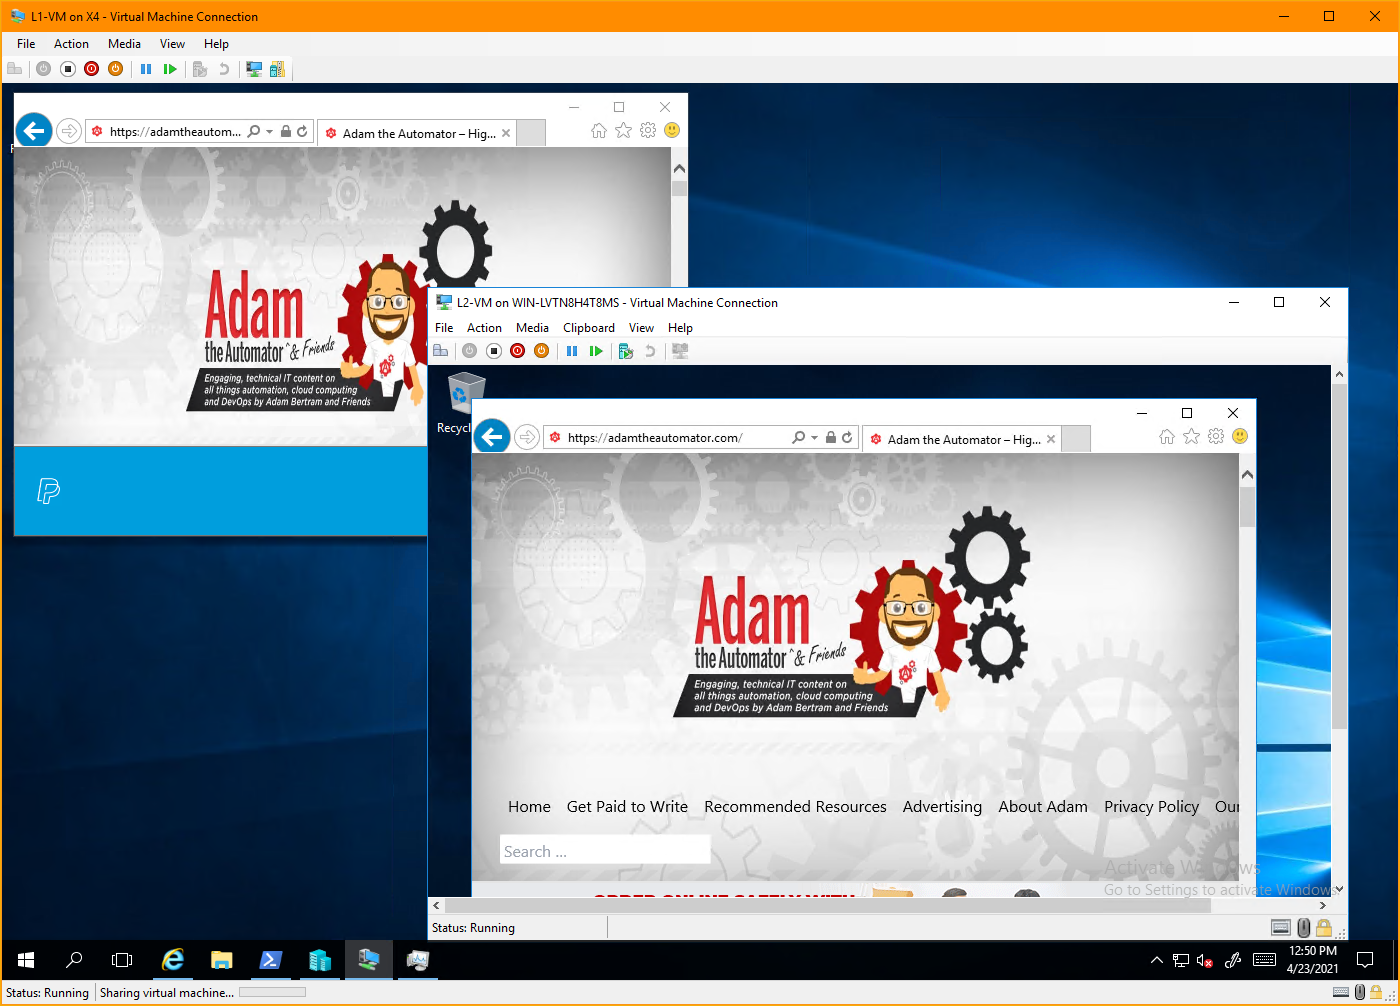
At this point, you’ve successfully enabled nested virtualization in Hyper-V, and you can now create and set up your second-level VM (call it L2-VM) using the same steps as when you created L1-VM.
Conclusion
This article took you through the step-by-step process of setting up nested virtualization with Hyper-V. With nested virtualization, you can run a guest VM inside another guest VM, ideal for testing, lab environment, or simulating a production environment.
What do you think of Hyper-V nested virtualization? Is it something you’d use in your job? Or do you think there are better alternatives?


