


Have you struggled to create a system information report on your computer system? Collecting system details might seem difficult, but the Microsoft System Information Tool (MSInfo32) makes quick work of collecting all that information!
In this article, you will master generating and viewing system information reports in no time. Read on to learn more!
Prerequisites
For this tutorial, you can use any build of Windows 10. Reading system reports from the command line require PowerShell. This tutorial uses Windows 10 version 21H1 build 19043 and PowerShell v7.1.
Viewing a System Information Report
The first step in retrieving detailed information about your system is to open the MSInfo32 tool.
To find the tool, search for MSInfo32 on the Start Menu, and be sure to click the Run as administrator option.
When MSInfo32 is not run as an administrator, MSInfo32 cannot update its internal information cache correctly, and some drivers may show as stopped when they are not.
As soon as the tool opens, it will present you with a report, an automatically generated one. You’ll see a hardware summary of your computer in the System Summary view. This view outlines an overall view of the system configuration. To the left, you’ll see categories, which further break down each section.

Saving MSInfo32 reports
Perhaps you are about to make hardware changes to your system and would like to save a system information report for later comparison or reporting. With MSInfo32, you have two options to save that information: saving and exporting. You will learn about them next.
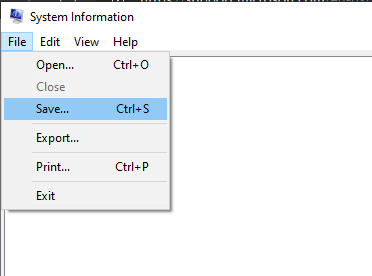
You could click File → Save to save the information as an NFO file, which is known as a System Information File. The NFO file is an XML-based file that can be later opened by the MSInfo32 tool to view in the same organized format.
You can see an example of the NFO XML file below.
<?xml version="1.0"?>
<MsInfo>
<Metadata>
<Version>8.0</Version>
<CreationUTC>08/12/21 02:09:47</CreationUTC>
</Metadata>
<Category name="System Summary">
<Data>
<Item><![CDATA[OS Name]]></Item>
<Value><![CDATA[Microsoft Windows 10 Education]]></Value>
</Data>
<Data>
<Item><![CDATA[Version]]></Item>
<Value><![CDATA[10.0.19043 Build 19043]]></Value>
</Data>
<Data>
<Item><![CDATA[Other OS Description ]]></Item>
<Value><![CDATA[Not Available]]></Value>
</Data>
<Data>
<Item><![CDATA[OS Manufacturer]]></Item>
<Value><![CDATA[Microsoft Corporation]]></Value>
</Data>
<Data>
<Item><![CDATA[System Name]]></Item>
<Value><![CDATA[ASPIREBOX]]></Value>
</Data>
<Data>
<Item><![CDATA[System Manufacturer]]></Item>
<Value><![CDATA[Acer]]></Value>
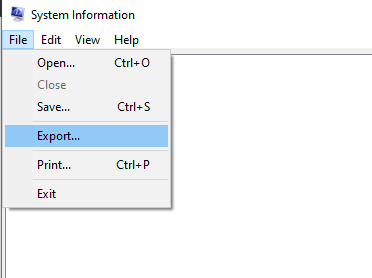
...You could also click File → Export which saves the information as a TXT plaintext file that may be easier to read but cannot be opened via the System Information Tool later.
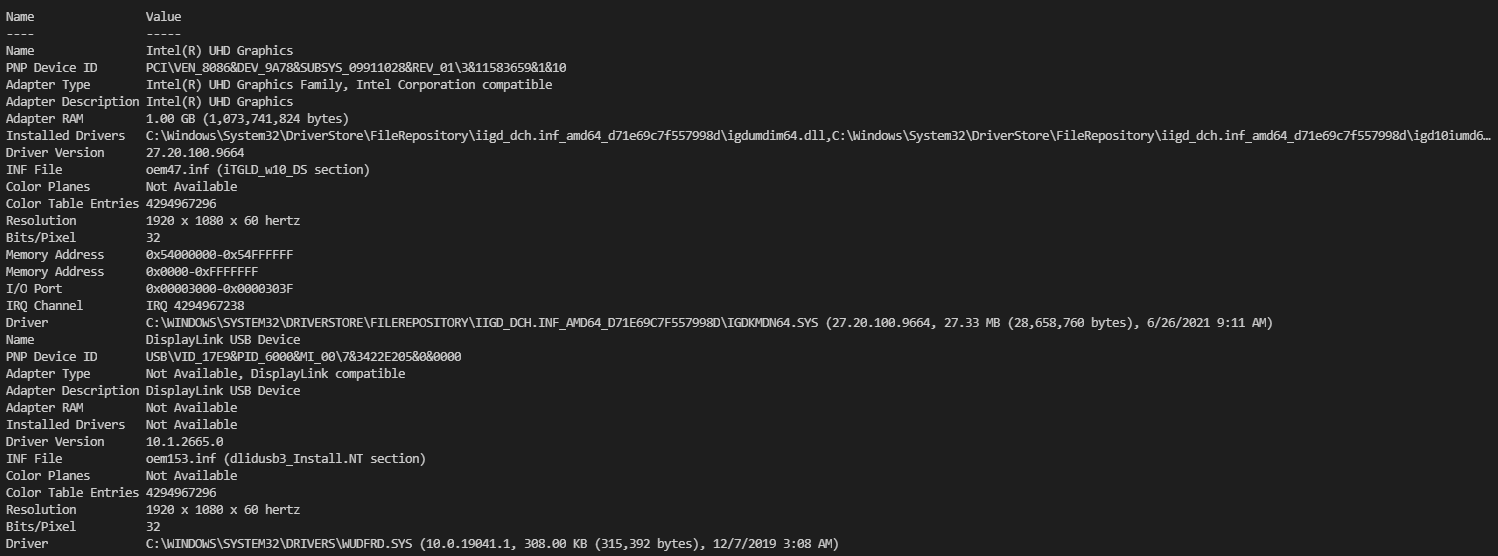
And below you’ll see an example of the text file format MSInfo32 exports.
System Information report written at: 08/11/21 23:33:55
System Name: ASPIREBOX
[System Summary]

Item	Value
OS Name	Microsoft Windows 10 Education
Version	10.0.19043 Build 19043
Other OS Description 	Not Available
OS Manufacturer	Microsoft Corporation
System Name	ASPIREBOX
System Manufacturer	Acer
System Model	Aspire A514-54
System Type	x64-based PC
System SKU	0000000000000000
Processor	11th Gen Intel(R) Core(TM) i5-1135G7 @ 2.40GHz, 2419 Mhz, 4 Core(s), 8 Logical Processor(s)
BIOS Version/Date	Insyde Corp. V1.12, 5/26/2021
SMBIOS Version	3.3
Embedded Controller Version	1.12
BIOS Mode	UEFI
BaseBoard Manufacturer	TGL
BaseBoard Product	Lily_TL
BaseBoard Version	V1.12
Platform Role	Mobile
Secure Boot State	On
PCR7 Configuration	Elevation Required to View
Windows Directory	C:\WINDOWS
System Directory	C:\WINDOWS\system32
Boot Device	\Device\HarddiskVolume1
Locale	Brazil
Scripting Exported Reports from MSInfo32
Now that you know how to generate a system information report from MSInfo32, how would you go about generating either an NFO or TXT report from the command line? Maybe you’re creating a script, and you need a quick way to retrieve hardware information.
Below are two different options using the command line to generate both an NFO and TXT report.
You can find plenty of outdated articles about MSInfo32 where you may see options such as
/categories,/category,/pch, and/showcategories. These are only available on Windows XP, not available for Windows 10.
This first example demonstrates generating a TXT report in the same directory the command is run, as you can see in the following screenshot.
MSInfo32 /report report.txtEven when running from the command line, a window pops up where you can see the System Information being refreshed before the report generation.

This second example demonstrates generating the NFO report, this time by specifying the directory where the report will be saved. Be aware that the directory must exist before running the command. Otherwise, it will fail silently.
MSInfo32 /nfo c:\ata\report.nfoAlthough any file extension will work, as the system information report export is an NFO file, /nfo option, convention dictates using .nfo as the report extension.
Reading NFO Files via PowerShell
Throughout this tutorial, you’ve learned how to generate and export MSInfo32 reports. But you came to Adam the Automator for a reason, so you will learn to automate the process.
Saved NFO reports may be opened and viewed in MSInfo32 via the File → Open menu. The problem is: a graphical interface is not ideal when automating information retrieval. As NFO files are saved as XML files, PowerShell can parse XML files and retrieve that information.
To read the XML report file, open a PowerShell window and run Get-Content, as shown in the screenshot below. The [XML] allows PowerShell to read the XML text and converts that to PowerShell objects. Finally, save the result to the $Report variable. The resulting command can be seen below.
$Report = [XML](Get-Content -Path 'Report.nfo')
$Report variable. Perhaps you need to retrieve the list of services that were running at the time the report was generated. Since MSInfo32 reports contain that, you retrieve the list via the SelectNodes() method.
The
SelectNodes()method uses XPath. XPath is query language for XML. Crafting complex XPath queries is out of scope for this article.
<Category name="Services">
        <Data>
          <Display_Name><![CDATA[ACC Service]]></Display_Name>
          <Name><![CDATA[ACCSvc]]></Name>
          <State><![CDATA[Running]]></State>
          <Start_Mode><![CDATA[Auto]]></Start_Mode>
          <Service_Type><![CDATA[Own Process]]></Service_Type>
          <Path><![CDATA["c:\\program files (x86)\\acer\\care center\\accsvc.exe"]]></Path>
          <Error_Control><![CDATA[Normal]]></Error_Control>
          <Start_Name><![CDATA[LocalSystem]]></Start_Name>
          <Tag_ID><![CDATA[0]]></Tag_ID>
        </Data>
        <Data>
          <Display_Name><![CDATA[AllJoyn Router Service]]></Display_Name>
          <Name><![CDATA[AJRouter]]></Name>
          <State><![CDATA[Stopped]]></State>
          <Start_Mode><![CDATA[Manual]]></Start_Mode>
          <Service_Type><![CDATA[Share Process]]></Service_Type>
          <Path><![CDATA[c:\\windows\\system32\\svchost.exe -k localservicenetworkrestricted -p]]></Path>
          <Error_Control><![CDATA[Normal]]></Error_Control>
          <Start_Name><![CDATA[NT AUTHORITY\\LocalService]]></Start_Name>
          <Tag_ID><![CDATA[0]]></Tag_ID>
        </Data>
</Category>
The XPath query '//Category[@name="Software Environment"]/Category[@name="Services"]/Data' will serve as an example. Its parts are shown below, so you can understand it and adapt it for several scenarios.
//Category[@name="Software Environment"]– Returns any Category node in the entire document, indicated by the pre-ceding double-slash, with the name “Software Environment”./Category[@name="Services"]– Returns the Category node underneath the previously returned “Software Environment” node that has the name “Services.”/Data– Returns the child Data node under the previously returned “Services” node.
The example structure above is present the automatically generated System Report we see when MSInfo32 runs. You can adapt it by building according to the section you see in those.
Passing the XPath query //Category[@name="Software Environment"]/Category[@name="Services"]/Data to the SelectNodes() method on the $Report object shown below returns all Window services as XML nodes. Since the XML nodes are not displaying an expected output (The service Name, DisplayName, and State), the code below creates a PSCustomObject and formats the output to fit on the screen with Format-Table.
# The XPath query shown below will change based on what data you wish to extract, it will not always follow this convention
$Report.SelectNodes('//Category[@name="Software Environment"]/Category[@name="Services"]/Data') | ForEach-Object {
  [PSCustomObject]@{
    "Name"    = $PSItem.Name.innerText
    "Display" = $PSItem.Display_Name.innerText
    "State"   = $PSItem.State.innerText
  }
} | Format-Table -AutoSize
Shown below is an additional example of how to use an XPath query and PowerShell to find information on the System Report Display category. The XPath query itself is very similar to the ones before, but looking for the Components and Display categories this time.
# The XPath query shown below will change based on what data you wish to extract, it will not always follow this convention
$Report.SelectNodes('//Category[@name="Components"]/Category[@name="Display"]/Data') | ForEach-Object -Begin {
	# Create an Objects collection to hold all a collection of devices
	$Objects = [System.Collections.ArrayList]@()
	# The temporary object used to hold the names and values of a single device
	$Object = @()
} -Process {
	# If the Item name is not blank, signifying a new device is coming, then add the Name and Value to the temporary $Object array.
  # The reason this cannot be in a custom hashtable is because the Name may be duplicated which is not allowed in a hashtable
  If (-Not [String]::IsNullOrWhiteSpace($PSItem.Item.innerText)) {
    $Object += [PSCustomObject]@{
      "Name"  = $PSItem.Item.innerText
      "Value" = $PSItem.Value.innerText
    }
  } Else {
		# Once a blank Item name is encountered add this to the overall Objects list of devices
    $Objects.Add($Object)
		# Reset the single device object
    $Object = @()
  }
} -End {
	# Send only the collection of Device objects further down the pipeline
	$Objects
} | Format-Table -AutoSize
Conclusion
In this article, you have learned how MSInfo32 offers a convenient way to generate a comprehensive system report for a local system. With the save and export functions of MSInfo32, you learned how to export the system status to analyze over time and use PowerShell to analyze the available information.
How would you go about automating MSInfo32 across multiple systems?


