


Have you ever wanted to browse the web via the command line? Yea. Me neither. But have you ever needed to pull information from a webpage, monitor a website or submit information via automation? I have and I use Invoke-Webrequest to do it!
The Invoke-WebRequest PowerShell cmdlet is the swiss army knife for the web. This cmdlet can send any HTTP verb to a web service along with common things like HTTP parameters, specify different HTTP headers and so on. Invoke-WebRequest along with it’s brother, Invite-RestMethod are the two PowerShell cmdlets you’ll want to familiarize yourself with if you need to do any kind of web automation.
The Invoke-WebRequest cmdlet is a part of the Microsoft.PowerShell.Utility module that comes with Windows PowerShell and PowerShell Core. This cmdlet was included with PowerShell ever since v3 and it’s one that is extremely powerful yet easy to use.
By using Invoke-WebRequest, PowerShell allows a developer to work with websites, web services and REST APIs in a lot of different ways.
Basic Usage
At it’s most basic, the Invoke-WebRequest cmdlet sends an HTTP request method to an endpoint such as a URI or URL. The cmdlet supports all of the common request methods.
By far, the most common method is the GET method. This method reads information such as information from a website or maybe querying a REST API. The method is defined by using the Method parameter. Since we need an endpoint to query, we’ll also need a URI as well. To keep this easy, I’ll pick any website. To shamelessly promote TechSnips, I’ll choose techsnips.io.
Let’s say I want to get a listing of all of the latest published videos as shown below.

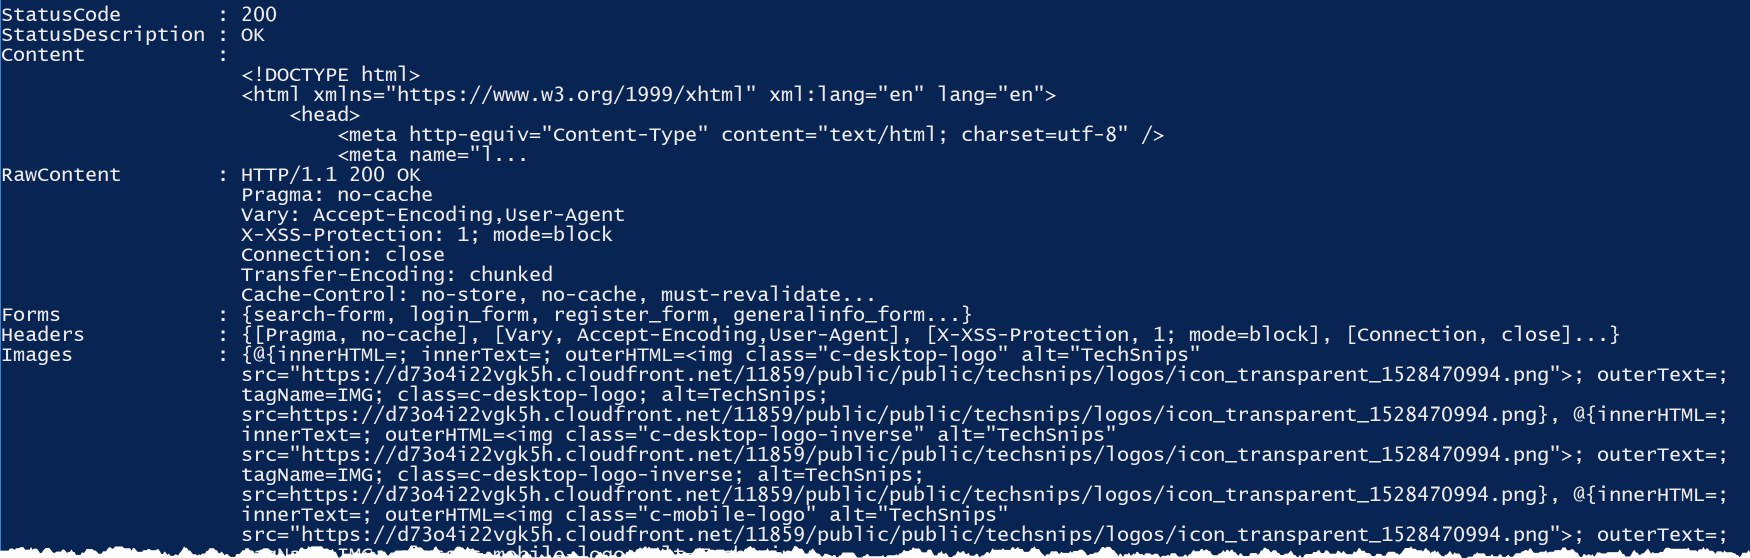
I can get an HTML representation of this page by running Invoke-WebRequest -Uri 'https://techsnips.io' -Method GET. When I do this, Invoke-WebRequest downloads the entire web page and returns an output with various parsed information around the elements of the page.
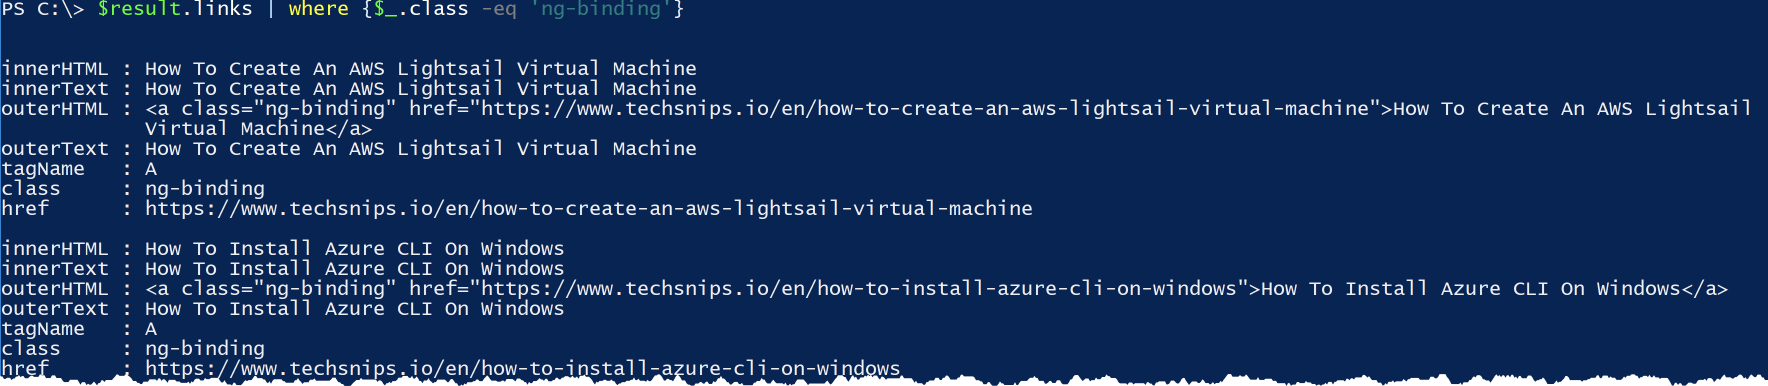
To get the videos, I’ll need to do some digging. When I look at the links property I see a commonality that all of the video links have a class of ng-binding as shown below.
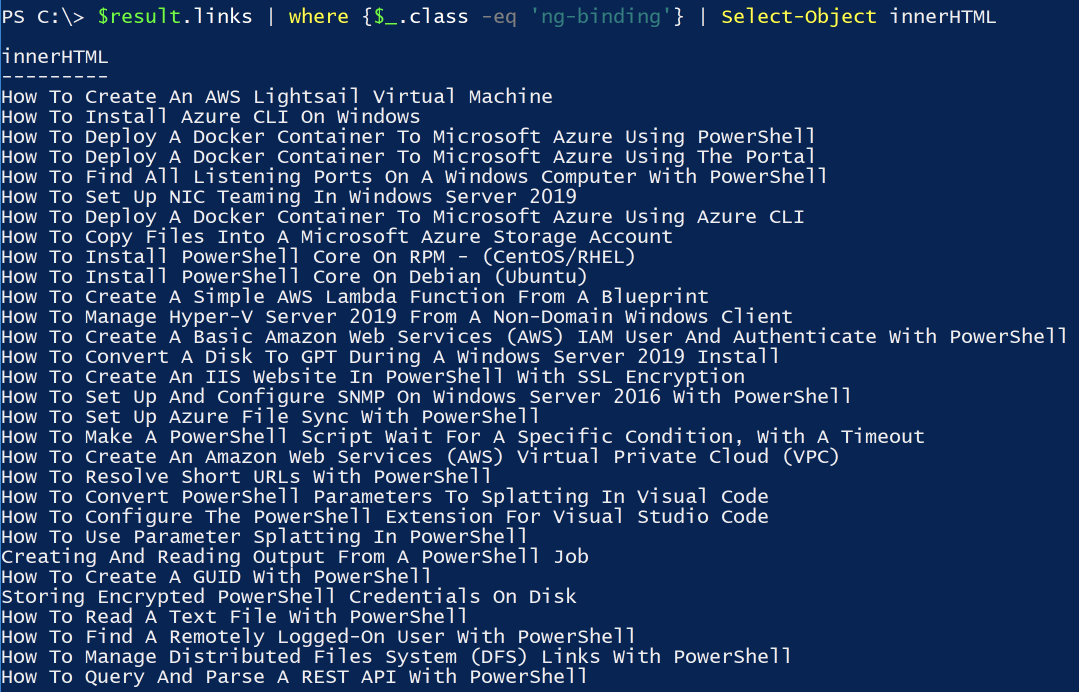
Once I know this, I can then find all of those elements and only return the innerHTML property and voila!
Downloading Files with Invoke-WebRequest
We can also use Invoke-WebRequest to download files from the web as well and it’s really easy! We can download files by simply pointing Invoke-WebRequest at a URI of a file and using the OutFile parameter to tell the cmdlet to save the file to local disk.
As an example, below I’m downloading the SysInternals Handle utility and expanding the zip file once downloaded. It’s really that easy!
Invoke-WebRequest -Uri 'https://download.sysinternals.com/files/Handle.zip' -OutFile C:\handle.zi Expand-Archive -Path C:\handle.zipSubmitting a Form and Working with Sessions
We can use Invoke-WebRequest to also fill forms. To do this though, we commonly need to work with web sessions. HTTP is a naturally stateless protocol and your browser (in this case PowerShell) must be able to create a session which will be used to track things like cookies, for example. A common form is a login/password form so let’s login to a fictional website!
Let’s say our fictional login form is at the URL http://somewebsite.com. We’d first need to run Invoke-WebRequest to download the HTML structure and create a session.
$response = Invoke-WebRequest -Uri 'http://somewebsite.com' -SessionVariable rbOnce we do this, the response will have a Forms property we can then populate with a username and password. In this case, the username is represented by a field called user and the password should be in a field called password. This will depend on the webpage.
$form = $response.Forms[0]
$form.Fields["user"] = "username"
$form.Fields["password"] = "password"
Once the form has been populated, we can then use Invoke-WebRequest again but this time re-use the session we just created and automatically figure out the URI to send it to by reading the Action property that’s on the form as shown below.
$response = Invoke-WebRequest -Uri $form.Action -WebSession $rb -Method POSTIf you’ve got all of the appropriate field names right and the webpage isn’t doing any fancy, you should be logged in with the username and password inside of the $rb web session. At this point, you can read various pages behind that authentication if you use the $rb web session variable.
Resolving Short URIs
Finally, another great use of Invoke-WebRequest is resolving short URIs. Perhaps you need to know what’s behind that shortened URL but don’t want to click on it to find out! No problem. Using Invoke-WebRequest, we can read the AbsoluteUri property from the parsed response it gives us!
Notice below I’m also using the UseBasicParsing parameter. By default, Invoke-WebRequest tries to use Internet Explorer (IE) to parse the HTML returned. This doesn’t work on systems without IE. To get around that, we can use the UseBasicParsing parameter to still download the content but only lightly parse it.
$Url = 'buff.ly/2sWvPOH'
$Web = Invoke-WebRequest -Uri $Url -UseBasicParsing
$Web.BaseResponse.ResponseUri.AbsoluteUri
Summary
The Invoke-WebRequest cmdlet is one of the most versatile cmdlets that come with PowerShell. If there’s an action that can be performed via a typical graphical browser, the Invoke-WebRequest cmdlet can do it too. You can find an example of using this cmdlet by taking a look at this article on monitoring REST APIs.


