

Need to simplify your device management, increase security, and streamline IT operations? With the sudden spike in remote work policies, IT admins faced a significant challenge in managing devices that used to stay on-premise. Fear not, and let Microsoft Intune deal with the obstacles!
With Microsoft Intune, you can manage your organization’s mobile devices, PCs, and apps from a single platform in the cloud. And in this tutorial, you will learn how to set up Microsoft Intune and how it works with policies for increased security.
Read on and start protecting your endpoints with Microsoft Intune!
Prerequisites
This tutorial comprises hands-on demonstrations. To follow along, there are a few things you need as follows:
- A Microsoft Intune subscription and a verified domain.
- Devices running in supported operating systems (OSs), such as Windows 10, macOS, iOS, or Android.
- An Azure Active Directory (AD) registered device or Azure-joined device.
- Users with valid Azure AD accounts.
Setting Up and Configuring Microsoft Intune
Microsoft Intune needs some settings and customizations to fit an organization’s needs as a cloud-based solution platform for managing devices. You must assign user licenses and onboard devices.
Each Azure AD user who needs to use Intune requires a license, and you can use either the Microsoft Intune admin center or the Azure Portal. But in this example, you will assign a user license via the Microsoft Intune admin center.
To assign a user license, follow these steps:
1. Open your favorite web browser, and log in to the Microsoft Intune admin center.
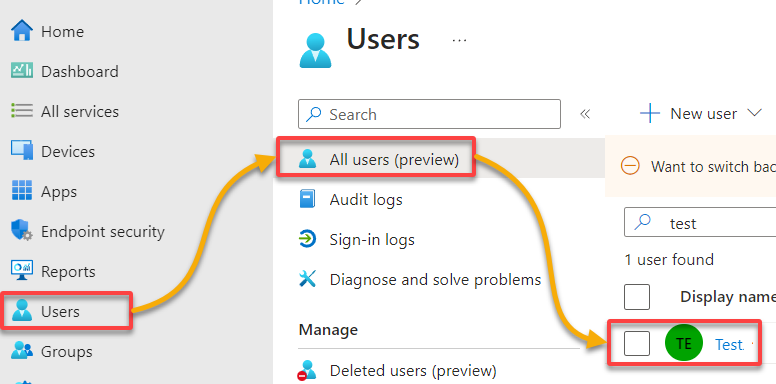
2. Once logged in, navigate to Users (left navigate pane) → All Users → and select a user (i.e., Test), as shown below, to access the user information page.
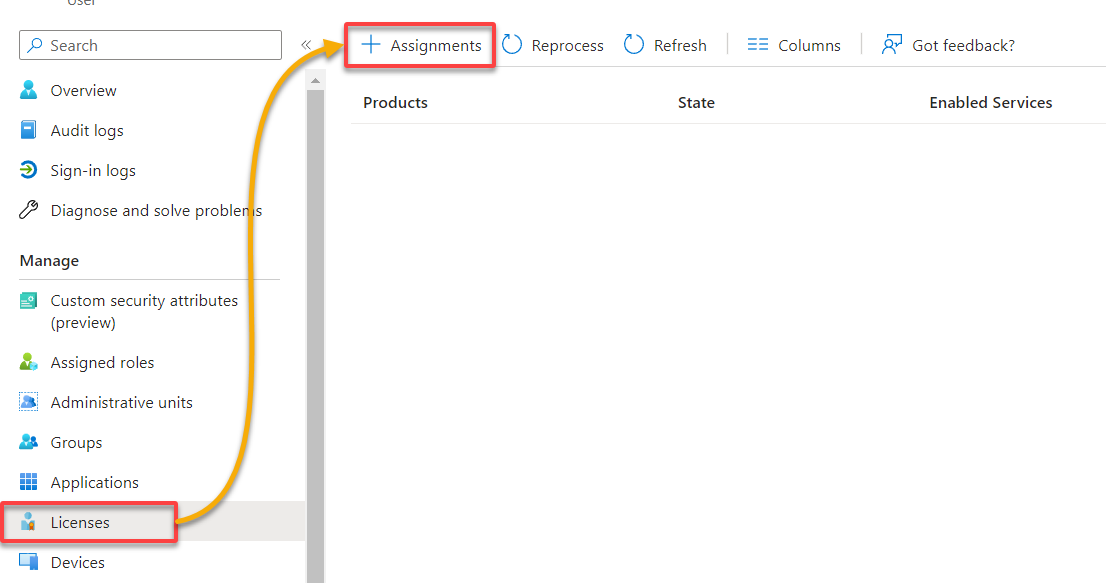
3. Next, navigate to Licenses, and click Assignments to see the list of available licenses you can assign to the selected user.
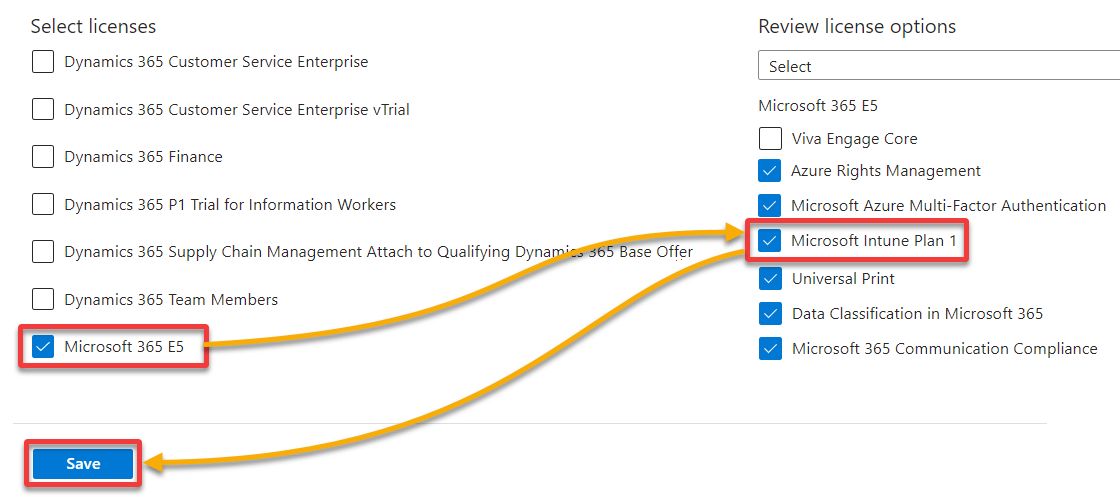
4. Now, select the license you got, for example, Microsoft 365 E5 and Microsoft Intune Plan 1, as the license option, then click on Save.
Alternatively, using Azure AD, you can use Azure Portal to assign Intune licenses to users.
The user account now has permission to use Intune and enroll devices into management.
You can set up dynamic groups and assign licenses based on device attributes and user roles. This setup automates the provisioning and de-provisioning of licenses and policies based on changing conditions.
Enabling Automatic Device Enrollment
While devices do not appear at risk on the surface, ensuring risks are mitigated is crucial, which is where Microsoft Endpoint Protection comes in handy. The good news is that Azure AD-joined devices are automatically joined to Microsoft Endpoint Protection if Auto-Enrollment is enabled.
To enable Auto-Enrollment, follow these steps:
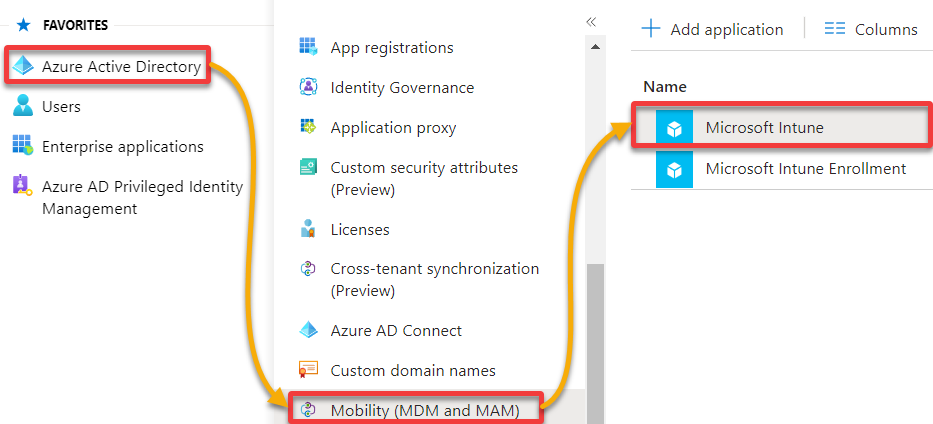
Navigate to Azure Active Directory → Mobility (MDM and MAM) → Microsoft Intune. This opens up the Microsoft Intune enrollment setting page.
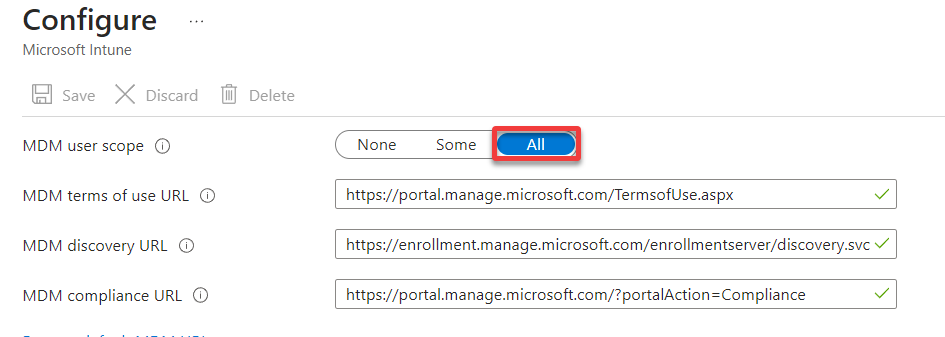
Enable auto-enrollment for All devices, as shown below, so that new Azure AD-joined devices are automatically enrolled to Microsoft Endpoint Protection.
By enrolling your devices into Microsoft Intune, you can enforce security policies, manage device configurations, and deploy applications to your users.
Note that you can select Some to test the auto-enrollment on some devices and see the impact before going full blast on all devices.
You can also enforce mobile application management (MAM) policies on apps to protect app data and control app features. Doing so prevents data leakage and unauthorized access to your apps.
Configuring Device Policies
More than joining your devices to Microsoft Endpoint Protection is required to protect your endpoints; configuration policies play a big part too. In this example, you will configure Antivirus settings, but you can configure as much configuration as you wish.
In Intune, you can push configurations to a device using configuration policies that allow you to configure a wide range of settings. These settings include but are not limited to security settings, device features, network settings, and app settings.
To create a device policy, follow the steps below:
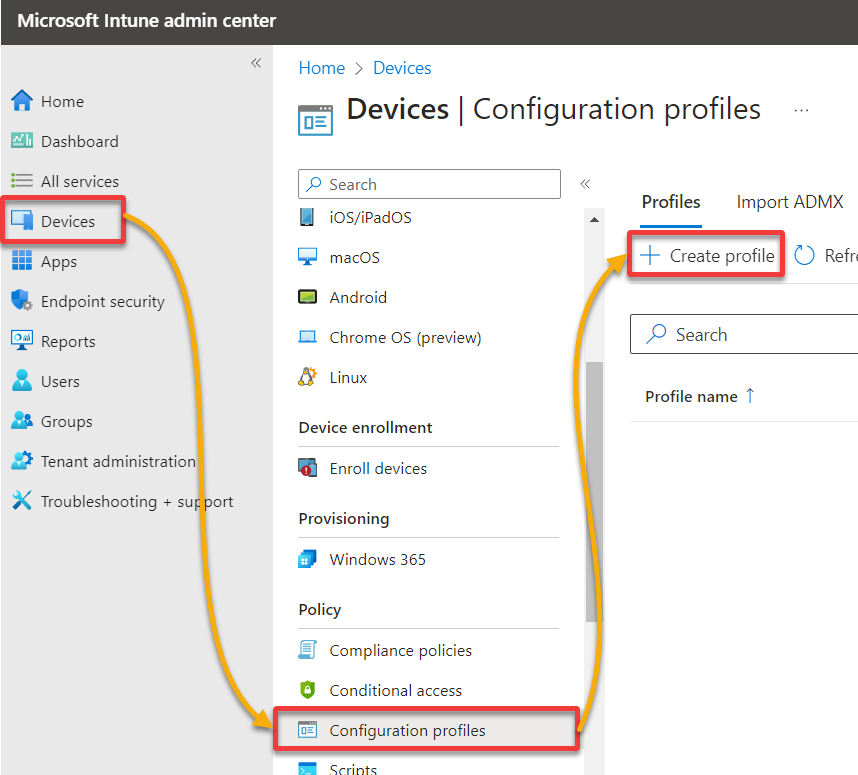
1. On the Microsoft Intune admin center, navigate to Devices (left navigation pane) → Configuration profiles, and click Create profile to initiate creating a device profile.
A panel on the right side of your browser appears, where you can configure the device profile (step two).
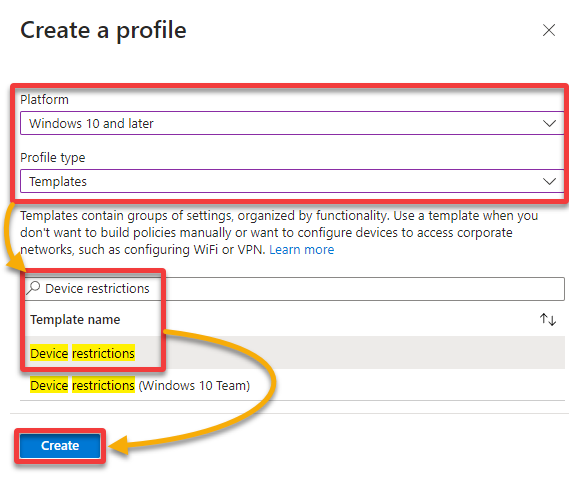
2. Configure the device profile with the following:
- Platform – Select the OS to which you wish to target the policy, which in this case, Windows 10 and later.
- Profile type – select Templates, and a list of default templates appears below.
- Search for and select Device restrictions.
Once configured, click Create to finalize creating the device profile.
Use security baselines to deploy best practice security configurations for devices and applications. This way, you can apply a consistent and recommended level of security across your devices and apps.
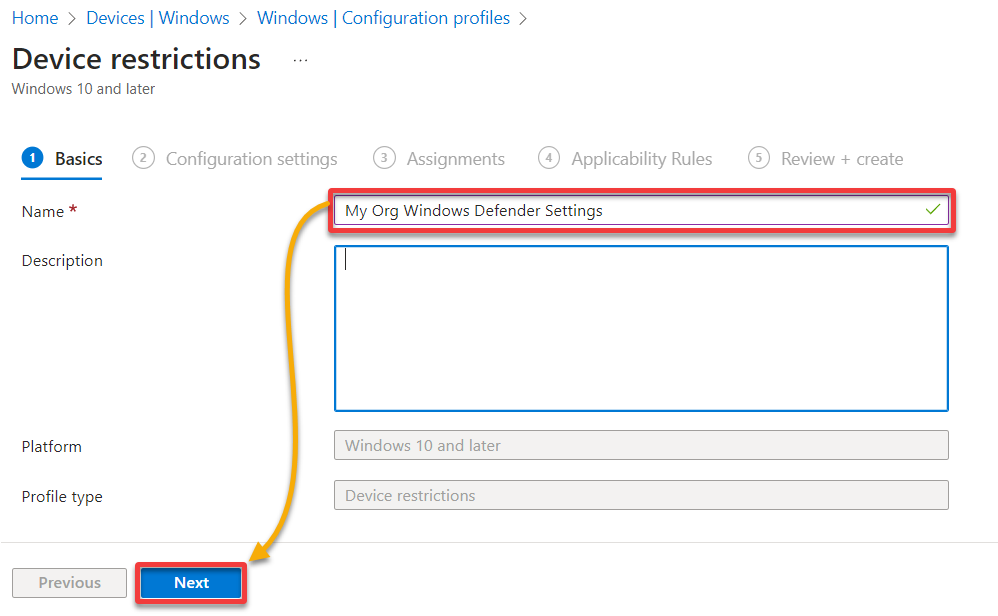
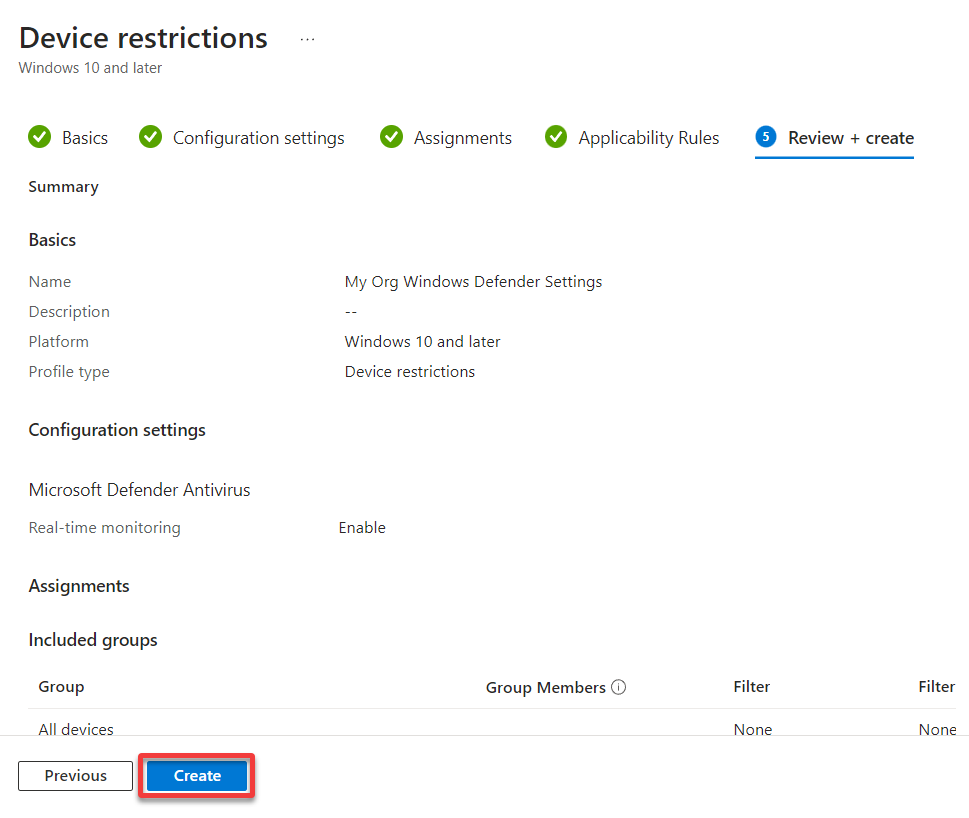
3. Name the new policy (i.e., My Org Windows Defender Settings), and click Next.
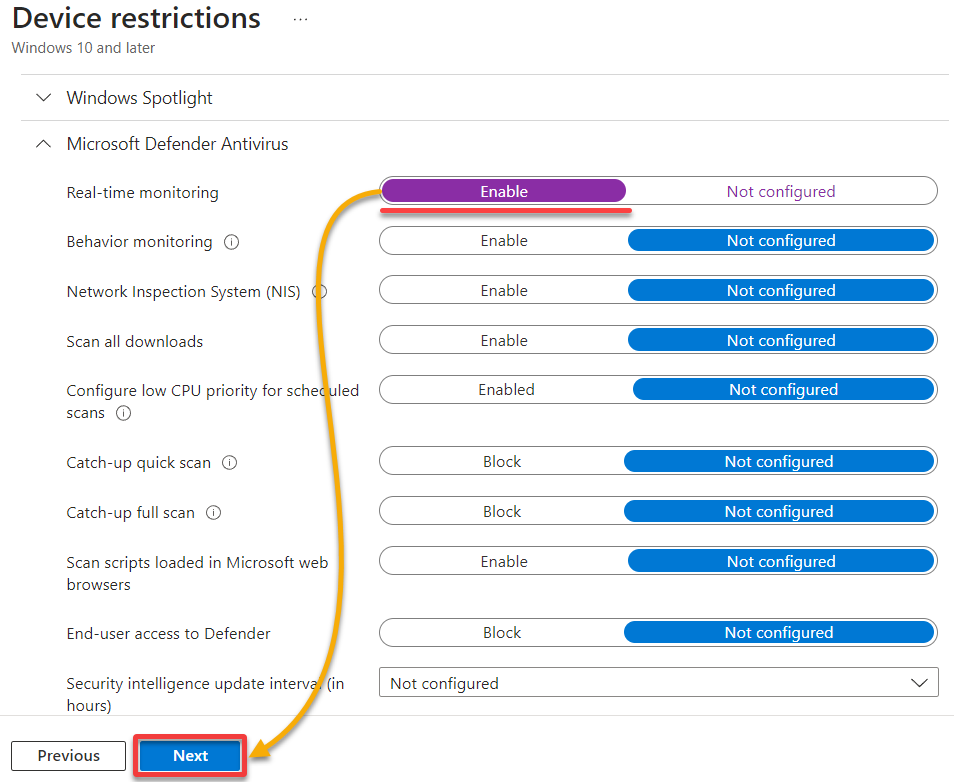
4. Now, expand Microsoft Defender Antivirus, Enable the Real-time monitoring option, as shown below, and click Next.
The policies shown below are all related to the device restrictions template. And enabling Real-time monitoring activates Windows Defender and sets it to monitor and protect the computer.
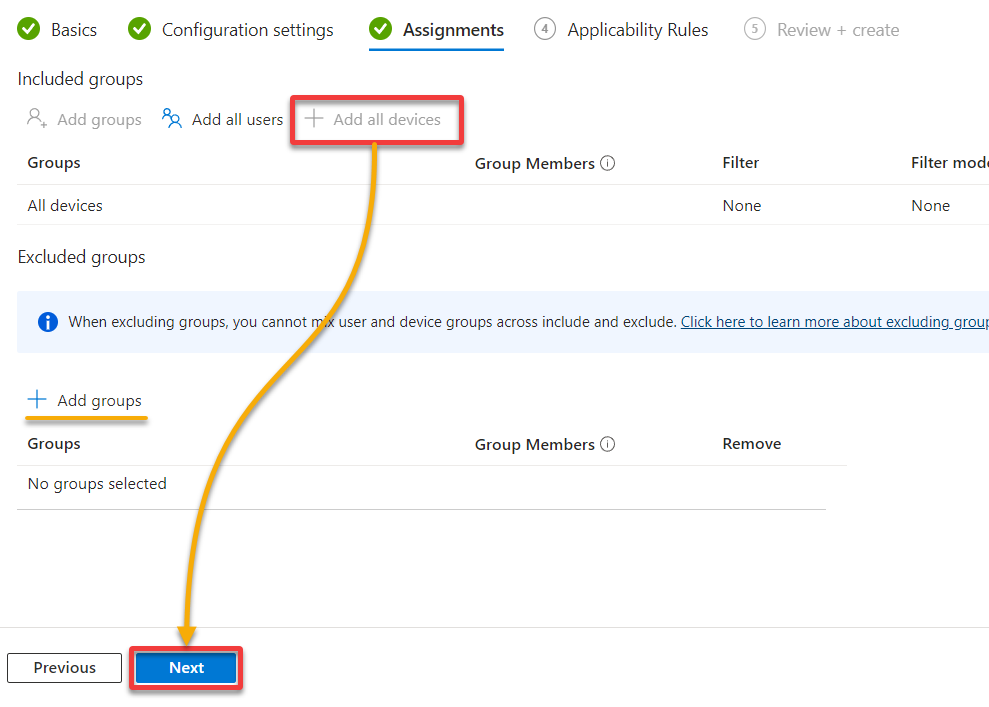
5. Under the Assignments settings, click Add all devices to include all devices as a group in the policy and click Next.
But if you are unwilling to apply this policy to all devices, click Add Groups and add a particular group that contains the users you want to target the policy to.
Use Azure AD groups to manage access and assign policies to devices. This way, you can easily control who can access your resources and what they can do with them.
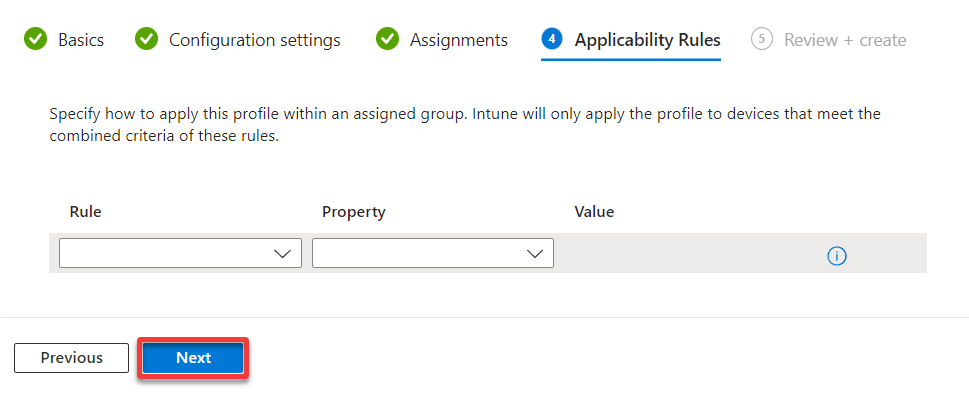
6. In the Application Rules settings, leave the fields empty, and click Next.
Perhaps you added all devices in the Assignments tab but still need to apply the policy to Windows 11 devices only. In that case, you can set a rule to which OS the policy applies on this page.
7. Lastly, review the summary of your selected settings, and click Create to finalize creating the policy.
Excellent! You have configured an Intune policy to enable Windows Defender in your organization. This policy ensures your devices are protected against viruses and malware.
But still, regularly monitoring and updating your Intune policies ensure your devices are up-to-date and secure.
Configuring Compliance Policies
You now have a device configured with a policy for an antivirus to be enabled, which adds a layer of security. But what if the policy failed to enable the antivirus for some reason? One reason is that the antivirus configured in the policy could conflict with another outdated antivirus.
But the good news is that compliance policies in Intune allow you to monitor and manage device compliance. These policies ensure that only compliant devices can access your organization’s resources.
To create a compliance policy in the Microsoft Intune admin center, follow these steps:
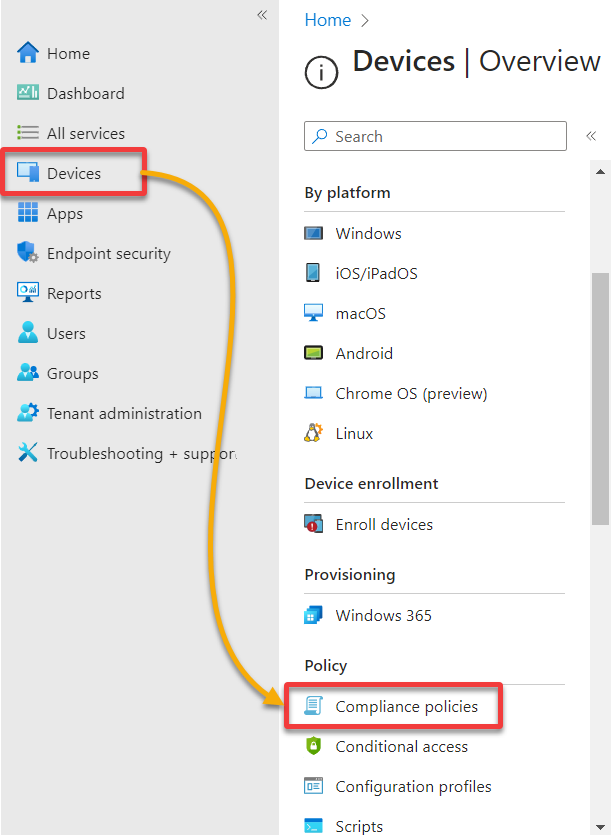
1. Navigate to Devices (left navigation panel) → Compliance policies, redirecting your browser to a page where you can manage compliance policies.
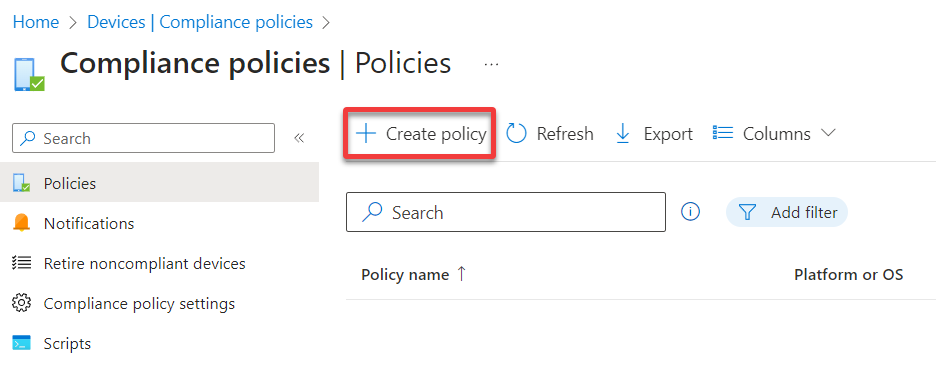
2. In the Compliance policies page, click Create policy to initiate creating a new policy.
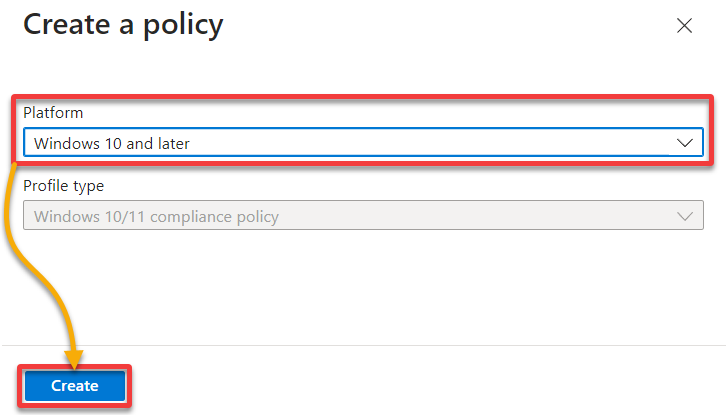
3. Next, select the Windows 10 and later platform, and click Create to continue configuring the policy.
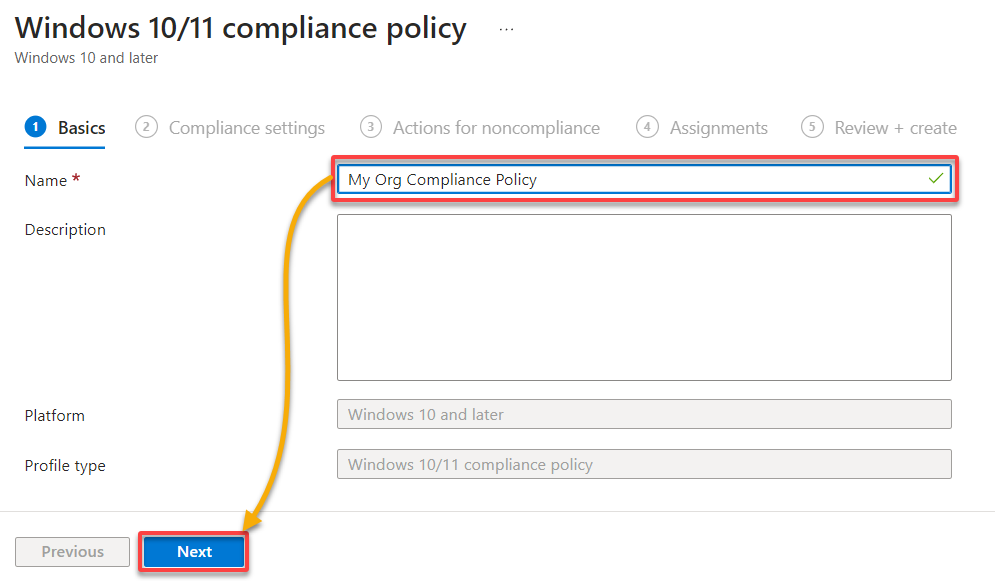
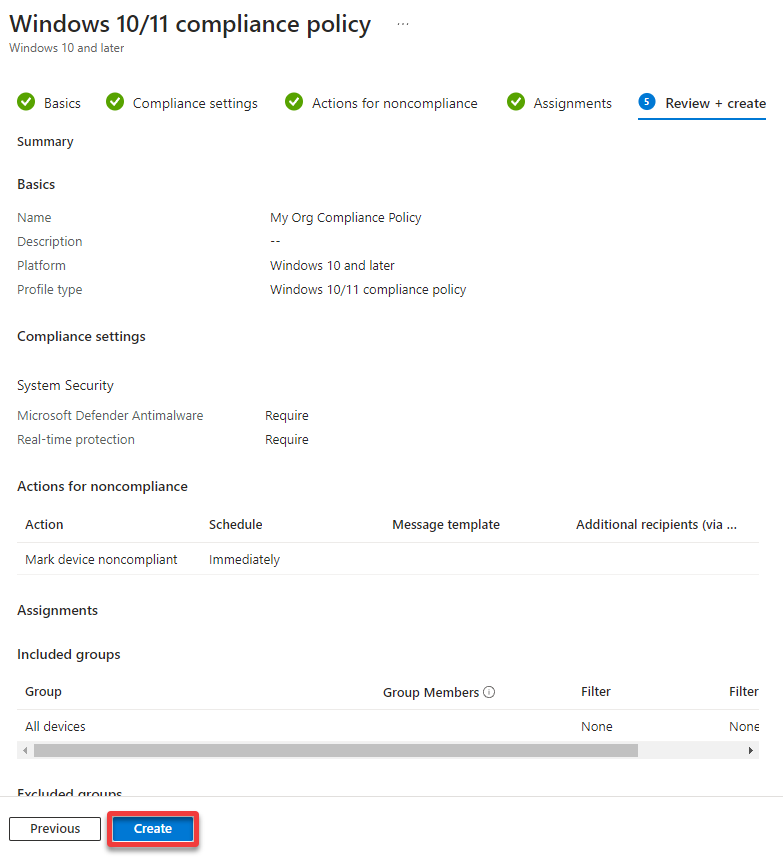
4. Name the new policy (i.e., My Org Compliance Policy), **and click Next.
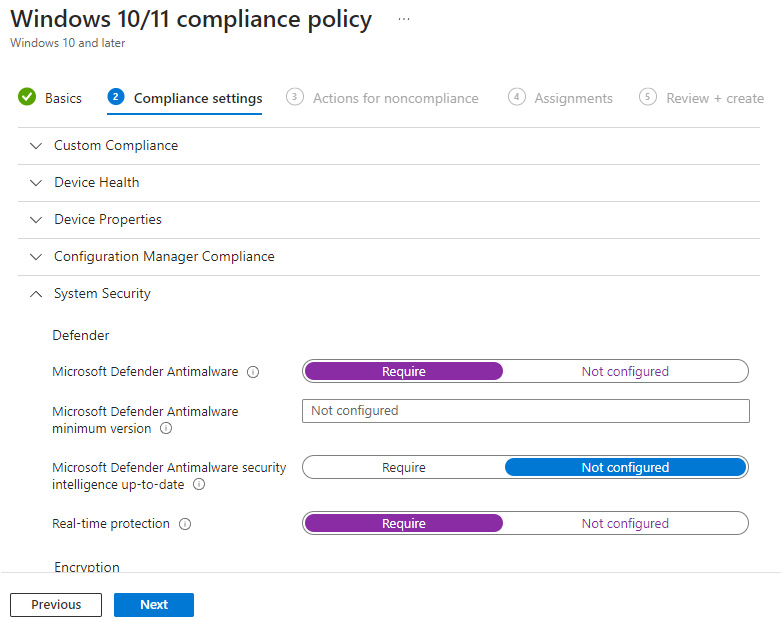
5. Now, expand System Security, select the Require option for the following compliance settings, and click Next.
| Compliance Settings | Details |
|---|---|
| Microsoft Defender Antimalware | Checks if Windows Defender is enabled in the system or not. |
| Real-time protection | Checks and confirms that Real-Time scanning is also enabled in Windows Defender. |
Compliance policies also allow you to set up rules and requirements for devices, such as requiring encryption, a minimum version of the OS, and specific security settings.
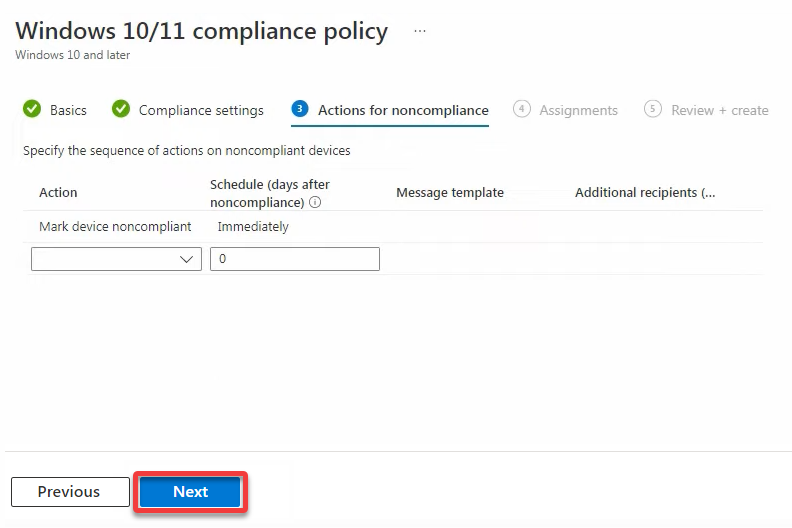
6. Click Next to skip specifying actions for noncompliance for now.
But when necessary, this page lets you choose an action to set for devices that do not match the compliance policy.
If a device is non-compliant, Intune can try to remediate it. Intune can also set the status of the device as non-compliant. As a result, conditional access can take action and block the device from accessing the organization’s resources.
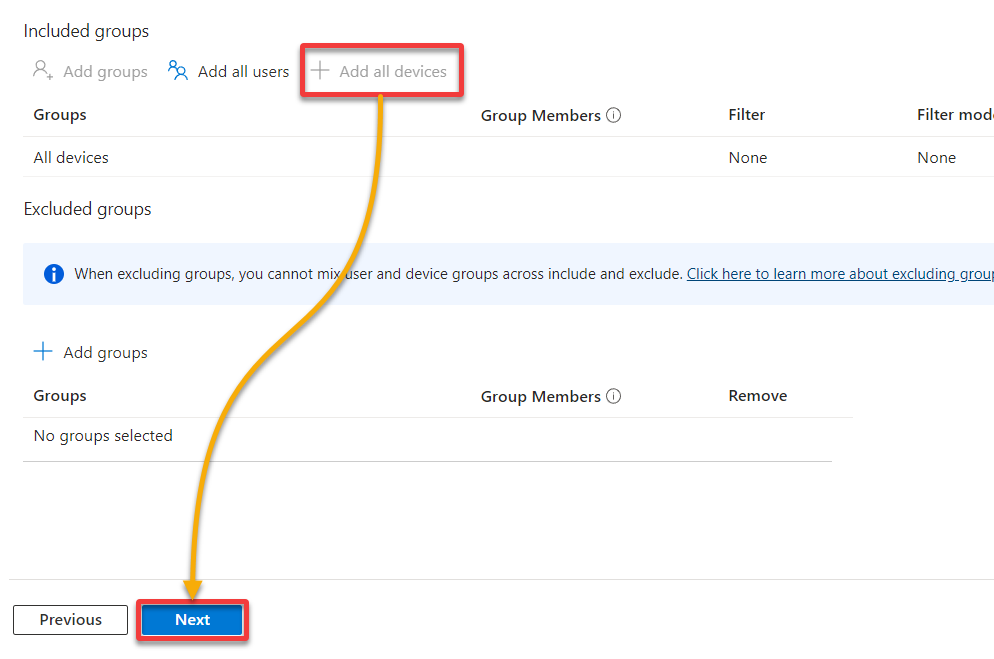
7. Set the Assignments as you did with the device compliance, and click Next.
8. Finally, review the policy configuration’s summary, and click Create to finalize creating the compliance policy.
Conclusion
Microsoft Intune is essential for effective device management and security in any organization. And in this tutorial, you have learned to set up and configure Microsoft Intune to protect your endpoints with Microsoft Intune by configuring policies.
At this point, you can confidently ensure your organization’s devices and data are secure, and users can work productively from anywhere.
Now, why not dive deeper into Microsoft Intune fundamentals? Continue the journey, and minimize the risk of data breaches and unauthorized access to your organization’s resources!


