


Tenable’s Nessus Vulnerability Scanner facilitates the quick identification of software flaws, missing patches, malware, and misconfigurations across your connected devices. Once you install Nessus on Kali Linux assists with vulnerability prioritization and finding fixable actions.
Kali is a Debian-based Linux distribution focused on security professionals and provides hundreds of built-in penetration testing tools. In this article, you will learn how to couple Nessus with Kali to enhance an already capable Linux distribution with a powerful network testing tool.
Prerequisites
To follow along with this tutorial, you will need to adhere to the following requirements.
- Administrative, or “root”, access to a Kali Linux installation with internet access. The following are recommended minimum system requirements, according to Tenable’s hardware recommendations:
- CPU: 4 * 2GHz cores
- Memory: 4 GB RAM (8 GB RAM recommended)
- Disk Space: 30 GB, not including space used by the host operating systemIn this article, a 64-bit Kali Linux (version 2020.4) Virtual Machine (VM) is used running on VMWare Workstation Player. Related: How to Install Ubuntu 20.04 [Step-by-Step]
- Access to a Nessus-supported browser. The following browsers are supported by Nessus, according to Tenable’s software requirements:
- Google Chrome (50+)
- Apple Safari (10+)
- Mozilla Firefox (50+)
- Internet Explorer (11+)
Downloading the Nessus Installation Package on Kali Linux
As Nessus is not installed by default on Kali, you will need to download the Nessus software package prior to installation. First, start the Kali Linux operating system and launch a supported web browser. Follow the below steps to download the necessary Nessus installation files.
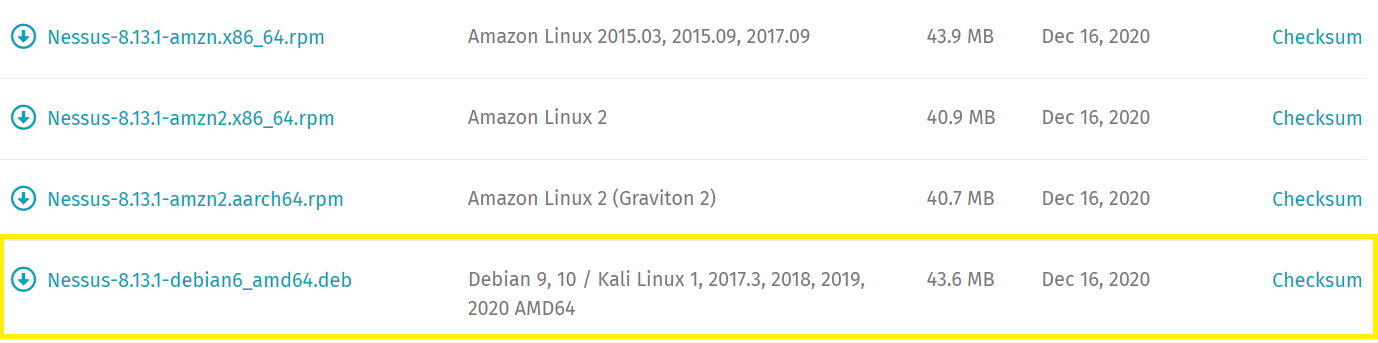
- Navigate to the Nessus downloads page.
2. Nessus is supported on a wide range of operating systems and architectures. In this article, a 64-bit version of Kali Linux (version 2020.4) is used. Therefore, the Nessus-8.13.1-debian6_amd.deb is the correct installation package:
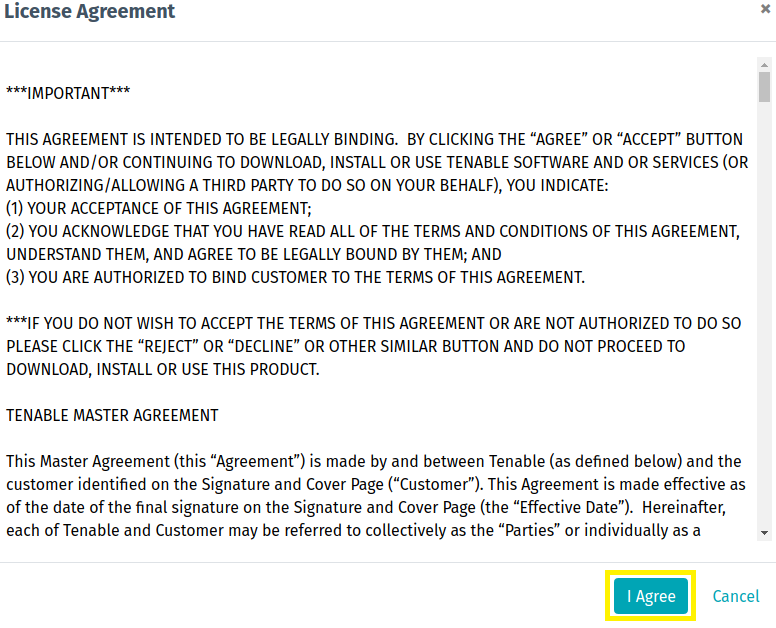
3. Click on the download link and when prompted, review the License Agreement and select I Agree.
Now that the download is complete, it is time to verify the integrity of the installation package. It is important to verify that the file has not been modified during transit.
Verifying the Nessus Installation Package Integrity
Verifying file integrity becomes especially important when you download a file from an external source, such as a vendor website. Verify the listed checksum of the file to the computed hash of the downloaded Nessus installation package, as shown below.
Related: How to Create Checksums in Windows (Built-in and Third-Party Tools)
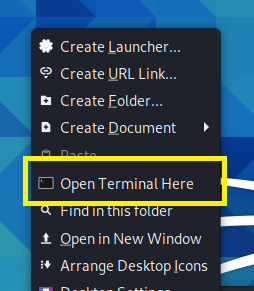
- Open a Terminal by right-clicking anywhere on your Kali Linux desktop and selecting Open Terminal Here.
2. Click on the Checksum link to obtain the SHA256 hash from the downloads page.
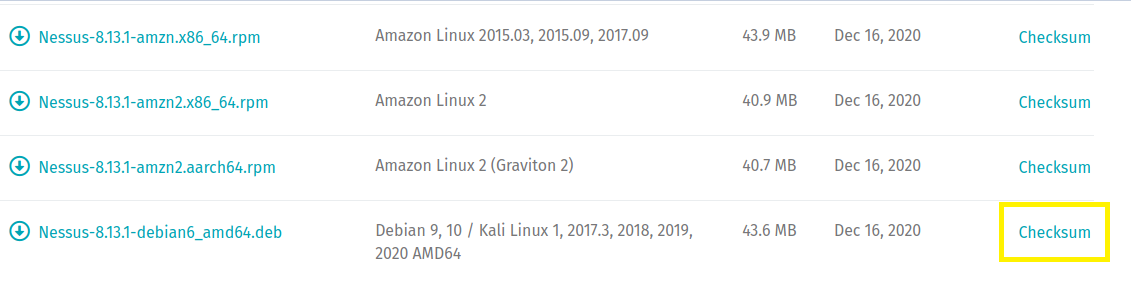
3. A popup window will display showing both an MD5 and SHA256 hash value. To copy the SHA256 value to your clipboard, simply click the Copy icon to the right of the hash.

4. Run the following command, in the previously opened Terminal window, to verify the downloaded file’s checksum.
# Substitute "checksumhash" with the provided SHA256 hash on the download website.
# Replace the path below with your download location using an absolute path.
echo "checksumhash" /path/to/download | sha256sum -c 
If the output of your command does not suggest that your installation package is OK, do not install the software.
Installing Nessus on Kali Linux
Once you’ve verified the package’s integrity, it’s time to install the Nessus application. Using the Debian Package Manager (dpkg) tool with the i (install) parameter, pass the downloaded installation package, as shown below.
Be sure to use the
sudocommand to install Nessus under an account with administrative rights.
# Replace the path below with your downloaded installation file.
sudo dpkg -i /home/kali/Downloads/Nessus-8.13.1-debian6_amd64.deb
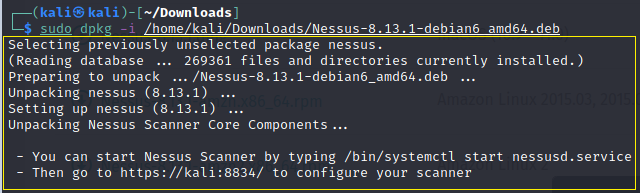
Way to go! You’ve just installed the Nessus Vulnerability Scanner on your Kali Linux operating system. The next section walks you through obtaining an activation code.
Obtaining an Activation Code for Nessus Vulnerability Scanner
Tenable offers a few variations of their Nessus Vulnerability Scanner, two of which are Nessus Essentials and Nessus Professional. Nessus Essentials is free but provides a reduced feature set compared to its paid counterpart, Nessus Professional. A few of the main Nessus Essentials limitations are listed below:
- Scanning is limited to 16 IP Addresses per scanner.
- Compliance checks or live results are not available.
- No ability to use the Nessus virtual appliance.
This tutorial will be using Nessus Essentials. Despite being free, the software does require a valid activation code as outlined below.
- Navigate to the Nessus Essentials Product Portal.
2. Fill out the registration form with your First Name, Last Name, and Email Address.
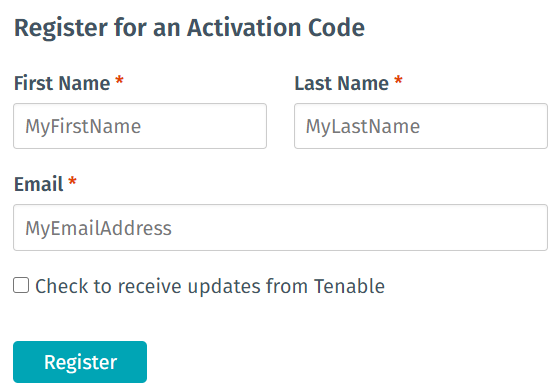
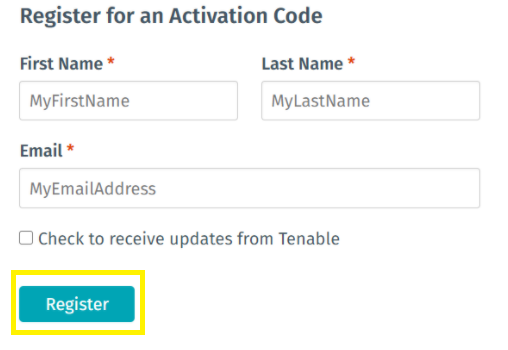
3. Click on the Register button, to complete registration.
4. Upon successful registration, Tenable will send you a confirmation email. Finally, you will be prompted with the following message:

5. Now check your email, you should find an activation code that appears like D234-C7CB-04AF-79A6-1555. The email sender address will be [email protected]. Be sure to check your junk mail if you do not see the registration email in your inbox!
Start the Nessus Service and Set for Automatic Startup
Before using the Nessus application, the nessusd system service must be started. This service controls and makes available the Nessus application interface and functions, such as scans. To start the nessusd service, follow the below steps.
- Open a terminal by right-clicking on your Kali Linux desktop and selecting Open Terminal Here.
2. Start the nessusd service by issuing the following command:
# Start the nessusd service.
sudo systemctl start nessusd
This article assumes you are not running under the
rootaccount, but an account with administrative elevation rights. Therefore commands requiring elevation are prefaced with thesudocommand to ensure elevation.
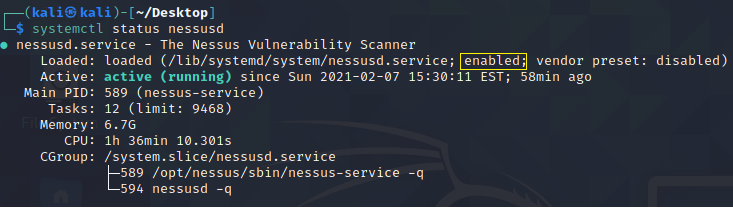
3. Verify that the service is in the running state by issuing the following command and verifying the expected output is shown in the below screenshot, as indicated by the Active: active (running) output.
# Obtain the Nessus current service state.
sudo systemctl status nessusd 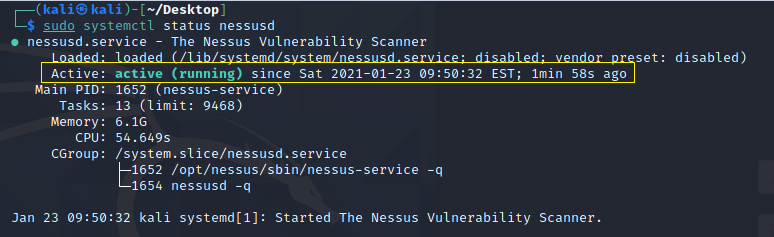
Enabling the nessusd Service to Start on Boot
By default, the nessusd service does not start when your Kali Linux operating system boots. To enable the nessusd service to run when the Kali Linux operating system starts, run the following command to enable the nessusd service on startup.
# Enable the nessusd service at boot
sudo systemctl enable nessusd
Verify that the service is in an enabled state by issuing the below command. As shown in the below screenshot, the nessusd service shows enabled in the Loaded output line.
# Obtain the Nessus current service state.
sudo systemctl status nessusd
Activating the Nessus Application
Now that you’ve obtained your activation code and started the nessusd service, it is time to activate your Nessus installation. To activate your Nessus installation follow the below steps.
- Open a web browser on your Kali Linux operating system and navigate to the address,
https://localhost:8834. Keep in mind that the default port is8834and not the typical port443.
The Nessus installation comes with a self-signed SSL certificate, which will likely prompt you with a warning when you attempt to access the Nessus application’s web interface. Tenable provides options to customize the SSL certificate used by your Nessus application.
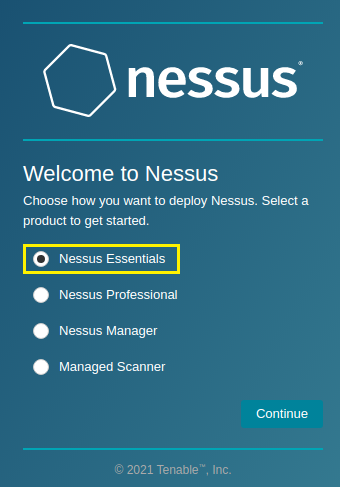
2. On the Welcome to Nessus screen, select the product version, Nessus Essentials.
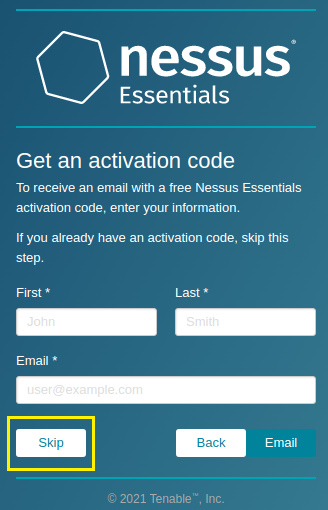
3. Select Skip on the Get an activation code screen, as you have previously obtained the activation code.
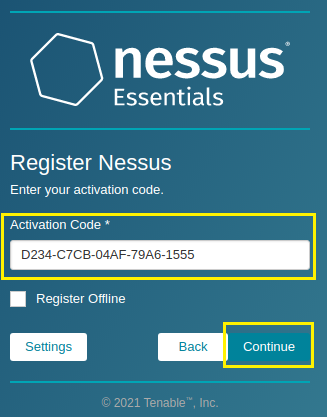
4. Enter the Activation Code, on the Register Nessus screen, that you received during the registration process and select Continue. In the screenshot below, you will see that this tutorial’s mock activation code is D234-C7CB-04AF-79A6-1555:
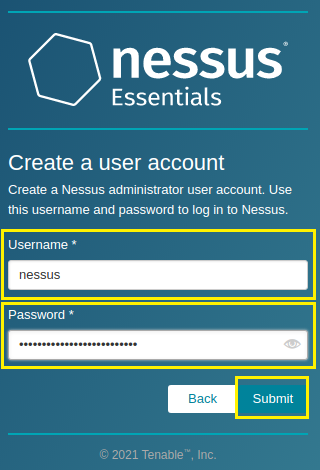
5. When prompted with the Create a user account screen, define a Username and Password and click on Submit. The defined username and password are used to log into the Nessus application.
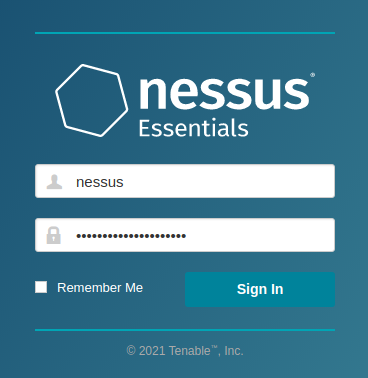
6. Once the scanner finishes initializing, which may take a while, enter the username and password for the user account that you established earlier in this tutorial and click on Sign In.
Awesome work! Installation and activation of your Nessus Vulnerability Scanner software is complete! In the next section, you will configure Nessus to target your local system with a vulnerability scan.
Running a Nessus Vulnerability Scan
You’ve now got Nessus up and running. It’s time to kick the tires and see what this handy tool can do; finding vulnerabilities! The remainder of this section provides instruction on how to configure and launch a scan against your Kali Linux host.
Assuming you’re still on the Nessus application page, supply the username and password for the user account that you established earlier in this tutorial if you are not currently logged in.
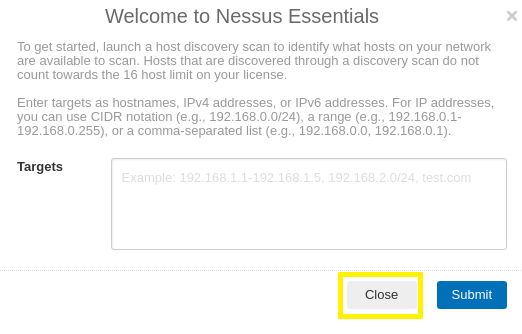
Upon initial login, you may be prompted with a welcome message that allows you to quickly configure a discovery scan, which locates networked devices. Feel free to close this message, as you are going to configure and launch a custom scan.
There are several different methods that can be used to configure a scan. This tutorial focuses on the following three-step approach, as outlined below and in the following sections.
- Configure a scan policy
- Configure a scan
- Launch the scan
Configuring a Nessus Vulnerability Scan Policy
Scan policies may be thought of as a set of scanning instructions. Scan policies direct the scanner on what tasks to perform and how to perform those tasks.
There is a collection of pre-configured scan policy templates or customize an advanced scan to choose from. Tenable categorizes Nessus scanning capabilities into the following three categories:
- Discovery Scan: Targets address space to report on live hosts and open ports.
- Vulnerability Scan: Targets endpoints to assess for known vulnerabilities.
- Compliance Scan: Targets endpoints to assess endpoint configuration for compliance with a particular standard (e.g., Center for Internet Security (CIS) benchmarks, Security Technical Implementation Guide (STIG), etc.).
To create and configure your scan policy follow the below steps.
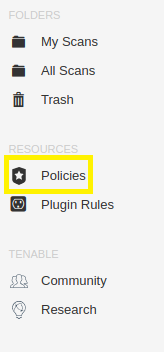
- Select Policies from the menu on the left-hand side of the screen, under the Resources heading.
2. Select New Policy, which is located in the upper right-hand corner of the screen.

3. Select Basic Network Scan. The Basic Network Scan option includes pre-configured settings required to assess your Kali Linux host for vulnerabilities.
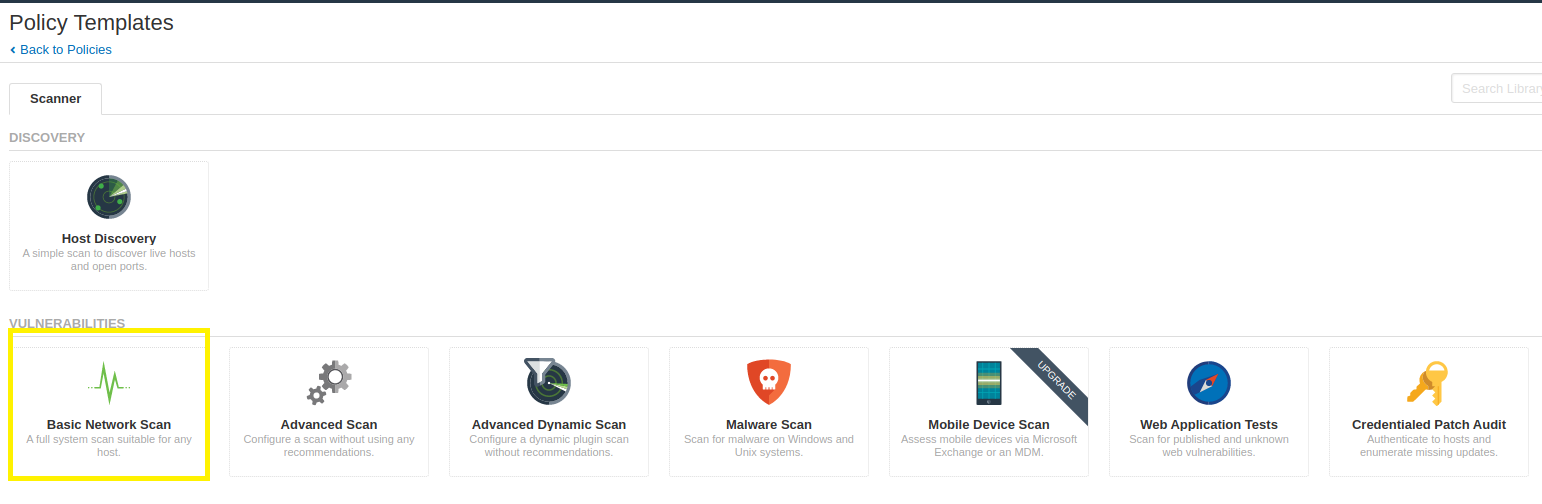
4. After selecting a scan policy template there are additional configurable elements shown. Leave each pre-configured setting in its default state for now, but feel free to experiment at a later time.
Enter a Name for your scan policy and click on the Save button. In the following screenshot, you will see that this tutorial’s scan policy name is Basic Network Vulnerability Scan Policy.

To launch specific vulnerability tests (some of which this tutorial will demonstrate), Tenable requires administrative credentials. Executing a scan without credentials provides insight into externally enumerable vulnerabilities, which mimics an attacker’s perspective.
Configuring a Nessus Vulnerability Scan
The next step in the process is to configure your scan. During this phase of the process, select a scan policy and target host as outlined below.
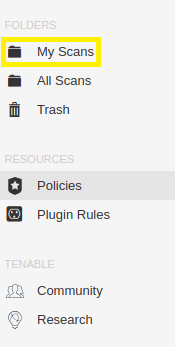
- Select My Scans from the menu on the left-hand side of the screen.
2. Click on the New Scan button, which is located in the upper right-hand corner of the screen.

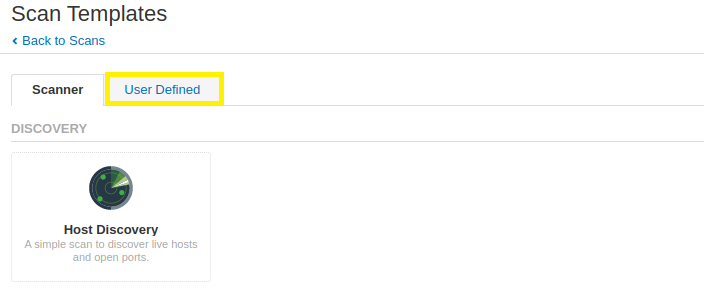
3. Select the User Defined tab to choose the newly configured Basic Network Vulnerability Scan.
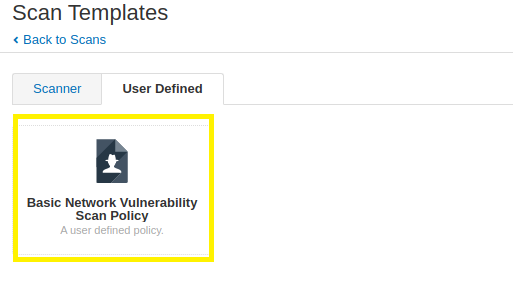
4. Select the scan policy that you configured in the previous section. In the following screenshot, you will see that this tutorial’s Basic Network Vulnerability Scan Policy appears for selection.
5. Define your target(s). To target your local Kali Linux host, specify localhost in the Targets text entry box.
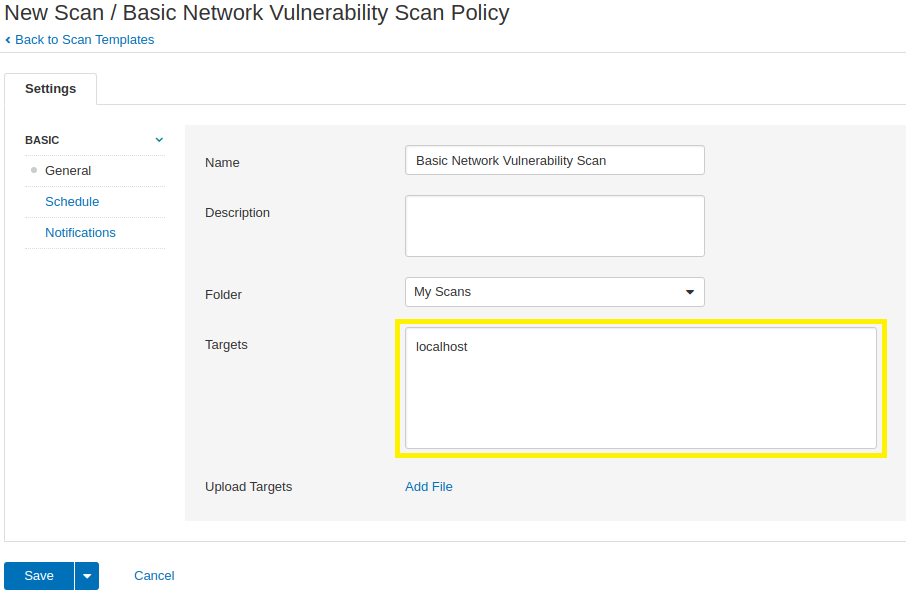
Define multiple targets within a single scan by separating each target with a comma. For example, specifying
localhost,10.10.10.10will target yourlocalhostand the10.10.10.10IP address.
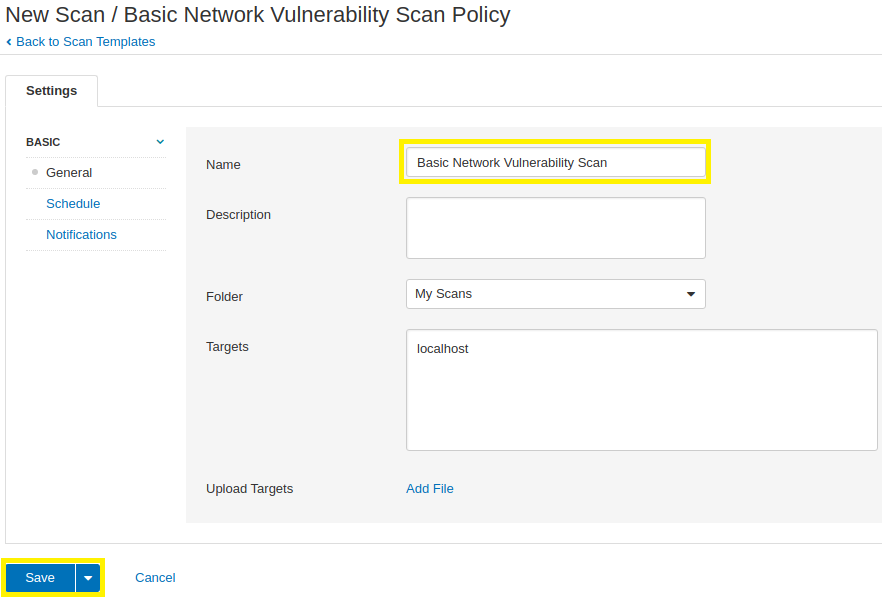
6. Provide a Name for your scan and click on the Save button. In the following screenshot, you will see that this tutorial’s scan has a Name of Basic Network Vulnerability Scan.
Launching a Nessus Vulnerability Scan
After saving your scan, create an entry in the My Scans section of the Nessus application.
- To launch your scan, click on the Play button, next to the Basic Network Vulnerability Scan.

2. The rotating green arrow icon indicates that the scan is running. Be patient, as it takes time for the scan to complete.

3. When the rotating green arrow icon changes to a green checkmark, the scan is complete. Click on the scan name to view the results!

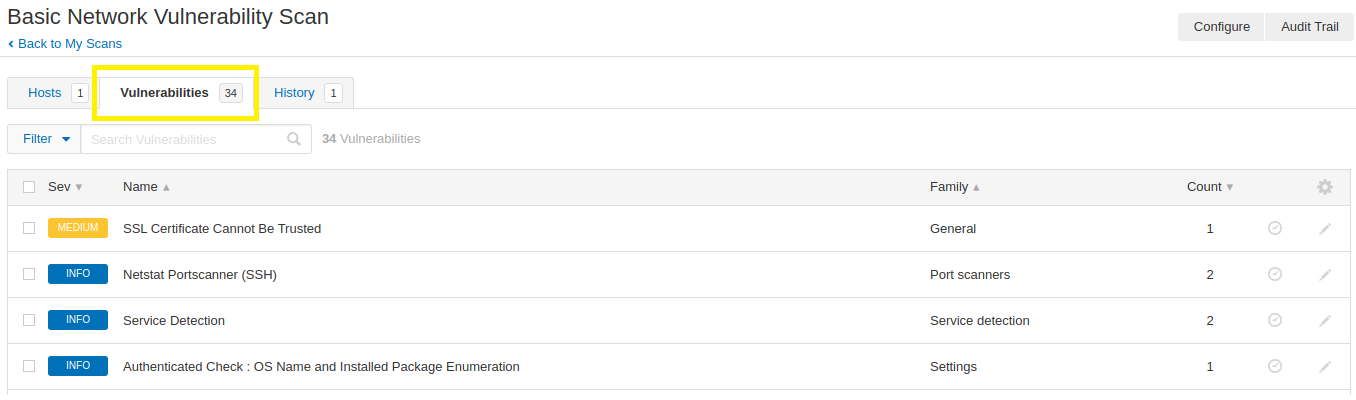
Awesome work! You just ran a vulnerability scan against your local Kali Linux host! To display the results click on the Vulnerabilities tab on the scan summary page.
Next Steps
In this tutorial, you downloaded, installed, and configured Nessus on a Kali Linux host. You then leveraged the Nessus technology to assess a local Kali Linux host for vulnerabilities.
Take a more in-depth look at the scan results. What information can you gather from the scan that you performed? After you gain comfort using the Nessus application, feel free to target additional hosts by supplying the host’s IP address as a target within your scan.


