

Disruptions and delays in your organization’s workflow can be a real headache. But with IdFix, you will soon be waving goodbye to connectivity woes.
In this tutorial, you will learn the IdFix tool’s knack for pinpointing and resolving those pesky errors for a more efficient Azure AD environment.
Ready? Take charge and conquer those Azure AD Connect errors like a pro!
Prerequisites
Before ridding of those dreadful errors, ensure you have the following in place so you can follow along in this tutorial:
- A Windows Server machine with Active Directory and Domain Services (AD DS) – This tutorial uses a Windows Server 2016 Datacenter 10.0 Build 14393.
- A domain-joined machine running a Windows Operating System (OS) – This tutorial uses a Windows 11 Enterprise 10.0 Build 22000.
- An Azure subscription – A free trial will suffice.
- An account with read-and-write access to the Active Directory (AD).
Installing and Running the IdFix Tool
Having met the prerequisites, you will now gain firsthand experience in leveraging IdFix to identify and resolve Azure AD Connect errors efficiently. But first, you must install the IdFix tool on any domain-joined computer or server.
To install and run the IdFix tool, follow these steps:
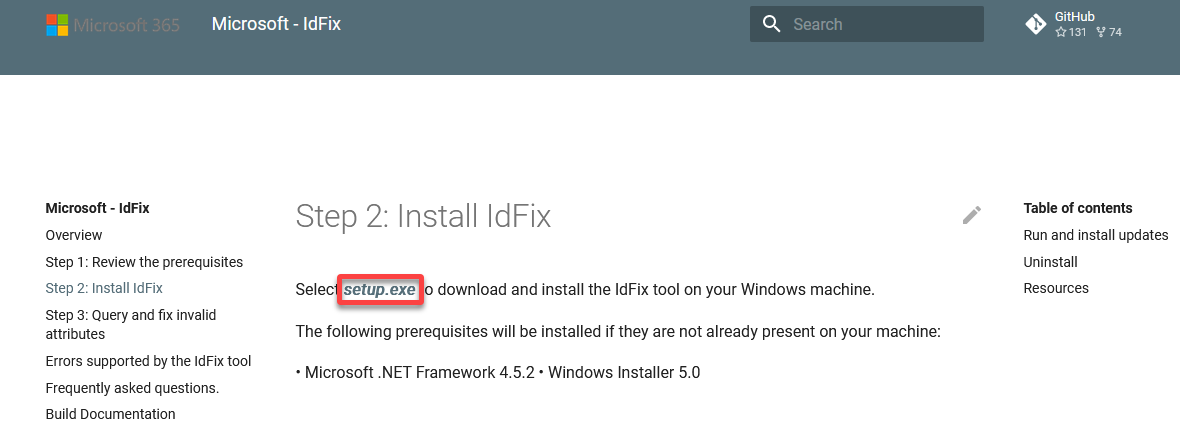
1. Open your web browser and download the Microsoft IdFix tool installer (setup.exe) from the official Microsoft GitHub page.
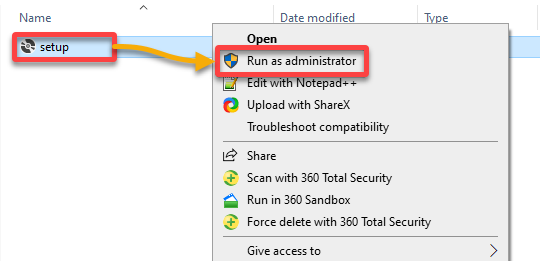
2. Once downloaded, run the IdFix installer as administrator for required privileges to access AD users and groups.
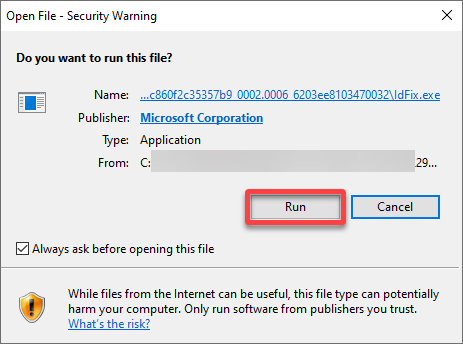
3. When prompted, click Run to start the installation.
4. Finally, click OK to accept the Privacy Statement.
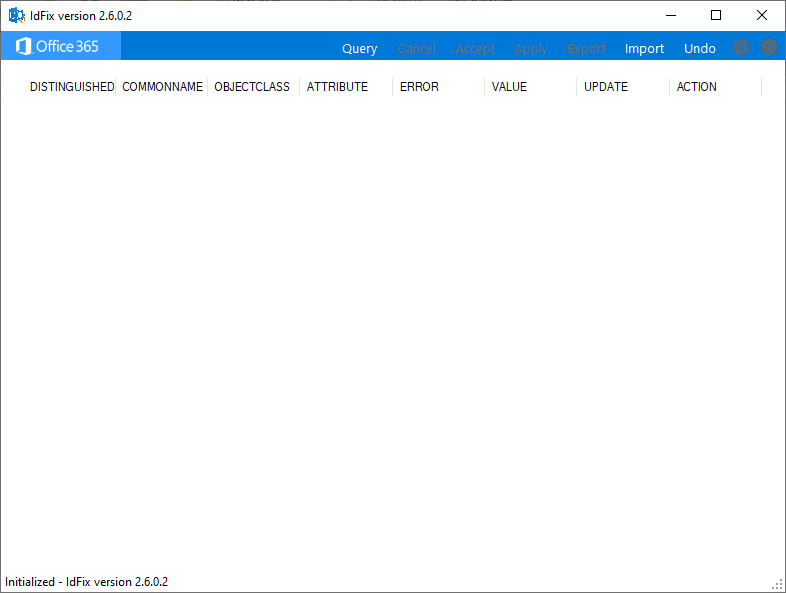
Once done, the IdFix tool launches automatically, as shown below.
You can now use the IdFix tool to check your AD for corruption and errors.
Scanning for Errors via the IdFix Tool
After installing the IdFix tool, you will fill in the initial blank page by scanning for errors. Think of this process as peeling back the layers to reveal any hidden imperfections in your Azure AD setup.
To scan for errors via the IdFix tool, complete the steps below:
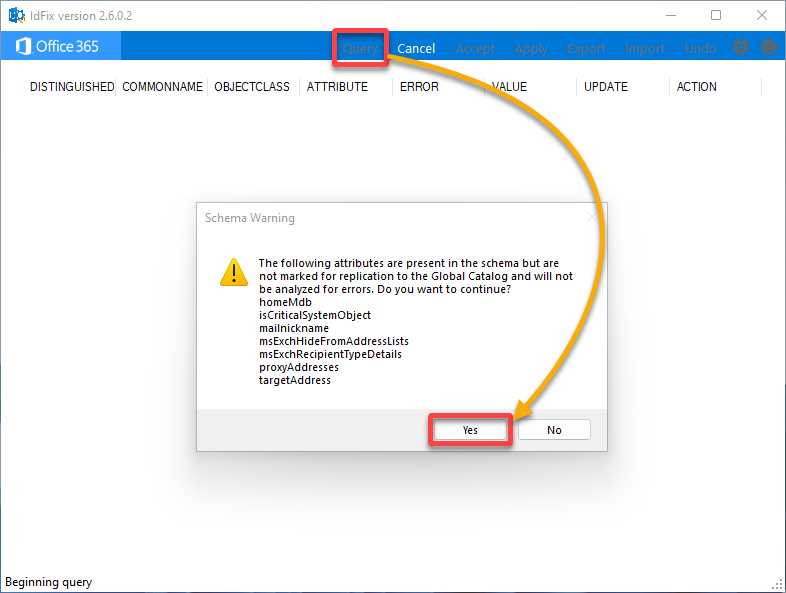
While on IdFix, click Query in the menu bar to start the AD scan, then click Yes on the prompt to continue despite the Schema Warning. This warning alerts you about some attributes that are not marked for replication.
The IdFix tool then analyzes your on–premises AD environment for any existing errors. Depending on the size of your AD, the process can take a couple of minutes until the IdFix scan is completed.
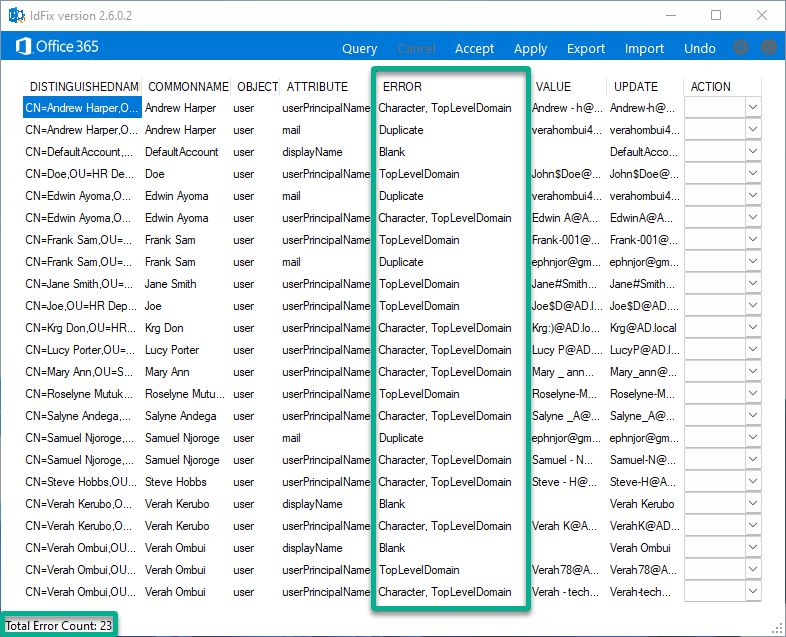
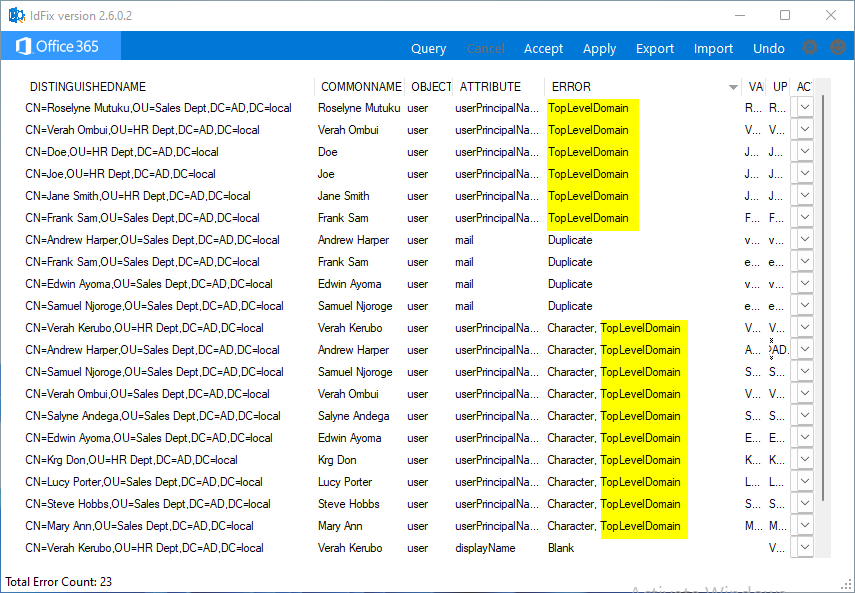
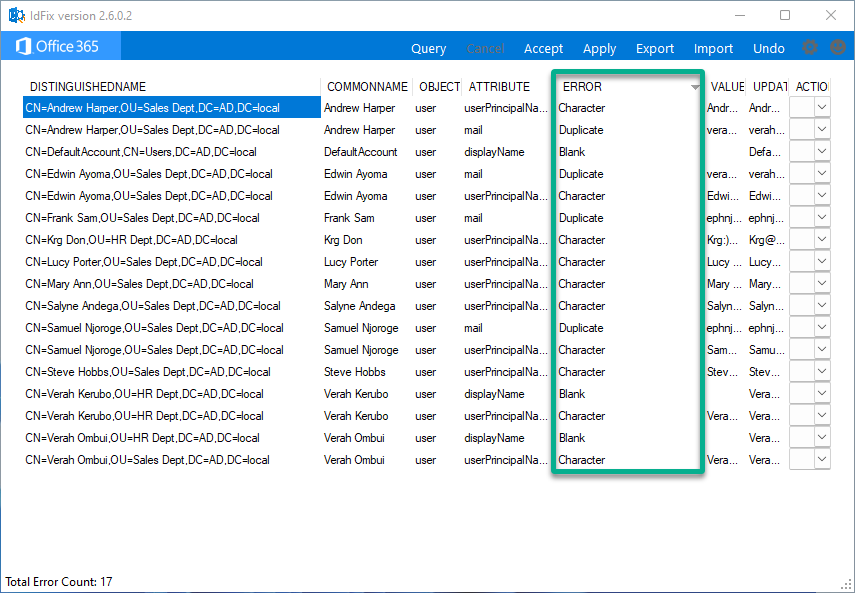
Once the scan is complete, you will see the status (lower-left), and any identified errors will be listed in the dashboard, as shown below.
Take a closer look at the query results; you will notice that each error contains eight columns of information displayed as follows:
| Column | Details |
|---|---|
| DISTINGUISHED NAME | Refers to the distinguished name of the AD object affected by the identified issue. The distinguished name uniquely identifies each object within an AD forest and represents its hierarchical location in the directory tree. |
| COMMON NAME | Represents the object’s name and is often used to identify users, groups, or other directory objects. |
| OBJECT CLASS | Specifies the AD object affected by the issue, such as a user account, group, or other AD object. |
| ATTRIBUTE | Indicates the AD attribute associated with the identified issue. This column specifies which attribute is causing the problem. |
| ERROR | Describes the type of issue or error identified. This column provides a summary of the problem. |
| VALUE | Refers to the problematic value currently assigned to the attribute. |
| UPDATE | Specifies the recommended resolution for addressing the identified issue. |
| ACTION | Lets you choose the action to perform, such as Edit, Delete, or Complete. |
Resolving Common Issues Identified by the IdFix Tool
After querying to get the problematic users/groups, you can solve the ones to be synced to Office 365 Azure AD.
There exist several options recommended by IdFix to remediate the errors identified, including:
- Edit – The UPDATE field contains the value to apply to an object. Admins can change the contents of this field.
- Complete – You can use this action with duplicate items. You can mark the record as Complete or set the action to Remove for the duplicated object.
- Remove – This option lets you remove the field’s value but not the object itself.
Read on and see how to resolve common issues via the IdFix tool.
Fixing TopLevelDomain Errors
Wondering about the most common issues? TopLevelDomain errors take the lead in Azure AD Connect hiccups, as highlighted below. They pop up when you use .local as your domain name.
To fix TopLevelDomain errors for all the users/groups, carry out the following:
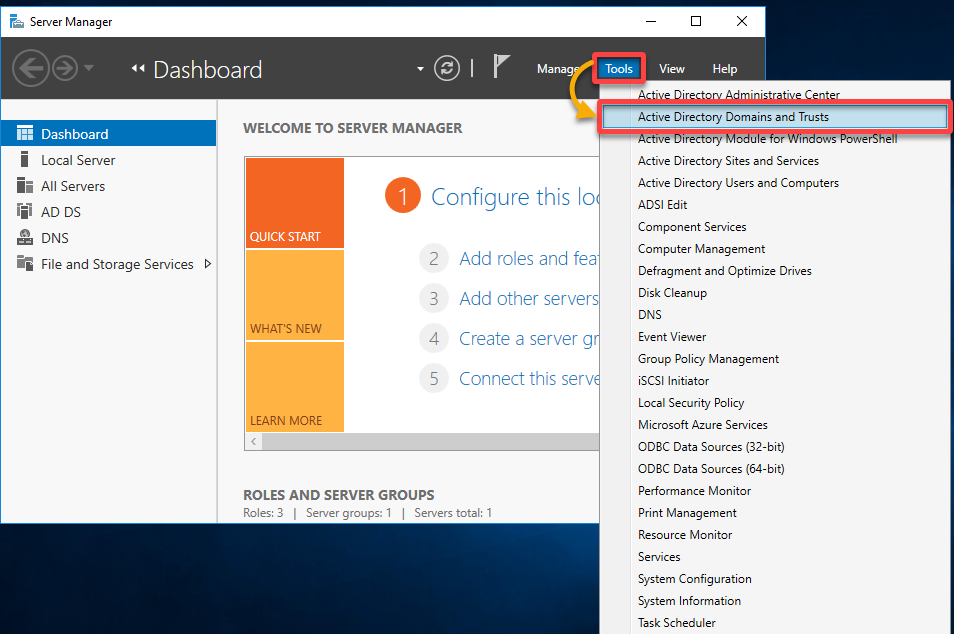
1. On your Windows Server, launch your Server Manager from the Start menu.

2. On the dashboard, click Tools and choose Active Directory Domains and Trusts, which opens its management console (step three).
This management console is where you can manage domains and trust relationships within your AD environment.
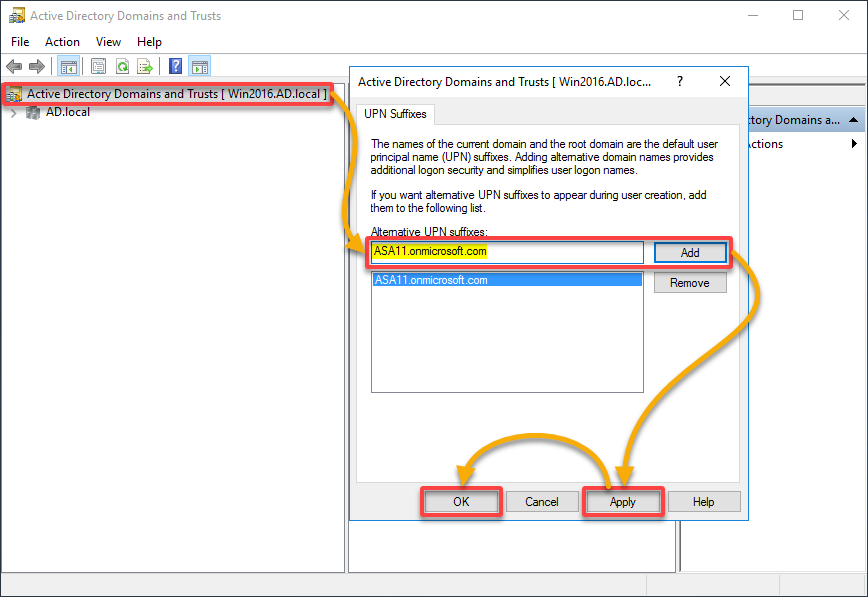
3. On the ADDT console, add an alternative domain name as follows:
- Double-click on Active Directory Domains and Trusts (left pane) to open its properties window.
- Under the UPN Suffixes tab, input Alternative UPN suffixes (public domain), and click Add to confirm.
Adding alternative UPN suffixes helps align user authentication with email domains, supports organizational changes, and improves the overall user experience. - Click Apply, then OK for your changes to take effect.
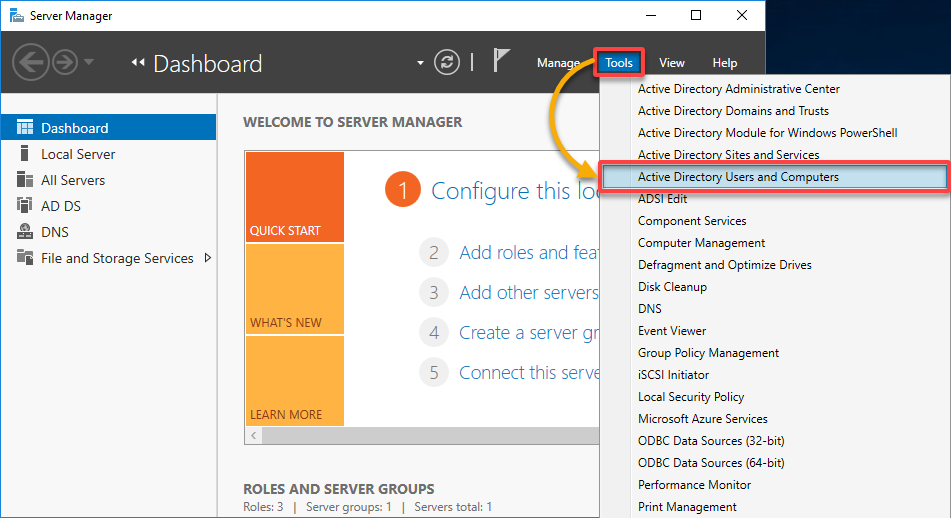
4. Switch to your Server Manager, click Tools, and choose Active Directory Users and Computers (ADUC).
💡 Note: Changing the domain suffix for your users will not affect their login to their machines or any other application server.
5. Expand your domain (i.e., AD.local) in the left pane, choose an Organization Unit (OU) (i.e., Sales Dept), select all users to be synced, right-click, and choose Properties.
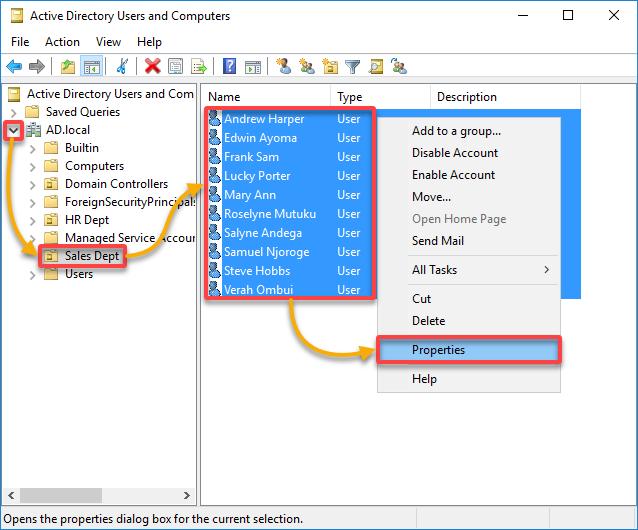
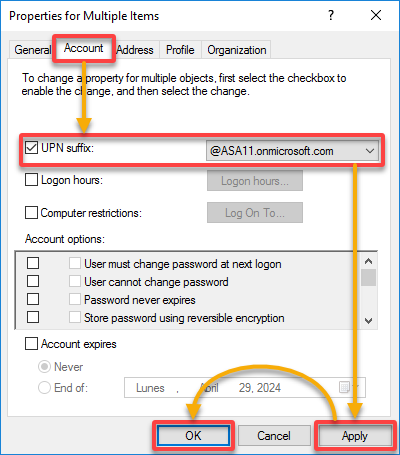
6. Now, modify all selected users’ UPN suffixes with the following in the Properties window:
- Navigate to the Account tab and tick the UPN suffix checkbox.
- Select your newly created UPN suffix (i.e., @ASA11.onmicrosoft.com) from the drop-down field. With this action, you update each user’s UPN to reflect your public domain accurately.
- Click Apply, then OK to effect your changes.
7. Lastly, rerun the IdFix tool scanning to ensure TopLevelDomain errors are no longer present.
Addressing Duplicate Errors
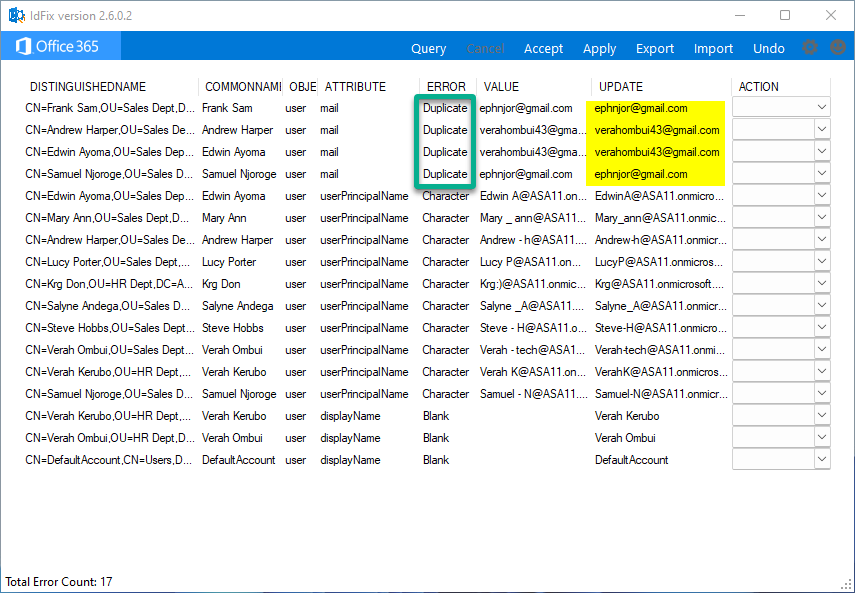
IdFix duplicate error, as illustrated below, occurs when two or more objects share identical values in an attribute configuration. The issue typically arises between two user objects or various mail-enabled objects, like a distribution group and a user object.
To address duplicate errors, proceed with these steps:
Input a unique email address in the UPDATE column of an object, select EDIT in the ACTION column, and click Apply in the menu bar to confirm.
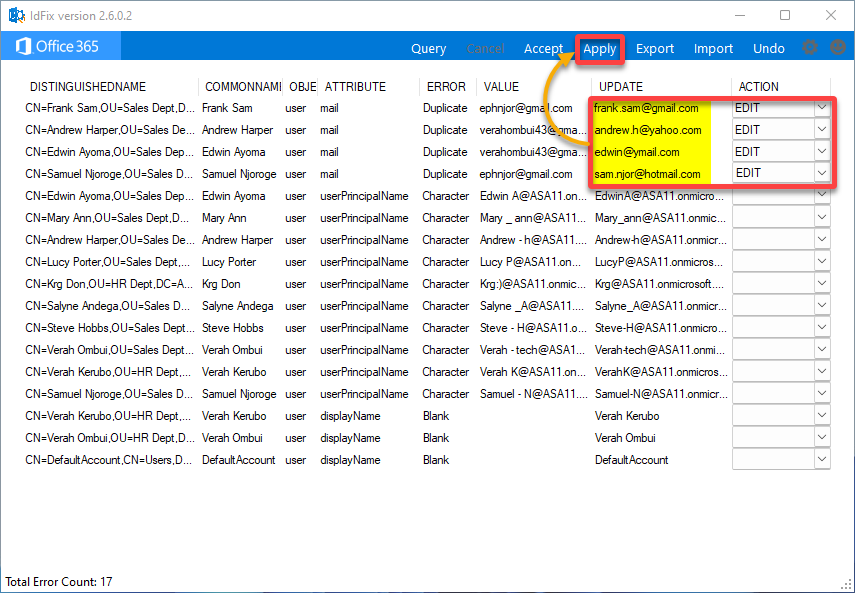
Once changes are applied, the ACTION status changes to COMPLETE.

Now, rerun IdFix to look for more object errors.
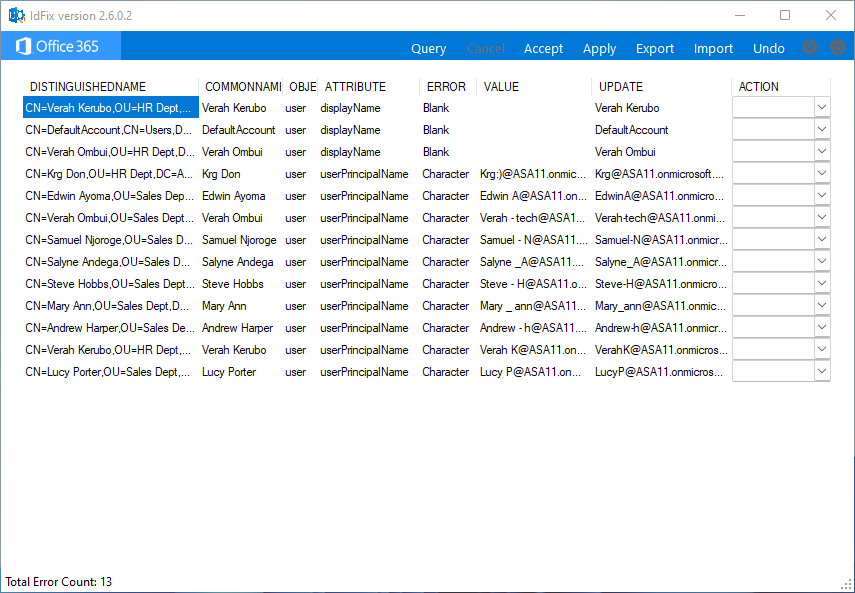
Rectifying Blank Attribute Issues
Blank attribute issues typically occur due to missing or incomplete data in specific attributes of user accounts or other directory objects. Addressing these issues may involve manual data entry, data migration, scripting, or other methods, depending on the underlying cause of the issue.
This example demonstrates fixing missing data (VALUE) for the displayName attribute of some objects, like in the following screenshot.
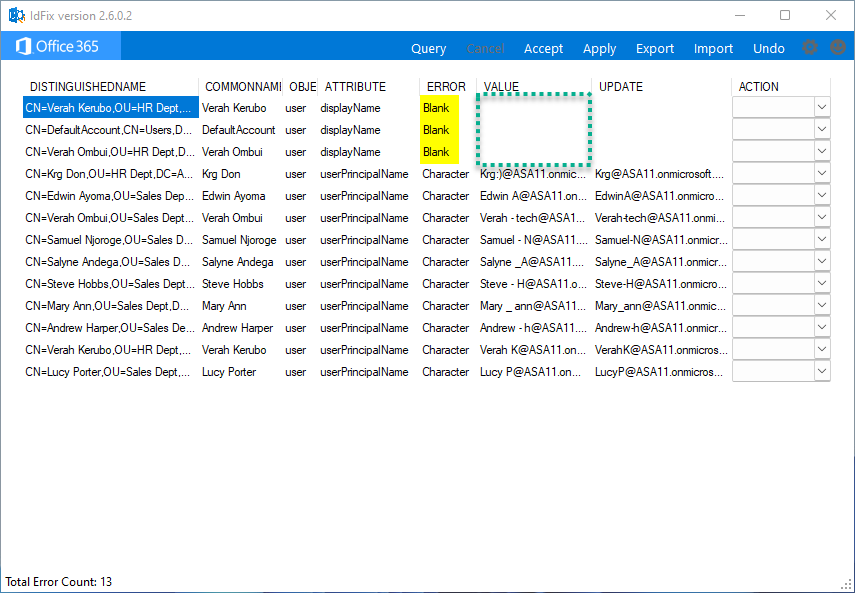
Undertake the following steps to rectify blank attribute issues:
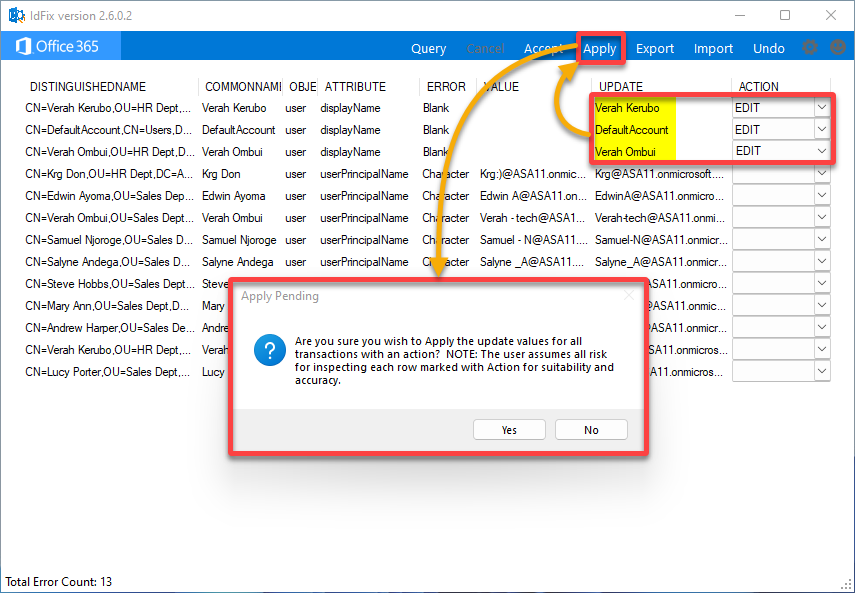
- In the UPDATE column, input the value of an object’s displayName attribute, and choose EDIT under the ACTION column.
- Repeat the same process for the remaining objects, then click Apply for the changes to take effect.
- When prompted, click Yes to confirm applying the changes.
Afterward, rerun the IdFix tool to look for more object errors.
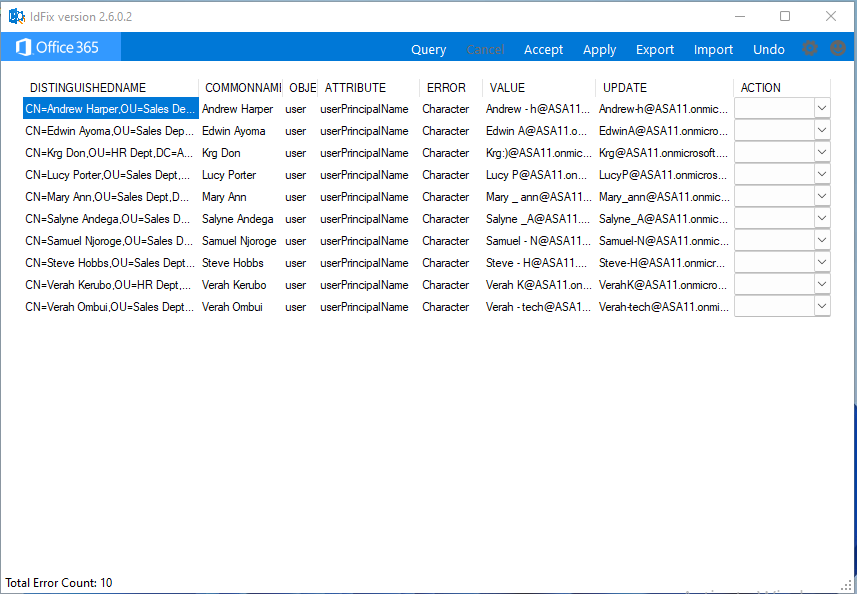
Dealing with Invalid Character Errors
Encountering an invalid character error during domain operations can impede the smooth functioning of your AD environment. This error typically arises when attempting to create, modify, or rename objects within AD due to the presence of characters not supported by AD.
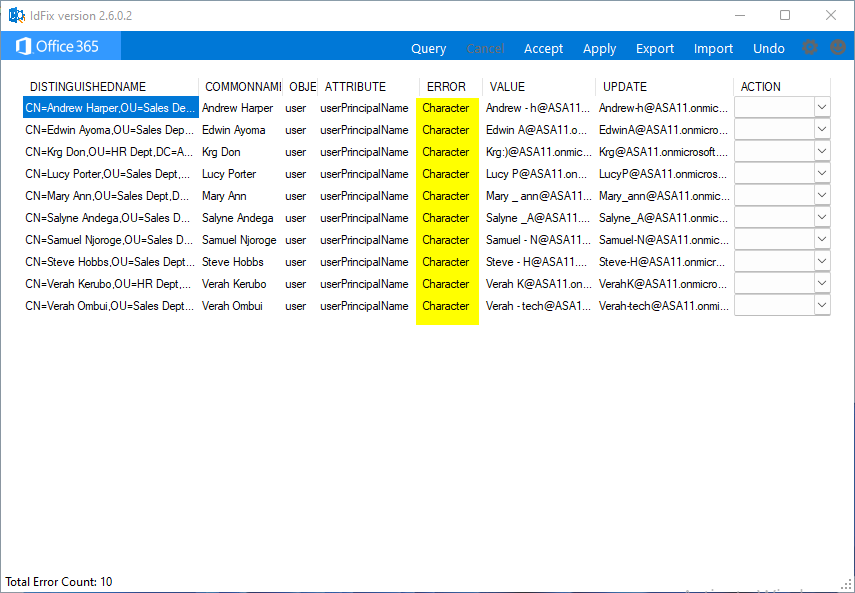
Look for invalid characters for each object and correct them as follows:
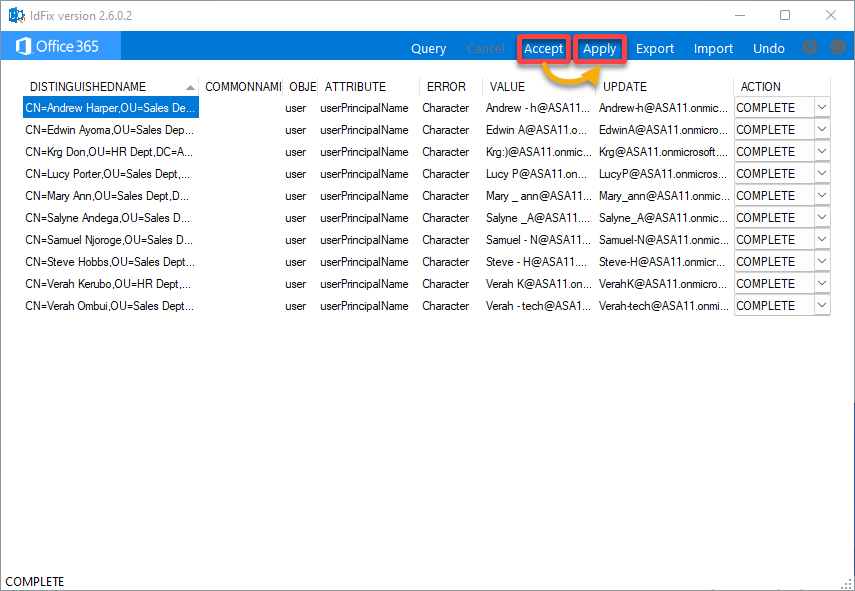
- Input the correct VALUE of the object’s userPrincipalName attribute in the UPDATE column.
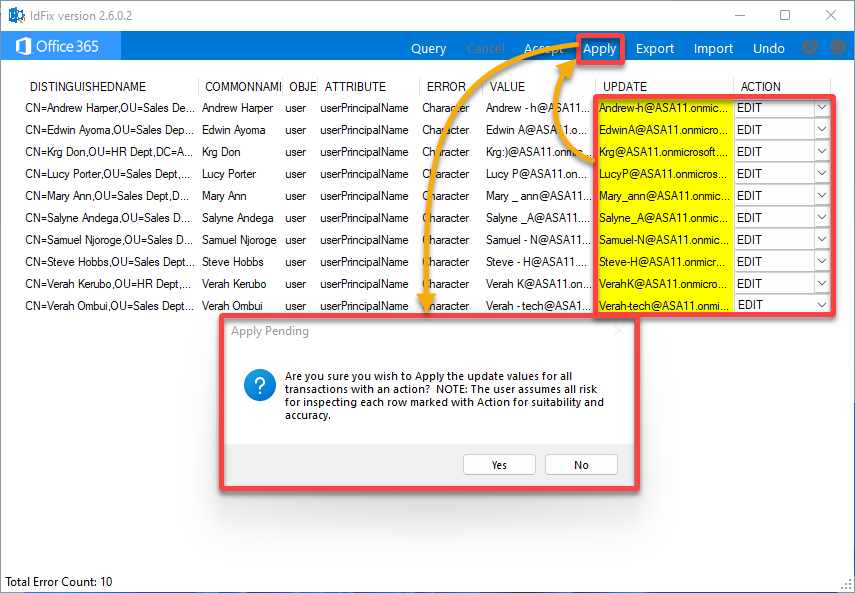
- Choose EDIT under the ACTION column for each object with invalid characters, and click Apply to confirm the changes.
- Click Yes in the warning message to proceed.
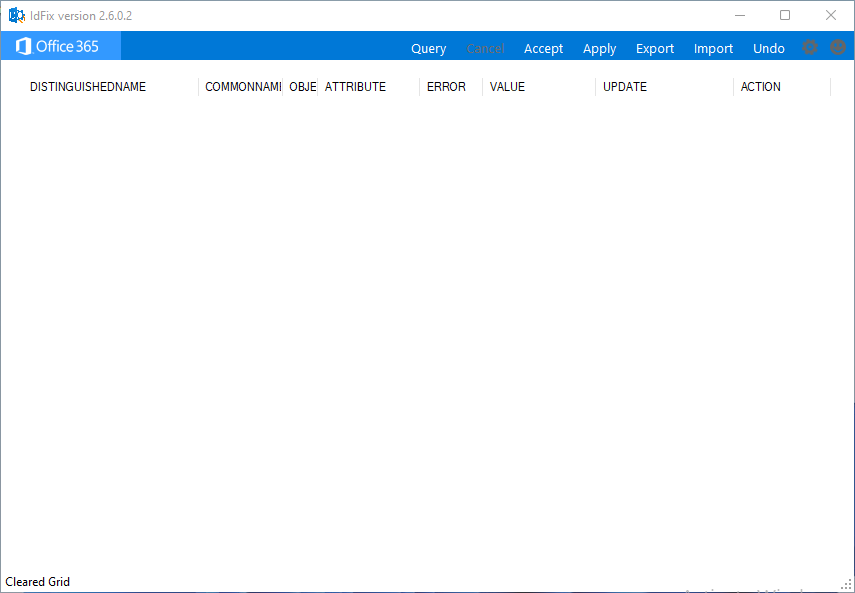
Now, rerun IdFix to look for more object errors.
The image below shows a blank page, which indicates you have successfully resolved different issues with the help of the IdFix tool.
Undoing the Changes Made to Active Directory
Realized you made changes you are not supposed to? Worry not! Undoing unwanted changes is effortless with the IdFix tool. Any changes made using the IdFix tool are usually logged in a transaction log, which lets you revert the changes previously made with the tool.
💡 Note: You can only go back one step, so ensure your changes are in small steps and do not have any unwanted impact.
To undo changes, proceed as follows:
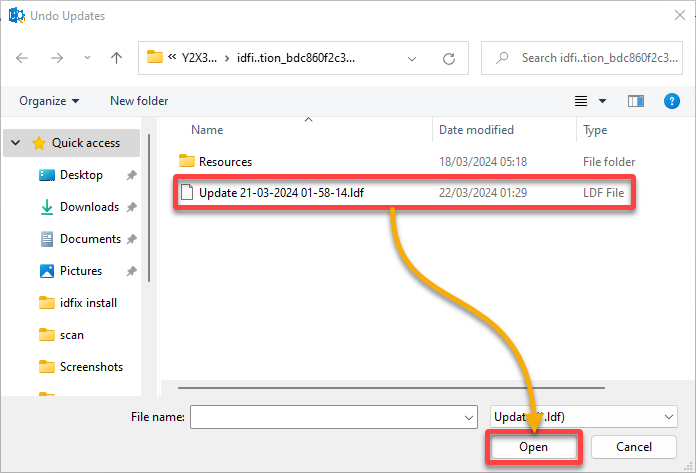
1. On IdFix, click Undo in the menu bar to initiate undoing changes.

2. Next, select the .ldf file in the dialog box and click Open. The log file is typically in the same directory where you installed IdFix.
3. Subsequently, click Accept, then Apply to revert the changes.
Synchronizing the Local AD with the Azure AD
With all errors fixed, you can start installing and configuring Azure AD Connect. You must install this tool on a domain-joined server in your network to synchronize your on-premise AD with Azure AD. This synchronization aligns user accounts, groups, and objects in both AD environments.
To synchronize your on-premises AD with Azure AD, perform the following:
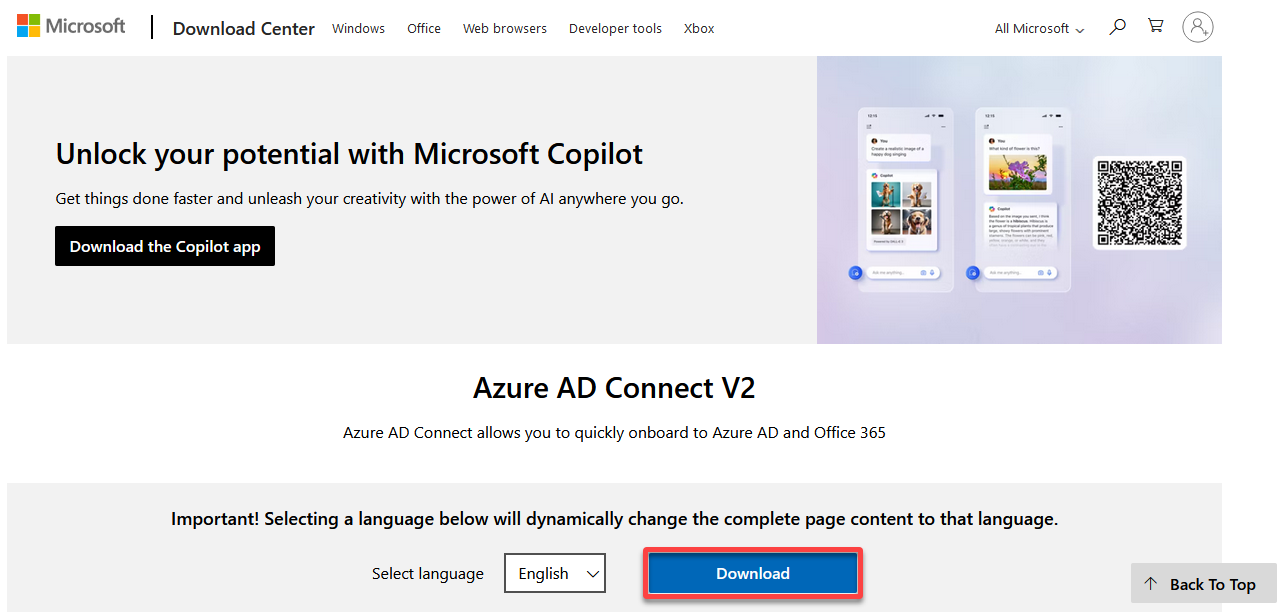
1. Open a new tab and download the latest Azure AD Connect tool installer version from the Microsoft Download Center.
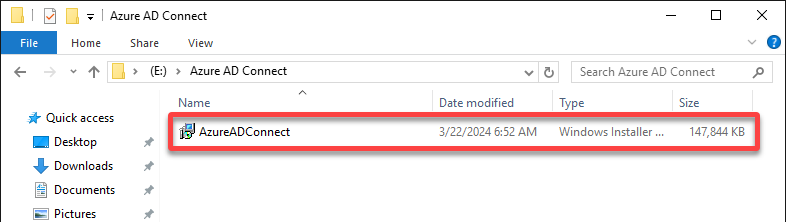
2. Next, run the downloaded installer (AzureADConnect) on a server within your on-premises environment.
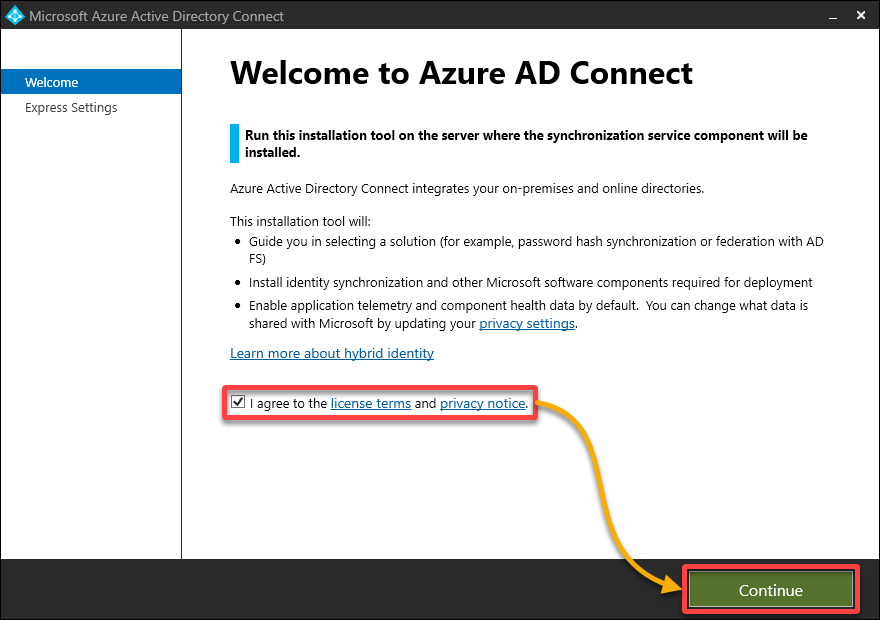
3. Once the installer launches, accept the license agreement and click Continue.
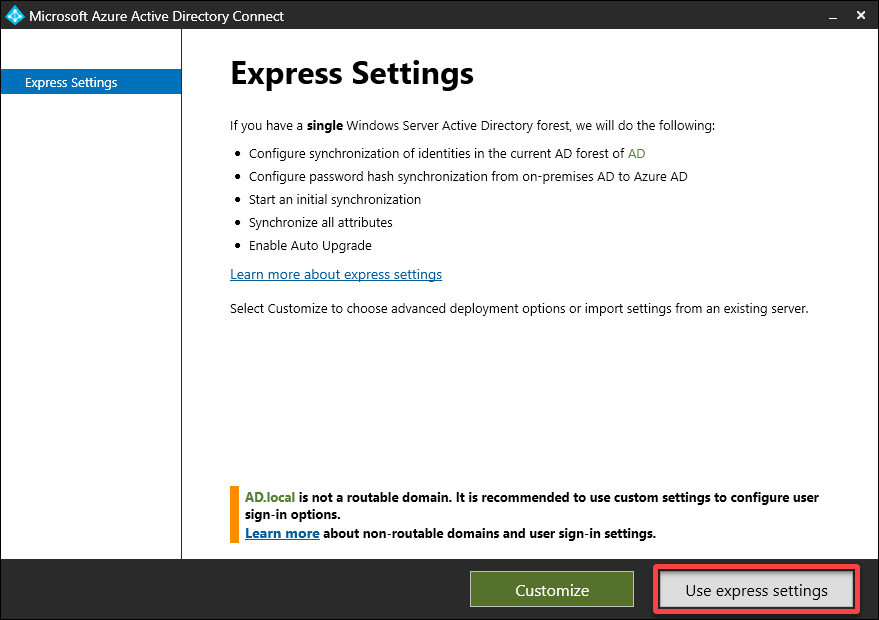
4. Now, click Use express settings to install the Azure AD Connect tool quickly.
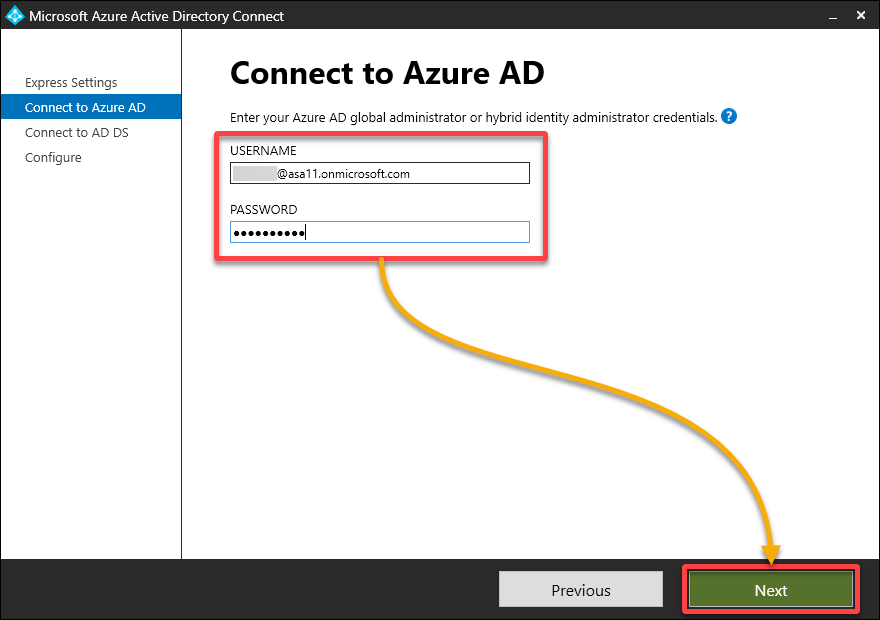
5. Connect to Azure AD by entering your Azure AD Global Administrator account, then click Next.
The USERNAME for this account concludes with .onmicrosoft.com, indicating it is not your local domain administrator account.
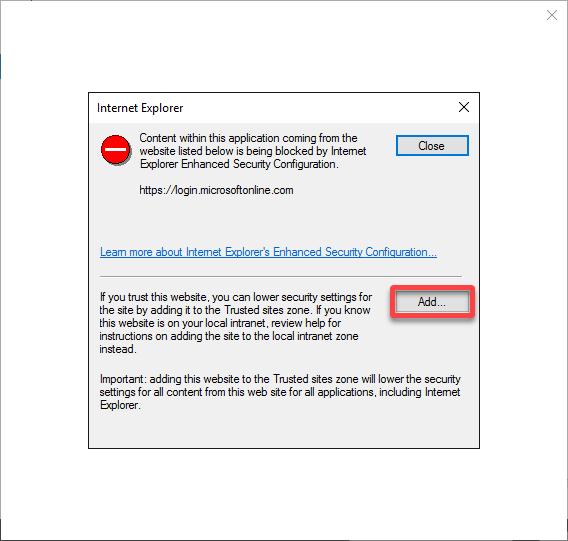
(Optional) Click Add to and add the suggested URL to the trusted sites list.
If you use MFA on the Global Administrator account, you might get an error saying the content is blocked (up to three times).
6. Login to Microsoft 365 with the credentials of your Azure AD Global Administrator.
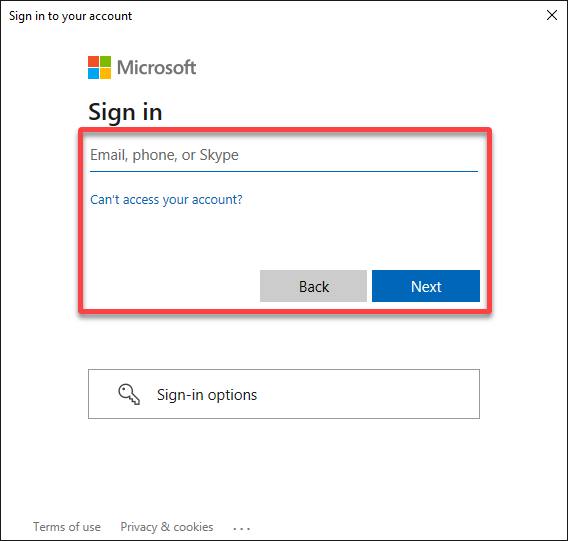
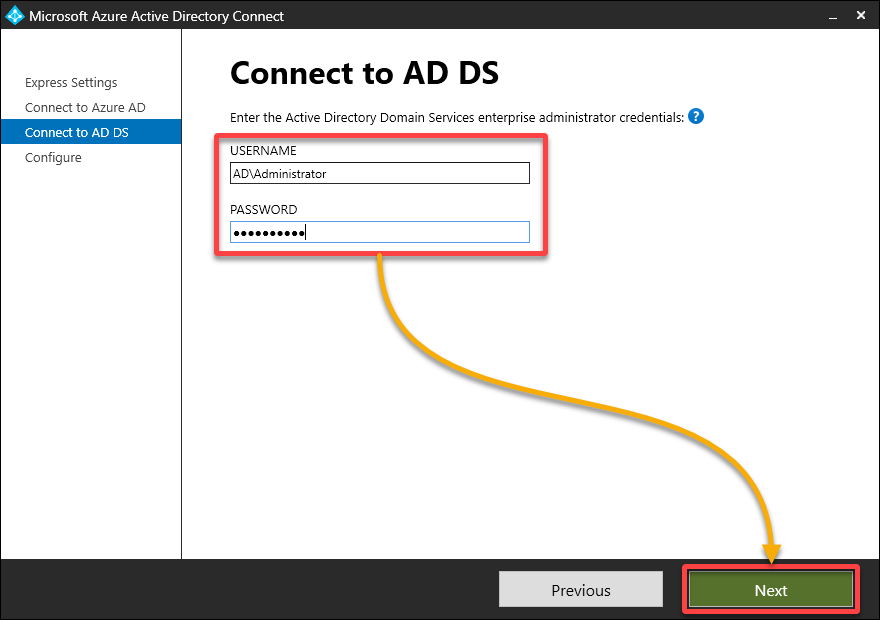
7. Once authenticated, sign in via your local domain administrator account. This account is employed to generate a local AD account for synchronization purposes.
8. Tick the box at the bottom; if multiple domains are listed and the primary domain is verified, click Next to proceed.
💡 Confirm your domain with Microsoft 365 to ensure seamless integration. Otherwise, users will be required to log in using the [email protected] format.

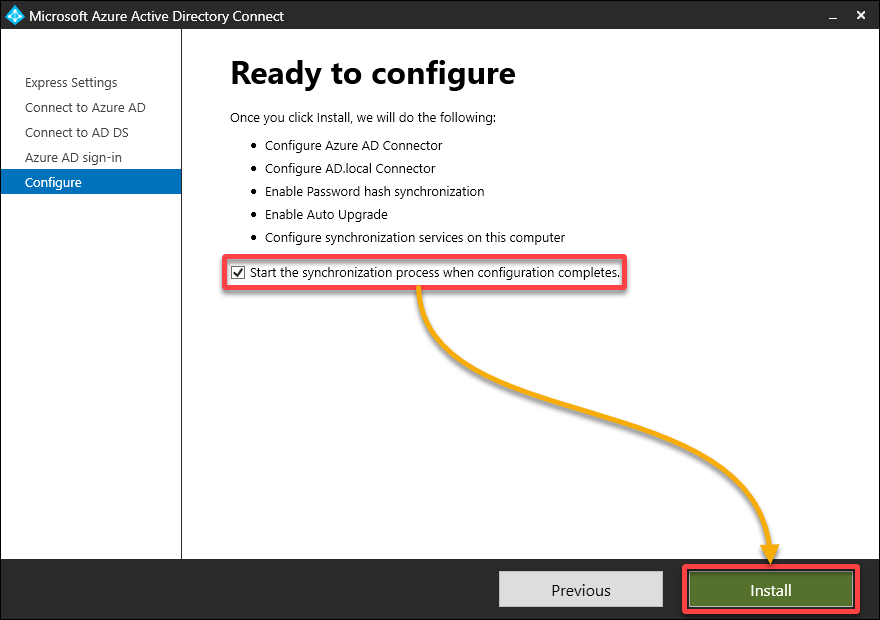
9. Afterward, tick the checkbox (bottom) to synchronize all OUs if you have used the express option, then click Install to install the Azure AD Connect tool.
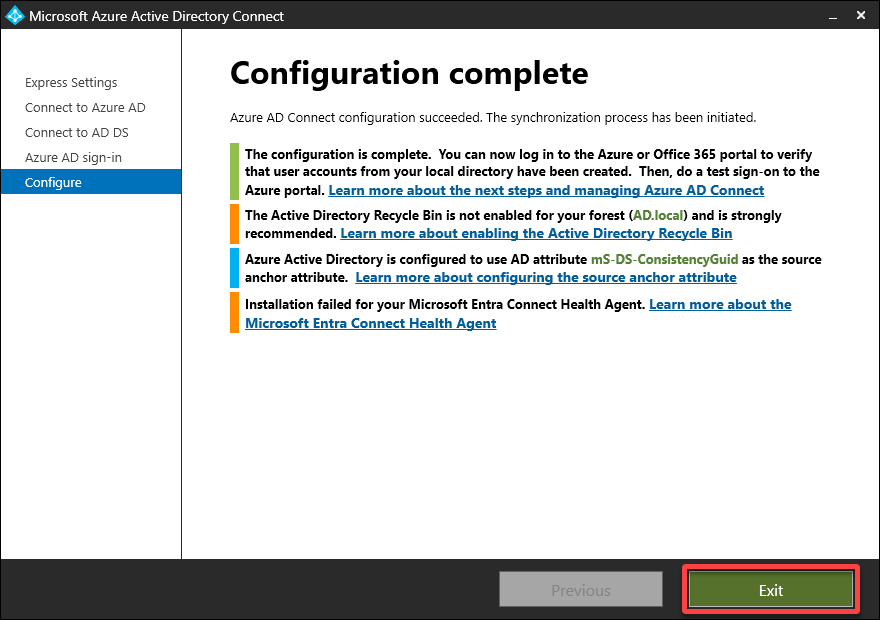
10. Wait for the installation to complete, which can take a few minutes, and click Exit to close the installation wizard.
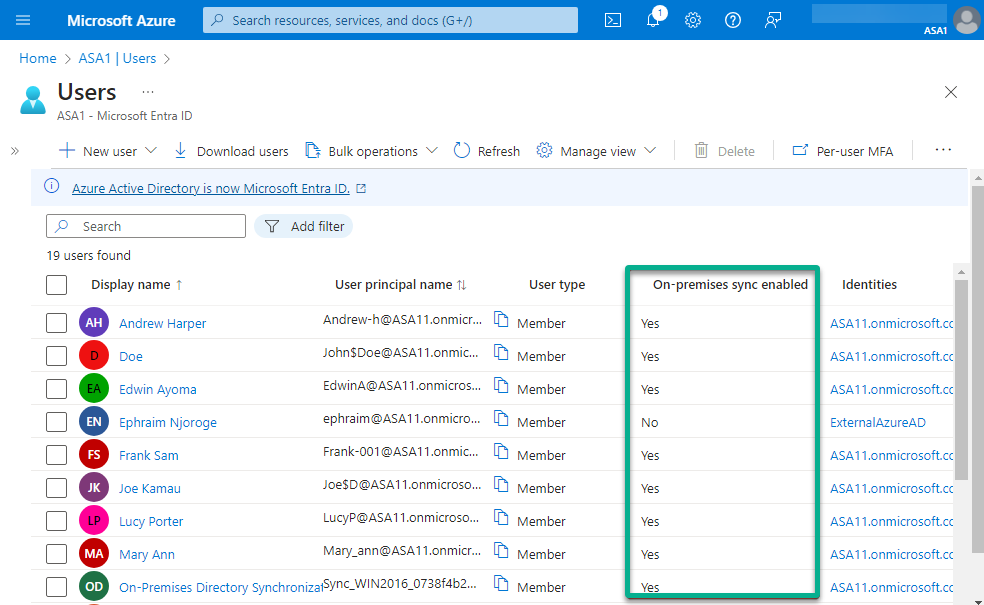
11. Ultimately, open the Azure Portal and navigate to your Azure AD (ASA1) → Users to see all directory synced users listed.
Conclusion
Throughout this tutorial, you have learned how IdFix lets you identify common errors, be it duplicate user principal names, invalid characters, and formatting inconsistencies. IdFix empowers administrators like yourself to preemptively address issues before initiating synchronization with Azure AD.
From this point, why not perform comprehensive health checks with ADHealthCheck to identify various issues within your AD environment? Together with IdFix, these tools form a dynamic duo, providing a robust solution for optimizing your organization’s directory infrastructure.


