


The phrase “mail server” is almost synonymous with the name Microsoft Exchange. You don’t have to choose Microsft Exchnage. Instead, you can set up the free mail server called hmailserver!
And if you’re interested in trying it out, then you’re in luck! Because in this article, you will learn about the basic requirements and how to install hMailServer and set it up as a mailbox and SMTP server.
By the end of this article, you will have learned how to perform basic configuration tasks such as adding domains, users, SSL certificates, and using SMTP smart host for external email delivery.
Preparing Your Environment
This article will be a walkthrough about installing and configuring hMailServer on a single server. If you plan to follow along with the examples, you will need to prepare some requirements.
- A Windows Server 2016 computer.
- Download the latest copy of hMailServer from this link.
- An email client used for accessing email accounts. In this article, Mozilla Thunderbird will be used.
- (Optional) Active Directory. This is only needed if you will create hMailServer email users based on Active Directory users. Otherwise, you can still create email users without it.
- (Optional) A valid SSL certificate to encrypt email client connections. You can get an SSL certificate for free from Let’s Encrypt. The certificate must be in PEM format. It’s okay if you don’t have this, hMailServer will still work without encryption.
Database Requirements
hMail Server can be installed with a built-in database (Microsoft SQL Server Compact Edition (CE)). It is suitable for testing, small deployment, or personal installations.
However, if you plan to use hMailServer commercially or in production, you will need an external database instead. If you choose to use an external database, the following database engines are supported by hMailServer.
- Microsoft SQL Server 2000 or later
- MySQL
- PostgreSQL
In this article, only the built-in database will be used.
Network and Port Requirements
The following ports must be allowed in your network. Depending on your planned usage (i.e., IMAP only, no POP3), you may opt to leave some ports that will not be used.
- 25 (SMTP)
- 465 (SMTP SSL/TLS)
- 587 (SMTP Submission)
- 110 (POP3)
- 995 (POP3 SSL/TLS)
- 143 (IMAP)
- 993 (IMAP SSL/TLS)
DNS Record Requirements
Mail systems rely heavily on DNS for email delivery to function correctly. So proper DNS records must be in place, both for internal and external resolution.
To keep things simple, in this article:
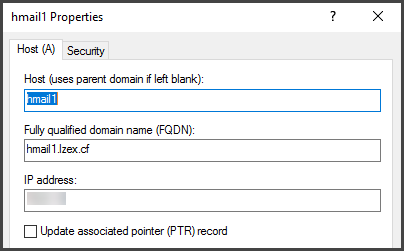
- Only one DNS (A) record will be used for the internal DNS – which is the FQDN of the server where hMail Server will be installed. In this article, the server address is hmail1.lzex.cf.
(Optional) Two DNS records will be used for the external DNS.
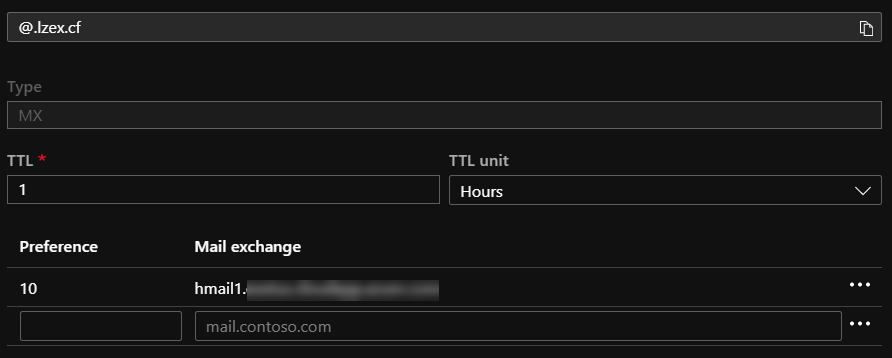
- An MX record that will be used for mail delivery pointed to the external address of the hMailServer.
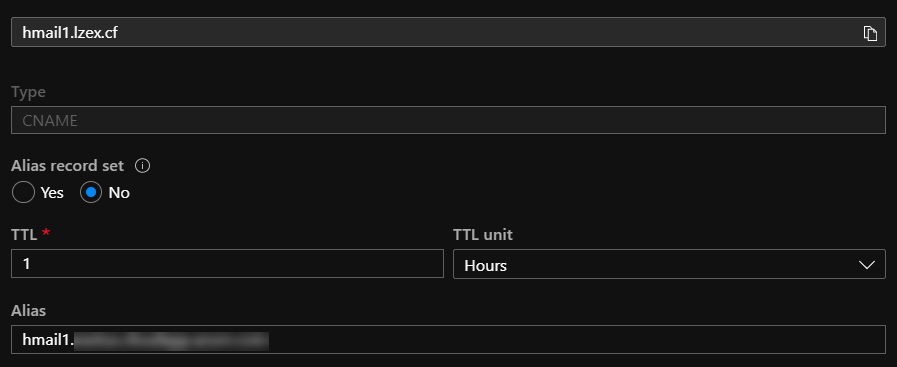
- A CNAME record that will be used for client connection (IMAP, POP3, SMTP), also pointed to the external address of the hMailServer.
For a complete list of system requirements, visit the hMailServer’s System Requirement page.
Installing hMailServer
To perform an hMailServer installation is a fairly straightforward process. It is a wizard-based installation type, which means that you will only be clicking on buttons.
- Locate the installation file that you’ve downloaded and then launch it. Then, click Next on the welcome page.
- In the License Agreement page, you must accept the terms. Click Next.
- Next, either select a custom path or leave the default path where the hMailServer will be installed. Then, click Next.
- You are not presented with two options; Full Installation or Custom. Select Full Installation to install both the server and admin tools. Then click Next.
- Next, choose the database server type. In this article, the built-in database engine will be used. Then click Next.
- Click Next on the Select Start Menu Folder page to leave it to its default value.
- Next, you need to specify a password for the hMailServer instance that you are installing. Make sure to remember this password.
- You’ll be shown a summary of the installation options you chose. Click on the Install button to being the installation process.
- Wait for the installation to complete, then click Finish.
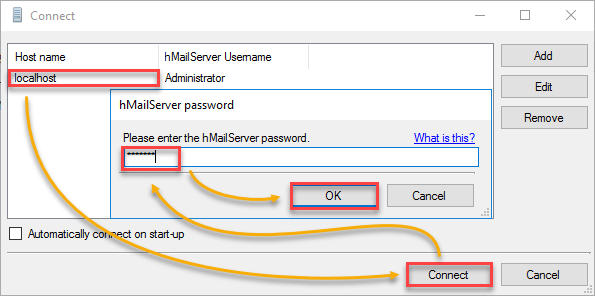
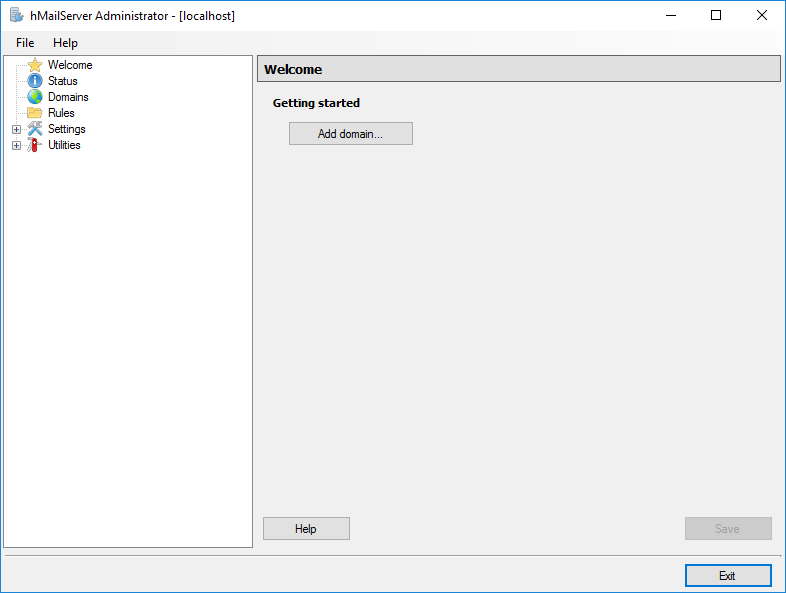
- On the Connect window, select the instance of hMailServer and click on Connect. Enter your password when prompted, then click OK.
And that’s it! You have successfully installed your first hMailServer.
Adding Domains to Hmailserver
Just installing hMailServer is not enough to make it usable. You still need to configure things like domain(s), users, ports, and relay settings.
Before you can add users, you must first add an email domain. This must be the email domain that you’ve prepared and plan to use for your email address.
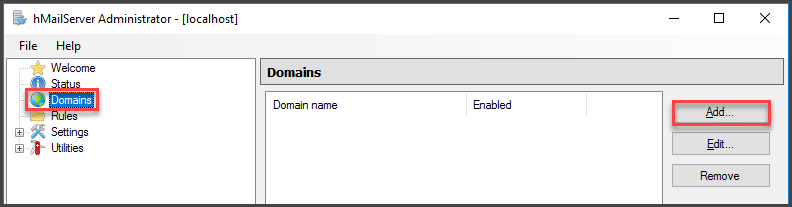
To add a new domain, in the hMailServer Administrator (admin console window), click on Domains. You will notice that the list of domains is empty – which is to be expected. Click on Add.
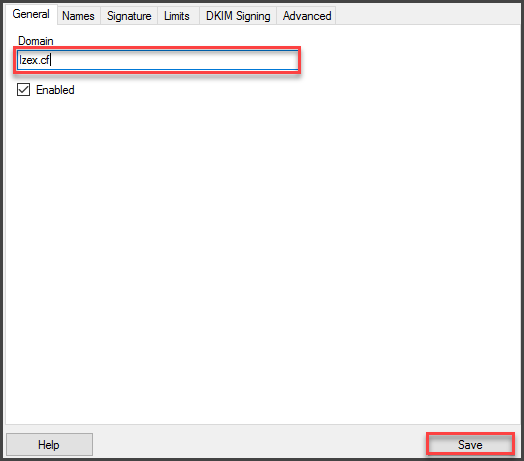
Next, type in your domain in the Domain box. Make sure that the Enabled checkbox is checked, then click Save.
Note that there are more configurations available for the domain, like the message size limits and default signatures. Feel free to configure those if you prefer.
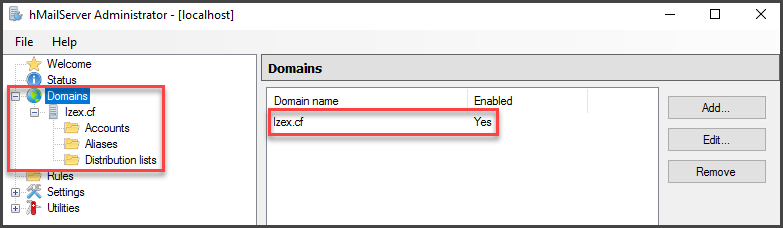
After clicking on Save, as you can see below, a new domain has been created and added to the Domains list.
Adding Users to Hmailserver
Now that the domain is added, email accounts can now be added under that domain.
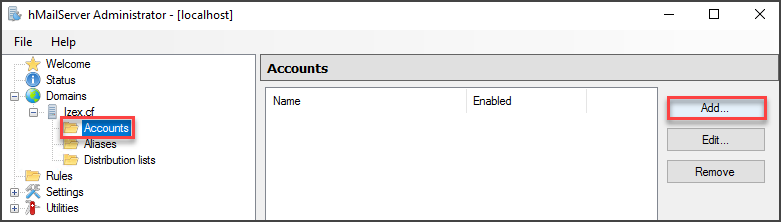
To add a new account, click on the Account folder under the domain. Then, click on the Add button on the right.
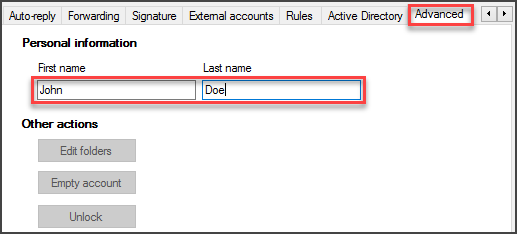
Go to the Advanced tab and specify the First name and Last name of the new user.
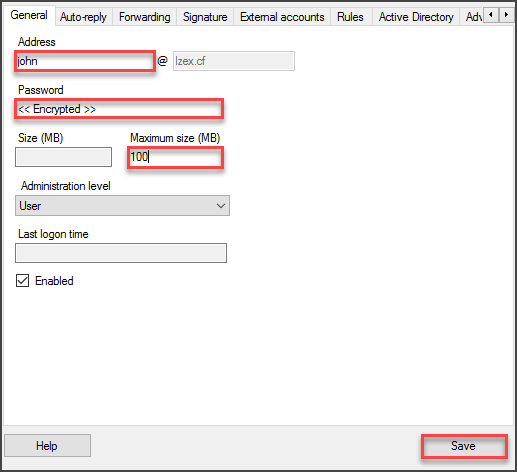
Then, go to the General tab, type in the address and password of the account you are creating. It is also recommended to set a maximum size for the user’s mailbox. When you’re done, click on Save.
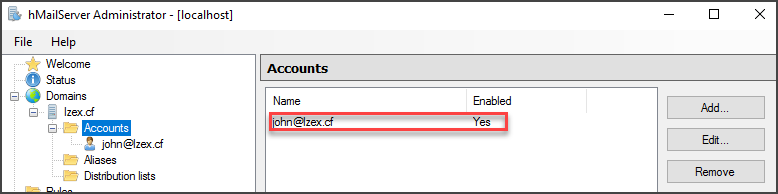
As you can see from the image below, the new email account has been created.
Integrating Users with Active Directory
You can modify existing users or create new users and connect them with Active Directory. Integrating an hMailServer user with Active Directory ensures that your users can use their domain credentials to log in to their hMailServer accounts.
Suppose that you have already created the account and want to integrate it with AD, follow these steps.
First, locate and edit the account in the hMailServer admin console. Then, go to the Active Directory tab.
Next, put a check on the Active Directory account box. Enter the active directory domain in the Domain box, and the user name in the User name box. When you’re done editing, click Save.
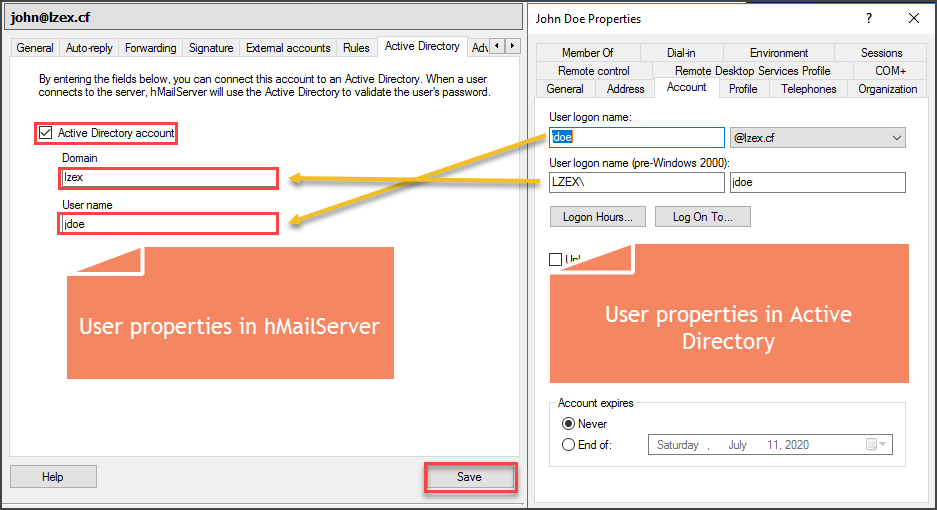
As you can see from the image above, the hMailServer user has a corresponding Active Directory account. The user can now use his AD domain credentials to access his hMailServer email account.
Adding a User from Active Directory
Instead of creating a user and then integrate it with Active Directory, there is also an option to directly create a user in hMailServer from an existing Active Directory user object.
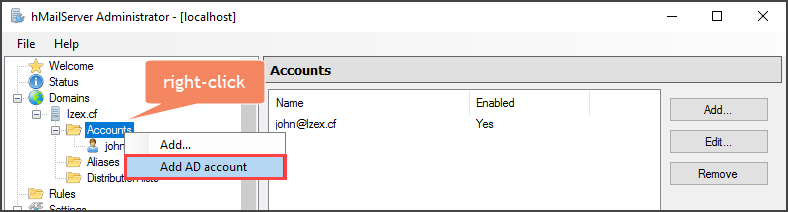
From the admin console, right-click on the Accounts folder —> click on Add AD Account.
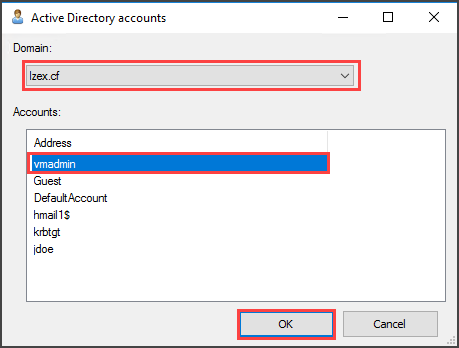
Next, select the domain from the dropdown list. In this example, there’s only one domain available. Then, from the list of users, select the user that you want to create an email account for. Click OK.
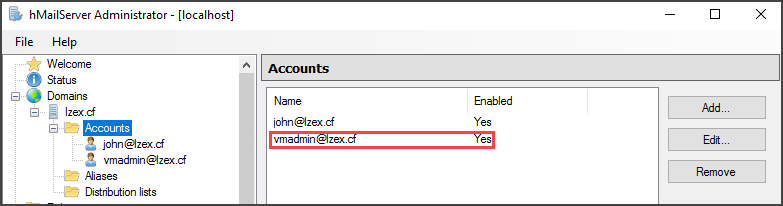
As you can see from the screenshot below, a new user has been created in hMailServer based on the Active Directory user account vmadmin.
Testing Email Client Setup and Mailbox Access (Unencrypted)
The hMailServer configuration you’ve done so far is enough to work for internal and external email access.
In this example, the specific email client being used is Mozilla Thunderbird. Feel free to use any other email clients that support IMAP, POP3, and SMTP configurations.
The mail client configuration below is specific to this example. Take note of the server hostname, port number, and SSL values.
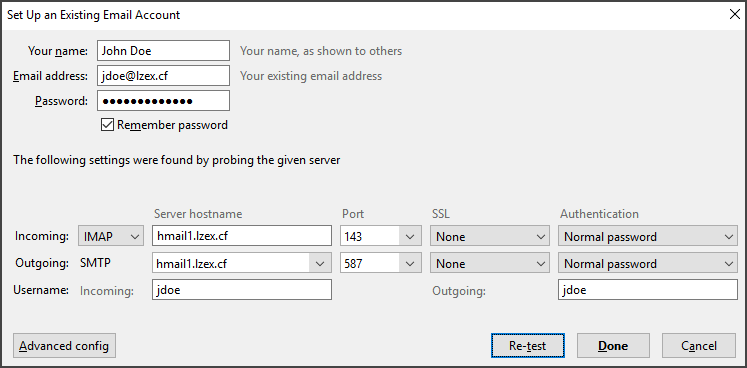
As you can see from the screenshot above, the SSL values for incoming and outgoing mail server are None. When you click Done, you will get a warning message that the incoming and outgoing settings are not using any encryption, as shown in the image below.
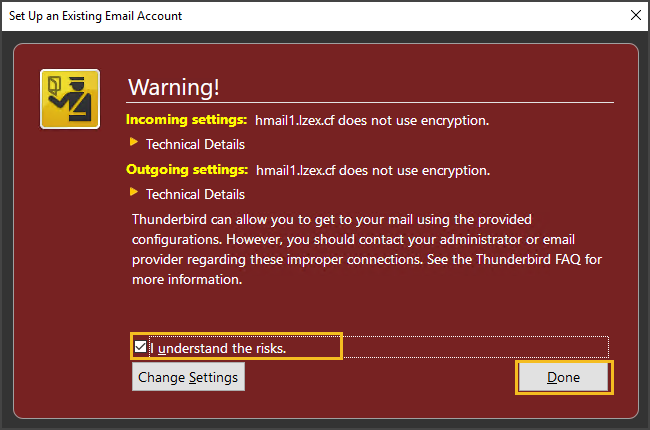
To proceed with the account setup, check the box that says I understand the risks. Click Done.
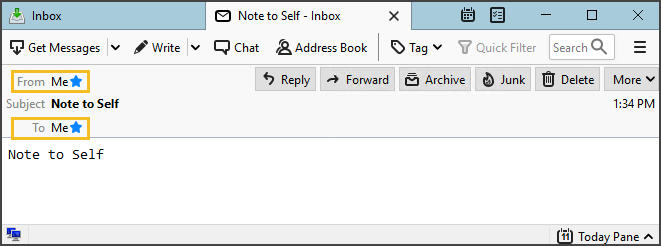
Once the account setup is done, the next test is to send a test email to the same account and confirm that the email was sent and received. The screenshot below shows that the test email was delivered.
Securing Client Connections with SSL Certificates
In the previous section, you’ve seen that the current hMailServer setup so far does not include encryption for client connections in IMAP, POP3, and SMTP. Needless to say, adding encryption to your mail client connectivity for security and protection.
In this section, you’ll learn how to add an SSL certificate for authentication and encryption and assign the certificate to POP3, IMAP, and SMTP.
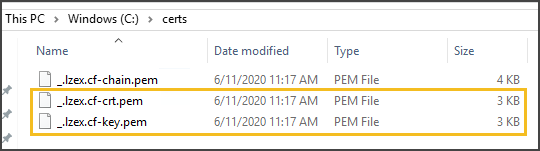
Before you proceed, you must have the PEM format certificate file and keyavailable. In this example, the certificate files are located in c:\certs.
Importing an SSL Certificate
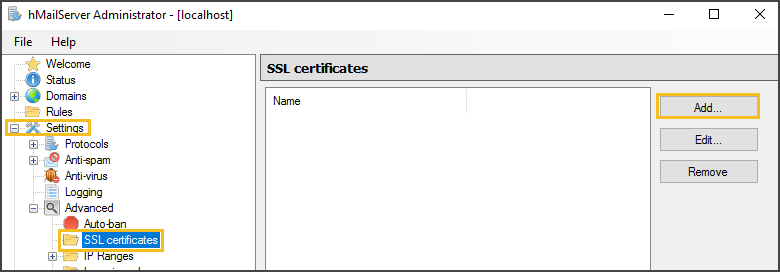
Back in the admin console, go to Settings —> Advanced —> SSL Certificates. It is expected that the list of certificates is empty. Click on Add.
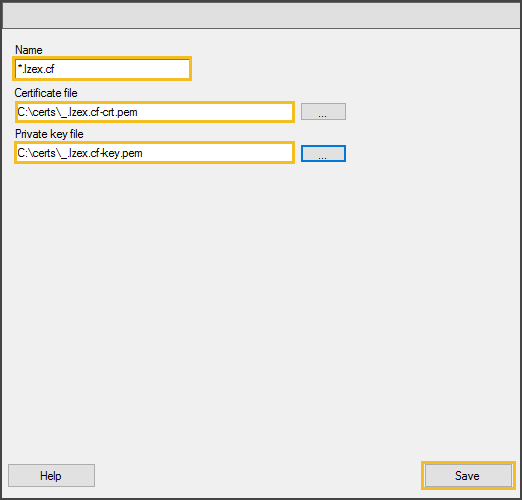
Next, specify a Name that you want your certificate to be identified as. This can be any name, but it is recommended to use the certificate’s subject name instead. Then, provide the location of the Certificate file and Private key file. Click on Save.
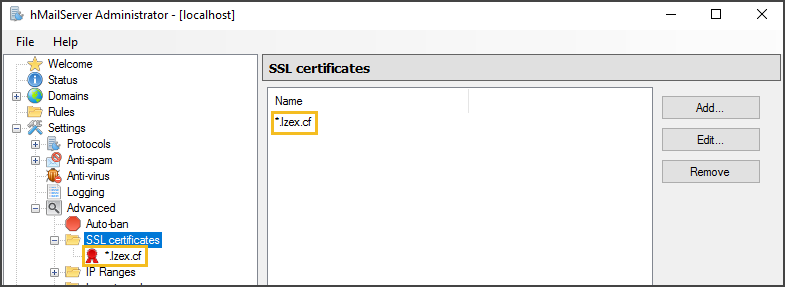
The new SSL certificate will be added to the list of certificates that are available for hMailServer’s use.
Now that the SSL certificate is added, you can start assigning it to the protocol ports.
Assigning an SSL Certificate to TCP/IP Ports
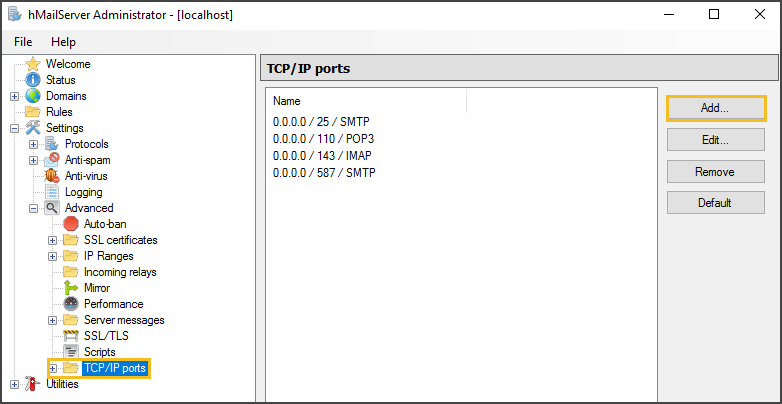
Go to the TCP/IP Ports folder. You should see a list of ports already configured. Click on Add to create a new TCP/IP port binding.
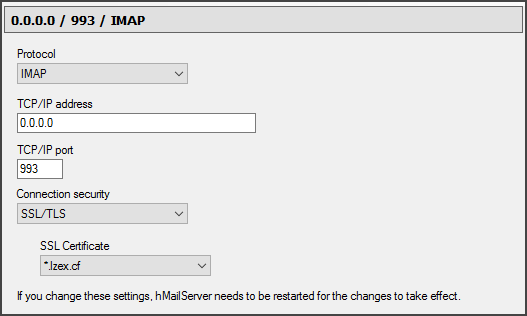
Create a new entry for IMAP with these settings.
- Protocol: IMAP
- TCP/IP address: 0.0.0.0
- TCP/IP port: 993
- Connection security: SSL/TLS
- SSL Certificate: select your certificate from the list
The new entry should look similar to what’s shown in the screenshot below.
You may be prompted to restart the hMailServer, do not restart yet because you will still create the entries for POP3 and SMTP.
Now, follow the repeat the same procedure above to create the POP3 TCP/IP secured port.
Use the below values for the new POP3 TCP/IP port.
- Protocol: POP3
- TCP/IP address: 0.0.0.0
- TCP/IP port: 995
- Connection security: SSL/TLS
- SSL Certificate: select your certificate from the list

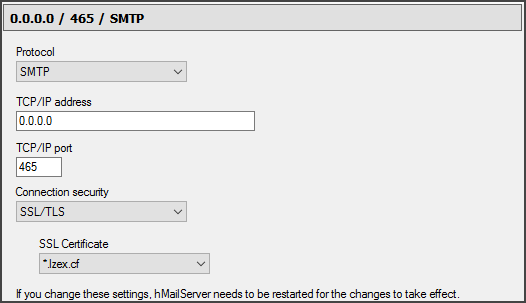
Lastly, create the new SMTP port with these settings below.
- Protocol: SMTP
- TCP/IP address: 0.0.0.0
- TCP/IP port: 465
- Connection security: SSL/TLS
- SSL Certificate: select your certificate from the list
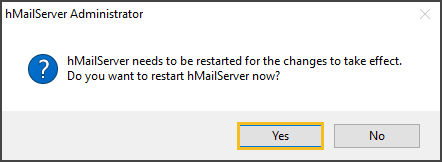
This time, when prompted to restart the hMailServer, click Yes.
You have successfully created the new TCP/IP ports secured with an SSL certificate. You should now see a list similar to the screenshot below.
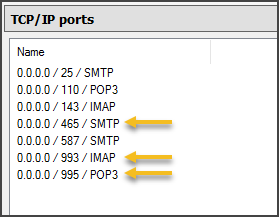
At this point, it is up to you to decide if you want to delete the old TCP/IP port entries.
Testing Email Client Setup and Mailbox Access (Encrypted)
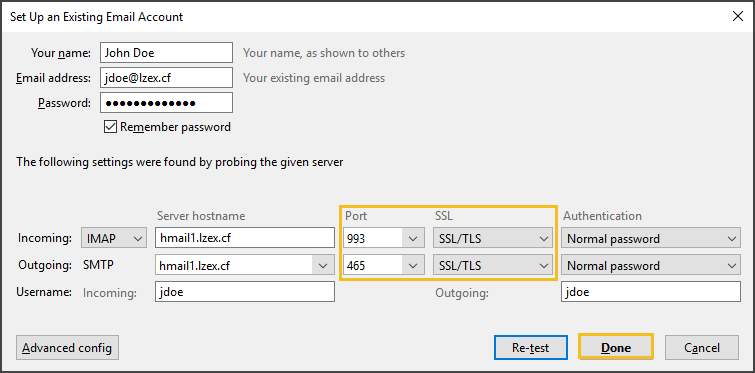
Now that an SSL certificate has been installed in hMailServer, go back to your email client and reconfigure your email account to use the following settings, as shown in the screenshot below.
Take note of the Port and SSL values having changes to the new TCP/IP port configuration that you created in the previous section. Below is where you will set up both incoming (IMAP) and outgoing (SMTP authentication).
After configuring the email account, you should be able to access the mailbox and send/receive emails using the new IMAP and SMTP ports.
Also, the warning message about the incoming mail server and outgoing mail server settings being unencrypted is no longer displayed.
Configuring an SMTP Smart Host for External Mail Delivery in Hmailserver
By default, hMailServer uses DNS-MX lookup to determine where emails to external domains must be delivered. This means that if port 25 is allowed in your network/firewall, hMailServer can attempt to deliver external messages to the intended destination.
This default setup could be enough for some organizations, but most organizations are using a perimeter SMTP service. Perimeter email servers may be cloud hosted or on-premise. These perimeter mail services are, most of the time, provide email hygiene services as well.
If you have such services and would like to utilize them, you can configure hMailServer to use your perimeter mail server as a smart host for delivering external messages.
To configure an SMTP relayer or smart host for your hMailServer, follow these steps.
In the hMailServer admin console, go to Settings —> Protocols —> SMTP. Next, go to the Delivery of e-mail tab.
Then, enter the name of your hMailServer that is published in your public DNS record. In this example, the public-facing hostname of the email server is hmail1.lzex.cf.
Next, fill out the SMTP Relayer settings with the values of your SMTP smart host. In this example, hMailServer will be configured to use SendGrid Email Delivery Service as the smart host.
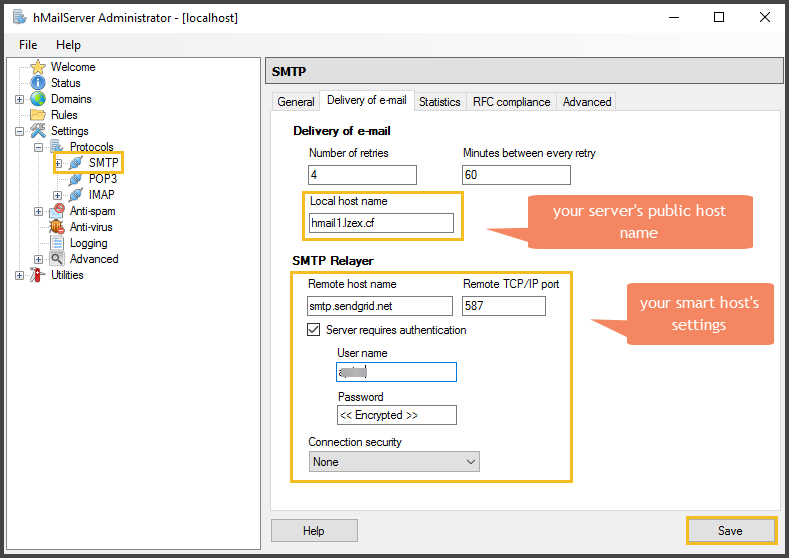
Don’t forget to click Save once you’re done supplying the values required.
Testing External Email Delivery
To test that the SMTP smart host configuration is working, the best way
The best way to confirm if the SMTP smart host configuration is working is by:
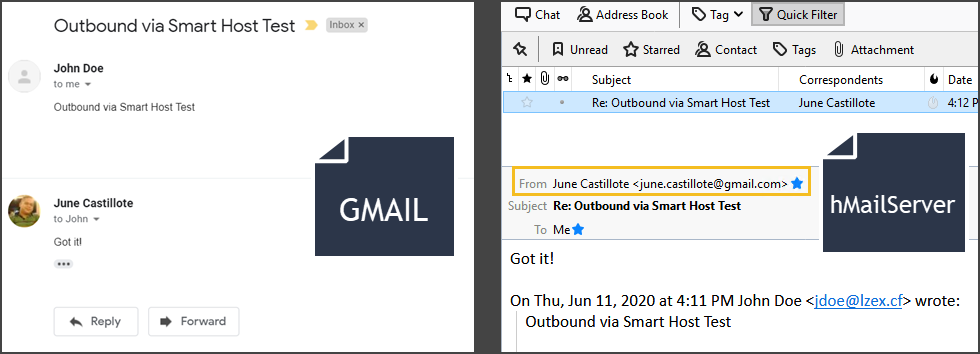
- Sending an email to an external domain (e.g., gmail.com) and confirm that the message was delivered.
- Reply to the email and confirm that the reply was received.
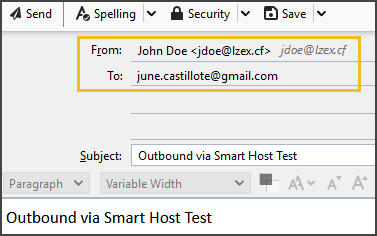
In this example, a message will be sent from the hMailServer user [email protected] to a gmail.com recipient.
As you can see from the screenshot of the email below, the message was received by the gmail.com recipient, and the reply was delivered back to the hMailServer user mailbox.
Conclusion
You’ve made it to end, congratulations!
In this article, you’ve learned about the basic requirements for building a successful hMailServer email system. Then, you’ve learned how to install hMailServer on a single machine.
You’ve seen the step-by-step instructions on how to configure hMailServer to have a new domain and add new users from scratch or from existing Active Directory accounts. Moreover, you’ve learned the difference between the encrypted and unencrypted server connections and how to use an SSL certificate to secure TCP/IP ports for POP3, SMTP, and IMAP.
What you’ve learned here is just the basics of configuring a functional hMailServer mail server. There are many more customization and configuration that can be done with hMailServer that could not be covered in this article.
Some of the advanced configurations include attaching a spam filter, installing a webmail server, and scripting. It’s up to you now if you want to pursue learning more about hMailServer and improve your skills.


