


Securing SSH access is critical to maintaining the integrity and security of server infrastructure. If you are grappling with securing server access effectively, fret not. Gravitational Teleport emerges as a cutting-edge solution that revolutionizes how teams manage and fortify SSH security.
In this tutorial, you will unravel the intricacies of Teleport, equipping you with the essentials to safeguard your server infrastructure. From seamless access management to robust security features, you will explore how Teleport secures your server access.
Master server security with Gravitational Teleport and fortify your infrastructure!
Prerequisites
Embarking on this Gravitational Teleport tutorial requires certain foundational knowledge and resources. Thus, ensure the outlined prerequisites are met to follow along with this tutorial:
- Two Linux servers: One server (host) is used as the bastion host, and the other is used to restrict SSH access with Teleport – This tutorial uses two Ubuntu 22.04 EC2 instances.
- Allowed HTTPS ingress traffic for the host server (see your cloud provider’s documentation).
💡 Note: This tutorial uses AWS EC2 instances. The required changes are made to Security Group > Inbound Rules. See the AWS documentation on how to configure security group inbound rules.
- A registered domain name with DNS A record pointing to your host server’s IP address.
- A multi-factor authenticator app such as Authy, Google Authenticator, or Microsoft Authenticator.
Installing and Configuring Gravitational Teleport on Ubuntu
With your DNS setup in place, you must equip your Ubuntu server with robust security features—Gravitational Teleport. Like a castle with gates wide open, without the proper security measures, your server is vulnerable to unauthorized access and potential breaches.
Gravitational Teleport ensures robust fortification, allowing only authorized individuals to access your server fortress.
To install and configure Gravitational Teleport, carry out the following:
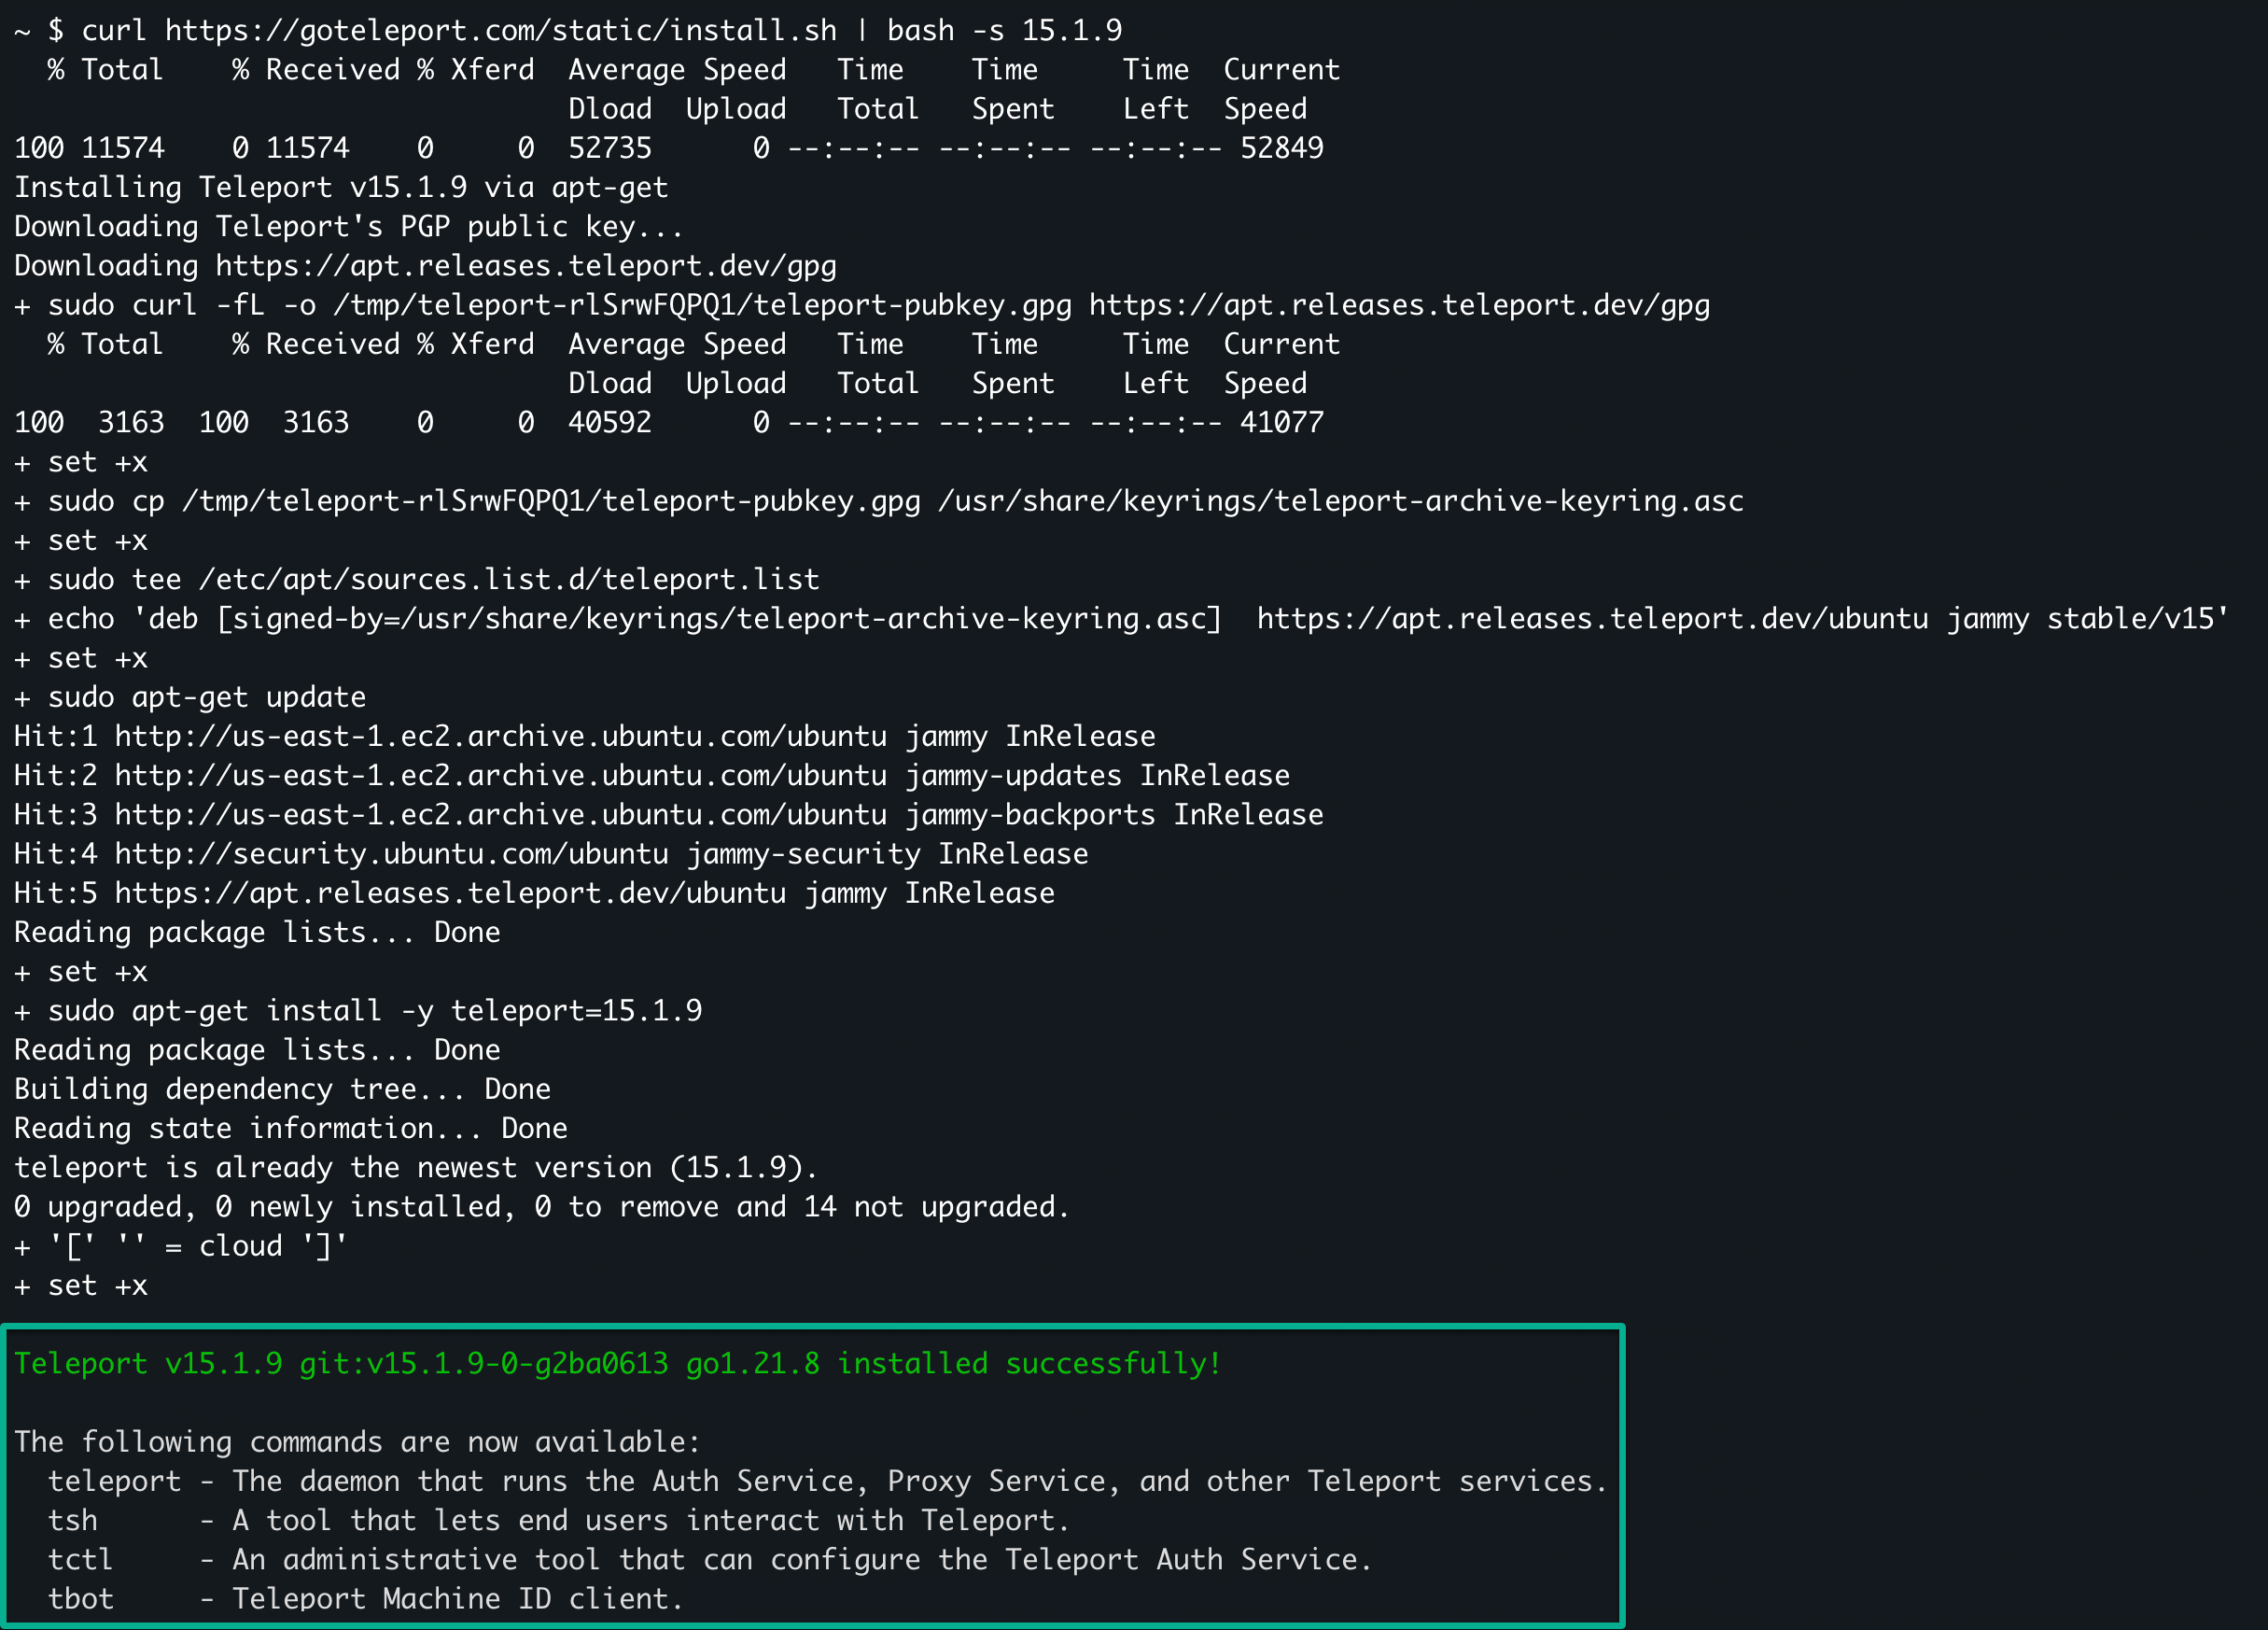
1. SSH into the host server, run the following command to update the repository for the package manager, and install Teleport. The latest version is 15.1.9 at this time of writing, but you can always look at all releases.
curl https://goteleport.com/static/install.sh | bash -s 15.1.9💡 Note: This tutorial uses the Advanced Package Tool (APT) package manager. If the Teleport installation script does not function properly, visit the official Teleport documentation for installation instructions tailored to your package manager.
After running the installation script above, you should get a similar output.
2. Once installed, execute the following systemctl command to verify the status of the teleport service.
systemctl status teleportAs shown below, Teleport is currently not active and disabled.
Before enabling and starting the Teleport service, you must set some configurations for Teleport in the following steps.

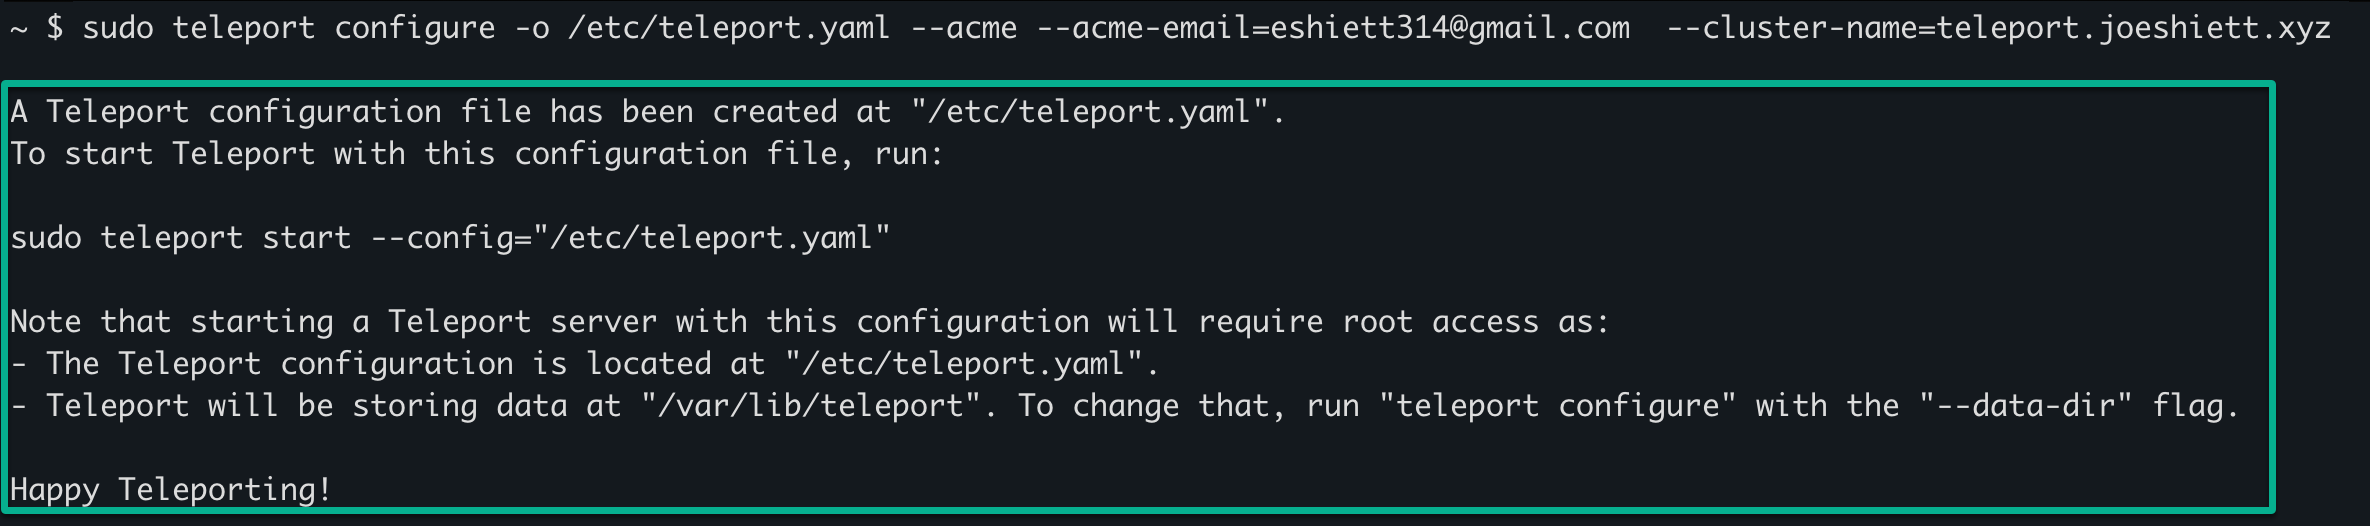
3. Next, run this teleport command to accomplish the following:
- Generate a configuration file called
/etc/teleport.yamlfor Teleport. The Teleport Systemd service, which was set up during installation, requires this file to start Teleport.
- Specify the email address (replace
<YOUR_EMAIL>) for ACME certificate registration and notifications. The--acmeflag tells Teleport to automatically get certificates from Let’s Encrypt.
- Specify the Teleport
--cluster-name, typically represented by the URL of the Teleport proxy server (replace<YOUR_TELEPORT_PROXY_URL>).
sudo teleport configure -o /etc/teleport.yaml \
--acme --acme-email=<YOUR_EMAIL> \
--cluster-name=<YOUR_TELEPORT_PROXY_URL>
If configured correctly, you will see the following output on the terminal.
4. Now, run each command below to enable and start the Teleport service.
These commands have no output to the terminal, but you will verify the changes in the following step.
# Enable Teleport service to start automatically on boot
sudo systemctl enable teleport
# Start the Teleport service
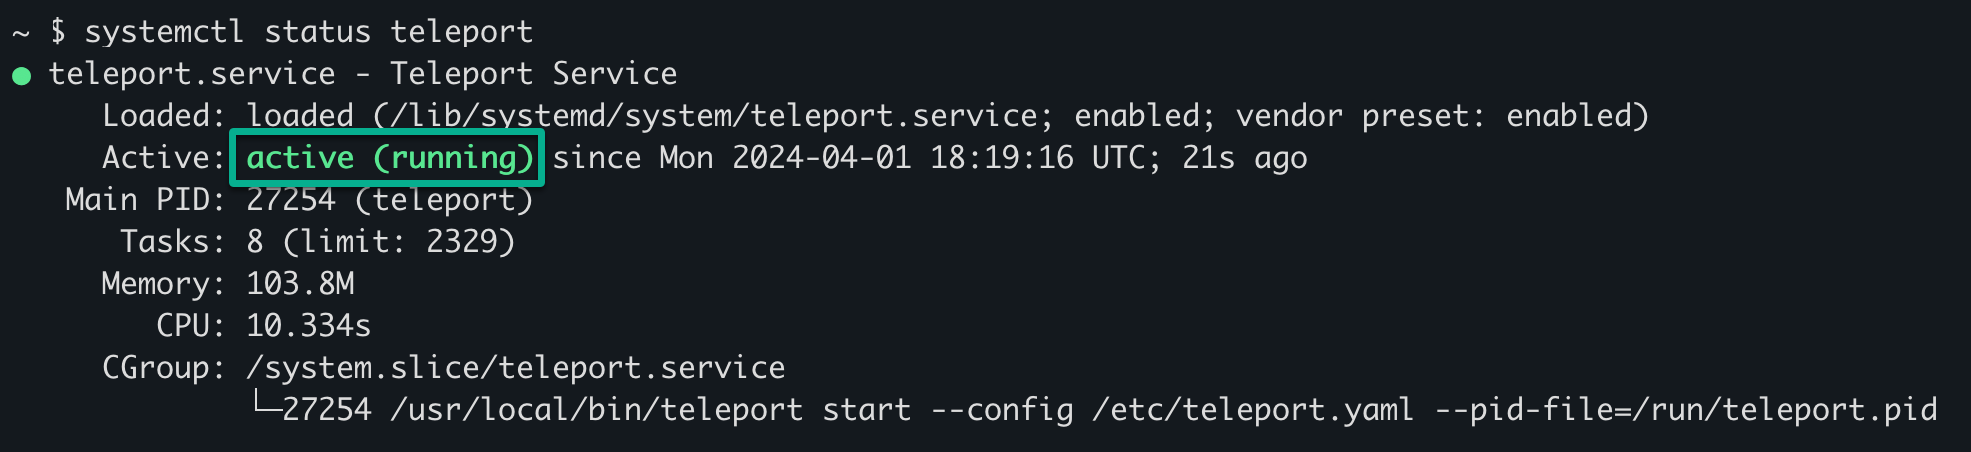
sudo systemctl start teleport5. Lastly, run the below systemctl command to confirm the status of the Teleport service.
systemctl status teleportThe output below confirms the Teleport service is active and running, which signifies you can access the UI and perform operations.
Setting Up Teleport Web UI Access and Administrator Credentials
Teleport is up, but how do you seamlessly manage user access, monitor sessions, and oversee your server infrastructure? You can interact with Teleport from the comfort of your web browser with its web UI, but first, you must set up the web UI access and the admin user credentials.
To set up the Teleport web UI access and admin credentials, follow these steps:
1. Visit the Teleport proxy URL you configured in step three of the “Installing and Configuring Gravitational Teleport on Ubuntu” section (i.e., https://teleport.example.com).
If successful, you will be greeted with the Teleport login page below. Unfortunately, you cannot sign in yet. You must set up an admin user and two-factor authentication (step two).

2. On your host server, run the following Teleport CLI tool (tctl) command to perform the following:
- Create (
add) a dedicated Teleportadminuser. - Allow the
adminuser to log into SSH hosts with the designated logins:root,ec2-user, andubuntu. - Assign the roles,
access, andeditorto the admin user.
sudo tctl users add admin --roles=access,editor --logins=root,ec2-user,ubuntu Once added, copy the generated invite link from the output indicating successful admin user creation once added.

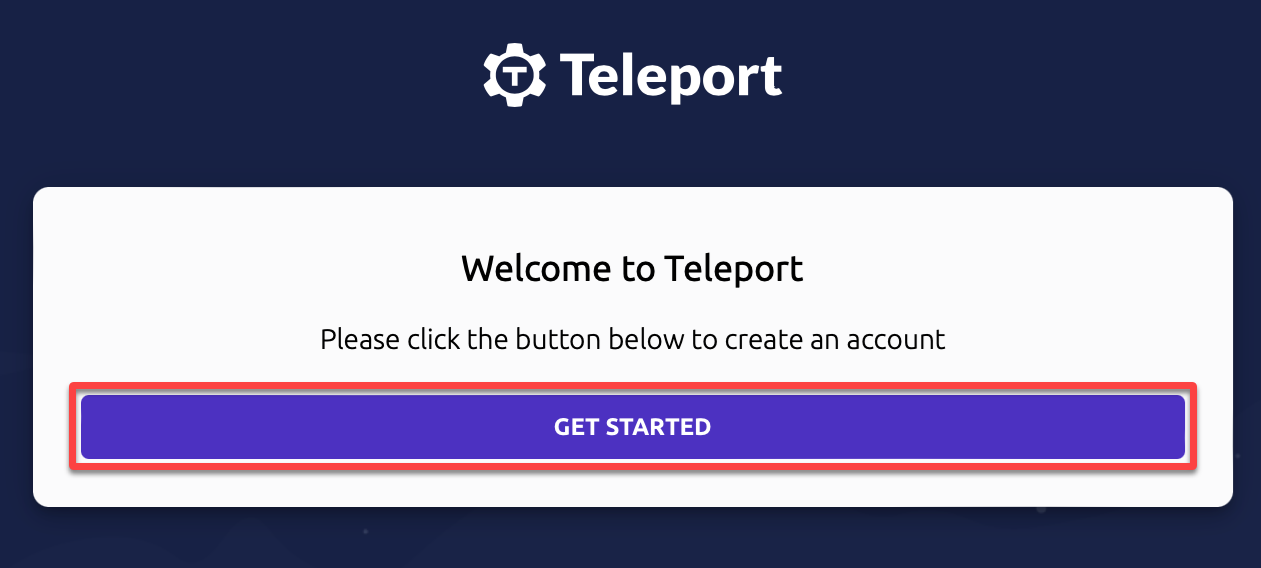
3. Navigate to the invite link you copied in step three to a new browser tab, then click GET STARTED on the Welcome page, as shown below. This action lets you get started in setting up the admin user.
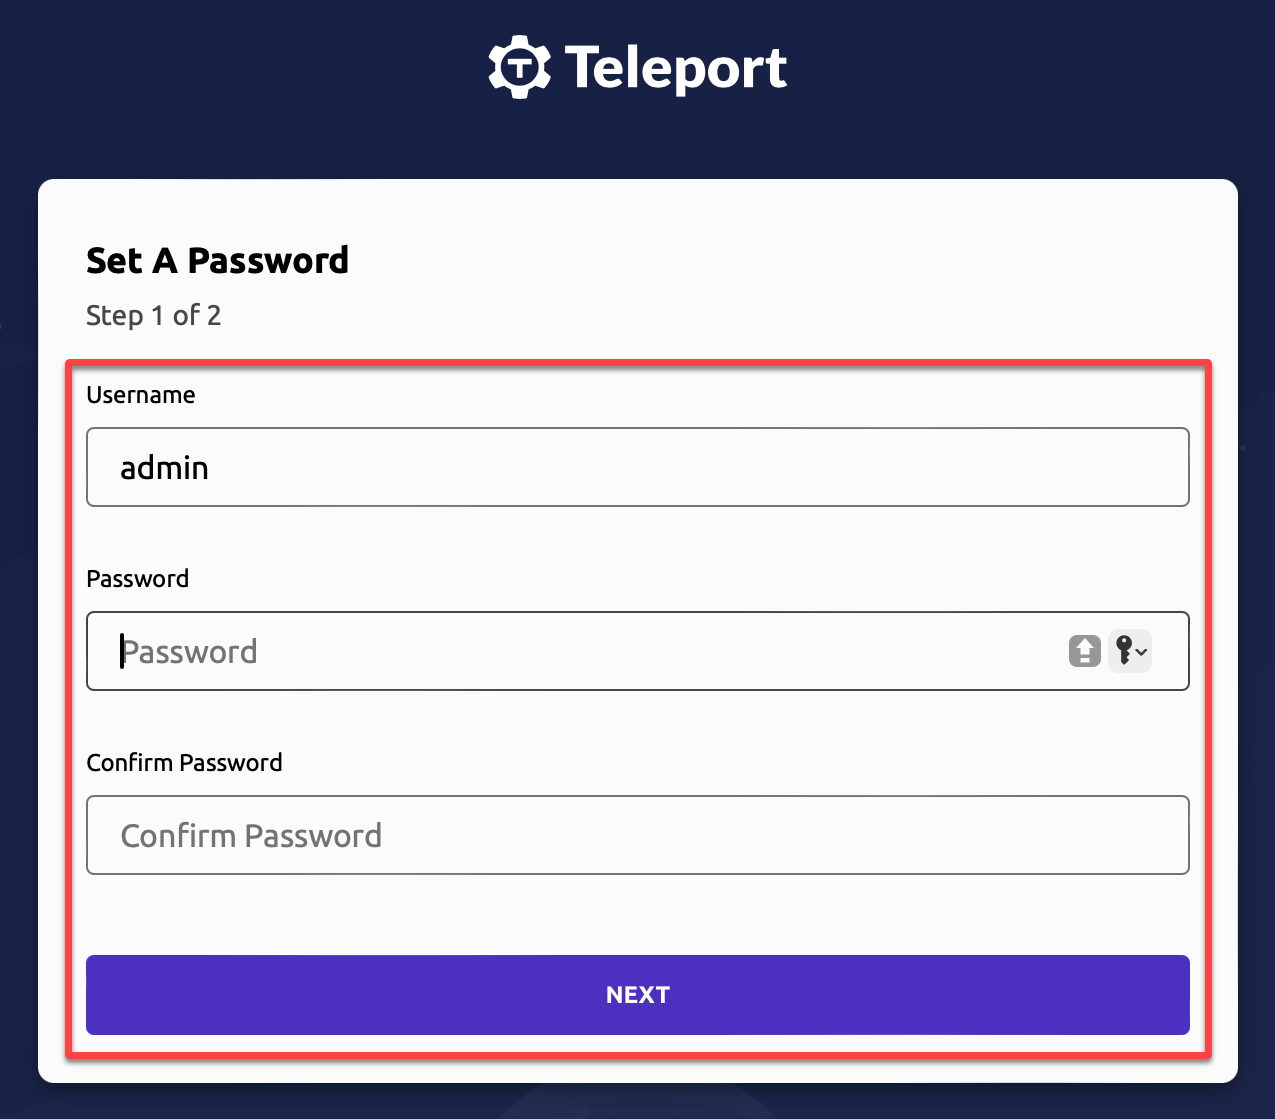
4. Next, provide and confirm a strong password for the admin user, and click NEXT to proceed.
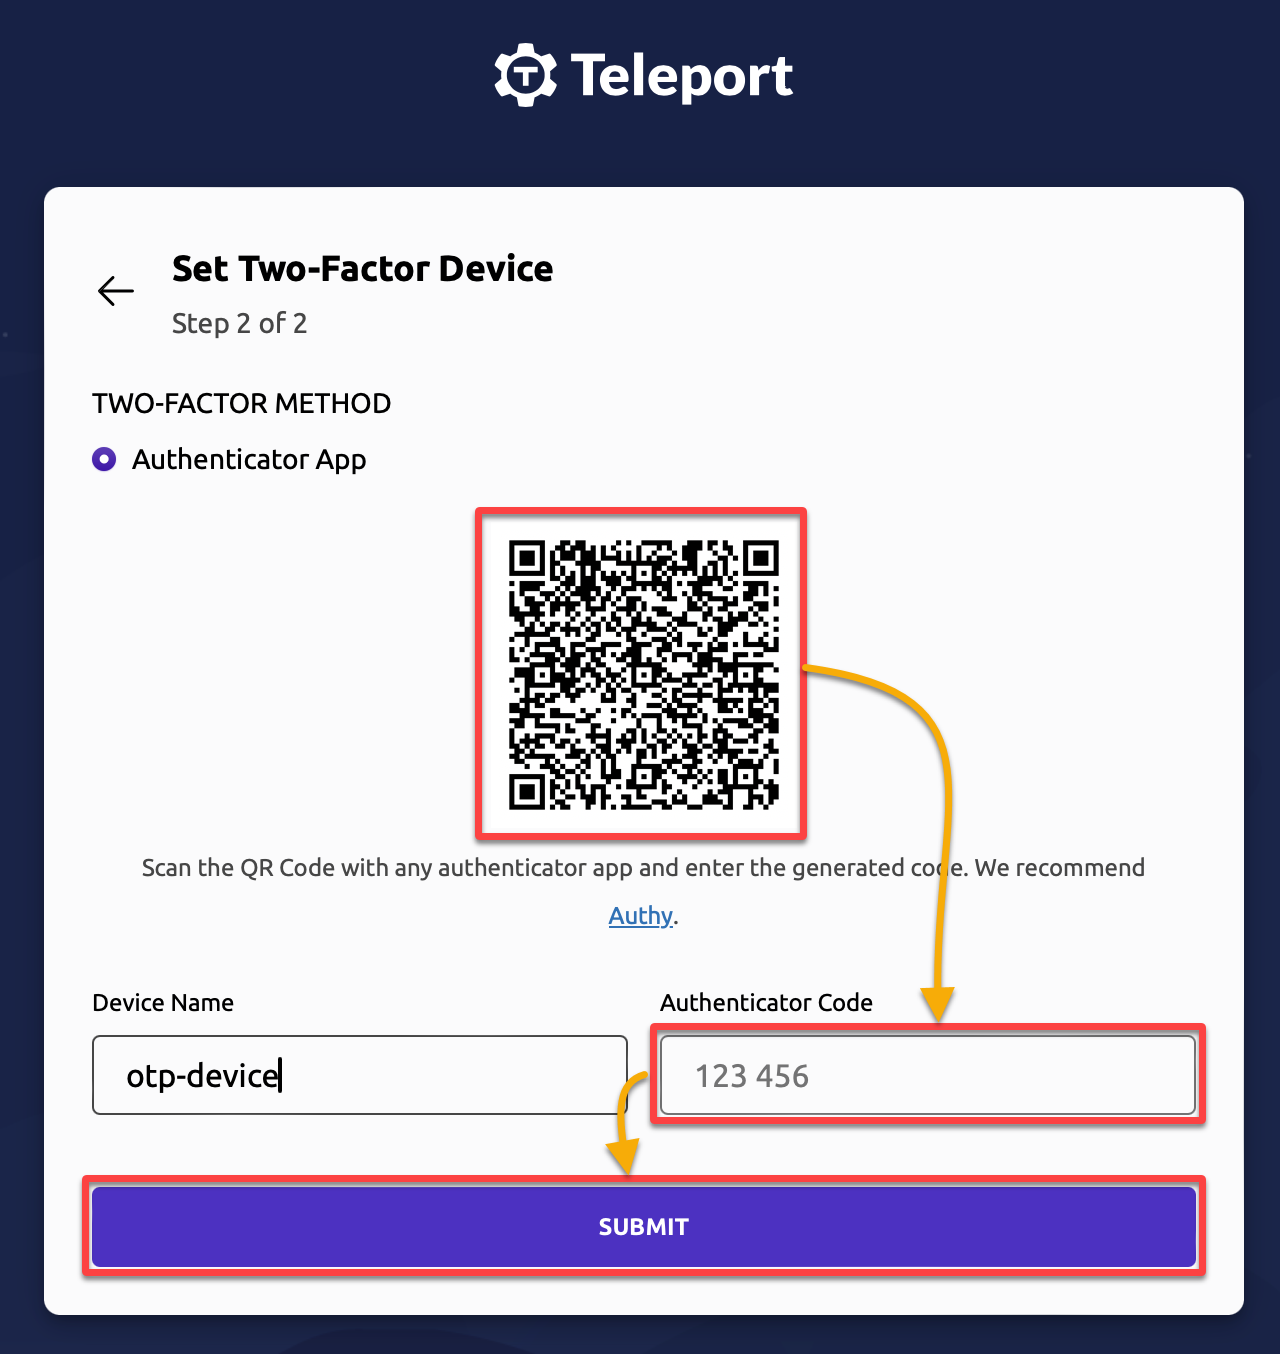
5. Open your authenticator app, scan the QR code, type in the generated Authenticator Code in the required field, and click SUBMIT.
This process lets you set up two-factor authentication on your device for an additional layer of security.
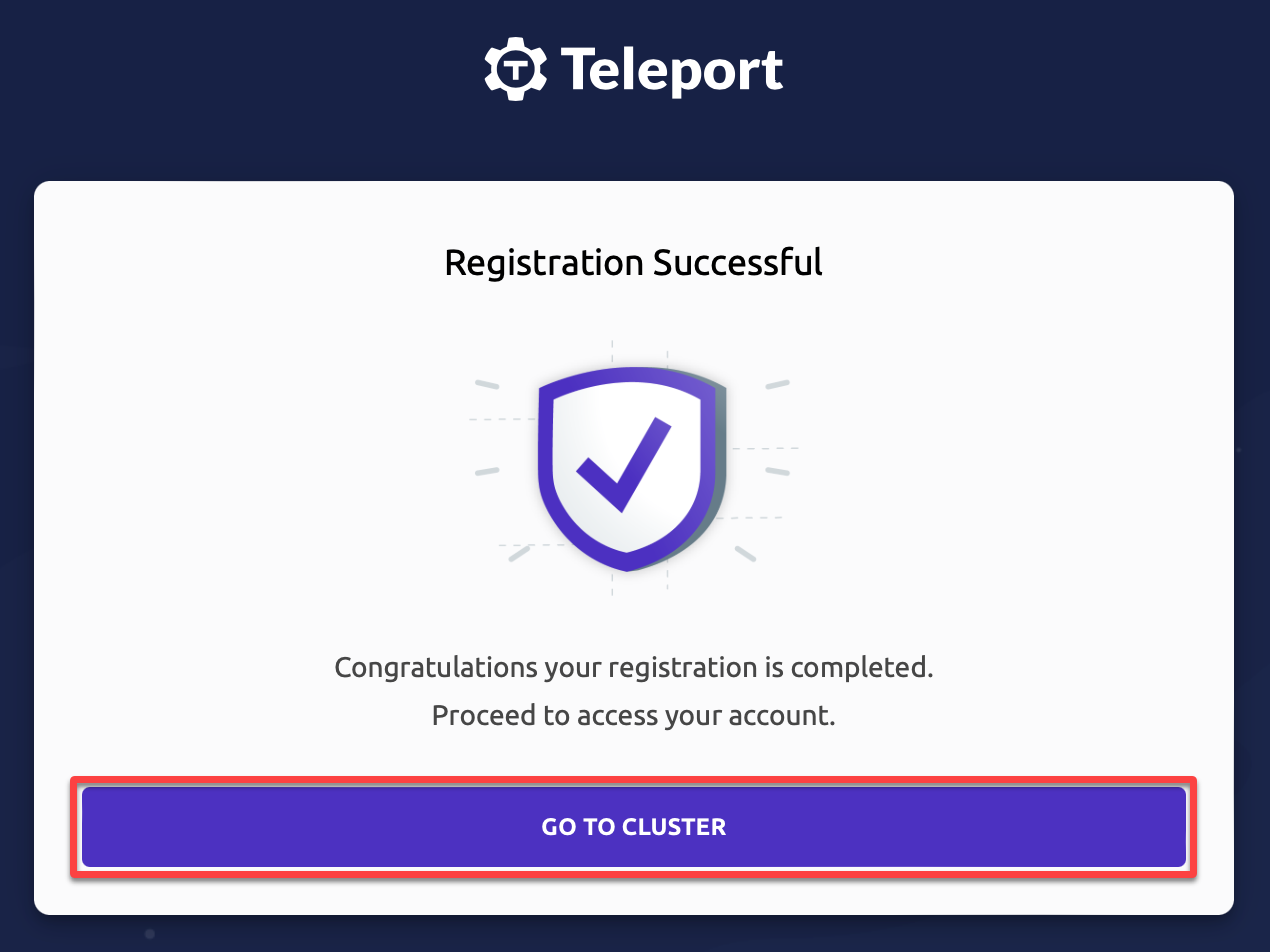
6. Now, click GO TO CLUSTER to access your Teleport account.
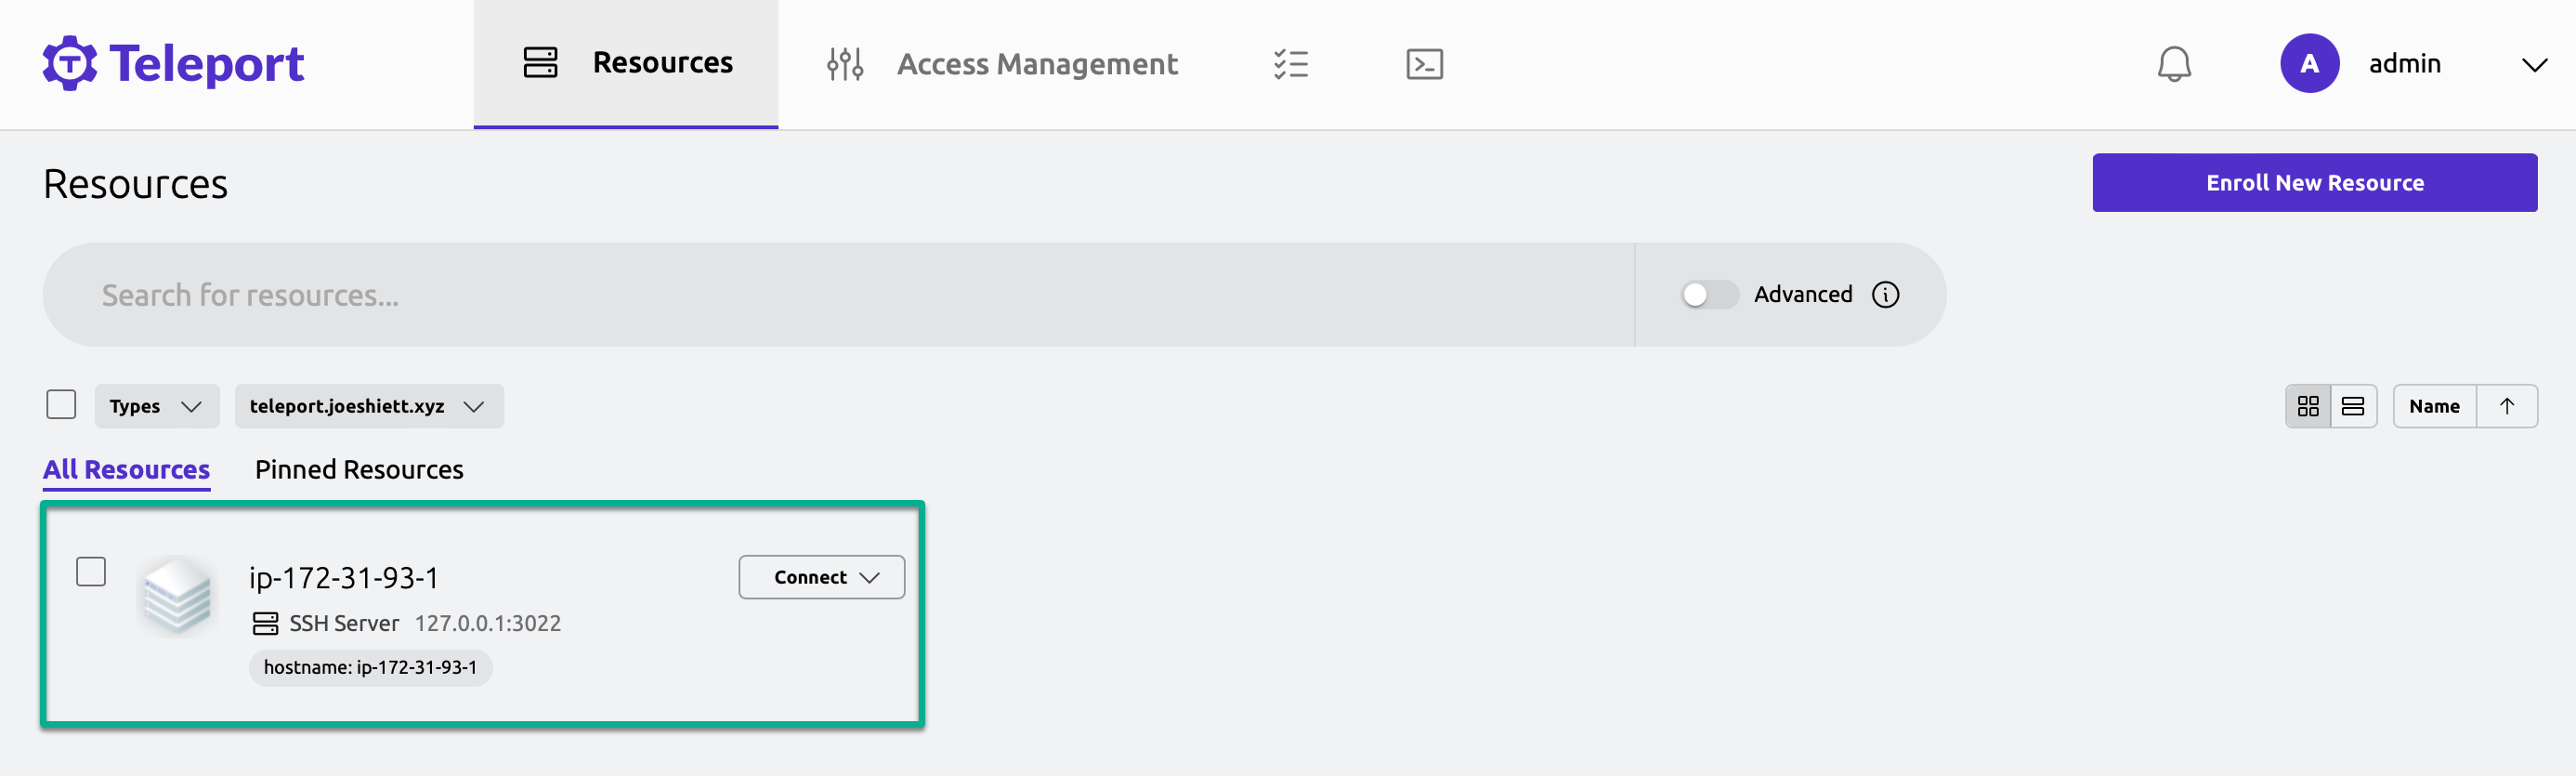
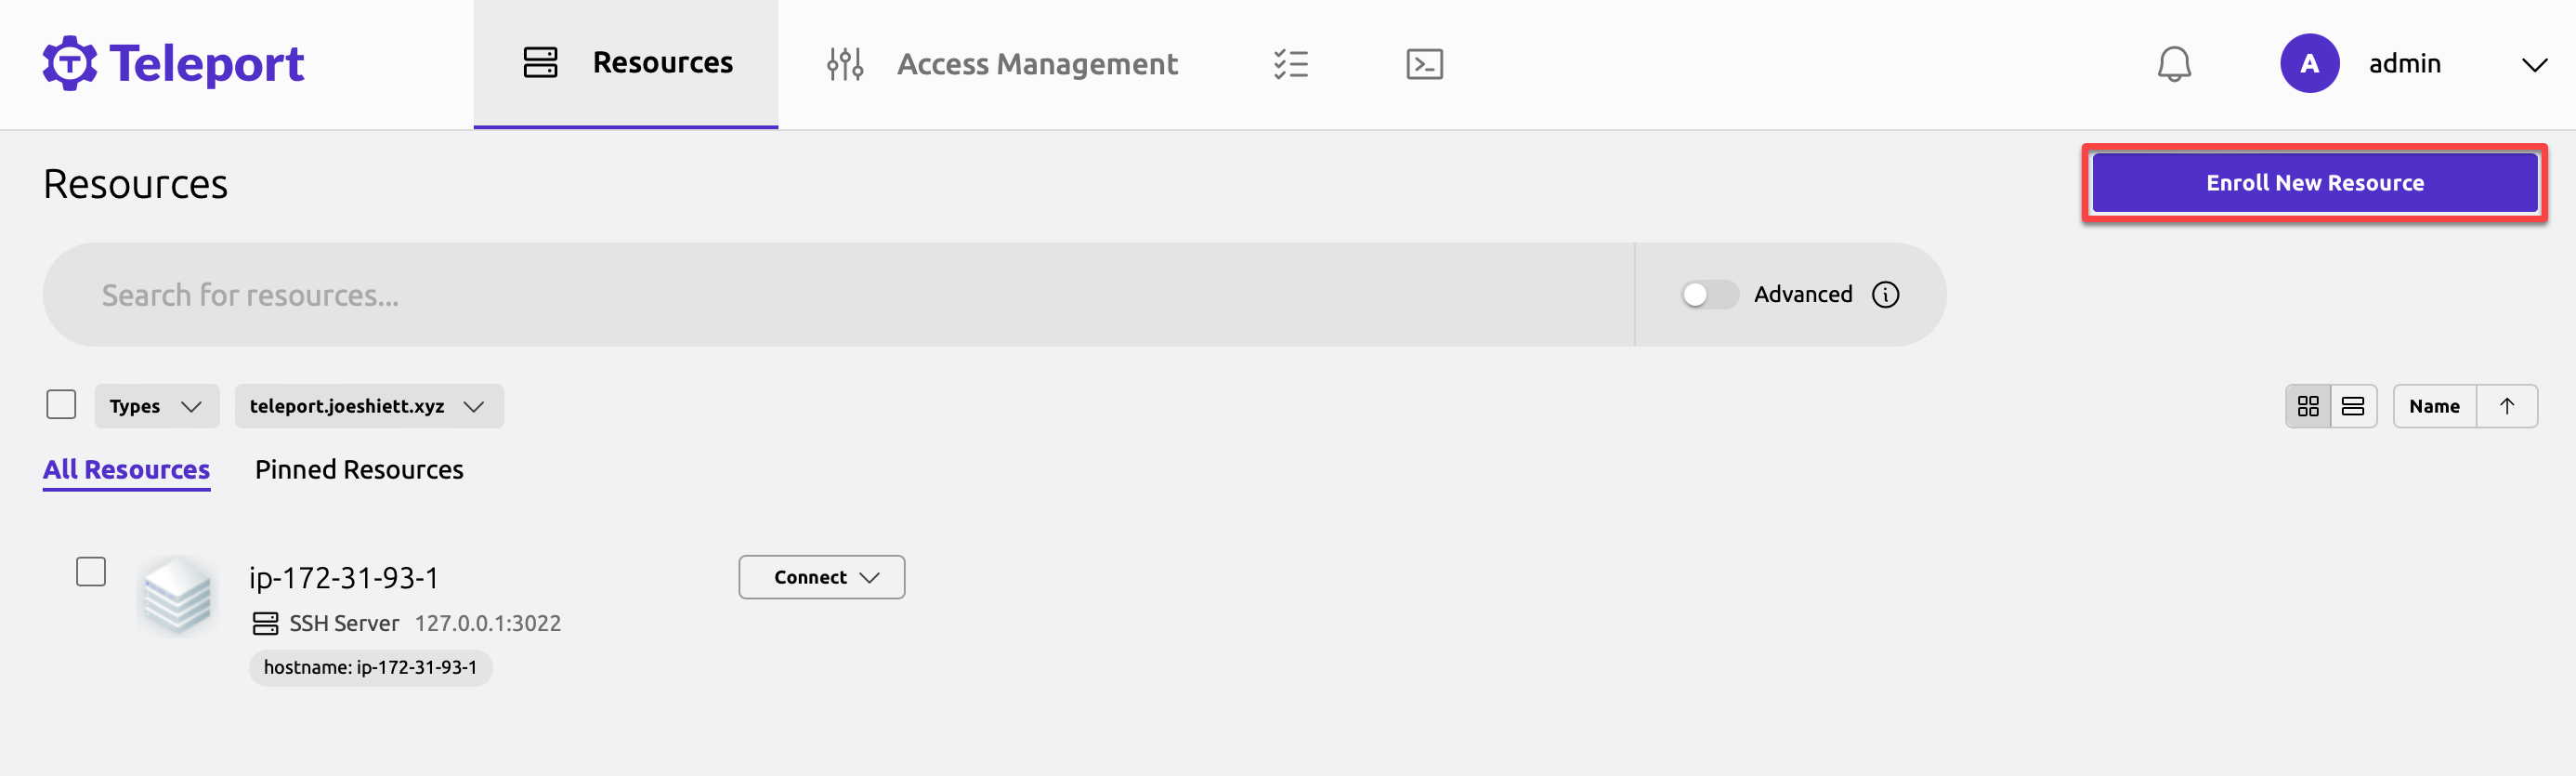
Your browser redirects to the Teleport dashboard like the one below that shows your host server where Teleport runs. Notice that your host server is the only available resource currently being handled by Teleport.
Adding and Managing Resources with Teleport
You now have access to your Teleport dashboard, which has only one resource available. But a centralized platform truly shines when you can manage multiple resources within.
With Teleport’s powerful resource management capabilities, you can effortlessly onboard additional servers, databases, or other infrastructure components, all from a single interface.
To manage resources with Teleport, proceed as follows:
1. On the Teleport dashboard, click Enroll New Resource (upper-right) to initiate enrolling a new resource.
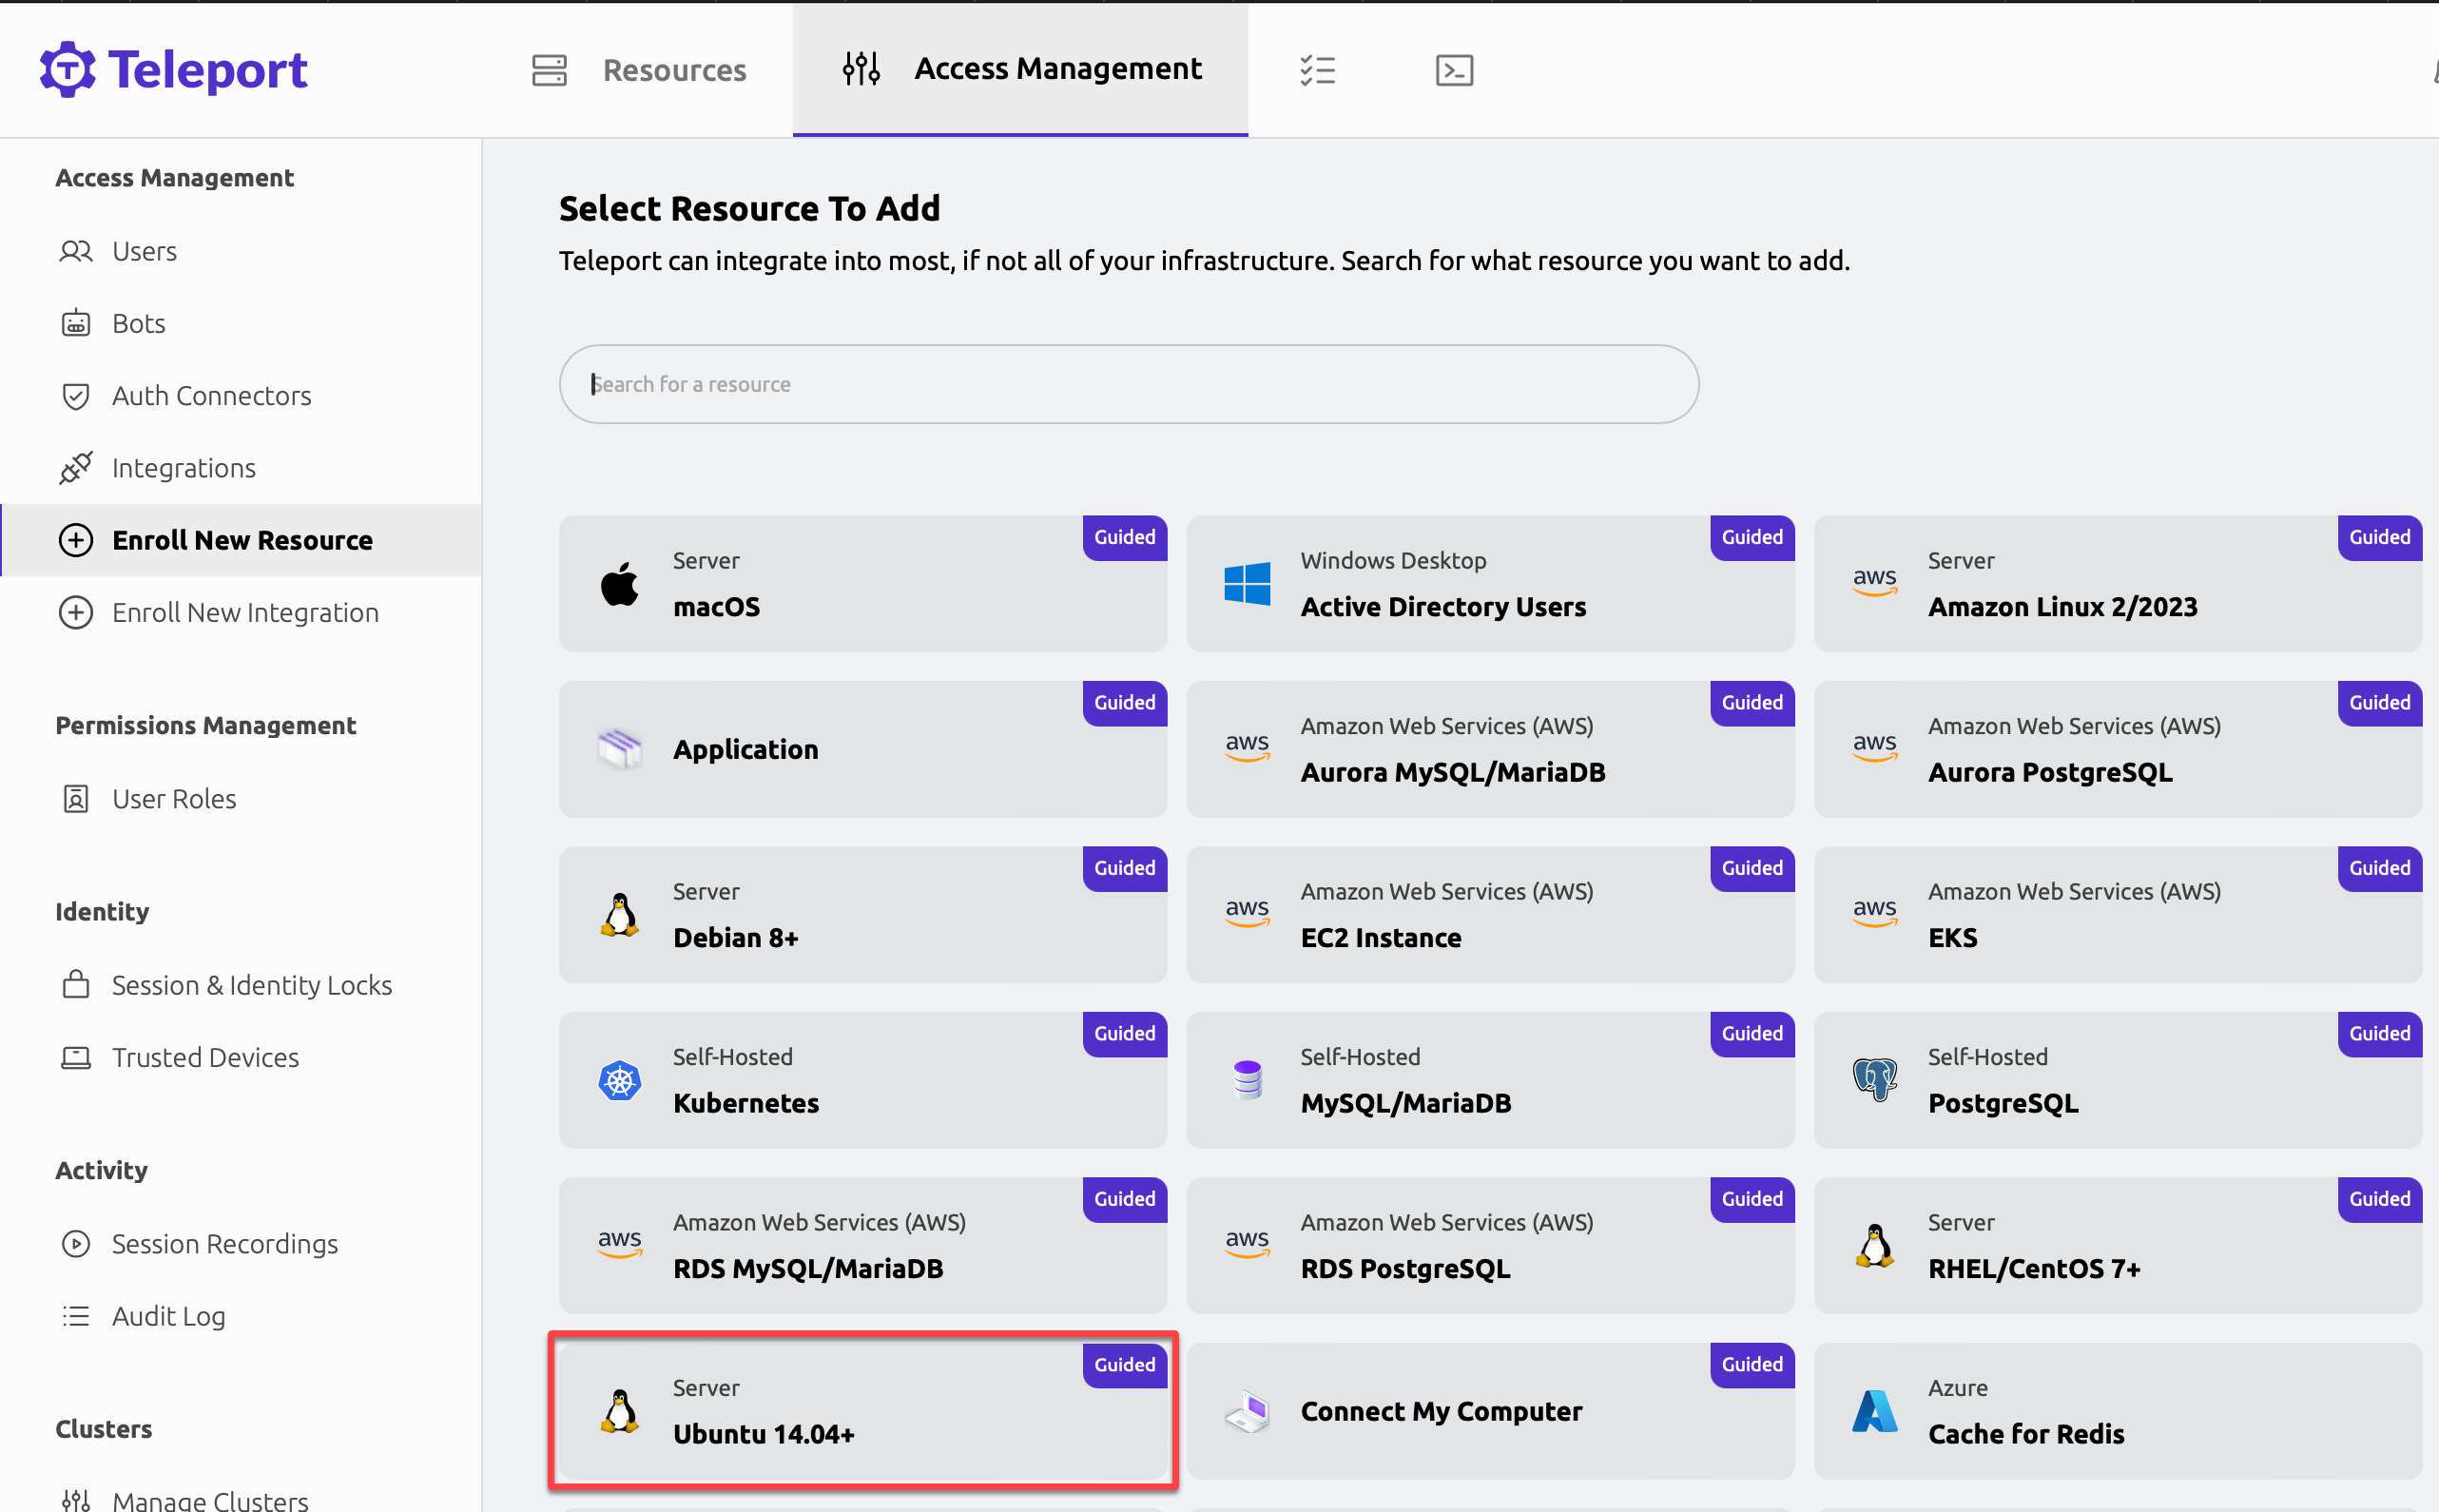
2. Pick one from the plethora of resources you can potentially add to secure access to using Teleport. This tutorial’s choice is the Ubuntu 14.04+ Server, as indicated below.
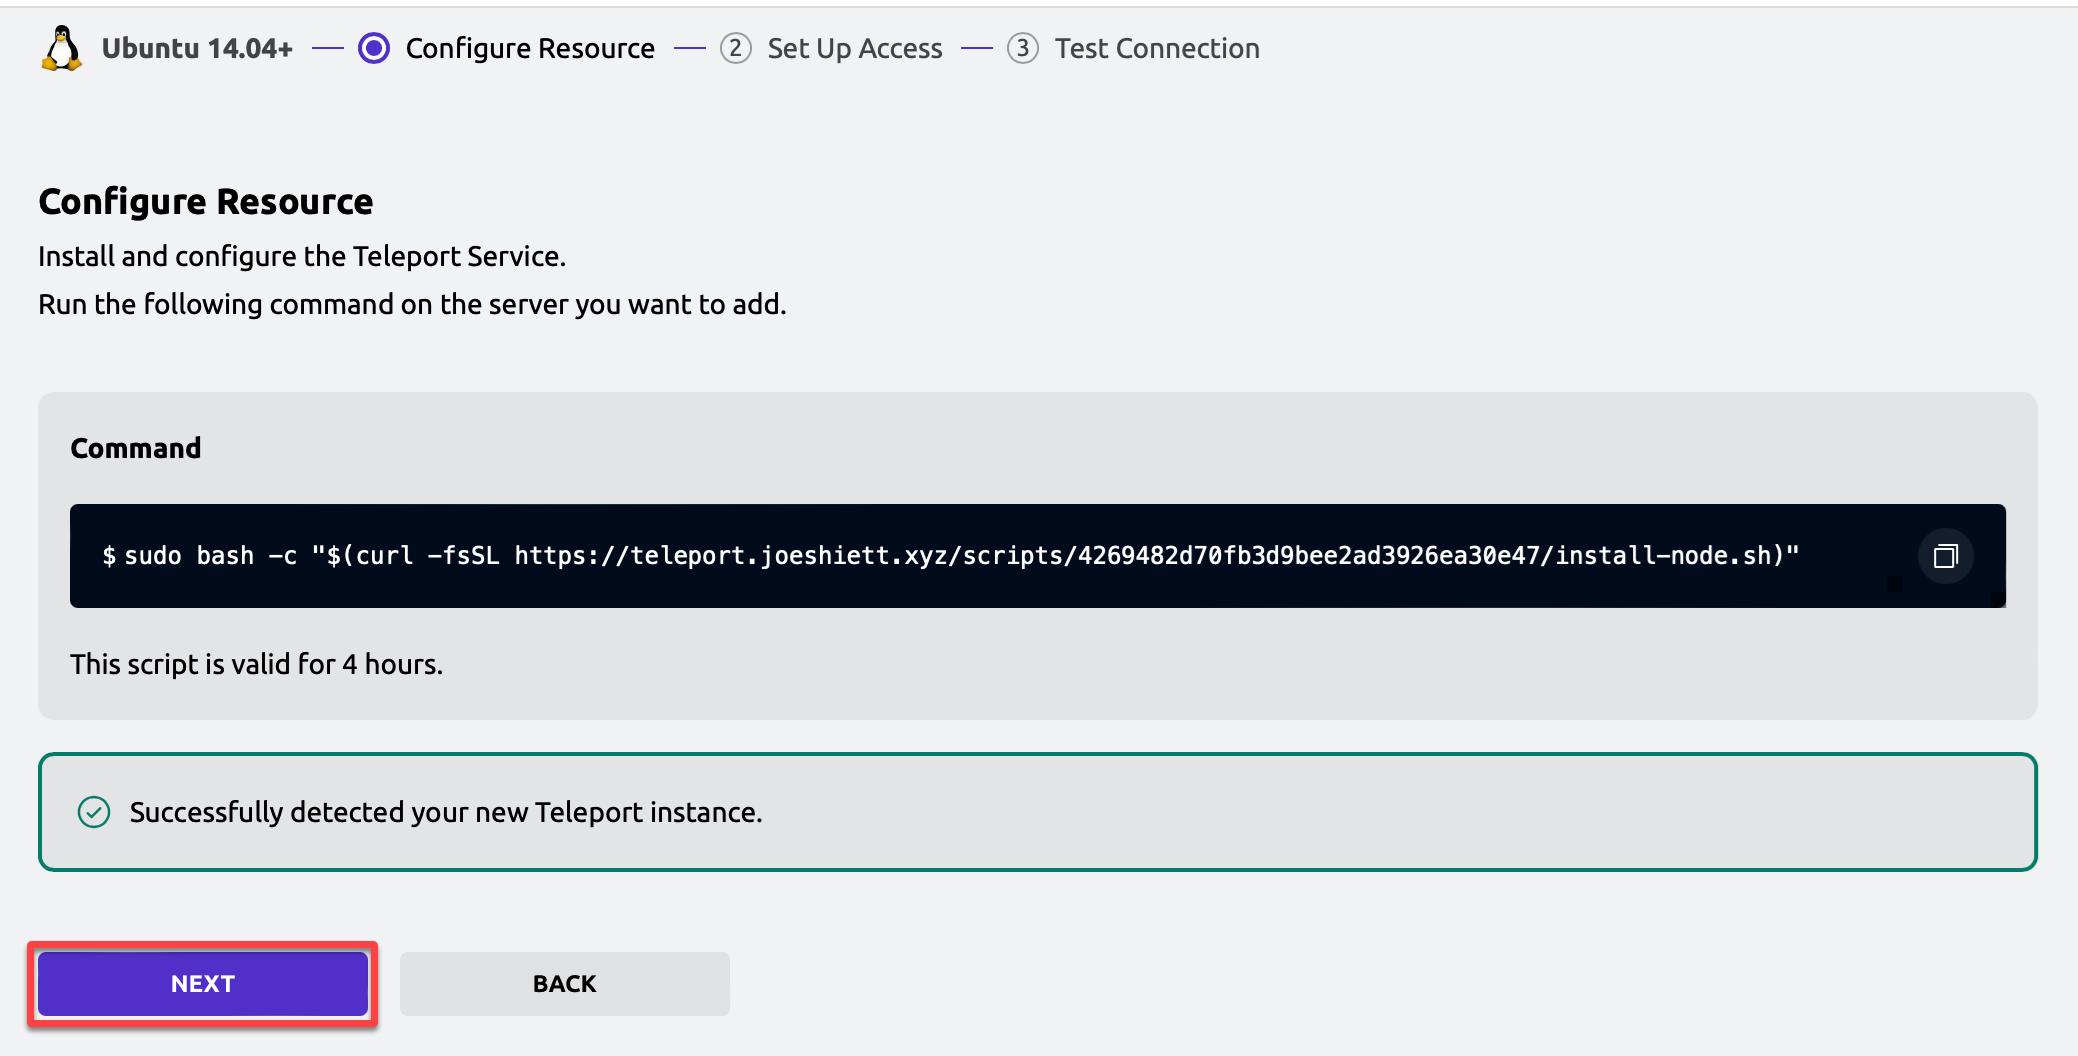
3. Copy the command Teleport generated, which you will run in the following step.
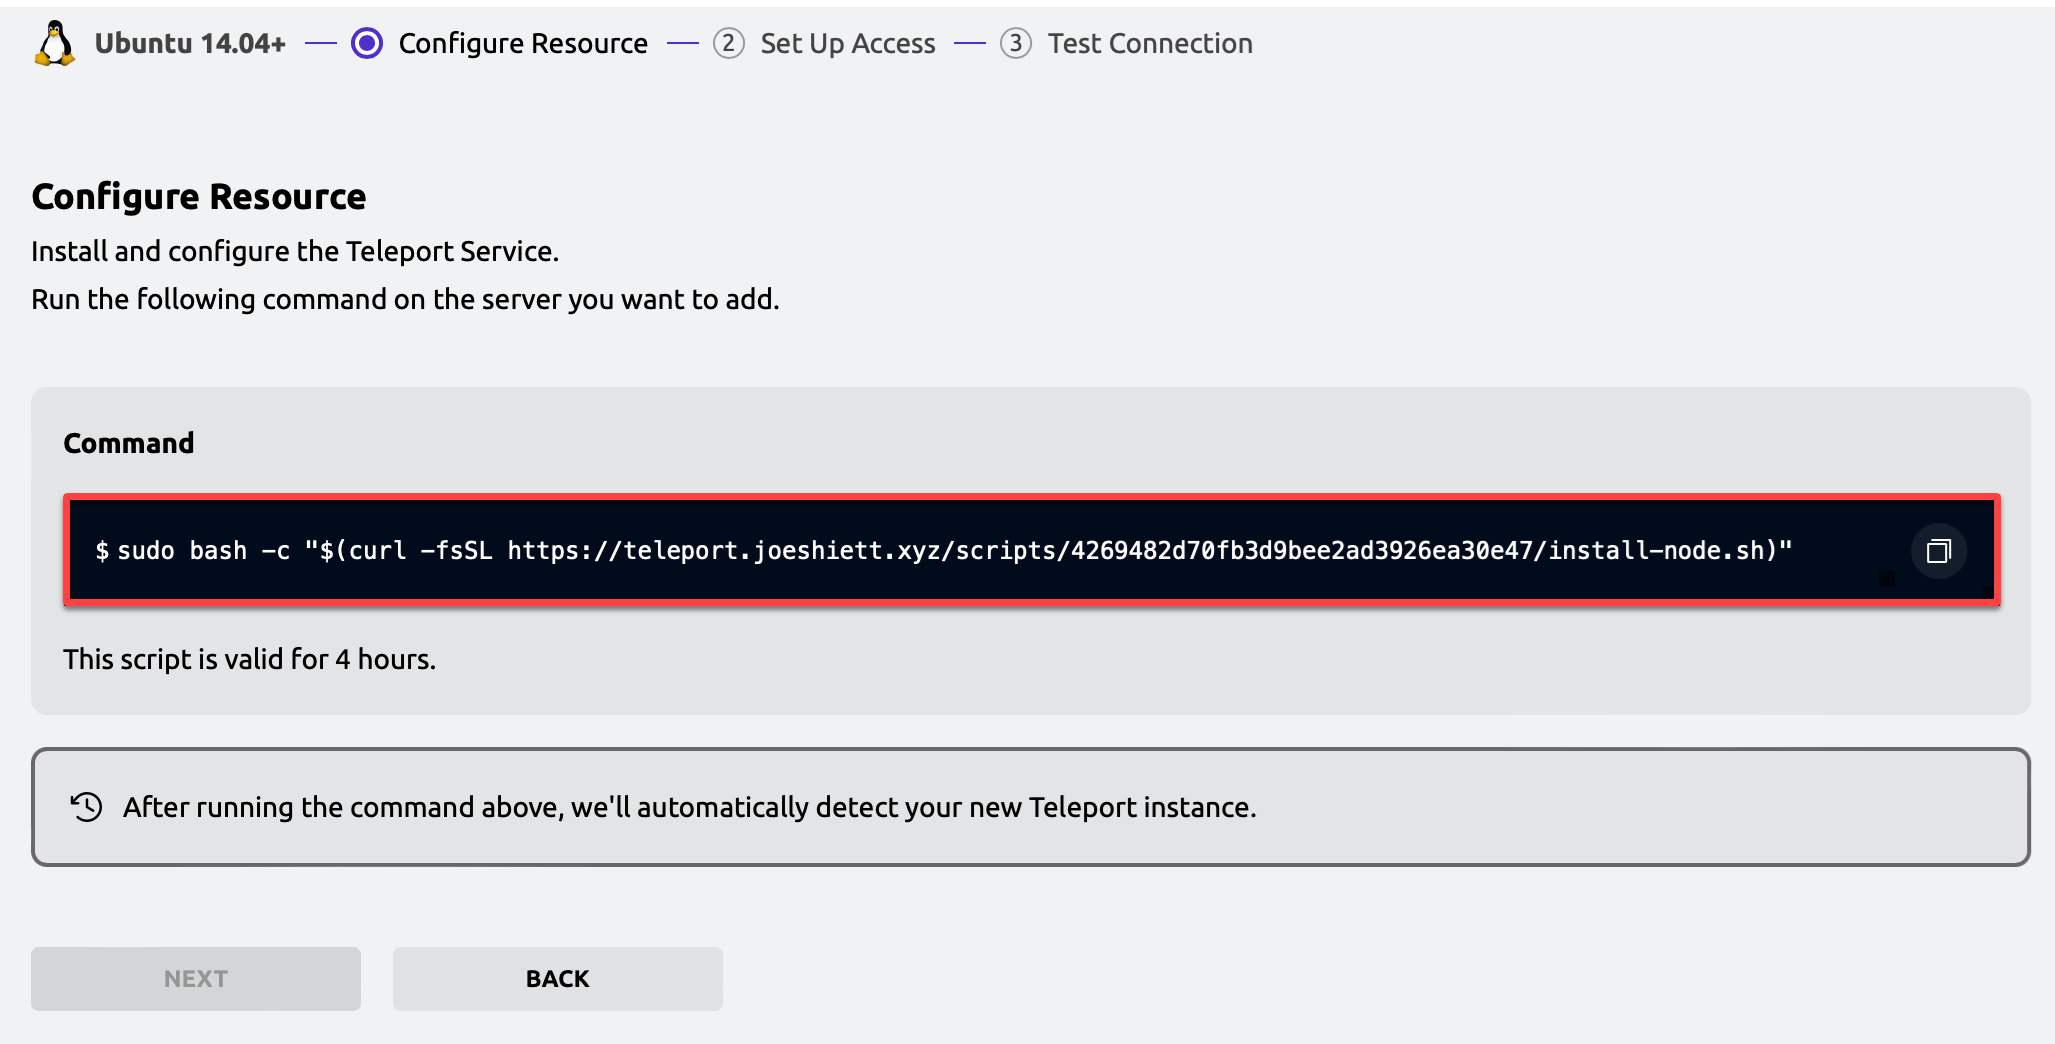
4. Now, open a terminal in your second server and run the command you copied in step three to add the server for access management.
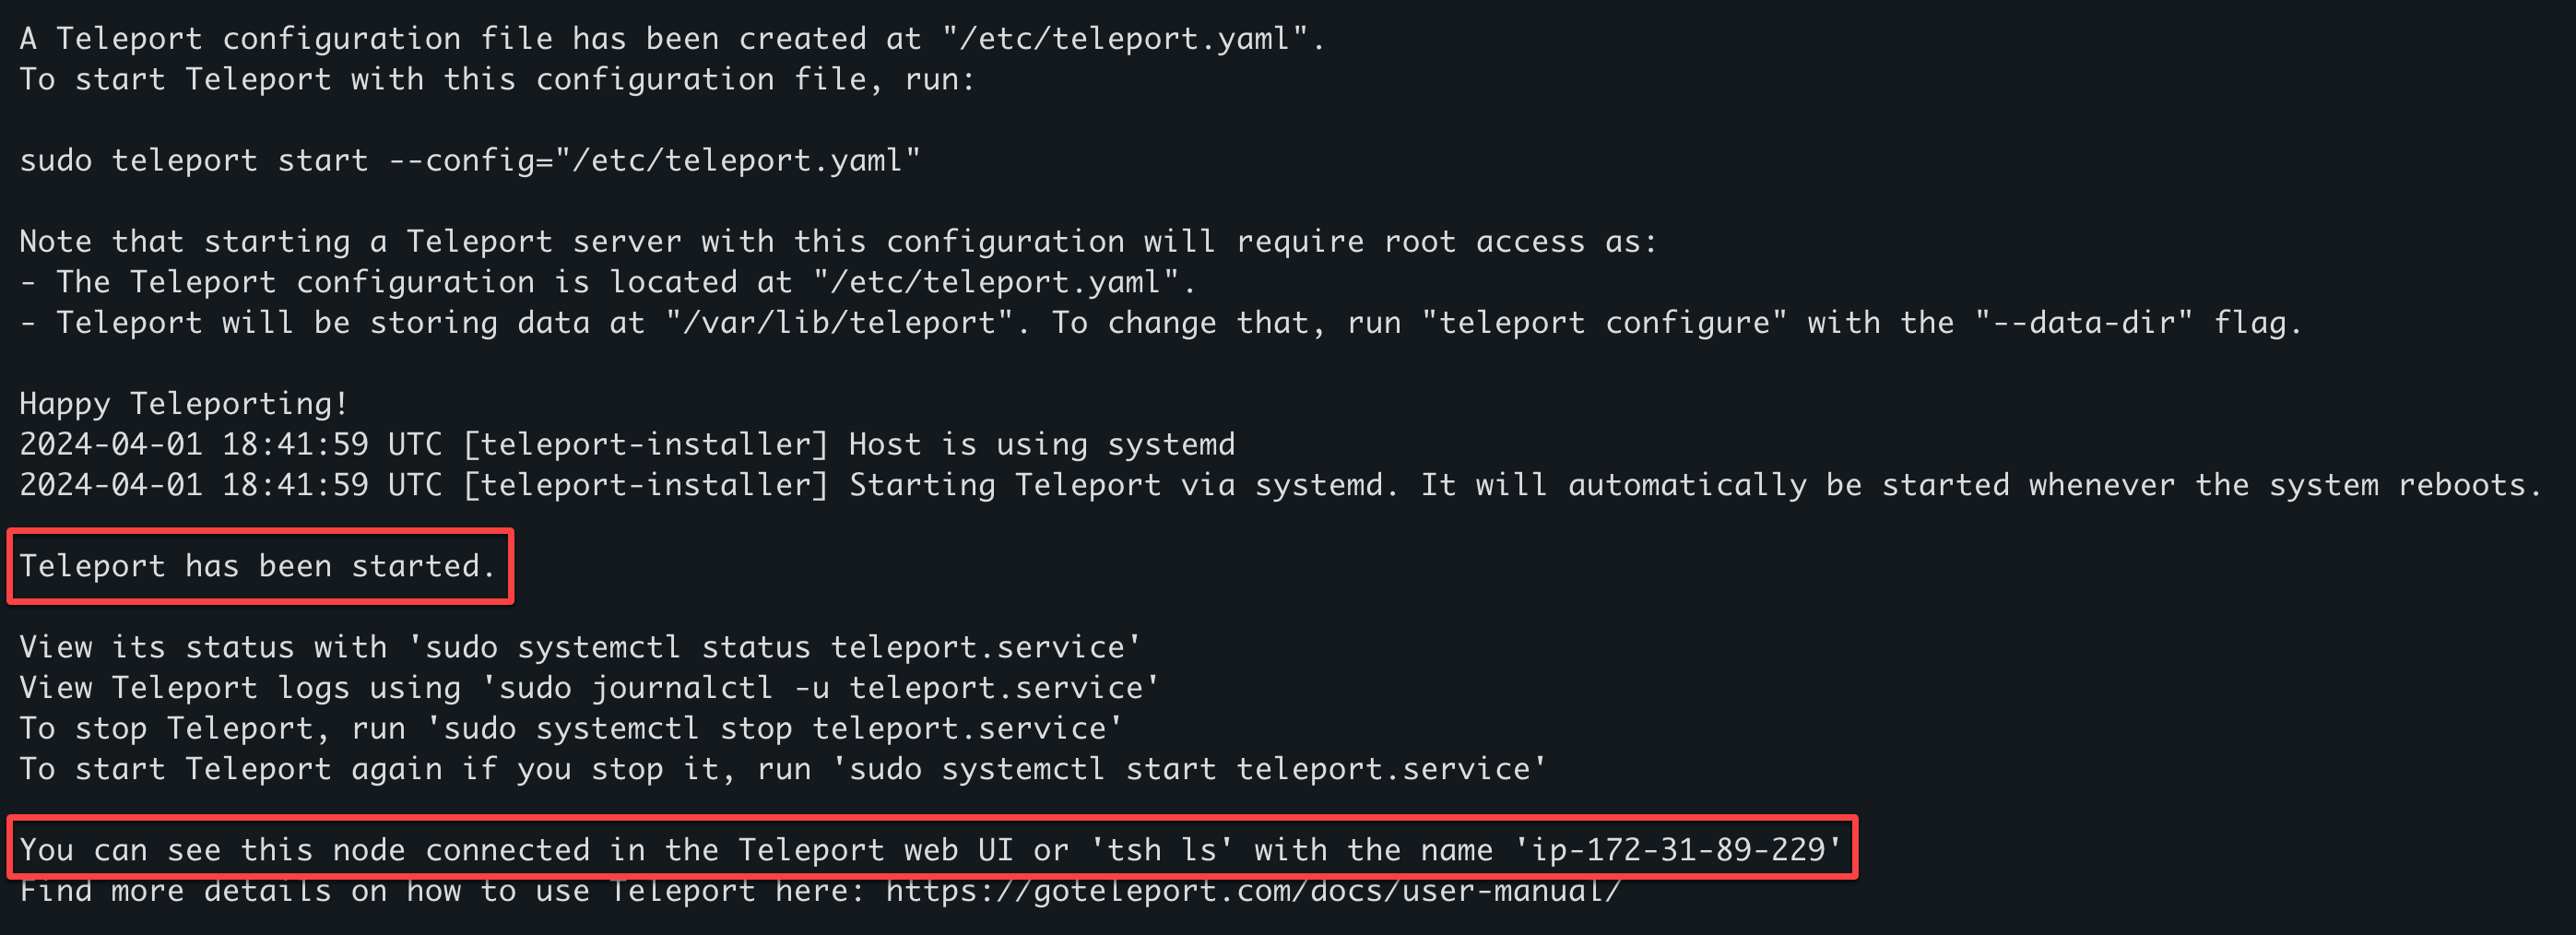
If successful, you will see an output like in the screenshot below.
5. Once added, click NEXT and complete the consecutive prompts by clicking NEXT and FINISH.
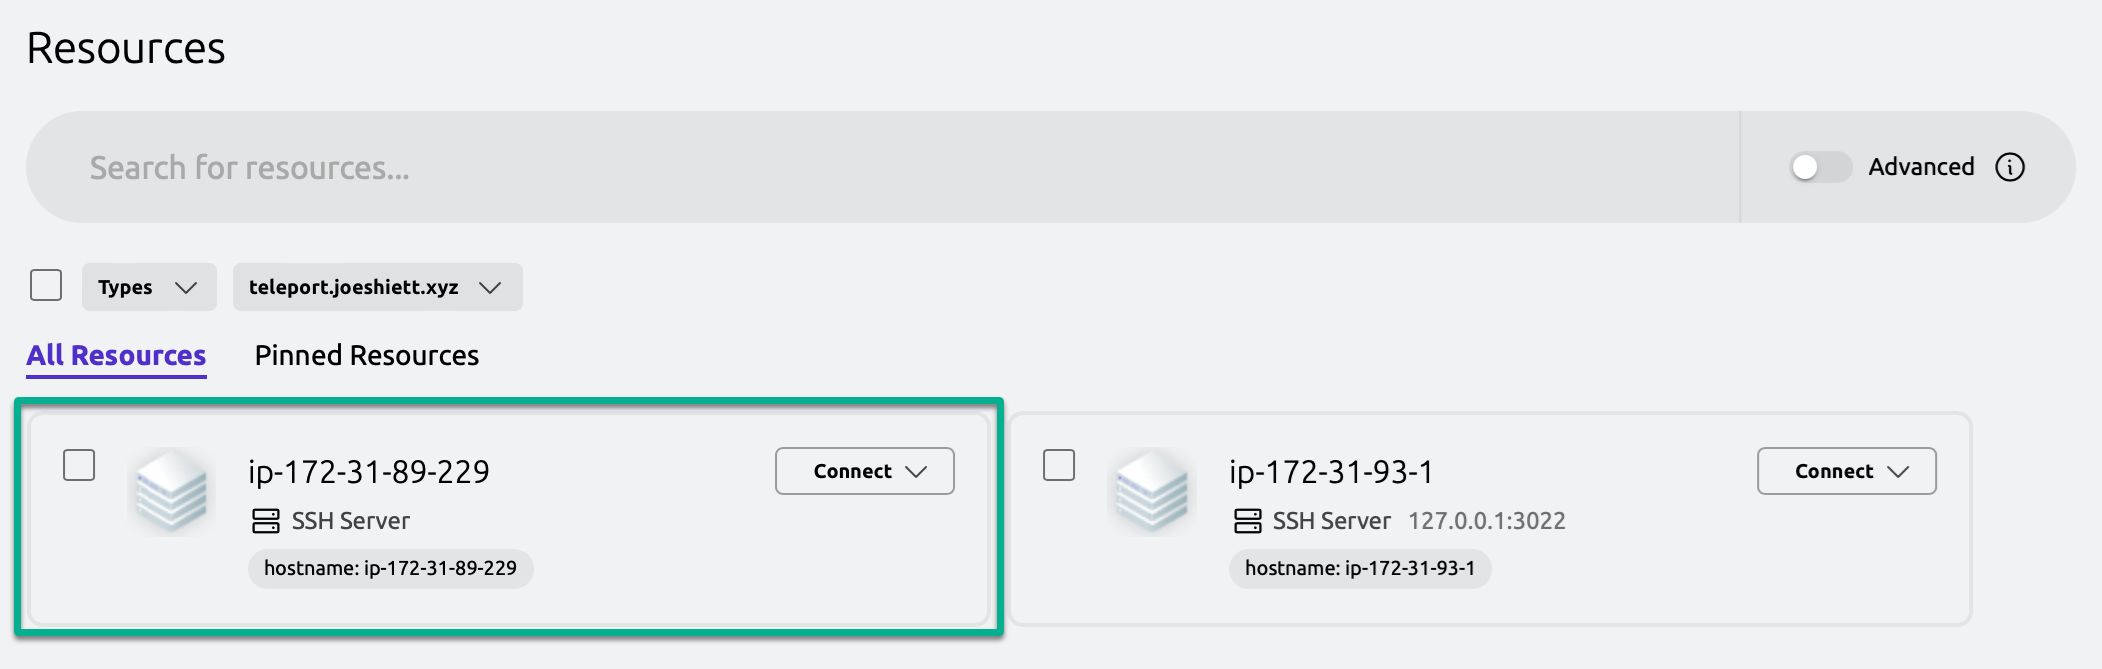
6. Finally, navigate to your Teleport dashboard, and you will see your newly added instance, as illustrated below.
Conclusion
There you have it—successfully installed and configured Gravitational Teleport, set up the Teleport Web UI, and established admin credentials. Throughout this tutorial, you have gained valuable insight into securing and managing server access effectively!
Now, why not take this newfound knowledge up a notch? Install the Teleport CLI (tsh) specifically on your local machine and connect to your Teleport server via CLI instead of the UI.
Implement access management for more resources such as Kubernetes Clusters and much more!


