


Lost amidst the complexities of Active Directory (AD), have you ever felt the frustration of extracting user attributes? Is there a more viable path to unveil the information you’re after? Fear not, for there is not just one but several solutions, and this tutorial has got your back.
In this tutorial, you’ll unveil the secrets to seamlessly extracting user attributes from AD—no more endless scrolling or navigating through confusing menus.
Take charge of identity management, enhance access control, and streamline security audits!
Prerequisites
Before digging into user attributes, ensure you have the following in place to follow along in this tutorial.
- A Windows machine – This tutorial uses Windows Server 2022 configured as a domain controller.
- Active Directory Users and Computers (ADUC) and Active Directory Administrative Center (ADAC) installed.
💡 If you don’t have a Windows Server, you can set up ADUC and ADAC on a Windows client differently.
- A user with admin access to your Windows machine.
Extracting User Attributes via the ADUC
The ultimate goal is to achieve efficiency, precision, and a smooth user management experience – and ADUC perfectly meets these expectations. Whether extracting user names or diving into organizational units, ADUC is your go-to tool for gathering the required information seamlessly.
To extract user attributes via ADUC, carry out the following:
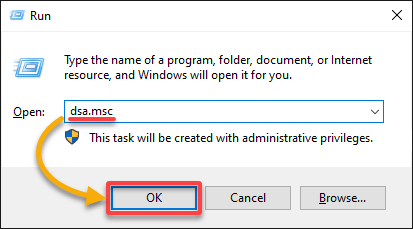
1. Open the Run dialog, type in dsa.msc, and click OK (or press Enter) to open ADUC.
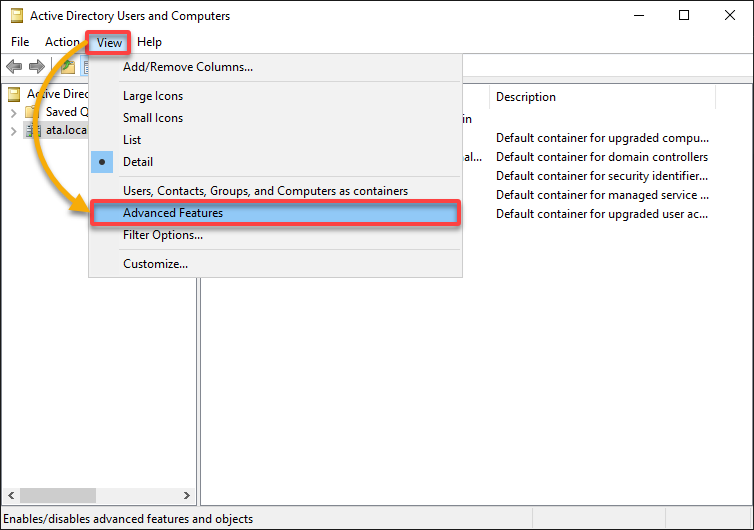
2. On ADUC’s main window, click on the View menu and select Advanced Features to enable the Attribute Editor.
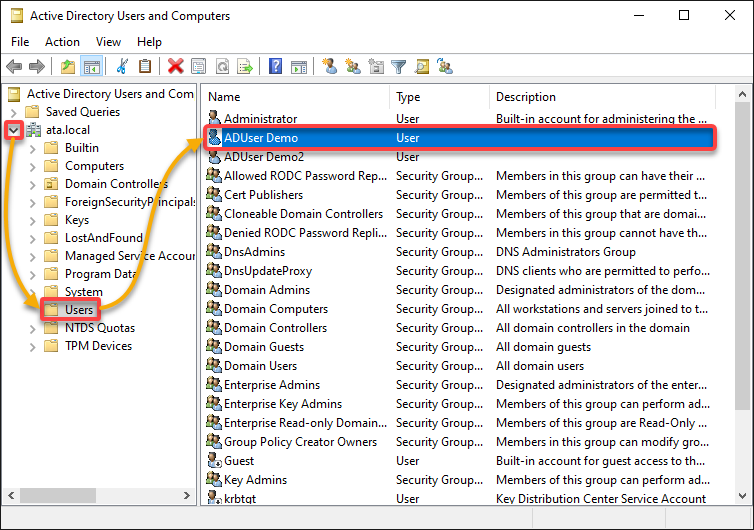
3. Once enabled, expand your domain (left pane), select Users to view all users, and double-click your target user to open its properties window (step four).
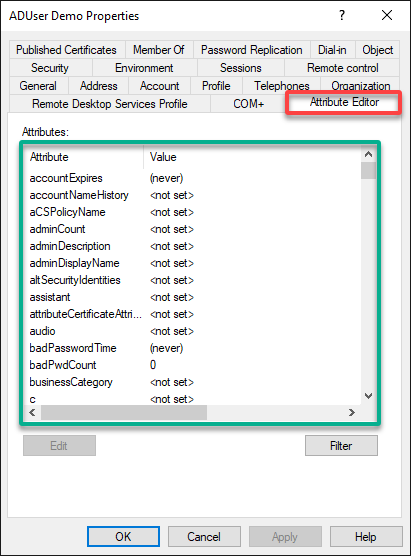
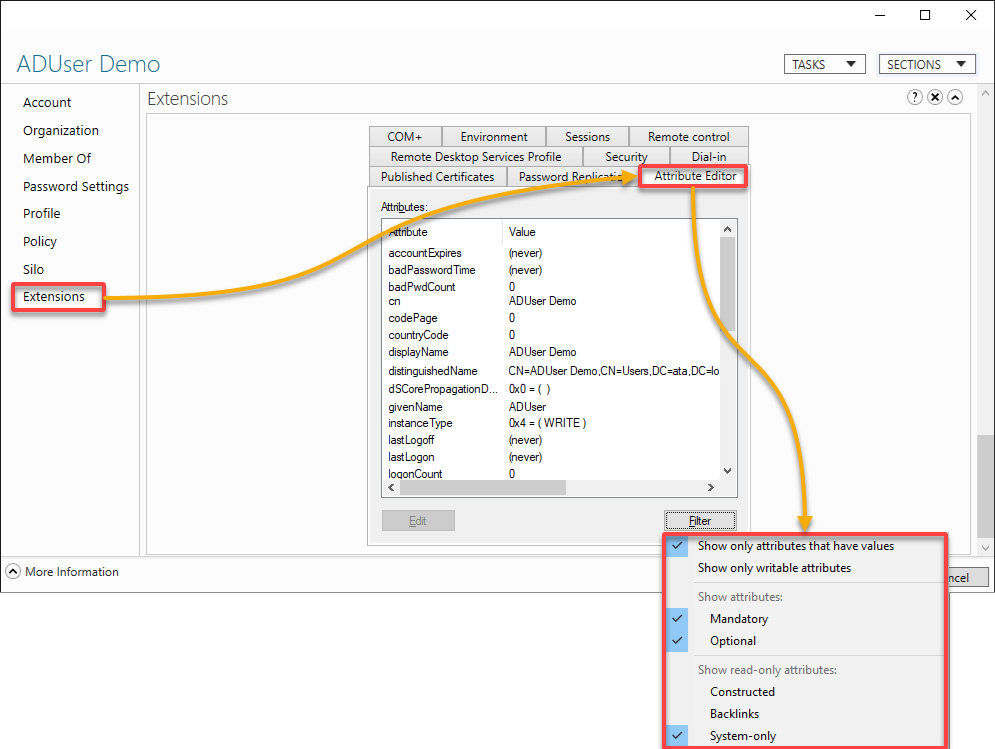
4. Now, navigate to the Attribute Editor tab in the user’s Properties window to view the user’s attributes.
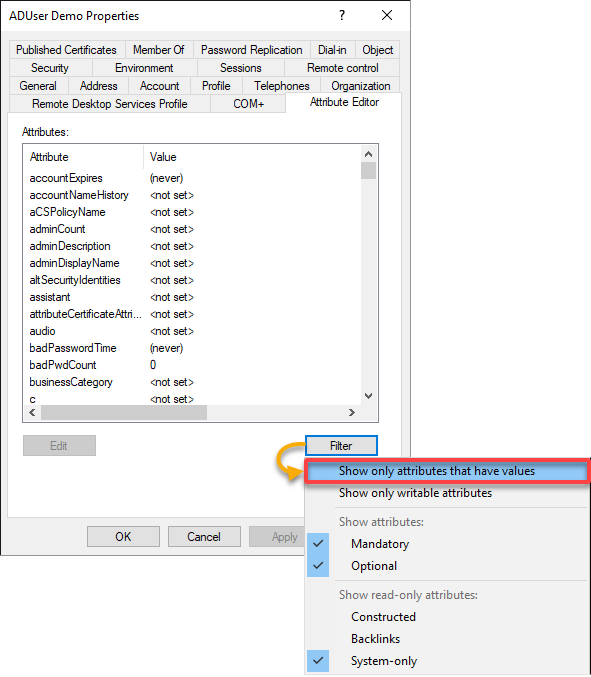
Notice that there are too many empty attributes. Will you scroll through everything? If not, then jump to the following step to filter user attributes.
5. Click Filter, and choose how you wish to filter the list of attributes. But for this example, select the first option to Show only attributes that have values.
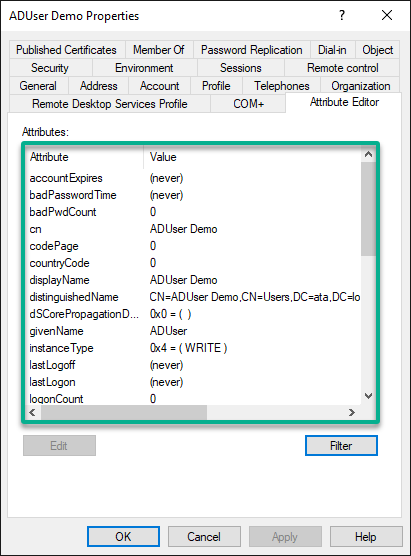
If successful, you’ll only see attributes with values in the list, as shown below.
The list looks much better in the eyes, right? Even the scroll thumb’s size increased, which indicates the list is shorter than before you filtered the list.
Enforcing ADAC for Extracting User Attributes
ADUC, even as a legacy tool, undoubtedly works in extracting user attributes. But if you’re more into a modern interface and enhanced features, ADAC is your guy.
To extract user attributes via ADAC, complete the steps below:
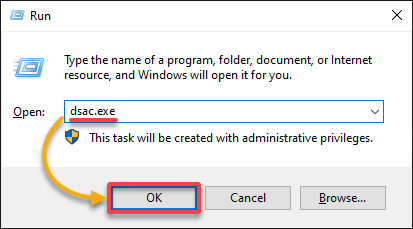
1. Open the Run dialog (Win+R), type in dsac.exe, and press Enter to launch ADAC.
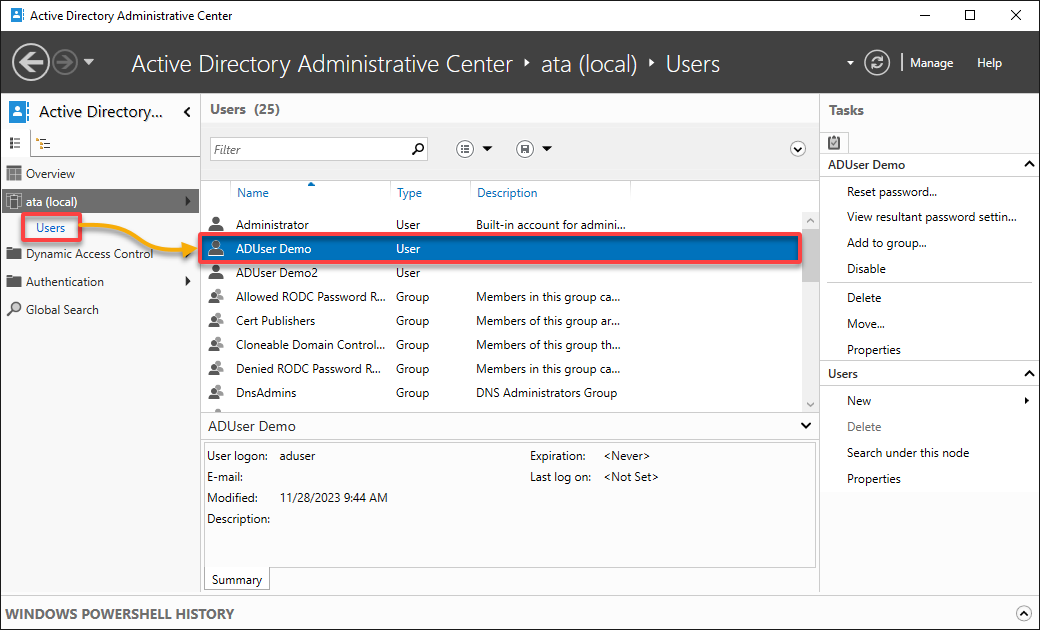
2. Next, navigate to Users under your domain (i.e., ata.local) to view all users, and double-click your target user to view its properties window.
3. Now, navigate to Extensions (left pane) to view the user’s properties, access the Attribute Editor tab, and Filter the list as desired.
Do the steps seem familiar? The reason is that ADAC is the modern version of ADUC. So, what makes ADAC stand out? The ability to view and modify fine-grained password policies and dynamic access control, to name a few.
But then again, your focus in the meantime is extracting user attributes.
Employing a Command-Line Approach for Extracting User Attributes
ADUC and ADAC both give you a GUI experience in extracting user attributes. But you must embrace a command-line approach when the vision is to automate the task. One example is executing the dsquery and dsget commands for querying directory service objects.
To extract user attributes via a command-line approach, fulfill the following steps:
Open the command prompt as administrator, and run the below dsquery command to query users with *demo* in its name. Once queried, the dsget user displays the result by SamAccountName (-samid) and DisplayName (-display).
dsquery user -name *demo* | dsget user -samid -displayAs shown below, you’ll see more than one result if multiple AD users have ‘demo’ in their names.
Pick one samid (i.e., aduser) from the result, as you’ll need it in the following step in extracting user attributes.

Now, execute the below command to query (dsquery) and display information about the AD user object you noted in step one (aduser).
💡 Remember that when you wish to include all attributes, you must manually specify each one in the command.
Below is the breakdown of what attributes are specified in the command:
| Options | Details |
|---|---|
| -samid | The Security Account Manager (SAM) account name is a unique name assigned to each user in a domain. |
| -display | The DisplayName attribute typically represents the user’s full name or display name. |
| -upn | The User Principal Name (UPN) is a user-friendly identifier for a user account in AD and is often used for user logins. |
| -dn | The user’s Distinguished Name (DN) in the output is a unique identifier for an object in AD. DN provides the full path to the object’s location within the directory tree. |
dsquery user -samid aduser | dsget user -samid -display -upn -dn
dsget user commandExtracting User Attributes via the PowerShell Get-ADUser cmdlet
Think about the time saved by automating user attribute extract. This skill is crucial for compliance, auditing, or just keeping your AD in shape.
Harnessing the power of PowerShell amplifies your efficiency in AD management with its robust capabilities. Encapsulated in a set of purpose-built cmdlets, like Get-ADUser, PowerShell empowers you to streamline complex tasks, including extracting user attributes.
To extract user attributes via PowerShell cmdlets, follow these steps:
1. Open PowerShell as administrator, and run the following command to list all Enabled AD users (Get-ADUser) by their SamAccountName.
💡 If you already know the SamAccountName of your target user, you can skip this and jump to step two to proceed with extracting user attributes.
Get-ADUser -Filter {Enabled -eq $true} -Properties SamAccountName | Select SamAccountName💡 Perhaps you wish to list all users, including the disabled ones. If so, replace the
{Enabled -eq $true}argument with the wildcard character (*).
Pick one user from the list and note down its SamAccountName for later use, but the choice in this example is aduser.

💡 Optionally, you can append the
Sort-Objectcmdlet to sort the list by a specific property (i.e.,SamAccountName).
2. Next, execute the command below to extract information about the AD user you picked in step one (i.e., aduser), along with its DisplayName, UserPrincipalName, and DistinguishedName.
Get-ADUser -Filter {SamAccountName -eq 'aduser'} -Properties SamAccountName, DisplayName, UserPrincipalName |
	Select-Object SamAccountName, DisplayName, UserPrincipalName, DistinguishedName | Format-Table
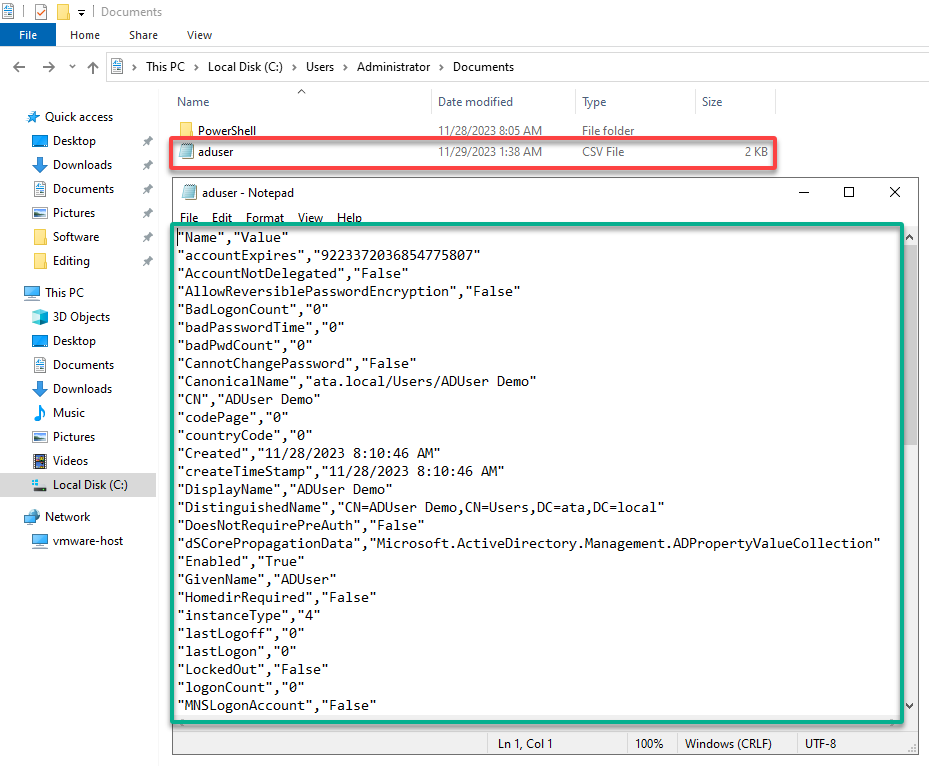
3. Execute the following code to export (Export-Csv) the AD user’s attributes data by its SamAccountName (aduser) to a CSV file (i.e., aduser.csv).
Ensure you replace aduser with aduser.csv with the user’s SamAccountName and your preferred CSV filename (full path).
This code has no output on the console, but you’ll later check the data in the CSV file.
# Define user SamAccountName
$samName = 'aduser'
# Define CSV file path
$CSVFile = ".\Documents\aduser.csv"

# Get user details from Active Directory
$userDetails = Get-ADUser -Filter {SamAccountName -eq $samName} -Properties * |
    ForEach-Object {
        # Extract properties, exclude 'PropertyNames' and 'PropertyCount', and remove null values
        $_.PSObject.Properties |
            Where-Object { $_.Name -notin ('PropertyNames', 'PropertyCount') -and $_.Value -ne $null } |
            ForEach-Object {
                [PSCustomObject]@{
                    Name = $_.Name
                    Value = $_.Value
                }
            }
    }

# Export user details to CSV file
$userDetails | Export-Csv -Path $CSVFile -NoTypeInformation4. Finally, open the CSV file to verify the data has been exported successfully.
The PowerShell Get-ADUser cmdlet is truly a powerhouse. This cmdlet is your ticket to unparalleled flexibility, allowing you to tailor your queries in extracting user attributes.
Conclusion
Throughout this tutorial, you delved into various methods of extracting user attributes from AD. You’ve explored techniques ranging from the familiar ADUC interface to the more advanced ADAC and command-line approaches via PowerShell. With a focus on the PowerShell Get-ADUser cmdlet, you can efficiently harness its functionality to retrieve user details based on specific criteria.
Reflecting on what you’ve learned, you now have diverse tools for extracting user attributes tailored to your needs.
But moving forward, why not consider streamlining your workflow and making codes reusable by creating PowerShell functions or modules you can call anytime?


