


Every company that needs to meet compliance standards, especially concerning valid legal regulations, will ask how to archive mailboxes after an employee leaves. In this tutorial learn how to export Office 365 PST file with eDiscovery in Office 365.
Ready? Let’s get started!
Prerequisites
This tutorial comprises hands-on demonstrations. To follow along, be sure you have the following in place:
- Microsoft Outlook (Office 365)
- An Office 365 Global Administrator role assignment
- A supported web browser, such as Microsoft Edge, Firefox, Safari, and Google Chrome.
- The Exchange Online PowerShell V2 module connected to Office 365 Security & Compliance Center
- You must be a member of the Organization Management role group or be given the Role Management role.
Granting the eDiscovery Administrator Role via Office 365
To export a mailbox via the eDiscovery feature of Office 365, you must first assign the appropriate Office 365 privileges to the user performing the export. There are two ways to grant rights. You can grant permission via Office 365 Security & Compliance Center and PowerShell. But let’s focus on giving rights first using Office 365 Security & Compliance Center.
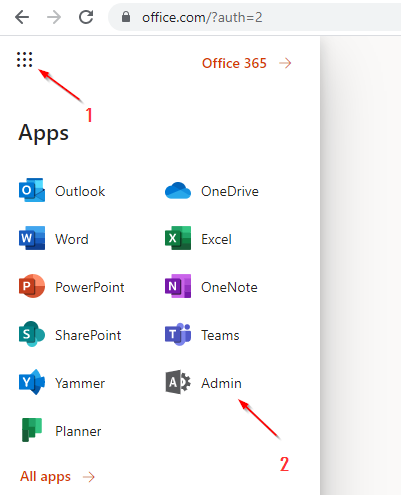
1. Launch your favorite web browser, and log into Office 365.
2. Navigate within the Apps area and click on Admin.
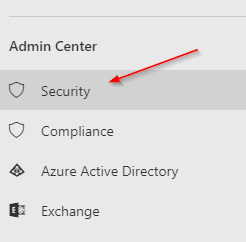
3. Click on Security in the Admin Center section located in the left panel. The page will redirect to the Office 365 Security & Compliance Center.
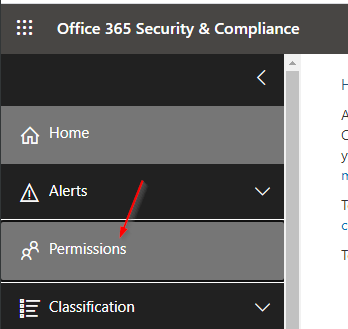
4. Click on the Permissions menu in the left panel to view the list of all existing roles.
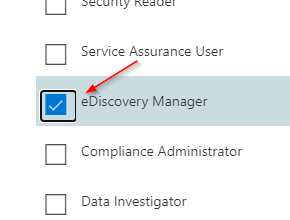
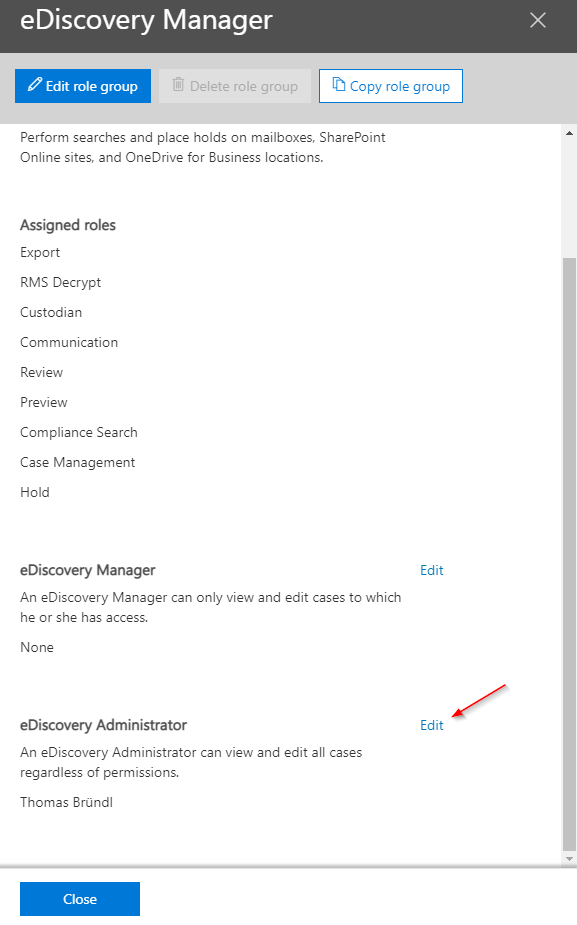
5. Next, check the eDiscovery Manager role in the list to edit the eDiscovery Manager roles. The eDiscovery Manager role lets you add case-management permission to a user, such as exporting a mailbox.
6. In the eDiscovery Manager tab, scroll down until you reach the eDiscovery Administrator section. Now click Edit to open a list of the existing users assigned to this role.
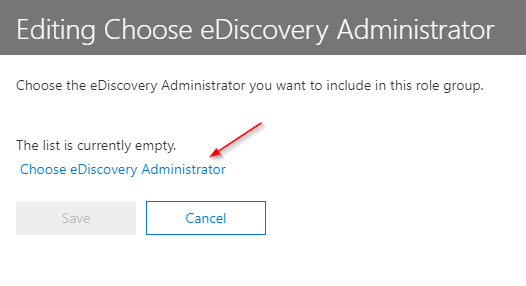
7. Click on Choose eDiscovery Administrator to add a user from a new tab that pops up.
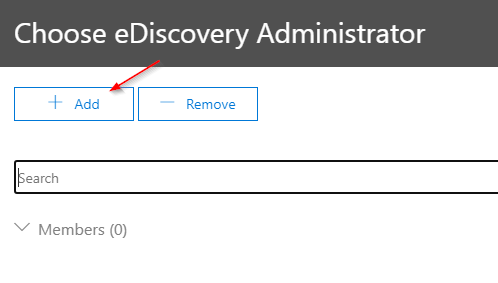
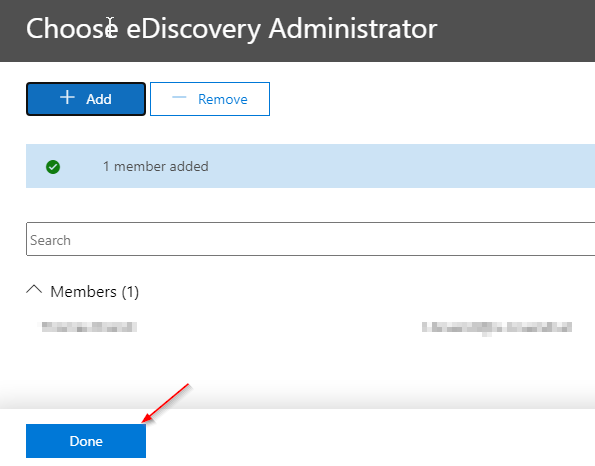
8. Next, select Add to browse for a user to assign to the eDiscovery Administrator role.
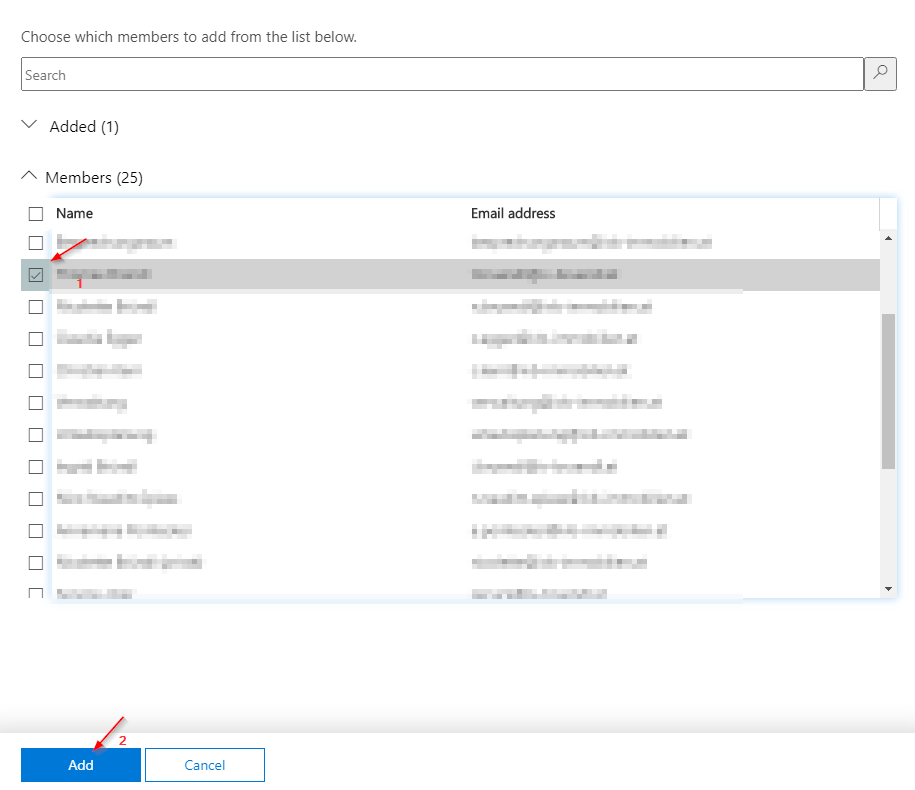
9. Check each user you’d like to give the eDiscovery Administrator permission to, then click on Add. As you see below, multiple selections are possible.
10. Now, click on Done to complete the user assignment and to close the last opened tab.
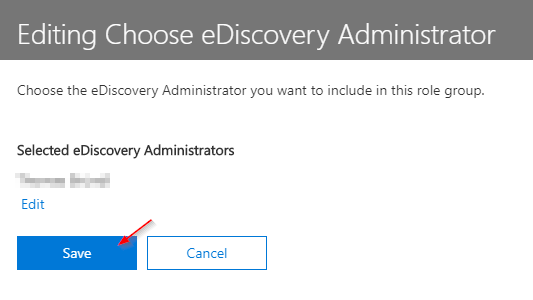
11. Click on Save to apply the settings immediately.
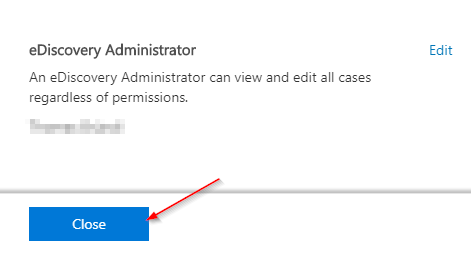
12. Finally, click on Close to complete the privilege assignment.
Granting the eDiscovery Administrator Role via PowerShell
Alternatively, the necessary permissions can be assigned more quickly via PowerShell without clicking through the individual menus of Office 365.
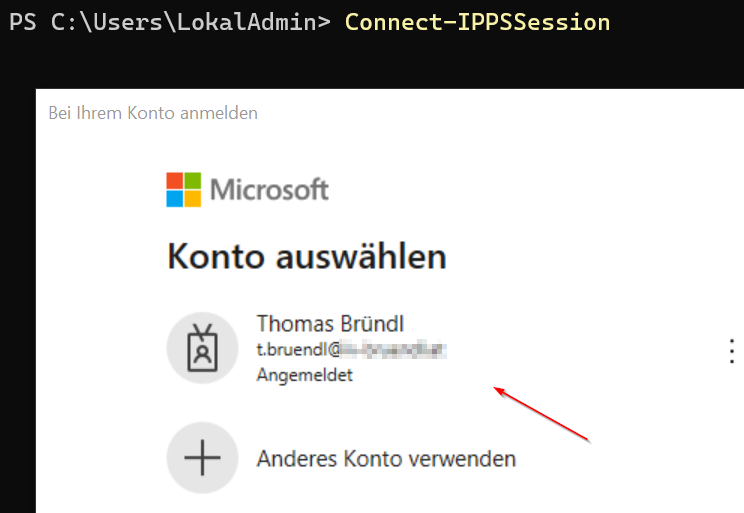
1. Open your PowerShell as administrator, then run the following command to connect to the Office 365 Security & Compliance Center.
Connect-IPPSSession2. Next, log in using your Office 365 credentials in the Microsoft authentication window, as shown below.
If you use Multi-Factor Authentication (MFA), you must also pass any of these two security steps: proof of identity via your mobile phone or by receiving a sign-in code as a text message.
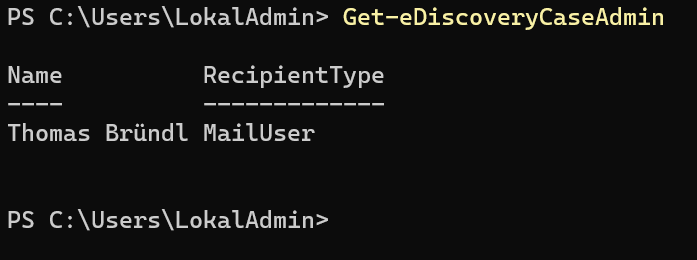
3. Run the command below to list the users who already have the necessary permissions to perform mailbox exports.
Get-eDiscoveryCaseAdminAs you see below, the command returns that there is already one user with the correct permissions.
4. Now run the Add-eDiscoveryCaseAdmin command below to assign the eDiscovery Administrator permissions to the desired user. Replace <xyz>@contoso.com with the User Principal Name (UPN). Typically, UPN matches the user’s mail address or login name for Office 365.
Add-eDiscoveryCaseAdmin -User <xyz>@contoso.com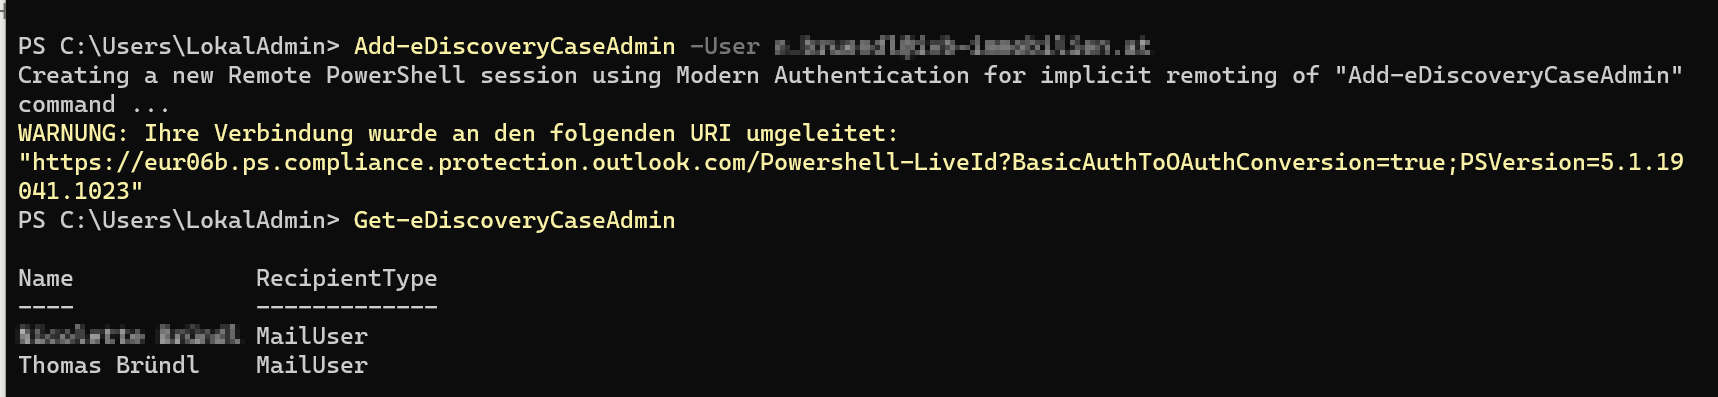
5. Finally, run the command below to log out properly from the Office 365 Security & Compliance Center.
Disconnect-ExchangeOnlineCreating an eDiscovery Export Case
At this point, you’ve already learned how to grant the necessary permissions to carry out a mailbox export. Now let’s turn to the concrete export procedure itself. Before exporting a mailbox that includes all email objects of a user, you must create an eDiscovery case in advance.
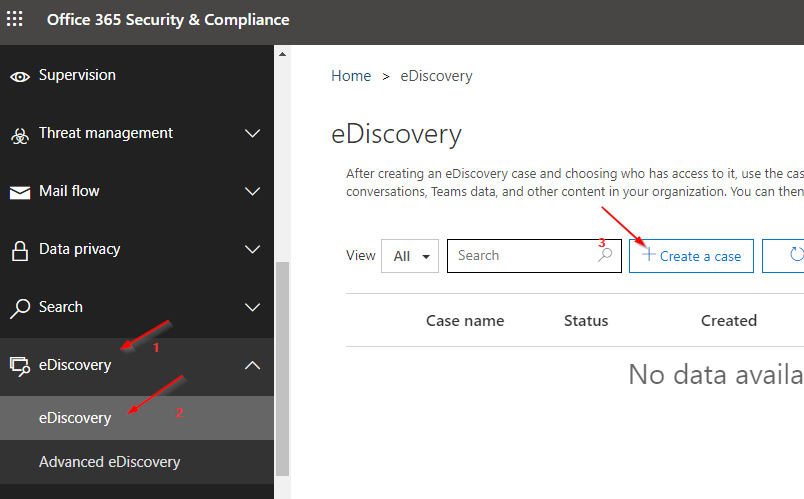
1. Navigate to the eDiscovery section (1) in the Office 365 Security & Compliance Center and select the eDiscovery subitem (2). A new tab opens where you have the option to create a case by clicking Create a Case (3).
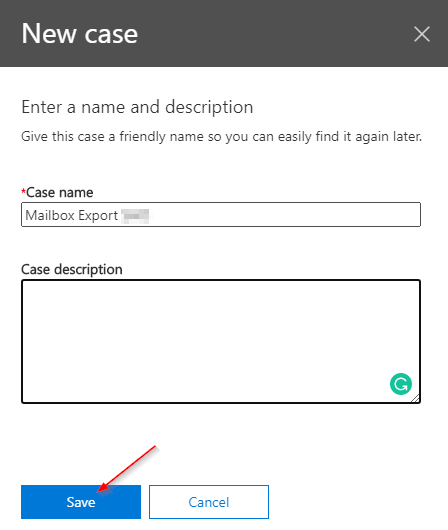
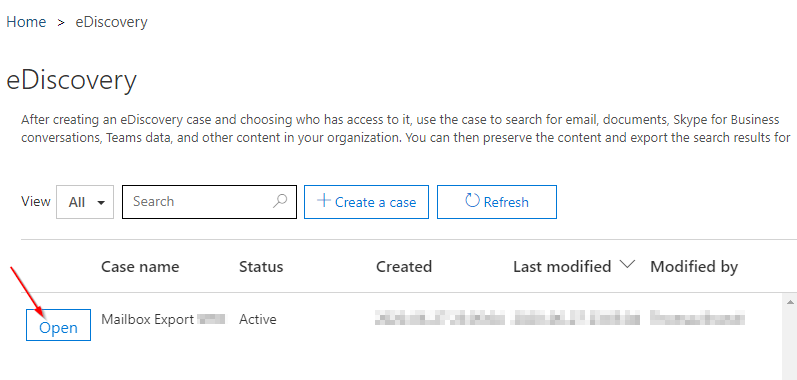
2. In the New case tab, enter a suitable name for the case under Case name. In this example, name the case as named Mailbox Export, as shown below. Now click on Save to save the case. The page automatically redirects to the case overview page, where you will find the newly created case.
3. Next, click on Open in front of the newly created eDiscovery export case (Mailbox Export) to open it and set its properties.
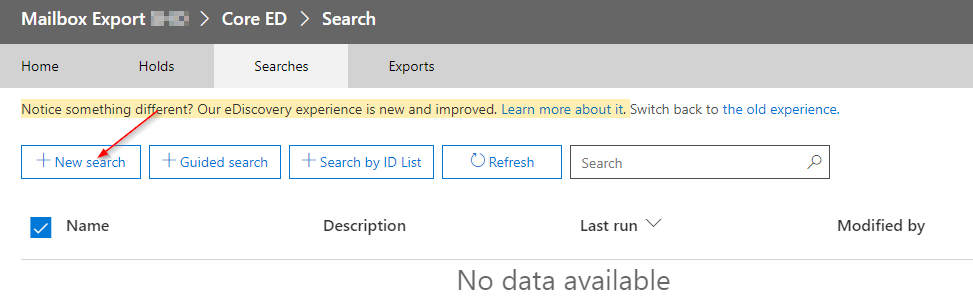
4. Click on New Search to open a new tab to define the conditions for the newly created case.
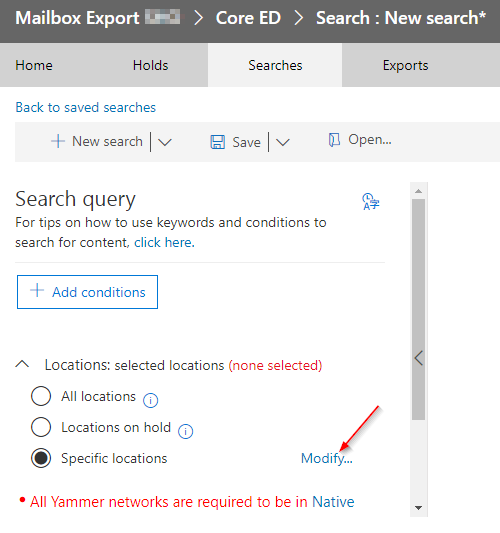
5. Select the Specific locations option under Locations, then click on Modify. A new tab will open where you’ll choose one of the available locations.
By locations, Microsoft means a service-based classification. The assumption that these are local sites is not correct for this reason.
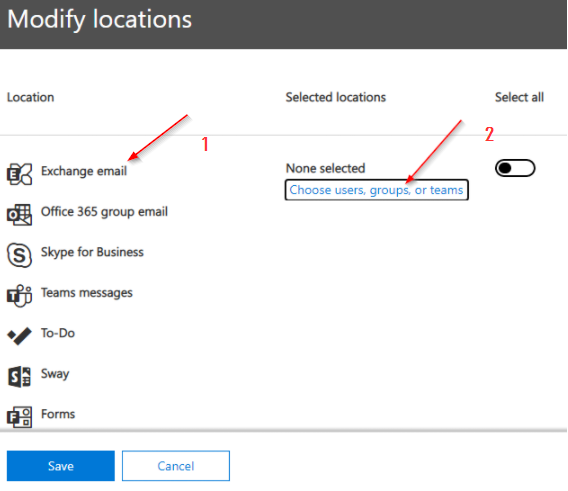
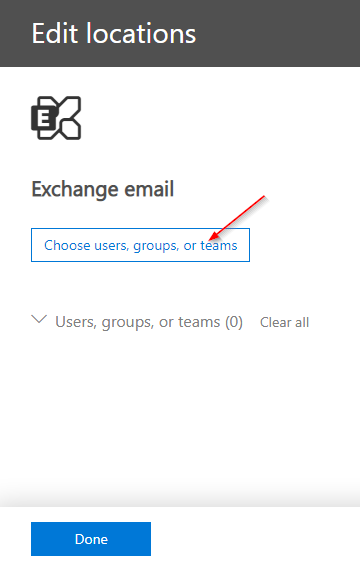
6. In the Modify locations tab, click on Exchange Email and then click on Choose users, groups, or teams to get to a list of currently assigned users.
7. Now click on Choose users, groups, or teams to fill it in.
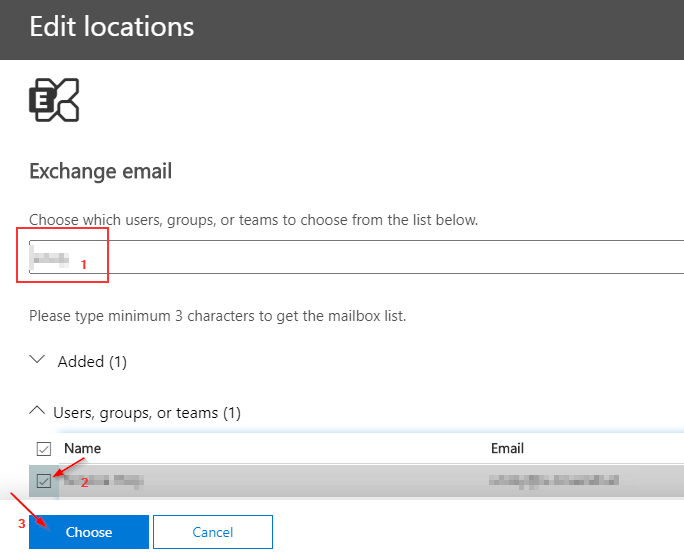
8. Search for a user in the search box to add to the Exchange email group. Once you find a user, check the box next to the user name in the list, and click Choose.
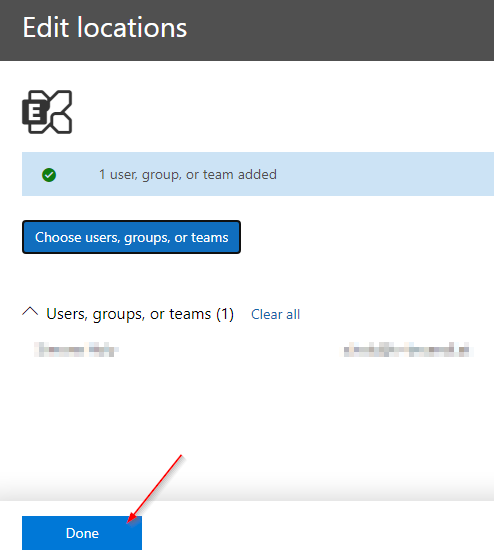
9. Click Done once you see the success message shown below to complete the selection.
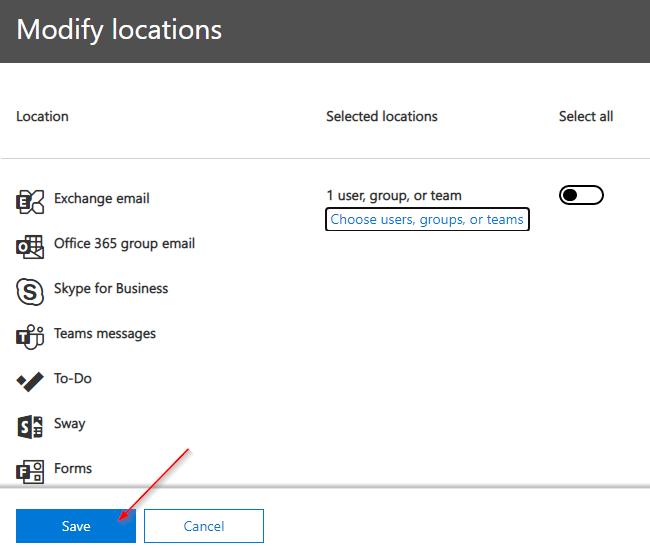
10. Finally, click on Save at the bottom-left corner of the page to finalize the location assignment. You will then return to the initial eDiscovery search condition form.
Defining Search Conditions for Keywords
When searching the entire mailbox contents, you typically use an undefined keyword condition to capture everything in the mailbox (similar to a wildcard search).
You already defined some steps previously using the location property. Now let’s set the search condition for keywords in the eDiscovery export case to find some items.
1. Back in the condition setup menu, click on Add condition and select Keywords from the drop-down.
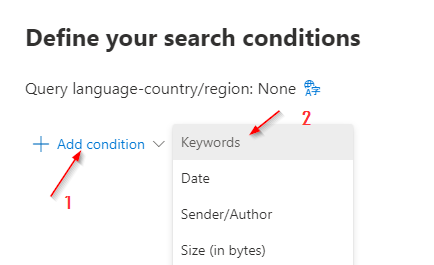
2. Leave the Keywords field empty. This form is sufficient to ensure you include all objects in a mailbox when searching mailboxes.
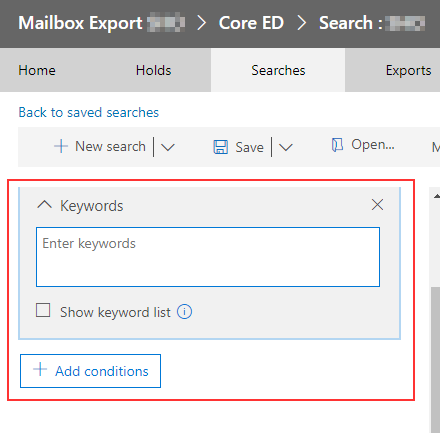
Since all email objects (e.g., mails, tasks, appointments…) should be included when exporting a PST file. You must create a keyword filter condition without specifying a keyword (similar to a wildcard search).
3. Click Save & run to continue and to launch the search under the defined conditions. The page redirects to the eDiscovery Overview form of the created case.

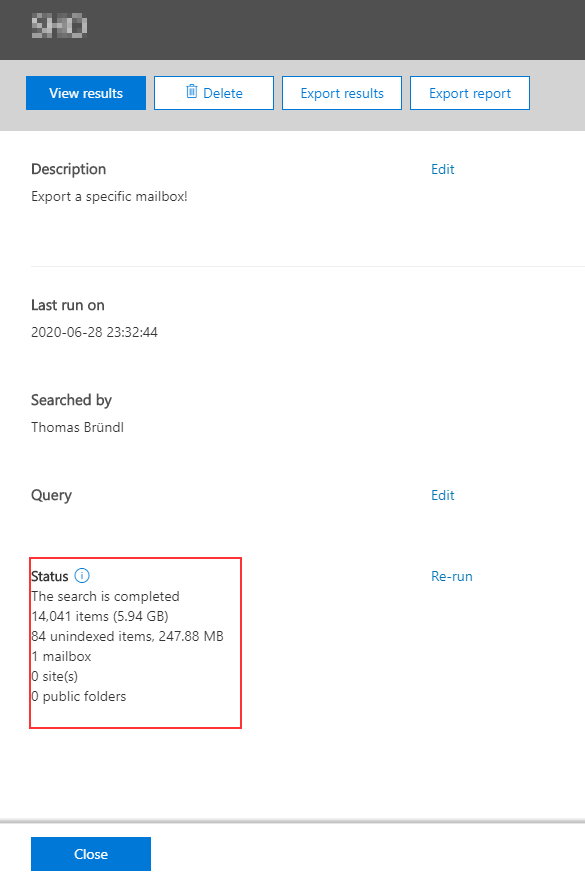
4. Now click on View results to see the status of the search progress, as shown below. All mail objects will be collected and prepared for export.
As soon as the status changes to The search is completed, you export the results in the next section.
Exporting and Downloading the Search Results in a PST File
Now that the eDiscovery search result is complete, it is time to export the results. eDiscovery allows you to export a mailbox without having a hybrid exchange environment in place.
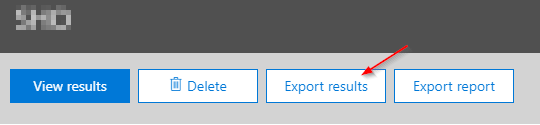
- To export the search results, select Export results shown below. A form opens where you must define the export conditions to create an export job.
When you export search results, mailbox items are downloaded in PST files or as individual messages.
2. Next, select the radio buttons All items, including ones that have unrecognized format, are encrypted, or weren’t indexed for other reasons, and One PST file for each mailbox. By selecting these options, you make all objects available in a single PST file. Now click the Export button at the lower-left corner to register this export job.

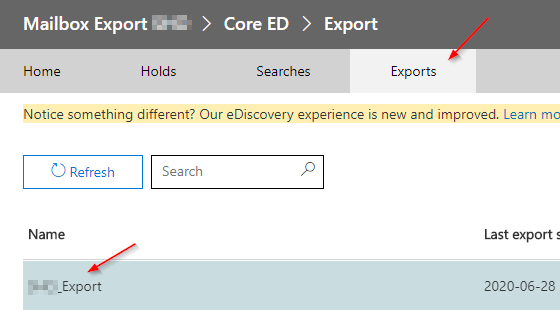
3. Click on the Exports tab to get an overview of all placed export orders, and click on the newly created export order. The name of the job is composed of the search name and the phrase _Export, as shown below.
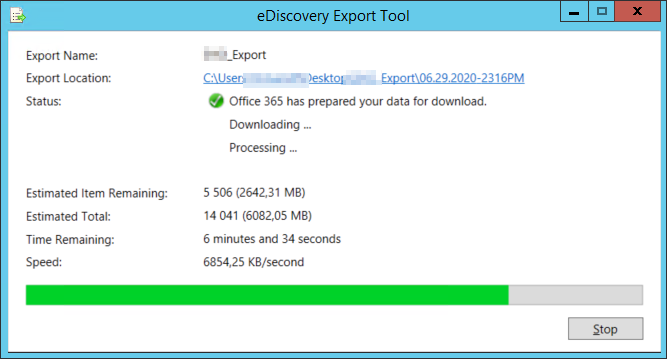
4. In the status area, click on the Refresh button to retrieve the current export status. Once all data and information are ready, click on Download results at the top of the page to start the download.
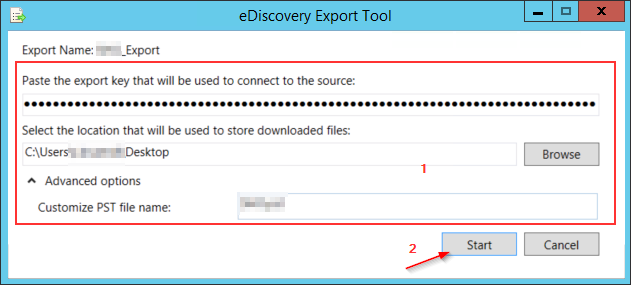
Take note of the export key or keep it in the clipboard by clicking on Copy to clipboard, as you will need it later.

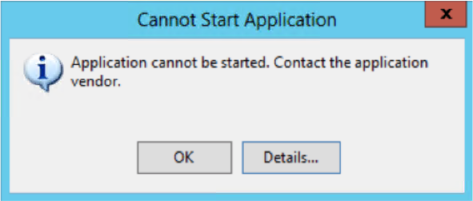
Note that you’d get the error message shown below if you started the download process in a Chromium-based browser. To avoid the error, switch to the Internet Explorer browser.
5. Now enter your previously noted export key. Specify the download path and file name and click on Start to start downloading the PST file.
6. Click on Close to finish the download process.
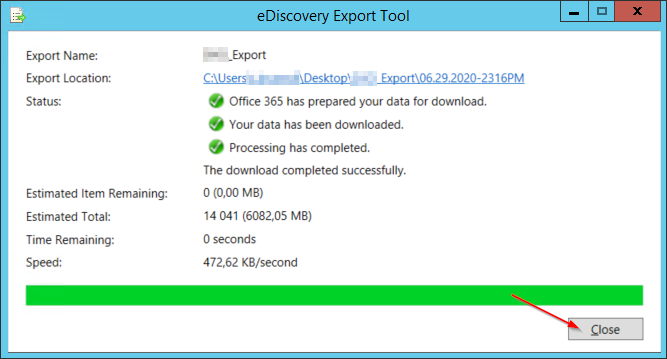
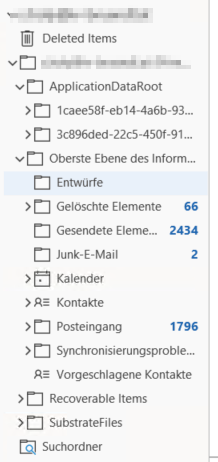
7. Finally, open the PST file in your Outlook to check whether the export was successful or not.
As soon as you open the file, your folder pane might look like the image below.
Conclusion
You should now know how to export an Office 365 PST using eDiscovery. Using Office 365 and PowerShell, you should know how to export PSTs based on various criteria. Even if this export variant cannot be 100% automated (Microsoft is still missing a full PowerShell implementation), it’s still a good fallback solution to archive a mailbox.
With this newly acquired knowledge, why not create search queries for individual mailboxes or specific mails across the entire email infrastructure of a company hosted in Office 365?


