


In any managed digital environment, user and group management is one of administrators’ most common time sinks. How do you eliminate this technological beast of burden? Automation! Google has introduced dynamic groups to the enterprise version of Workspace to allow administrators to “set it and forget it” for ongoing group management.
With the query builder (or writing your own CEL query), you can build a dynamic group once to sort and organize users based on attributes, and the group will then manage itself! And in this tutorial, you’ll learn the basics of creating and managing dynamic groups in Google Workspace Admin Console.
Stay tuned and get ready to level up your user and group management skills!
Prerequisites
This tutorial will be a hands-on demonstration. If you’d like to follow along, be sure you have the following:
- A Google account with any of these subscriptions active: Google Workspace Enterprise Standard, Enterprise Plus, Enterprise for Education, and Cloud Identity.
- A super admin account, or an account with the proper group management and user management roles, in an active Google Workspace environment.
- At least five other users in the Google Workspace directory you can assign to groups (for testing) and have attributes currently assigned to them.
Preparing and Documenting Users’ Attributes for Group Assignment
Dynamic groups in Google are created based on assigned user attributes. Determining which attributes should be used for queries when creating dynamic groups is up to the admin.
Often, these attributes are assigned to users during initial enrollment into a Google Workspace directory. Depending on the user creation method used within your domain, the number and value of attributes will vary.
Some of the user attributes you can use in dynamic group queries are as follows:
- Keywords, Department, Building ID, Organizational Unit, Email format.
- Location (city, state, zip, etc.), and Domains/Subdomains.
These examples are only a small portion of available user attributes. A complete list of user attributes and how they can be assigned is available on Google’s cloud identity webpage.
But before creating dynamic groups in the Google Admin console, you must review the users in your Workspace Directory and note which attributes will be used for queries.
To find these user attributes:
1. Log in to the Google Workspace Admin Console for your workspace domain.
2. Next, expand Directory (left panel), click on Users, and select any user from the directory list.
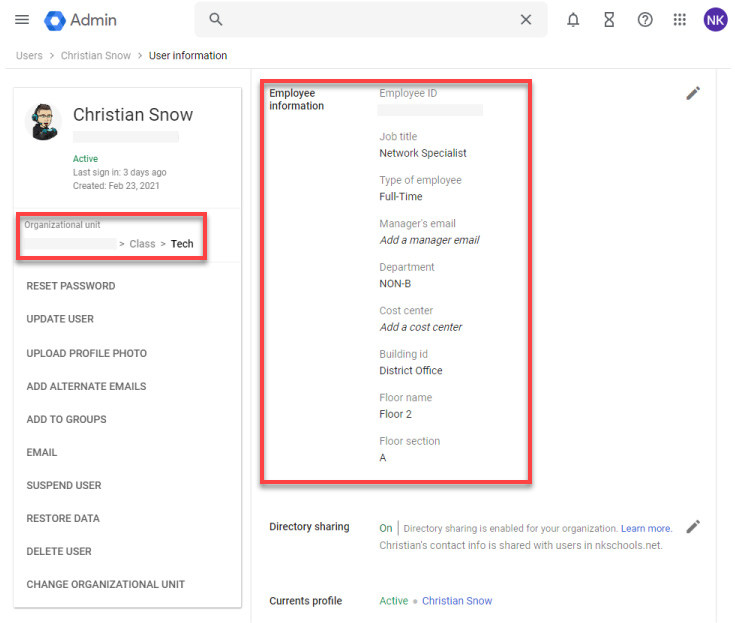
3. Now, expand the User Information panel, and you’ll see some of the currently assigned attributes, as shown below.
Creating Dynamic Group Assignments in Google Admin
There are many benefits to dynamic groups. Most notable among these benefits is the self-management of user assignment based on attributes.
But there are a couple of notable differences between dynamic and standard groups:
| Limitations | Details |
| Dynamic groups cannot have managers or owners assigned to them. | The groups are managed by Workspace administrators, similar to Google’s “Shared Drives.” |
| Dynamic groups do not allow for nesting other groups (standard or dynamic). | Only users can be members of a dynamic group. |
| Users cannot be added manually to dynamic groups. | Membership can only be changed by modifying the query. |
To create a dynamic group, follow the steps below:
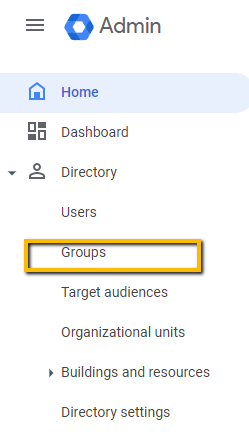
1. Expand Directory (left panel) on the Google Workspace Admin Console, and select Groups. Doing so opens the Groups page where you can manage groups.
If the Groups app does not appear in your sidebar, it may be that the app needs to be enabled for your domain.
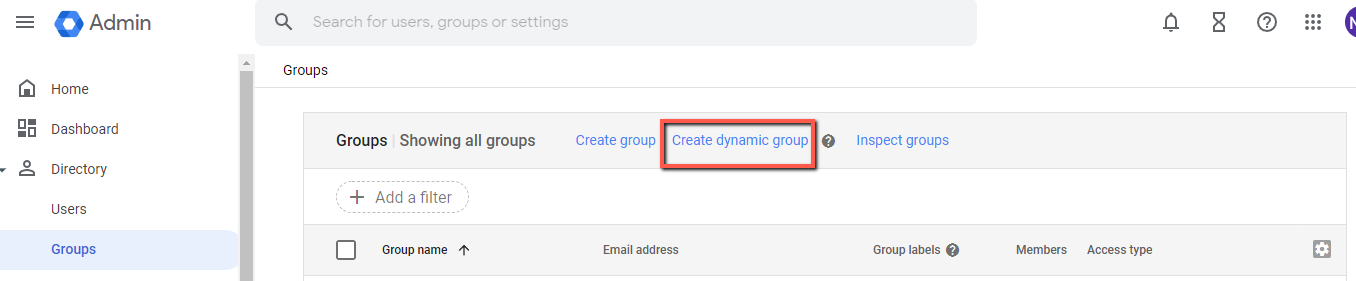
2. Next, click Create Dynamic Group on the Groups page to access the Membership Query page.
3. On the Membership query page, click on the Condition dropdown field and select a user attribute type. This attribute will be the primary attribute used in the query.
Once selected, two new fields appear on the right side of the dropdown field (step four).

4. Now, select a logic operator for the query in the middle dropdown field.
The types of logic operators in this field depend on the type of condition selected in the dropdown (leftmost). The most frequently used operators are Starts With, Equals, and/or Equals Ignore Case.
The first available logic operator always populates this field by default. In the screenshot below, the logic operator has been set to Equals Ignore Case.
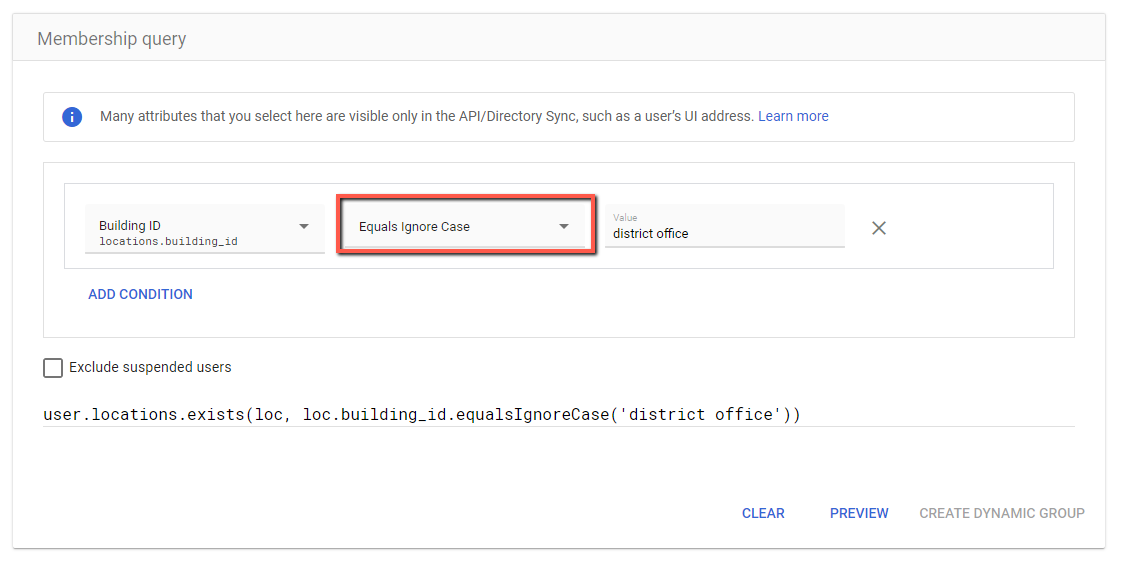
5. Populate the Value field with the term to search for in the query. In this case, the value is set to district office.
The Equals Ignore Case logic operator ensures the results are returned for any attribute matching the string “district office” regardless of capitalization.
If you do not want results to return users marked as suspended, tick the Exclude suspended users checkbox below the query builder.
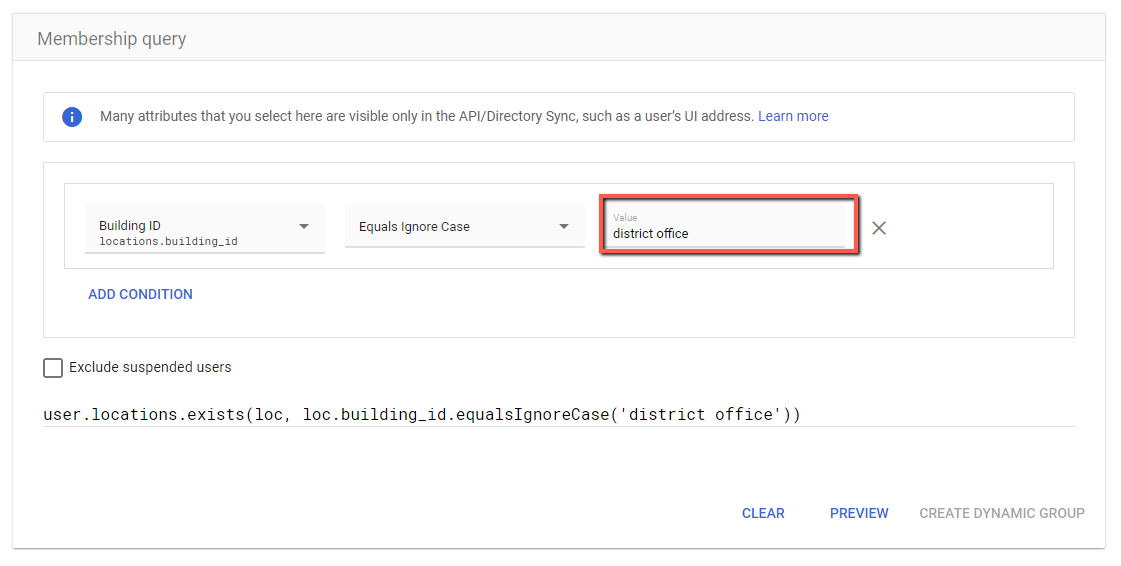
As you populate the query builder, a query string populates, as shown below.
The query is constructed using the Common Expression Language and references a limited list of Valid User fields for Dynamic Groups created by Google. Writing custom query strings is beyond the scope of this guide.

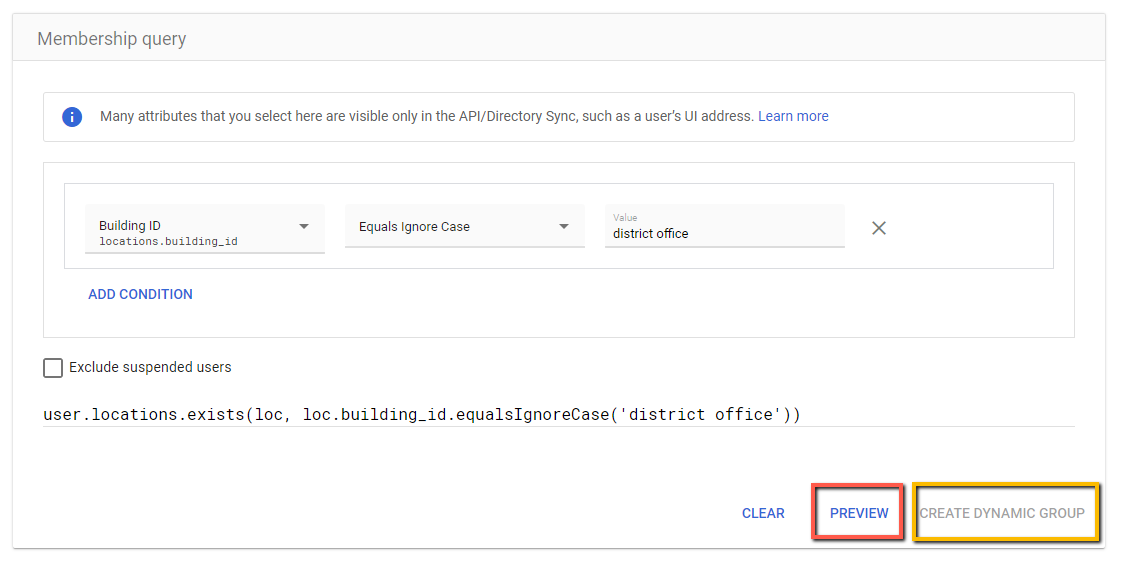
6. Next, click on the Preview button to test the group query.
The Create Dynamic Group button will be grayed until the group membership previews. This behavior ensures your query has been built and tested correctly before publishing.
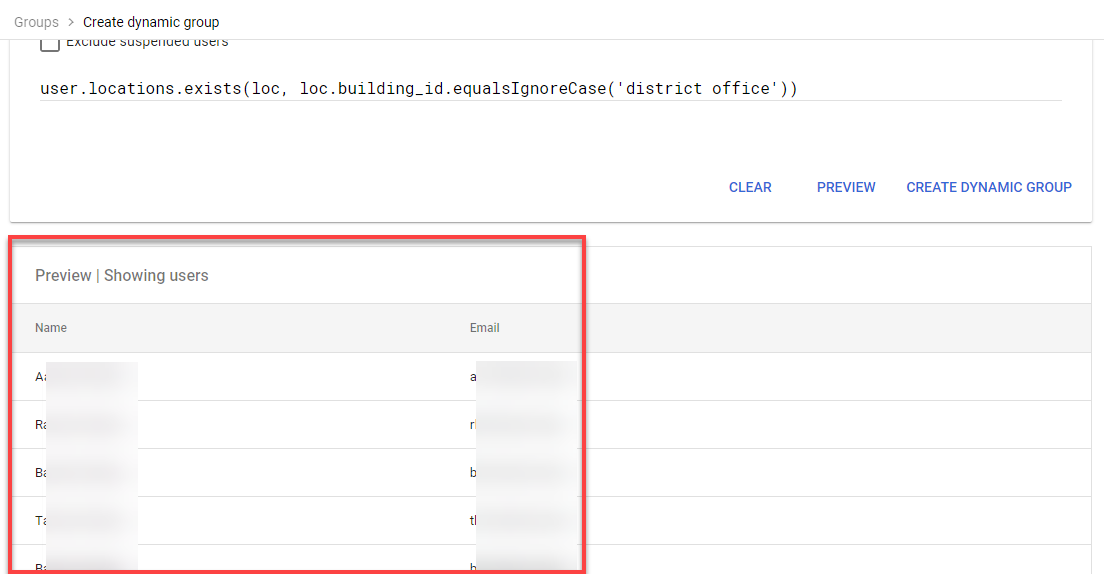
A list of results appears below the membership query builder area. In the output below, you can see several results returned based on your query.
In this case, the results returned each user with a Building ID attribute of District Office assigned to their profile.
7. Once satisfied with the results, click the Create Dynamic Group button to initiate creating the group.
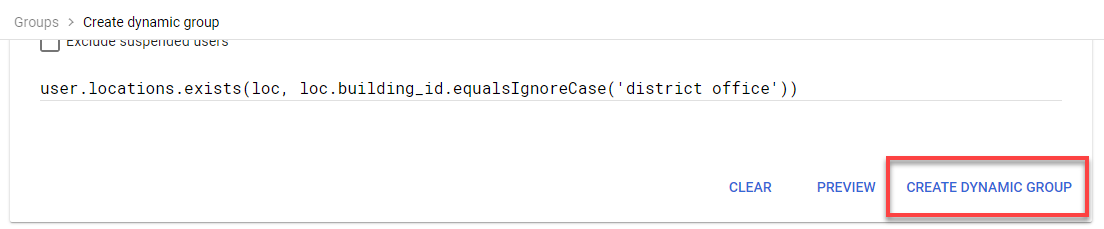
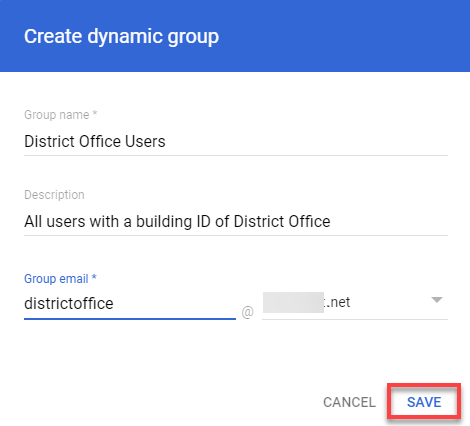
8. Finally, configure the new dynamic group with the following:
- Group name – Provide a unique name for the new dynamic group. This tutorial’s choice is District Office Users.
- Description – Add a description that distinguishes this dynamic group from the others.
- Group email – All groups must be assigned a unique email address. Group email addresses include letters, numbers, underscores, and/or hyphens.
- Click on the Save button to save the new dynamic group.
Setting Dynamic Groups Permissions
After creating dynamic groups, permissions can be set for each group. And as new users are swept into place by the dynamic query you already built, they inherit permissions automatically. This behavior leaves you with time to focus on much more essential tasks.
Since dynamic groups do not have traditional managers or owners, these settings must be modified by a workspace administrator. All group types and their settings can be modified manually through the admin console or their group settings page and through automation tools like GAM.
When making changes manually, there are two places where permissions must be set for each dynamic group:
- The first location is in the Google Workspace Admin Console, the directory, and the group profile page.
- The second location is within the Group’s settings page on the Google Groups for Business app page. Google’s Support page for Group Settings applies to dynamic and standard group settings.
But in this tutorial, you’ll make the changes in the first location:
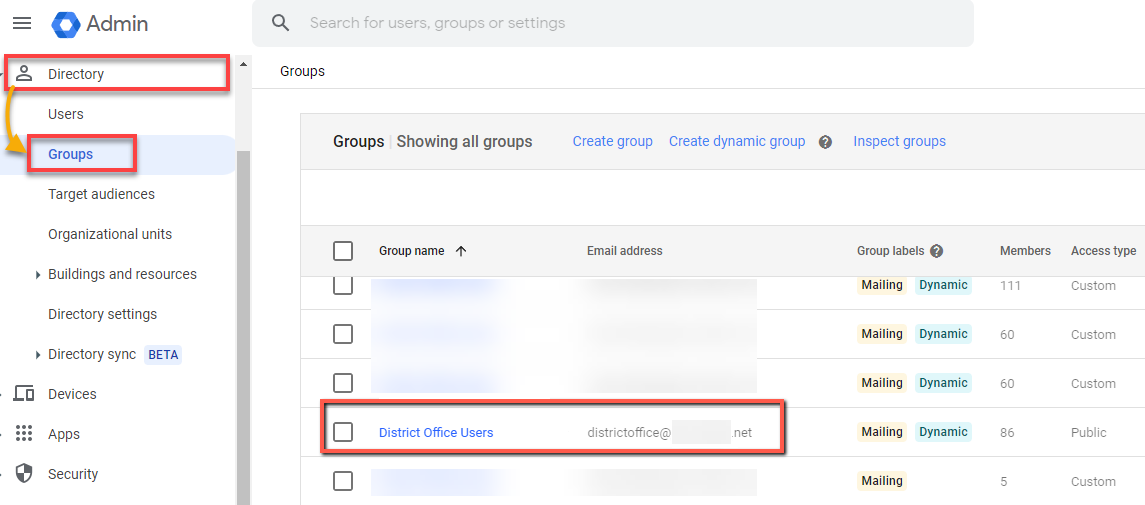
1. Expand Directory (left panel) in the Google Workspace Admin Console, and select Groups.
Search for the group you want to modify in the search box (or scroll through the list), and click on the group profile to access the group’s information page.
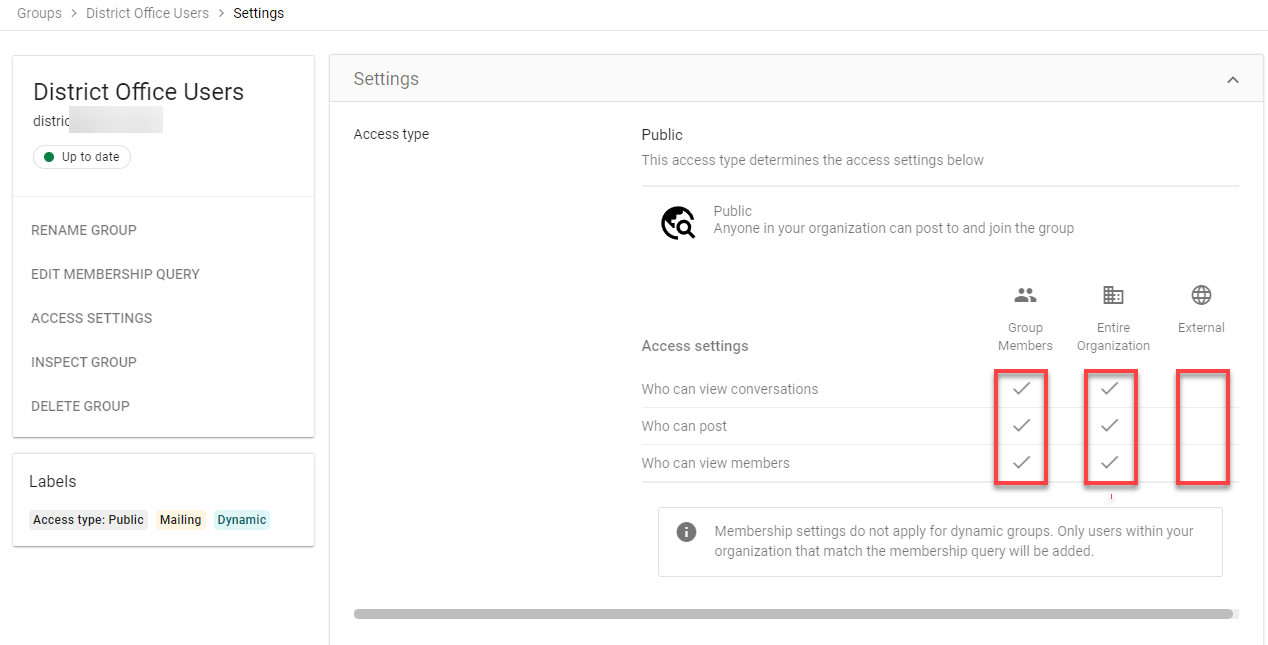
2. Next, expand the Access Settings to modify the first set of group permissions.
For each of the settings, there are three levels of permission available:
| Permission Level | Description |
| Group Members | Only direct members of the group. |
| Entire Organization | All users in the domain. |
| External | Any external user that is not a user within your Google Workspace domain. |
Tick the checkboxes for each row shown below to set permissions based on your policy or needs. These permissions are the most critical for all Groups within the domain as they determine who can:
- Email the group.
- View conversations from the group’s page.
- View members in the group.
Google Workspace can now also assign Workspace App privileges based on Group membership. But if your domain has more than 50 active users, assigning privileges using Organizational Units is a much more viable option.
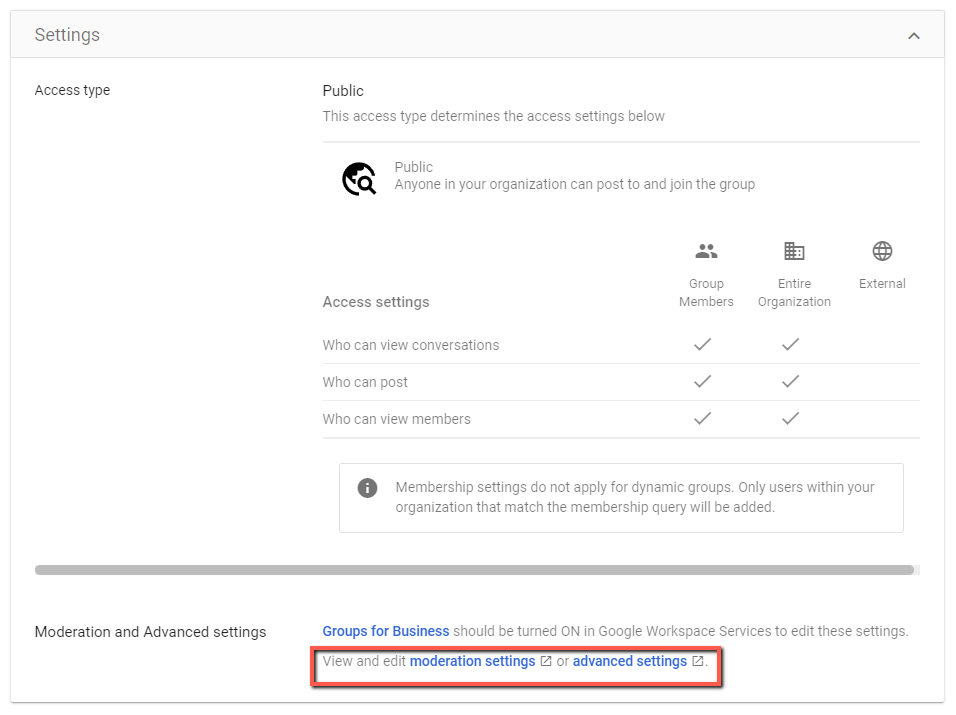
3. Lastly, modify the remaining settings within the Groups Advanced Settings page (accessed via the Moderation Settings or Advanced Settings link at the bottom).
The advanced settings for dynamic groups are identical to the settings for standard groups.
Conclusion
Dynamic groups are a non-permanent change. You can preview, save, and destroy the groups without affecting the users included. And in this tutorial, you’ve learned how to create dynamic groups and set specific permission levels.
By leveraging the power of dynamic group queries and user attributes, you eliminate the need for manual intervention (mostly). Rest assured that the correct permissions are applied as new users are added to the workspace.
Why not take this newfound knowledge to another level? Perhaps make even more refined groups by nesting conditionals or try writing your own CEL query? See what results come back!


