

Get ready to learn how to write better DFS PowerShell scripts using the knowledge you gain in this tutorial. In this post, you’ll learn all about managing DFS links in PowerShell!
Not a reader? Watch this related video tutorial!This blog post has a companion video created by TechSnips contributor, Scott Hurst. Feel free to have a watch or, if you prefer text, read on!
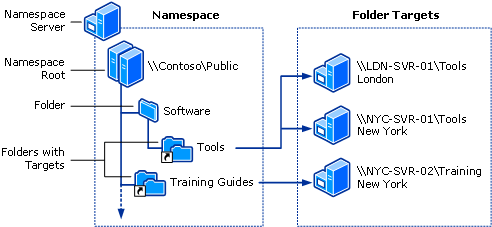
Distributed File System (DFS) Links reduce the complexity of working with network file shares. DFS Links allow users and applications to access a virtual path name to connect to shared folders. You can create DFS links with PowerShell.
Whether you’re managing Active Directory or another DFS product, writing DFS PowerShell scripts will help you wrangle whatever issues you run int.
This virtual namespace enables administrators to present shared folders located on different servers, or even change a shared folder’s location, completely transparent to that folder’s consumers.
Users will not need to update bookmarks, and applications will not be required to be updated with new paths when file servers change.
DFS Benefits
For the users, access to network share folders is simplified down to a <namespace>\FolderName format, a reduction in the complexity associated with folders stored on remote servers.
For applications, hard-coded paths to resources on the network do not have to be changed due to a change in the network path. A simple update to the DFS link and the application will continue to access the resources at their new location.
Prerequisites for the DFS Server Role
- Active Directory
- File and Storage Services role installed on a Windows Server
- Windows Server (Semi-Annual Channel)
- Windows Server 2016
- Windows Server 2012 R2
- Windows Server 2012
- Windows Server 2008 R2 Datacenter/Enterprise
Prerequisites
- An administrator account with the proper permissions
- RSAT Tools with the ‘File Services Tools – DFS Management Tools’ installed
Getting Set up for your DSC PowerShell Scripts
First, download and install RSAT. Next, you need to install all of the necessary Windows features. This will install DFS Management GUI, the DFS Namespaces module for Windows PowerShell to create DFS links with PowerShell and manage them, and command-line tools, but it does not install any DFS services on the server.
Install-WindowsFeature FS-DFS-Namespace, RSAT-DFS-Mgmt-ConCommon DFS Commands
You can administer namespaces by using DFS Management GUI, the DFS Namespace (DFSN) cmdlets in PowerShell, the DfsUtil commands, or scripts that call WMI.
Some common PowerShell commands are:
Get-DfsnRoot– Discover all DFS Namespaces in the current domain – Commonly used to check for available namespaces in the current domainNew-DfsnFolder– Create a new DFS Folder Name
– Commonly used to create a new DFS Folder in a NameSpaceNew-DfsnFolderTarget– Assign path(s) to a DFS Folder Name
– Commonly used to assign one or more network folder paths to a DFS FolderRemove-DfsnFolderTarget– Removes a path from a DFS Folder but does not remove the DFS Folder.
– Commonly used to remove one or more network folder paths from a DFS FolderRemove-DfsnFolder– Removes a folder and all its paths
– Commonly used to remove a DFS Folder from a NameSpace
Finding DFS Namespaces
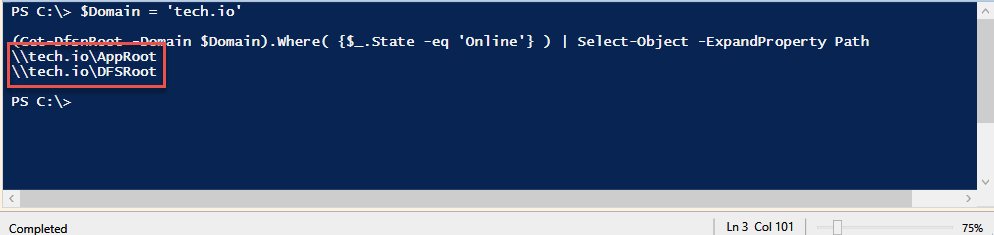
We’ll start out by getting an idea of all the online and available namespaces in the current domain using the Get-DfsnRoot cmdlet.
$Domain = 'tech.io'
(Get-DfsnRoot -Domain $Domain).Where( {$_.State -eq 'Online'} ) | Select-Object -ExpandProperty Path
This shows that there are two namespaces that are Online in this domain.
Finding DFS folders
Using the Get-DfsnFolder command we can list the DFS folders in each namespace.
$Domain = 'tech.io'
Get-DfsnFolder -Path "\\$Domain\AppRoot\*" | Select-Object -ExpandProperty Path
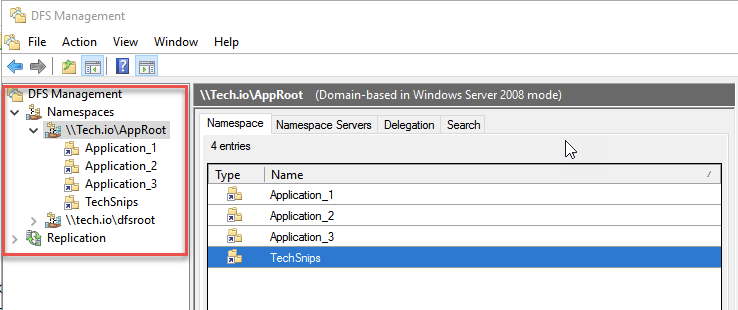
Get-DfsnFolder -Path "\\$Domain\DFSRoot\*" | Select-Object -ExpandProperty PathFrom this output, we can see that in the AppRoot namespace this is not a DFS folder named PowerShell.

Creating DFS Link Folders for DSC PowerShell Scripts
In this example, we have a replicated folder named PowerShell on our three file servers; FileServer01, FileServer02 and Datacenter.
The goal is to share this replicated folder with our admins using a single path.
To do this, we’ll create a new DFS link folder in the AppRoot namespace called PowerShell using New-DfsnFolder and point it to the datacenter server’s file share. We’ll set the DFS folder state to Online and set the TargetPath state to Online.
$Domain = 'tech.io'
try {
Get-DfsnFolderTarget -Path "\\$Domain\AppRoot\PowerShell" -ErrorAction Stop
} catch {
Write-Host "Path not found. Clear to proceed" -ForegroundColor Green
}
$NewDFSFolder = @{
Path = "\\$Domain\AppRoot\PowerShell"
State = 'Online'
TargetPath = '\\datacenter\FileShare\PowerShell'
TargetState = 'Online'
ReferralPriorityClass = 'globalhigh'
}
New-DfsnFolder @NewDFSFolder
# Check that folder now exists:
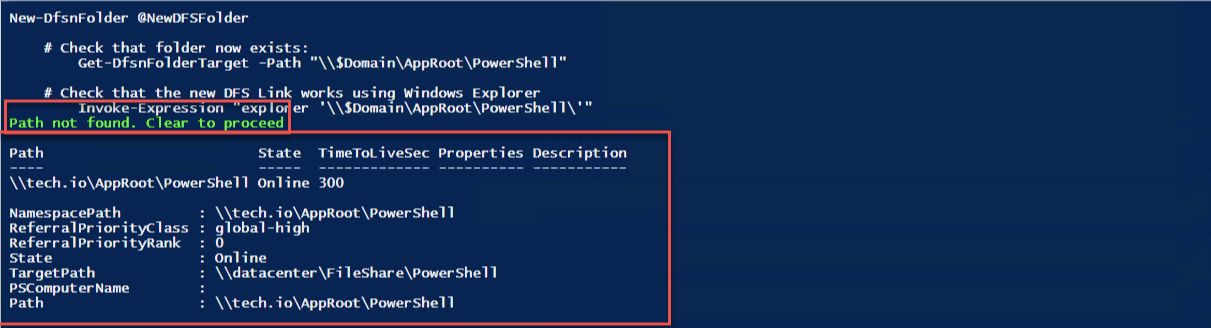
Get-DfsnFolderTarget -Path "\\$Domain\AppRoot\PowerShell"
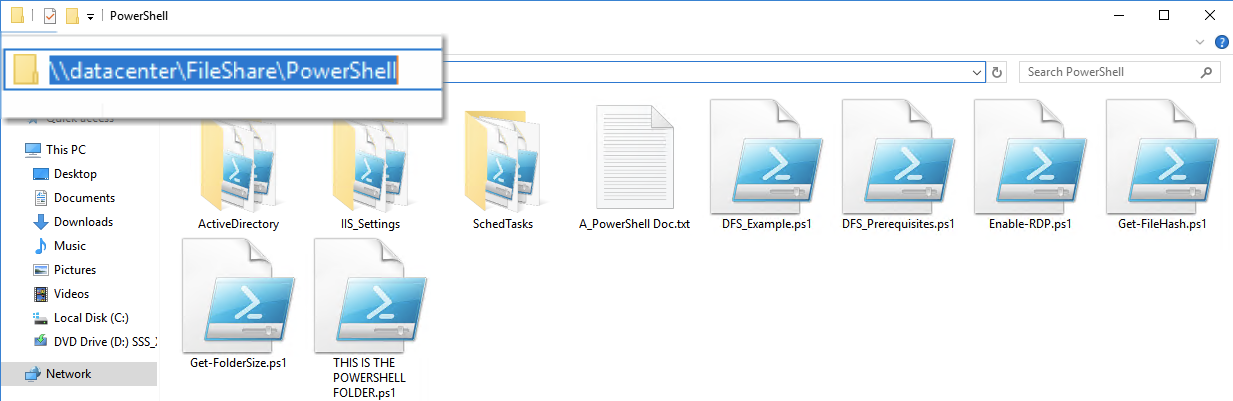
# Check that the new DFS Link works using Windows Explorer
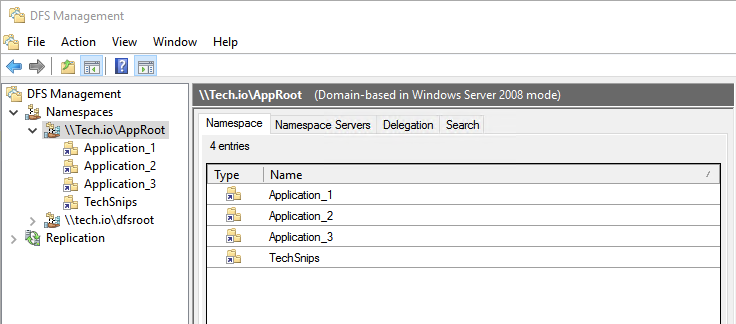
Invoke-Expression "explorer '\\$Domain\AppRoot\PowerShell\'"In the DFS Management GUI, we can see that the PowerShell DFS folder does not exist.
Let’s now execute Windows Explorer from within a PowerShell console and confirm it doesn’t exist.
Invoke-Expression "explorer "\\$Domain\AppRoot\PowerShell"If the folder does not exist it will write the output Path not found. Clear to proceed in green text in the terminal window as you can see below.
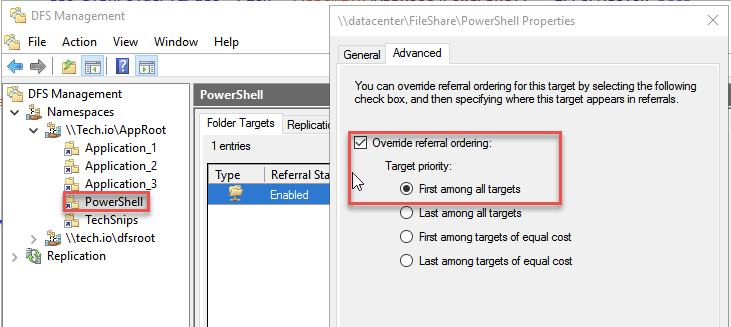
From the output we see that the folder has been created, the Referral Priority Class is set to Global-High and the State is Online.
The GUI also confirms what PowerShell told us.
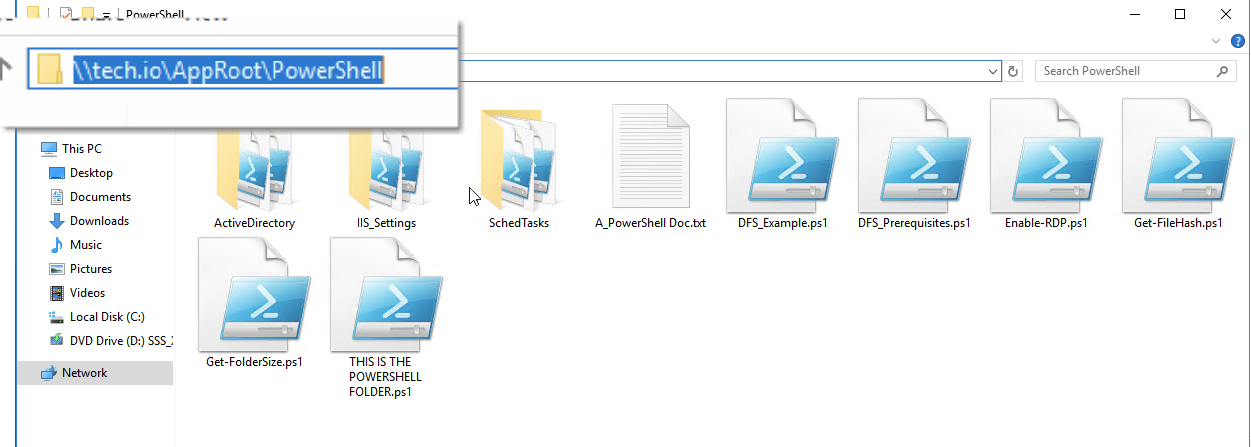
and our path is now available in Windows Explorer.
Creating DFS Folder Targets
Now that we successfully created the Powershell DFS folder in the namespace, add an additional folder target path to it and set that path as Online using New-DfsnFolderTarget. DFS PowerShell scripts allow you to add any number of components.
$Domain = 'tech.io'

## Splat the settings for easy readibility
$NewTPS = @{
    Path = "\$Domain\AppRoot\PowerShell"
    TargetPath = '\FileServer01\FileShare\PowerShell'
    State = 'Online'
}

## Add new folder located on the 'FileServer01' server & set Online
New-DfsnFolderTarget @NewTPS
Up to this point, we have two of our three server paths added, and online. For our last folder path, we want to add the path but not make it available to users. So let’s add a folder target path to our PowerShell DFS folder and this time set the DFS older Path State to offline we will again use New-DfsnFolderTarget.
$Domain = 'tech.io'
## Splat the settings for easy readibility
$NewTPS = @{
    Path = "\$Domain\AppRoot\PowerShell"
    TargetPath = '\FileServer02\FileShare\PowerShell'
    State = 'Offline'
}

## Add new folder located on the 'FileServer02' server & set to Offline
New-DfsnFolderTarget @NewTPS
## Check that folder now exists:
You can see that FileServer01 and Datacenter’s path is currently Online and FileServer02’s state has been set to Offline.

Setting DFS Folders Targets to Offline or Online
We can also change which servers are the Online and Offline hosts, and even which will be our server will be the primary host of the file path using Set-DfsnFolderTarget.
$Domain = 'tech.io'

## Splatting the settings where the path pointed at the server named FileServer01
$ChangeTPsFS1 = @{
    Path = "\$Domain\AppRoot\PowerShell"
    TargetPath = '\FileServer01\FileShare\PowerShell'
    State = 'Offline'
}

## Set folder located on the server path 'FileServer01' to Offline
Set-DfsnFolderTarget @ChangeTPsFS1

## Splatting the settings where the path pointed at the server named FileServer02
$ChangeTPsFS2 = @{
    Path = "\$Domain\AppRoot\PowerShell"
    TargetPath = '\FileServer02\FileShare\PowerShell'
    State = 'Online'
    ReferralPriorityClass = 'globalhigh'
}

## Set folder located on the 'FileServer02' server to Online
Set-DfsnFolderTarget @ChangeTPsFS2

## Splatting the settings where the path pointed at the server named Datacenter
$ChangeTPsFS3 = @{
    Path = "\$Domain\AppRoot\PowerShell"
    TargetPath = '\datacenter\FileShare\PowerShell'
    ReferralPriorityClass = 'sitecostnormal'
}

## Change Priority of 'Datacenter' server folder path to 'Normal'
Set-DfsnFolderTarget @ChangeTPsFS3
As you can see below:
- FileServer01‘s path has changed to
Offline - The Datacenter server’s
ReferralPriorityClasshas switched tositecost-normalfromglobal-high - FileServer02‘s path has changed its state to
Online - FileServer02’s
ReferralPriorityClasshas switched toglobal-high

Removing DFS folder target paths with PowerShell
I try to vaccinate my code against the fat finger flu as much as possible. Here we will try to install a safety net before removing one of the folders by making sure that it is offline before deleting it.
# Check Target Path to 'FileServer01' server to Offline & Remove the Folder Target Path
if ((Get-DfsnFolderTarget -Path "\\$Domain\AppRoot\PowerShell" -TargetPath '\\FileServer01\FileShare\PowerShell').State -eq "Offline") {
    Remove-DfsnFolderTarget -Path "\\$Domain\AppRoot\PowerShell" -TargetPath '\\FileServer01\FileShare\PowerShell' -Force:$true
}
So long FileServer01 folder!

For those who prefer to forego the safety net option, we can accommodate you, brave souls, also.
$Domain = 'tech.io'

## Splatting the settings where the path pointed at the server named 'FileServer02'
$DelFTS = @{
    Path = "\$Domain\AppRoot\PowerShell"
    TargetPath = '\FileServer02\FileShare\PowerShell'
}

##Delete the DFS FolderTarget
Remove-DfsnFolderTarget @DelFTS -Force:$true
We’ve bid adieu to the FileServer02 folder.

Removing DFS Folders
It’s has been a long and winding path, but the time for our DFS link has come to an end. We can remove the PowerShell folder and DFS link using the Remove-DfsnFolder cmdlet.
$Domain = 'tech.io'

## Delete the DFS Folder
Remove-DfsnFolder -Path "\$Domain\AppRoot\PowerShell" -Force:$true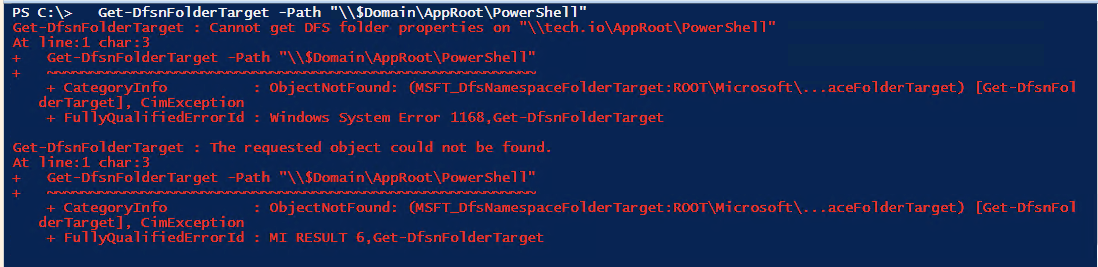
A quick double-check of the DFS Management GUI shows our DFS link is no more.
Summary
That’s it! You covered a winding road of DFS and PowerShell kung fu. By now I hope you have some acquired some code snippets to help you build better PowerShell DFS scripts!


