

Have you ever wanted to customize the look of Teams by easily creating your own cards in channels? Using a concept called Adaptive Cards, Teams allows you to create and customize various cards in Teams via JSON. You could create them by typing up some JSON but it’s much more fun to create them with incoming Teams webhooks and a little PowerShell!
Not a reader? Watch this related video tutorial!In this tutorial, you’re going to learn how to not only create Adaptive Cards with PowerShell but you’ll also learn how to create legacy cards via Teams webhooks and PowerShell too!
Microsoft 365 Backup For Dummies eBook addresses the data security challenges by outlining the out-of-the-box security features in Microsoft 365. Get eBook
Prerequisites
There are only a handful of prerequisites necessary for this article.
- Microsoft Teams
- PowerShell – Any version of PowerShell should work
Setting up a Webhook Connector in Microsoft Teams
The first step in getting started with any Teams webhook is configuring Microsoft Teams to accept incoming messages via a Teams webhook or a connector.
If your team’s Settings —> Member permissions —> Allow members to create, update, and remove connectors is selected, any team member can add, modify, or delete a connector.
To create a connector (incoming webhook):
- Open up Teams and navigate to the Team that you want to configure the Teams webhook for.
- Right-click on the channel that you intend to send the notification cards into and choose Connectors as seen in the below screenshot.

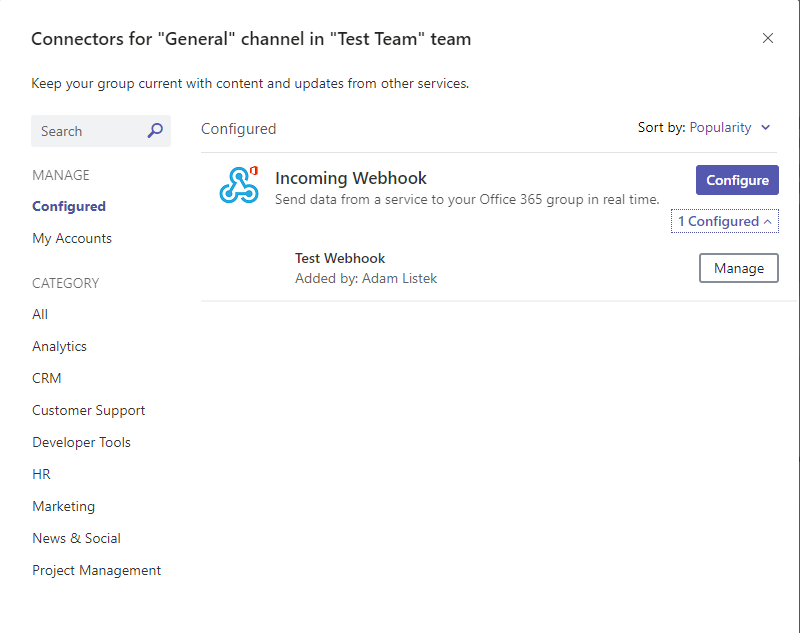
3. Locate the Incoming Webhook option and click on Add.
4. In the pop-up window, click on Add again to connect the Incoming Webhook to the channel.

5. Enter a name for the Teams webhook. This name should be descriptive of the integration that you are planning. You can also upload an optional, image if you’d like. This image will show up as the “profile” picture of the incoming card.

6. When you’re done setting up the Teams webhooks, click on Create.
7. Once you have clicked on the Create button, a unique URL will be generated that you will use to POST content to Teams. Save this URL by clicking on the copy button. You’ll need this URL later in a PowerShell script. If you don’t copy it now, you can retrieve this later via this same configuration screen.
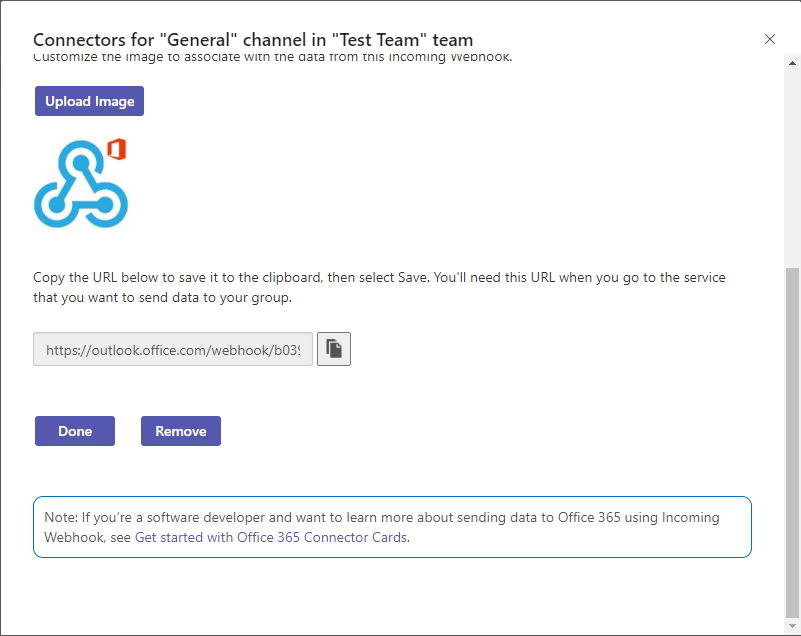
An example of this URL is shown below, and the one we will be using for the tutorial.
https://outlook.office.com/webhook/b0396d14-beb8-4c9e-97fd-35cc33c8abcd@76377818-3e78-4fc7-b06a-6eb5d4bbf18f/IncomingWebhook/6d90a61335754f7dbaf2e8ddba924a33/64a9850c-7a4d-4f2a-826b-0ff3910c408cYou can create as many connectors (Teams webhooks) as you need. You can see below an example of two different connectors for a channel. You can then manage these connectors via the Connectors window. You may want multiple connectors so you can differentiate between individual integrations.
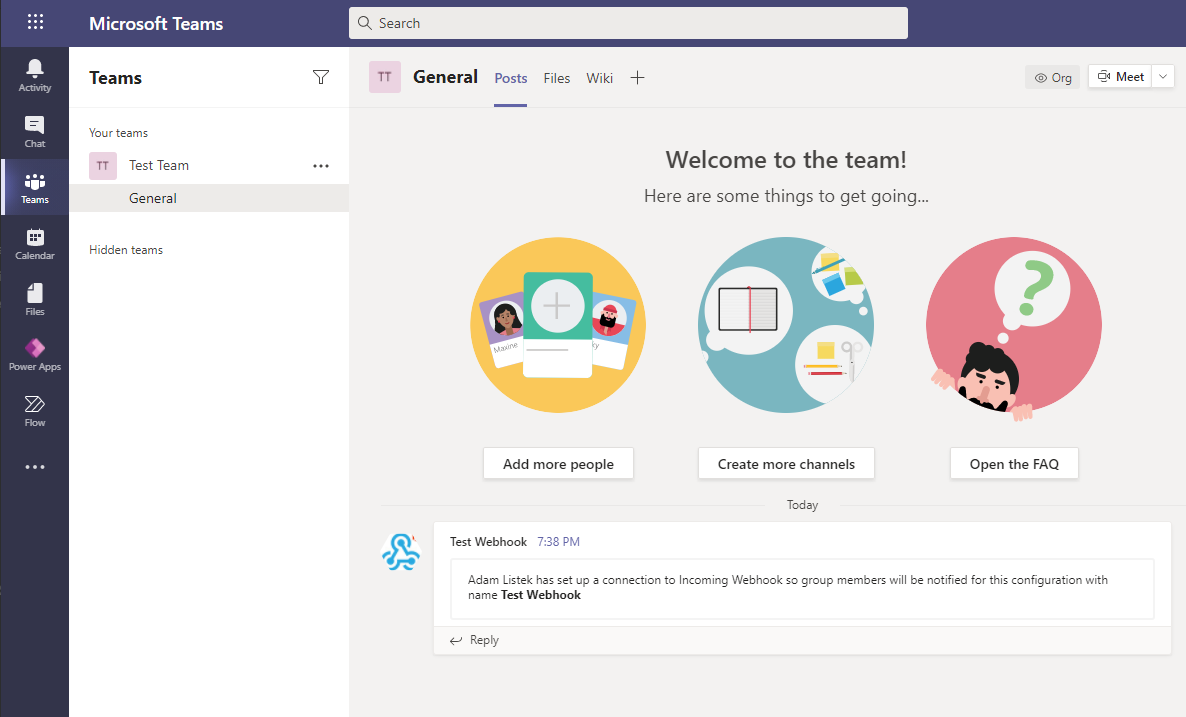
Once you have configured the webhook, the channel will display a notification that it has been added as seen below.
Now that you have a connector (webhook) created to accept messages, you can now build some PowerShell to send messages to that webhook and create some Adaptive cards!
Using PowerShell to Create Legacy Cards
Before you learn about Adaptive cards, you should first be familiar with the legacy card format. Why? Because the process to build legacy cards with PowerShell is similar to Adaptive cards and some options aren’t available with Adaptive cards. This legacy format is simplified and allows you to use different sections, images, and facts (a name-value list).
Below is an example of creating a legacy card. Notice you’re using the URI found by creating the connector earlier. Any relevant information about the code is in the comments.
$URI = '<https://outlook.office.com/webhook/b0396d14-beb8-4c9e-97fd-35cc33c8abcd@76377818-3e78-4fc7-b06a-6eb5d4bbf18f/IncomingWebhook/6d90a61335754f7dbaf2e8ddba924a33/64a9850c-7a4d-4f2a-826b-0ff3910c408c>'

# @type - Must be set to `MessageCard`.
# @context - Must be set to [`https://schema.org/extensions`](<https://schema.org/extensions>).
# title - The title of the card, usually used to announce the card.
# text - The card's purpose and what it may be describing.
# activityTitle - The title of the section, such as "Test Section", displayed in bold.
# activitySubtitle - A descriptive subtitle underneath the title.
# activityText - A longer description that is usually used to describe more relevant data.

$JSON = @{
  "@type"    = "MessageCard"
  "@context" = "<http://schema.org/extensions>"
  "title"    = 'Test Card Title'
  "text"     = 'Typically used to describe the purpose of the card.'
  "sections" = @(
    @{
      "activityTitle"    = 'Test Section'
      "activitySubtitle" = 'Section Subtitle'
      "activityText"     = 'Descriptive text for the activity.'
    }
  )
} | ConvertTo-JSON

# You will always be sending content in via POST and using the ContentType of 'application/json'
# The URI will be the URL that you previously retrieved when creating the webhook
$Params = @{
  "URI"         = $URI
  "Method"      = 'POST'
  "Body"        = $JSON
  "ContentType" = 'application/json'
}

Invoke-RestMethod @Params
Once you run the above code, you’ll see a resulting card message appear in the Teams client (web, desktop, or mobile). This message will look like the below example, formatted according to the code laid out above.
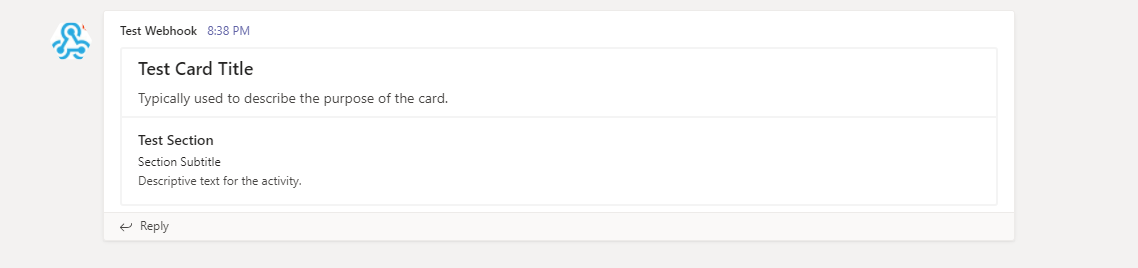
You can have multiple sections that contain data such as facts which are definition list items. Additionally, you have items such as heroImage, actions, and groupings. Next, we will talk about how adaptive cards take your messaging to the next level.
Enhancing Messages with Adaptive Cards
Now that you have seen how legacy cards work, let’s explore Adaptive Cards and how they can enhance the display of cards in Microsoft Teams. In the example below is one interpretation of the same card that was done above. As you can see, there is far more verbosity to the syntax than in the original legacy example.
You may notice that the
[Ordered]type is used occasionally, this creates an ordered dictionary. When troubleshooting, it maintains the attribute order, whereas a traditional hashtable would not. This is not necessary, but convenient.
$URI = '<https://outlook.office.com/webhook/b0396d14-beb8-4c9e-97fd-35cc33c8abcd@76377818-3e78-4fc7-b06a-6eb5d4bbf18f/IncomingWebhook/6d90a61335754f7dbaf2e8ddba924a33/64a9850c-7a4d-4f2a-826b-0ff3910c408c>'

# type - Must be set to `message`.
# attachments - This is the container for the adaptive card itself.
# contentType - Must be of the type `application/vnd.microsoft.card.adaptive`.
# content - The header and content of the adaptive card.
# $schema - Must have a value of [`http://adaptivecards.io/schemas/adaptive-card.json`](<http://adaptivecards.io/schemas/adaptive-card.json>) to import the proper schema for validation.
# type - Set to the type of `AdaptiveCard`.
# version - Currently set to version `1.0`.
# body - The content of the card itself to display.

$JSON = [Ordered]@{
  "type"       = "message"
  "attachments" = @(
    @{
      "contentType" = 'application/vnd.microsoft.card.adaptive'
      "content"     = [Ordered]@{
        '$schema' = "<http://adaptivecards.io/schemas/adaptive-card.json>"
        "type"    = "AdaptiveCard"
        "version" = "1.0"
        "body"    = @(
          [Ordered]@{
            "type"  = "Container"
            "items" = @( ## The different contained elements such as TextBlock or an Image.
              @{
                "type"   = "TextBlock"
                "text"   = "Test Card Title"
                "wrap"   = $true ## whether to wrap text that expands past the size of the card itself.
                "weight" = "Bolder" ## Whether to show the card as bolder, lighter, or as the default. If omitted then the text will be shown as default.
                "size"   = "Large" ## The size of the text ranging from small, default, medium, large, or extralarge. If omitted then the text will be shown as default.
              }
              @{
                "type"   = "TextBlock"
                "text"   = "Typically used to describe the purpose of the card."
                "wrap"   = $true
              }
            )
          }
          [Ordered]@{
            "type"  = "Container"
            "style" = "emphasis" ## Two different styles available are emphasis and default.
            "items" = @(
              @{
                "type"   = "TextBlock"
                "text"   = "Test Section"
                "weight" = "Bolder"
                "wrap"   = $true
              }
              @{
                "type"   = "TextBlock"
                "text"   = "Section Subtitle"
                "size"   = "Small"
                "wrap"   = $true
              }
              @{
                "type"   = "TextBlock"
                "text"   = "Descriptive text for the activity."
                "wrap"   = $true
              }
            )
          }
        )
      }
    }
  )
} | ConvertTo-JSON -Depth 20

$Params = @{
  "URI"         = $URI
  "Method"      = 'POST'
  "Body"        = $JSON
  "ContentType" = 'application/json'
}

Invoke-RestMethod @Params
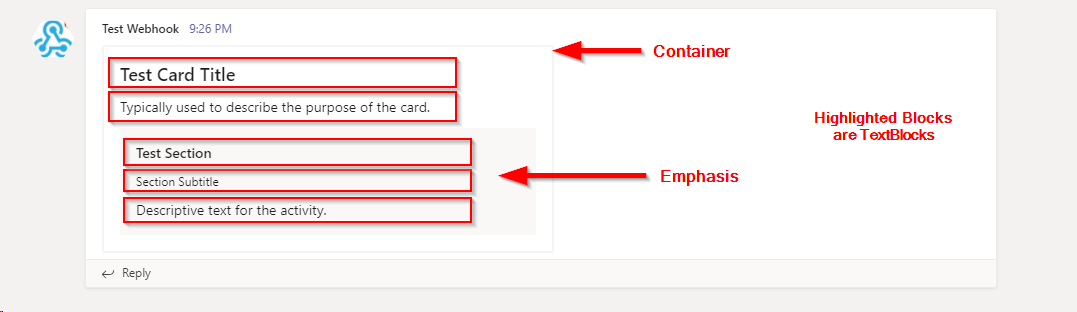
Once you’ve created the adaptive card by calling the Teams webhook with the code above, open up Teams and you’ll see the various elements you’ve created.
Expanding our Display
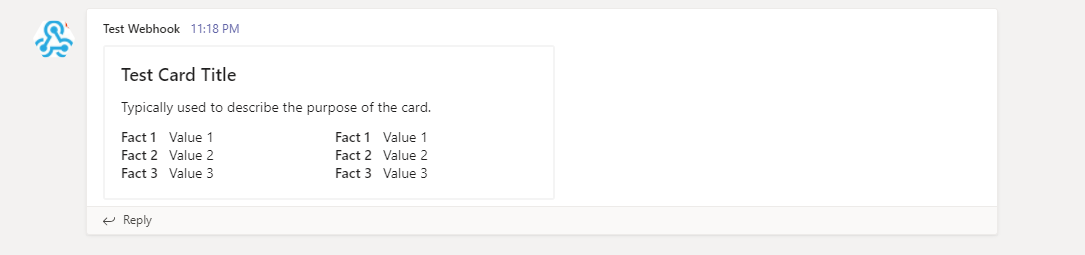
In the previous section, you saw a demonstration of a simple Adaptive card. Let’s now demonstrate creating a card with two columns and a list of facts or definition lists. In this example, you are using ColumnSet and FactSet to create the columns we want and the list of facts to display. The code and comments do not demonstrate all available options but a subset that is useful to demonstrate how this works.
# Columns Options:
# width - This can be of the type "auto" or "stretch". Stretch means that it will expand to fill the available container width whereas auto only expands to the content itself.

# FactSet Options:
# title - The title of the fact to display, in bold.
# value - The associated value of the fact.

[Ordered]@{
  "type"  = "Container"
  "items" = @(
    @{
      "type"   = "TextBlock"
      "text"   = "Test Card Title"
      "wrap"   = $true
      "weight" = "Bolder"
      "size"   = "Large"
    }
    @{
      "type" = "TextBlock"
      "text" = "Typically used to describe the purpose of the card."
      "wrap" = $true
    }
  )
}
[Ordered]@{
  "type"    = "ColumnSet" ## With ColumnSet we get the ability to divide content into columns and a variety of display formatting methods.
  "columns" = @(
    @{
      "type"  = "Column"
      "width" = "stretch"
      "items" = @(
        @{
          "type"  = "FactSet" ## FactSet is similar to that of the Facts list in the original legacy card type.
          "facts" = @(
            @{
              "title" = "Fact 1"
              "value" = "Value 1"
            }
            @{
              "title" = "Fact 2"
              "value" = "Value 2"
            }
            @{
              "title" = "Fact 3"
              "value" = "Value 3"
            }
          )
        }
      )
    }
    @{
      "type"  = "Column"
      "width" = "stretch"
      "items" = @(
        @{
          "type"  = "FactSet"
          "facts" = @(
            @{
              "title" = "Fact 1"
              "value" = "Value 1"
            }
            @{
              "title" = "Fact 2"
              "value" = "Value 2"
            }
            @{
              "title" = "Fact 3"
              "value" = "Value 3"
            }
          )
        }
      )
    }
  )
}
That’s it! You’ve now created both a legacy card and an Adaptive card with PowerShell!
Microsoft 365 Backup For Dummies eBook addresses the data security challenges by outlining the out-of-the-box security features in Microsoft 365. Get eBook
Next Steps
As you can tell, there are big advantages to using adaptive cards over the legacy card format. With a range of display options, actions, and formatting you will be able to display cards that are of much greater use to Microsoft Teams users. With the simple method of creating adaptive cards via a webhook and Invoke-RestMethod in PowerShell, you can quickly incorporate this method in your scripts!
If you’d like to learn more, be sure to check out all of the options you have available in creating adaptive cards in the Microsoft documentation.


