


Have you been desperately trying to move or delete a file, only to be met with a frustrating error message that says, “Destination Path Too Long”? This infamous error is more common than you might think, turning the simplest file management tasks into a digital labyrinth.
But fear not! In this tutorial, you’ll learn battle-tested strategies to conquer the “Destination Path Too Long” dilemma.
Now, if you’re tired of feeling like your computer is playing hard to get, stick around to get rid of this pesky Windows error message!
Prerequisites
Before you conquer the “Destination Path Too Long” error, ensure you’re well-equipped for the journey with the following:
- A Windows computer – This tutorial uses Windows 10 for demonstrations.
- PowerShell 5.1 or later – This tutorial uses PowerShell 7.4.0.
- Administrative permissions.
- 7-zip installed – This tutorial uses 7-zip 23.01, the latest version at this time of writing.
Demystifying the “Destination Path Too Long” Error
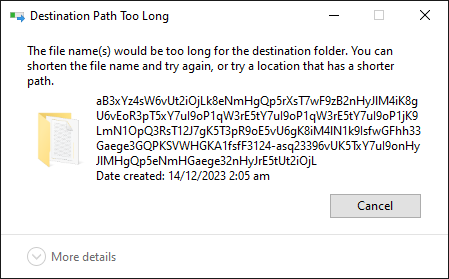
This cryptic message, “Destination Path Too Long,” like the one below, often arises from the MAX_PATH limit, a historical constraint deeply ingrained in Windows file systems. The MAX_PATH limit, set at 260 characters, has been a longstanding challenge for users dealing with deeply nested directories, intricate folder structures, and lengthy filenames.
Throughout this tutorial, you’ll unravel the intricacies of the MAX_PATH limit and unveil practical strategies to overcome this limitation.
Reducing the File Path Length by Renaming the Parent Folder
Imagine your computer suddenly decides to channel its inner Shakespeare and declares, “To move or not to move, that is the question.” But seriously, if you’ve been scratching your head over this Windows hiccup, one of the basic fixes is renaming the parent folder.
Suppose you have a folder (containing important files) with a long name that you wish to move or copy to another location. Renaming the parent folder will help avoid the “Destination Path Too Long” error.
To see how reducing the file path length works, follow these steps:
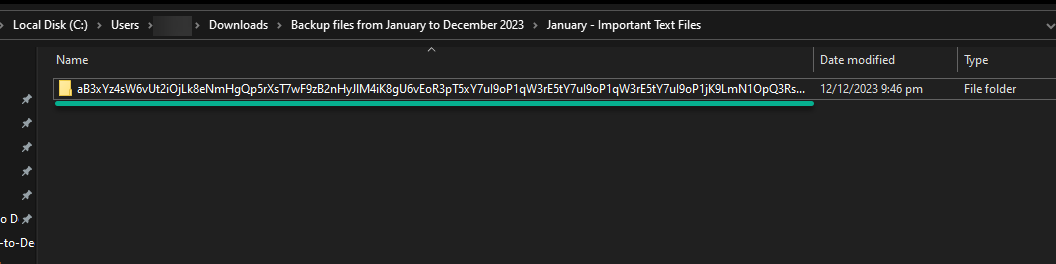
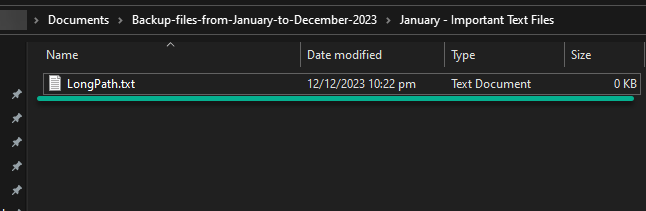
1. Locate the folder with the long path, as shown below, where the folder name is a bunch of random letters and numbers.
One of the primary culprits behind this enigmatic message is the MAX_PATH limit (260 characters) imposed by the Windows OS. This limit stands to maintain compatibility across various applications and systems.
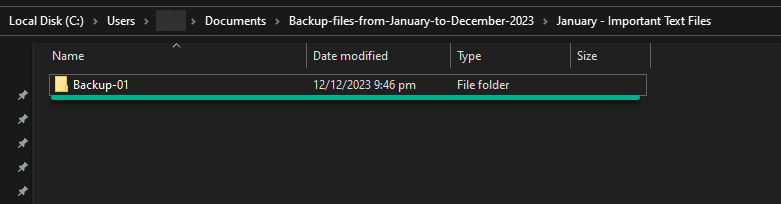
2. Rename the folder name with a shorter one (i.e., Backup-01).

3. Now, copy or move the renamed folder to your preferred location and see if you still get the “Destination Too Long Error.”
Performing File Operations on Lengthy File Paths via 7-zip
If altering the name of the folder or file isn’t a critical consideration, a quick remedy would be to rename them, which sidesteps the “Destination Path Too Long” error.
But if preserving the existing names is paramount, is there a viable approach without triggering the error? Yes, by leveraging 7-zip, a robust file compression and archiving tool.
To perform file operations on lengthy file paths via 7-zip, complete the steps below:
1. Launch the 7-zip file manager from your Start menu or desktop shortcut.
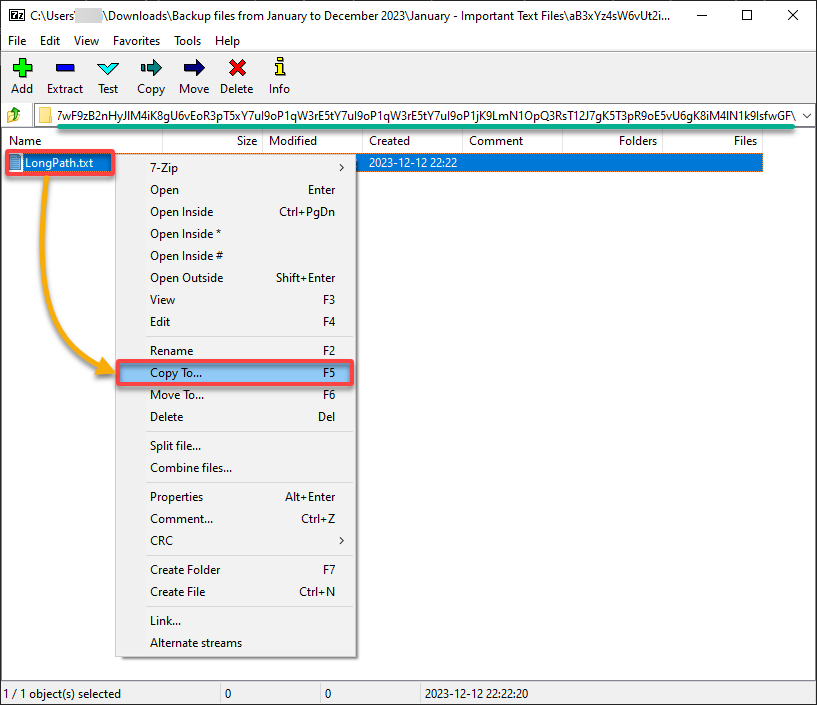
2. Next, locate and right-click on your target file or folder and choose a file operation from the context menu. But in this example, copy the file (Copy To) to another location.
Notice that the text file has a ridiculously long file path.
3. Browse the location of the file’s destination in the dialog box, and click OK to confirm copying the file.
7-zip ignores Win32API restrictions on max path lengths, which lets you perform file operations on files and directories.

4. Lastly, navigate to your target location and verify the file you copied exists.
This outcome confirms you’ve successfully copied the file, bypassing the MAX_PATH limit via 7-zip.
Enabling the Win32 Long Paths Support on Windows
Perhaps you wish to stick with Windows-based solutions instead of relying on third-party tools like 7-zip when dealing with long file paths. If so, enabling the Win32 long paths support on Windows offers a native and integrated approach to overcoming the notorious “Destination Path Too Long” error.
By unlocking Win32 long paths support, you empower your Windows system to handle lengthy file paths gracefully without needing external applications. This feature offers a tailored solution that aligns with your preference for native Windows functionalities.
Read on and explore different methods of enabling the Win32 long paths support.
Using the Registry Editor
One key avenue for enabling the Win32 long paths support lies in wielding the power of the Registry Editor. This digital control center acts as the beating heart of your Windows system, allowing you to tune settings with precision.
To enable the Win32 long paths support via Registry Editor, proceed with the following:
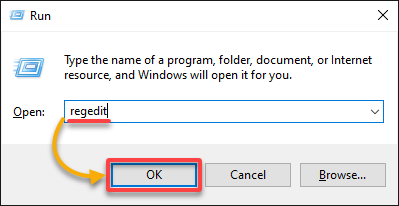
1. Open the Run dialog (Win + R), type in regedit, and press Enter (or click OK) to launch the Registry Editor.
💡 IMPORTANT: Prior to making any changes in the Registry Editor, create a backup of the registry. This backup is a safeguard, allowing you to restore the registry in case of any complications or unforeseen issues.
2. Navigate to the following key or paste the key into the address bar to access various settings and configurations related to the file system behavior.
HKEY_LOCAL_MACHINE\SYSTEM\CurrentControlSet\Control\FileSystem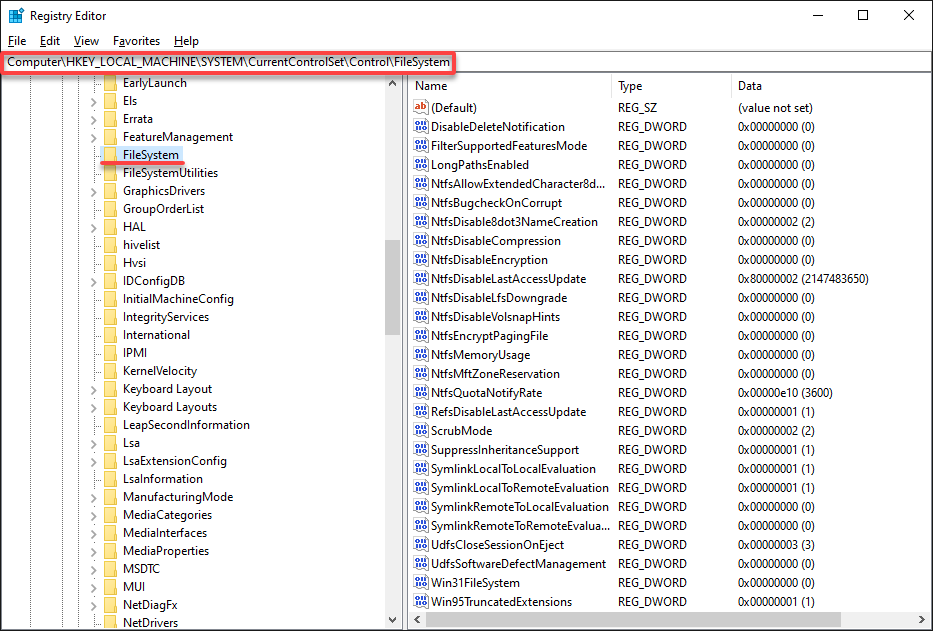
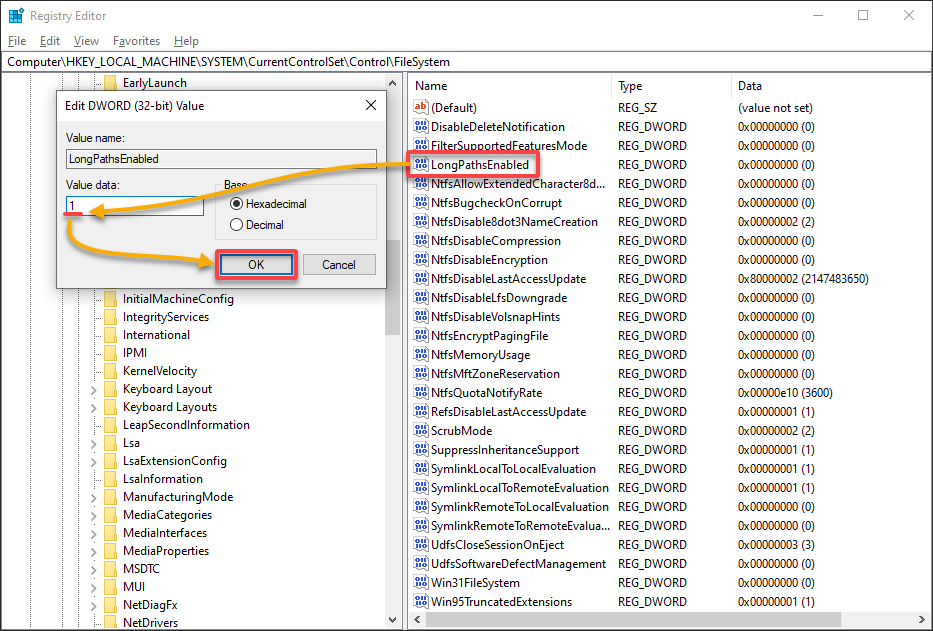
3. Look for and double-click the LongPathsEnabled entry (right-hand pane) to access its associated data and change the Value data from 0 to 1.
This entry tells the system to enable Win32 long paths support.
4. Exit the Registry Editor and reboot your Windows system to apply your changes.
5. Now, perform file operations like copying or moving files or folders with long file paths to see if you can bypass the “Destination Path Too Long” error.
💡 Unfortunately, at this time of writing, the native File Explorer in Windows 10 and Windows Server 2022 still faces limitations supporting NTFS long paths. If you often work on long file paths in your workflow, there are free third-party file managers you can turn to, like OneCommander and TotalCommander.
Using the Group Policy Editor (GPE)
Delving into the intricacies of enabling Win32 long paths support unveils a myriad of approaches, and among the most refined is harnessing the GPE. Think of the GPE as your bespoke toolkit for fine-tuning Windows functionalities.
When empowering your system with extended path capabilities, the GPE takes center stage, offering a centralized and systematic method.
To enable the Win32 long paths support via GPE, perform the following:
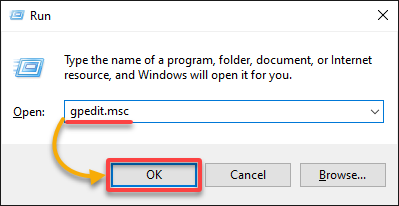
1. Open the GPE (gpedit.msc) via the Run dialog, as shown below.
The GPE is a Microsoft Management Console (MMC) snap-in that provides a GUI for managing policy settings in Windows.
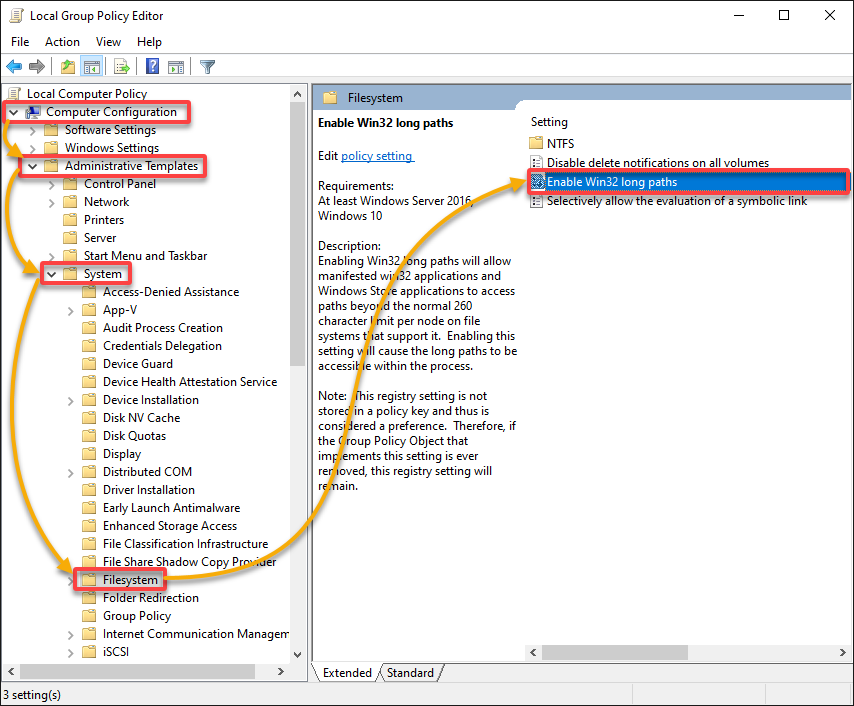
2. Next, initiate enabling the Win32 long path support in the GPE’s main window as follows:
- Navigate to Computer Configuration → Administrative Templates → System → Filesystem in the console tree (left-hand pane). Doing so lets you access the policy settings related to the filesystem.
- Look for and double-click the Enable Win32 long paths policy setting (right-hand pane). A configuration dialog for the selected policy setting appears (step three).
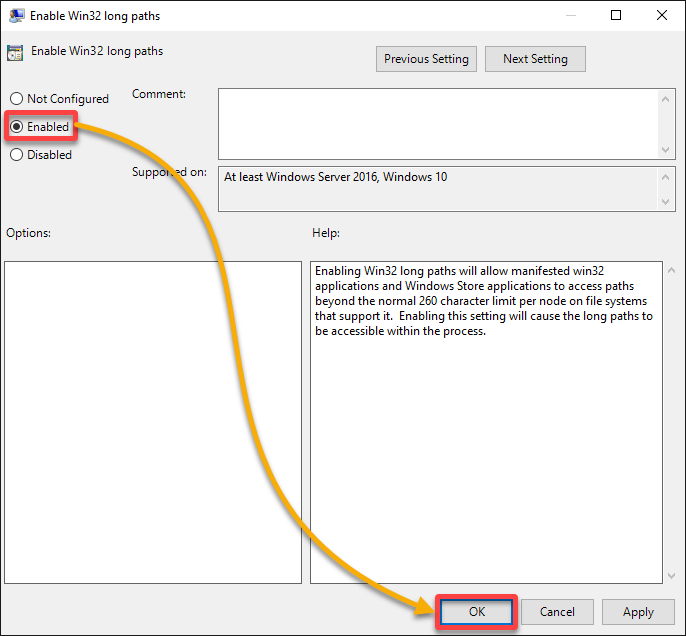
3. Subsequently, choose the Enabled option in the configuration dialog and click OK to enable the Win32 long paths support for Windows.
4. Now, copy or move files or folders with long file paths to test the Win32 long paths support.
Creating Symbolic Links for Long Paths
Besides enabling the Win32 long paths support, one other option to bypass the constraints of lengthy file paths is creating your digital shortcuts—symbolic links.
Creating a symbolic link is akin to placing a hidden door in your filing cabinet. Open it, and you will find an express lane to your files without compromising the existing structure.
To create symbolic links for long paths, carry out the steps below:
1. Launch Command Prompt as administrator, and execute the following mklink command to create a directory symbolic link (/D) in the specified destination path (i.e., C:\folder-link).
The symbolic link points to your folder with an excessively long path. Thus, replace <symlink> with the destination path and <long-path> with your long path.
mklink /D <symlink> <long-path>
2. Next, run the below dir command to check if your directory symbolic link exists.
dir <symlink>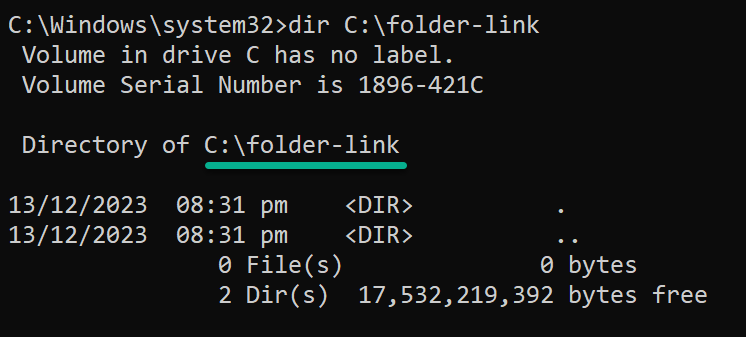
3. Inside your long path folder, create a text file named symlink.txt, which serves as proof that your symbolic link works.
💡 This tutorial uses a third-party file manager called Directory Opus, similar to XYplorer. Both are feature-rich file managers designed to enhance the file management experience on Windows.
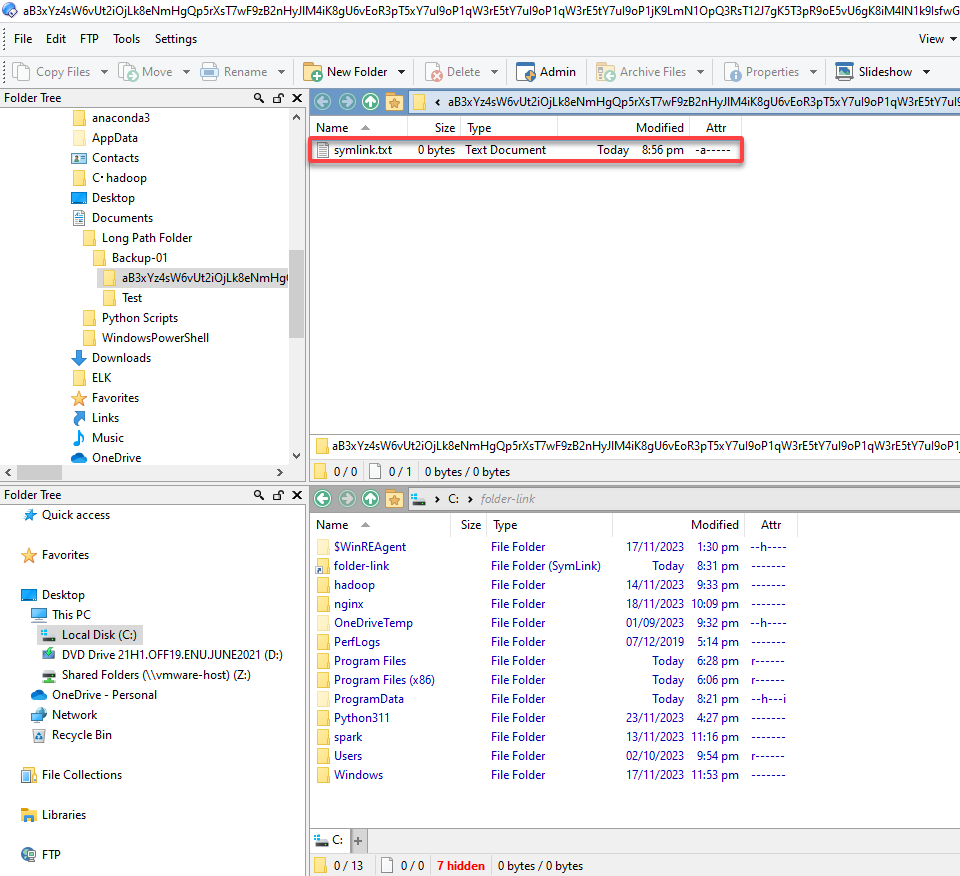
4. Lastly, locate and navigate inside your newly-created directory symbolic link in your file manager to confirm it points to your long path folder.
Now, you can copy or move files to your target folder, disregarding the MAX_PATH limit.
Employing the Robocopy Command for File Operations
Perhaps creating a symbolic link is not part of your plan, but you’re looking for a direct file operation, like copying files from and to folders with long file paths. If so, you’ll need Robocopy, a powerful solution to turn your file transfer woes into a seamless experience.
To perform file operations via the Robocopy command, proceed with these steps:
1. Open PowerShell as administrator and execute the following commands to declare variables to hold your target file’s source and destination paths.
These commands have no output, but ensure you replace <source> and <destination> placeholders accordingly.
$srcPath=<source>
$destPath=<destination>
2. Next, run the robocopy command below to copy the symlink.txt file and all its information (/COPYALL) from the source ($srcPath) to the destination ($destPath).
This command ensures the target file is copied without waiting (/W:0) or retrying (/R:0) in case of errors during the copy operation.
robocopy $srcPath $destPath symlink.txt /COPYALL /W:0 /R:0💡 Perhaps you wish to move the file to a different location. If so, replace
/COPYALLwith the/MOVEoption, as shown below. This option tellsrobocopyto perform a “cut and paste” operation.
robocopy $srcPath $destPath symlink.txt /MOVE /W:0 /R:0
The output below confirms that you’ve successfully copied one file regardless of the long path.
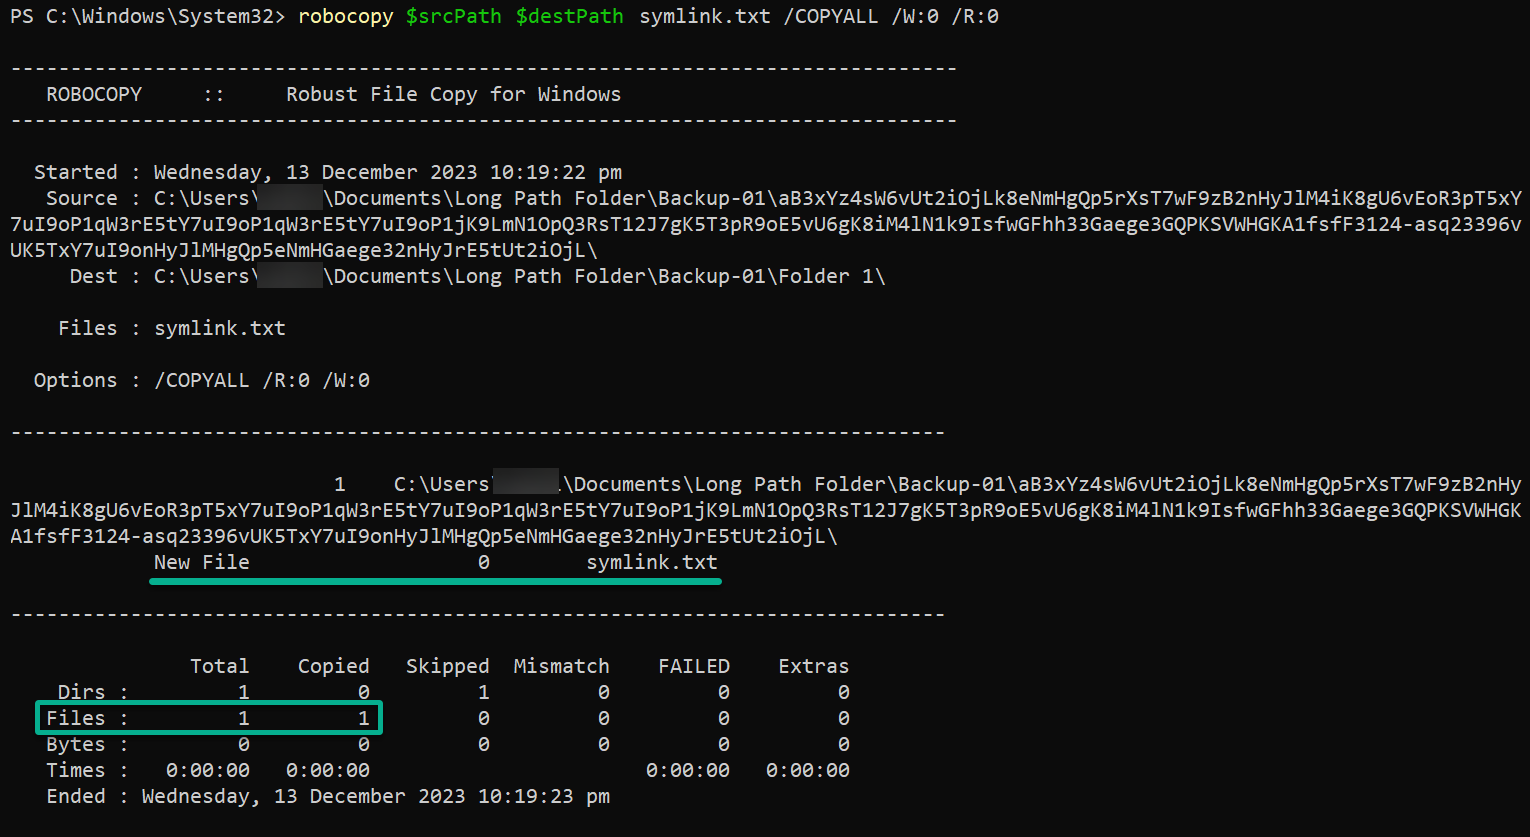
robocopy command bypassing the MAX_PATH limit3. Now, run the Get-ChildItem cmdlet below to verify the copied file exists in your specified location.
Get-ChildItem $destPath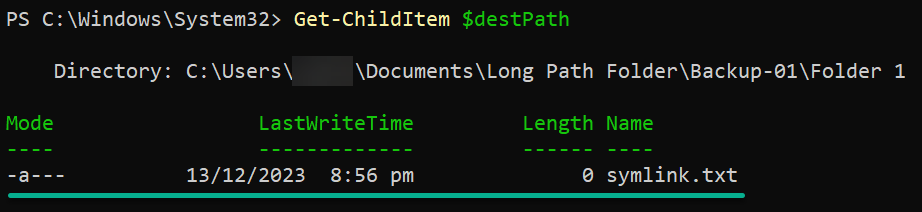
Leveraging the -LiteralPath Parameter in PowerShell cmdlets
You’ve already harnessed the power of Robocopy to navigate the intricate paths of file management. Yet, a lingering question remains: How can you further enhance your control and precision in handling file operations?
PowerShell offers cmdlets with parameters, like -LiteralPath, that let you conquer the complexities of file management.
To perform file operations using the -LiteralPath parameter, execute the following:
1. Open PowerShell as administrator and execute the following commands to declare variables to hold the path for the source file and destination paths.
Ensure you replace <source\symlink.txt> with your file’s full path and <destination> with your preferred destination path.
$srcPath=<source\symlink.txt>
$destPath=<destination>
2. Next, run the Copy-Item command below to copy the symlink.txt file to the specified destination ($destPath). The -LiteralPath lets you specify the file path in a literal manner without any wildcard character interpretation.
This command, when successful, has no output to the console, but you’ll verify the result in the following step.
Copy-Item -LiteralPath $srcPath -Destination $destPath💡 When necessary, the
-LiteralPathalso works with other cmdlets for file operations, such asMove-Item,Rename-Item, andRemove-Item.
3. Lastly, run the below Get-ChildItem command to list files and folders within the destination path ($destPath).
Get-ChildItem $destPath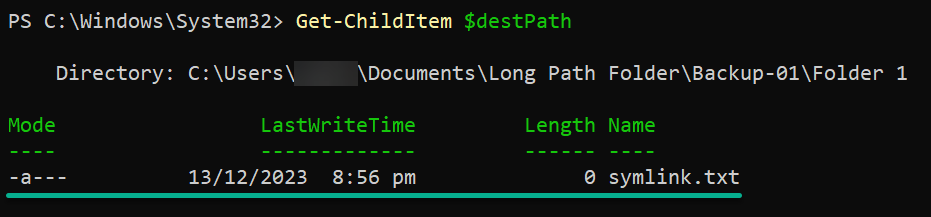
💡 While the
-LiteralPathworks as excellently as it does, this parameter is primarily used for specifying the source path or file name. But in scripting scenarios, the-LiteralPathensures your script operates on the exact paths specified, reducing the risk of errors due to unexpected character interpretations.
Extracting Archive Files via the Expand-Archive Command
Suppose you’ve downloaded an archive file (ZIP) with an absurdly long name you wish to extract without changing the name. In such cases, PowerShell’s Expand-Archive command can be a practical solution.
The Expand-Archive command allows you to unzip or extract files from an archive while providing the flexibility to handle long paths.
To extract archive files leveraging the Expand-Archive command, undertake the following:
1. Execute the following commands in PowerShell (as admin) to declare variables to hold the full path to your archive file and the destination path.
$srcPath=<source\file.zip>
$destPath=<destination>
2. With variables declared, run the below Expand-Archive command, which provides no output but extracts the archive file to your specified destination.
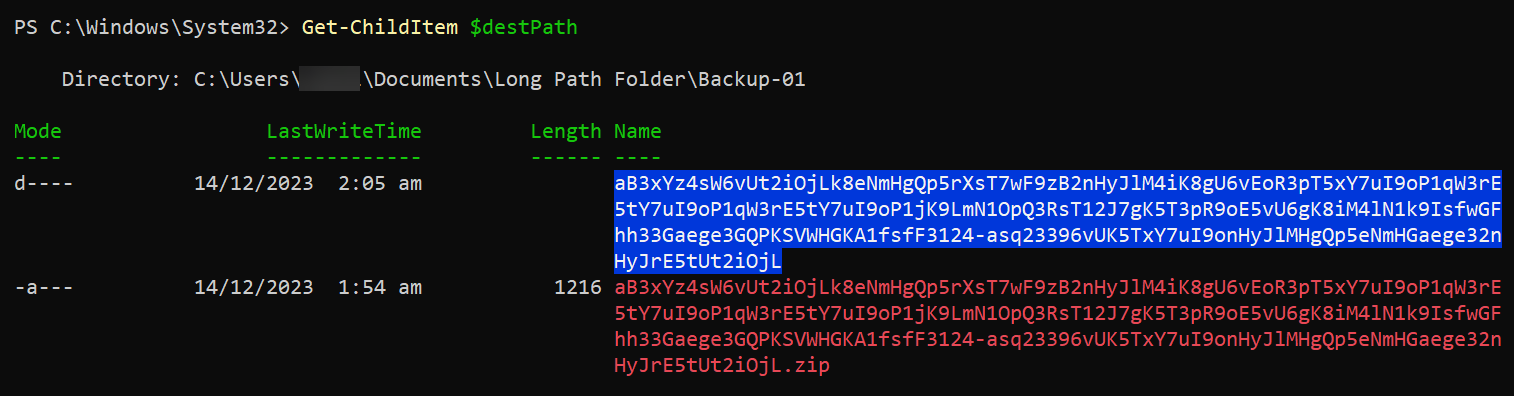
Expand-Archive -Path $srcPath -DestinationPath $destPath3. Finally, run the Get-ChildItem command below to view the list of files and folders within the destination path ($destPath).
Get-ChildItem $destPathNotice two items in the output: the archive file (text in red) and the extracted folder (highlighted in blue). This output confirms you’ve successfully extracted your archive file without triggering the “Destination Path Too Long” error.
Conclusion
Throughout this journey, you’ve covered an arsenal of strategies to conquer the notorious “Destination Path Too Long” error on Windows. You’ve explored various techniques, from renaming parent folders to the prowess of 7-zip and enabling Win32 long paths support.
Symbolic links offered a clever workaround, and the mighty Robocopy demonstrated its prowess for efficient file operations. Your dive into PowerShell showcased the utility of the -LiteralPath parameter and the Expand-Archive command. All these proved invaluable for extracting files without succumbing to path length constraints.
Now, why not consider combining these strategies to create robust solutions tailored to your specific challenges? Experiment with scripting in PowerShell, integrating symbolic links where needed, and fine-tuning your file operations with Robocopy.
Remember, the key lies not just in solving the immediate problem but also in understanding how these methods can work harmoniously to tackle a range of file-related challenges.


