


NodeJS is a popular framework for developing APIs and various other applications, but may not fit the needs of every application. Deno is a V8 JavaScript engine-based runtime built with Rust for JavaScript and TypeScript. And in this tutorial, you’ll learn how to use the Deno runtime as an alternative to NodeJS to build an HTTPS server.
Read on and start building your server!
Prerequisites
This tutorial is going to be a practical one. To follow along, be sure you have the following:
- Deno – This tutorial uses version 1.17.1
- An Ubuntu machine – This tutorial uses Ubuntu 20.04, but any OS with Git installed will work.
Installing Deno on Linux
Before building your Deno application, you first need to install Deno on your machine. Deno works on Linux, Windows, and macOS. But for this tutorial, you’ll install Deno on your Linux (Ubuntu OS).
1. Open your terminal and run the curl command below to download the Deno installation script (install.sh). The command then executes the installation script to install Deno on your machine.
curl -fsSL https://deno.land/x/install/install.sh | sh
2. Next, run the deno command below to confirm your installed Deno version.
deno --version
3. Lastly, create a project folder (mkdir), then switch to that directory. You can name the folder differently, but for this tutorial, the folder is named DenoHTTPSServer.
mkdir DenoHTTPSServer && cd DenoHTTPSServerSetting up a Deno Server
After Deno is installed, you’re ready to start building your Deno projects. Well, almost. You’ll still need to set up a Deno server by creating a TypeScript file in your project directory.
- Run the following command to create a
server.tsfile in the DenoHTTPSServer directory you’ve created previously created in the “Installing Deno” section (step three).
touch server.ts2. Open the DenoHTTPSServer/server.ts file in your preferred text editor and add the following code to the file.
The code below creates a Deno server by importing the serve function to listen to requests and return a greeting message to the client.
// Import the serve function from Deno
import { serve } from "https://deno.land/[email protected]/http/server.ts";

// Create a server handler function and return a greeting
function server(req: Request): Response {
  return new Response("Greetings from Deno");
}
//Listen to incoming requests
serve(server);
3. Now, execute the deno run command below to run your Deno server with network access to the localhost IP address enabled (--allow-net). The server will run on port 8000, which server.ts listen to by default.
deno run --allow-net server.tsYou can add the
--watchflag to automatically restart the server when a change is made to the codebase.
4. Finally, run the below curl command to test your Deno server.
curl http://localhost:8000If your server works properly, you’ll get the Greetings from Deno message as shown below.

Securing a Web Application with an SSL Certificate
At this point, your Deno application is working, but it doesn’t support HTTPS yet and is currently unsecured. So you’ll configure an SSL certificate to secure your Deno application.
You can either use a public trusted certificate or a self-signed certificate. But for this tutorial, you’ll use a self-signed certificate signed locally by the host. This setup is much more practical for proof of concept projects.
Always acquire and install a trusted certificate for your Deno applications in a production environment.
1. Run the openssl command below to generate (genrsa) a key file used for the self-signed certificate. The command creates (-out) a private key as a file called key.pem.
openssl genrsa -out key.pem
2. Next, run the below command to request (req -new) a Certificate Service Request (CSR) for the key file (key.pem) you previously generated (step one). You’ll need a CSR (csr.pem) to provide all of the input necessary to create the actual certificate.
openssl req -new -key key.pem -out csr.pem3. Finally, run the below command to generate your certificate (x509) for a private key to sign it with the public key you previously created (step two) (-signkey key.pem).
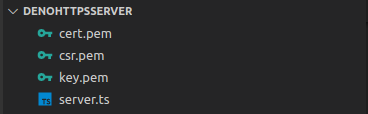
This command creates (-out) a certificate file called cert.pem with an expiry date of 9,999 days.
openssl x509 -req -days 9999 -in csr.pem -signkey key.pem -out cert.pemAt this point, your app folder structure should look like the one below.
Configuring TLS to Secure Application
You’ve successfully created an SSL certificate, but it’s not doing much right now. You’ll need to configure TLS to secure your application.
1. Open the server.ts file and replace the first line of code with the following line to import the serveTls function.
import { serve, serveTls } from "https://deno.land/[email protected]/http/server.ts";2. Next, replace the serve function you added in the “Creating a Sample Project” section (step seven) with the one below and save the changes.
The code below uses the serveTls function instead of listening to incoming requests in the application with the serve function.
The serveTls function passes the server function as the first parameter, then passes an object containing the port number, the cert.pem, and key.pem files as a second parameter.
serveTls(server, {
  port: 4000,
  certFile: "./cert.pem",
  keyFile: "./key.pem"
});
3. Execute the following command to run the server while allowing file system read access (--allow-read) since your Deno server reads cert.pem and key.pem files’ content.
deno run --allow-net --allow-read server.ts4. Finally, open your web browser and navigate to https://localhost:4000 to test your application. If all goes well, you’ll see an output like the one below.

Managing Cache in Deno
Perhaps you’re worried about messing up your web application if you change a module in your remote server. If so, caching in Deno can help.
You can keep track of all the modules used in a Deno application to a JSON file. This file stores and checks subresource integrity for modules used in your application. So even if you change the module in the remote server, your application will still work as expected.
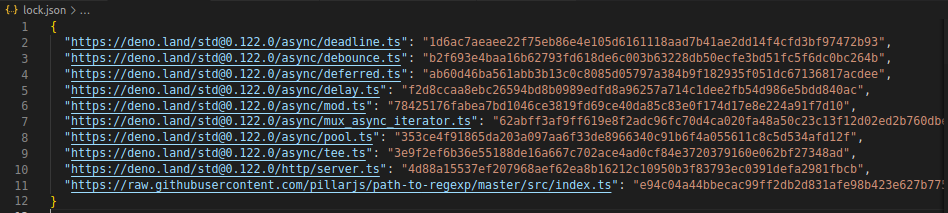
Run the deno command to create a lock file (--lock=lock.json) in your project root directory with all the hash for the dependencies used in your application.
deno cache --lock=lock.json --lock-write server.ts
Don’t forget to include the lock.json file when committing to the version control system.
Now, run the command below to download (--reload) the project’s dependencies (--lock=lock.json) into the machine’s cache (when you run your application on another computer).
deno cache --reload --lock=lock.json server.ts
Configuring NGINX for Deno Server
With your HTTPS server setup, configuring NGINX for your Deno server is time to make the server more productive. But you’ll first have to install NGINX on your machine.
1. Run the below commands to update your package repository and install NGINX on your machine.
# Update repository
sudo apt update
# Install Ngnix
sudo apt install nginx
2. Once the installation is complete, run the below command to confirm the installation. This command returns the version of NGINX installed on your system.
nginx -vIf all goes well with the installation, you’ll see an output like below.

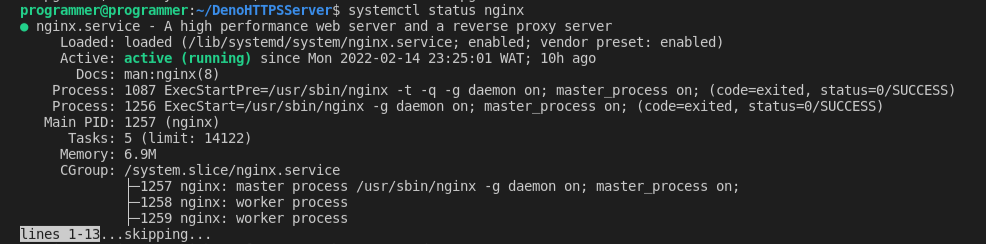
3. Run the below command to confirm the nginx server’s status and see if the NGINX server is running.
systemctl status nginxAs you see below, the NGINX status shows active (running).
If the server is not active, run the below command to start the nginx service.
sudo systemctl start nginx4. If your NGINX server is running, run the command below to copy (cp) the NGINX default configuration to create your domain name.
In this demo, the domain name is todox.co. The command creates a todox.co file in the /etc/nginx/sites-available directory.
sudo cp /etc/nginx/sites-available/default /etc/nginx/sites-available/todox.co5. Now, open the todox.co file with your preferred text editor, but this demo uses nano.
sudo nano /etc/nginx/sites-available/todox.coLocate the server_name line, replace _ value with your domain name, and add the following configuration in the location object block.
This configuration let NGINX know about the apps custom domain and how to run the app.
proxy_pass https://localhost:4000
proxy_set_header Host $host;
proxy_set_header X-Real-IP $remote_addr;
proxy_set_header X-Forwarded-For $proxy_add_x_forwarded_for;
proxy_set_header X-Forwarded-Proto $scheme;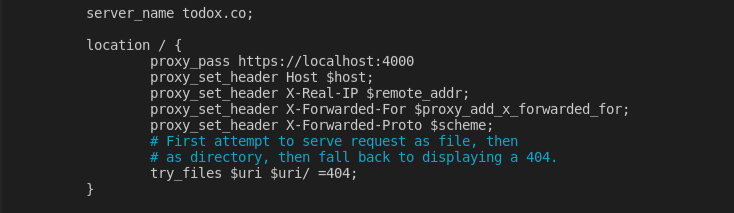
Run the below command to test (-t) your configurations. sudo nginx -t
If your configurations are correct, you’ll see an output like below.
sudo nginx -t
7. Finally, run the following command to restart your nginx server. sudo systemctl restart nginx
sudo systemctl restart nginxConclusion
In this tutorial, you’ve learned how to set up a Deno server and create a sample project with Deno. You’ve also touched on generating an SSL Certificate and configuring TSL to secure your application.
At this point, you’ve realized that you don’t always have to rely on NodeJS as Deno is just right around the corner.
Now that you’ve taken a slice of the cake, how would you build your next Deno project? Perhaps learn how to Create an HTTPS NodeJS Web Service with Express.


