


Stay ahead with your Dell software maintenance by leveraging the “Dell Command Update” tool. This essential tool rolls out continuous updates, including new features, bug fixes, and adjustments. Keeping your Dell apps updated is crucial to avoid potential issues. Let’s dive into how the Dell Command Update can streamline this process for you.
For IT professionals, “Dell Command Update” is a vital software tool. It maintains the health of Dell devices by updating drivers, BIOS, and software patches. In this tutorial, you’ll learn each step of setting up and utilizing Dell Command Update. The tool automatically detects and installs updates, ensuring your devices run smoothly and securely.
If you’re an IT professional looking to manage Dell device updates effortlessly, this tutorial is tailor-made for you. Follow the steps closely to never miss an update again!
Prerequisites
Before jumping into the tutorial, ensure you have everything needed to follow along. You’ll require a Dell PC running Windows 10 or 11 (this tutorial uses Windows 10).
Step-by-Step Guide: Installing Dell Command Update
Updating your Dell apps doesn’t have to be a daunting task. With the “Dell Command Update” tool, it’s a straightforward process!
Here’s how to get the Dell Command Update tool running on your system:
1. Begin by launching your favorite web browser and navigating to the official Dell Command Update download page.
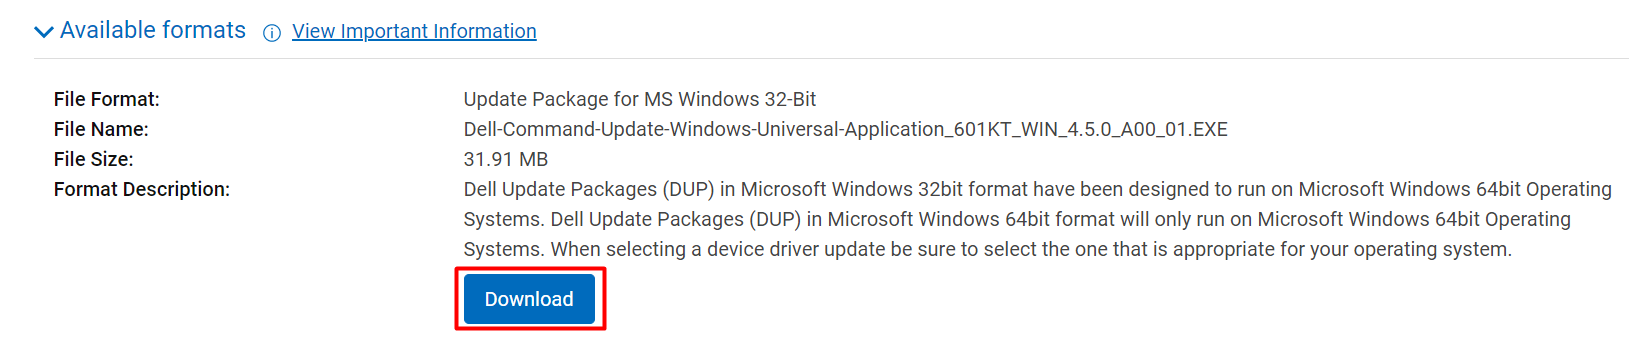
2. On the download page, look for the Available formats section and click Download to get the installer package.
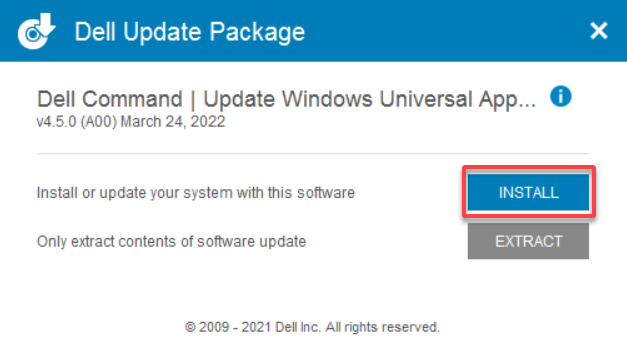
3. After downloading the installer package (a .exe file), launch it and click Install on the setup screen to begin.
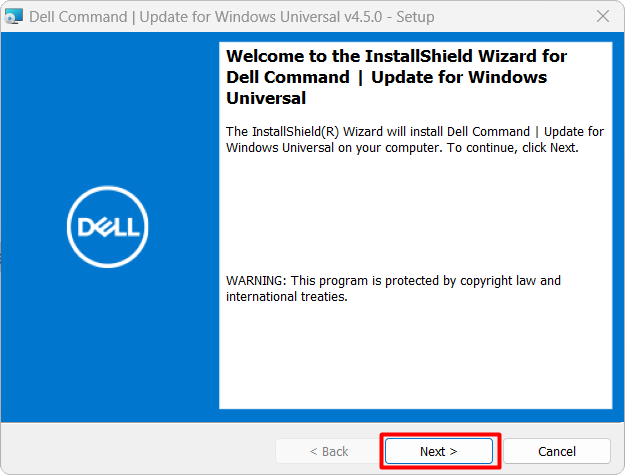
4. Proceed from the InstallShield Wizard welcome screen by clicking Next.
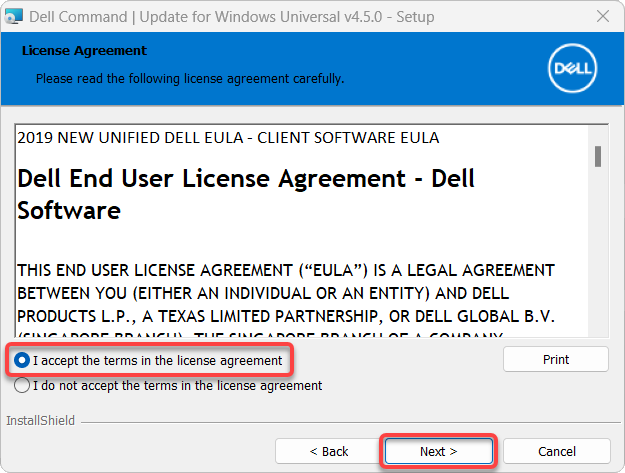
5. Accept the End User License Agreement by choosing the first option, then click Next.
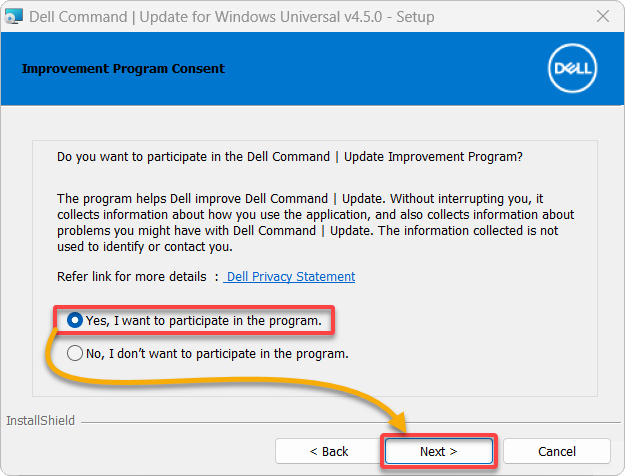
6. Choose to join the Update Improvement Program and click Next. This program enhances the Dell Command Update tool, keeping your Dell apps efficiently updated.
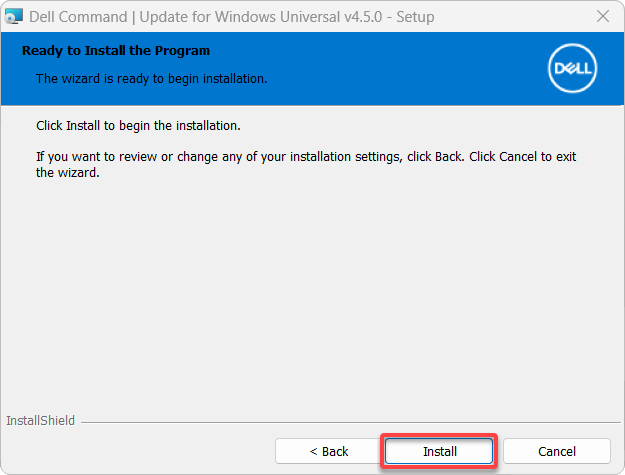
7. Finally, click Install to start installing the Dell Command Update tool on your system.
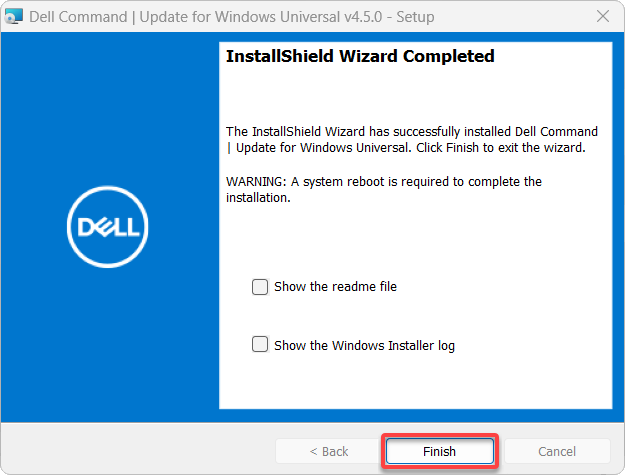
8. After installation, click Finish to close the InstallShield Wizard, completing this part of the setup for Dell Command Update.
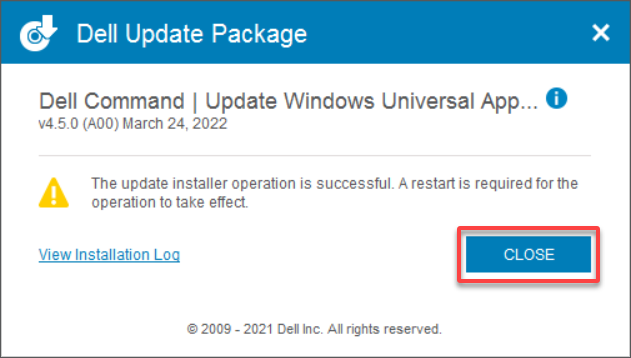
9. To finalize the installation, close any notification messages and restart your Dell PC. This ensures all components of the Dell Command Update are properly initialized.
Efficient Update Management with Dell Command Update
With Dell Command Update now set up on your system, managing updates for optimal performance, security, and device reliability becomes effortless. Remember, outdated software can lead to security vulnerabilities, performance issues, and compatibility problems with newer software.
Let’s navigate through the process of installing updates with Dell Command Update:
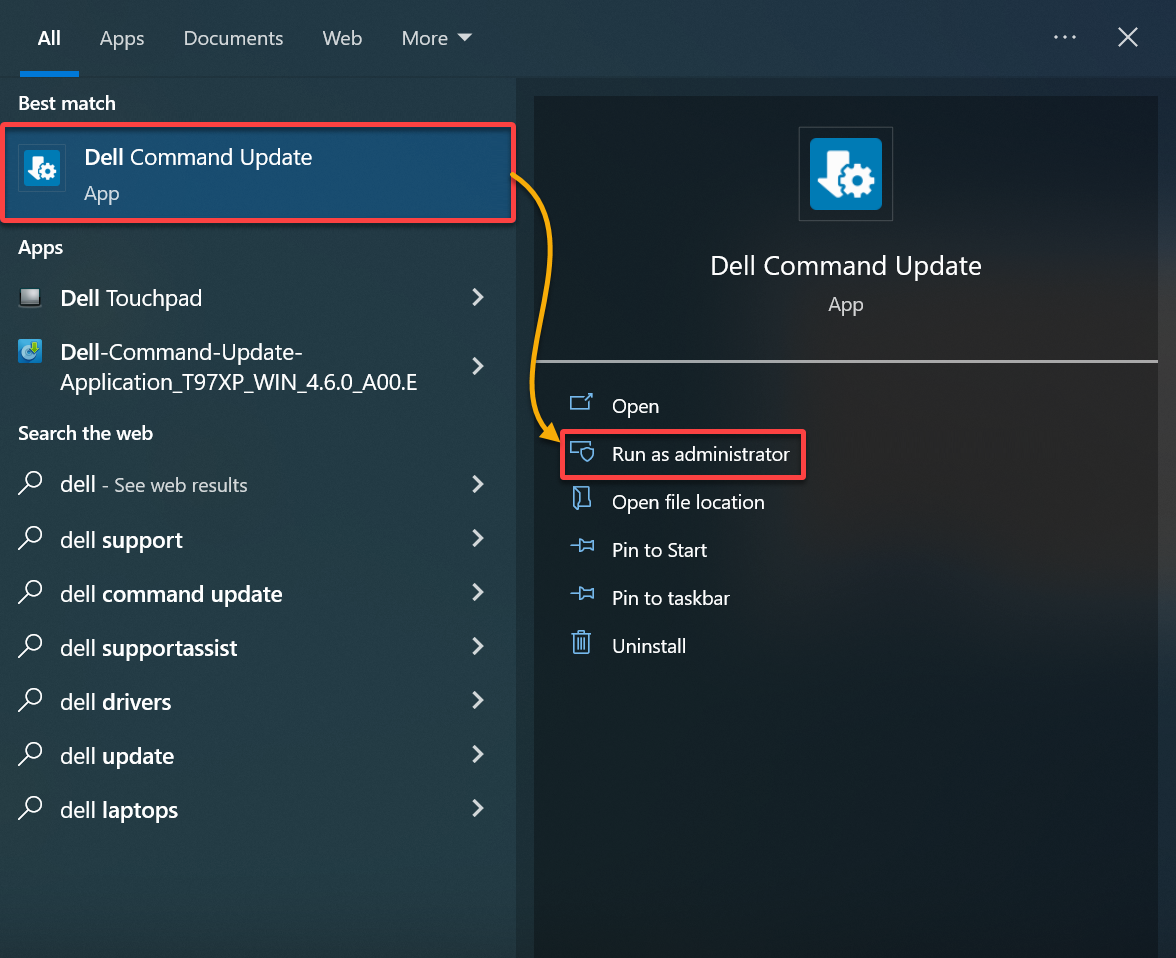
1. Start by opening the Dell Command Update tool from the Windows Start menu. Remember to run it as an administrator for full functionality.
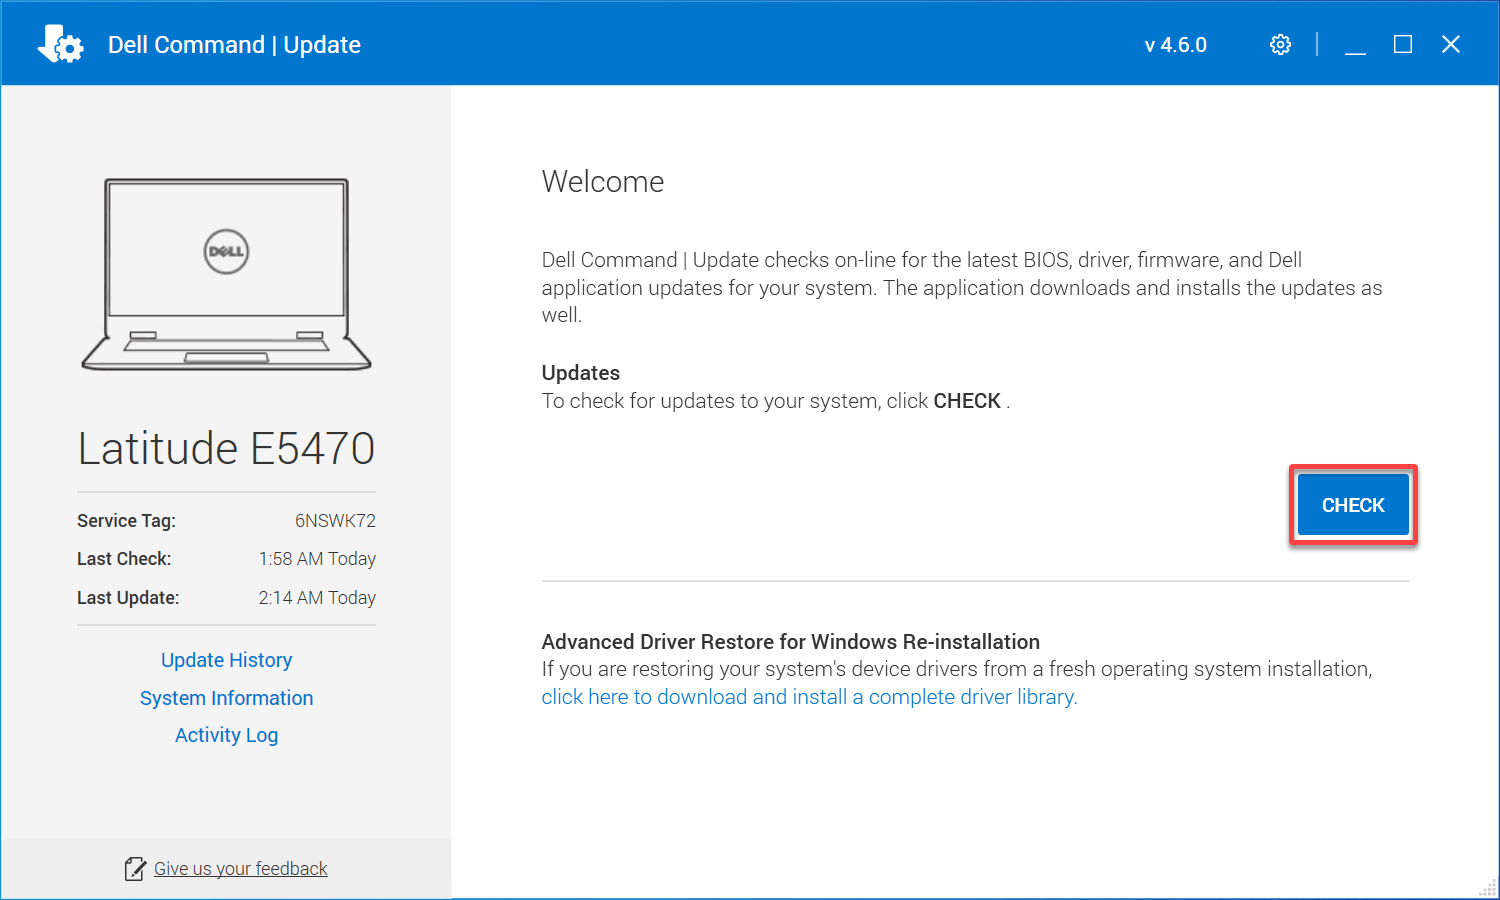
2. In the Dell Command Update tool, click CHECK to initiate a search for updates. This connects to downloads.dell.com to find available updates for your system.
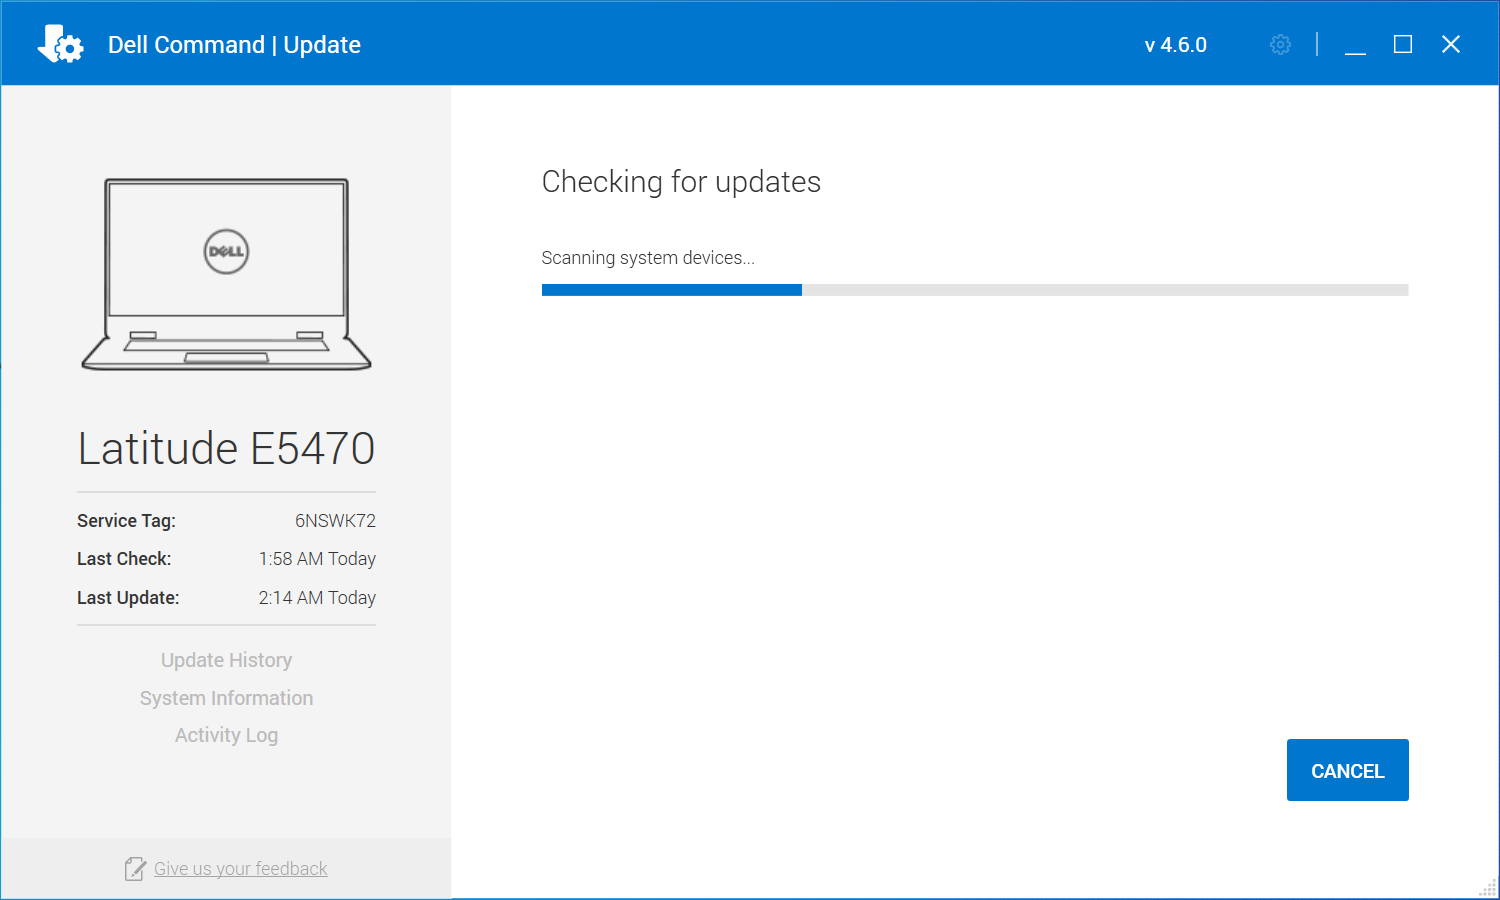
The Dell Command Update tool is actively searching for new updates, as depicted below.
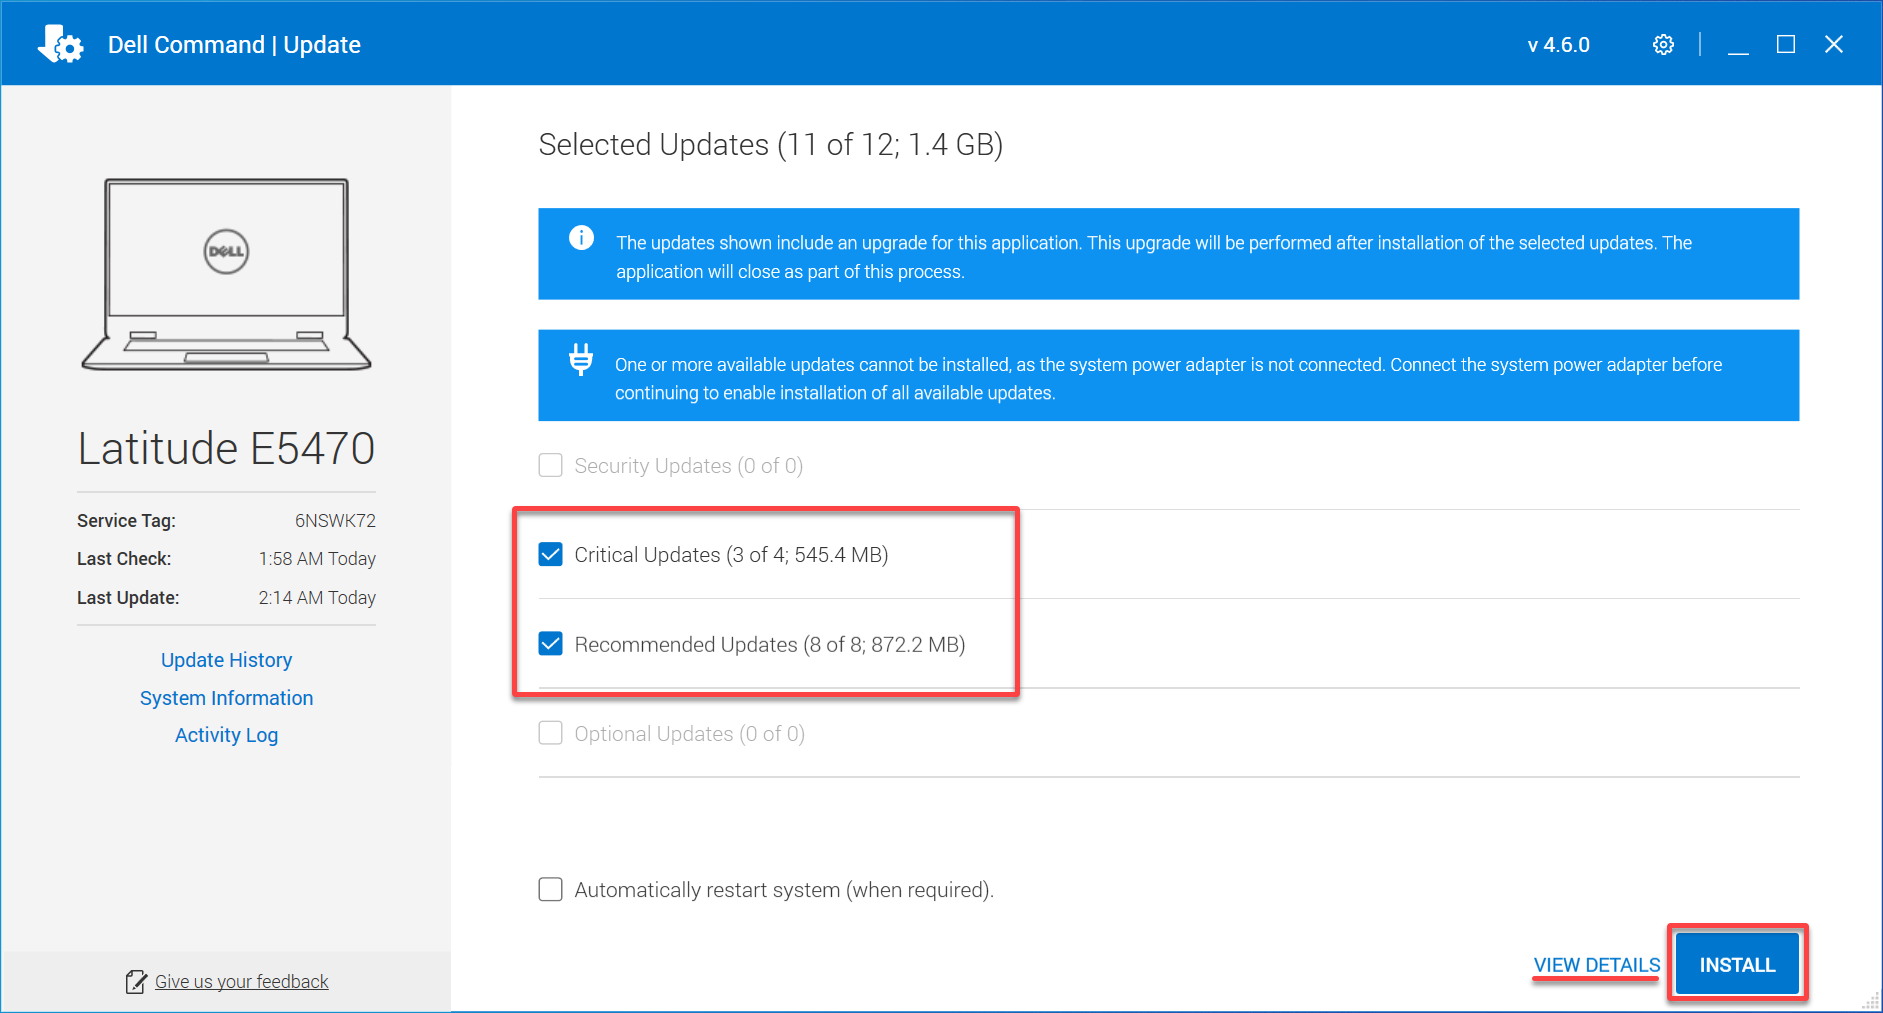
3. Upon finding updates, select VIEW DETAILS to review them, then choose the desired updates and click INSTALL to proceed with the installation.
For added convenience, Dell Command Update offers an option to automatically restart your system after updates, which can be enabled by selecting Automatically restart the system (when required).
Dell Command Update categorizes updates based on their importance, including Critical, Recommended, Optional, and Dell Docking Solutions.
Tailoring Dell Command Update to Your Needs
While Dell Command Update is set to automatically check and download updates by default, you might prefer to customize these settings. Advanced settings provide control over the timing of updates and other preferences to suit your needs.
To customize the settings of your Dell Command Update, follow these steps:
1. Click the Settings button (top-right) to access the settings menu.
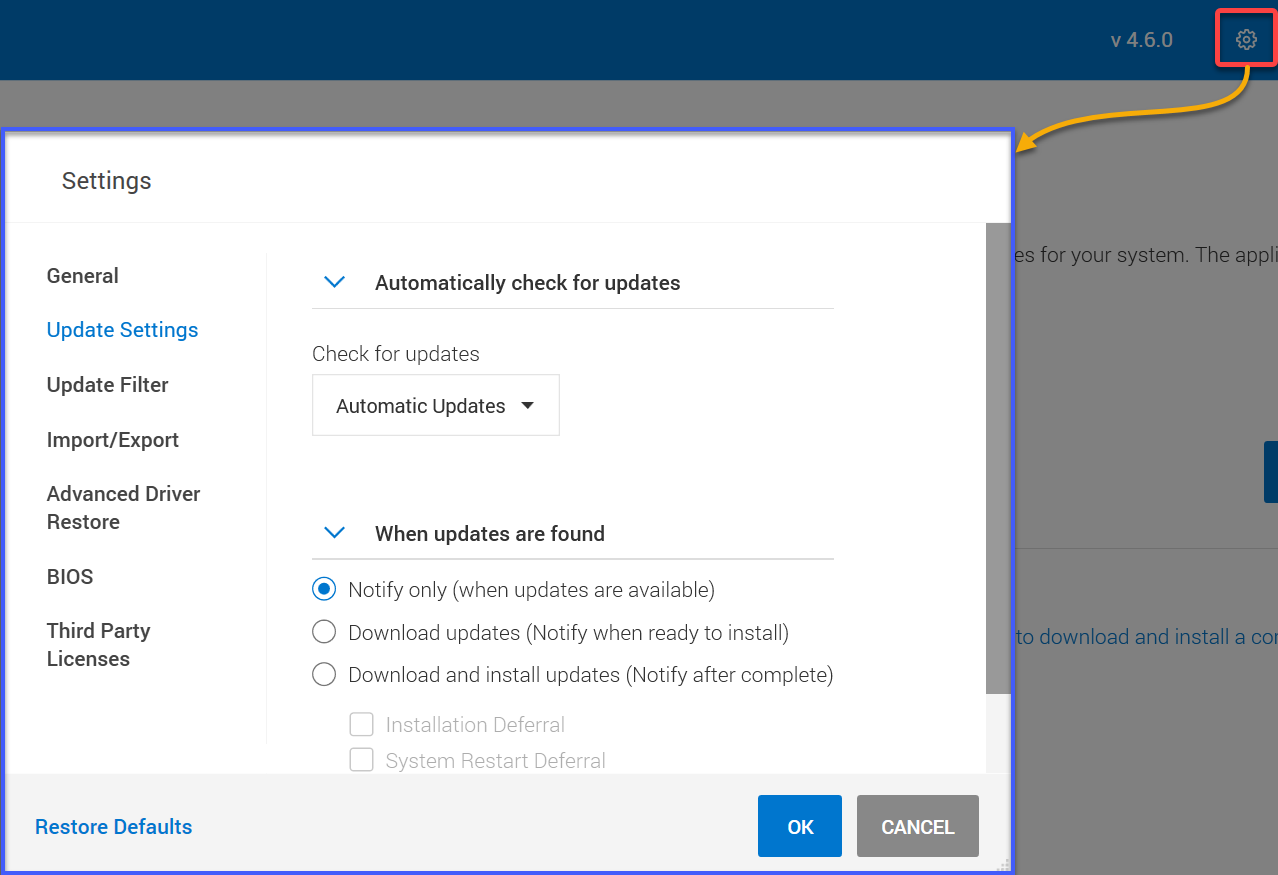
2. Inside the settings menu of Dell Command Update, adjust the Update Settings as per your needs:
- Automatically check for updates – Set how often Dell Command Update should search and apply updates (options include daily, weekly, or monthly).
- When updates are found – Define how Dell Command Update reacts upon finding new updates.

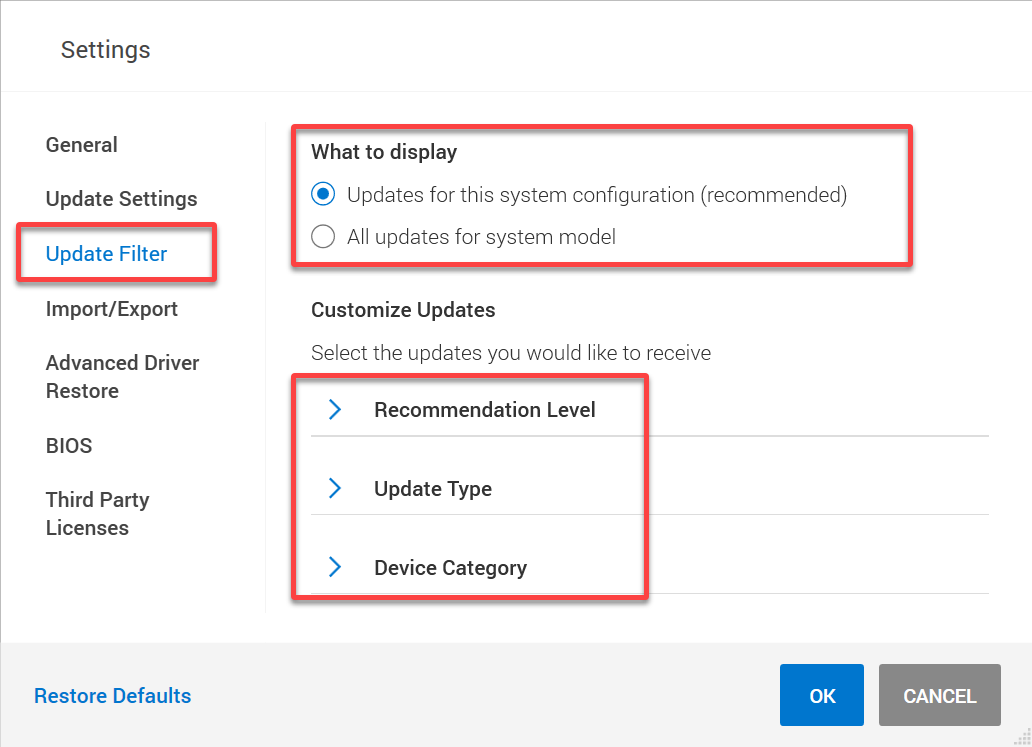
3. Proceed to the Update Filter section to tailor update visibility and selection:
- What to display – Choose to show updates specific to your system’s configuration or all available updates for your system model.
- Customize Updates – Further refine the updates you receive by categories such as Recommendation Level, Update Type, and Device Category.
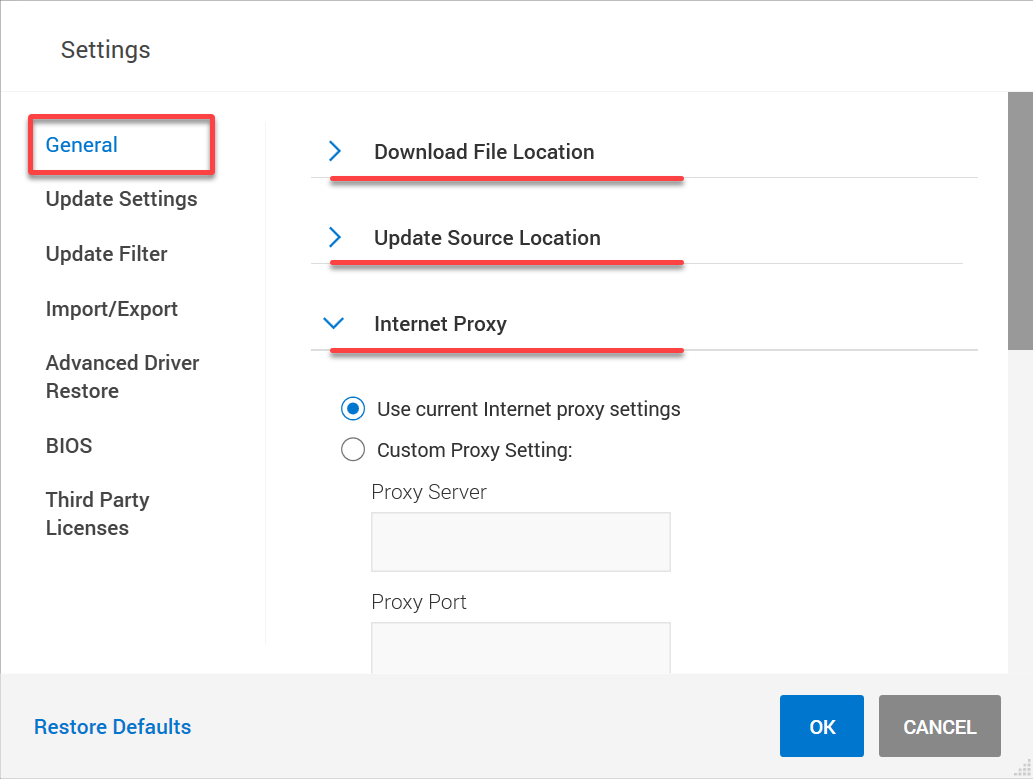
4. Under the General settings, customize these important options:
- Download File Location – Select the default directory for storing downloaded updates.
- Update Source Location – Choose the update source, especially useful for networked Dell computers sharing updates.
- Internet Proxy – Set up proxy settings for Dell Command Update to connect to the internet.
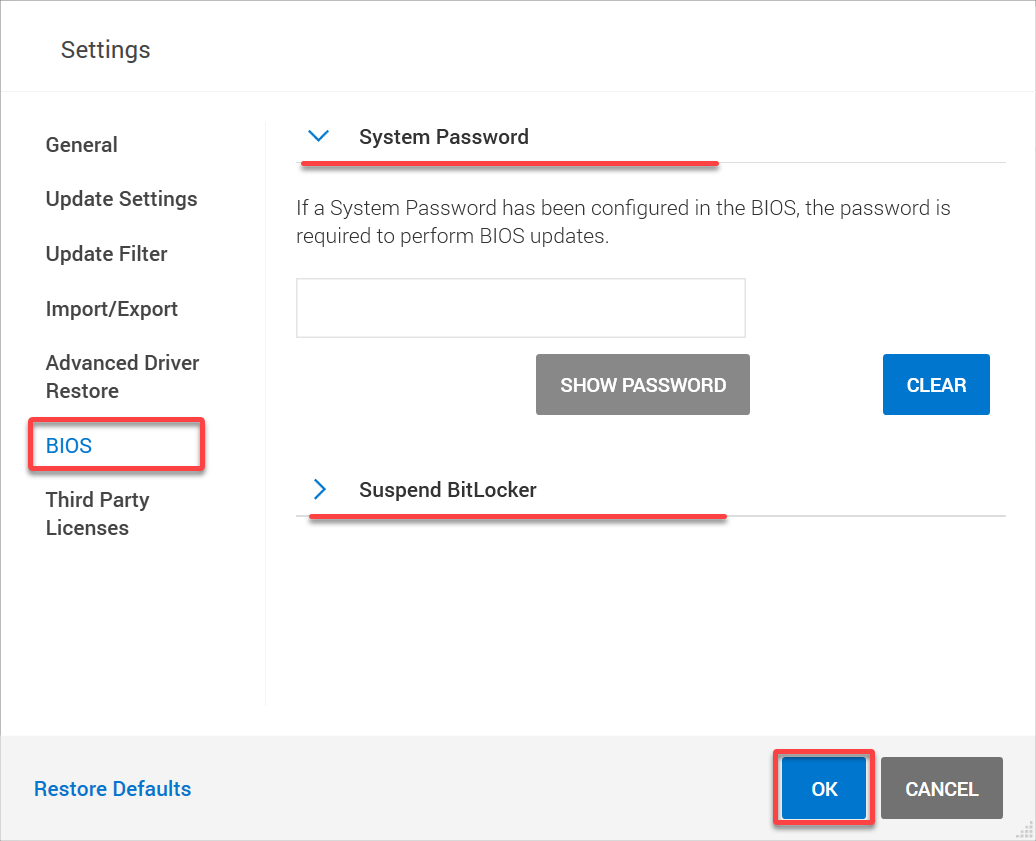
5. In the BIOS section of Dell Command Update, ensure these settings are correctly set:
- System Password – If a BIOS password is set on your Dell PC, enter it here to enable BIOS updates.
- Suspend BitLocker – Temporarily suspend BitLocker encryption for uninterrupted update processes.
After configuring these settings, click OK to save your preferences in Dell Command Update.
Consider exploring additional settings in Dell Command Update for enhanced control and compatibility:
Advanced Driver Restore – This feature enables you to revert to previously installed driver versions if needed.
Import/Export – Use this to export or import Dell Command Update settings, ideal for consistent configurations across multiple Dell systems.
Mastering Dell Command Update: CLI Automation
Besides its user-friendly graphical interface, Dell Command Update also offers a Command Line Interface (CLI) for automation. This CLI is especially beneficial for batch operations and scripting, adding flexibility to your update management strategies.
While the CLI of Dell Command Update is potent, it doesn’t provide some GUI features like scheduling updates. But this CLI is a powerful tool for IT professionals who prefer script-based operations.
Here’s a basic guide to using the CLI with Dell Command Update:
dcu-cli.exe/<command> -option1=value1 -option2=value2 -option3=value3...To utilize the Dell Command Update CLI effectively:
1. Open the command prompt or PowerShell as an administrator. Navigate to the Dell Command Update’s installation directory:
cd "C:\Program Files\Dell\CommandUpdate"2. Execute the desired actions using appropriate CLI commands. For example:
# Check for updates
dcu-cli.exe /detect

# Download and install updates
dcu-cli.exe /download /install
3. For more advanced configurations and options, consult the official Dell Command Update documentation.
The CLI option of Dell Command Update streamlines update processes, ideal for managing multiple Dell devices efficiently.
4. Implement automation scripts or scheduled tasks to regularize the update process across your Dell devices.
Utilizing the CLI for Dell Command Update not only saves time but also ensures consistency in keeping your Dell devices updated and secure.
Wrapping Up: Dell Command Update
The Dell Command Update tool is a versatile and powerful solution for maintaining the latest updates on Dell devices. This tutorial has guided you through installing the tool, applying updates, customizing settings, and utilizing the CLI for automation.
Adopting these practices ensures that your Dell devices remain updated with the latest drivers, BIOS, and software patches, contributing to optimal performance and security.
Regular updates are key to avoiding security risks and compatibility issues. Establish a routine for updating your Dell devices to maintain a secure and efficient IT environment.
If this tutorial has been beneficial, consider sharing it with peers in your network.
Stay updated with more tutorials and insights on IT process optimization!


