

Have you purchased a new hard drive but cannot access all of its disk space? Is it limited to only 2TB? Maybe you have a complex operating system installation and need to divide your hard drive into more than four active partitions? You probably need to convert MBR to GPT on your disk.
Not a reader? Watch this related video tutorial!In this tutorial, you will learn the difference between MBR & GPT partition table schemes and how to convert MBR to GPT. You’ll also learn how to take the next step to actually get Windows to recognize that GPT disk by switching your BIOS to UEFI.
Prerequisites
- A Windows 10 PC. This tutorial will use Windows 10 v20H2.
- An MBR-formatted storage volume.
- An account in the local administrators’ group – Some of the tasks you’ll perform will require elevation of privileges.
What Is a Partition Table Scheme?
A partition table forms a low-level structure at the firmware level in your hard drive. The storage the hard drives to then has to be presented to an operating system before a disk can be formatted and made ready for data.
By default, every hard drive has at least one partition table scheme called Master Boot Record (MBR), but now there’s a new partition table scheme called GPT (GUID Partition Table) with updated and unique features.
Identifying Whether Your Drive Is MBR or GPT?
Before making any changes to your hard drive, you first need to know which partition table scheme you’re using. So let’s start this tutorial by first covering how to identify which type is already in use.
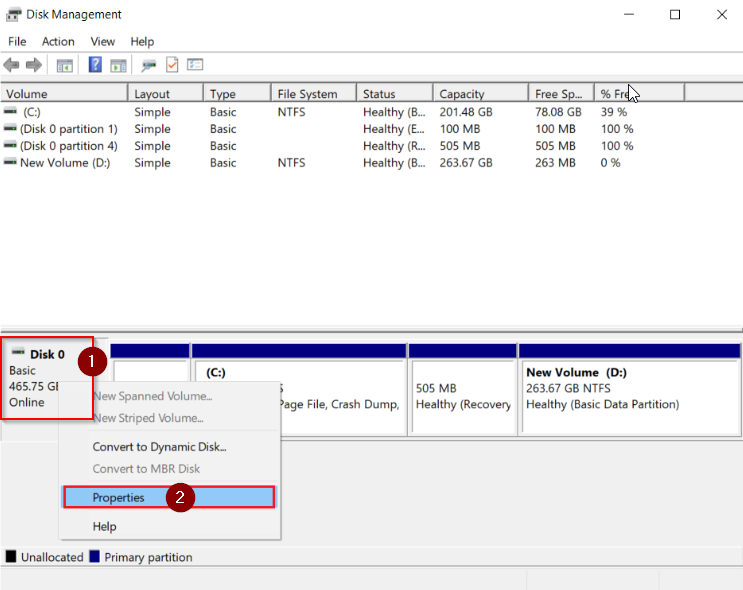
1. Open the Disk Management tool. You should see a list of all partitions currently set up that Windows recognizes.
2. Right click on Disk 0 and select Properties to open the volume window.
If you have multiple hard drives attached, you will see all of them here as Disk 0, Disk 1, Disk 2, etc.
3. Click on the Volume tab. Here you’ll see the Partition style. The tutorial’s example volume below has a Master Boot Record (MBR) partition style which indicates the partition table scheme.
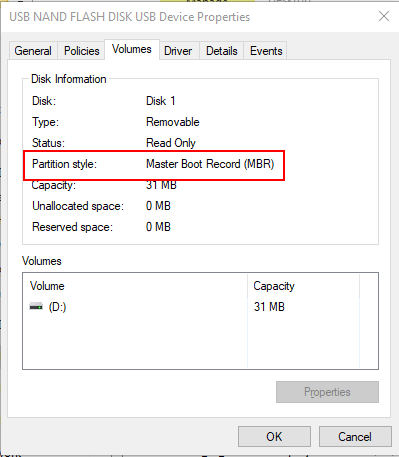
There are only two possible options for Partition style, GUID Partition Table (GPT) or Master Boot Record (MBR).
Converting MBR to GPT in the GUI
Now that you have identified which partition table scheme you have, let’s now go over how to convert an MBR partition scheme to GPT via the Disk Management GUI.
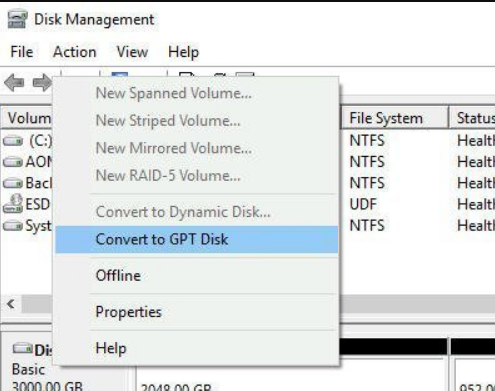
With the Disk Management GUI, to convert MBR to GPT is a single action. Right click on the disk you’d like to convert and click on Convert to GPT Disk.
You can only convert a disk from MBR to GPT that has no data stored on it or is encrypted by BitLocker with Bitlocker active. You’ll see later in the command-line sections how you can get around this limitation.
Converting MBR to GPT via Diskpart
If the GUI isn’t your thing or you’d like to implement an MBR to GPT conversion in a script perhaps, the command line is your friend. Let’s start out the command line how-tos by covering how to perform the conversion with the Diskpart tool.
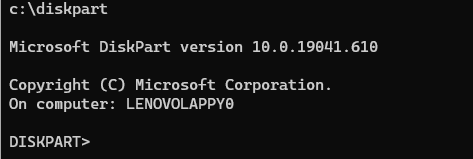
1. Open a command prompt as administrator.
2. Type diskpart to open the command-line utility. You’ll be moved into the interactive Diskpart menu. You’ll notice this because the prompt changes to DISKPART>.
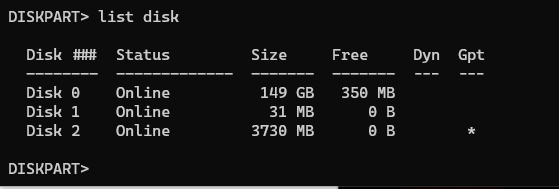
3. Enter the command list disk to display all the disks attached to the PC. Note the asterisk in the output column labeled Gpt. This asterisk indicates that the disk is already GPT-formatted.
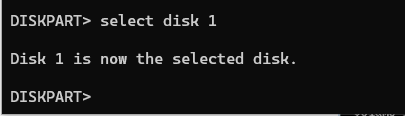
4. Type select disk 1 to tell diskpart you’d like to perform an action on a disk.
5. Now, type convert gpt to convert the MBR partition table scheme into GPT partition table scheme. If all goes well, you should see a successful message.

6. Type exit to safely close the diskpart utility.
Converting MBR to GPT using MBR2GPT
Next up in the command-line lineup for performing partition scheme conversion is the MBT2GPT utility! This innocent-looking utility can punch above its weight when it comes to converting partition table schemes. It’s secret weapon? It converts the partition table without damaging the data that is already on the disk.

You can also run MBR2GPT via Windows Preinstallation Environment (WinPE).
To use the MBR2GPT utility to convert a disk:
1. Open Windows PowerShell as an administrator.
2. Find the disk number to convert. Find the disk number using the Disk Management GUI or the diskpart utility as shown earlier.
This command gives you the option to validate whether the operation is likely to succeed before committing.
3. Run the conversion command but run validation conversion first. The command below should convert the disk number 0 to GPT using the /allowFullOS switch to run from a full Windows environment. By default, MBR2GPT runs in WinPE.
Since the tutorial used the /validate switch, MBR2GPT performs a scan of the disk to ensure the conversion is possible without actually making any changes.
mbr2gpt /validate /disk: 0 /allowFullOSOnce you’ve confirmed the conversion can take place, now remove the /validate switch to perform the conversion for real. You can see below MBR2GPT takes care of all existing partitions and cleanly performs the conversion.
mbr2gpt /convert /disk: 0 /allowFullOS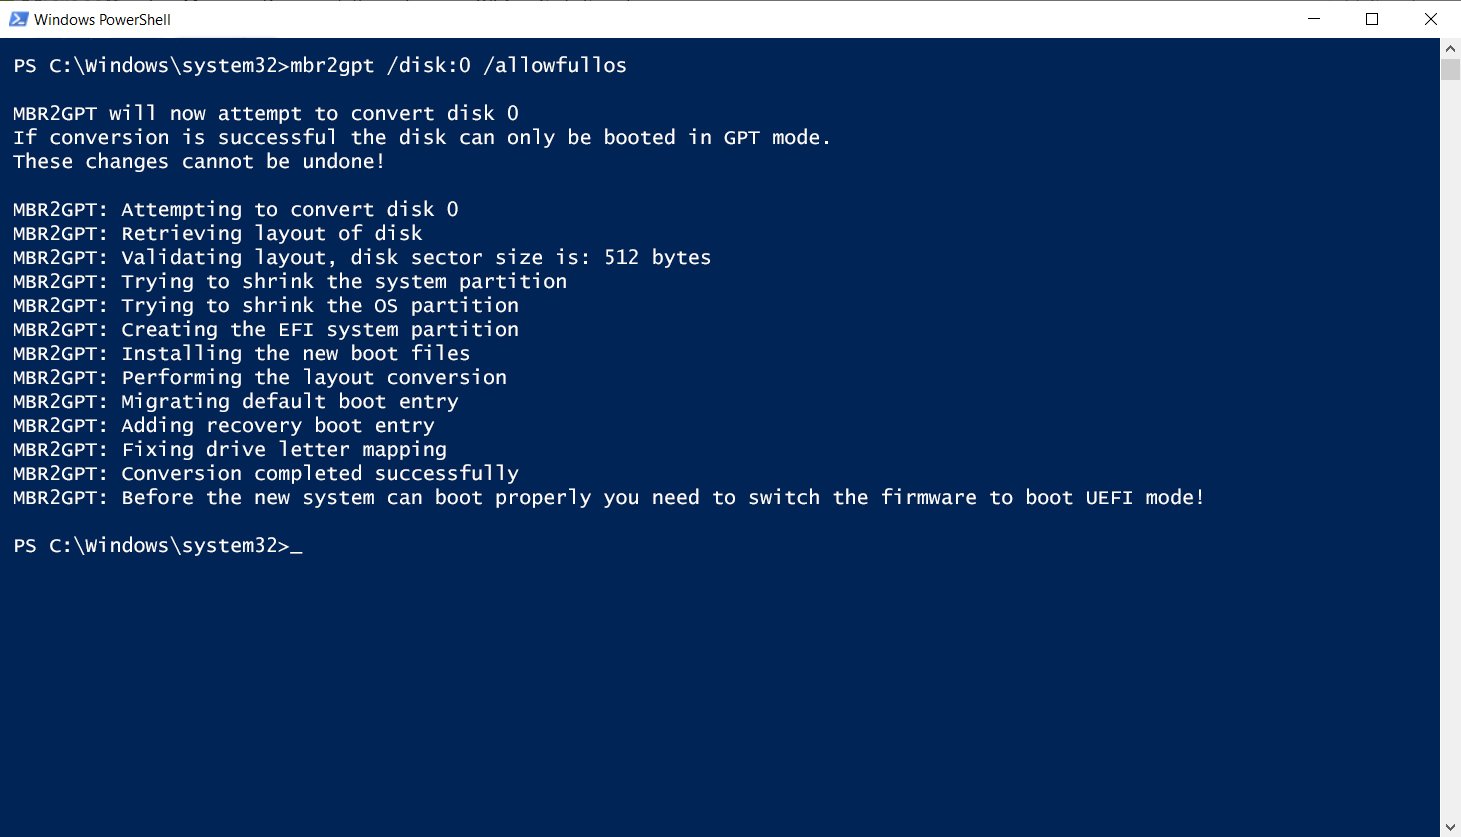
BIOS to EFI Using Windows settings
Even though you now have a GPT disk, Windows cannot take advantage of it. To allow Windows to use a GPT disk, you must “upgrade” your computer’s BIOS to UEFI.
This process will change your PC’s firmware from BIOS to UEFI, be careful. Whilst this process is reversible, it does carry some risk. Always ensure that you have an offline backup of any important data. This change alters the system’s firmware settings which, if not performed correctly, can cause data loss.
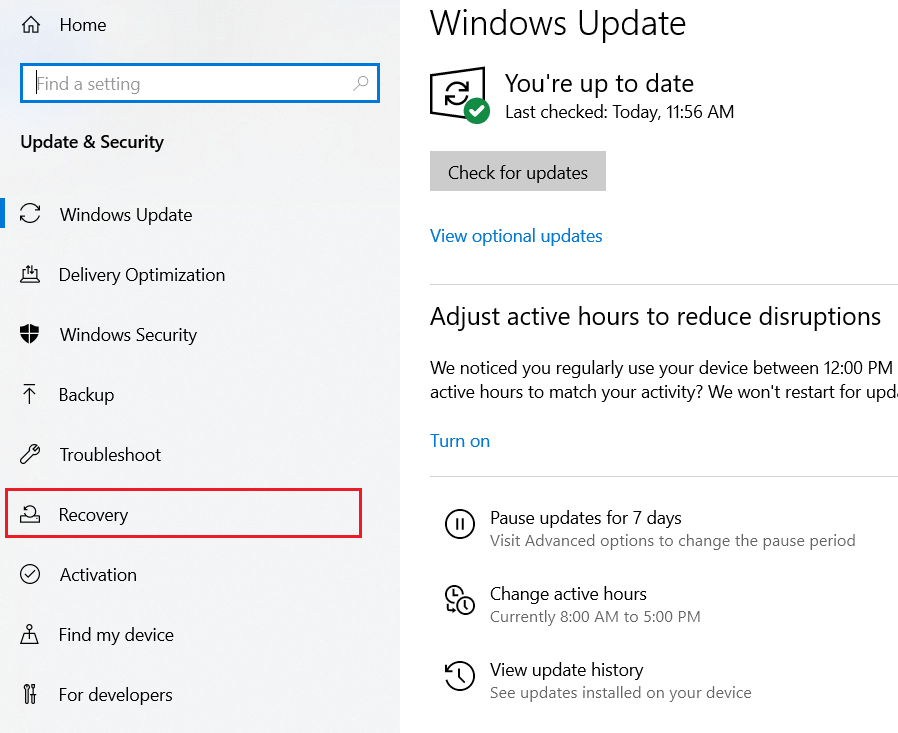
1. Open the Update & Security applet by clicking on Start —> Settings —> Update & Security.
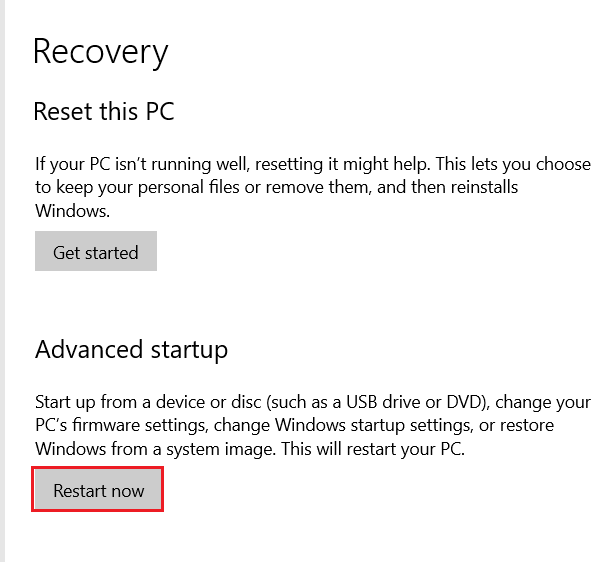
2. In the Update & Security applet, click on Recovery to access the Advanced Recovery Options screen.
3. Click the Restart Now button to restart the PC into safe mode. Windows 10 will immediately restart.
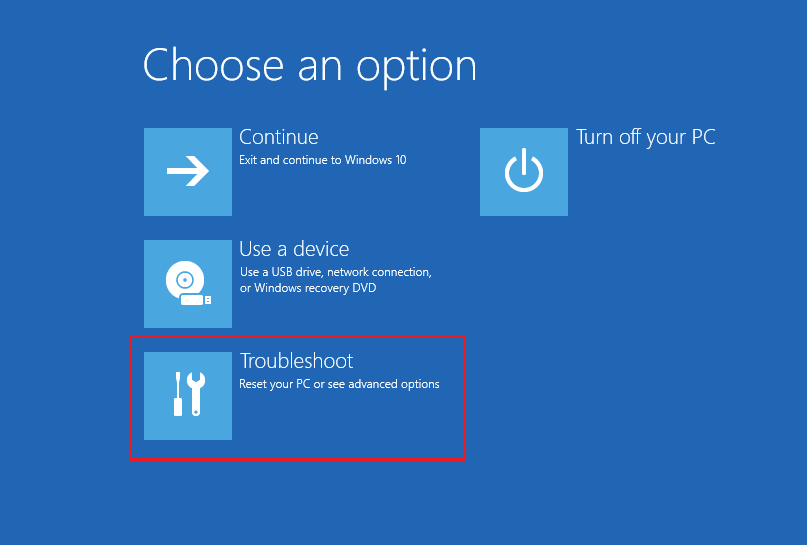
4. After a reboot, you’ll enter safe mode. From here, click on Troubleshoot.
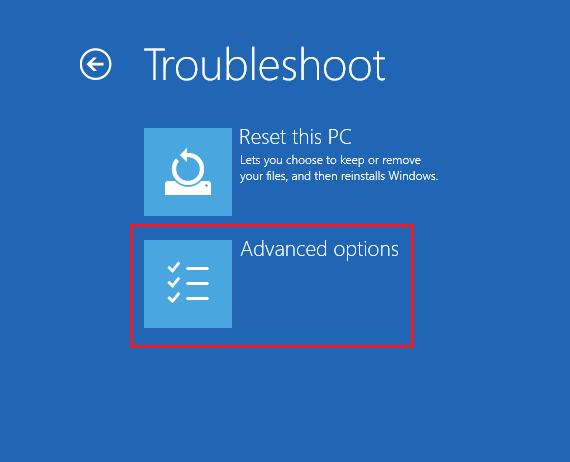
5. In the Troubleshoot window, click on Advanced options.
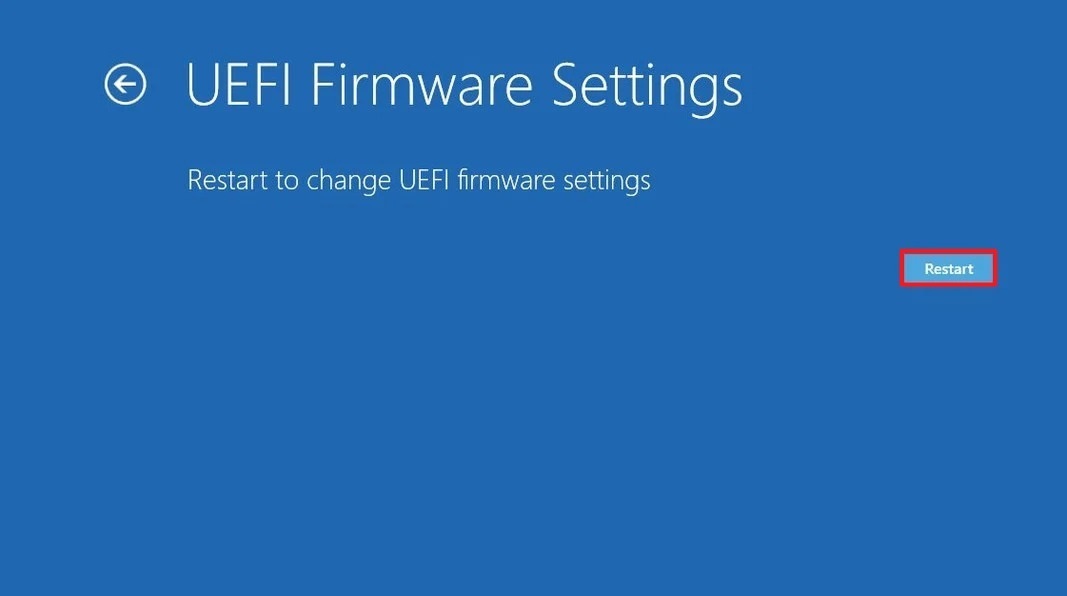
6. Now, click on UEFI Firmware settings in the Advanced options window.
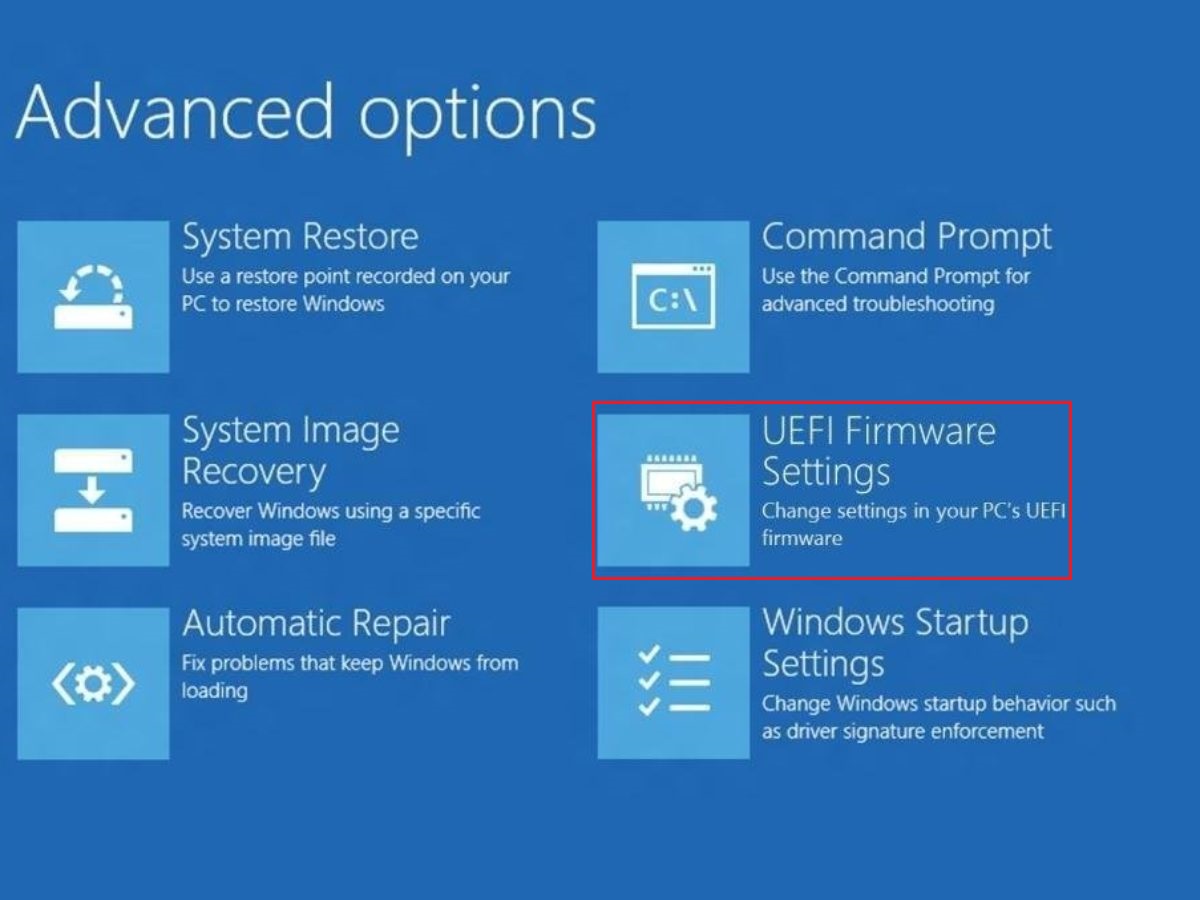
7. On the UEFI Firmware Settings screen, click on the Restart button to restart the computer and start the firmware change.
Once complete, your PC will then boot into Windows again and you will have all of the benefits that come with UEFI such as faster start-up, shutdown, sleep, and resume. You’ll also get the benefit of Secure Boot, Device Guard, and Credential Guard.
Conclusion
This tutorial has taken you from using 1970’s technology to the 21st century by converting your MBR disks to GPT and upgrading your legacy BIOS to modern UEFI. You’ve learned three different ways to convert your hard disks to a modern standard that’ll satisfy even the most demanding of you out there.
So now that your PC is running the latest and greatest technology, how do you plan on using your newfound knowledge?


