


Do you manage multiple Amazon Web Services (AWS) accounts? As the number of accounts increases, the harder it is to switch between accounts to monitor workloads. If only you can have a consolidated view of CloudWatch metrics in a single dashboard, right? Yes, you can!
In this tutorial, you will learn how to set up your multiple AWS accounts to share data and view them in a single dashboard. In the end, you will eliminate the need to switch forth and back to your AWS account to monitor your AWS resources.
Let’s get started!
Prerequisites
This article will be a tutorial. If you plan on following along step-by-step, be sure you have the following.
- An AWS Organization. If you haven’t created an organization yet, visit Creating and managing an organization to learn how.
- The example in this article will work with AWS Free-Tier accounts. And in this tutorial, you will need three.
- An AWS management account (the one you used to create the organization). This account will serve as the CloudWatch monitoring account, where you’ll set up the consolidated dashboard. In this article, this account’s name is AWSLAB901.
- An AWS member account (the account you invited/added into your AWS organization). This account will serve as the CloudWatch sharing account with the account name AWSLAB902.
- A third AWS account that is not a member of your AWS organization (standalone). This account will serve as another CloudWatch sharing account with the account name AWSLAB903.
- Your AWS sharing accounts must already have at least one CloudWatch dashboard. Create a dashboard on the sharing accounts if you don’t have one yet. In this article, each sharing account will have one dashboard that shows the CPU utilization metric of a virtual machine.
- You must know the Account ID of each of your AWS accounts.
Setting Up the Sharing Account
By default, AWS doesn’t allow accessing the AWS services data between AWS accounts, even when they belong to the same organization. To change this default restriction, you have to enable cross-account data sharing on your sharing accounts.
Enabling cross-account data sharing gives the monitoring account access to your sharing accounts’ data. The monitoring account, in turn, can retrieve the shared CloudWatch metrics data to display in the consolidated dashboard.
Enabling Cross-Account Data Sharing
To access CloudWatch data from the centralized monitoring account, you must first enable cross-account sharing of the CloudWatch data from the sharing accounts. To do so, follow the steps below.
1. Open your web browser, navigate to the CloudWatch Management Console, and log in to your AWS member account (AWSLAB902).
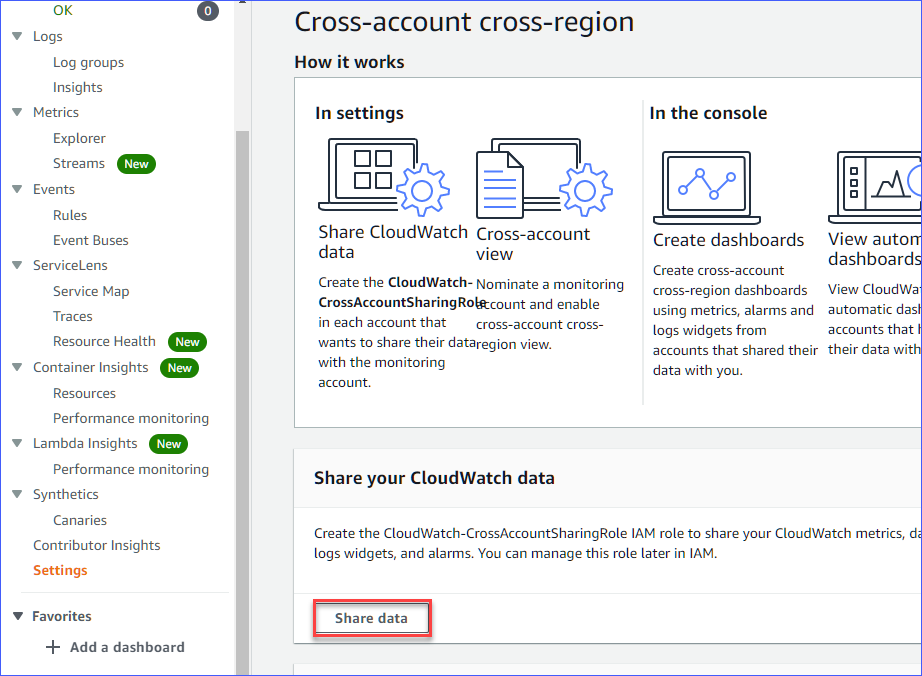
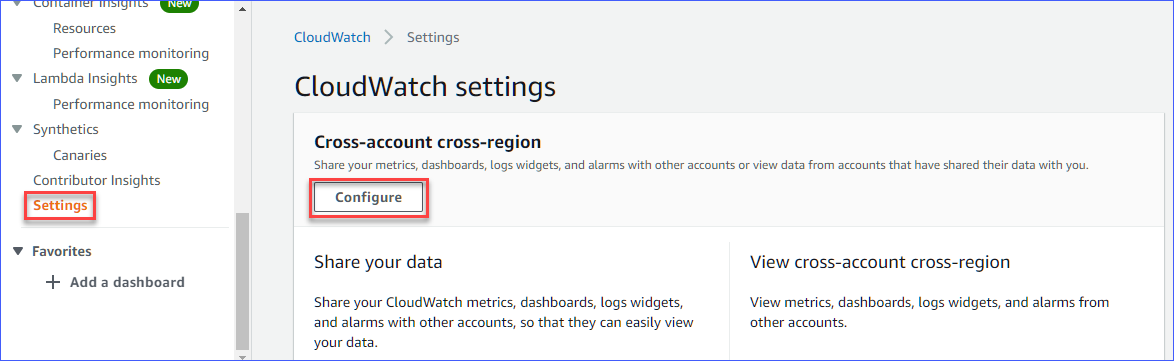
2. From the left-hand side pane, choose Settings, then click Configure under the Cross-account cross-region section, as shown below.

3. On the Cross-account cross-region page, click Share data under the Share your CloudWatch data section.
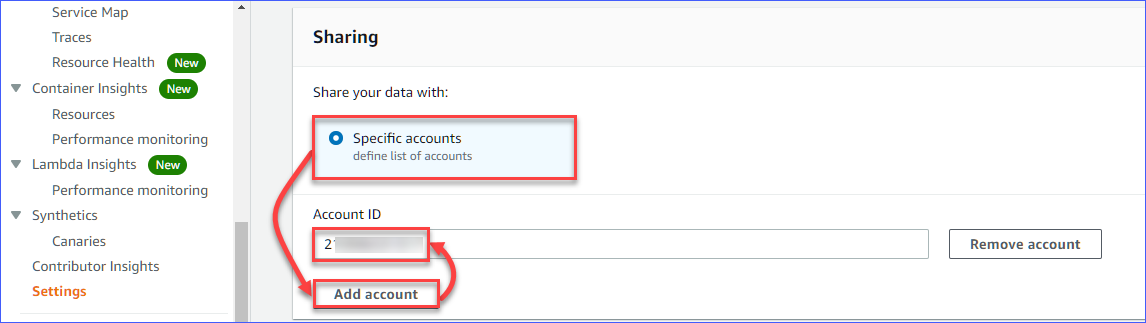
4. Inside the Sharing section, select the Specific accounts option and click the Add account button to reveal the Account ID box. Next, type in the monitoring account ID inside the Account ID box.
You can share your CloudWatch data to multiple AWS monitoring accounts by adding the Account ID of the other monitoring accounts.
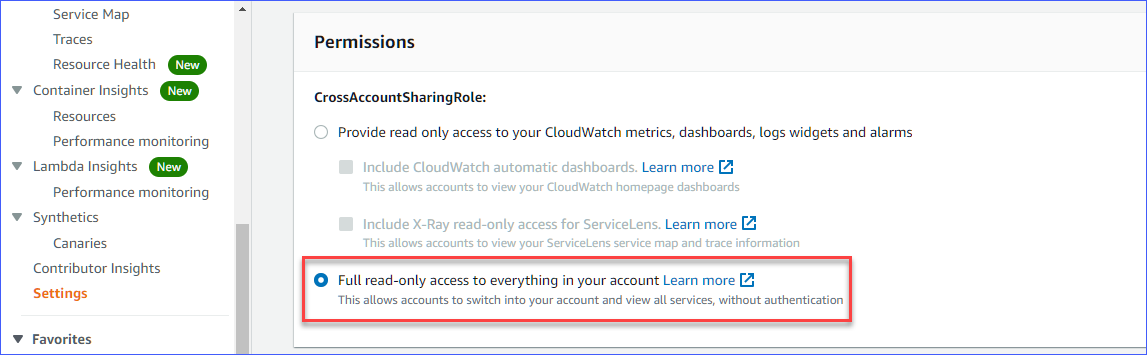
5. Next, scroll down to the Permissions section. Under the CrossAccountSharingRole, select the Full read-only access to everything in your account. Choosing this permission will give the monitoring account read-only access to all of the sharing account’s data.
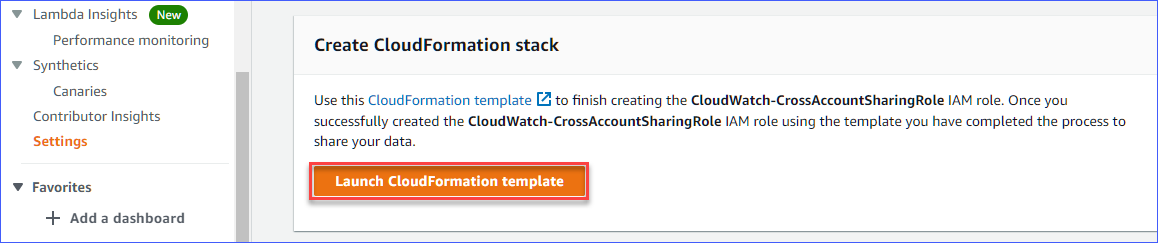
6. After selecting the permission, scroll down to the Create CloudFormation stack section and click the Launch CloudFormation template button.
A CloudFormation stack is a collection of resources that’s get created when you deploy a CloudFormation template.
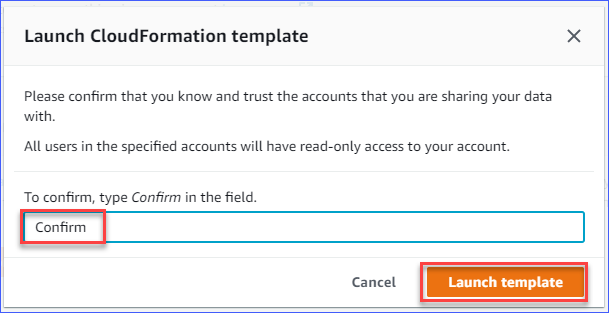
7. At the confirmation prompt that pops up, type Confirm into the box and click Launch Template. This action will launch the template in a new browser tab.
8. On the Quick create stack page in the new browser tab, scroll down to the bottom of the page, and check the I acknowledge that AWS CloudFormation might create IAM resources with custom names box. Finally, click Create stack.
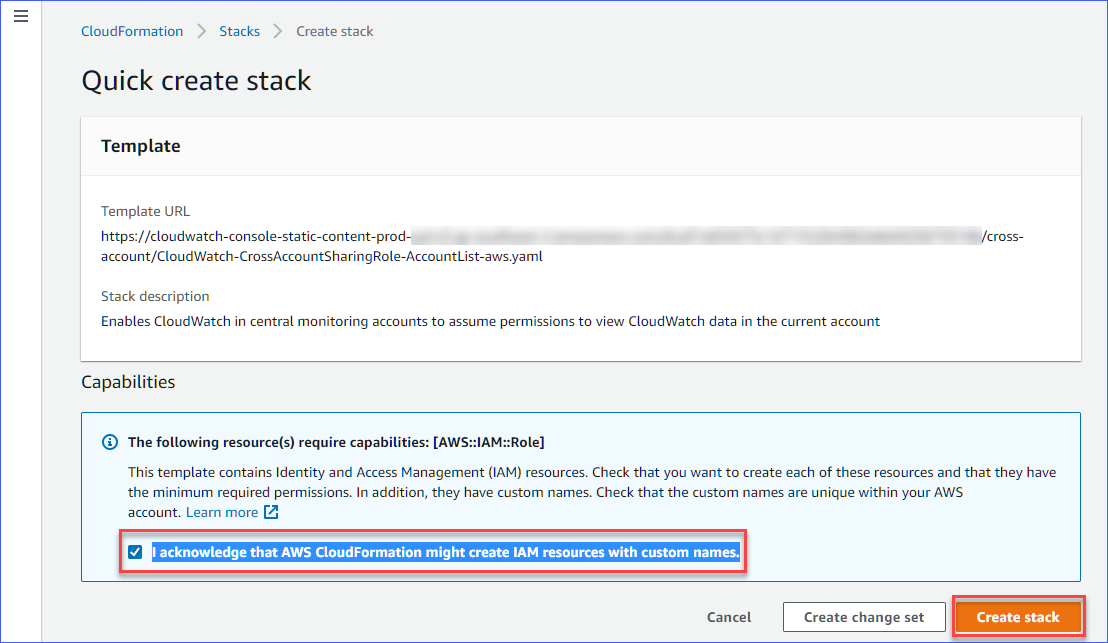
The CloudFormation stack automatically creates a new Identity and Access Management (IAM) role called CloudWatch-CrossAccountSharingRole on your AWS account. If needed, you can edit the role’s trust relationship to allow only specific users access or share your data with multiple monitoring accounts.
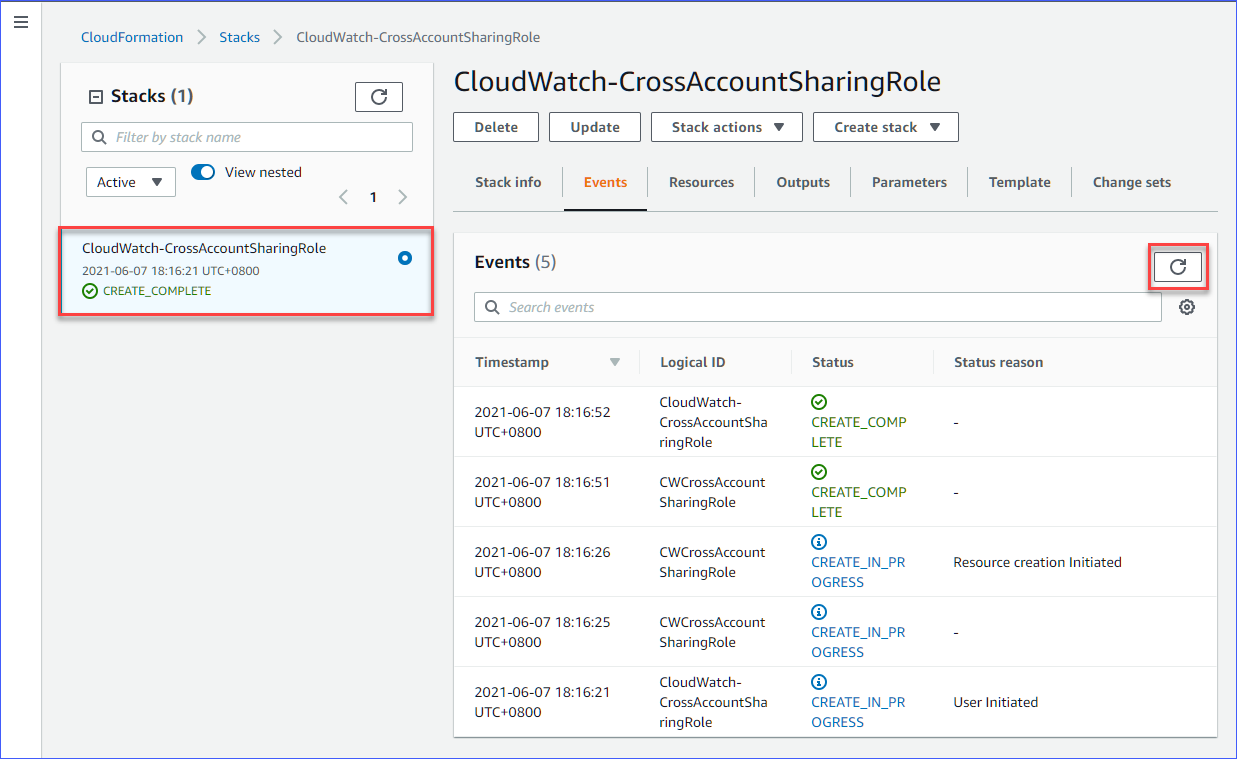
9. Next, the process will take you to the CloudWatch-CrossAccountSharingRole page. On this page, you can see the CloudFormation stack creation. Click the refresh button to update the progress. Once the stack creation is complete, you should see a similar status, as shown below.
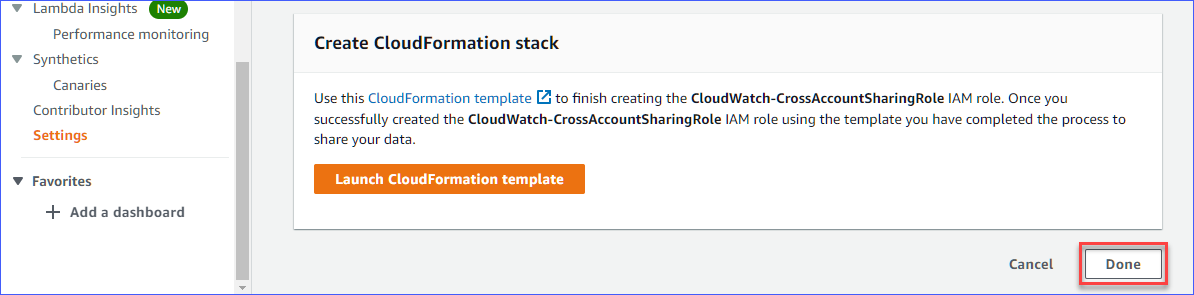
10. After you’ve created the CloudFormation stack, switch back to the CloudWatch Management Console browser tab. At the bottom of the page, click Done.
11. At this point, you’ve enabled cross-account CloudWatch metrics data sharing on the sharing account (AWSLAB902). Now, follow the same steps to enable cross-account CloudWatch metrics data sharing on the standalone sharing account (AWSLAB903).
Sharing CloudWatch Metric Data to Multiple Monitoring Accounts
Note: You can skip this section if you don’t plan to have multiple monitoring accounts. Skipping this section will not affect the outcome of the main topic of this article.
For most organizations, having multiple AWS monitoring accounts in an organization is a common practice. In which case, you can share CloudWatch data with multiple monitoring accounts, too.
Follow the below steps to share the CloudWatch data with multiple monitoring accounts.
1. While still in the CloudWatch Management console, navigate back to Settings —> Configure —> (Cross-account cross-region) Configure.
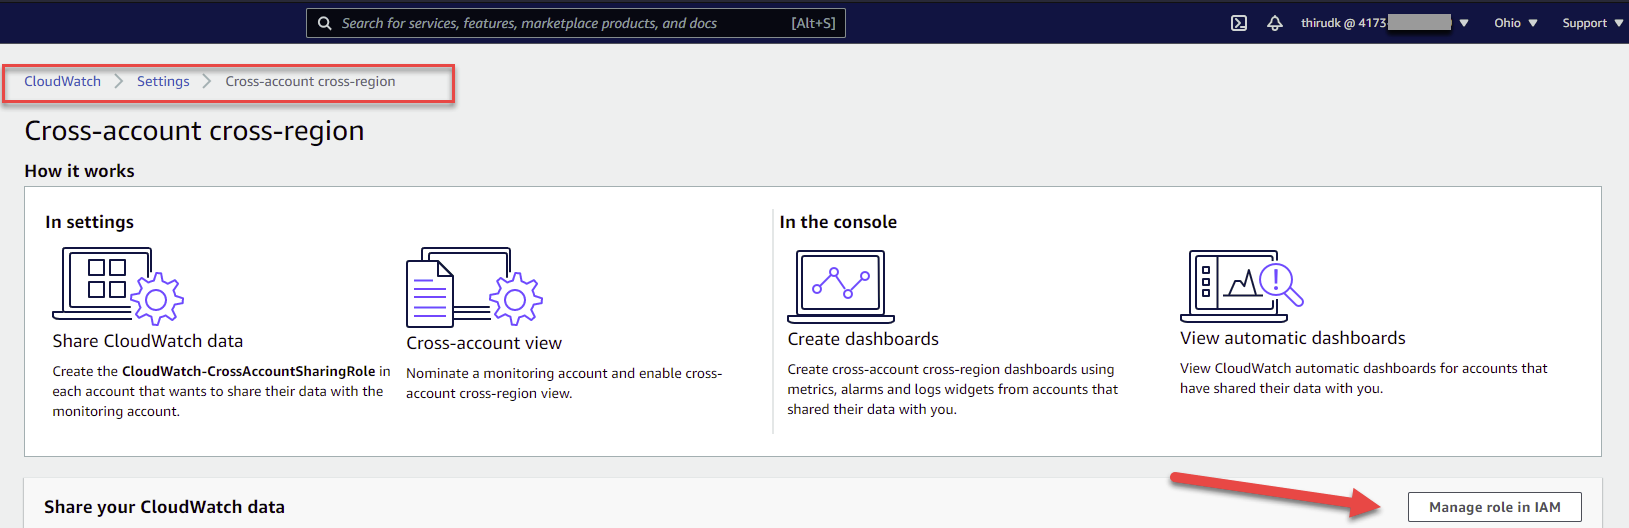
2. Click Configure under Cross-account cross-region and click Manage role in IAM as shown below.
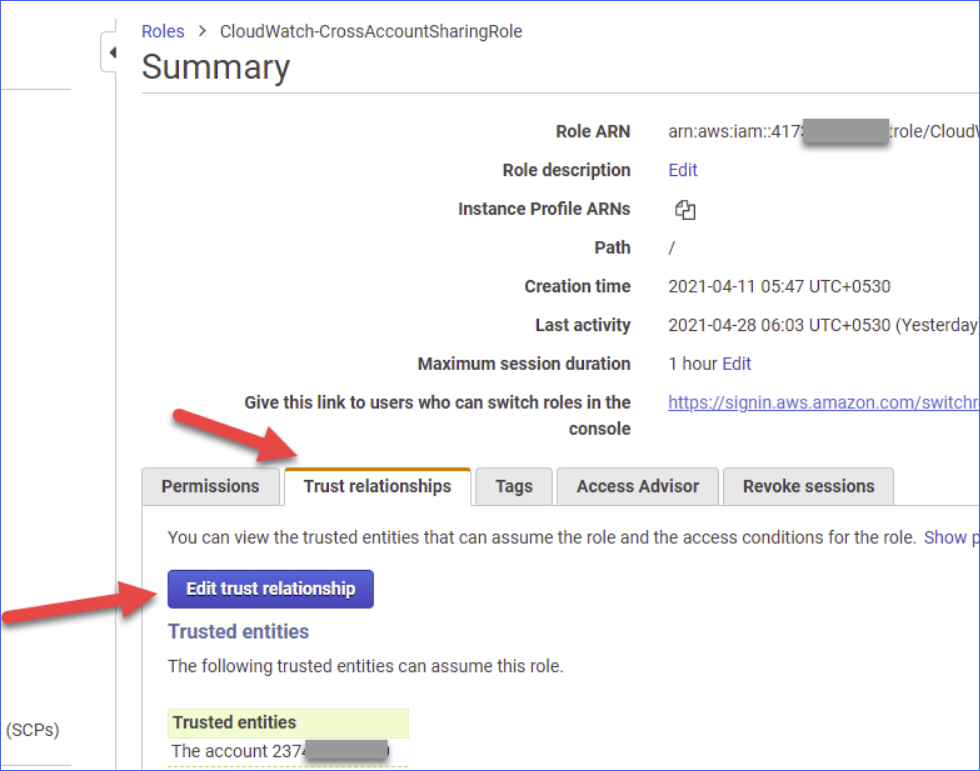
3. Under the Roles section within the IAM service, click Edit trust relationship. Doing so will open a trust relationship JSON editor for the CloudWatch-CrossAccountSharingRole IAM role.
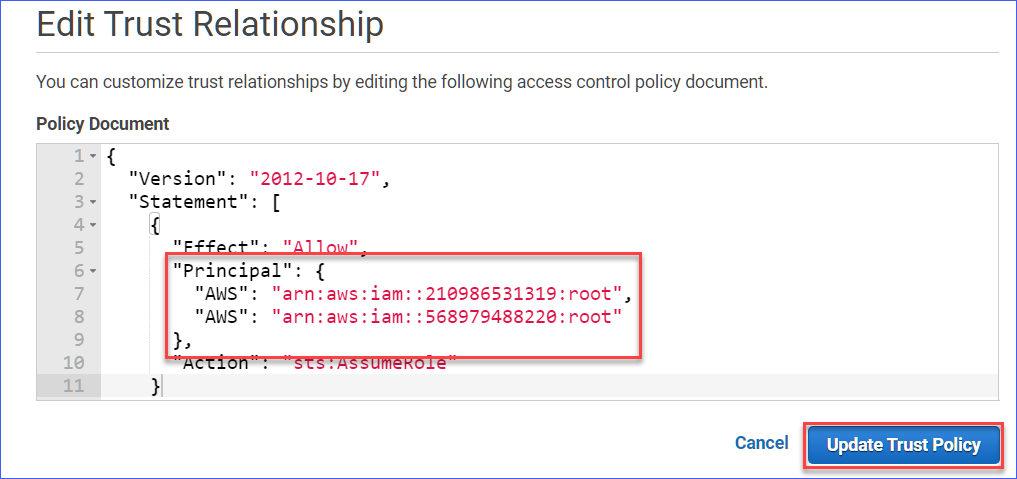
4. Next, inside the Principal bracket of the policy document, add the Amazon Resource Names (ARNs) of the monitoring account(s) to whom you’ll share the data as a new line. For example, to add the root user of the AWS account ID 568979488220, you will edit the trust relationship as below.
"Principal": {
     "AWS": "arn:aws:iam::210986531319:root",
     "AWS": "arn:aws:iam::568979488220:root"
 }
As a result, your trust relationship policy document will look like the screenshot below. After editing the policy, click Update Trust Policy.
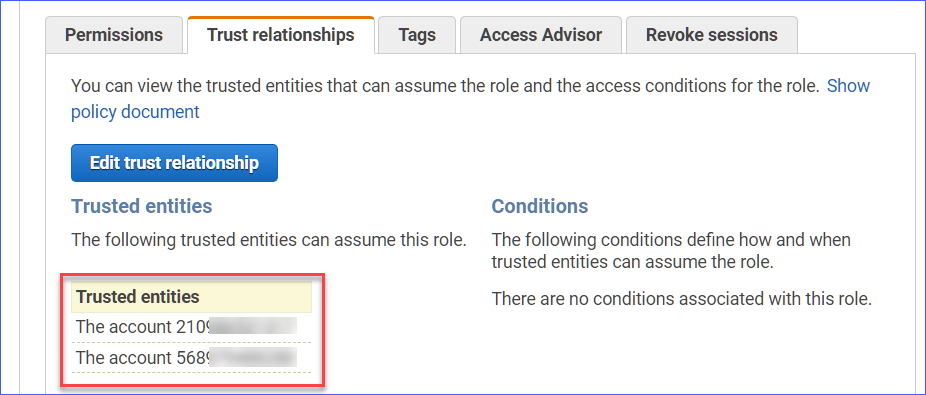
You now have an added monitoring account with access to your CloudWatch metrics data.
Setting Up the Monitoring Account
Now that you enabled cross-account data sharing on your sharing accounts, can you access the shared data from your monitoring account right away? The answer is no. The shared data should already be available to access, but you need to configure your monitoring account before accessing the shared data.
Enabling the AWS Account Selector on the Monitoring Account
To access the cross-account shared data from your monitoring account, follow the steps below.
1. Open a different browser or open a private/incognito browser, navigate to the CloudWatch Management Console, and log in to your monitoring account (AWSLAB901).
2. Click Settings on the left-hand pane to bring up the CloudWatch settings page. Next, Under the Cross-account cross-region section, click Configure.
3. On the View cross-account cross-region page, click Enable.

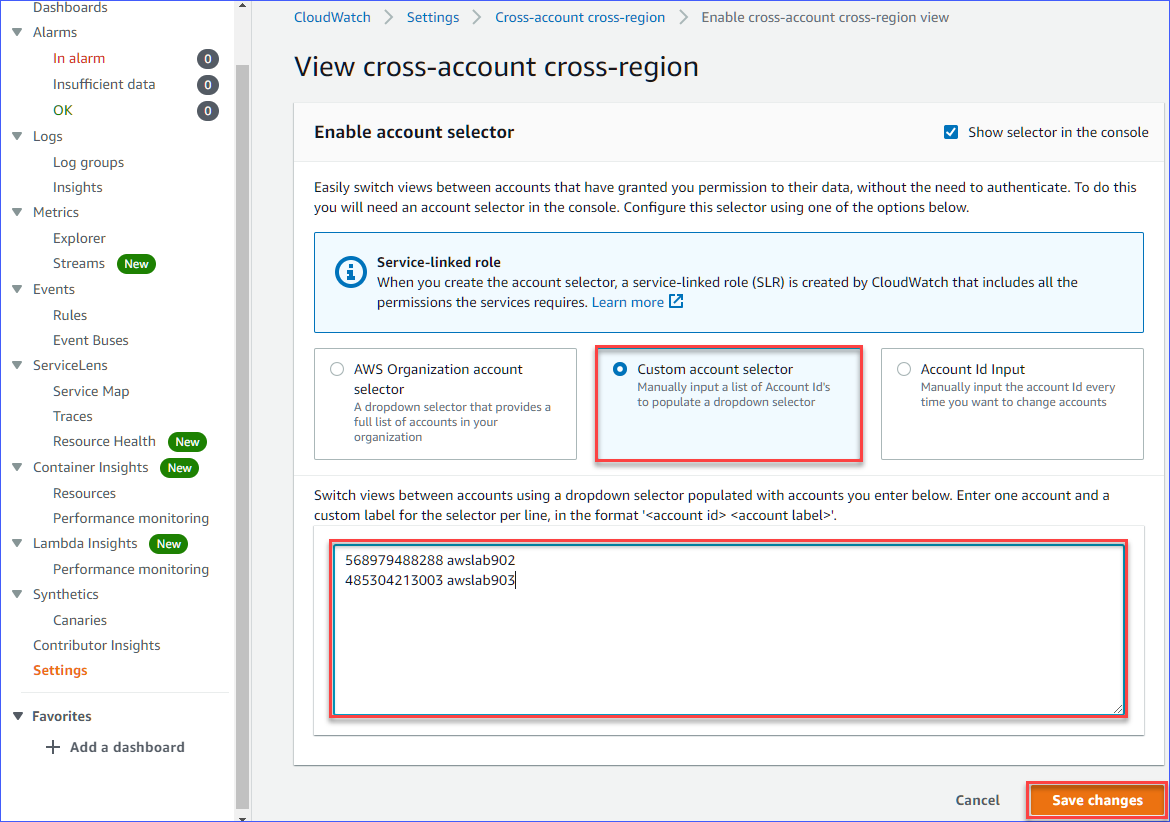
4. Next, under the Enable account selector section, choose one account selector type. Your options are:
- AWS Organization account selector – This selector type will provide the full list of accounts in your organization in a dropdown list. If you select this type, only the accounts that are part of your AWS organization will be available in the list.
- Custom account selector – This selector allows you to manually create a list of account IDs to populate a dropdown list selector. This type can also include standalone accounts or accounts that are not members of your AWS organization.
- Account Id Input – This selector will require you to manually enter the account ID of the account you want every time you want to view its data.
Since this guide includes a member account and a standalone account, the example below selects the Custom account selector type.
After choosing the selector type, enter the list of account IDs and the corresponding labels you want to appear in the selector, as shown in the screenshot below. For simplicity, the list below uses the account name as the label.
Finally, click Save changes after you’ve finalized your list.
Viewing the Shared CloudWatch Metrics Dashboard
At this point, you’ve already enabled the cross-account CloudWatch metrics sharing on the sharing accounts AWSLAB092 and AWSLAB093. You also enabled your monitoring account to view cross-account CloudWatch data.
Naturally, you’d want to know whether your actions so far work as you’d expected. And what better way to confirm your setup than by viewing the CloudWatch metrics dashboard of the sharing account from your monitoring account? To do so, proceed as follows.
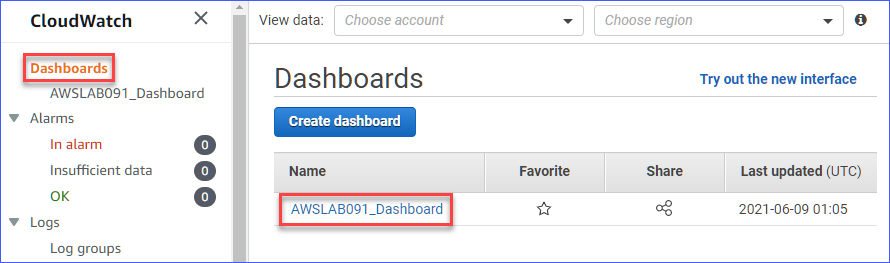
1. In your monitoring account’s CloudWatch Management Console, click the Dashboards menu on the left pane. By default, only the dashboards local to your account will be on the list, as you can see below.
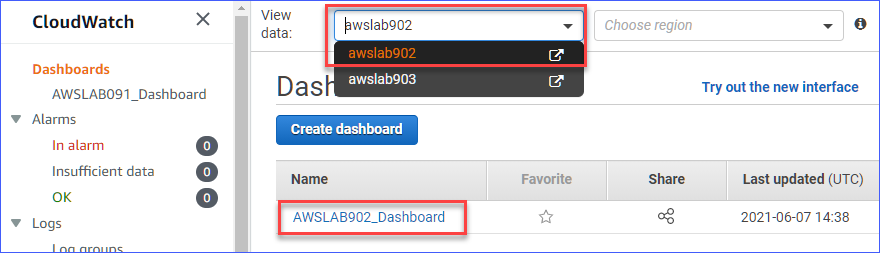
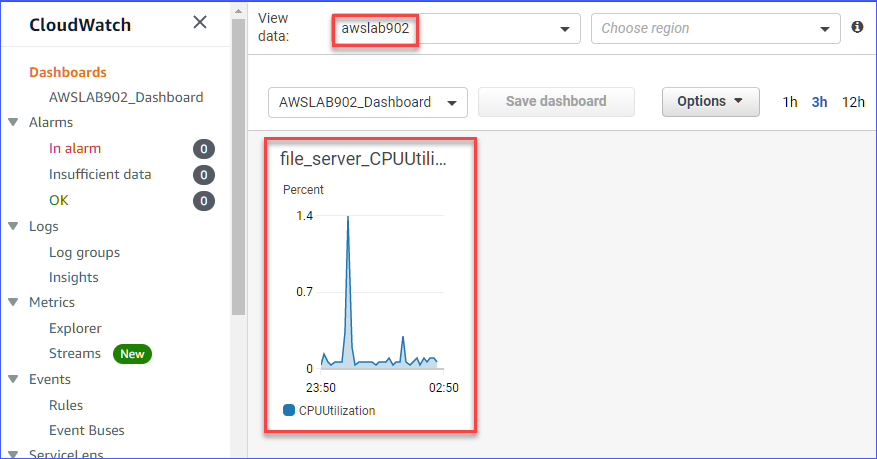
2. Next, to view the dashboard(s) on the sharing accounts, click the dropdown box next to View data and select one of the sharing accounts you previously configured. The example below selects AWSLAB092. After selecting the data source from the list, you will see the list of dashboards from the sharing account.
3. On the Dashboards list, click the dashboard name you want to view. After clicking on the dashboard name, you should see the widget(s) ]available in the sharing account’s dashboard.
In the example below, you’re viewing the CPU Utilization metric from AWSLAB902’s dashboard directly on your monitoring account dashboard.
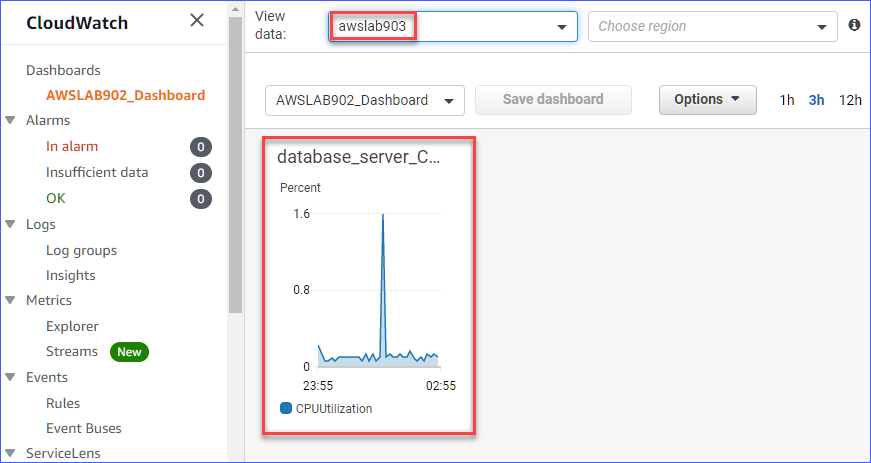
4. To view the dashboard of another sharing account, repeat the same steps but choose a different source this time. For example, the image below shows the CloudWatch dashboard pulled from AWSLAB903.
Creating a Consolidated CloudWatch Metrics Dashboard
Now you can view the shared CloudWatch metrics dashboard of different sharing accounts. You no longer have to switch and re-authenticate between different accounts to view their metrics, which is excellent. But, having all CloudWatch metrics on a single dashboard would provide a far better experience, wouldn’t it?
Luckily, all the configurations that you’ve done so far have prepared your AWS accounts to enable you to create a consolidated CloudWatch metrics dashboard. And you can do so by following the steps below.
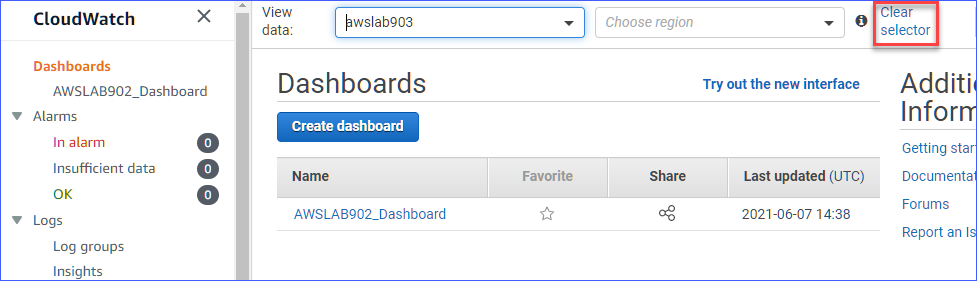
1. While still on the monitoring account’s CloudWatch Dashboards view, click the Clear selector link at the top. Doing so will clear the dashboards in view and make sure that you’ll create the consolidated dashboard on your monitoring account.
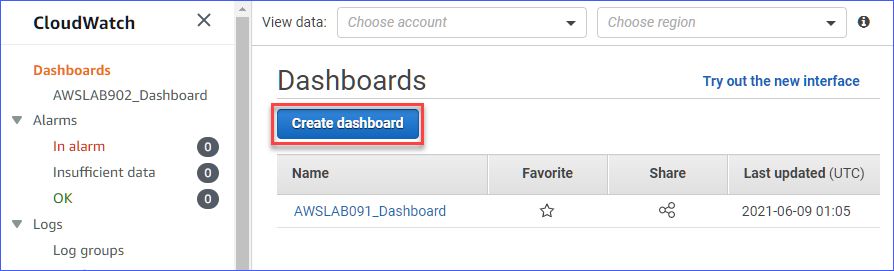
2. When the View data box is empty, click the Create dashboard button.
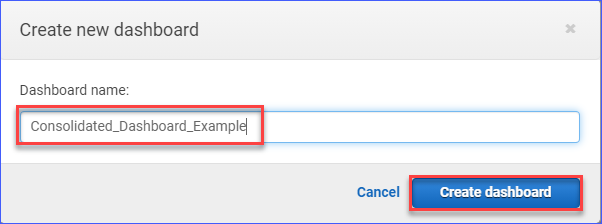
3. At the Create new dashboard prompt, enter the name for your new dashboard. This example will use the name Consolidated_Dashboard_Example. After entering the name, click Create dashboard.
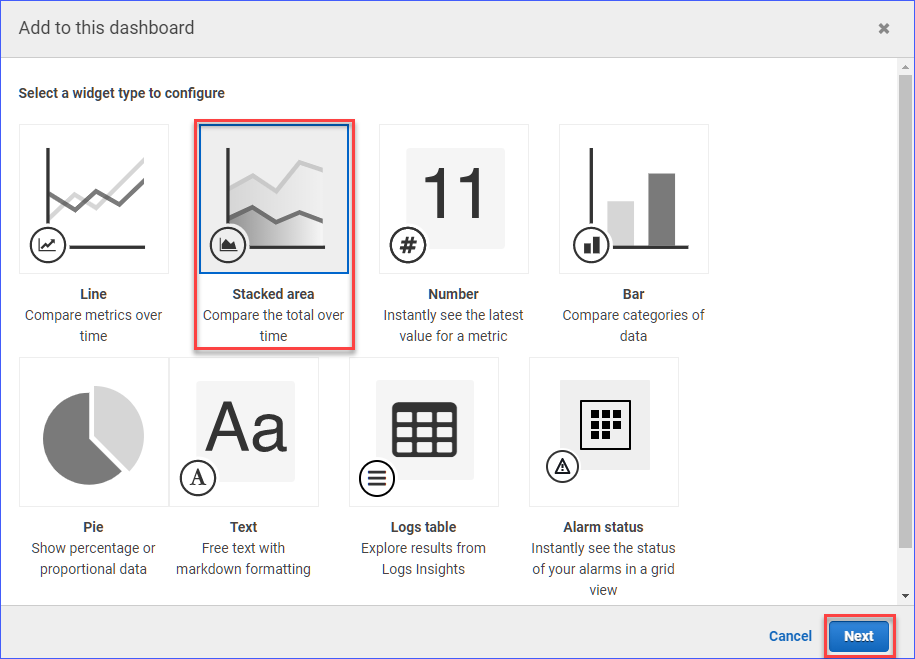
4. Now, select which widget will represent the metric you plan to add to the dashboard. In this example, the widget to select is the Stacked area. After selecting the widget, click Next.
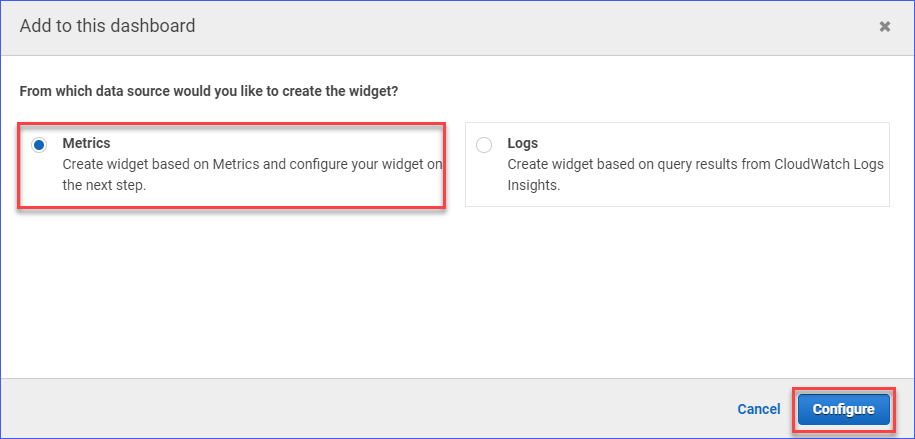
5. Next, since you’ll display metrics on the dashboard, choose the Metrics option and click Configure.
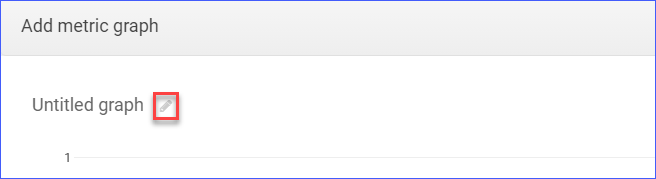
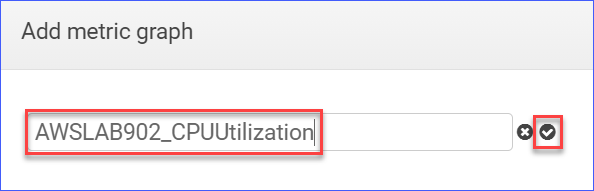
6. On the Add metric graph page, click the edit icon next to the Untitled graph, as you can see below.
Next, type in the metric graph name. In this example, the graph name is AWSLAB902 CPU Utilization. Feel free to use any name that you believe is appropriate based on which metric you include in the dashboard. After entering the name, click the check button.
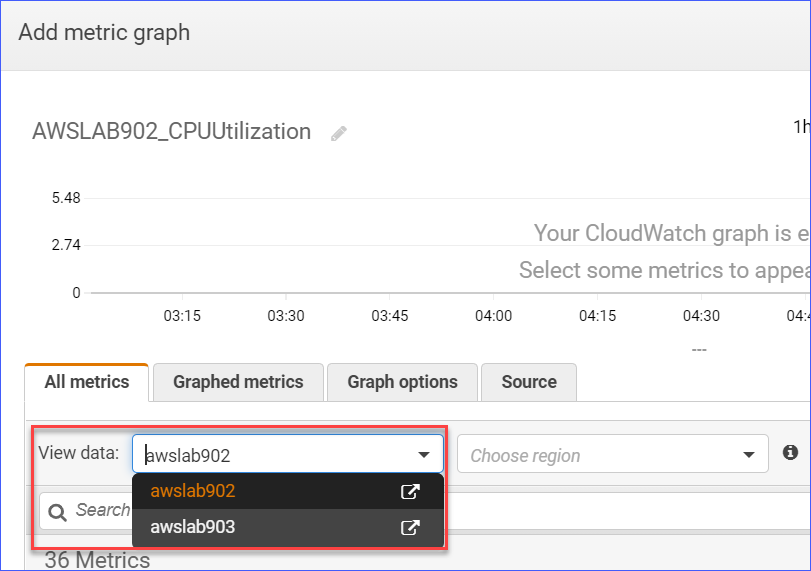
7. On the same page, under the All metrics tab, click the Choose account dropdown list and select which sharing account will be the data source. This example selects AWSLAB092.
8. After choosing the sharing account, select which metric to add to the dashboard. This example will choose EC2 —> Per-Instance Metrics —> CPUUtilization. When you’ve selected which metric to add, click Create widget.
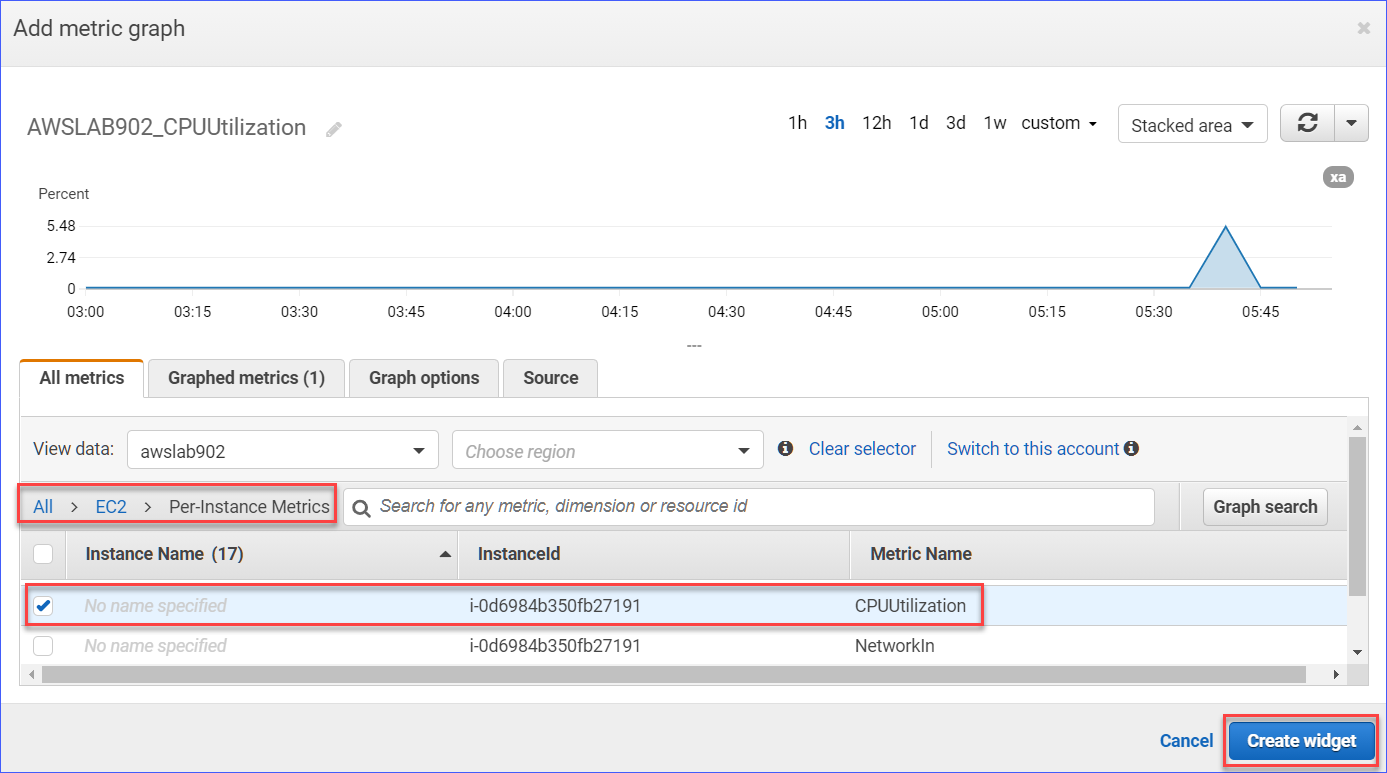
Now you’ve created a dashboard that displays the CloudWatch metric data from the sharing account.
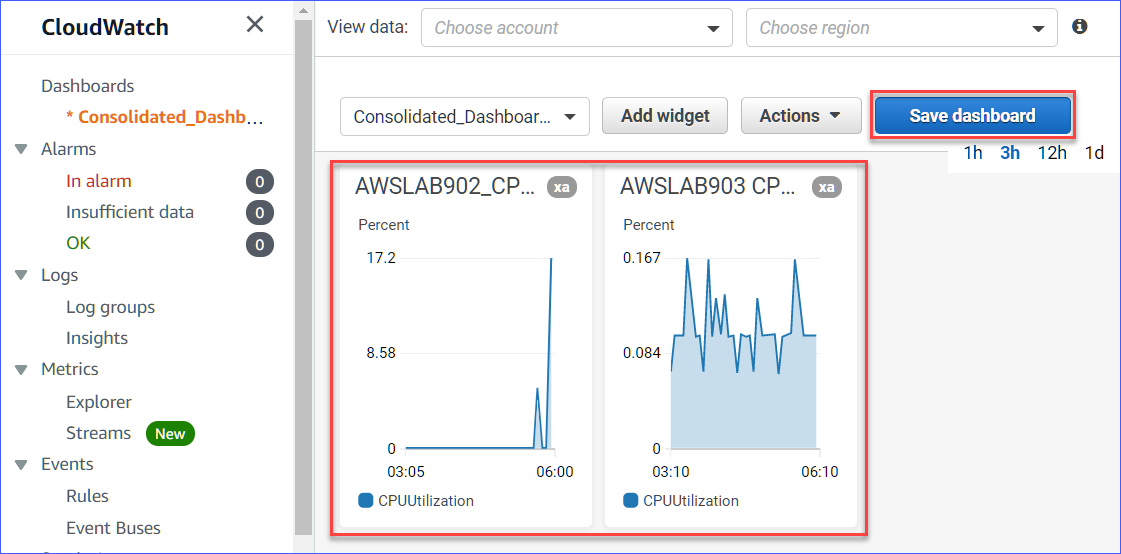
9. So far, you have created a dashboard that includes a metric from one sharing account. Now, you can add more metrics from the same or different sharing account. To do so, click the Add widget button and follow the same steps (1 to 8) until you’ve added the metrics widgets that you want to the dashboard.
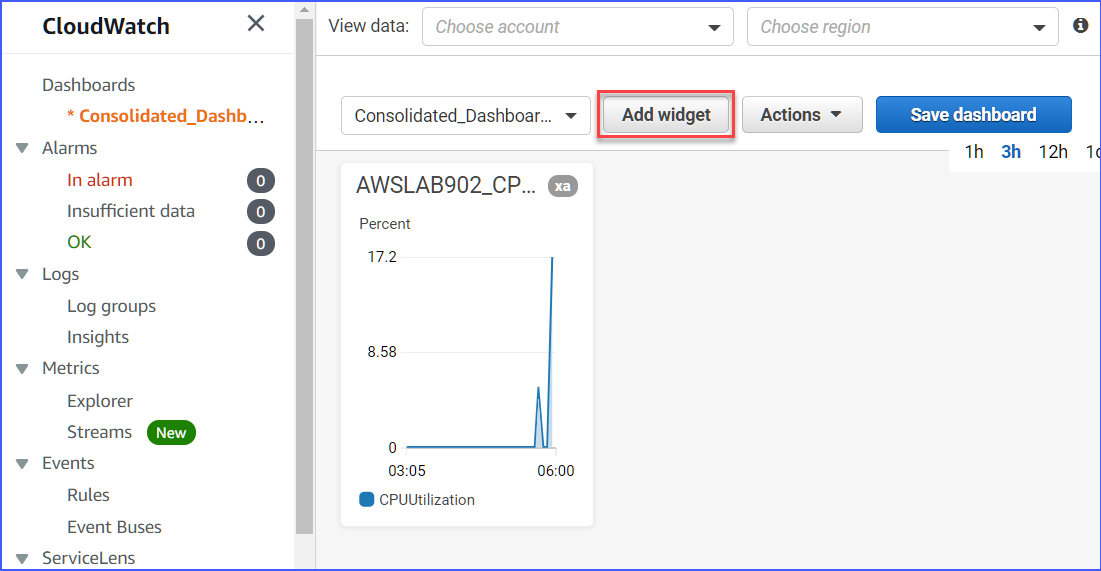
Once you’ve added all the metrics you want, click Save dashboard.
Disabling Cross-Account Data Sharing
If, for some reason, you decided to disable the cross-account sharing setup, you can do so by deleting the two IAM roles that the CloudFormation stack automatically created. These IAM roles are the CloudWatch-CrossAccountSharingRole and AWSServiceRoleForCloudWatchCrossAccount.
From the Sharing Account
To disable the cross-account sharing on the sharing accounts, follow the steps below.
1. Navigate to the IAM console, and log in to your sharing account.
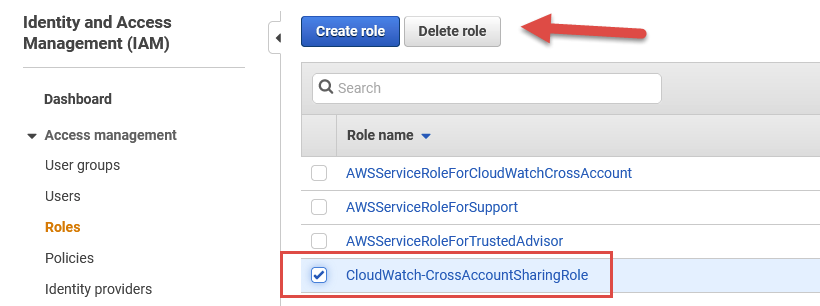
2. After logging in, click Roles under the Access management section. Next, on the list of roles, check the CloudWatch–CrossAccountSharingRole role, and click Delete role.
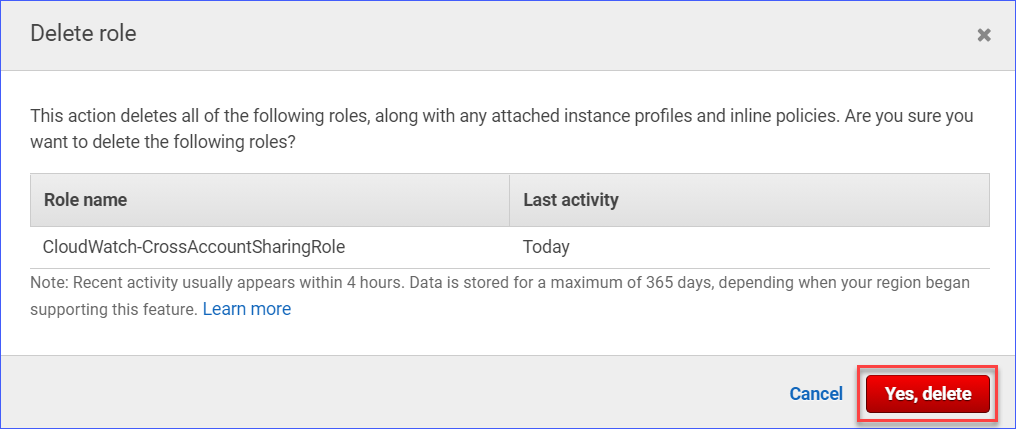
3. At the next prompt, confirm the deletion by clicking on the Yes, delete button.
Repeat the same process on the other sharing accounts if necessary.
From the Monitoring Account
To disable the cross-account viewing of shared CloudWatch data on the monitoring account, follow the steps below.
1. Open a web browser, navigate to the IAM console, and log in to your monitoring account.
2. After logging in, click Roles under the Access management section. Next, on the list of roles, check the AWSServiceRoleForCloudWatchCrossAccount role, and click Delete role.

3. At the confirmation prompt, click on the Yes, delete button to confirm.
Deleting the Consolidated CloudWatch Metric Dashboard
Now that you’ve disabled the CloudWatch metrics data sharing, the consolidated dashboard you created will no longer show any data. And as good practice, you can delete the dashboard that’s no longer in use. To do so, proceed as follows.
1. Navigate to the CloudWatch Management Console, and log in to your monitoring account if you haven’t done so already.
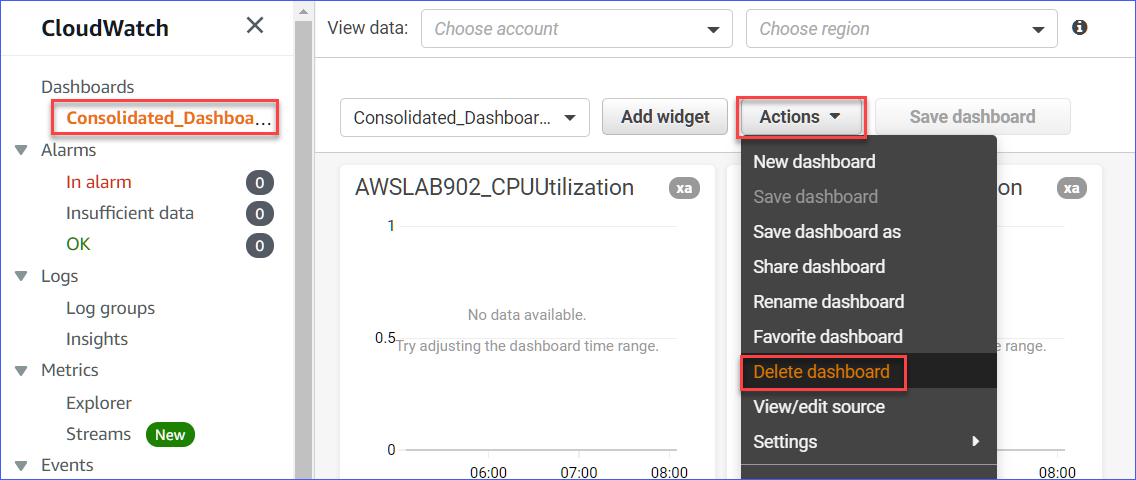
2. On the left pane, click the dashboard name you want to delete. In this example, the dashboard name is Consolidated_Dashboard_Example. Next, click Actions —> Delete dashboard.
3. Finally, at the confirmation prompt, click Delete to remove the dashboard.
Conclusion
This article aims to help you quit the tedious monitoring habit you’re probably doing with multiple AWS accounts. You’ve learned how to enable cross-account data sharing and consolidating CloudWatch metrics in a single dashboard.
Apart from working with plain metrics, you can also go further by creating alarms or consolidating CloudWatch logs. Also, there are many possibilities you can explore that can end up helping make your job easier. Thank you for reading, and good luck!


