

Your hard drive crashes, you get a new computer, and then you realize that your drive was encrypted with BitLocker. Even worse, you don’t remember your BitLocker recovery key to bypass the BitLocker protection. What now?
Minimize encryption lockout calls at the service desk. A self-services BitLocker and Symantec Endpoint Encryption solution with added security of MFA. Try it FREE with Specops’ Key Recovery
Before you consider throwing away that hard drive or shelling out money for data recovery, know this: there are several ways to find your key and gain access to your encrypted files. This article will guide you through various methods to back up, manage, and locate your BitLocker recovery keys.
Before You Begin with BitLocker Recovery Key Retrieval
This article is geared toward the BitLocker Drive Encryption feature available in the business editions of Windows 10. The methods discussed here are not applicable to consumer editions of Windows 10.
The examples may require a domain user account, a Microsoft account, an Azure Active Directory user account, or a local user account for successful key ID retrieval.
If you’re unfamiliar with BitLocker, or need a refresher, you might want to read BitLocker Overview before proceeding.
How to Save BitLocker Recovery Keys
Storing or backing up your keys can be done both automatically and manually. Let’s delve into each method for effective BitLocker recovery.
Accessing BitLocker Drive Encryption Management
To manipulate your BitLocker encrypted drive settings, you’ll first need to navigate to the BitLocker Drive Encryption management interface on your Windows 10 device.
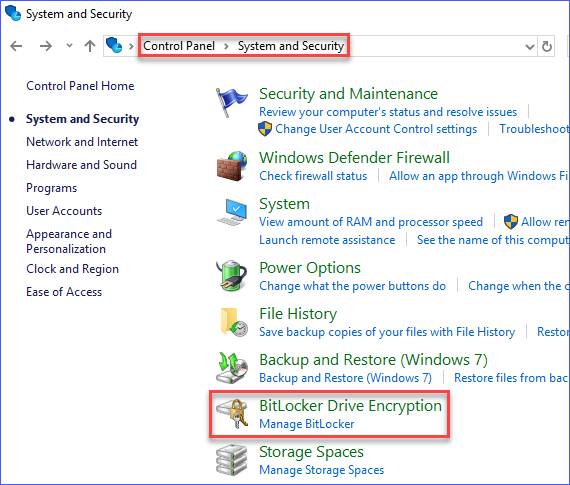
You can find this by going to Control Panel —> System Security —> BitLocker Drive Encryption.
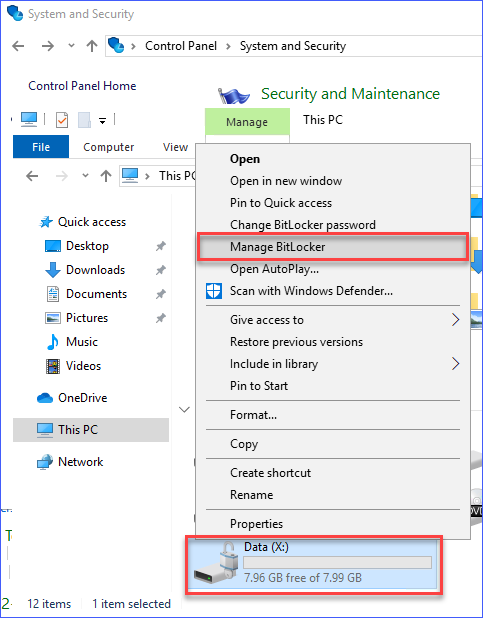
Alternatively, locate the BitLocker encrypted disk from File Explorer —> Right-Click on the Drive —> Click Manage BitLocker.
Exporting Keys to USB
Storing your key on a USB device is one option. This method is especially useful if you have a USB key you always carry.
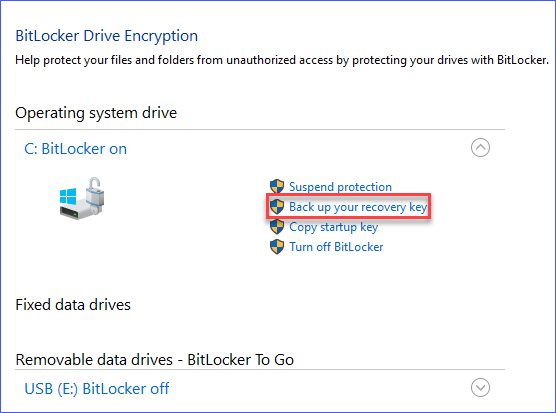
To store the key on a USB device, first head to the BitLocker Drive Encryption management interface. From there, locate your encrypted drive in the list, and click Backup your recovery key.
Backing Up Your BitLocker Recovery Key to a USB Flash Drive
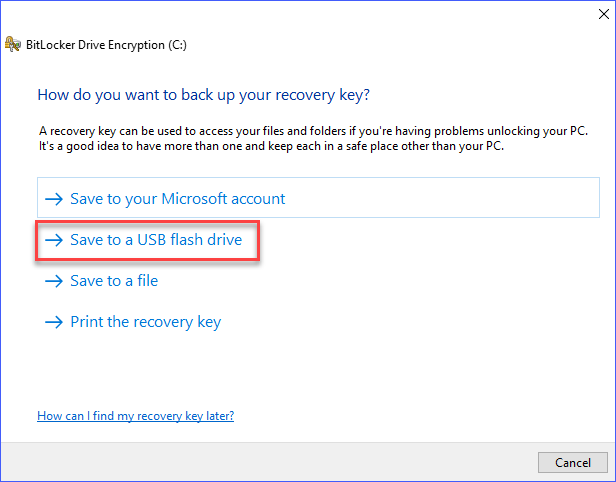
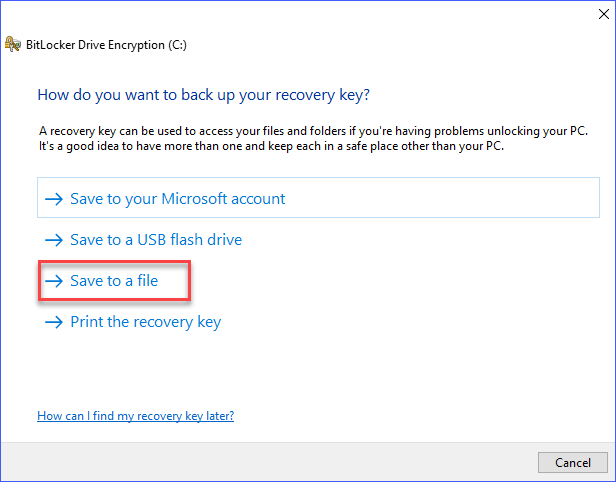
When you’re prompted with, “How do you want to backup your BitLocker recovery key?“, choose Save to a USB flash drive.
Insert a USB flash drive and then select the appropriate drive from the list. Hit Save to proceed with BitLocker Drive Encryption.
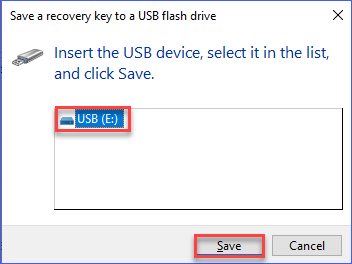
Click on Finish. Your recovery key is now safely backed up to your USB drive.
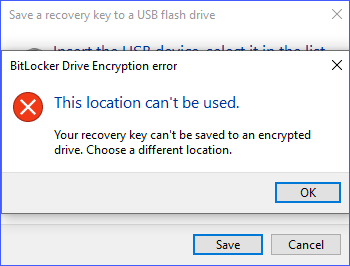
Note: You cannot use a USB drive that is also BitLocker encrypted. Any attempt to save the key on an encrypted drive will trigger the error shown below.
Saving the Key to a TXT File
This approach to BitLocker protection is quite similar to backing up the recovery key to a USB drive. The difference lies in the flexibility to save the key to your desired location, like a network drive.
Head to the BitLocker page and click on the Backup your recovery key link. Choose Save to a file from the available options.
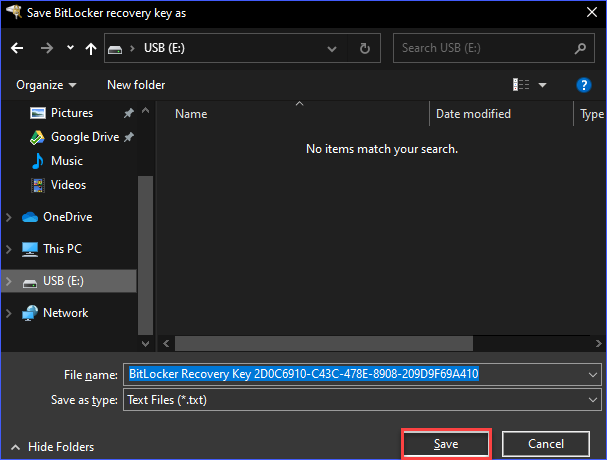
A dialog will appear allowing you to specify the location to save your BitLocker recovery key file. Confirm your choice by clicking Save.
Note: Saving the BitLocker recovery key to an encrypted drive is not possible. A warning will be displayed if you attempt to do so.
Printing the BitLocker Recovery Key for Safekeeping
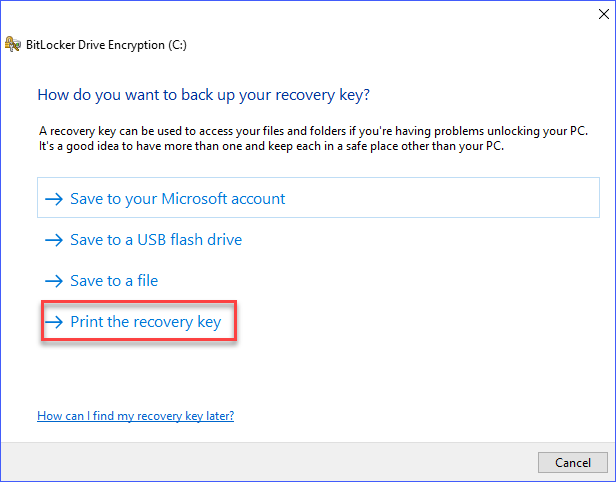
Another option for safeguarding your BitLocker recovery key is printing it, either to paper or to a file such as a PDF. To do this, navigate to the BitLocker page and select Print the recovery key.
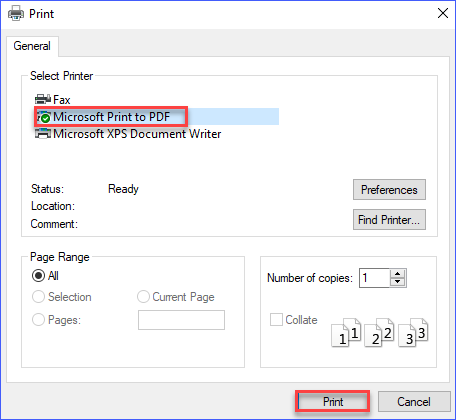
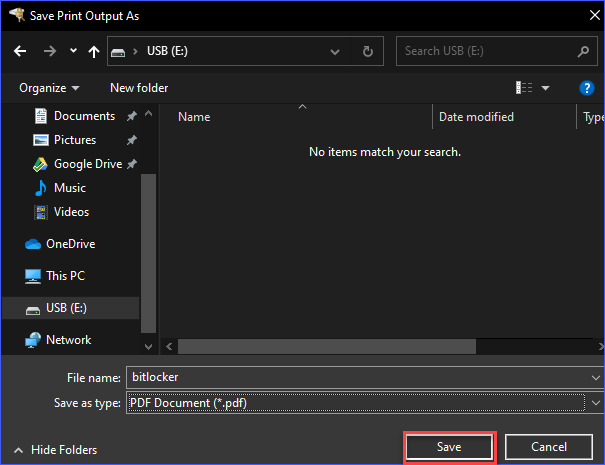
Next, choose the printer you want to use on the Print page. For demonstration purposes, we’re using the Microsoft Print to PDF driver to save your BitLocker recovery key.
After that, specify the destination where you’d like to save the PDF containing your BitLocker recovery key. In this guide, the PDF is saved to a USB drive for secure storage.
Note: You won’t be warned, but it’s crucial not to store the BitLocker recovery key backup on the same encrypted drive.
Saving Your BitLocker Recovery Key to Microsoft Account
If you’re logged into your Windows 10 PC with a Microsoft Account, BitLocker offers you the option to save your BitLocker recovery key directly to your cloud account.
The benefit of this method is convenience; you don’t have to keep track of your BitLocker recovery keys manually. Access to your Microsoft account guarantees you can retrieve your BitLocker recovery key ID and other related information online.
To take advantage of this, navigate to BitLocker management in the Control Panel. Then, select Save to your Microsoft account among the BitLocker protection options.
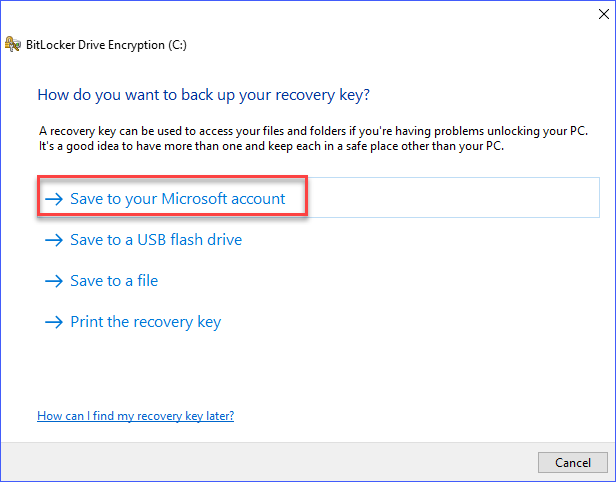
After clicking on the Save to your Microsoft account option, the BitLocker drive encryption key will be saved swiftly, allowing you to proceed by clicking Finish.
Automatically Saving BitLocker Recovery Keys in Active Directory
BitLocker also supports saving your keys in Active Directory Domain Services, facilitated through a group policy.
If a group policy is active, initiating BitLocker protection for a drive automatically backs up your key without requiring any action on your part.
If you want to delve deeper into storing keys using Active Directory, check out – Store BitLocker Recovery Keys using Active Directory.
Saving Your BitLocker Recovery Key to Azure Active Directory
If your system is part of an Azure Active Directory domain, you have the option to save your key to your Azure AD account.
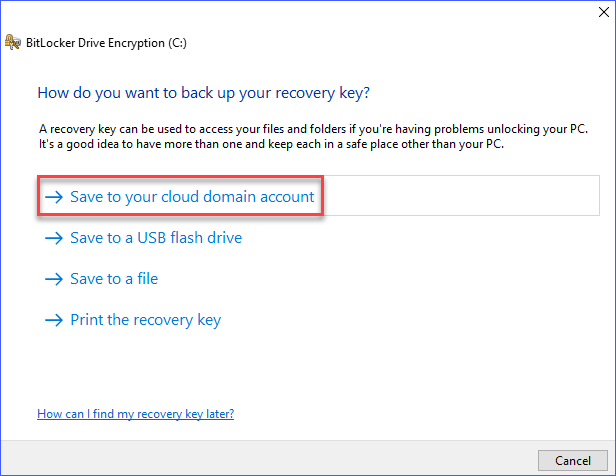
To do this, go to BitLocker management in the Control Panel. You’ll see several options related to BitLocker encrypted drives. Choose the Save to your cloud domain account option.
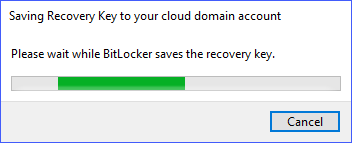
A progress indicator will appear briefly, confirming the BitLocker recovery key has been saved to your Azure AD account.
Once the save operation for your key is complete, you can click Finish to exit the BitLocker drive encryption management.
How to Recover Your Keys
In the previous sections, you learned how to save a backup of your key. Whether you chose to save it to a file, USB, or a printed document, you’d know where to find that crucial BitLocker recovery key when you need it.
Up next, you’ll learn the key recovery methods to find your keys from Azure Active Directory, Active Directory, and your Microsoft Account.
Finding the BitLocker Recovery Key from Active Directory
Finding keys in Active Directory is not typically available for end-users. Unless your organization’s IT admins provide a self-service option, your default course of action is to call your admin for bitlocker recovery.
When you’re prompted to enter your key, your key ID should already be displayed on the screen. You’ll need to provide the first 8 characters of your key ID to your admin.
For instance, if you’re unlocking a BitLocker encrypted drive with the recovery key ID: D79286AF, your admin can look up the corresponding BitLocker recovery key in Active Directory using that ID.
Your admin will navigate to Active Directory Users and Computers, click on Action, and then select Find BitLocker recovery password.
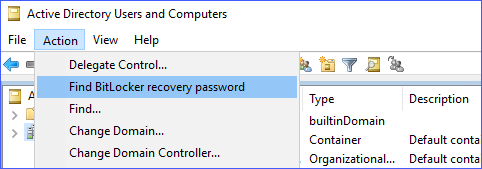
After that, the admin will input the recovery key ID you’ve provided and initiate a search. The image below illustrates how keys are searched for in Active Directory.
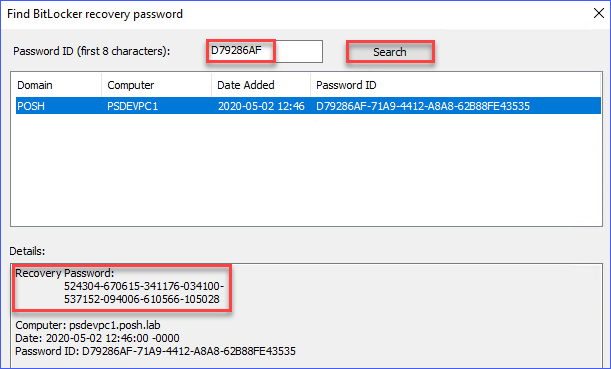
Finally, your admin will provide you with the BitLocker recovery password, allowing you to unlock your BitLocker drive encryption.
Finding Your Key From Your Microsoft Account
If you’ve saved your key to your Microsoft account, you can easily retrieve it. To confirm that your key was successfully saved, follow these simple steps.
First, navigate to the BitLocker recovery keys site and log in with your Microsoft account. Once logged in, you’ll see a list of BitLocker recovery keys associated with your account.
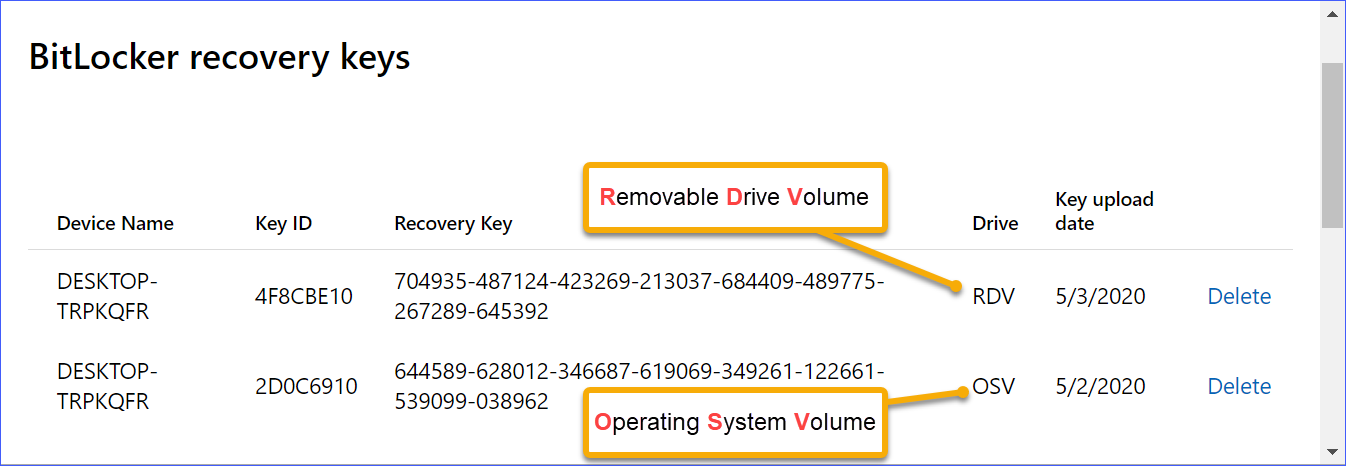
As illustrated in the screenshot, keys are sorted based on the devices they originated from. For example, you may find one key for the Operating System BitLocker Volume and another for the Removable Drive Volume.
Finding the BitLocker Recovery Key From Azure Active Directory
If your setup allows it, you can find your key right in your Azure Active Directory profile. Below, the screenshot illustrates a user’s Azure Active Directory profile page, listing various devices and including a link to obtain the BitLocker recovery keys.
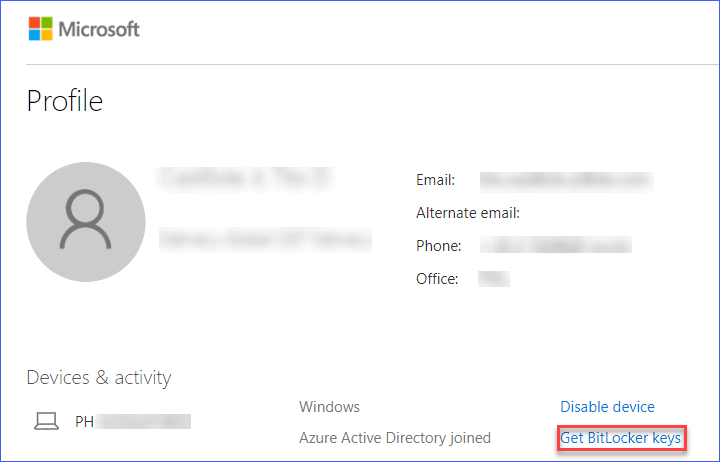
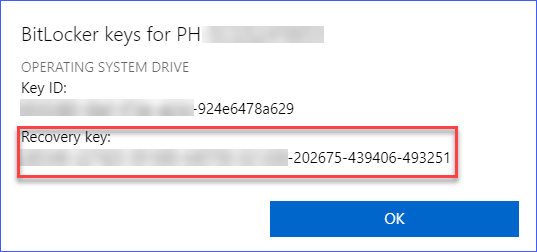
After clicking the Get BitLocker keys link, your keys will display in a pop-up, as shown below.
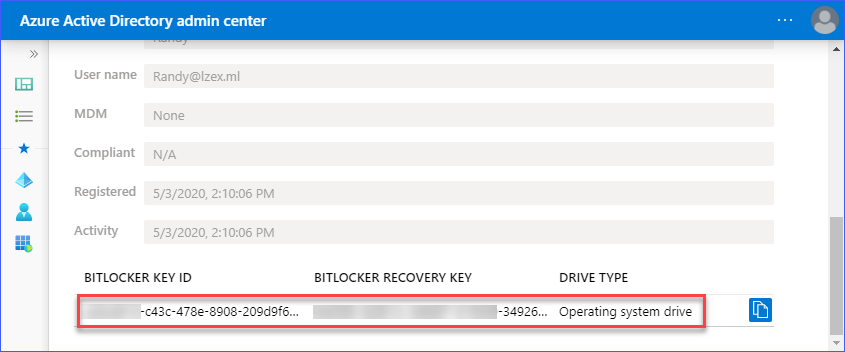
If you don’t find the keys in your Azure AD profile, you’ll need to contact your admin. Provide the first 8 characters of your key ID. The admin can then locate your key in the Azure Active Directory Admin Center.
As illustrated below, the admin can effortlessly find the key related to your account and device.
How to Unlock BitLocker Encrypted Drives
By now, you’re equipped with the knowledge to back up and find your keys. Let’s move on to using these keys to unlock BitLocker encrypted drives.
Unlocking a BitLocker Encrypted Operating System Drive
Your operating system drive may lock up, requiring the key for unlocking. This usually occurs due to reasons like:
- Hardware or firmware upgrades.
- Installing new hardware drivers.
- Corrupted TPM module.
- Transferring the drive to another computer.
Should your operating system drive lock up, a BitLocker recovery prompt will appear during boot, as depicted below.

The screen will display a prompt to enter the key, enabling you to unlock the encrypted drive.
Unlocking an Encrypted Fixed or Removable Drive
If you’ve encrypted a fixed or removable drive using BitLocker, there might come a time when you need to access the data on a different computer. To do so, you’ll need to unlock the drive using the BitLocker recovery key.
The image below shows what the icon of a BitLocker encrypted drive looks like when it’s locked.

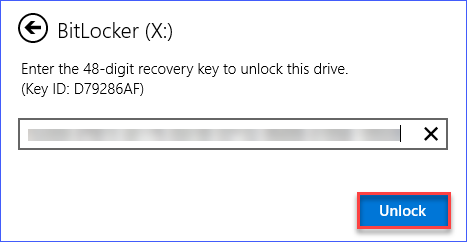
When you attempt to unlock a BitLocker encrypted drive in Windows, you will be prompted to enter the key ID, as depicted below.
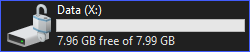
After successfully entering your key, you’ll gain access to the drive’s contents. The icon of the drive will also change to reflect its unlocked status, as shown below.
Add the security of MFA when recovering BitLocker keys and support for Symantec Endpoint Protection. Try it FREE with Specops’ Key Recovery!
Concluding Thoughts on Managing and Finding Your BitLocker Recovery Key
In this guide, you’ve discovered various methods to backup, manage, and find your keys. You’ve learned which approach to saving the recovery key is most appropriate for your situation.
You can’t go wrong with storing your keys on a USB drive, a digital file, or even a printed document. These options ensure quick retrieval if you need to unlock BitLocker drive encryption.
Storing your keys in your Microsoft account offers the convenience of retrieving them from anywhere at any time.
Automatically saving the keys to Active Directory centralizes your keys, making them accessible even if users forget to back them up.
Finally, manual storage of keys in Azure Active Directory is another effective measure to ensure you can always recover your encrypted data.
Remember to back up your keys to avoid losing access to your encrypted data due to BitLocker protection errors.


